Kategorie: Mobile

  • Celebrating the community: St Joseph’s Secondary School

    Celebrating the community: St Joseph’s Secondary School

    Reading Time: 4 minutes

    In our series of community stories, we celebrate some of the amazing young people and educators who are using their passion for technology to create positive change in the world around them. 

    A group of students at secondary schools.

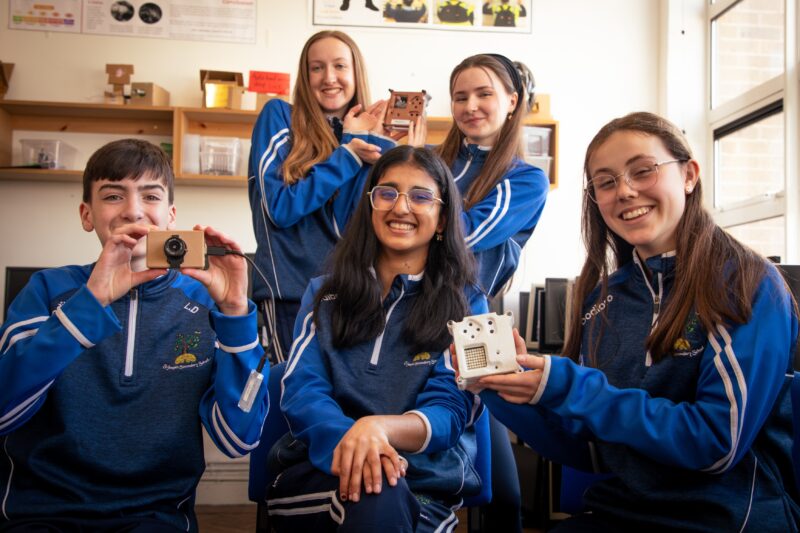
    In our latest story, we’re sharing the inspiring journey of St Joseph’s Secondary School in Rush, Ireland. Over the past few years, the school community has come together to encourage coding and digital skills, harnessing the European Astro Pi Challenge as an opportunity to kindle students’ enthusiasm for tech and teamwork. 

    We caught up with some of the educators and students at St Joseph’s, fresh off the success of their participation in another round of Astro Pi, to delve a little deeper into the school’s focus on making opportunities to engage with computing technologies accessible to all.

    Introducing St Joseph’s Secondary School

    [youtube https://www.youtube.com/watch?v=lR5bJBvUh64?feature=oembed&w=500&h=281]

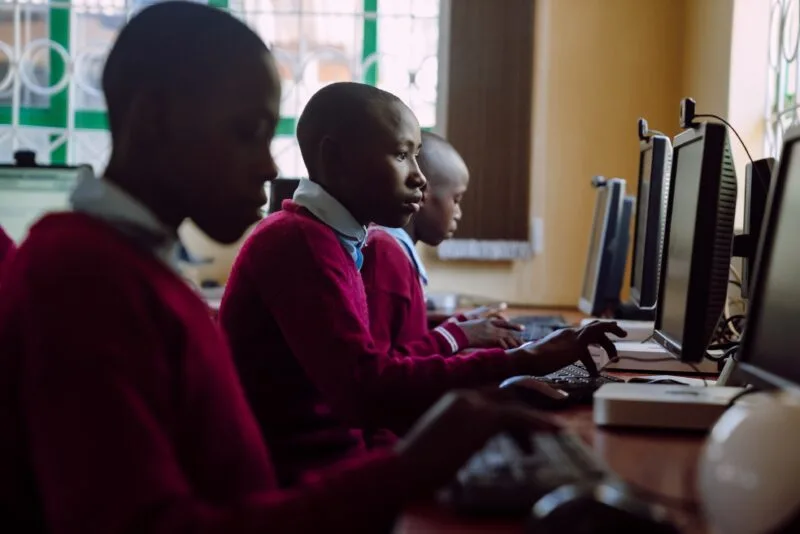
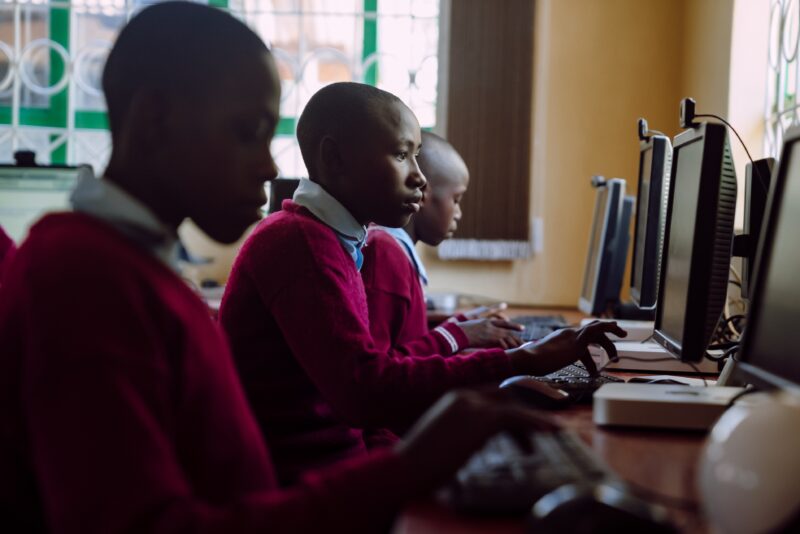
    St Joseph’s Secondary School is in the heart of Rush, a rural town steeped in agricultural heritage. The school houses a diverse student population coming from the local multigenerational farming families as well as families who’ve been drawn to Rush more recently by its beautiful countryside and employment opportunities. St Joseph’s leadership team has responded to the changing demographics and increase of its student population by adapting and growing the school’s curriculum to meet the evolving needs of the young people and help them build a strong community.

    A group of students at a computer at secondary schools.
    Working as teams for the Astro Pi Challenge has helped the St Joseph’s students connect and support each other as a community.

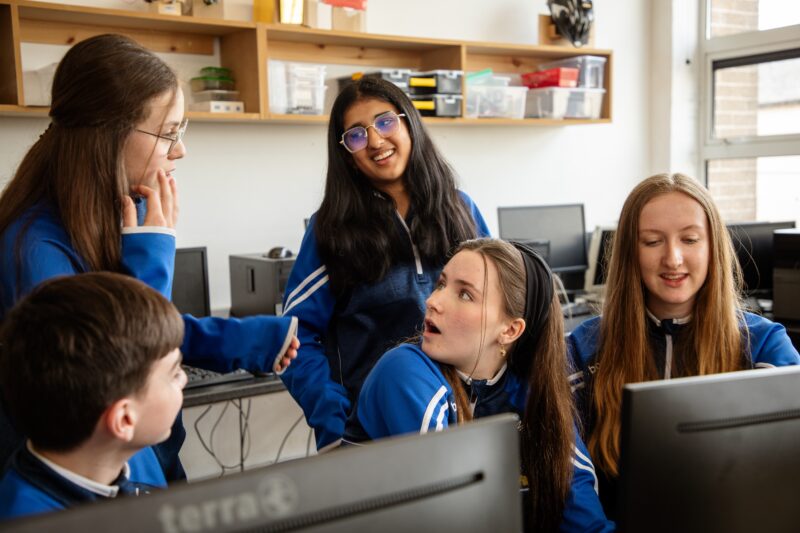
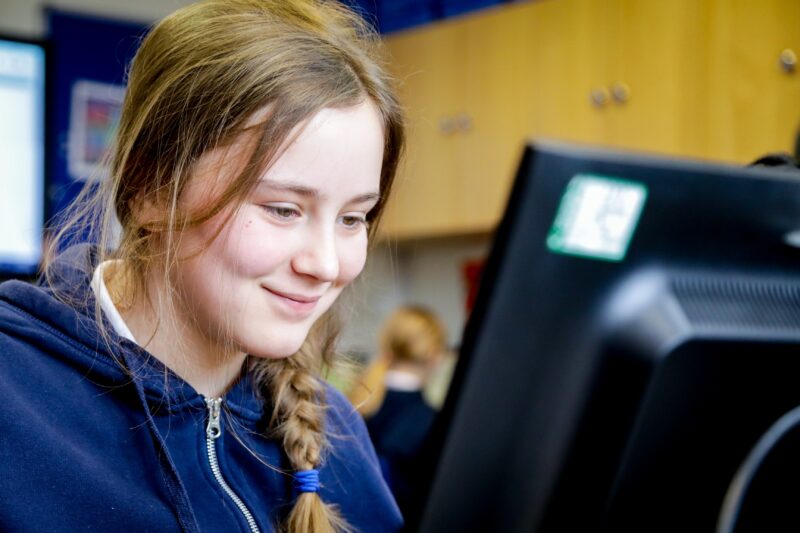
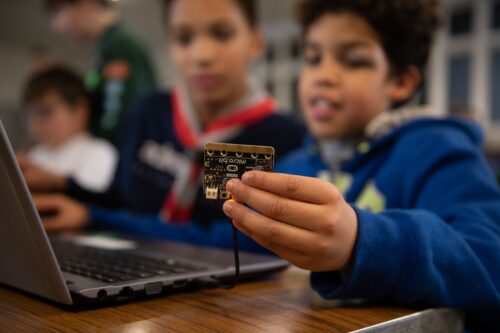
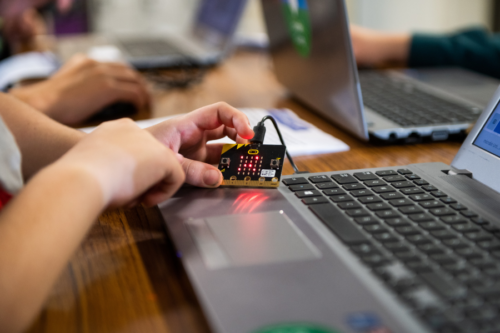
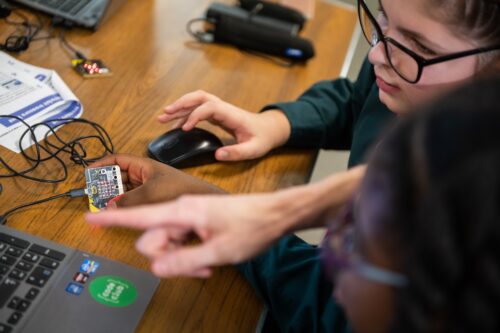
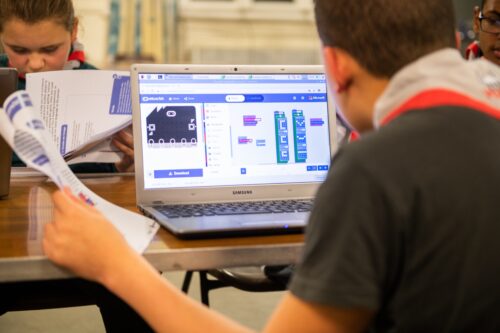
    One of the school’s most popular initiatives has been teaching coding from first year (ages 12–13). This proactive approach has resonated with many students, including Kamaya, a member of the school’s 2022/23 Astro Pi cohort, who first discovered her passion for space science and computing through the movie Interstellar.

    I remember the first time I was like, ‘OK, space is cool’ is when I watched a movie. It was called Interstellar. I [realised] I might want to do something like that in my future. So, when I came to [St Joseph’s] secondary school, I saw coding as a subject and I was like, ‘Mum, I’ve got to do coding.’

    Kamaya, student at St Joseph’s

    Inspiring students to build community through Astro Pi

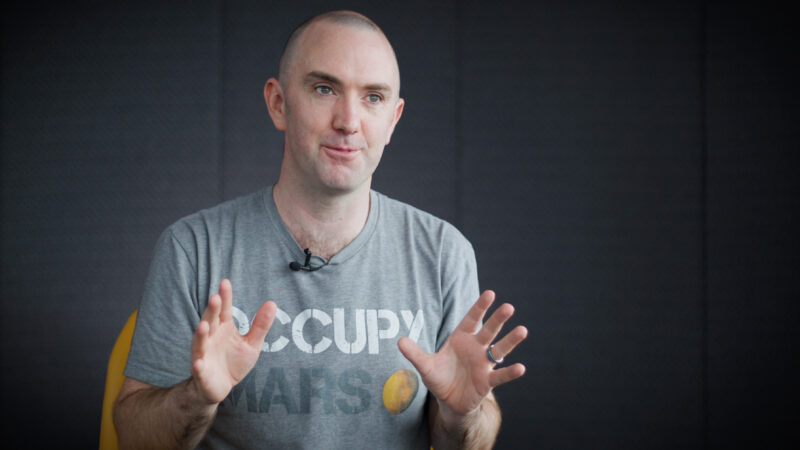
    A key person encouraging St Joseph’s students to give coding a try has been Mr Murray, or Danny as he is fondly referred to by students and staff alike. Danny was introduced to the importance of engaging with computing technologies while teaching science at a school in England: he attended a Code Club where he saw kids building projects with Raspberry Pis, and he couldn’t wait to get involved. Growing his knowledge from there, Danny changed subject focus when he moved back to Ireland. He took on the challenge of helping St Joseph’s expand their computer science offering, along with leading on all IT-related issues.

    A secondary school teacher.
    Teacher Danny Murray has used his enthusiasm to help shape a culture of digital skills at St Joseph’s.

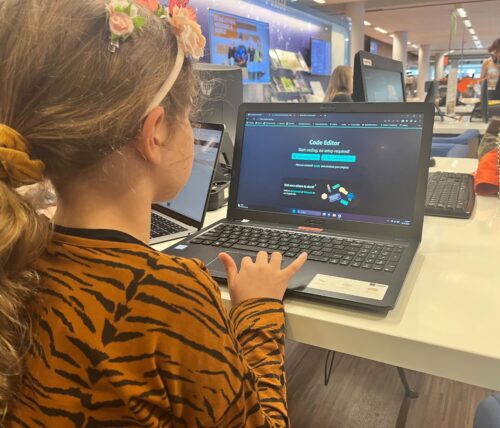
    When the school introduced mandatory coding taster sessions for all first-year students, Danny was blown away by the students’ eagerness and wanted to provide further opportunities for them to see what they could achieve with digital technologies.

    This is where Astro Pi came in. After hearing about this exciting coding challenge through an acquaintance, Danny introduced it to his computer science class, as well as extending an open invitation to all St Joseph’s students. The uptake was vast, especially once he shared that the young people could become the recipients of some very exciting photos.

    You get to see photos of Earth that nobody has ever seen. Imagine just talking to somebody and saying, ‘Oh, there’s a picture of the Amazon. I took that picture when I was 14. From space.’

    Danny Murray, computing teacher at St Joseph’s

    Danny’s mission is to instil in his students the belief that they can achieve anything. Collaborating on Astro Pi projects has enabled young people at St Joseph’s to team up and uncover their strengths, and has helped foster a strong community.

    A culture of digital skills

    The students’ sense of community has transcended Danny’s classroom, creating a culture of enthusiasm for digital skills at St Joseph’s. Today, a dedicated team of students is in charge of solving tech-related challenges within the school, as Deputy Principal Darren Byrne explains:

    Our own students actually go class to class, repairing tech issues. So, every day there are four or five students going around checking PCs in classrooms. They […] give classes to our first-year students on app usage.
    It’s invested in the whole school [now], the idea that students can look after this kind of technology themselves. We’re the ones reaching out for help from the students!

    Darren Byrne, Deputy Principal at St Joseph’s

    Spark enthusiasm in your school community

    To find out how you can get involved in Astro Pi, visit astro-pi.org for further information, deadlines, and more. If you would like to learn more about the other free resources we have available to help you inspire a coding community in your school, head to www.raspberrypi.org/teach

    Help us celebrate St Joseph’s Secondary School by sharing their story on X (formerly Twitter), LinkedIn, and Facebook.

    Website: LINK

  • This RC tank has Möbius strip tracks

    This RC tank has Möbius strip tracks

    Reading Time: 2 minutes

    Möbius strips are often used to symbolize infinity, because they are continuous loops with only a single surface. They can’t exist in real life, because every solid object in reality has thickness — even if it is very thin, like a piece of paper. But we can construct similar objects that loop and twist over on themselves. James Bruton demonstrated that concept by building an RC tank with Möbius strip tracks.

    This project doesn’t seem to have any real purpose beyond curiosity. Bruton wanted to see how Möbius strip tracks would work and so he constructed this tank to find out. The treads and most of the rest of the tank were 3D-printed, with the tread links getting a special design that lets them pivot relative to each other. They pivot just enough that the each track was able to make a half-twist over the course of 8 or 9 links. That half-twist is what makes the tracks similar to a Möbiusstrip, because the “outer” surface continues endlessly and transitions to being the “inner” surface and then repeats forever.

    As is the case for many of Bruton’s creations, this tank has an Arduino Mega 2560 for control. It receives commands from Bruton’s universal remote through an OrangeRX DSM2 radio receiver. A DC gear motor drives each track, providing plenty of torque.

    In testing, this tank performed similarly to a standard RC tank—though there is, presumably, more friction to overcome. When the tracks are bare plastic, they slip on hard surfaces a lot. When Bruton added grippy pads, they didn’t slip quite enough. But interestingly, the unique geometry of the tracks means that one “side” can be grippy and the other slick. The track will then alternate between the two, even though that doesn’t seem to provide any real benefit.

    [youtube https://www.youtube.com/watch?v=AoWeljpA6-U?feature=oembed&w=500&h=281]

    The post This RC tank has Möbius strip tracks appeared first on Arduino Blog.

    Website: LINK

  • Announcing a better Arduino Cloud, together!

    Announcing a better Arduino Cloud, together!

    Reading Time: 3 minutes

    At Arduino, we’ve always believed in the power of community. Our journey has been shaped by the incredible feedback and input we’ve received from our users, and today, we’re thrilled to introduce a renewed and improved Arduino Cloud based on your insights. 

    This renewal goes beyond just a fresh coat of paint. It impacts not only the new user interface (UI) but also many other aspects of the Cloud, as well as our IoT Remote app. These new features and improvements will be progressively introduced in the coming weeks, so be sure to stay tuned for the next wave of exciting announcements.

    It’s better, with you

    Arduino Cloud is the platform that Internet of Things (IoT) and do-it-yourself (DIY) enthusiasts use to develop, monitor, and control their creations. It is an increasingly popular platform that was born to democratize the access to IoT, to make it simple and accessible for everyone, pretty much in a similar fashion as Arduino has done with hardware and DIY. Our journey mirrors our core values: open-source, accessibility, and community-driven innovation. 

    And it’s your contributions that drive our progress. Through our thriving forum, direct feedback channels, and our shared community-driven values, we actively engage with your ideas, questions, and experiences to shape the future of the Arduino Cloud. Your input is invaluable in our quest to create a platform that truly meets your needs and aspirations.

    We’ve listened, we’ve learned, and we’ve transformed. The result is a platform that’s more intuitive, powerful, and user-friendly than ever before. It’s better, with you!

    New user interface

    The first major feature we’re excited to unveil is the brand-new user interface (UI). The UI has been designed with your needs in mind, and we’re confident it will greatly enhance your interaction with the Arduino Cloud.

    What’s new in the UI?

    • New navigation bar: Say hello to a new, sleek navigation bar in the Arduino Cloud. You can now seamlessly jump between your devices, sketches and your dashboards.
    • Cleaner design: We’ve revamped the design to make it more visually appealing and clutter-free. Your projects and data take center stage, ensuring a distraction-free development environment.
    • New sketchbook: Discover a new evolution of our sketch management features, turning your sketches into a digital, secure sketchbook. You’ll always be on top of things, whether you’re tinkering with IoT projects, working on standalone sketches, or both. 
    • Quick access to templates: We’ve made it easier for users to find and select pre-built templates from the new navigation bar. Now, you can choose among thermostat control, ventilation, smart garden, and many more to get quickly started with an IoT project.
    • Shared Spaces home dashboard: We’re introducing a new dashboard view for Shared Spaces, where you can monitor usage of the Cloud instantly.
    • White labeling: With our new white labeling feature, you can add a custom logo to your dashboard and even customize the Arduino logo on the top left. Make it truly yours!

    What’s on the horizon

    But this is just the beginning. Over the next few weeks, we have a series of major announcements lined up. Without giving away all the surprises, we can promise you more exciting features and enhancements to make your development experience even easier and your IoT projects even more accessible. Keep an eye out for upcoming blog posts where we’ll reveal these exciting developments.

    Try Arduino Cloud today

    At Arduino, we’re committed to improving our products and services with your active participation. The renewal of the Arduino Cloud is a testament to the power of community-driven innovation. 

    We invite you to explore the new UI, experiment with the features, and share your thoughts with us. Your feedback is invaluable as we continue to enhance the Arduino Cloud. Share your feedback, ideas, and experiences with us on social media, forums, and other communication channels.

    Thank you for being a part of the Arduino community and making Arduino Cloud better, with you.

    The post Announcing a better Arduino Cloud, together! appeared first on Arduino Blog.

    Website: LINK

  • AI literacy for teachers and students all over the world

    AI literacy for teachers and students all over the world

    Reading Time: 5 minutes

    I am delighted to announce that the Raspberry Pi Foundation and Google DeepMind are building a global network of educational organisations to bring AI literacy to teachers and students all over the world, starting with Canada, Kenya, and Romania.

    Learners in a classroom in Kenya.
    Learners around the world will gain AI literacy skills through Experience AI.

    Experience AI 

    We launched Experience AI in September 2022 to help teachers and students learn about AI technologies and how they are changing the world. 

    Developed by the Raspberry Pi Foundation and Google DeepMind, Experience AI provides everything that teachers need to confidently deliver engaging lessons that will inspire and educate young people about AI and the role that it could play in their lives.

    A group of young people investigate computer hardware together.
    Experience AI is designed to inspire learners about AI through real-world contexts.

    We provide lesson plans, classroom resources, worksheets, hands-on activities, and videos that introduce a wide range of AI applications and the underlying technologies that make them work. The materials are designed to be relatable to young people and can be taught by any teacher, whether or not they have a technical background. Alongside the classroom resources, we provide teacher professional development, including an online course that provides an introduction to machine learning and AI. 

    Part of Experience AI are video interviews with AI developers at Google DeepMind.

    The materials are grounded in real-world contexts and emphasise the potential for young people to positively change the world through a mastery of AI technologies. 

    Since launching the first resources, we have seen significant demand from teachers and students all over the world, with over 200,000 students already learning with Experience AI. 

    Experience AI network

    Building on that initial success and in response to huge demand, we are now building a global network of educational organisations to expand the reach and impact of Experience AI by translating and localising the materials, promoting them to schools, and supporting teacher professional development.

    Obum Ekeke OBE, Head of Education Partnerships at Google DeepMind, says:

    “We have been blown away by the interest we have seen in Experience AI since its launch and are thrilled to be working with the Raspberry Pi Foundation and local partners to expand the reach of the programme. AI literacy is a critical skill in today’s world, but not every young person currently has access to relevant education and resources. By making AI education more inclusive, we can help young people make more informed decisions about using AI applications in their daily lives, and encourage safe and responsible use of the technology.”

    Learner in a computing classroom.
    Experience AI helps learners understand how they might use AI to positively change the world.

    Today we are announcing the first three organisations that we are working with, each of which is already doing fantastic work to democratise digital skills in their part of the world. All three are already working in partnership with the Raspberry Pi Foundation and we are excited to be deepening and expanding our collaboration to include AI literacy.

    Digital Moment, Canada

    Digital Moment is a Montreal-based nonprofit focused on empowering young changemakers through digital skills. Founded in 2013, Digital Moment has a track record of supporting teachers and students across Canada to learn about computing, coding, and AI literacy, including through supporting one of the world’s largest networks of Code Clubs

    Digital Moment logo.

    “We’re excited to be working with the Raspberry Pi Foundation and Google DeepMind to bring Experience AI to teachers across Canada. Since 2018, Digital Moment has been introducing rich training experiences and educational resources to make sure that Canadian teachers have the support to navigate the impacts of AI in education for their students. Through this partnership, we will be able to reach more teachers and with more resources, to keep up with the incredible pace and disruption of AI.”

    Indra Kubicek, President, Digital Moment

    Tech Kidz Africa, Kenya

    Tech Kidz Africa is a Mobasa-based social enterprise that nurtures creativity in young people across Kenya through digital skills including coding, robotics, app and web development, and creative design thinking.

    Tech Kidz Africa logo.

    “With the retooling of teachers as a key objective of Tech Kidz Africa, working with Google DeepMind and the Raspberry Pi Foundation will enable us to build the capacity of educators to empower the 21st century learner, enhancing the teaching and learning experience to encourage innovation and  prepare the next generation for the future of work.”

    Grace Irungu, CEO, Tech Kidz Africa

    Asociația Techsoup, Romania

    Asociația Techsoup works with teachers and students across Romania and Moldova, training Computer Science, ICT, and primary school teachers to build their competencies around coding and technology. A longstanding partner of the Raspberry Pi Foundation, they foster a vibrant community of CoderDojos and support young people to participate in Coolest Projects and the European Astro Pi Challenge

    Asociata Techsoup logo.

    “We are enthusiastic about participating in this global partnership to bring high-quality AI education to all students, regardless of their background. Given the current exponential growth of AI tools and instruments in our daily lives, it is crucial to ensure that students and teachers everywhere comprehend and effectively utilise these tools to enhance their human, civic, and professional potential. Experience AI is the best available method for AI education for middle school students. We couldn’t be more thrilled to work with the Raspberry Pi Foundation and Google DeepMind to make it accessible in Romanian for teachers in Romania and the Republic of Moldova, and to assist teachers in fully integrating it into their classes.”

    Elena Coman, Director of Development, Asociația Techsoup

    Get involved

    These are the first of what will become a global network of organisations supporting tens of thousands of teachers to equip millions of students with a foundational understanding of AI technologies through Experience AI. If you want to get involved in inspiring the next generation of AI leaders, we would love to hear from you.

    Website: LINK

  • ClipZin PCB connector review

    ClipZin PCB connector review

    Reading Time: < 1 minute

    While you could always just solder Pico’s castellations directly onto metal contact pads on the surface of another PCB, ClipZin has the advantage of being able to clip the board in and out at any point – ideal for when you’re prototyping a design or want to later replace a standard Pico board with a Pico W.

    Clip in, clip out

    In practice, we found it extremely easy to clip a Pico onto a sample PCB fitted with a pair of surface mounted, 20-way ClipZin connectors. Just push Pico down and it clicks securely into place, held by individual springy pins that maintain a good connection with each castellation. Small plastic retention clips on either end also help to keep it in place.

    The connectors’ springy pins maintain a reliable connection with Pico’s castellations

    Removing Pico from the ClipZin connectors is as simple as gently pulling one of the retention clips and lifting the board out.

    While a little more expensive than the alternative of using FlexyPins, ClipZin connectors benefit from being all-in-one (coming in 6-, 8-, 17-, and 20-way versions), making them far less fiddly to solder onto a PCB.

    Verdict

    8/10

    Should prove handy for Pico-based PCB prototyping and could also be used in final products.

    Specs

    Features: Gold flash-plated contacts, surface-mount connectors, board retention clips

    Dimensions: 57 × 26 × 6 mm

  • This simple machine quickly dispenses labels

    This simple machine quickly dispenses labels

    Reading Time: 2 minutes

    Most of us don’t use label stickers very often, so we can afford to spend several minutes fumbling around with corners to try and peel the labels from their backing paper. But if you’re handling many of them a day, like putting “fragile” stickers on shipping boxes, then that inefficient fumbling will be an issue. To make life easier for you, Mr Innovative built this simple machine that quickly dispenses labels.

    Mr Innovative designed this machine for the kinds of label stickers that come on rolls of backing paper. It should work with a wide range of roll sizes and the dimensions are easy to modify if you need to accommodate even larger rolls. The best part is that it doesn’t require any configuration. The machine will pull the paper backing around a roller, releasing the sticker. That causes the sticker to cover an infrared sensor and the machine stops. After the user removes that sticker, the machine pulls the paper backing again until the next sticker is ready.

    As with most of Mr Innovative’s projects, this utilizes a custom multipurpose control board that hosts an Arduino Nano board. That drives a single stepper motor, which rotates a spool to pull the backing paper from the roll of labels. The machine’s mechanical parts are all either 3D-printable, off-the-shelf hardware and fasteners, or standard 2020 T-slot aluminum extrusion.

    [youtube https://www.youtube.com/watch?v=eJGyxnacZnw?start=17&feature=oembed&w=500&h=281]

    The post This simple machine quickly dispenses labels appeared first on Arduino Blog.

    Website: LINK

  • Code Editor update: Support for HTML and mobile devices 

    Code Editor update: Support for HTML and mobile devices 

    Reading Time: 3 minutes

    Earlier this year, we launched our Code Editor, a free online tool to help make learning text-based programming simple and accessible for kids age 9 and up. We focus on supporting the needs of young people who are learning programming at school, in Code Clubs and CoderDojos, and at home.

    A young coder using the Code Editor.

    Today, we have two exciting updates to share: support for web page projects with HTML/CSS, and an improved mobile and tablet experience.

    What’s the Code Editor?

    Learners can use the Code Editor to write and run code in a web browser without installing any additional software. The Editor is currently available as a beta version, and we’ve already received really positive comments: 

    “The Editor looks really nice! I have tried the Python part, and it is intuitive and concise. My little program worked no problem, and I am sure the Editor will be easy, intuitive, and quick to learn for the young [learners].”

    — Volunteer in the CoderDojo community

    Introducing HTML and CCS in the Code Editor 

    The Code Editor now supports the HTML and CSS web development languages, giving young people the ability to create and preview their own websites directly in the Editor interface. Learners can have their code and the preview panel side by side, and they can also preview their websites in a separate, larger tab.

    A web project in the Code Editor.

    We have embedded the Editor in our ‘Introduction to web‘ path on the Projects site. The path contains six HTML and CSS projects for beginners and helps them create fun websites like the ones shown here.

    We want the Code Editor to be safe, age-appropriate, and suitable for use in classrooms or coding clubs. With this in mind, we have excluded certain functions, like being able to add links to external websites in the code. Rather than enabling image uploads, we provide a library of images when projects in our free learning paths contain images, in order to support multimedia projects safely.

    A web project in the Code Editor.

    Whether users are coding in Python or HTML/CSS, the Editor offers accessibility options so you can easily switch settings between light and dark mode, and between small, medium, and large text size. The text size feature is useful for people with visual impairments, as well as for educators who want to demonstrate something to a group of learners.

    Improved experience for mobile and tablet devices

    Our Code Editor now offers a new and improved experience for users of mobile and tablet devices. This improves access for learners in classrooms where tablets are used, and in low- and middle-income countries, where mobile phones are commonly used for digital learning.

    A web project in the Code Editor.

    The Editor now includes: 

    • A clearer and simpler navigation for small-screen devices
    • Separate Menu, Code and Output/Preview tabs
    • The same features on mobile/tablet devices as on desktop of laptop computers, such as responsive panels and the option to open HTML/CSS projects in a new tab

    Try the Code Editor today

    We’re continuing to develop the Code Editor and have more improvements planned. If you would like to try it out and provide us with your feedback, we’d love to hear what you think of our latest updates. 

    Code Editor developments have been made possible with generous support from Endless and the Cisco Foundation.

    Website: LINK

  • Ivan Miranda’s clock is a master class in marble mechanism design

    Ivan Miranda’s clock is a master class in marble mechanism design

    Reading Time: 2 minutes

    There are a surprising number of marble-based machines out there. Marbles work well in machines because they roll easily, have substantial weight, and are very consistent in diameter. Ivan Miranda was able to take advantage of those characteristics to build this amazing marble clock.

    This project uses hundreds of marbles to display the time in numeric digits. To do so, the machine needs to roll specific marbles down tracks — white marbles for “on pixels” and black marbles for “off pixels.” When the time rolls over to the next minute, the clock releases those marbles back into a big hopper where they wait for the next cycle.

    The machine carries marbles to the top of the track using an elevator mechanism. It picks up an entire row of marbles at once from the hopper, but their colors are random as far as the machine knows. So Miranda programmed an Arduino board to look at each marble in the row on the elevator. It uses infrared sensors to determine if each marble is black or white. It then triggers solenoids to eject any marbles that are the wrong color.

    It is an inefficient trial-and-error process, but the machine can repeat that “lift and check” cycle as many times as it needs to until it sends all the right marbles down the appropriate tracks. Miranda has a few tweaks to make to increase reliability, but the clock is already a marvel!

    [youtube https://www.youtube.com/watch?v=Qtcqx2pZbrI?feature=oembed&w=500&h=281]
    [youtube https://www.youtube.com/watch?v=8IF4esSNA3k?feature=oembed&w=500&h=281]

    The post Ivan Miranda’s clock is a master class in marble mechanism design appeared first on Arduino Blog.

    Website: LINK

  • Home automation ideas for the fall season

    Home automation ideas for the fall season

    Reading Time: 6 minutes

    There’s a lot to love about the fall season, and when it comes to home automation there’s a ton of opportunity here for smart makers to start playing around with new ideas and creations.

    In this article, we’ll take a look at some ways you can use home automation to enhance your autumn experience, and we’ll share a few inspiring ideas from the Arduino community.

    Automated garden care

    If you have a lawn — or any outdoor space — you probably know the never-ending struggle of keeping it in good condition.

    On top of your regular tasks of cutting the grass and caring for its quality, you’ll also have to contend with the yearly influx of beautiful but dead leaves cascading down from the trees and forming a crisp blanket over your grass.

    This can keep the autumnal gardener much busier than usual, but the good news is that home automation can make things much easier in this department. Let’s find out how!

    Smart leaf blowers

    Clearing the fallen leaves out of your yard can be a tedious task, but with the power of home automation it gets a lot easier.

    Remote-controlled leaf blowers like this one can take care of the laborious work of getting rid of dead leaves while you relax on the porch with a nice cup of coffee. Right now this kind of tech is still mostly in the prototype DIY stage, but the future could see more commercially available models.

    Robot lawn mowers

    The Roomba revolutionized the world of home maintenance. No longer did you have to devote chunks of your day to walking around the house with a vacuum cleaner — now a neat little robot could take care of it all for you.

    Robot lawn mowers are now bringing the same game-changing concept to the world of gardening, automatically whizzing around your lawn and getting it to just the right condition while you hang out and enjoy the cool autumn breeze.

    If you’re feeling creative, why not build your own robot lawn mower?

    Arduino user ReP_AL decided to do that with this project —  an Arduino-controlled lawn mowing robot. Now you can sit inside with a pumpkin spice latte and watch in comfort as your robot leaves your lawn in perfect condition. You can check out a full guide for this project here.

    Temperature control and energy efficiency

    While it’s not quite winter yet, fall is the period where temperatures start to drop, and some days can get pretty chilly.

    This is the perfect opportunity to get on top of your temperature control systems and get prepared for the colder months on the way. Once again, home automation can play a major role here, helping you maintain just the right conditions in your home without wasting any energy.

    Smart thermostats

    Until recently, controlling the heat in your home required you to actually be at home.

    Today, thanks to smart thermostats, that’s no longer the case. These gadgets allow you to check the temperature of your house and make adjustments from wherever you are, by connecting your thermostat to a mobile app.

    Smart thermostats can also automatically change the temperature based on when you enter or leave your home, the occupancy of a room at any given time, and your energy usage over time.

    You can even make your own smart thermostat with Arduino. That’s exactly what Hwhardsoft did with this project, combining an Arduino MKR board with a wall mounting enclosure and color TFT touchscreen to create a professional-looking and easy-to-use thermostat for the chilly winter months.

    Energy conservation

    As the days get shorter and colder in the fall months, it’s tempting to crank up the heating and flood your house with light.

    The downside to this is that it takes its toll on your energy bills, especially during a time when costs are high. Home automation can help mitigate this, with the use of monitors that track energy usage, show alerts, and even automatically switch off or turn down lighting, heat, and electrical appliances when they’re not needed.

    Lighting and decorations for fall

    Fall isn’t all about dark nights and frosty mornings. It’s also a time for celebration, with quite a few big holidays taking place around this time.

    Halloween is the most famous, but even if you aren’t a big fan of spooky decorations, adding some light and color to your home can help warm things up as the days get colder.

    Smart lighting is a great example here. On top of keeping your living areas cozy and ambient, smart lighting can also help create a more seasonal mood, and can even be used to set up lighting displays for parties and holiday celebrations.

    It’s not just indoor lighting, either, you can also set up smart illumination displays on the outside of your home. If you’re feeling particularly ambitious, you can even rig up entire lighting displays to celebrate an occasion of your choice. 

    Home security

    One of the downsides of the darker months is an increase in certain types of crime — specifically burglary.

    Criminals like to operate under cover of darkness, and home break-ins are easier to carry out when the world is plunged into night from the afternoon onwards. Fortunately, burglars are fairly easy to deter, and home automation can be a powerful tool here. For instance:

    • Motion sensors and smart camera systems that can detect any unusual activity and quickly report it to you, wherever you are, via a mobile app. This can also trigger alarms and even notify the police if needed.
    • Smart locks and security systems that can be controlled remotely from your devices. This way you can ensure your home is secure at all times, giving you peace of mind, and grant trusted people access from afar.
    • Automated lighting systems that make your home seem occupied even when nobody is around, deterring opportunistic criminals.

    Entertainment

    The fall season is home to a number of festivals and holidays. Halloween, the Day of the Dead, and Thanksgiving are just a few well-known examples.

    Due to the chilly weather, most autumnal festivals tend to take place indoors, which is a great opportunity for you to tap into home automation to host a party nobody will ever forget.

    Home automation can give you a ton of the tools to achieve this. With automated lighting to create the perfect ambience, smart speaker systems connected to voice assistants and shared apps, and unique, novel costumes and light displays, you can host the perfect party.

    You don’t need to throw a huge celebration to make the most of smart entertainment, however. With the right combination of smart lighting, sound, and interactive entertainment systems you can have a great night in all by yourself.

    Preparing for the holidays

    On top of the fearful festivities of Halloween, fall also marks the beginning of a long holiday season.

    Thanksgiving, Christmas, and New Year are all just around the corner, and major events like Black Friday and Cyber Monday take place around this time, too. This makes fall the perfect season to start laying the foundations for a busy few months of holidays.

    Once again, home automation can make life easier and more productive here. For example:

    • Smart kitchen appliances — like trash cans that sound alerts when they’re full and cupboards that add to your shopping list when ingredients are running low — can make life much easier during big eating and guest-hosting holidays.
    • Automated travel planning — Tools such as Wonderplan make it easier than ever to create rough starting itineraries, book accommodation and transport ahead of time, and start making preparations for your coming trip.
    • Automated gift shopping — Tools like ChatGPT can help generate thoughtful ideas for gifts, and you can easily place orders using voice automation software and list-making apps that can handle the entire process of ordering and shipping.

    If you’re interested in getting started on your own home automation journey this fall, Arduino is the perfect place to start.

    Our Project Hub is full of inspiration, and we have products and guides to help anyone get started, no matter their experience level or comfort with tech. Everyone has to start somewhere, and before long you’ll be putting together some seriously impressive creations.

    Contact us to learn more!

    The post Home automation ideas for the fall season appeared first on Arduino Blog.

    Website: LINK

  • Instant Framed Camera

    Instant Framed Camera

    Reading Time: 4 minutes

    A flash of inspiration

    Using a Raspberry Pi Camera Module 3, a couple of Raspberry Pi 3 Model A+ boards, and some Python code, along with the other required bits of hardware, Max has essentially created a camera within a camera here, as a digital camera is hidden within the body of the original shell. “When the camera’s button is pressed, it makes a hidden digital camera take a picture,” he explains. “This picture is sent to a server, for the display frame to show.”

    Interestingly, Max decided that he wanted the picture to then be deleted from the camera itself and, once the frame has downloaded this picture to display it, it is deleted from its storage as well. “I really like the idea of having only one copy of the picture baked into the e-ink display. It makes the picture feel important, and it fits with the essence of Polaroid photos,” declares Max. When a new picture is taken, the old one disappears from the frame.

    Raspberry Pi is equipped with a Waveshare Li-ion Battery HAT, enabling a 14500 battery to be recharged via USB-C

    The e-paper display module was a key inspiration to Max to make the photo frame: “I really like the look of a display that doesn’t emit any light, so it’s more like an e-book instead of a screen. It’s really fun to see the individual dots on it; it looks just like a real print.” When he found a type of e-paper that could do colours, there was no stopping him. “The slow drawing speed of the e-paper module (~1 minute) fits with the idea of mimicking developing film, which was a happy accident,” he enthuses.

    Max was determined that the camera should send pictures to a server, instead of directly to the other device, so that it works “even if both devices are on opposite sides of the planet.” Deciding against using a SIM card in the camera and frame, he instead opted for Wi-Fi, and the camera simply connects to Wi-Fi networks by taking a picture of a QR code.

    Shooting the snags

    Max found that the physical build was the hardest element of the project, and many hours of work went into the venture. “At first, I only made little steps at a time for a couple hours a week but, once it started taking shape, I dedicated a few days to it to make some real progress,” he reveals. Most of his time went into the physical photo frame and the camera body. “Breaking the camera open on the inside without breaking it on the outside was a bit of a tedious task. And the photo frame needed a wooden shape on the back to fit the computer and wires, so that became a little arts‑and-crafts-session.”

    Max considered using a Pico in the camera, but eventually opted for a Raspberry Pi 3A+ for its extra RAM

    Max’s father was on hand to help him with the woodwork for the frame, but “I was scared I’d break the camera when drilling a hole through the top for an LED light,” he shares. Also, making the real camera’s button trigger a signal necessitated some good old-fashioned trial and error. “I ended up using a metal spring with aluminium foil on it, and the ends touch when the button is pressed to make a closed circuit.”

    Finally, deciding on power options for the camera demanded some further head-scratching – “I ended up using a battery HAT that works for about an hour on this setup and can be recharged with USB-C.” The end-product was well worth the labour and troubleshooting required en route, however. As long as there is Wi-Fi available, “the photos you take with the camera appear instantly on the display frame, no matter where in the world each of them is.”

    No negatives here

    Understandably, many people have enjoyed reading about Max’s camerawork.“There were a lot of positive reactions online! I really loved reading them. All the individual steps to making this project are nothing new, but bringing them together into this simple idea is what people seemed to appreciate the most.”

    Comprising another Raspberry Pi 3A+ and e-paper display, the digital photo frame downloads each image from the server

    Significantly, he has had messages from a number of people who are keen to replicate his endeavours using similar vintage cameras. Describing this as “super-cool”, Max is very keen that people make their own variations and, indeed, improvements to the project. “One possible variation someone told me about was to make multiple photo frames and connect them to the same camera, so you can update a whole group at once! That could be fun.”

  • 10 studios selected for Google Play’s 2023 Indie Games Fund10 studios selected for Google Play’s 2023 Indie Games FundDirector, Developer Marketing Google Play

    10 studios selected for Google Play’s 2023 Indie Games Fund10 studios selected for Google Play’s 2023 Indie Games FundDirector, Developer Marketing Google Play

    Reading Time: < 1 minute

    Google Play’s Indie Games Fund is back for 2023. It awards $2 million in equity-free funding and hands-on support to games studios based in Latin America, helping them continue to grow their businesses on Play.

    Today, we’re unveiling the 10 studios and games that have been selected — ranging from medieval-time adventures to 90’s-style arcade games.

  • 3 ways we work to make Google Play more accessible3 ways we work to make Google Play more accessibleGM

    3 ways we work to make Google Play more accessible3 ways we work to make Google Play more accessibleGM

    Reading Time: 3 minutes

    Google Play has millions of the latest apps, games, and books for people around the world. To serve everyone who uses Google Play, we need to make sure we build our platform to be as accessible as possible — especially for the more than 1.3 billion people who live with some form of disability. This means building with and for people from that community.

    Since this month is National Disability Employment Awareness Month, we wanted to highlight accessibility features and apps on Google Play and some of the Googlers who build them.

    Accessibility tags that help you find helpful apps

    Accessibility tags on the Play Store make it easier to discover accessible apps and games with tags that include information like screen reader-friendly, hearing assistance, learning disability and more. These tags help make it easy for those with diverse needs to easily find apps that are useful tools for a specific need (like a transcription app built for people who are Deaf or hard of hearing) and any app that is accessible (like a game that is screen-reader friendly).

    Karo Caran, an accessibility program manager for Google Play, helped launch this feature. As someone who has low vision, she hopes that the work she did with her team to launch this feature will help others more easily find accessible apps and games on Google Play like the one she uses every day. For example, they might find new apps like Aira Explorer, an app that connects someone who is blind or has low vision with a professionally-trained visual interpreter for on-demand assistance.

    New features designed to make Google Play Books work with accessibility tools

    Automagic is a page-turn feature improvement in Google Play Books that helps people using a Braille display that’s paired with Talkback on Android to navigate books, making the experience better for everyone.

    Previously, the basic navigation on Google Play Books supported using Braille input keys or dots to navigate through items on a page — like paragraphs, words or characters. However, moving from one page to another required switching from the Braille display to the touch screen, making the reading experience slower. Ankita Saxena, Software Engineer for Play Accessibility, noticed this issue when testing out Google Play Books and worked to find a solution. After prototyping multiple solutions, Automagic was launched, allowing users to navigate the entire book reading experience using a Braille display with Talkback.

    A design process that makes new products work better for everyone

    Reading Practice, a new feature in Google Play Books, helps beginner readers improve vocabulary and pronunciation skills, was designed and built with accessibility in mind, thanks to Googlers like Kevin Howald. Kevin, a software engineer for the Play Books Android App and a person with a disability, worked with the team building Reading Practice to incorporate a product design that worked for people with a range of abilities — this included design considerations for visual, auditory, and cognitive accessibility needs. As part of his role, Kevin works to identify accessibility barriers, review code and mentor engineers to ensure accessibility is an integral part of the design process for Google Play features.

    To find out more information about accessibility features in Google’s products, visit our product accessibility page.

  • Maintaining choice and opportunity on Android and Google PlayMaintaining choice and opportunity on Android and Google PlayVP, Government Affairs & Public Policy

    Maintaining choice and opportunity on Android and Google PlayMaintaining choice and opportunity on Android and Google PlayVP, Government Affairs & Public Policy

    Reading Time: 4 minutes

    Android has made phones more affordable, provided consumers with more options, and enabled developers to thrive. Epic Games has fought a global, years-long campaign to up-end this system all in the hope of getting something for nothing. They have already sued Apple and lost twice. Next week they are trying their luck with Android by bringing a case that has even less merit given the flexibility and choices Android offers.

    Epic argues that it is forced to distribute its apps through Google Play and that options available to developers are too restrictive. These claims are baseless. Android enables developers to distribute through multiple app stores or directly to users through the web, bypassing app stores altogether. The truth is that Epic simply wants all the benefits that Android and Google Play provide without having to pay for them. And it wants to strip away critical security and privacy protections that keep billions of users safe from things like unfair subscription practices and dishonest billing, for which Epic itself has faced record fines.

    Here’s more detail about the facts at the heart of this case:

    • Google Play competes fairly for users and developers. At trial, Epic will argue that Google Play doesn’t compete with the Apple App Store. This is obviously not true — and it’s a theory that courts have rejected. Android competes with Apple’s iOS and the iPhone, and Google Play competes intensely with the App Store for both consumers and developers. We also compete with other Android app stores, including the Samsung Galaxy Store and Amazon Appstore, as well as app stores on gaming consoles and PCs. We’ve worked to attract developers through efforts like our Games Velocity Program, which offered developers incentives to launch their apps on Play alongside other competing stores such as the Apple App Store. Contrary to Epic’s false characterization, this program did not require exclusivity on Play or prevent developers from opening their own app stores.
    • Developers have many ways to distribute their apps on Android. Epic also claims that developers have no other choice than to distribute their apps through Google Play. That’s not true either. Android is the only major mobile platform that gives developers multiple ways to distribute apps. In fact, most Android devices come preloaded with two or more app stores right out of the box — and users can install others if they want. Developers can also distribute their apps directly to their users. Epic takes full advantage of Android’s distribution options by making their most popular app, Fortnite, available for billions of Android users around the world to download through the Samsung Galaxy Store and directly through their website. This choice and flexibility is possible only on Android.
    • We provide a wide range of tools and services, not just payment processing. Epic would like you to believe the only value Google Play provides is payment processing, and that that’s the only thing we should charge for. The truth is Google Play invests heavily in supporting all developers big and small across every stage of an app’s journey, providing an array of tools and services to help them grow their businesses and acquire, engage and keep users. These investments mean developers can choose the business models that work for them which, in turn, creates more choice for customers. Plus, Google Play’s ongoing investment in safety features and platform improvements creates a trusted environment — one where people can explore a range of new apps with confidence while also discovering new developers.
    • Google Play’s fees are the lowest of any major app store. We fund our investments in the ecosystem in part through a service fee that applies only when a developer on Google Play sells in-app digital goods or services. This is a sensible model: We make money only when a developer does, so our success is aligned with theirs and we are incentivized to improve the platform for developers. While Epic argues our fees are too high, Google Play’s fees are actually the lowest among major app stores. In fact, 99% of developers qualify for a service fee of 15% or less. This fee structure also avoids higher up-front charges that would burden small developers. This flexibility has led to a rapid increase in digital transactions, particularly in gaming apps like Fortnite, where the “freemium” model has become very popular among game developers.
    • Google Play is the only mobile platform offering users choice in payments. Though Epic claims consumers are forced to use Google Play’s billing system, that’s again not true. We’re piloting a system on Google Play where users choose between Google Play’s billing system and a system of the developer’s choosing when they purchase in-app digital goods and services. User choice billing includes a standard fee to ensure that we can maintain Android’s safe and secure experience when purchasing in apps. Today this option is live in more than 35 countries, and we are committed to working with Android developers to iterate and improve the program while keeping users safe and protected. Of course, when downloaded from a competing app store or directly from a developer’s website, users pay with the developer or app store’s billing system of choice.
    • This lawsuit risks making Android less safe. Users expect a safe experience on Android, and we are committed to keeping our users safe even while giving them choice. For example, when someone downloads an app for the first time directly from a developer’s website, Android notifies the user and asks them to verify they are doing so intentionally. We do this to ensure that users understand the risks of downloading software onto their mobile device directly from the web. We’ve streamlined this user prompt to make it a seamless, simple process. However, Epic wants these user notifications removed entirely, leaving the three billion people around the world who rely on these security precautions uninformed and putting their security and privacy at risk.

    Android’s choice and flexibility work well for consumers and developers of all sizes. We look forward to making our case in court as we fight to keep our users safe from harm, partner with developers to grow their businesses, and keep the Android ecosystem thriving and healthy for everyone.

    Website: LINK

  • 15 years of Android memories15 years of Android memoriesGM and VP of Android Ecosystem

    15 years of Android memories15 years of Android memoriesGM and VP of Android Ecosystem

    Reading Time: 2 minutes

    „With the Android brand, we never took ourselves too seriously, and that personality brought joy and a unique sense of inclusion to Android users around the world. This year, when we began the challenge of modernizing the brand’s identity, our goal was to ensure what Android stood for remained at the center of our work. This allowed us to bring the dimensionality of our brand personality, reflect the diverse communities we serve all over the world, and still not take ourselves too seriously. (After all, our bugdroids can have mohawks.)“ –Adrienne Lofton, VP of Integrated Marketing for Platforms and Ecosystems

    A way for families to connect

    “In April 2020, we partnered with the UK’s National Health Service (NHS) to help get Android tablets in hospital rooms. It was powerful to see our technology be used to help families manage care and stay connected to loved ones that were being treated in intensive care units for COVID.” –Liesl Schumacher, Chief of Staff

    My journey with Android

    This whole journey has been nothing short of unpredictable. When I first joined the team, Dianne Hackborn, one of the earliest engineers on the project, let me know she’d been asked to write a chapter on Android for the 4th edition of the Modern Operating Systems book by Andrew S. Tannenbaum. Many of you that studied computer science will remember that book – edition 2 still sits on my shelf at home. At this moment, I realized what an honor and privilege it is to work on something that has had such an impact on the world.

    Happy 15th birthday to the whole Android ecosystem and thanks for all the support over years. Together, I’m sure we’ll make the next 15 years even more memorable.

    Website: LINK

  • Introducing Arduino’s new storage libraries: Streamline data management for your projects

    Introducing Arduino’s new storage libraries: Streamline data management for your projects

    Reading Time: 4 minutes

    At Arduino, we’re always on a mission to make development easier and more accessible. That’s why we’re excited to introduce two new libraries, Arduino_POSIXStorage and Arduino_UnifiedStorage, designed to simplify how you handle data and storage in your Arduino projects. These libraries empower you to do that faster, and with less complexity.

    Simplified data management with Arduino_POSIXStorage

    Imagine having an easy way to manage data and files without the headache of low-level operations. Arduino_POSIXStorage is here to simplify that for you. Especially if you’re familiar with the POSIX standard for file operations you will feel right at home. If POSIX doesn’t ring a bell, it’s the standard used for file system functions in Linux, macOS, FreeBSD, or similar operating systems.

    What can Arduino_POSIXStorage do for you?

    • Simplified storage access: No need to wrestle with complex storage operations. Arduino_POSIXStorage provides a straightforward way to manage SD cards, and USB storage.
    • Your choice of file systems: Whether you prefer FAT32 or LittleFS, you have the freedom to choose the file system that suits your project best.
    • Hotplug support: Detect and manage USB mass storage devices as you plug them in and out for added convenience.

    User-friendly data management with Arduino_UnifiedStorage

    Managing data and files shouldn’t be complicated. Arduino_UnifiedStorage takes the complexity out of the equation. Being based on Arduino_POSIXStorage, it offers the same functionality and adds some additional features. For those not familiar with the POSIX set of file functions, this library offers a user-friendly API in the usual Arduino style.

    Which additional features does Arduino_UnifiedStorage offer?

    • Unified storage interface: Gain streamlined access to internal storage, SD cards, and USB storage with a user-friendly interface.
    • Effortless file handling: Easily move within files and check available data, making file navigation a breeze.
    • Robust file and folder actions: Rename, delete, copy, and paste files and folders with confidence.
    • Smooth cross-medium data transfer: Move data between different storage types while controlling how overwriting works.
    • Advanced file navigation: Navigate through folder structures with ease for straightforward file management.
    • Partition support: Work with multiple partitions on internal QSPI storage for expanded storage options. Easily re-partition the storage according to your needs.

    Real-world use cases: Simplify your projects

    Let’s explore how these libraries can simplify real-world scenarios:

    Use case 1: Automated data backup for remote monitoring systems

    Imagine you’re building a remote monitoring system for an agricultural field or a remote weather station. These systems collect valuable data over time, but they also face the risk of data loss due to unforeseen circumstances like power outages or equipment failures.

    With the Arduino_UnifiedStorage library, you can easily set up automated data backup routines. As your system collects data, it can periodically back up that data to an SD card or USB storage device using the library’s intuitive file management features. In the event of an issue, your valuable data remains safe and accessible for analysis.

    Use case 2: Rapid firmware updates for IoT devices

    If you’re working on an Internet of Things (IoT) project, you may need to install new firmware before deploying devices in the field. Or you may find yourself in a situation that does not allow for Over-the-Air updates on the deployed devices. However, this is crucial for fixing bugs, adding new features, or enhancing security. 

    With the Arduino_POSIXStorage library, you can streamline the process of firmware updates. Store the updated firmware on an SD card or USB drive, and your IoT device can detect and apply the update automatically. This simplifies the update process and reduces the risk of errors, ensuring your devices always run the latest software.

    Use case 3: Data collection and machine learning motel training

    Imagine you’re working on a project that involves collecting sensor data from various sensors in a smart environment — maybe it’s a smart home, an industrial automation system, or an environmental monitoring setup. Your goal is to use this data to train a machine learning model for predictive analysis or automation.

    The Arduino_UnifiedStorage library can simplify the process of collecting, storing, and managing this sensor data. Use it to efficiently log sensor data to an SD card or USB storage device. With a rich dataset at your disposal, you can now use the collected sensor data to train machine learning models. Whether you’re developing predictive maintenance algorithms, anomaly detection systems, or smart automation routines, having easy access to high-quality data is essential.

    Examples and testing: A hassle-free experience

    Both libraries come with practical examples that help you dive right in, covering real-life scenarios such as data logging and storage backup. We’ve also rigorously tested these libraries to ensure they work seamlessly on various devices, giving you confidence in their performance and robustness.

    Compatibility

    The currently supported products are as follows:

    • Arduino Portenta H7
    • Arduino Portenta C33
    • Arduino Opta
    • Arduino Portenta Machine Control

    In the future, we plan to expand support for additional Arduino boards.

    Get started today

    Ready to simplify data management in your Arduino projects? Download the Arduino_POSIXStorage and Arduino_UnifiedStorage libraries, explore the documentation, and dive into the examples. Whether you’re a beginner or an experienced developer, these libraries are designed to streamline your workflow and help you unlock new possibilities.

    Installation

    You can conveniently download the libraries in the Arduino IDE using its library manager or download them directly from the following URLs:

    Tip: You can find the API documentation of these libraries in the “docs” folder of the corresponding repository.

    Join the conversation: Have questions or want to share your experiences with these libraries? Join the Arduino community on our forums and connect with fellow developers.

    We can’t wait to see how these libraries empower your projects and help you take your Arduino development to the next level. Happy coding!

    The post Introducing Arduino’s new storage libraries: Streamline data management for your projects appeared first on Arduino Blog.

    Website: LINK

  • This all-in-dashboard uses the Arduino GIGA Display Shield to control appliances

    This all-in-dashboard uses the Arduino GIGA Display Shield to control appliances

    Reading Time: 2 minutes

    In a previous video about controlling household appliances and lighting fixtures from the Arduino Cloud, Sachin Soni of the techiesms YouTube channel designed a custom PCB that allows an Arduino Nano ESP32 to toggle a series of relays. But since then, he realized that his project needed a faster and more permanent method of getting to the controls, which led him to build a complete home automation dashboard using solely Arduino hardware.

    Soni opted for the new Arduino GIGA Display Shield since it contains a 3.97” RGB touchscreen with support for up to five simultaneous touch points and an array of sensors if the functionality were to ever be expanded. On the back, an Arduino GIGA R1 WiFi was attached to act as the display’s controller and leverage its Wi-Fi capabilities to communicate with the system’s Arduino Cloud variables.

    The final step in this project involved creating a software-defined graphical user interface (GUI) complete with toggleable buttons for the lights, dials to indicate temperature/humidity levels, and a way to select the fan’s speed from an array of values. Soni was able to finish most of the groundwork by utilizing the LVGL library and its highly customizable GUI components.

    After laying out the buttons and dials, synchronizing Cloud variables, and connecting their event handlers to value updates, Soni had a functional tablet that could wirelessly manage his appliances from anywhere.

    [youtube https://www.youtube.com/watch?v=PTmjjoMCCQw?feature=oembed&w=500&h=281]

    The post This all-in-dashboard uses the Arduino GIGA Display Shield to control appliances appeared first on Arduino Blog.

    Website: LINK

  • TouchCam camera

    TouchCam camera

    Reading Time: 3 minutes

    Iterate and improve

    Designing the TouchCam gave Mukesh a chance to combine his skills as a maker and a computer science enthusiast. “My goal was to blend my love for creating things with my technical knowledge,” he enthuses of the versatile device “that can even work as a server for my test applications and database.”

    Perhaps it’s no surprise that, as a computer engineer and developer, Mukesh works in a process of continuously improving successive designs. Mukesh says many of the design updates and improvements he made when moving on from the PiCam and developing TouchCam were directly influenced by the feedback he got from the design of the PiCam. It is also an apposite demonstration of how far his Fusion 360 computer-aided design skills have developed and was used to showcase his design prowess for his BSc.

    The TouchCam’s screen provides instant video and time-lapse playback

    With the TouchCam, Mukesh was keen to design a system that is compact and easy to carry and that would appeal to multitaskers who enjoy activities such as 3D printing, time-lapse photography, electronics, robotics, programming, and machine learning. He also thinks the TouchCam could be used for software development, low-cost personal servers, and similar uses.

    Fine new features

    The TouchCam builds on the PiCam by integrating a high-definition touchscreen display and has a touch sensor that is used for live view, to access the photo gallery, and to switch between still, time-lapse, and video capture modes. The HQ Camera remote server also gained more prominence. “I chose the Raspberry Pi because it’s affordable, powerful, and has an internet full of resources. I am using the Raspberry Pi 4 8GB variant.” The components were sourced online, with standard items such as the HQ Camera paired with a DFRobot Raspberry Pi Touchscreen, cooling from a 5 V fan, and open-source software libraries such as Imager, and Silvan Melchior’s Raspberry Pi Camera Web Interface.

    TouchCam is an evolution of the PiCam Mukesh designed and built

    Having already got the basics down pat with the PiCam, the case design and touchscreen integration were the real challenges for this build. Only three 3D-printed versions were needed, and even these were simply to fix minor fit issues to accommodate the screws. Overall, Mukesh was pleased with the way the TouchCam turned out: “Everything from the outer shell that feels good to hold, to the special mounts that hold the camera perfectly. Each piece came from my careful design work, making sure they look good and work just right.”

  • Improve recycling with the Arduino Pro Portenta C33 and AI audio classification

    Improve recycling with the Arduino Pro Portenta C33 and AI audio classification

    Reading Time: 2 minutes

    In July 2023, Samuel Alexander set out to reduce the amount of trash that gets thrown out due to poor sorting practices at the recycling bin. His original design relied on an Arduino Nano 33 BLE Sense to capture audio through its onboard microphone and then perform edge audio classification with an embedded ML model to automatically separate materials based on the sound they make when tossed inside. But in this latest iteration, Alexander added several large improvements to help the concept scale much further.

    Perhaps the most substantial modification, the bin now uses an Arduino Pro Portenta C33 in combination with an external Nicla Voice or Nano 33 BLE Sense to not only perform inferences to sort trash, but also send real-time data to a cloud endpoint. By utilizing the Arduino Cloud through the Portanta C33, each AI-enabled recycling bin can now report its current capacity for each type of waste and then send an alert when collection must occur.

    While not as practical for household use, this integration could be incredibly effective for municipalities looking to create a network of bins that can be deployed in a city park environment or another public space.

    Thanks to these upgrades, Alexander was able to submit his prototype for consideration in the 2023 Hackaday Prize competition where he was awarded the Protolabs manufacturing grant. To see more about this innovative project, you can check out its write-up here and watch Alexander’s detailed explanation video below.

    [youtube https://www.youtube.com/watch?v=jqvCssm-7A4?feature=oembed&w=500&h=281]

    The post Improve recycling with the Arduino Pro Portenta C33 and AI audio classification appeared first on Arduino Blog.

    Website: LINK

  • Replicating two of history’s most iconic BattleBots with the Arduino UNO R4

    Replicating two of history’s most iconic BattleBots with the Arduino UNO R4

    Reading Time: 2 minutes

    When the BattleBots TV show first hit the airwaves in 2000, it felt like we were finally living in the future. Engineers and enterprising hobbyists from around the world would compete to build the most destructive robots, which then entered into televised mortal combat within an arena. The original series had many notable robots, but two of those most iconic were DeathRoll and Hydra. Max Imagination replicated those on a small scale for mini living room battles.

    BattleBots competitors could win their matches by either damaging their opponents to the point where they could no longer operate, or by making them unable to move. The most popular way to achieve that second goal was by flipping over the opposing robot and that is the tactic used by both DeathRoll and Hydra. DeathRoll did so with a spinning disc that catches on its opponents body, while Hydra used a hydraulic arm like a pancake spatula to flip opponents.

    Max Imagination wanted to create faithful reproductions of both bots, but at a size small enough to be 3D-printed. Because hydraulics are difficult at this scale, Hydra’s flipping arm is spring-actuated and cocked with a motor-driven gear mechanism. Otherwise, both replicas work in the same way as their bigger ancestors.

    Each robot takes advantage of the new Arduino UNO R4 WiFi board for control. Max Imagination programmed those with self-hosted web interfaces, so users can pilot the bots through smartphones. The bodies were designed in Autodesk Fusion 360 to be entirely 3D-printable and Max Imagination is even selling those models for anyone who wants to construct their own fighting robots.

    [youtube https://www.youtube.com/watch?v=yGK8LqaogvU?feature=oembed&w=500&h=281]

    The post Replicating two of history’s most iconic BattleBots with the Arduino UNO R4 appeared first on Arduino Blog.

    Website: LINK

  • CrowVision touchscreen review

    CrowVision touchscreen review

    Reading Time: 2 minutes

    Slim and flexible

    There is a small price to pay for the nice screen with touch capabilities, and that is with resolution. Perhaps we’ve been spoiled by modern consumer electronics, but 1366 × 768 does not seem like a lot of pixels, especially on a screen this size in 2023. It’s definitely very functional and it’s not like you’re going to get a bad experience because of it, although that does largely depend on the kind of use case.

    Kitchen computer or smart-home controller? Absolutely fine. As a screen to watch media or play video games? Not the very best solution.

    Speaking of different use cases, the screen is also platform-agnostic. It displays anything that will connect to the HDMI port on the back, and works as a nice auxiliary monitor for a PC in certain situations. We like the suggestion of a little screen on your case full of Windows Media Player visualisations, although something to keep track of a chat, or social media, is also handy. You can even use it this way with a Raspberry Pi – Raspberry Pi 4 and 400 do have dual monitor out after all.

    See it all

    In actual use, the touch is nice and responsive, and that aspect just requires you to plug in a USB cable to Raspberry Pi one end, and into the micro USB port on the display. Setup is very straightforward – it is just a screen after all, and the touch uses standard drivers – and if you’re not great at changing audio out settings on Raspberry Pi, a handy 3.5 mm jack on the screen has you covered for hearing what’s going on. It even has a nice Realtek audio chip for the sound.

    It’s good, it’s very practical, and it’s one of the rarer bigger screens for Raspberry Pi. We recommend.

    Verdict

    8/10

    While not the highest pixel density, it’s a good-quality screen that is easy to set up and fills a bit of a niche.

    Specs

    Screen: 11.6˝, 1366×768, 178 degree IPS, five-point touch

    I/O: 1 × mini HDMI, 1 × USB 2.0 power port, 1 × USB micro port for touch output, 1 × 3.5 mm audio jack

    Compatible Raspberry Pi: Raspberry Pi 1, 2, 3, 4, Zero, Zero 2

  • Voice-enabled controller makes video games more accessible

    Voice-enabled controller makes video games more accessible

    Reading Time: 2 minutes

    Almost all modern video games require either a gamepad or a keyboard and mouse, which means that they’re inaccessible to many people with disabilities that affect manual dexterity. Bob Hammell’s voice-enabled controller lets some of those people experience the joy of video games.

    This is a simplified video game controller with a minimal number of physical buttons, but with special voice-activated virtual buttons to make up the difference. The gamepad only has six physical buttons, plus an analog joystick. That makes it much easier to handle than a typical modern controller, which might have a dozen buttons and two joysticks. If the player has the ability, they can utilize the physical controls and then speak commands to activate the game functions not covered by those buttons.

    The controller’s brain is an Arduino Micro board, which Hammell selected because it can be configured to show up as a standard USB HID gamepad or keyboard when connected to a PC. The physical controls are an Adafruit analog two-axis joystick and tactile switches. An Adafruit 1.3″ OLED screen displays information, including the status of the voice activation.

    An Elechouse V3 Voice Recognition Module performs the voice recognition and it can understand up to 80 different commands. When it recognizes a command, like “menu,” it tells the Arduino to send the corresponding virtual button press to the connected computer. It takes time for a person to speak a command, so those are best suited to functions that players don’t use very often.

    If you know someone that would benefit from a controller like this, Hammell posted a full tutorial and all of the necessary files to Hackster.io so you can build your own.

    The post Voice-enabled controller makes video games more accessible appeared first on Arduino Blog.

    Website: LINK

  • New micro:bit coding projects for kids

    New micro:bit coding projects for kids

    Reading Time: 6 minutes

    Young people can now learn to code and create with our brand-new path of micro:bit coding projects. The ‘Intro to micro:bit’ path is free and kids can follow it to code projects that focus on wellbeing, including topics like mental health, relaxation, and exercise.

    As you might know, a micro:bit (pronounced “microbit”) is a small, programmable device designed for education. You can program it using any computer. It’s easy to use and learn with, and suitable for beginners, especially young people in and out of school.

    The theme of the new project path: Wellbeing

    Our aim for this new micro:bit project path is to help young people explore how they can create their own tech tools that help them look after themselves and others. By designing the micro:bit coding projects around wellbeing, we want to not only help kids develop programming and digital literacy skills, but also promote open conversations about the important topic of mental health.

    Kids coding a microbit project.
    Credit: David Bird

    The six micro:bit coding projects in our new path all cover different aspects of wellbeing in a fun, creative way:

    1. Good sleep patterns
    2. Relaxation
    3. Self-confidence
    4. Happiness
    5. Health 
    6. Entertainment

    We hope that following the path and making projects helps encourage learners to ask questions, share their experiences, and feel like they can ask parents, teachers, or mentors for support, and help support their friends and peers.

    What is in the ‘Intro to micro:bit’ project path?

    The ‘Intro to micro:bit’ path is designed according to our Digital Making Framework. Its aim is to encourage young people to become independent coders and tech creators as they progress along the projects in a path by gently removing scaffolding.

    • Our project paths begin with three Explore projects, in which learners are guided through tasks that introduce them to new coding skills.
    • Next, learners complete two Design projects. Here, they are encouraged to practise their skills and bring in their own interests to personalise their coding creations.
    • Finally, learners complete one Invent project. This is where they put everything that they have learned together and create something unique that matters to them.

    The structure of the path means that learners are led through the development process of a coding project and learn how to turn their ideas into reality. The path structure also supports them with fixing programming errors (debugging), showing them that errors are a normal part of computer programming and just temporary setbacks that they can overcome.

    Credit: David Bird

    Because community is important for learning, the path also offers young people the chance to share the projects they make with peers around the world.

    What coding skills and knowledge will young people learn?

    The Explore projects at the start of the path are where the initial learning takes place. Learners then develop their new skills and knowledge by putting them into practice in the Design and Invent projects, where they add in their own ideas and creativity.

    The key programming concepts covered in this path are:

    • Variables
    • Using selection (if, else if, and else)
    • Using repetition (for loops)
    • Using randomisation
    • Using functions
    Kids coding a microbit project.
    Credit: David Bird

    There are two versions of the micro:bit (V1 and V2) and learners can use either version to create the micro:bit coding projects in the path, using the micro:bit’s input and output features:

    Input features:

    • Buttons
    • Accelerometer
    • Sound sensor/microphone (micro:bit V2 only)
    • Capacitive touch sensor
    • Light sensor

    Output features:

    • LED display
    • Speaker
    • Headphones connected via GPIO (micro:bit V1 only)

    Explore project 1: Music player

    In this Explore project, kids create a music player on the micro:bit to explore how listening to music can improve their mood. While creating their music player, young people get to choose melodies that they enjoy or that make them feel more relaxed. They also add a range of functions such as pausing, skipping, and shuffling tracks.

    Explore project 2: Sound level meter

    Noise levels can affect people’s well-being, so in this project, kids create a program to use the micro:bit to display how noisy their environment is. They will also learn how to save the noise data the micro:bit measures so they can identify the noisiest times in their day.

    Explore project 3: Sleep tracker

    Sleep is an important factor that contributes towards well-being. With this third Explore project, kids create a program to track their sleep movements using the micro:bit. This teaches them about variables and about using the micro:bit’s accelerometer, and its LEDs to display data.

    Design project 1: How’s your day?

    The first Design project of the path gets young people to build a mood checker program using the question ‘How’s your day?’. Kids get creative design control over the mood checker’s outputs according to the user’s replies, including displaying an animation or positive messages, or playing music. Kids can also make use of sensors to measure the various factors in the environment that could be affecting the user’s mood.

    In this project, young people apply all of the coding skills and knowledge covered in the Explore projects, including selection, repetition, variables, functions, and randomisation.

    Design project 2: Active assistant

    In the second Design project, young people create an assistant that helps them get active.The project provides examples, a structure, and brief summaries of what kids have learned to do on the path so far to inspire and motivate them. This mean young people can work independently to produce their own outcomes and the functionality of their assistant is up to each young tech creator.

    Invent project: Party game

    The final project, Party game, encourages learners to independently replicate their favourite party game for entertainment and relaxation. Learners will combine all of the knowledge and skills they’ve gained throughout the path to make something of their own around the theme of well-being. This is a chance for them to unleash their creativity and reflect on real-life games they enjoy. The outcome will be unique, and fun for them to share with their friends and family.

    Key questions answered

    Who is this path for?

    We have written these micro:bit coding projects with young people around the age of 6 to 13 in mind. Building the projects on the path does not require any previous coding experience, although complete beginners may want to try our free ‘Intro to Scratch’ path first.

    What software do learners need to code these projects?

    A web browser on a computer. In every project, starter code is provided in the MakeCode online code editor. Learners can either download their project code to a physical micro:bit (recommended) or use the micro:bit simulator in MakeCode.

    Kids coding a microbit project.
    Credit: David Bird

    Young people who live where there isn’t constant internet connectivity can also download the offline version of the MakeCode editor. There are also free micro:bit coding apps for smartphones and tablets.

    How long will the path take to complete?

    We’ve designed the ‘Intro to micro:bit’ path to be completed in six one-hour sessions, with one hour per project. However, the project instructions invite learners to take additional time to upgrade their projects if they wish.

    What can learners do next?

    Take part in Coolest Projects

    At the end of the micro:bit path, learners are encouraged to register a project they’re making with their new coding skills for Coolest Projects, our annual online technology showcase for young people around the world.

    Taking part is free, and beginners as well as more experienced young tech creators are invited. This is their opportunity to share their ingenuity in an online gallery for the world and the Coolest Projects community to celebrate.

    Website: LINK