Kategorie: Mobile
-

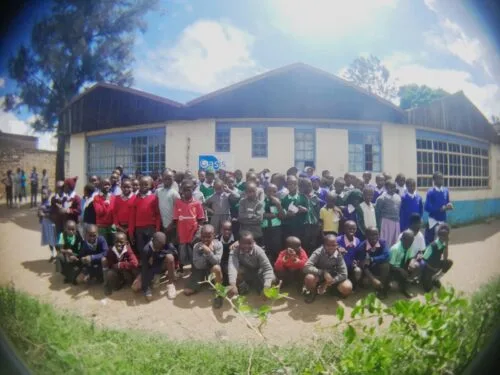
Global Impact: Empowering young people in Kenya and South Africa
Reading Time: 5 minutesWe work with mission-aligned educational organisations all over the world to support young people’s computing education. In 2023 we established four partnerships in Kenya and South Africa with organisations Coder:LevelUp, Blue Roof, Oasis Mathare, and Tech Kidz Africa, which support young people in underserved communities. Our shared goal is to support educators…
-

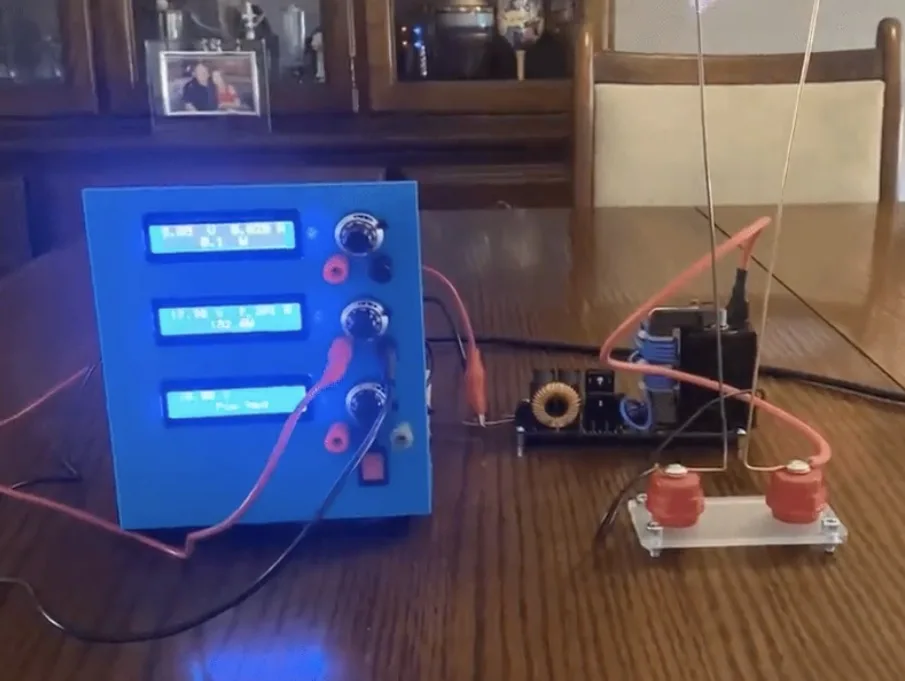
This beastly DIY bench power supply will satisfy any requirement
Reading Time: 2 minutesEvery maker should have a bench power supply in their possession, ready to provide whatever voltage a project or particular component requires. But not all bench power supplies are created equal. Some only have a single output, some have a limited voltage range, and some can’t handle much current. In an attempt…
-

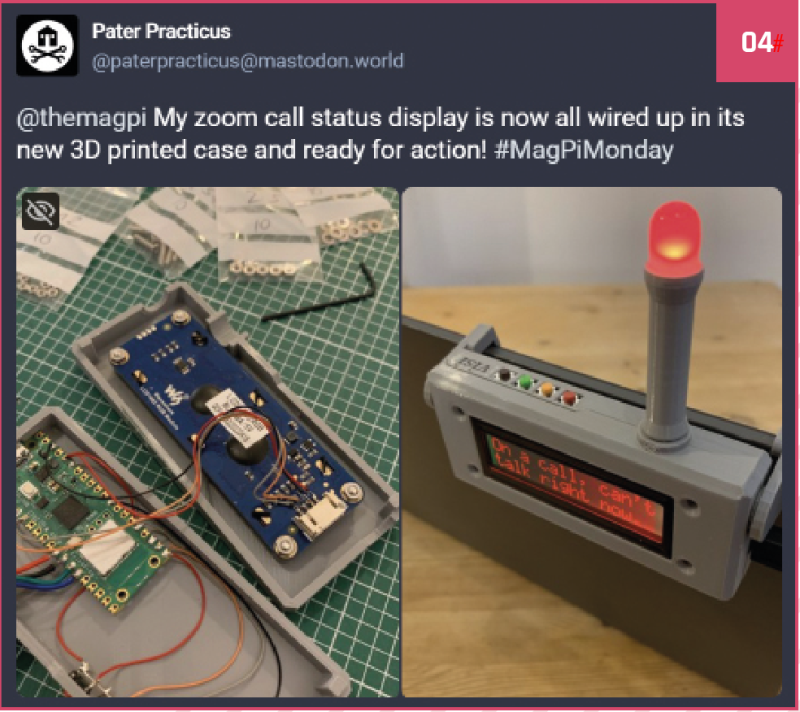
#MagPiMonday
Reading Time: < 1 minuteEvery Monday we ask the question: have you made something with a Raspberry Pi over the weekend? Every Monday, our followers send us amazing photos and videos of the things they’ve made. Here’s a selection of some of the awesome things we got sent this month. Remember to follow along at…
-

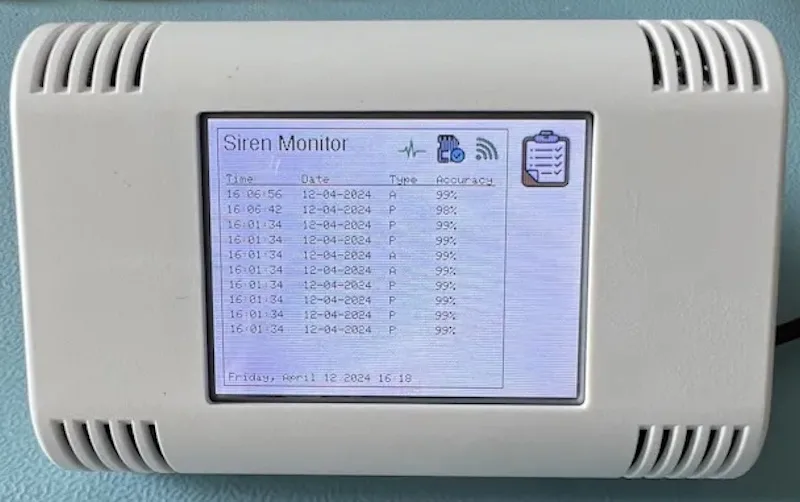
Classify nearby annoyances with this sound monitoring device
Reading Time: 2 minutesSoon after a police station opened near his house, Christopher Cooper noticed a substantial increase in the amount of emergency vehicle traffic and their associated noises even though local officials had promised that it would not be disruptive. But rather than write down every occurrence to track the volume of disturbances, he came up with…
-

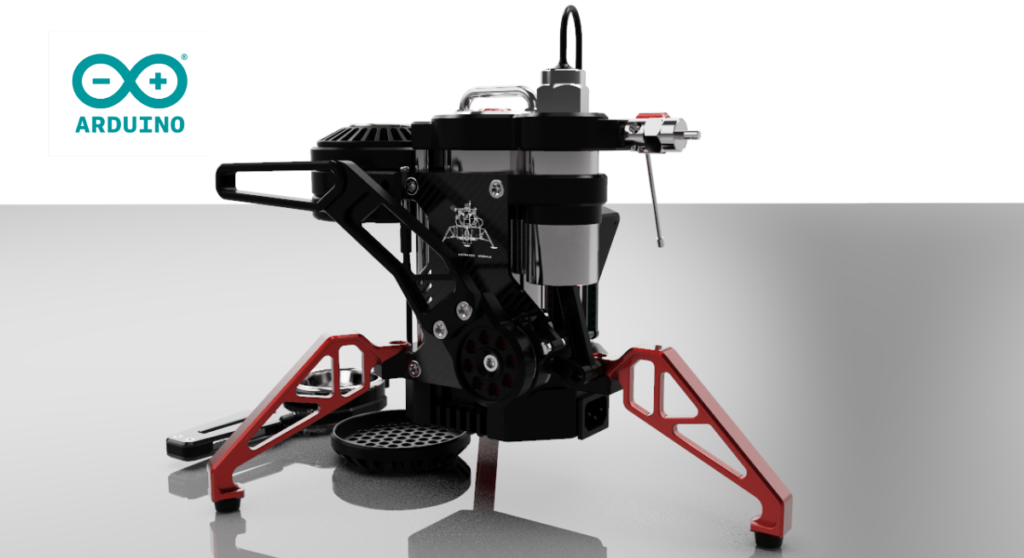
LanderShot is an out-of-this-world espresso machine
Reading Time: 2 minutesIf you think coffee people are opinionated, then you’ve never met an espresso person. There is a lot of art and science that goes into making the perfect little cup of espresso and a good barista will control every factor, from temperature to pressure to pour rate. It isn’t rocket science, but…
-

Mini Observatory
Reading Time: 3 minutesA familiar tale Matt began with a series of traditional telescopes, but found them “a little frustrating to use in practice”. It was hard to locate objects in the sky and most of what he could see was “often just a grey smudge”. Digital telescopes were not that common and were expensive,…
-

Celebrating the community: Arno & Timo
Reading Time: 3 minutesWe love hearing from members of the community and sharing the stories of amazing young people, volunteers, and educators who are using their passion for technology to create positive change in the world around them. Arno helping young coders at the CoderDojo Netherlands tenth birthday celebrations In our latest story, we’re heading…
-

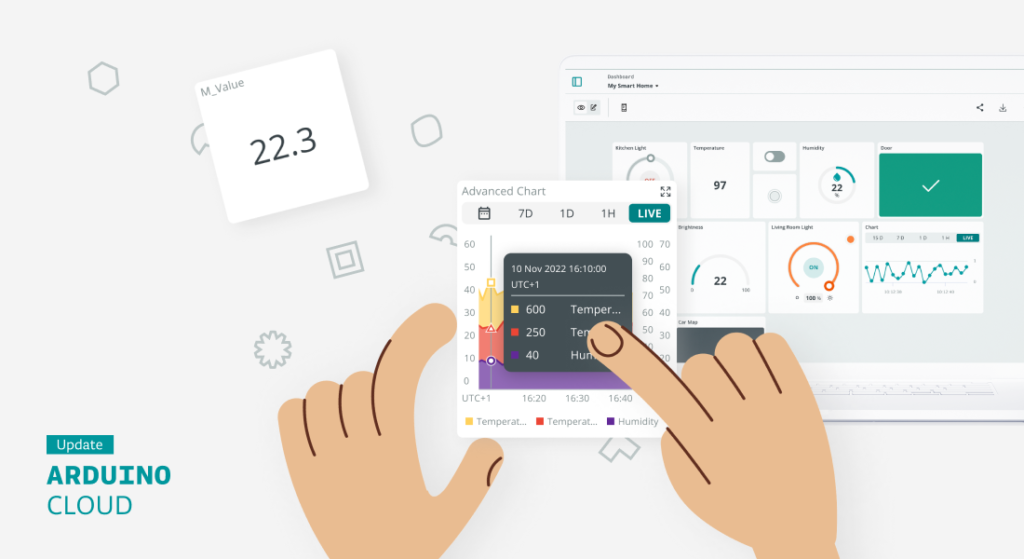
4 new IoT monitoring dashboard updates on Arduino Cloud
Reading Time: 4 minutesArduino Cloud recently received a major upgrade renewing the user interface and the Arduino Cloud editor. And as we promised it was just the beginning. This article dives into some of the new IoT monitoring dashboard features that may seem small, but pack a big punch for your connected projects. 1. Duplicate…
-

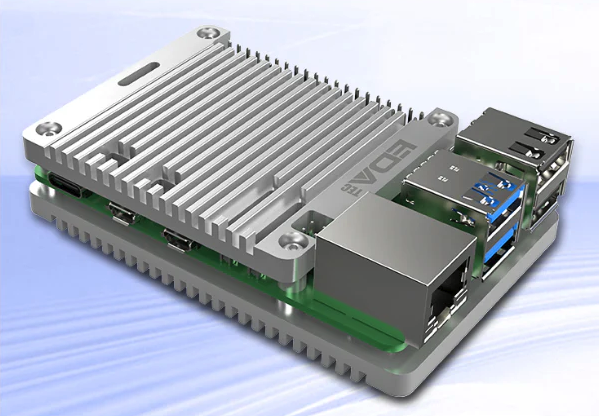
Passive Cooling Open CNC case review
Reading Time: < 1 minuteOn the smooth opposite side of the two parts are thermal pads; for the top piece, there are three that stick to the SoC, power management IC, and Wi-Fi and Bluetooth module. The base section is almost totally covered by a single thermal pad that sticks to the underside of Raspberry…
-

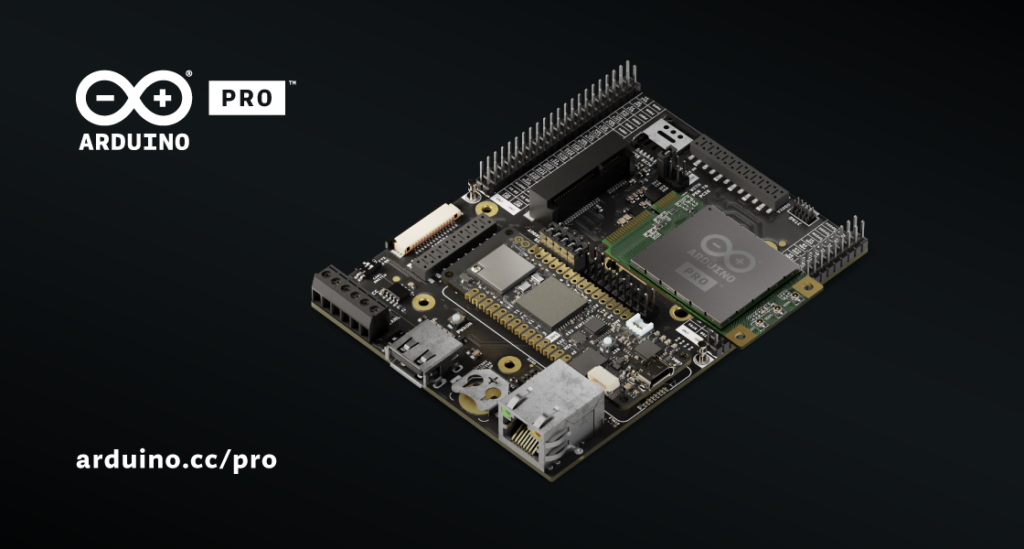
The new Arduino Pro 4G Module and Portenta Mid Carrier expand our ecosystem, and your options!
Reading Time: 2 minutesOur team at Embedded World (April 9th-11th in Nuremberg) has announced not one, but two groundbreaking additions to the Arduino Pro range that are ready to elevate your prototyping and connectivity experiences. Say hello to the Arduino Portenta Mid Carrier and the Arduino Pro 4G Module! Portenta Mid Carrier: maximizing prototyping potential…
-

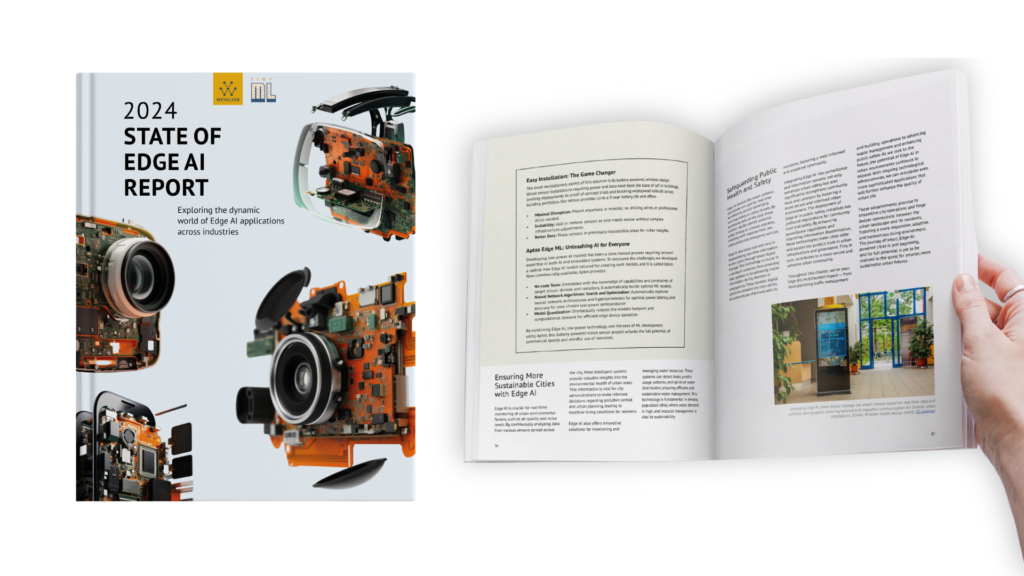
Arduino featured in the 2024 State of the Edge AI Report
Reading Time: 3 minutesThe 2024 State of Edge AI Report is out, and we’re proud to be in it — for the second year in a row! “Edge AI is a crucial technology in this world of finite resources. It allows us to monitor and optimize consumption in real time: so the use of electricity…
-

Localising AI education: Adapting Experience AI for global impact
Reading Time: 6 minutesIt’s been almost a year since we launched our first set of Experience AI resources in the UK, and we’re now working with partner organisations to bring AI literacy to teachers and students all over the world. Developed by the Raspberry Pi Foundation and Google DeepMind, Experience AI provides everything that teachers…
-

5 ways to use the new Find My Device on Android5 ways to use the new Find My Device on AndroidVP of Engineering
Reading Time: < 1 minuteWe’re sharing a few ways to use the new Find My Device experience on Android.We’re sharing a few ways to use the new Find My Device experience on Android.Website: LINK
-
Insights into students’ attitudes to using AI tools in programming education
Reading Time: 4 minutesEducators around the world are grappling with the problem of whether to use artificial intelligence (AI) tools in the classroom. As more and more teachers start exploring the ways to use these tools for teaching and learning computing, there is an urgent need to understand the impact of their use to make…
-

Coding in an AI age
Reading Time: 2 minutesArtists are understandably less than thrilled that AI is producing facsimiles of their work without giving them credit, or payment. For coders: AI changes everything. It can help you write, explain, understand, and improve the quality of code, and increase productivity by enhancing performance. It’s versatile in all programming languages and can…
-

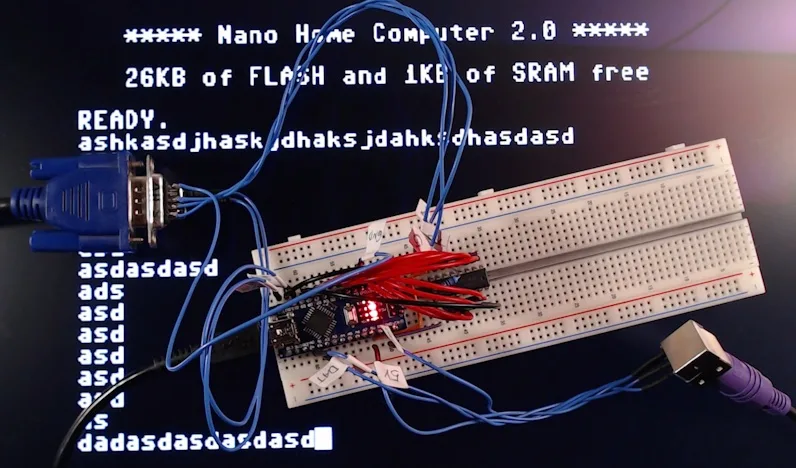
A shift register is all you need to build an Arduino Nano-based retro computer
Reading Time: 2 minutesIf you’ve ever tried to produce an analog video signal with an Arduino, then you know that it isn’t easy. That’s a bit counterintuitive if you think of analog video as “old” and assume that generating an analog video signal would be trivial with our powerful modern hardware. But there are many…
-
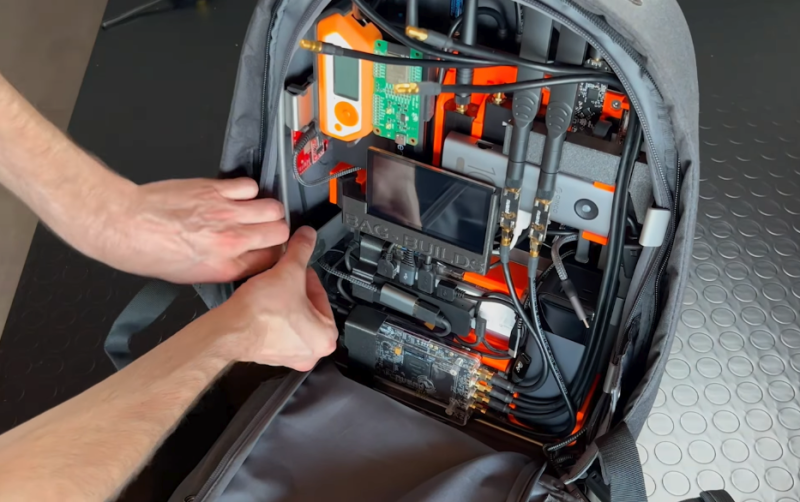
Backpack Cyberdeck
Reading Time: 3 minutesA great framework The Backpack Cyberdeck was inspired by Davide’s need to move his experiments easily without setup breakdowns – he works in the metalworking industry, and reasoned that a custom-designed frame that fits inside a commercially available backpack would come in mighty useful for other people as well as himself. He…
-

Detecting HVAC failures early with an Arduino Nicla Sense ME and edge ML
Reading Time: 2 minutesHaving constant, reliable access to a working HVAC system is vital for our way of living, as they provide a steady supply of fresh, conditioned air. In an effort to decrease downtime and maintenance costs from failures, Yunior González and Danelis Guillan have developed a prototype device that aims to leverage edge machine learning to predict issues…
-
Careers in computer science: Two perspectives
Reading Time: 6 minutesAs educators, it’s important that we showcase the wide range of career opportunities available in the field of computing, not only to inspire learners, but also to help them feel sure they’re choosing to study a subject that is useful for their future. For example, a survey from the BBC in September…
-

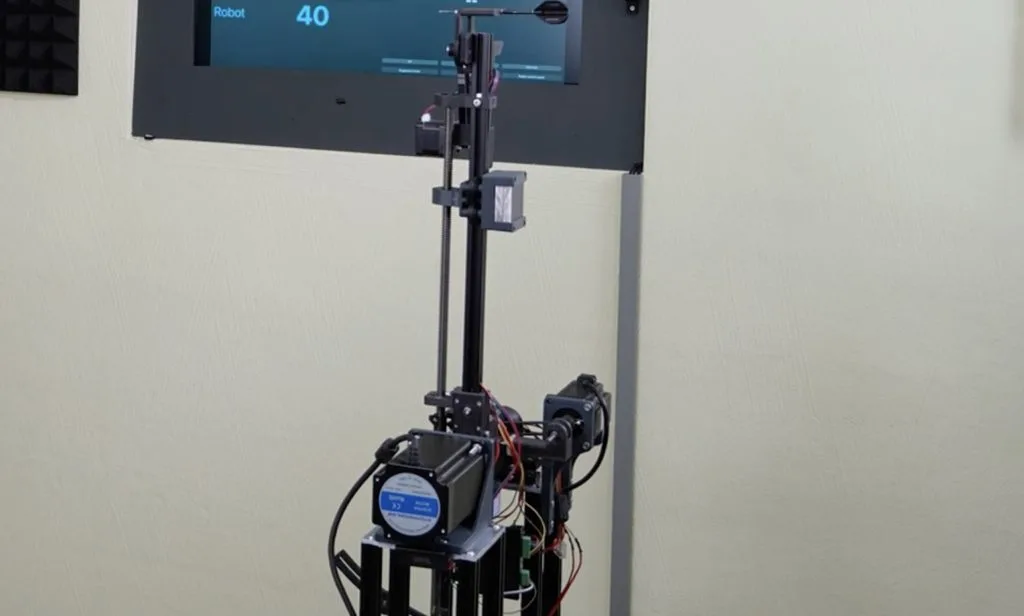
This robot dominates dart games
Reading Time: 2 minutesYou’ll find dartboards in just about every dive bar in the world, like cheaper and pokier alternatives to pool. But that doesn’t mean that darts is a casual game to everyone. It takes a lot of skill to play on a competitive level and many of us struggle to perform well. Niklas…
-
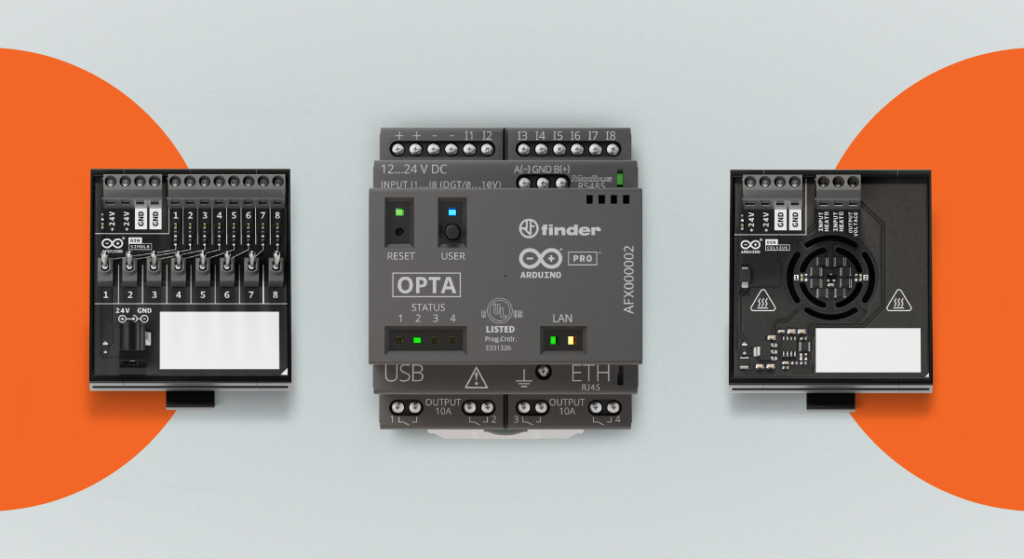
Introducing the new Arduino PLC Starter Kit: Plug into the future of industrial automation
Reading Time: 4 minutesIn a world where industrial automation is rapidly advancing, education often struggles to keep pace. This disconnect leaves a big gap in practical, industry-relevant skills among graduates. Addressing this critical need, we’re excited to introduce the Arduino PLC Starter Kit. Powered by the robust Arduino Opta mini PLC and backed by the…
-

Meet Sara Parodi: The MagPi’s new designer
Reading Time: 3 minutes“Growing up, I went to art school in Italy,” Sara says. “It felt like the right path for me to undertake, and through the years I pushed myself to try different things; I would find myself at events drawing on walls or floors, other times I would be at home testing lino…