A familiar tale
Matt began with a series of traditional telescopes, but found them “a little frustrating to use in practice”. It was hard to locate objects in the sky and most of what he could see was “often just a grey smudge”. Digital telescopes were not that common and were expensive, but when Raspberry Pi launched the HQ camera sensor Matt wondered whether he could build a really simple digital telescope with the Raspberry Pi at the heart of it.

He had already built an Aurora clock that lets you know if there’s a chance of seeing the Northern Lights, and a similar device using Raspberry Pi to track the International Space Station. With ten years of Raspberry Pi familiarity to draw upon, Matt was confident he could handle both high- and low-level functions and decided it would be the ideal basis for his own telescope and observatory design. “I knew there were Python packages available and I hoped to find pre-existing solutions to most of my needs”. The initial plans were for a Raspberry Pi Pico project but Matt soon realised he needed more power, switching to “Raspberry Pi 4B with RP2040 help”.
Matt was less confident of his 3D design skills: he needed to create more parts than he’d ever done previously and regarded this aspect as a distraction at the time, but says it’s a new skill that has come in useful elsewhere since.
Seeing the lights
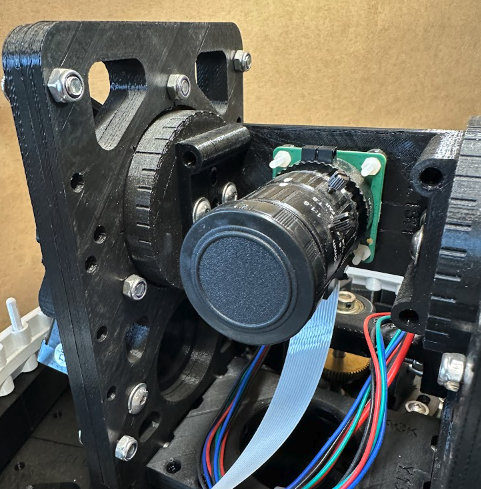
The Mini Observatory design emerged from successive experiments using Raspberry Pi Pico. Having started tinkering, Matt gradually developed routines to solve specific problems, learning how to control stepper motors and the technical aspects of the HQ camera. He needed precision here and went to a specialist company called Stepperonline to source them. Matt bought other parts from well-known Raspberry resellers such as The Pi Hut and Pimoroni, with more generic nuts and bolts from general hardware stores. He cautions over scrimping on potentially dangerous items such as power supplies: “always buy them from a trusted source”.

The project provided a great learning experience, with the observatory, gears and mechanism all home-grown. The ‘semi-intelligent’ motor controller for the telescope is probably the most novel element. Matt needed a way for the telescope to move while Raspberry Pi was busy taking photographs, so gave the motors a little RP2040 microprocessor brain. “They were released at the perfect time.”
Matt was able to make use of Python packages such as Skyfield, OpenCV, PiDNG and Astroalign and says it was a good choice for his Mini Observatory project. He is also really keen to process the photographs in real time onboard the telescope. “I haven’t solved that yet, so I still need to do some offline processing afterwards. Realtime processing must be possible, I just have to research more.”

Since Matt first unveiled the project, several other makers have created versions, providing invaluable feedback and prompting him to tweak a few elements such as removing the infrared cutoff filters from his cameras which will make more objects visible.
Matt is also plotting a second version of his mini observatory, and is excited about the possibilities of Raspberry Pi with improved imagery and support for a second camera: one camera to do the tracking another to photograph the heavens. In fact “Raspberry Pi 5 may trigger quite a rewrite!”
Schreibe einen Kommentar
Du musst angemeldet sein, um einen Kommentar abzugeben.