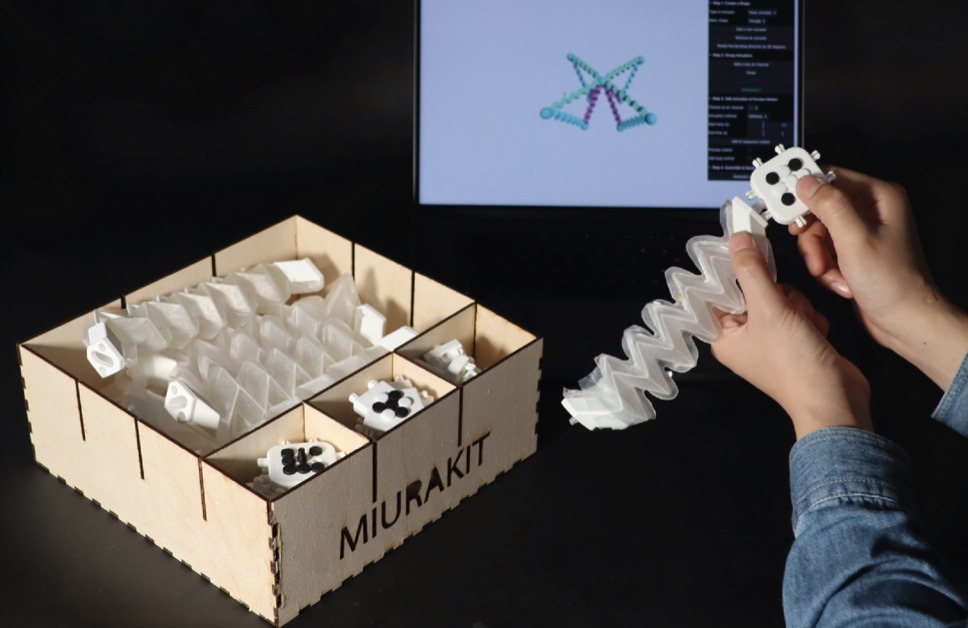
Soft robotics is a challenging field, because it comes with all of the difficulties associated with conventional robotics and adds in the complexity of designing non-rigid bodies. That isn’t a trivial thing, as most CAD software doesn’t have the ability to simulate the flexibility of the material. You also have to understand how the actuators will perform. That’s why a team of researchers from Zhejiang University and Carnegie Mellon University developed MiuraKit, which is a modular construction kit for pneumatic robots.
MiuraKit isn’t any one robot, but rather a set of tools and designs that can be combined to build robots and shape-changing interfaces. Anything made with MiuraKit will have a few things in common: pneumatic actuation, flexibility, and origami-like structures. Those structures expand or deform in a variety of different ways to suit the application. For example, one type is a simple one-dimensional expander similar to a linear actuator. Another type twists for rotary actuation. By linking different types together, roboticists can achieve complex motion.
Because these structures rely on pneumatic actuation, they need valves to control airflow. MiuraKit works with electromagnetic valves under the control of an Arduino board. That receives commands from a computer over a serial connection, but it can also work on its own with pre-programmed instructions. MiruaKit includes almost everything needed to create a robot: 3D-printable pneumatic connectors, a CAD design tool, laser cutter templates, and the pump with control system. In the coming weeks, the designers plan to give MiuraKit out to design firms and schools for evaluation.
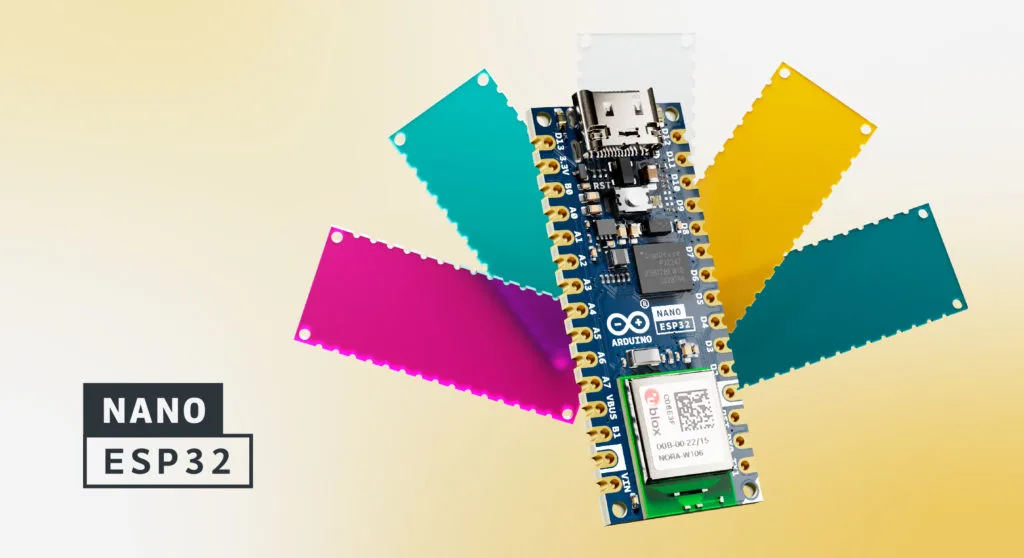
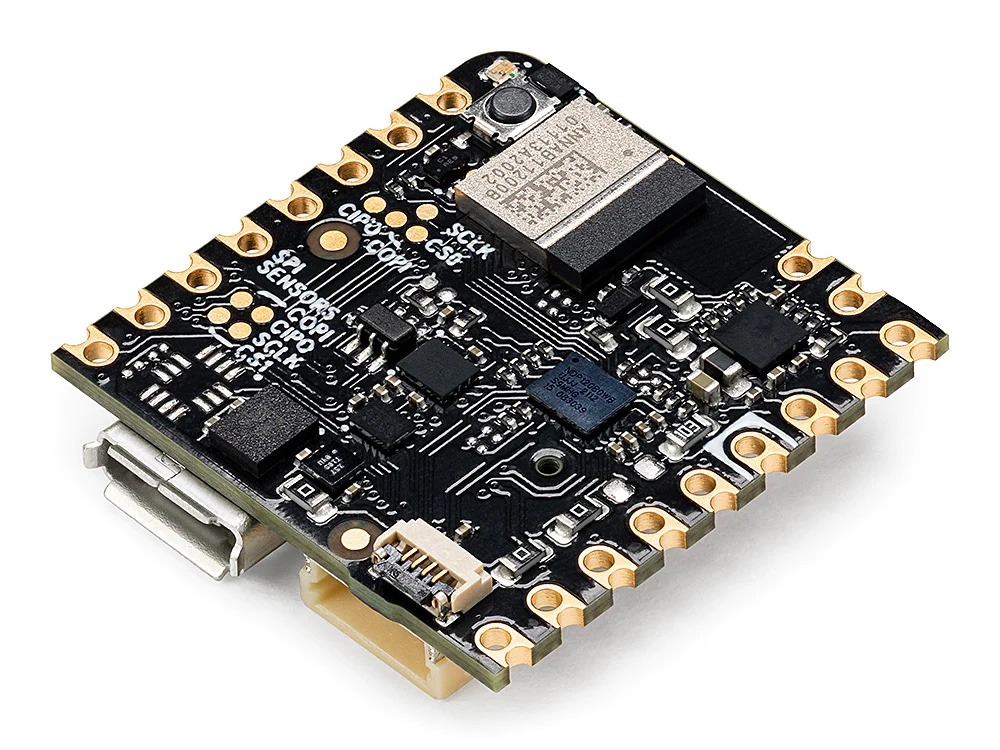
Create your first – or your next – IoT project with the new Arduino Nano ESP32. The latest addition to our wide range of tiny boards with mighty features pairs the accessibility and flexibility of the Arduino ecosystem with the potential of the low-power ESP32-S3 system-on-a-chip microcontroller.
This means you can keep the familiar Nano form factor (just 45×18 mm!), get all the support you need – via documentation or our vibrant community – and master MicroPython in no time.
Embrace IoT with the Nano ESP32 microcontroller
The Nano ESP32 introduces a whole new microcontroller architecture to the Nano family, embracing one of IoT’s favorite standards to offer you new opportunities for making at all levels.
Just imagine implementing a new system to control door locks remotely or automate blinds, building a custom interactive toy for your kids or challenging your students to make their first smart object with this convenient little board: there are infinite applications for home automation, gaming and education.
All you have to do is think on a different scale!
All in all, the Nano ESP32 brings MicroPython and IoT to the fingertips of Arduino users – and is a warm welcome to the Arduino ecosystem for anyone already using MicroPython and working on IoT! Thanks to extensive, regularly updated libraries and “portability” to any Arduino board that is compatible with ESP32, this can be your first step towards a whole universe of open-source projects and open-minded people. The Arduino Nano ESP32 is the best board for learning MicroPython: check out the free MicroPython 101 course!
Unlock new possibilities with Arduino Cloud
But the good news doesn’t stop here. The Nano ESP32 comes with out-of-the-box Arduino Cloud support, an all-in-one platform designed to bring your projects to life quickly. Whether you’re a seasoned developer or just starting your IoT journey, the Arduino Cloud empowers you to achieve complex things in a simple way with a user-friendly experience.
Develop from anywhere, control, and monitor your projects with beautiful custom dashboards from your favorite browser or the IoT Remote app, share information among multiple devices, smoothly integrate your devices with Alexa, and much more. The new Nano ESP32 and Arduino Cloud are the power couple of IoT to help you unleash your creativity and have fun! Arduino Cloud support for the Nano ESP32 will be available by August 2023.
Because when it comes to IoT and prototyping, we want you to have not only the best technology for your project, but the best experience using it. And we can’t wait to see what all of you will make with this new tool in your hands.
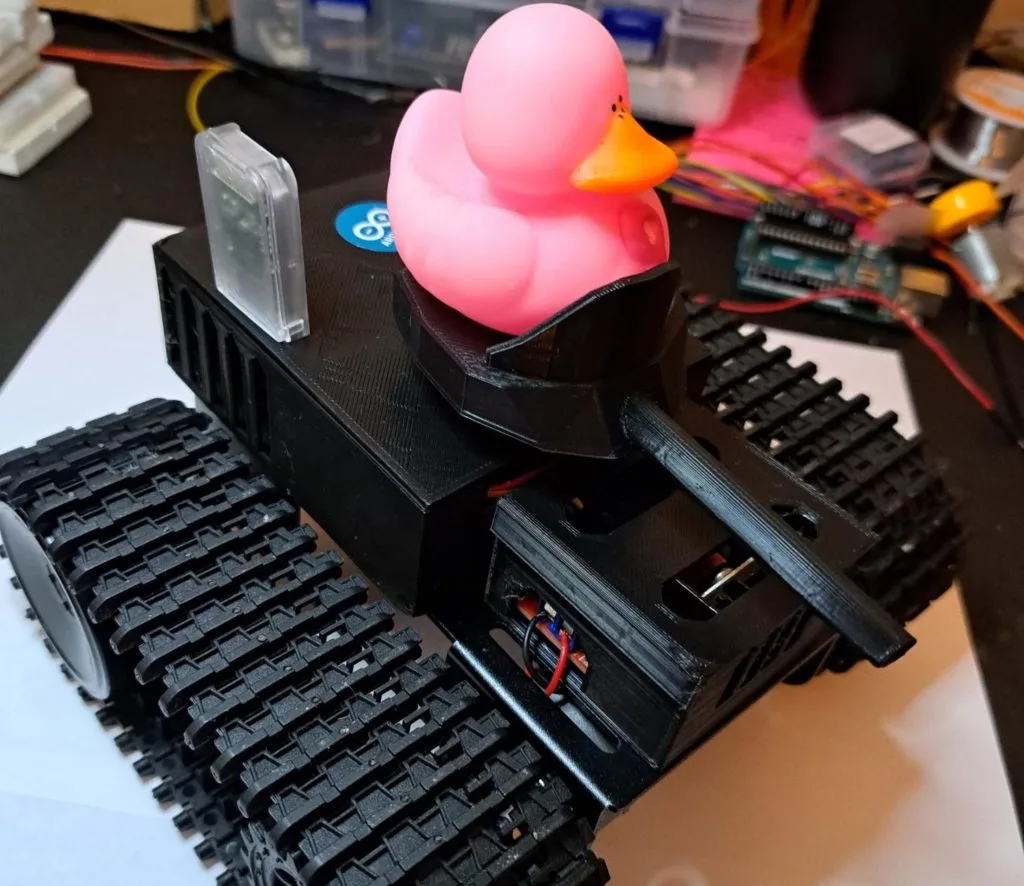
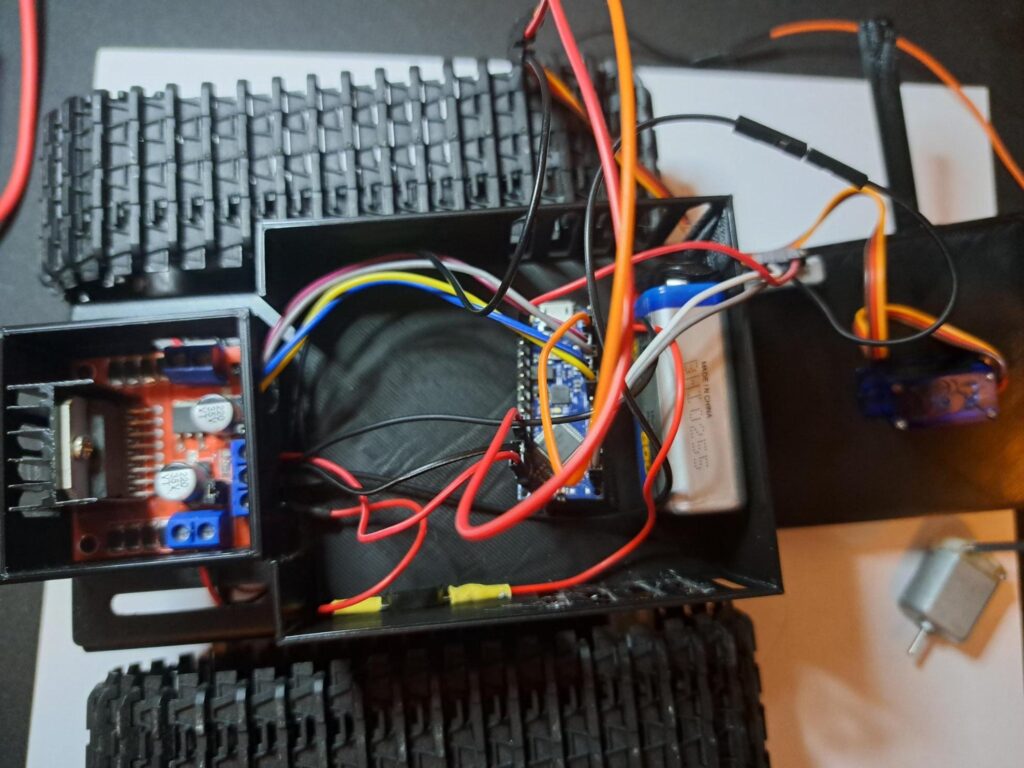
Many kids and adults have an interest in electronics because they want to build robots. But it can be difficult to figure out where to even start. There are hundreds of kits on the market and the options are endless where you veer into custom territory. But if you’re looking for a tank-style rover that you can control via Bluetooth®, then this robot designed by Mastoras Inc is a fantastic choice.
We like this project because it combines the advantages of robot kits and custom robots. It uses an off-the-shelf chassis to simplify the complicated mechanical parts, but with custom Arduino electronics that allow for customizability and that offer an introduction to coding. It has Bluetooth capability, so you can control it remotely from your smartphone. Mastoras Inc built an Android app, which you can tweak as much as you like. You can also create your own if you want to try you hand at app development.
The project starts with a tracked robot chassis kit, which includes the frame, DC motors, hubs, and tracks. An Arduino Nano Every board controls those motors through an L298N H-bridge driver. An HC-05 module adds connectivity and power comes from a 9V battery. The electronics enclosures are 3D-printable, but you can also use any pre-built project box. If you do have a 3D printer, you can also add a tank turret rotated by a 9g micro servo motor.
This robot won’t make waves at your local hackerspace, but it is a great way to dip your toes into robotics and develop a foundation that you can build upon.
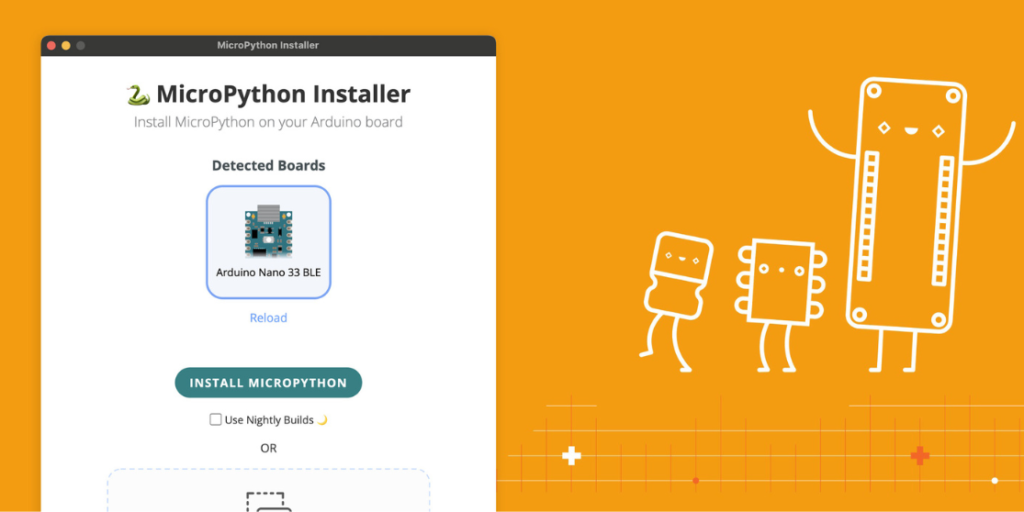
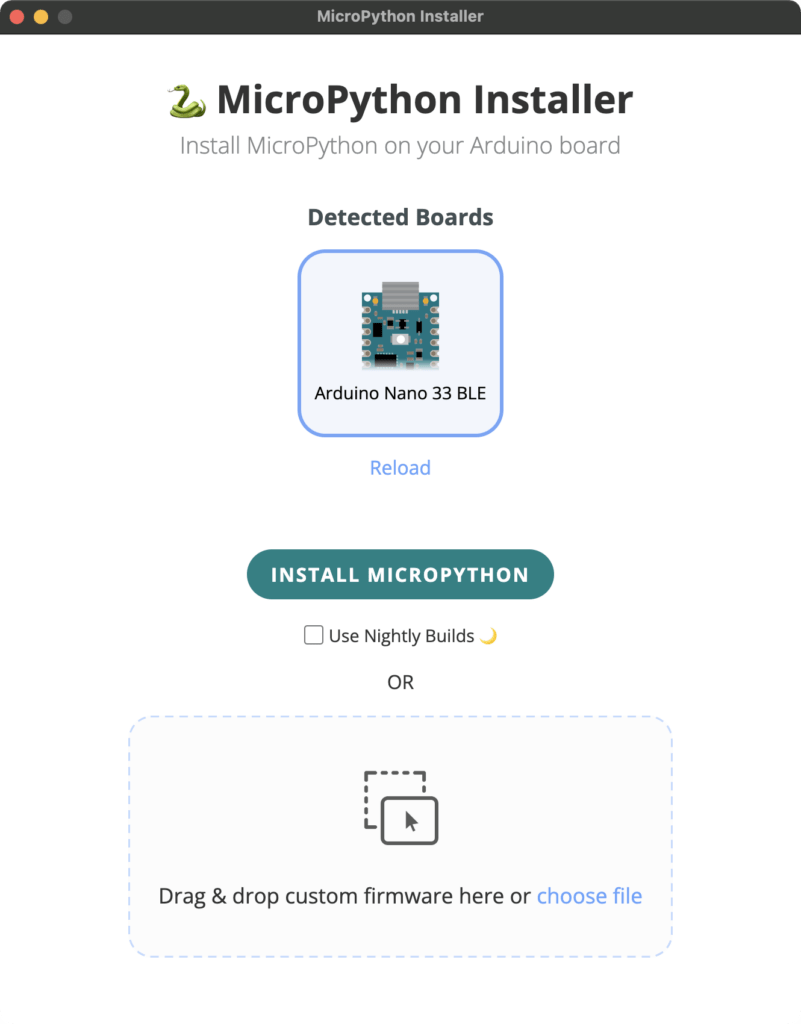
At the end of last year (November 2022) we announced initial support for MicroPython in the Arduino ecosystem, and continued to quietly work on the toolkit for this language.
We continuously expand the list of Arduino boards for which a MicroPython firmware is provided (available here)
Additionally, we are now releasing new tools to help developers use this language with Arduino Boards as well as third party ones. These tools are released as experimental, under the umbrella of Arduino Labs.
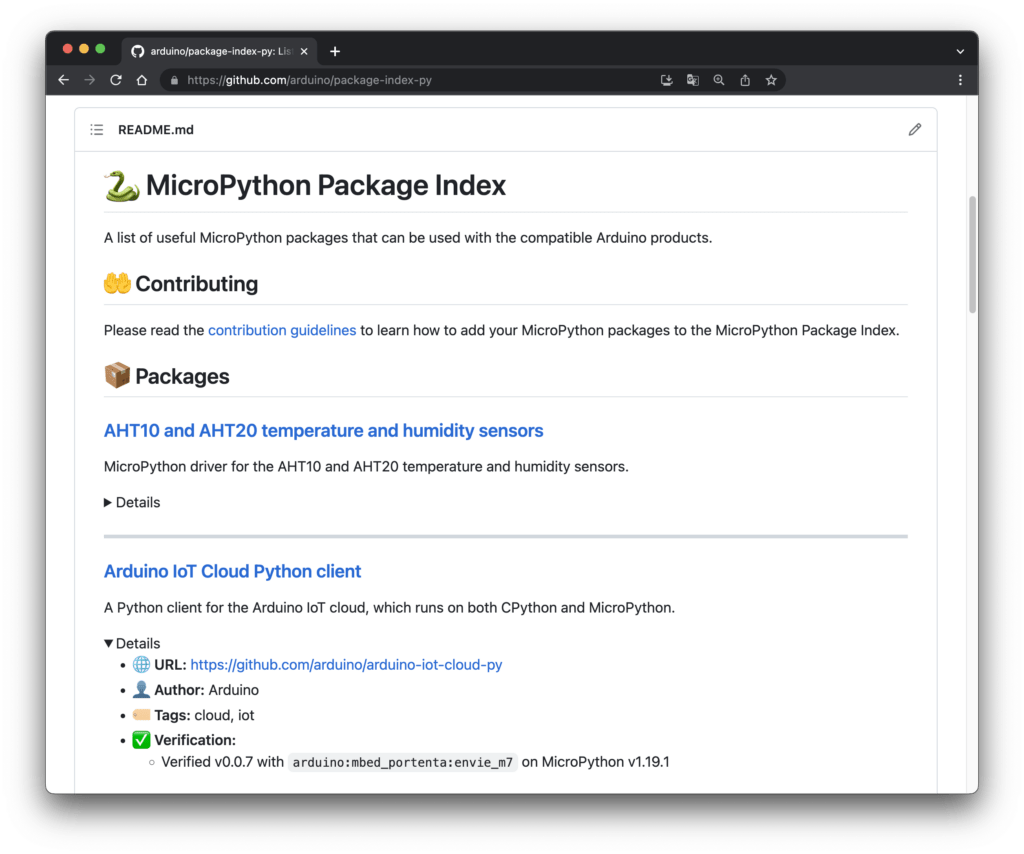
Last but not least, we have created an initial list of MicroPython packages that we consider useful to learn and experiment with this language. The list is published as Arduino MicroPython Package Index(here)
While investigating existing packages we quickly realized that many were available but not always up-to-date or in line with the latest MicroPython versions or certain target hardware. Therefore we decided to maintain a curated list of useful packages which are tested to be compatible with Arduino boards, and most importantly with updated versions of the official MicroPython..
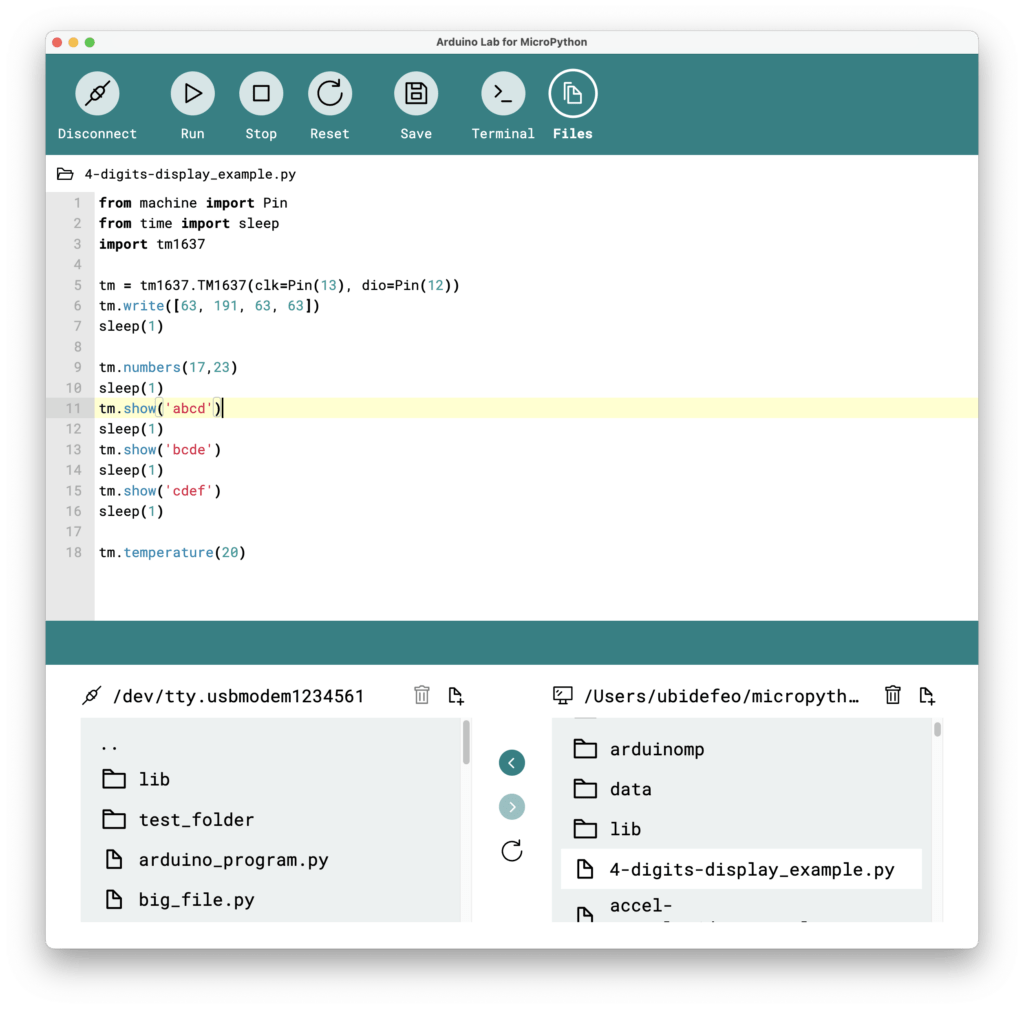
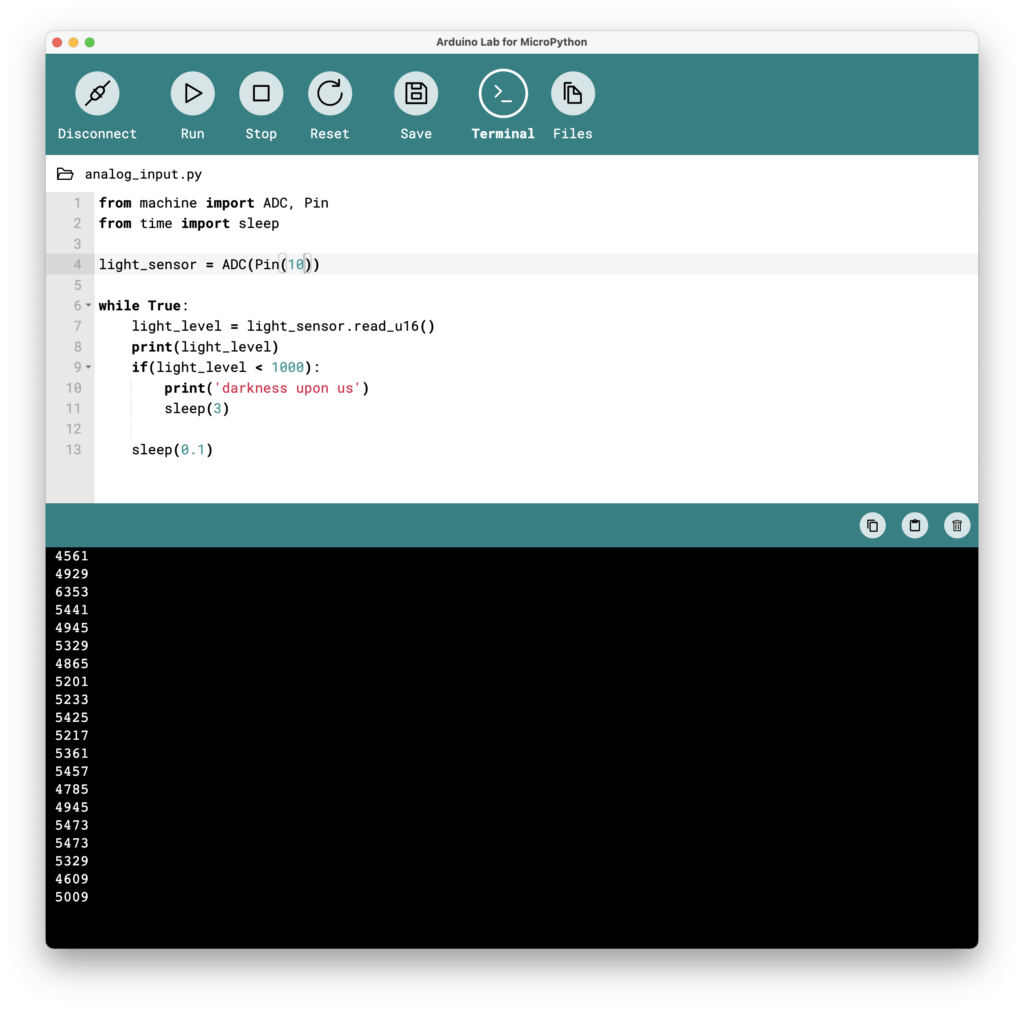
You can browse the list, download the packages from their corresponding Github repository and install them via Arduino Lab Editor for MicroPython. We plan to release tools to easily search, download and install from this package index in the future.
Anybody can contribute to the Arduino MicroPython Package Index! If you want to propose a package to be added, follow the contribution guidelines published in the repo.
Everyone at Arduino is excited about this new adventure, and we believe that we can contribute to this ecosystem as it keeps maturing and growing its user-base across the Maker, Education and Professional spaces.
Celebrate another year of young people’s computer programs in space with us: today we and our collaborators at the European Space Agency can finally announce the winning and highly commended teams in this year’s Astro Pi Mission Space Lab.
Mission Space Lab: Young people’s experiments in space
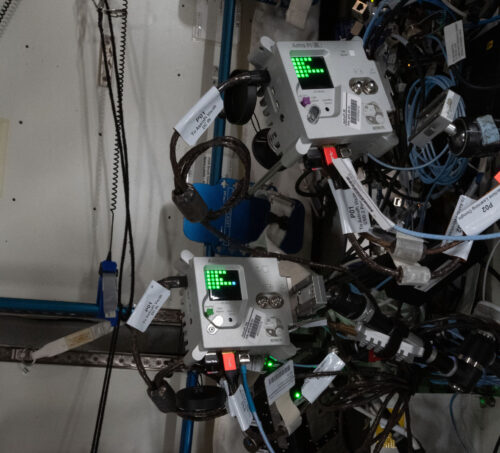
In Mission Space Lab, teams of young people work together to create computer programs for scientific experiments to be carried out on the International Space Station. The programs they design and create run on the two Astro Pi computers: space-adapted Raspberry Pis with cameras and a range of sensors.
The two Astro Pi computers on board the ISS
Teams’ programs were deployed on the ISS during May and ran for up to 3 hours, collecting data for their experiments. Once we’d sent the teams their data, they started analysing it in order to write their Phase 4 reports. To identify patterns and phenomena they were interested in, many teams chose to compare their data with other sources.
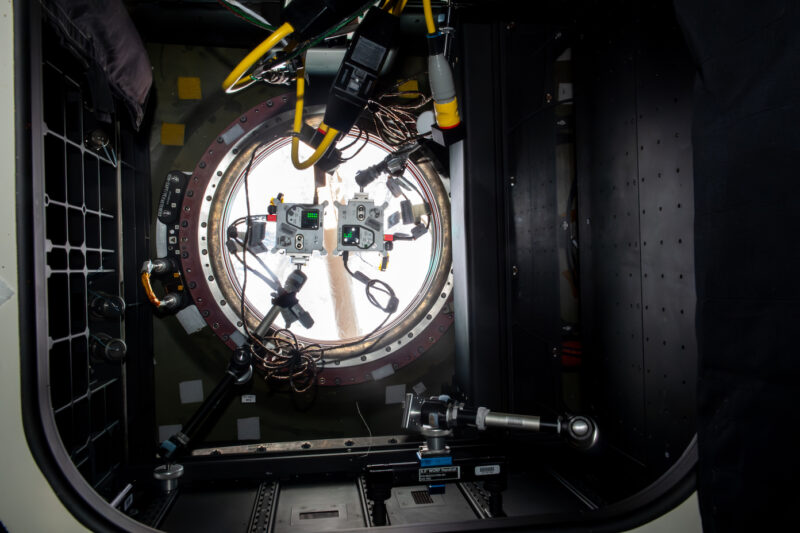
The Astro Pis in the WORF window of the ISS
We were especially excited to see the results from the experiments this year, particularly given that the upgraded Astro Pi units with their High Quality Cameras were positioned in a new observation window (WORF) on the ISS. This allowed teams to capture high-resolution images with a much wider field of view.
A volcano erupting in Guatemala, captured on the ISS by a team’s Mission Space Lab experiment
What have Mission Space Lab teams investigated this year?
We feel very privileged to see the culmination of the team’s experiments in their final reports. So let’s share a few highlights from this year’s experiments:
Team Aretusafrom Sicily explored the effects of climate change by cross-referencing the images they captured with the Astro Pis with historical images from Google Earth. They used Near Infrared photography to capture images, and NDVI (Normalised Difference Vegetation Index) image processing in their analysis. Below you can see that they have compared data of Saudi Arabia from 1987 to 2023, showing increasing levels of vegetation grown in attempts to restore degraded land.
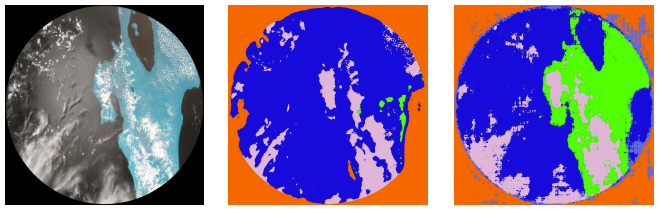
Team Barrande from the Czech Republic trained AI models on images they gathered to identify topographical features of Earth. Their Mission Space Lab program used the Astro Pi computer’s machine learning dongle to train one AI model in real time. Later, the team also used the collected images to train another model back on Earth. Comparing the outputs of the two models, the team could tell how well the models had identified different topographical features. The below selection shows an image the team’s experiment captured on the left, the same image after processing by the AI model trained on the Astro Pi computer in the middle, and the image processed by the AI model trained on Earth.
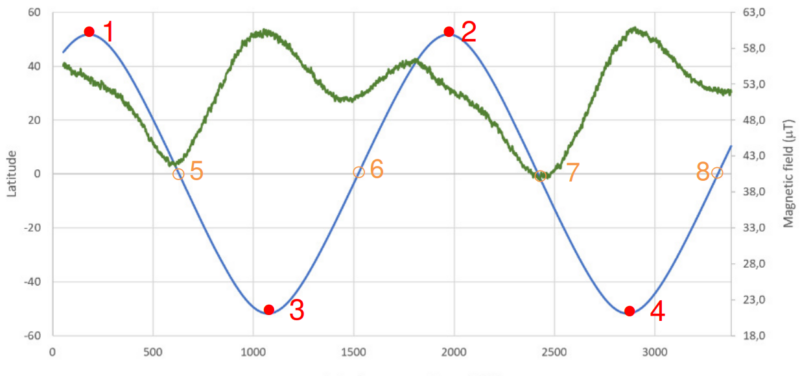
TeamDAHspace from Portugal measured the intensity of the Earth’s magnetic field along the orbit path of the ISS. Using the magnetometer on the Astro Pi, their experiment recorded data allowing the team to track changes of intensity. The team mapped this data to the ISS’s coordinates, showing the difference in the Earth’s magnetic field between the North Pole (points 1 and 2 on the chart below) and the South Pole (points 3 and 4).
And the winning teams are…
We and our collaborators at ESA Education have been busy reviewing all of the reports to assess the scientific merit, use of the Astro Pi hardware, experiment design, and data analysis. The ten winning teams come from schools and coding clubs in 11 countries. We are sending each team some cool space swag to recognise their achievement.
You can click on a team name to read the team’s experiment report.
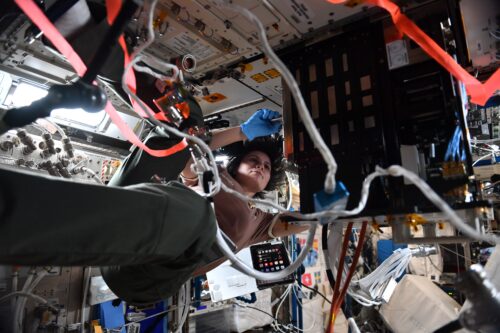
All of the teams whose Mission Space Lab programs ran on the ISS will receive a certificate signed by ESA astronaut Samantha Cristoforetti. The winning and highly commended teams will also be invited to a live video chat with an ESA astronaut in the autumn.
Samantha Cristoforetti on board the ISS during her Minerva mission and after returning from space. Credit: ESA/NASA
Huge congratulations to every team that participated in Astro Pi Mission Space Lab. We hope you found it fun and inspiring to take part.
A big thank you to everyone who has been involved in the European Astro Pi Challenge this year. An amazing 24,850 young people from 29 countries had their programs run in space this year. We can’t wait to do it all again starting in September.
And it’s not just us saying thanks and well done — here’s a special message from ESA astronaut Matthias Maurer:
On 18 September 2023, we’ll launch the European Astro Pi Challenge for 2023/24. Mission Zero will open in September, and we’ll announce exciting news about Mission Space Lab in September too.
If you know a young person who might be interested in the Astro Pi Challenge, sign up for the newsletter on astro-pi.org and follow the Astro Pi Twitter account for all the latest announcements about how you can support them to take the unique opportunity to write code to run in space.
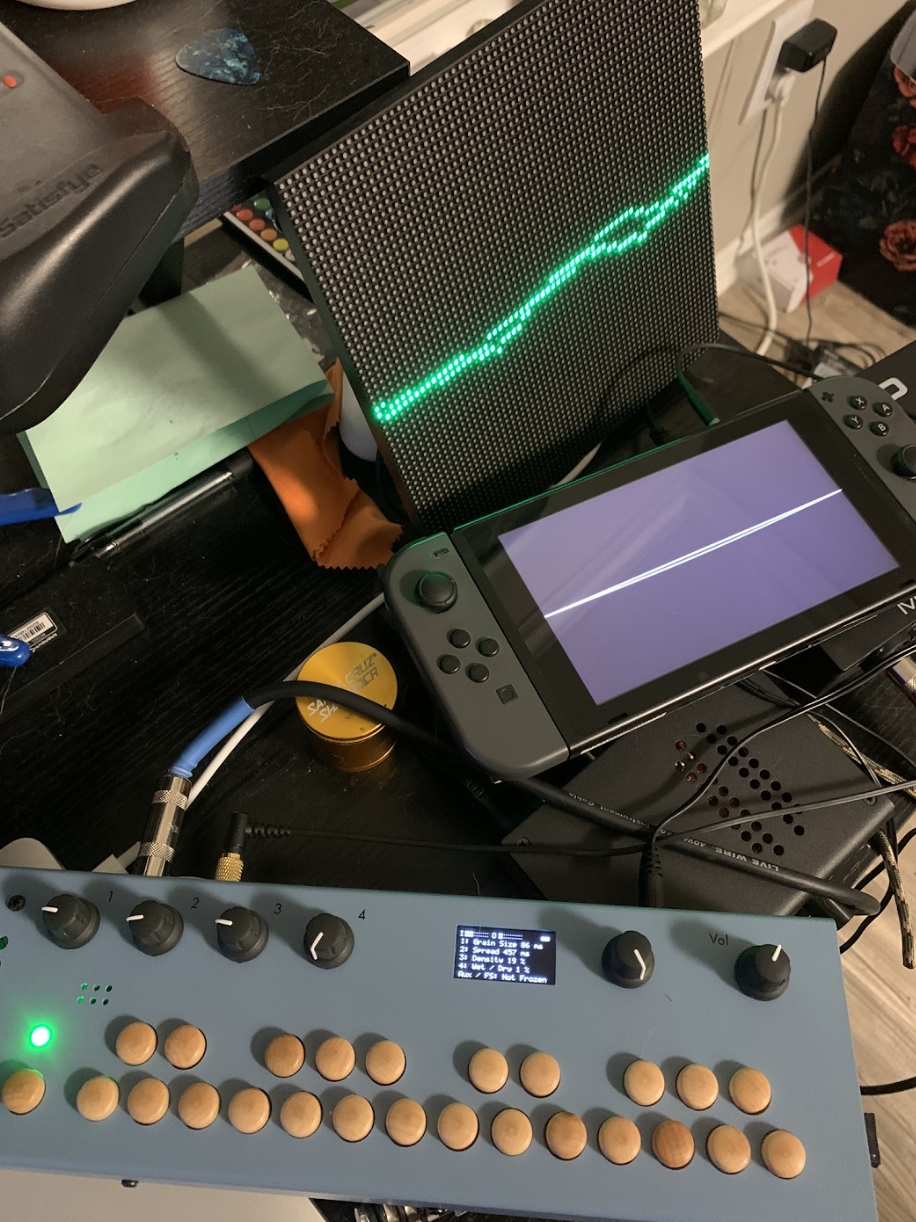
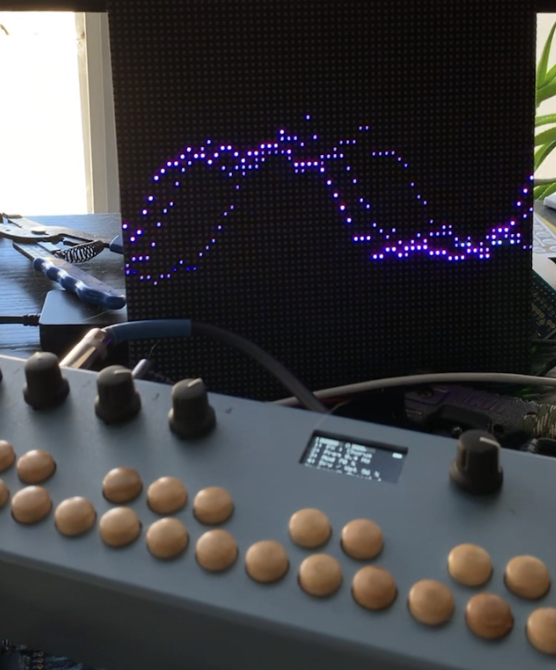
The project allows Thomas to play musical instruments and see the tunes visualised as waves on a 64×64 LED matrix display. “After getting the LED matrix and playing around with it, I figured there would have to be a way that I could use it with my guitar and other musical instruments,” he explains. “It’s always really fun watching the live signal from synthesiser software, but I imagined I could make something more physical with the matrix.”
Live jives
The idea, he explains, boiled down to registering a live audio signal with a Raspberry Pi computer. “Down the line, I want to make some more complicated visuals that are reactive to the audio signal coming in,” he says.
It has involved connecting the matrix panel to an Adafruit RGB Matrix HAT add-on. “I have Raspberry Pi recognise the audio interface it’s hooked up to, and I’ve used Linux’s Advanced Linux Sound Architecture (ALSA) library to read the signal from the interface and place it into the C code running the LED matrix’s library,” Thomas says. “It’s sampling at the refresh rate of the screen, which makes a really cool visual.” Learn more at alsa-project.org.
The result is a project that can be taken on the road as a visual accompaniment to musical performances. “At first, I was thinking that I could have it work through MIDI [a protocol which lets musical instruments, computers, and other hardware communicate with each other], but the idea of needing to be hooked up to the software Ableton Live killed the motivation to write an entire library to do so. I wanted something that didn’t require being by a computer to represent music.”
Looking good
Thomas loves using his creation. “It’s small and portable – something you just plug in knowing that everything is set up,” he says. “The LED matrix HAT was made for Raspberry Pi, so it was a no‑brainer. It also helped that I had a couple of Raspberry Pi Zero computers laying around begging to be used.”
Currently, he’s hooked the Ohsillyscope to the PA system in his band practice room. “It picks up the bass, guitars and drums, making an interactive show for anyone watching,” he says. “The people we’ve shown the Ohsillyscope to so far seem to love it and once we start gigging more, it’s sure to get the band more attention.” We’re definitely sure that it’s going to look good on the dance floor.
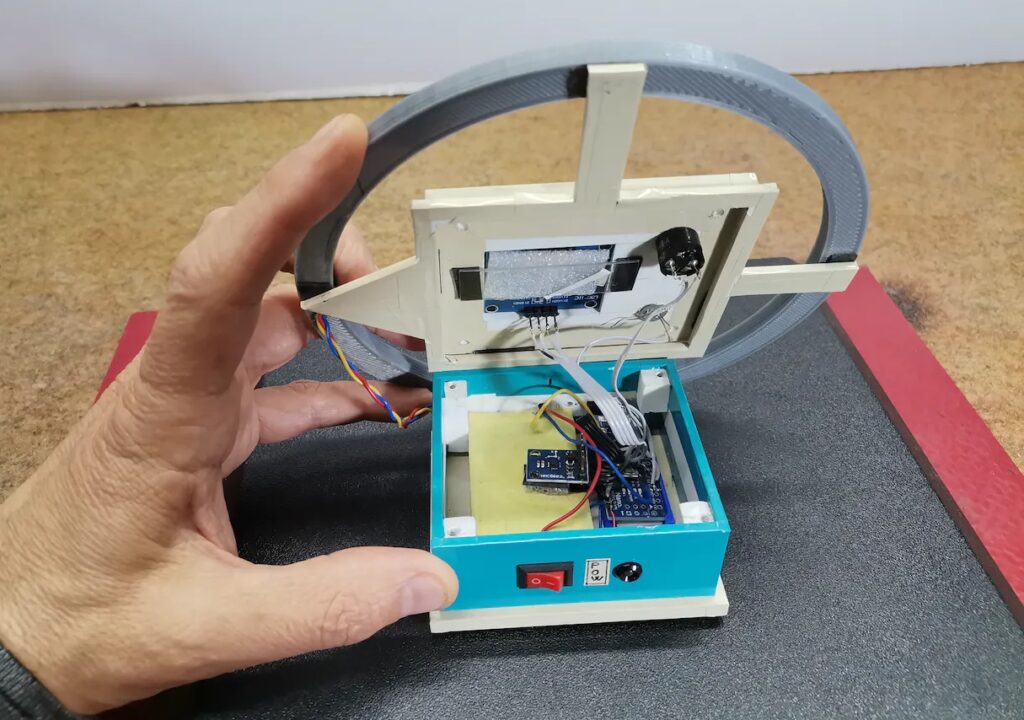
Humans evolved to sleep and wake according to natural light cycles. So it is strange that we, as a society, have largely chosen to rely on blaring alarms to wake up in the mornings. Wake-up lights have been gaining traction in recent years because they provide a pleasant experience that mirrors the rising sun — but at the time you need it. If you want a DIY option, AWAKE is a very aesthetically pleasing wake-up light.
This seems to be a concept with a prototype that isn’t quite finished yet, but the renders certainly look good. AWAKE uses two bright LED bulbs from flashlights to shine through arc-shaped diffusers, creating an arch. The idea is that the lights will gradually increase in brightness until you wake up. But there is also an integrated speaker, so it can sound an alarm at the last moment if you still haven’t woken up. There also appears to be a stand where you can place your smartphone, and it would be nifty if that included a wireless charger.
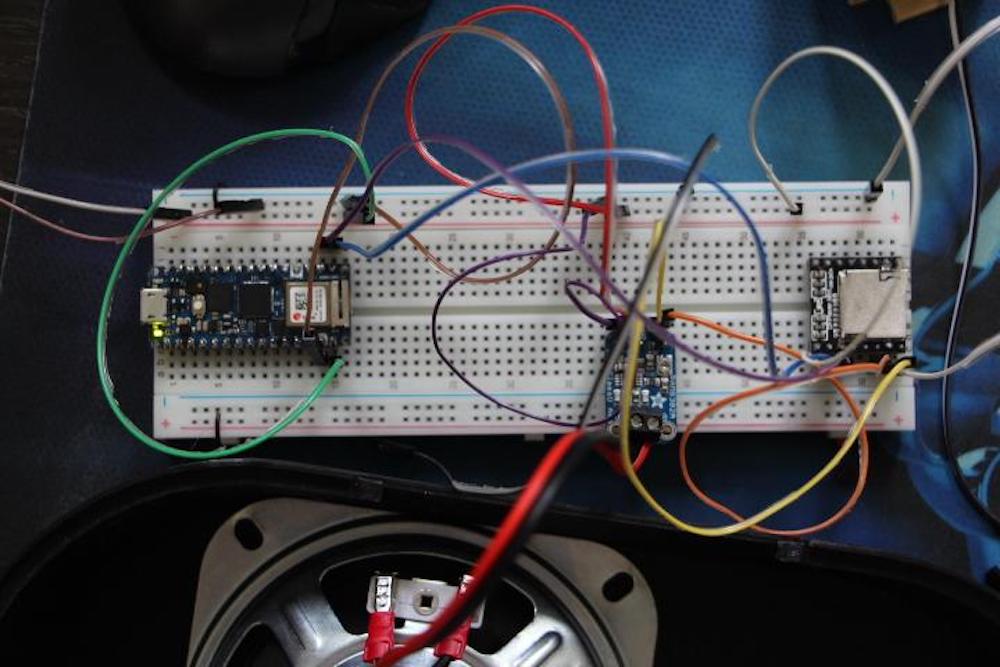
The heart of the AWAKE device is an Arduino Nano RP2040 Connect board. It has built-in Wi-Fi®, which is great for keeping time via the local network. It also has a Bluetooth® and BLE adapter, and those could be useful for setting alarms. The LEDs come from flashlights, so they’re extremely bright. Finally, and MP3 module can store and play audio files for the alarm sounds.
While the prototype doesn’t seem to be complete, the design files are available so you should be able to build an AWAKE wake-up light if you’re interested.
We are excited to announce that the Arduino Cloud now supports the UNO R4 WiFi board, providing makers with seamless connectivity and enhanced features.
Building upon the recent release of the much-anticipated UNO R4 in our store, this new integration significantly amplifies the capabilities of the Arduino Cloud. The UNO R4 WiFi is a revolutionary addition to the Arduino family, combining the widely popular UNO R3 form factor with built-in WiFi connectivity. It is perfect for all users, from beginners to experts, wanting to explore the forefront of innovation and IoT projects creation.
How to connect UNO R4 WiFi to Arduino Cloud
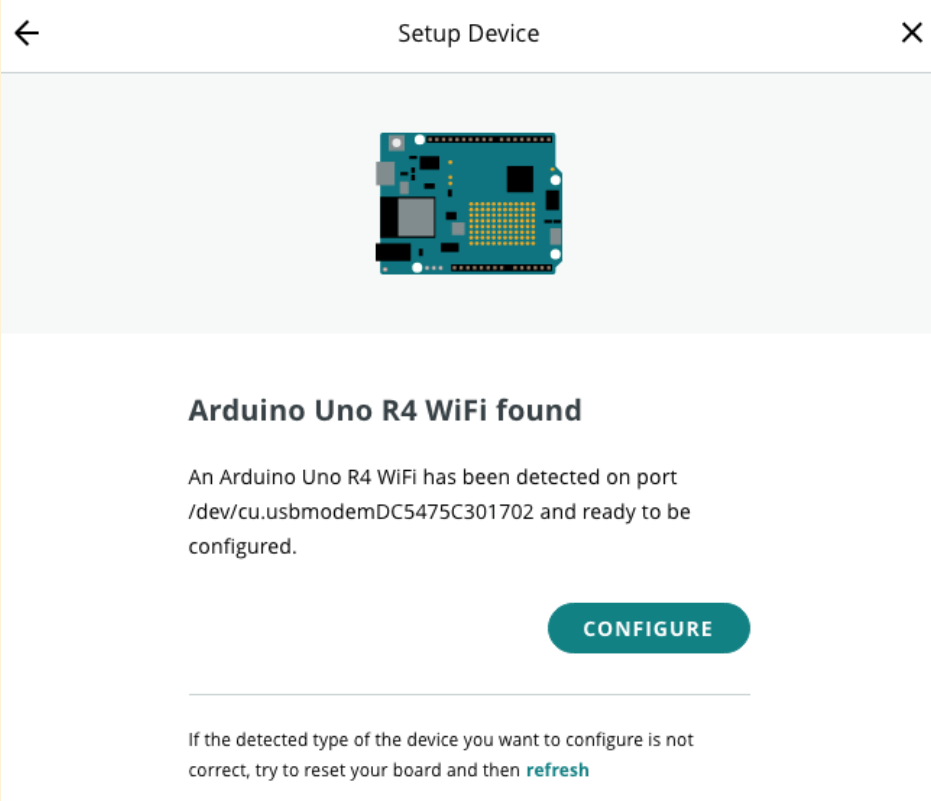
With the Arduino Cloud, connecting your UNO R4 WiFi board becomes a breeze. Our user-friendly interface and intuitive workflows ensure a smooth setup process. To get started, follow our usual “Add a device” workflow:
Navigate to the Devices section and click on “Add Device.” Your board will be detected automatically.
The workflow will guide you through updating the connectivity firmware to ensure compatibility.
Once the update is complete, your UNO R4 WiFi is ready to be managed from the Arduino Cloud.
UNO R4 WiFi + Arduino Cloud = Unleash your creativity
Develop from anywhere using the web editor, share your sketches with your colleagues and friends, create dashboards to monitor and control your devices remotely from a browser or your mobile phone, share information between multiple devices, or integrate seamlessly your devices with Alexa.
About Arduino Cloud
The Arduino Cloud is the next exciting journey for IoT enthusiasts to bring their projects to life quickly. It is an all-in-one intuitive IoT platform, supporting a wide range of hardware and backed by the vibrant Arduino community. Arduino Cloud removes complexity to empower users from all levels of expertise to create from anywhere, control and share their projects with stunning dashboards.
Sign up for Arduino Cloud now and unleash the full potential of your UNO R4 WiFi board!
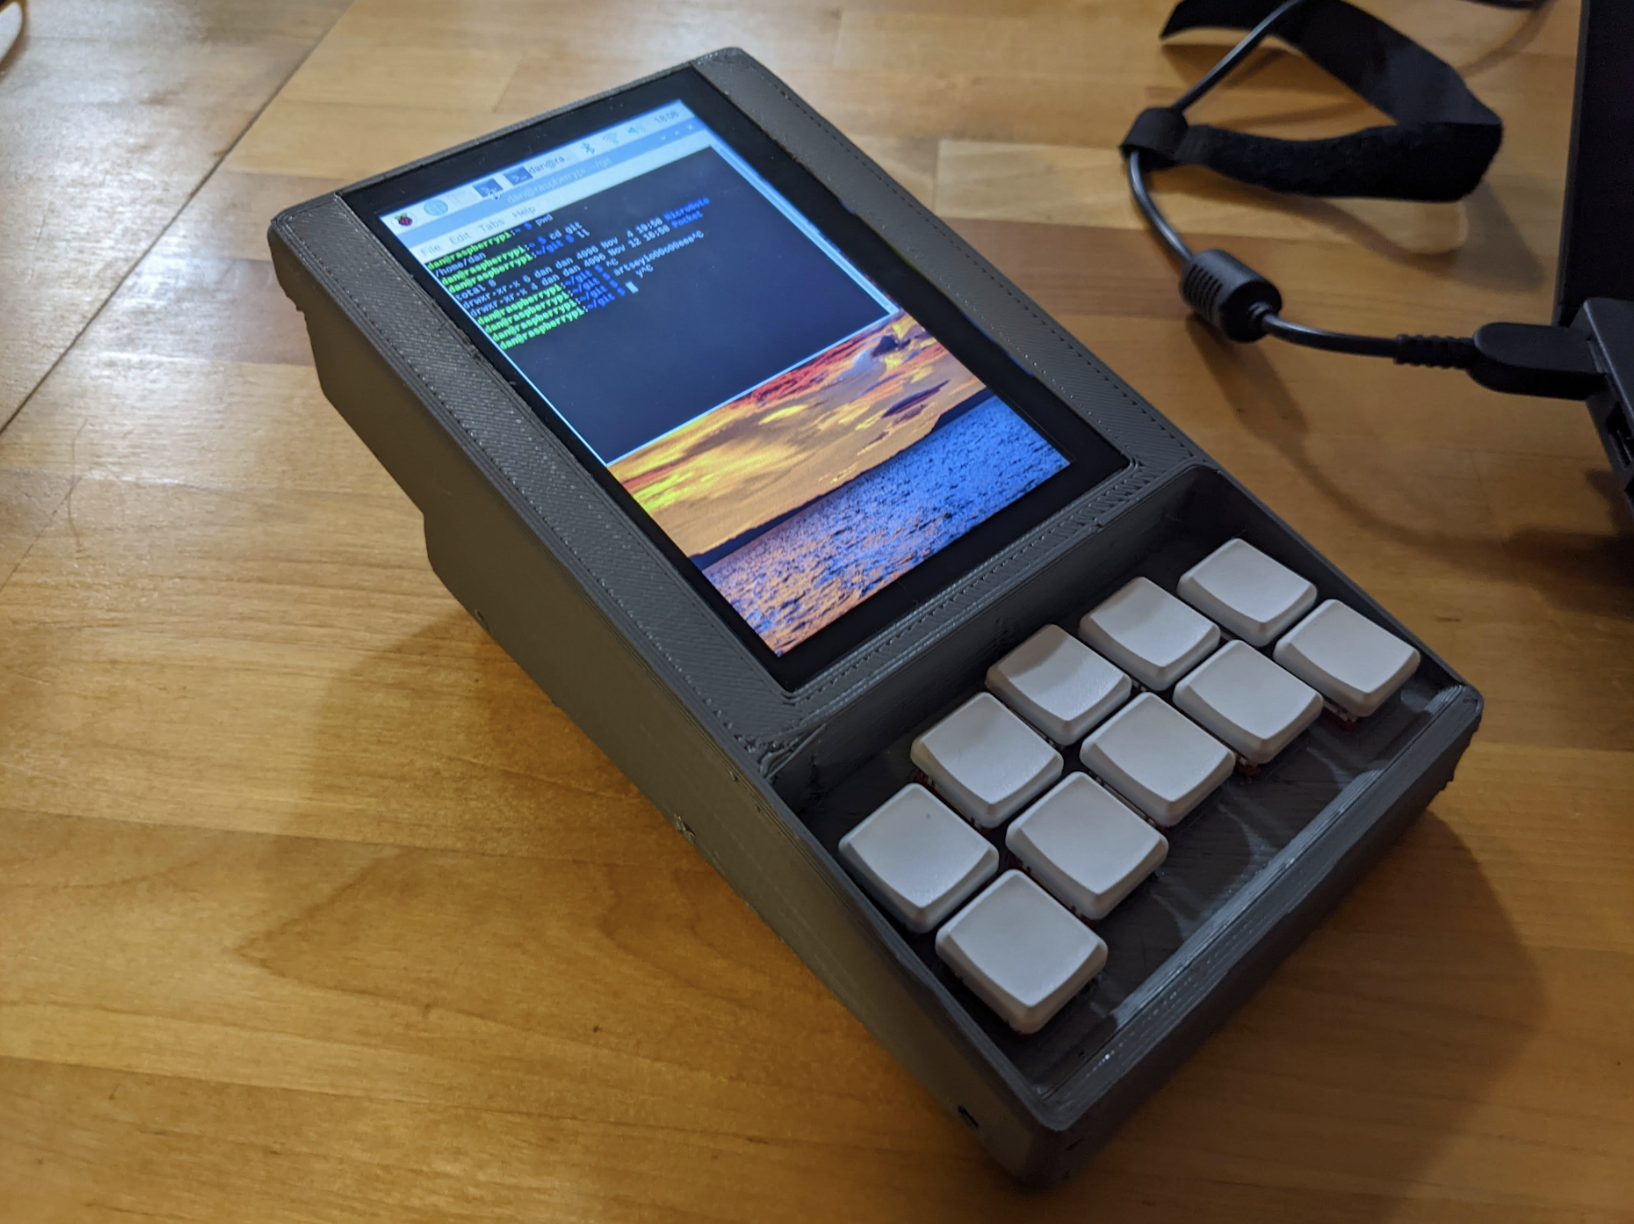
“I wanted a pocket-sized Linux computer with a physical keyboard and I sort of hacked something together last year that wasn’t very nice,” Dan explains. “I decided to have another go at it this spring when I got a pre-release Amp Ripper 4000 PSU to try out.” His goal was to incorporate a keyboard, scroll wheel, and touchscreen, and include a laptop-style battery that would report its state of charge to the OS.
Key points
At the Chonky Pocket’s heart is a Raspberry Pi 4 computer. “I usually use Ubuntu and it’s great that Raspberry Pi is officially supported,” Dan says. It’s hooked up to a 5-inch HDMI touchscreen with a speaker and, of course, a handful of keys. They’re ‘chorded’ which means: several keys need to be pressed together to enter characters, words, phrases, or commands.
“The keyboard layout is mostly just the eight-key ARTSEYIO chording layout with two extra keys mapped to ‘)’ and ‘(‘ and chorded ‘:’ – keys that normally require a layer shift with the ARTSEYIO layout.” This enables Python coding. “It was a bonus that the extra keys made the keyboard physically symmetrical, so I could change the layout for either hand,” Dan adds.
Of course, it’s going to take some getting used to. “I can type about 20 words per minute (wpm) with it when I practise a bit, but there are folks on the ARTSEYIO Discord who can do more than 40 wpm,” Dan continues. “If I wanted to type faster with one hand, I’d be inclined to use half of a Corne split keyboard (CRKBD) which has more thumb buttons for layer shifting and more direct access to symbols, numbers, and CTRL/SHIFT/ALT.”
Powering on
The build posed some challenges. “Modifying the battery kernel module for this was interesting,” Dan says. “I haven’t touched any C code since college and the window manager would crash when I loaded the module in Raspberry Pi OS. I’m just lucky that it worked in Ubuntu without having to do much troubleshooting.”
Power was hard to get right too. “Even using the wrong connector between a battery and the boost/charge board can cause voltage warnings and rebooting with Raspberry Pi 4,” he explains. And he has rewritten the GPIO keyboard firmware a couple of times. “It was an opportunity to learn about the current state of GPIO programming on Raspberry Pi with ‘lgpio’ and figure out how to use ‘uinput’.”
Dan hopes many people will enjoy building their own version and already plans for a build that includes a second HDMI port, external pins, a display that turns off when idle, and more. “I’ve gotten lots of supportive comments on Reddit for this build and some nice media coverage. It’s been a lot of fun,” he says.
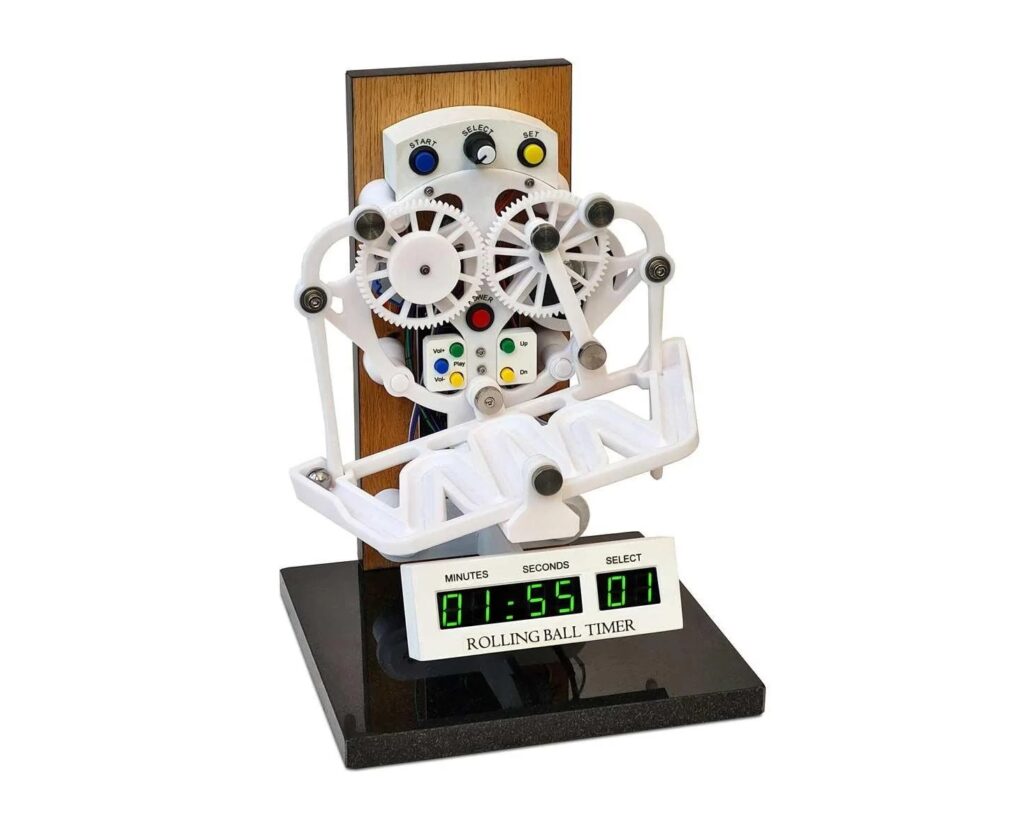
Before we had fancy digital clocks — or even spring-driven mechanical clocks — most methods for measuring short periods of time relied on gravity moving something in a consistent, repeatable way. Both water clocks and hour glasses work under that principle. But it isn’t very fun to watch grains of sand fall, which is why Brett Oliver built a kitchen timer that uses a rolling ball to count the seconds.
This project started with a rolling ball escapement designed by JBV Creative. That mechanism simply flips back and forth as a ball bearing rolls from one side of the track to the other. Perpetual motion is impossible, of course, so this mechanism relies on a weight to turn the gear system that pivots the track. The ball is just there for timing: when it reaches the end of the track, it pushes a lever that releases the mechanism and lets the weight drop a little. This will work until the weight reaches the ground or runs out of cord.
Oliver turned that mechanism into a kitchen timer by replacing the weight with a stepper motor controlled by an Arduino Nano board. Because the motor ultimately drives the mechanism, it can continue operating as long as it has power. An LCD display shows the remaining time and the user can set that with a few buttons. An MP3 module plays a user-configured sound effect when it reaches zero. The speed of the stepper motor determines the time it takes the ball to traverse the track and the default is five seconds, so the timer increments by five seconds with each pass.
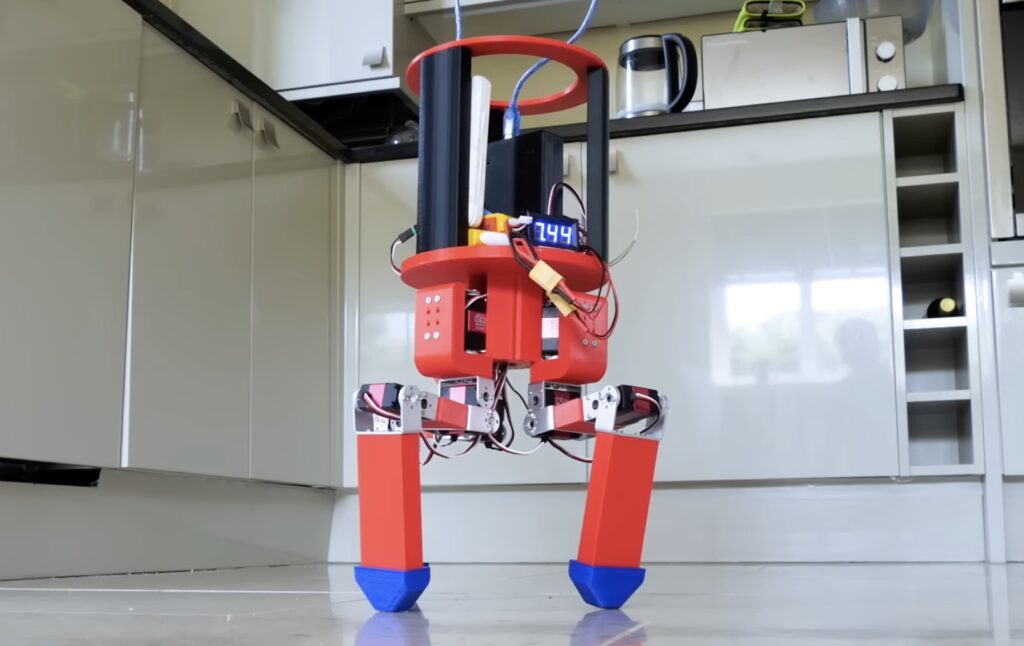
Building walking robots is difficult, because they either need a lot of legs or some ability to balance through their gait. There is a reason that the robots designed by companies like Boston Dynamics are so impressive. But lots of hobbyists have made bipedal and quadrupedal robots, while largely ignoring tripedal robots. To find out if they could be practical, James Bruton created a prototype tripedal robot.
When compared to a bipedal robot, a tripedal robot is more stable when standing still. But a bipedal robot is more stable when walking. That’s because it can keep its center of gravity almost directly above the foot that contacts the ground. A tripedal robot, on the other hand, needs to attempt to balance on two legs while move the third, while the center of gravity is somewhere above the middle of a triangle formed by the three feet. That makes walking gaits difficult to achieve.
Bruton built this prototype using a 3D-printed body, legs actuated by servo motors, and an Arduino Mega 2560 for control. The three legs are arranged with radial symmetry and each leg has three joints. Bruton attempted to give the robot a gait in which it tries to momentarily balance on two legs, while lifting and swinging the third around.
But that was very inefficient and clumsy. Bruton believes that he could achieve better results by equipping the robot with an IMU. That would give it a sense of balance, which could help it remain steady on two legs through a gait. With a counterbalancing weight, that could make a big difference. But for now, Bruton is putting this experiment on the back burner.
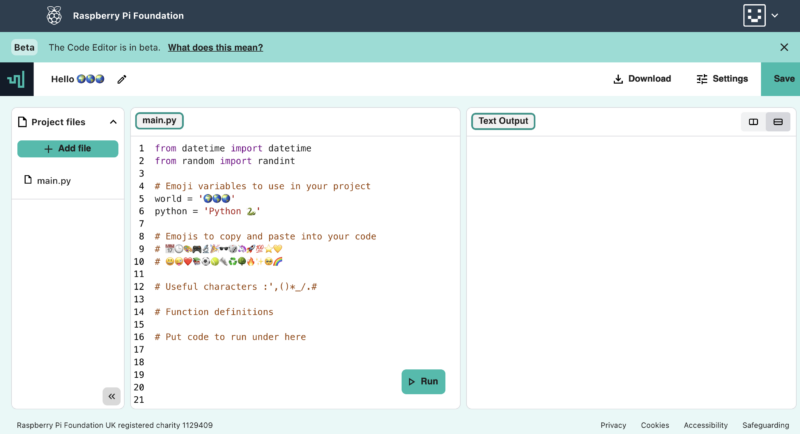
A couple of months ago we announced that you can test the online text-based Code Editor we’re building to help young people aged 7 and older learn to write code. Now we’ve made the code for the Editor open source so people can repurpose and contribute to it.
How can you use the Code Editor?
You and your learners can try out the Code Editor in the first two projects of our ‘Intro to Python’ path. We’ve included a feedback form for you to let us know what you think about the Editor.
The Editor lets you run code straight in the browser, with no setup required.
It makes getting started with text-based coding easier thanks to its simple and intuitive interface.
If you’re logged into your Raspberry Pi Foundation account, your code in the Editor is automatically saved.
If you’re not logged in, your code changes persist for the session, so you can refresh or close the tab without losing your work.
You can download your code to your computer too.
Since the Editor lets learners save their code using their Raspberry Pi Foundation account, it’s easy for them to build on projects they’ve started in the classroom or at home, or bring a project they’ve started at home to their coding club.
Putting ease of use and accessibility front and centre
We know that starting out with new programming tools can be tricky and add to the cognitive load of learning new subject matter itself. That’s why our Editor has a simple and accessible user interface and design:
You can easily find key functions, such as how to write and run code, how to save or download your code, and how to check your code.
You can switch between dark and light mode.
You can enlarge or reduce the text size in input and output, which is especially useful for people with visual impairments and for educators and volunteers who want to demonstrate something to a group of learners.
We’ll expand the Editor’s functionalities as we go. For example, at the moment we’re looking at how to improve the Editor’s user interface (UI) for better mobile support.
If there’s a feature you think would help the Editor become more accessible and more suitable for young learners, or make it better for your classroom or club, please let us know via the feedback form.
The open-source code for the Code Editor
Our vision is that every young person develops the knowledge, skills, and confidence to use digital technologies effectively, and to be able to critically evaluate these technologies and confidently engage with technological change. We’re part of a global community that shares that vision, so we’ve made the Editor available as an open-source project. That means other projects and organisations focussed on helping people learn about coding and digital technologies can benefit from the work.
How did we build the Editor? An overview
To support the widest possible range of learners, we’ve designed the Code Editor application to work well on constrained devices and low-bandwidth connections. Safeguarding, accessibility, and data privacy are also key considerations when we build digital products at the Foundation. That’s why we decided to design the front end of the Editor to work in a standalone capacity, with Python executed through Skulpt, an entirely in-browser implementation of Python, and code changes persisted in local storage by default. Learners have the option of using a Raspberry Pi Foundation account to save their work, with changes then persisted via calls to a back end application programming interface (API).
As safeguarding is always at the core of what we do, we only make features available that comply with our safeguarding policies as well as the ICO’s age-appropriate design code. We considered supporting functionality such as image uploads and code sharing, but at the time of writing have decided to not add these features given that, without proper moderation, they present risks to safeguarding.
There’s an amazing community developing a wealth of open-source libraries. We chose to build our text-editor interface using CodeMirror, which has out-of-the-box mobile and tablet support and includes various useful features such as syntax highlighting and keyboard shortcuts. This has enabled us to focus on building the best experience for learners, rather than reinventing the wheel.
Diving a bit more into the technical details:
The UI front end is built in React and deployed using Cloudflare Pages
The API back end is built in Ruby on Rails
The text-editor panel uses CodeMirror, which has best-in-class accessibility through mobile device and screen-reader support, and includes functionality such as syntax highlighting, keyboard shortcuts, and autocompletion
Python functionality is built using Skulpt to enable in-browser execution of code, with custom extensions built to support our learning content
Project code is persisted through calls to our back end API using a mix of REST and GraphQL endpoints
Data is stored in PostgreSQL, which is hosted on Heroku along with our back end API
Accessing the open-source code
You can find out more about our Editor’s code for both the UI front end and API back end in our GitHub readme and contributions documentation. These kick-starter docs will help you get up and running faster:
The Editor’s front end is licensed as permissively as possible under the Apache Licence 2.0, and we’ve chosen to license the back end under the copyleft AGPL V3 licence. Copyleft licences mean derived works must be licensed under the same terms, including making any derived projects also available to the community.
We’d greatly appreciate your support with developing the Editor further, which you can give by:
Providing feedback on our code or raising a bug as a GitHub Issue in the relevant repository.
Submitting contributions by raising a pull request against the relevant repository.
On the back end repository we’ll ask you to allow the Raspberry Pi Foundation to reserve the right to re-use your contribution.
You’ll retain the copyright for any contributions on either repository.
Sharing feedback on using the Editor itself through the feedback form.
Our work to develop and publish the Code Editor as an open-source project has been funded by Endless. We thank them for their generous support.
If you are interested in partnering with us to fund this key work, or you are part of an organisation that would like to make use of the Code Editor, please reach out to us via email.
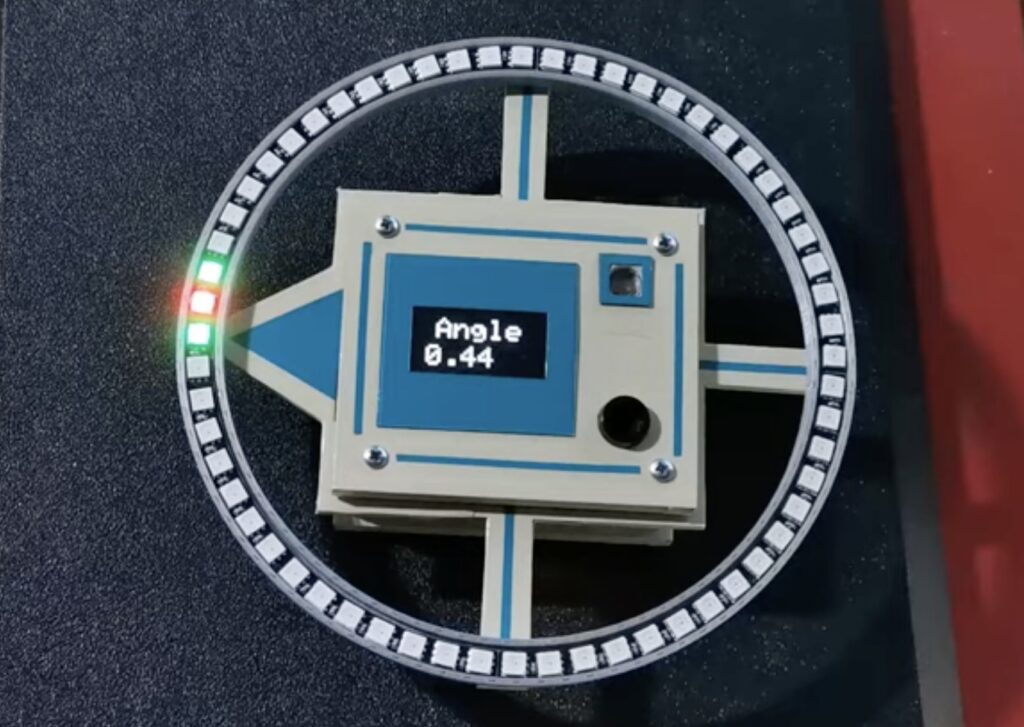
Of all the tools humanity has developed for navigation over our history, the humble compass is arguably the most important. A compass is cheap to produce, reliable, and incredibly useful for every kind of navigation. But standard mechanical compasses aren’t perfect; they can stick, are easy for people to misread, and don’t always indicate exact angles well. This simple digital compass built by Mirko Pavleski solves those problems.
There are, of course, many digital compasses on the market that will work just as well as this device. But this could still be a fun weekend project. It is a digital compass that aids navigation in two ways. First, it indicates magnetic north using an outer ring of LEDs. But there are only 60 LEDs, so that can be off by as much as three degrees in either direction. For that reason, this device also contains an OLED display that shows the exact angle (down to two decimal places) relative to magnetic north.
This is a very simple device to build and it only requires four components: an Arduino Nano board, an HMC5883L compass module, a ring with 60 WS2812B individually addressable RGB LEDs, and an OLED screen. If you want to use it on the go, a standard 9V battery will provide portable power. Those components fit into a basic 3D-printable case that protects the electronics and puts everything in the correct orientation.
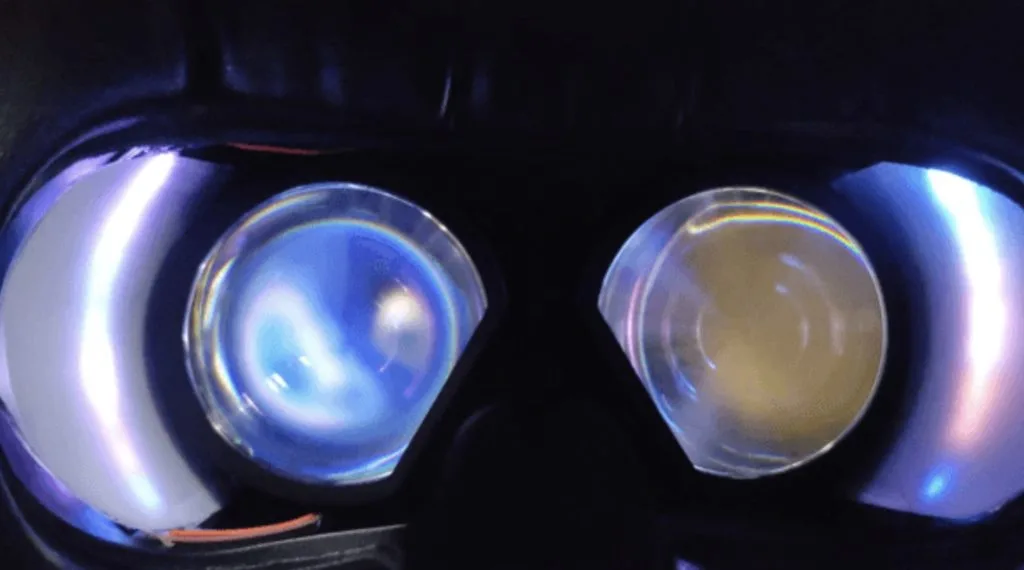
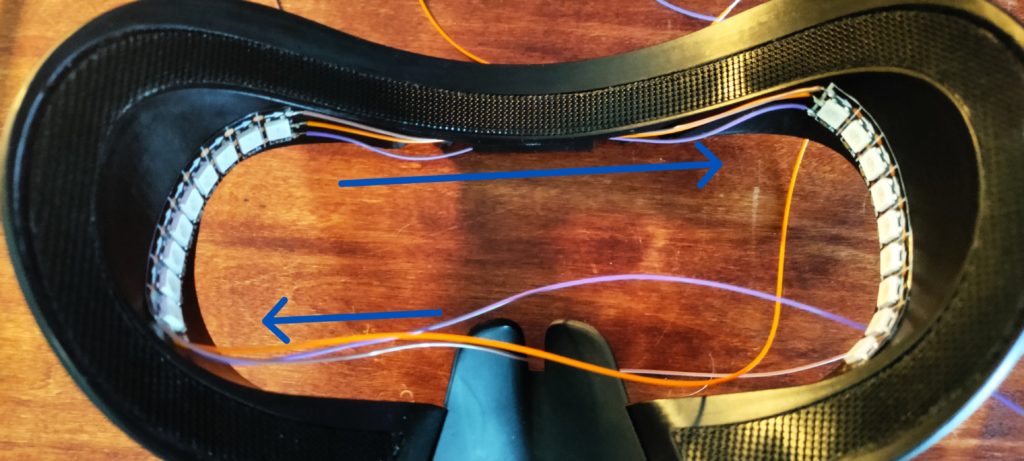
The entire purpose of virtual reality (VR) is to improve immersion beyond what can be achieved with a regular TV or monitor. So it can be frustrating to VR users when the darkness in their peripheral vision reminds them that they are, in fact, wearing a headset. To enhance the situation with Valve Index VR headsets without adding too much cost, Staton developed peripheral ambient lightning called VR Ambilight.
VR Ambilight works in the same way as Ambilight ambient backlighting for TVs and monitors. The system looks at the colors of the pixels around the entire outer border of the screen, then sets the colors of LEDs to match. That creates a gentle transition from the screen to the surrounding wall. When applied to VR, it extends the screen content into the user’s periphery. Because the user can’t see anything in their periphery in detail, the colored light is enough to maintain the illusion and eliminate breaks in immersion.
The only hardware components necessary for this system were an Arduino Nano board and two short strips of WS2812B individually addressable RGB LEDs. The LEDs mount inside of the Valve Index VR headset, with a thin sheet of translucent white plastic acting as a diffuser. Prismatik software works with Steam to detect the pixel colors along the screen edges, then uses a simple script to pass that along to the Arduino. The Valve Index has a handy USB port built-in, which helps to keep the wiring nice and tidy.
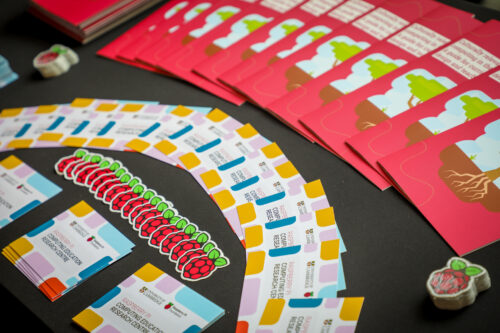
From 27 to 29 September 2023, we and the University of Cambridge are hosting the WiPSCE International Workshop on Primary and Secondary Computing Education Research for educators and researchers. This year, this annual conference will take place at Robinson College in Cambridge. We’re inviting all UK-based teachers of computing subjects to apply for one of five ‘all expenses paid’ places at this well-regarded annual event.
You could attend WiPSCE with all expenses paid
WiPSCE is where teachers and researchers discuss research that’s relevant to teaching and learning in primary and secondary computing education, to teacher training, and to related topics. You can find more information about the conference, including the preliminary programme, at wipsce.org.
As a teacher at the conference, you will:
Engage with high-quality international research in the field where you teach
Learn ways to use that research to develop your own classroom practice
Find out how to become an advocate in your professional community for research-informed approaches to the teaching of computing.
We are delighted that, thanks to generous funding from a funder, we can offer five free places to UK computing teachers, covering:
The registration fee
Two nights’ accommodation at Robinson College
Up to £500 supply costs paid to your school to cover your teaching
Up to £100 travel costs
The application deadline is Wednesday 19 July.
The application details
To be eligible to apply:
You need to be a currently practising, UK-based teacher of Computing (England), Computing Science (Scotland), ICT or Digital Technologies (N. Ireland), or Computer Science (Wales)
Your headteacher needs to be able to provide written confirmation that they are happy for you to attend WiPSCE
You need to be available to attend the whole conference from Wednesday lunchtime to Friday afternoon
You need to be willing to share what you learn from the conference with your colleagues at school and with your broader teaching community, including through writing an article about your experience and its relevance to your teaching for this blog or Hello World magazine
The application form will ask your for:
Your name and contact details
Demographic and school information
Your teaching experience
A statement of up to 500 words on why you’re applying and how you think your teaching practice, your school and your colleagues will benefit from your attendance at WiPSCE (500 words is the maximum, feel free to be concise)
After the 19 July deadline, we’re aiming to inform you of the outcome of your application on Friday 21 July.
Your application will be reviewed by the 2023 WiPSCE Chairs:
Sue and Mareen will:
Use the information you share in your form, particularly in your statement
Select applicants from a mix of primary and secondary schools, with a mix of years of computing teaching experience, and from a mix of geographic areas
Join us in strengthening research-informed computing classroom practice
We’d be delighted to receive your application. Being able to facilitate teachers’ attendance at the conference is very much aligned with our approach to research. Both at the Foundation and the Raspberry Pi Computing Education Research Centre, we’re committed to conducting research that’s directly relevant to schools and teachers, and to working in close collaboration with teachers.
We hope you are interested in attending WiPSCE and becoming an advocate for research-informed computing education practice. If your application is unsuccessful, we hope you consider coming along anyway. We’re looking forward to meeting you there. In the meantime, you can keep up with WiPSCE news on Twitter.
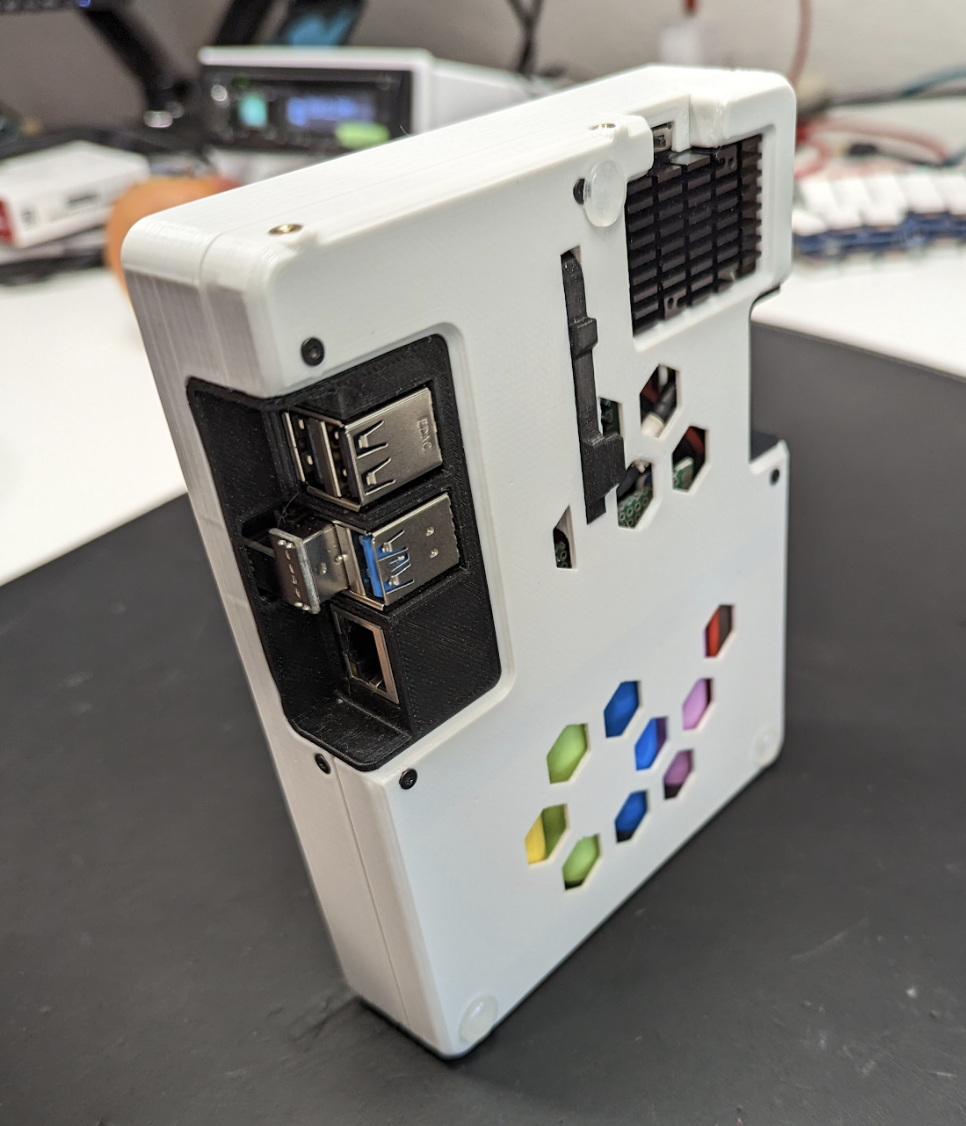
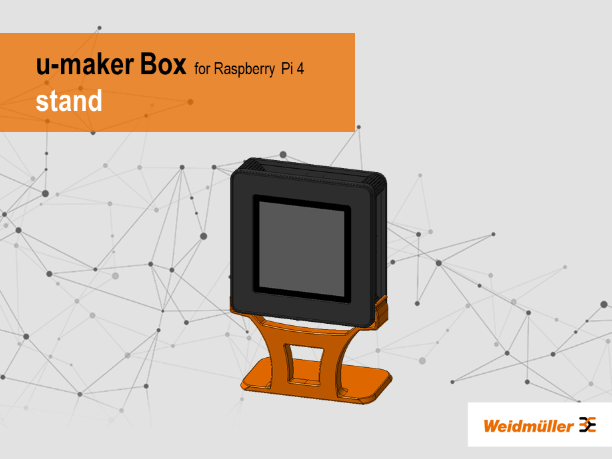
What’s cool, though, is that you can really modify and personalise the case to what you need it to do thanks to a smart construction system and freely available templates to play around with for 3D printing.
Snap build
The standard box comes with some mounts that allow you to attach it to a wall or VESA mount, and even a special one for boom arms. As well as the extra bits in the Extension Kit that help connect extra boards, brackets, or even a case fan, there’s a ton of Thingiverse files for various kinds of stands, extenders, and even an alternate lid that can fit a square HyperPixel.
The number of options are truly astounding and none of it looks or feels hacky. It’s just a very nice implementation of the design idea.
Verdict
10/10
A unique and very cool way to customise or prototype a case for your Raspberry Pi projects.
At under £10, the WuKong 2040 certainly keeps prices low while still packing a huge array of features on a small board. Buzzers, buttons, LEDs, motor controllers, a traditional GPIO breakout to hook up more, and the ability to power it all with a rechargeable battery so you can take it anywhere.
Code by numbers
Programming a Pico attached to the board is quite simple, making use of standard MicroPython, CircuitPython, and C libraries to work, and each pin and component labelled with the corresponding GPIO to which it’s connected. Examples are given in CircuitPython on the website, which can be fairly easy to translate to MicroPython if needed, and give you a nice little overview of what you can do with the board.
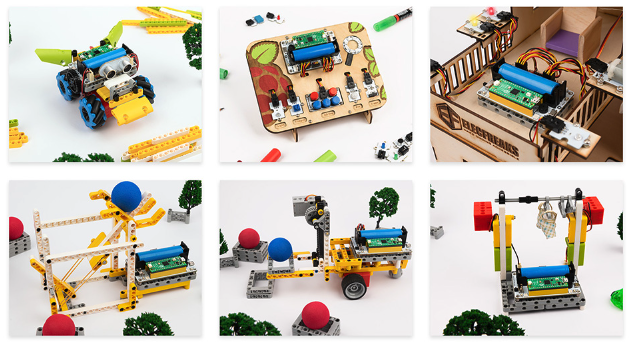
For those wanting a more practical application of the board, it also comes with a little add-on that makes the base compatible with many kind of brick building systems like LEGO – a good way to create a fun robot completely powered by custom code you made yourself.
Verdict
9/10
Small, reasonably priced, and packed with functionality, this board is a fun way to learn and grow with Pico.
Specs
Size: 55.8 × 87.8 × 36.3 mm, 50 g (without Pico or battery)
Speech recognition is everywhere these days, yet some languages, such as Shakhizat Nurgaliyev and Askat Kuzdeuov’s native Kazakh, lack sufficiently large public datasets for training keyword spotting models. To make up for this disparity, the duo explored generating synthetic datasets using a neural text-to-speech system called Piper, and then extracting speech commands from the audio with the Vosk Speech Recognition Toolkit.
Beyond simply building a model to recognize keywords from audio samples, Nurgaliyev and Kuzdeuov’s primary goal was to also deploy it onto an embedded target, such as a single-board computer or microcontroller. Ultimately, they went with the Arduino Nicla Voice development board since it contains not just an nRF52832 SoC, a microphone, and an IMU, but an NDP120 from Syntiant as well. This specialized Neural Decision Processor helps to greatly speed up inferencing times thanks to dedicated hardware accelerators while simultaneously reducing power consumption.
With the hardware selected, the team began to train their model with a total of 20.25 hours of generated speech data spanning 28 distinct output classes. After 100 learning epochs, it achieved an accuracy of 95.5% and only consumed about 540KB of memory on the NDP120, thus making it quite efficient.
To read more about Nurgaliyev and Kuzdeuov’s project and how they deployed an embedded ML model that was trained solely on generated speech data, check out their write-up here on Hackster.io.
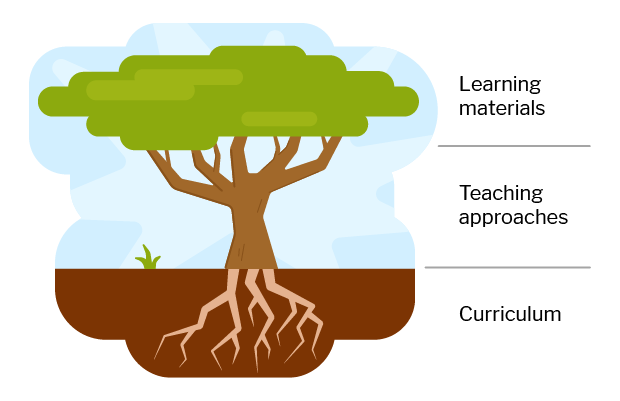
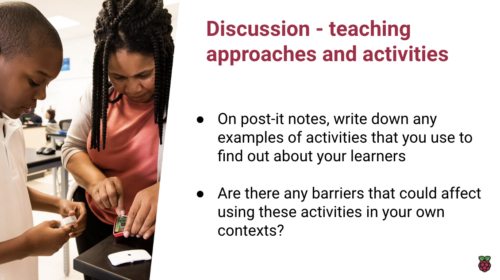
Learning materials, teaching approaches, and the curriculum as a whole are three areas where culturally relevance is important.
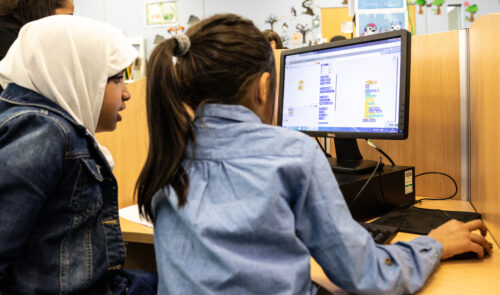
In our latest research study, funded by Cognizant, we worked with 13 primary school teachers in England on adapting computing lessons to incorporate culturally relevant and responsive principles and practices. Here’s an insight into the workshop we ran with them, and what the teachers and we have taken away from it.
Adapting lesson materials based on culturally relevant pedagogy
In the group of 13 England-based primary school Computing teachers we worked with for this study:
One third were specialist primary Computing teachers, and the other two thirds were class teachers who taught a range of subjects
Some acted as Computing subject lead or coordinator at their school
Most had taught Computing for between three and five years
The majority worked in urban areas of England, at schools with culturally diverse catchment areas
In November 2022, we held a one-day workshop with the teachers to introduce culturally relevant pedagogy and explore how to adapt two six-week units of computing resources.
An example of a collaborative activity from the workshop
The first part of the workshop was a collaborative, discussion-based professional development session exploring what culturally relevant pedagogy is. This type of pedagogy uses equitable teaching practices to:
Draw on the breadth of learners’ experiences and cultural knowledge
Facilitate projects that have personal meaning for learners
Develop learners’ critical consciousness
The rest of the workshop day was spent putting this learning into practice while planning how to adapt two units of computing lessons to make them culturally relevant for the teachers’ particular settings. We used a design-based approach for this part of the workshop, meaning researchers and teachers worked collaboratively as equal stakeholders to decide on plans for how to alter the units.
We worked in four groups, each with three or four teachers and one or two researchers, focusing on one of two units of work from The Computing Curriculum for teaching digital skills: a unit on photo editing for Year 4 (ages 8–9), and a unit about vector graphics for Year 5 (ages 9–10).
In order to plan how the resources in these units of work could be made culturally relevant for the participating teachers’ contexts, the groups used a checklist of ten areas of opportunity. This checklist is a result of one of our previous research projects on culturally relevant pedagogy. Each group used the list to identify a variety of ways in which the units’ learning objectives, activities, learning materials, and slides could be adapted. Teachers noted down their ideas and then discussed them with their group to jointly agree a plan for adapting the unit.
By the end of the day, the groups had designed four really creative plans for:
A Year 4 unit on photo editing that included creating an animal to represent cultural identity
A Year 4 unit on photo editing that included creating a collage all about yourself
A Year 5 unit on vector graphics that guided learners to create their own metaverse and then add it to the class multiverse
A Year 5 unit on vector graphics that contextualised the digital skills by using them in online activities and in video games
Outcomes from the workshop
Before and after the workshop, we asked the teachers to fill in a survey about themselves, their experiences of creating computing resources, and their views about culturally relevant resources. We then compared the two sets of data to see whether anything had changed over the course of the workshop.
The workshop was a positive experience for the teachers.
After teachers had attended the workshop, they reported a statistically significant increase in their confidence levels to adapt resources to be culturally relevant for both themselves and others.
Teachers explained that the workshop had increased their understanding of culturally relevant pedagogy and of how it could impact on learners. For example, one teacher said:
“The workshop has developed my understanding of how culturally adapted resources can support pupil progress and engagement. It has also highlighted how contextual appropriateness of resources can help children to access resources.” – Participating teacher
Some teachers also highlighted how important it had been to talk to teachers from other schools during the workshop, and how they could put their new knowledge into practice in the classroom:
“The dedicated time and value added from peer discourse helped make this authentic and not just token activities to check a box.” – Participating teacher
“I can’t wait to take some of the work back and apply it to other areas and subjects I teach.” – Participating teacher
What you can expect to see next from this project
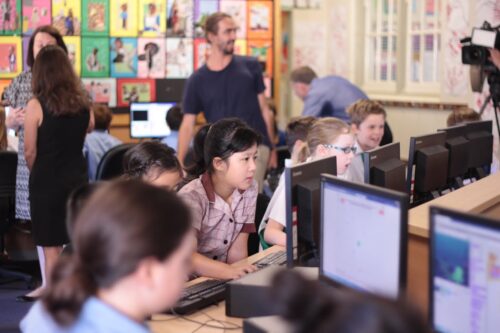
After our research team made the adaptations to the units set out in the four plans made during the workshop, the adapted units were delivered by the teachers to more than 500 Year 4 and 5 pupils. We visited some of the teachers’ schools to see the units being taught, and we have interviewed all the teachers about their experience of delivering the adapted materials. This observational and interview data, together with additional survey responses, will be analysed by us, and we’ll share the results over the coming months.
As part of the project, we observed teachers delivering the adapted units to their learners.
In our next blog post about this work, we will delve into the fascinating realm of parental attitudes to culturally relevant computing, and we’ll explore how embracing diversity in the digital landscape is shaping the future for both children and their families.
We’ve also written about this professional development activity in more detail in a paper to be published at the UKICER conference in September, and we’ll share the paper once it’s available.
Finally, we are grateful to Cognizant for funding this academic research, and to our cohort of primary computing teachers for their enthusiasm, energy, and creativity, and their commitment to this project.
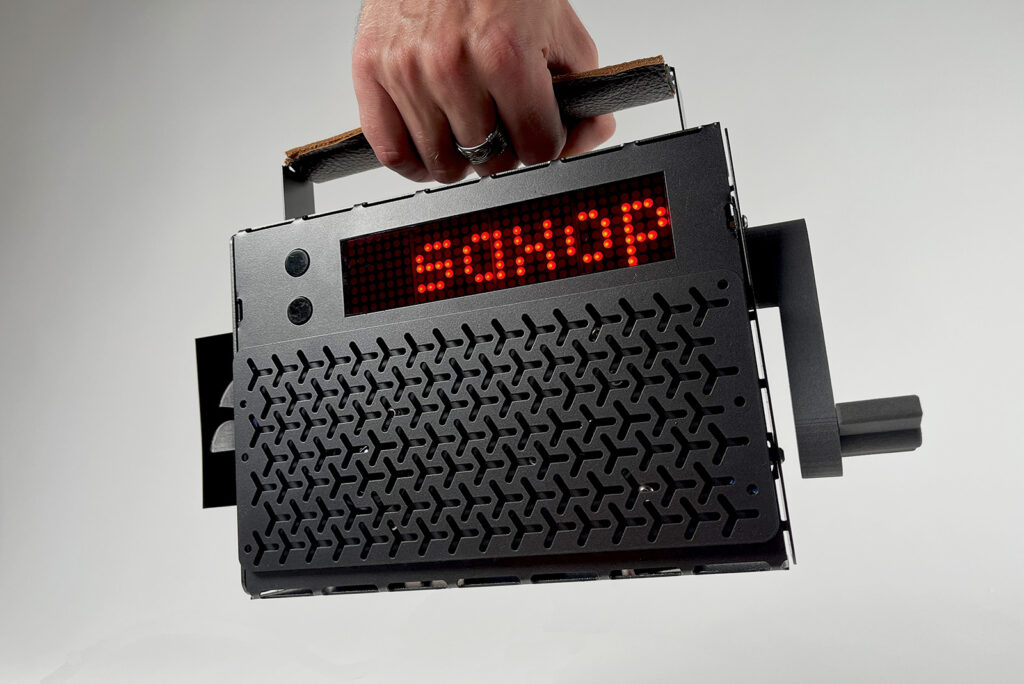
Discovering new music is difficult, making it a frustrating experience for both listeners and services. Identifying what one person liked about a specific song is a challenge when music is so subjective. Two different people may love the same song, but for different reasons that affect their wider tastes. In an attempt to improve the situation, Danning Liang and Artem Laptiev from MIT’s School of Architecture and Planning built a kind of AI-powered boombox called VBox that helps listeners discover music in a new way.
Most existing services use some combination of listener data and qualitative categorization of songs to aid in music discovery. But those connections are obvious and tend not to identify the factors that actually predict a listener’s enjoyment of a song. Artificial intelligence models, on the other hand, excel at finding connections and patterns that we might not see ourselves. In this case, VBox uses OpenAI’s natural language models to categorize music and find similar songs. As a song plays, VBox will list keywords related to the music. If a specific keyword resonates with the listener, they can select it to influence the next song choice.
There aren’t a lot of technical details available, but we do know that an Arduino board is somewhere in the mix. It uses RFID to identify genre cards that start the music discovery process. The keywords scroll across a LED matrix display and a crank handle attached to a rotary encoder lets listeners move through the keyword list. The enclosure is made of gorgeous stamped sheet metal with a leather strap and some 3D-printed internal framework for the electronic components. Music pumps out through a pair of small speakers.
This is more of an art project and an AI experiment than a true attempt at creating an appealing music discovery system, but the idea is novel and it very well could prove useful for some music lovers.
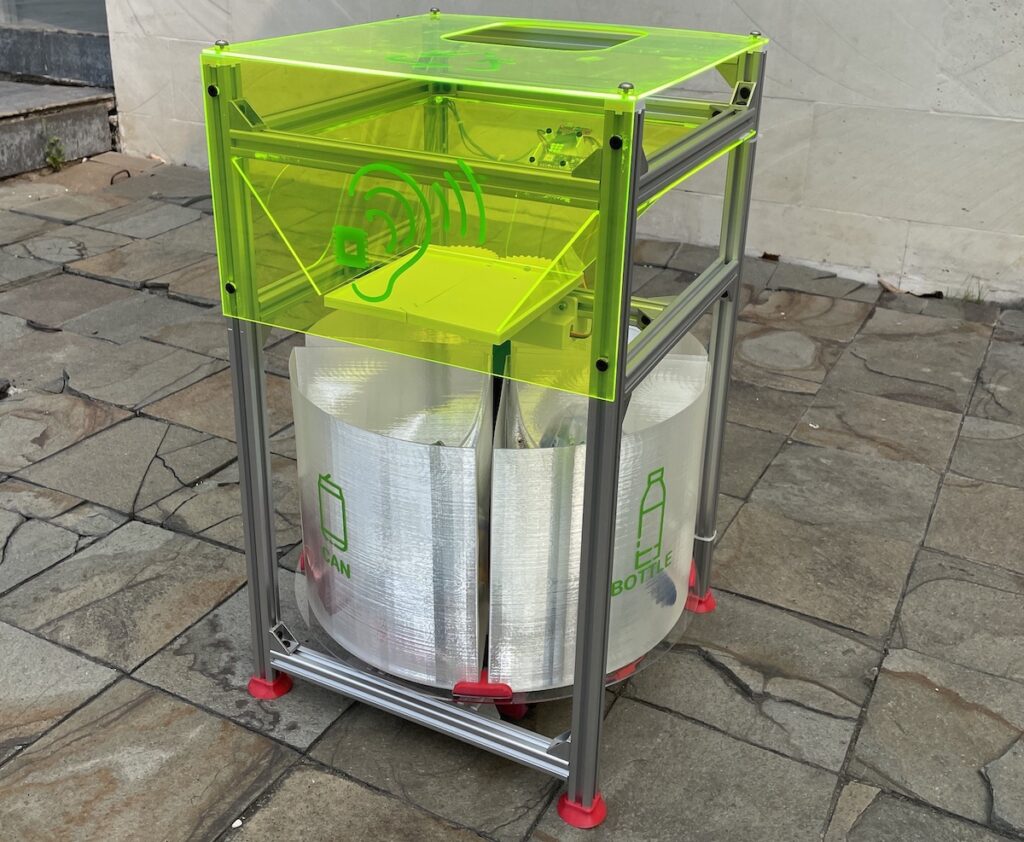
Although a large percentage of our trash can be recycled, only a small percentage actually makes it to the proper facility due, in part, to being improperly sorted. So as an effort to help keep more of our trash out of landfills without the need for extra work, Samuel Alexander built a smart recycling bin that relies on machine learning to automatically classify the waste being thrown in and sort it into separate internal compartments.
Because the bin must know what trash is being tossed in, Alexander began this project by first constructing a minimal rig with an Arduino Nano 33 BLE Sense to capture sounds and send them to an Edge Impulse project. From here, the samples were split into 60 one-second samples for each rubbish type, including cans, paper, bottles, and random background noise. The model, once trained, was then deployed to the Nano as a custom Arduino library.
With the board now able to determine what type of garbage has been thrown in, Alexander got to work on the remaining portions of the smart bin. The base received a stepper motor which spins the four compartments to line up with a servo-actuated trap door while a LiPo battery pack provides power to everything for fully wireless operation.
Jonathan first came across Raspberry Pi when he was still an electrical engineering student back in 2014. He promptly put his first Model A Raspberry Pi to good use controlling the door to a co-working space at the ETH Entrepreneur Club where he was a member, using Slack. There isn’t much call for the computer vision skills that were part of his degree course, but Jonathan enjoys creating projects that exploit his technical knowledge.
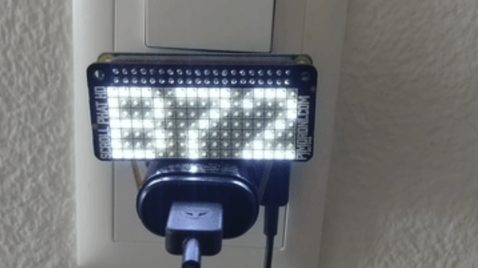
When Jonathan moved into his apartment two years ago, he quickly realised that the unique view it gave him of the trains going by would make for an ideal project subject. “Inspired by the slit-scan finisher photographs from bike races, I then came up with the idea of creating pictures with similar aesthetics – but of trains instead of bikes, and a cheap camera instead of specialist hardware,” he explains. Slit-scan photography creates an animation from a series of still shots. For his train version, Jonathan was keen to use the Go programming language’s computer vision and cross-compilation tools, and see how well it worked alongside older tech such as SQLite and FTP.
Jonathan chose Raspberry Pi 4 to run Trainbot, as “it offers all that is needed for such a project: quite a lot of compute power, cheap, good ergonomics and docs, and good software support.” It is also powerful enough to handle the graphical computations required, while being less expensive than a board with a dedicated graphics processor. He notes that “the computer vision used in Trainbot is fairly naïve and simple. There is no camera calibration, image stabilisation, undistortion, perspective mapping, or ‘real’ object tracking.”
Name that train!
With plenty of Raspberry Pi and Linux experience under his belt, Jonathan’s challenges for the Trainbot included creating mounting plates and other small parts to fit inside the waterproof case he bought, so the AI camera setup could live outdoors on his balcony, as well as developing and testing the computer vision algorithm. He needed data with which to train the algorithm and spent “quite some time” recording video with his phone first, before “semi-manually chopping up the recordings and setting a test harness with them”.
There was also a lot of “testing and tuning” involved in ensuring the computer vision setup was able to recognise most trains. “I soon figured out that patch-matching alone is not robust enough to estimate train velocity.” Jonathan notes that this led to missed frames, or wrongly estimated ones, which led to chopped-up images. To address this, he added a step after the initial image gathering which applied an estimation and smoothing process using RANSAC and “ a simple s = v0 + a*t model” to estimate start velocity and acceleration. RANSAC is a classical computer vision approach used to estimate a model when there are lots of outliers. He wrote much of the code himself, including instructions for patch-matching and the low-level computer vision, to keep things as light as possible.
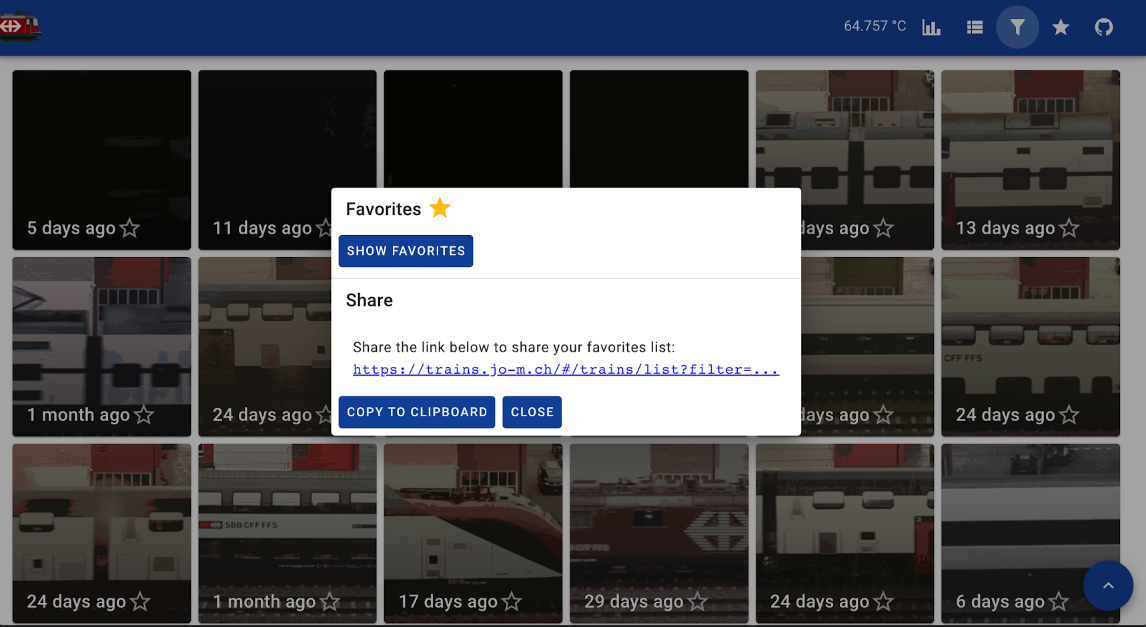
With half of the coding and cross-compilation done in Go, Jonathan tried out Trainbot on his Raspberry Pi. At first, the project used a webcam but, as soon as Jonathan realised Raspberry Pi also makes camera modules, he switched over to HQ Camera Module 3, resulting in “much higher image quality (and very good software support via libcamera) than a cheap webcam, at a low price point.” Next, he intends to develop the machine learning element to recognise and highlight ‘atypical’ trains, something that will be aided by him also adding details from the GTFS+/GTFS real-time timetables available in machine readable format from Swiss public transport companies.
Einwilligung verwalten
Um dir ein optimales Erlebnis zu bieten, verwenden wir Technologien wie Cookies, um Geräteinformationen zu speichern und/oder darauf zuzugreifen. Wenn du diesen Technologien zustimmst, können wir Daten wie das Surfverhalten oder eindeutige IDs auf dieser Website verarbeiten. Wenn du deine Einwillligung nicht erteilst oder zurückziehst, können bestimmte Merkmale und Funktionen beeinträchtigt werden.
Funktional
Immer aktiv
Die technische Speicherung oder der Zugang ist unbedingt erforderlich für den rechtmäßigen Zweck, die Nutzung eines bestimmten Dienstes zu ermöglichen, der vom Teilnehmer oder Nutzer ausdrücklich gewünscht wird, oder für den alleinigen Zweck, die Übertragung einer Nachricht über ein elektronisches Kommunikationsnetz durchzuführen.
Vorlieben
Die technische Speicherung oder der Zugriff ist für den rechtmäßigen Zweck der Speicherung von Präferenzen erforderlich, die nicht vom Abonnenten oder Benutzer angefordert wurden.
Statistiken
Die technische Speicherung oder der Zugriff, der ausschließlich zu statistischen Zwecken erfolgt.Die technische Speicherung oder der Zugriff, der ausschließlich zu anonymen statistischen Zwecken verwendet wird. Ohne eine Vorladung, die freiwillige Zustimmung deines Internetdienstanbieters oder zusätzliche Aufzeichnungen von Dritten können die zu diesem Zweck gespeicherten oder abgerufenen Informationen allein in der Regel nicht dazu verwendet werden, dich zu identifizieren.
Marketing
Die technische Speicherung oder der Zugriff ist erforderlich, um Nutzerprofile zu erstellen, um Werbung zu versenden oder um den Nutzer auf einer Website oder über mehrere Websites hinweg zu ähnlichen Marketingzwecken zu verfolgen.