Arguably the winner of the standards war around wide area networking protocols for the Internet of Things, LoRaWAN is a low-powered, low-bandwidth, and long-range protocol. Intended to connect battery-powered remote sensors back to the internet via a gateway, on a good day, with a reasonable antenna, you might well get 15km of range from an off-the-shelf LoRa radio. The downside is that the available bandwidth will be measured in bytes, not megabytes, or even kilobytes.
Support for LoRa connectivity for Raspberry Pi Pico was put together by Sandeep Mistry, the author of the Arduino LoRa library, who more recently also gave us Ethernet support for Pico. His library adds LoRa support for Pico and other RP2040-based boards using the Semtech SX1276 radio module. That means that breakouts like Adafruit’s RFM95W board, as well as their LoRa FeatherWing, are fully supported.
LoRaWAN coverage?
To make use of a LoraWAN-enabled Pico you’re going to need to be in range of a LoRa gateway. Fortunately there is The Things Network, an open-source community LoRaWAN network that has global coverage.
Depending on where you are located, it’s quite possible that you’re already in coverage. However, if you aren’t, then you needn’t worry too much.
The days when the cost of a LoRaWAN base station was of the order of several thousand dollars are long gone. You can now pick up a LoRa gateway for around £75. However I built my own gateway a couple of years ago. Unsurprisingly, perhaps, it was based around a Raspberry Pi.
Getting the source
If you already have the Raspberry Pi Pico toolchain set up and working, make sure your pico-sdk checkout is up to date, including submodules. If not, you should first set up the C/C++ SDK and then afterwards you need to grab the project from GitHub.
$ git clone --recurse-submodules https://github.com/sandeepmistry/pico-lorawan.git
$ cd pico_lorawan
Make sure you have your PICO_SDK_PATH set before before proceeding. For instance, if you’re building things on a Raspberry Pi and you’ve run the pico_setup.sh script, or followed the instructions in our Getting Started guide, you’d point the PICO_SDK_PATH to
$ export PICO_SDK_PATH = /home/pi/pico/pico-sdkAfterwards you are ready to build both the library and the example applications. But before you do that we need to do two other things: configure the cloud infrastructure where our data is going to go, and wire up our LoRa radio board to our Raspberry Pi Pico.
Set up an application
The Things Network is currently migrating from the V2 to V3 stack. Since my home gateway was set up a couple of years ago, I’m still using the V2 software and haven’t migrated yet. I’m therefore going to build a V2-style application. However, if you’re using a public gateway, or building your own gateway, you probably should build a V3-style application. The instructions are similar, and you should be able to make your way through based on what’s written below. Just be aware that there is a separate Network Console for the new V3 stack and things might look a little different.
Migration from TTN V2 to V3
While any LoRa device in range of your new gateway will have its packets received and sent upstream to The Things Network, the data packets will be dropped on the ground unless they have somewhere to go. In other words, The Things Network needs to know where to route the packets your gateway is receiving.
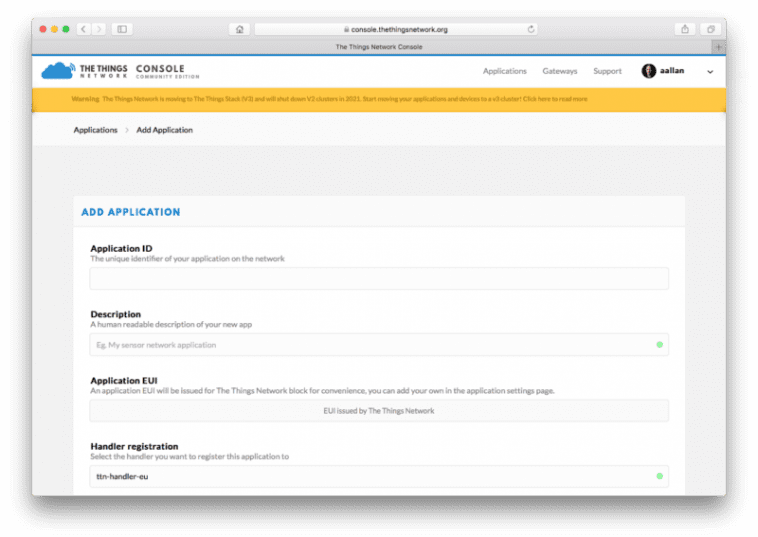
In order to give it this information, we first need to create an application inside The Things Network Console. To do this all you’ll need to do is type in a unique Application ID string — this can be anything — and the console will generate an Application EUI and a default Access Key which we’ll use to register our devices to our application.
Once we’ve registered an application, all we have to do then is register our individual device — or later perhaps many devices — to that application, so that the backend knows where to route packets from that device.
Registering a device
Registering our device can be done from the application’s page in the console.
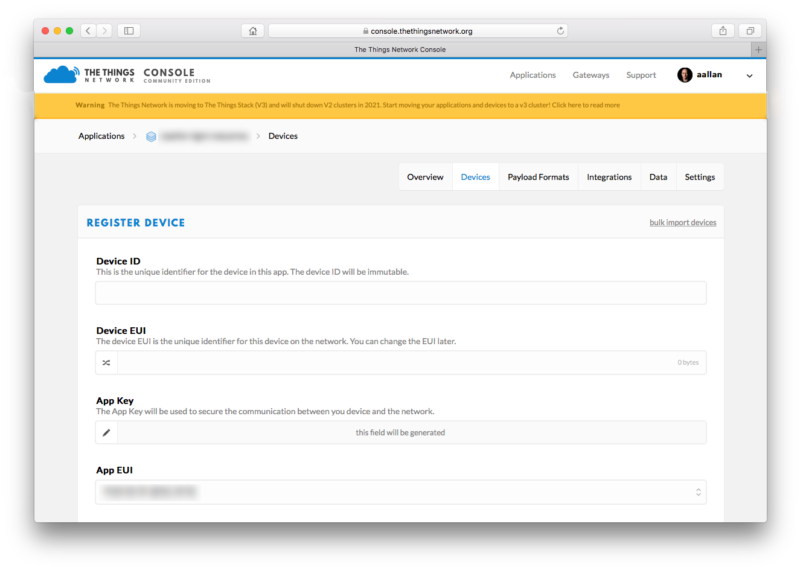
The Device ID is a human-readable string to identify our remote device. Since RFM9W breakout board from Adafruit ships with a sticker in the same bag as the radio with a unique identifier written on it we can use that to postpend a string to uniquely identify our Pico board, so we end up with something like pico-xy-xy-xy-xy-xy-xy as our Device ID.
We’ll also need to generate a Device EUI2. This is a 64-bit unique identifier. Here again we can use the unique identifier from the sticker, except this time we can just pad it with two leading zeros, 0000XYXYXYXYXYXY, to generate our Device EUI. You could also use pico_get_unique_board_id( ) to generate the Device EUI.
If you take a look at your Device page after registration you’ll need the Application EUI2 and Application Key2 to let your board talk to the LoRa network, or more precisely to let the network correctly route packets from your board to your application.
2 Make a note of your Device EUI, Application EUI, and Application Key.
Wiring things up on a breadboard
Now we’ve got our cloud backend set up, the next thing we need to do is connect our Pico to the LoRa breakout board. Unfortunately the RFM95W breakout isn’t really that breadboard-friendly. At least it’s not breadboard-friendly if you need access to the radio’s pins on both sides of the board like we do for this project — in this case the breakout is just a little bit too wide for a standard breadboard.
Fortunately it’s not really that much of a problem, but you will probably need to grab a bunch of male-to-female jumper wires along with your breadboard. Go ahead and wire up the RFM95W module to your Raspberry Pi Pico. The mapping between the pins on the breakout board and your Pico should be as follows:
| Pico | RP20401 | SX1276 Module | RFM95W Breakout |
| 3V3 (OUT) | — | VCC | VIN |
| GND | GND | GND | GND |
| Pin 10 | GP7 | DIO0 | G0 |
| Pin 11 | GP8 | NSS | CS |
| Pin 12 | GP9 | RESET | RST |
| Pin 14 | GP10 | DIO1 | G1 |
| Pin 21 | GP16 (SPI0 RX) | MISO | MISO |
| Pin 24 | GP18 (SPI0 SCK) | SCK | SCK |
| Pin 25 | GP19 (SPI0 TX) | MOSI | MOSI |
1 These pins are the library default and can be changed in software.
Building and deploying software
Now we have our backend in the cloud set up, and we’ve physically “built” our radio, we can build and deploy our LoRaWAN application. One of the example applications provided by the library will read the temperature from the on-chip sensor on the RP2040 microcontroller and send it periodically to your Things Network application over the LoRaWAN radio.
void internal_temperature_init() { adc_init(); adc_select_input(4); adc_set_temp_sensor_enabled(true);
} float internal_temperature_get() { float adc_voltage = adc_read() * 3.3f / 4096; float adc_temperature = 27 - (adc_voltage - 0.706f) / 0.001721f; return adc_temperature;
}
Go ahead and change directory to the otaa_temperature_led example application in your checkout. This example uses OTAA, so we’ll need the Device EUI, Application EUI, and Application Key we created.
$ cd examples/otaa_temperature_led/Open the config.h file in your favourite editor and change the REGION, DEVICE_EUI, APP_EUI, and APP_KEY to the values shown in the Network Console. The code is expecting the (default) string format, without spaces between the hexadecimal digits, rather than the byte array representation.
#define LORAWAN_REGION LORAMAC_REGION_EU868
#define LORAWAN_DEVICE_EUI "Insert your Device EUI"
#define LORAWAN_APP_EUI "Insert your Application EUI"
#define LORAWAN_APP_KEY "Insert your App Key"
#define LORAWAN_CHANNEL_MASK NULL
I’m located in the United Kingdom, with my LoRa radio broadcasting at 868MHz, so I’m going to set my region to LORAMAC_REGION_EU868. If you’re in the United States you’re using 915MHz, so need to set your region to LORAMAC_REGION_US915.
Then after you’ve edited the config.h file you can go ahead and build the example applications.
$ cd ../..
$ mkdir build
$ cd build
$ cmake ..
$ make
If everything goes well you should have a UF2 file in build/examples/otaa_temperature_led/ called pico_lorawan_otaa_temperature_led.uf2. You can now load this UF2 file onto your Pico in the normal way.
Grab your Raspberry Pi Pico board and a micro USB cable. Plug the cable into your Raspberry Pi or laptop, then press and hold the BOOTSEL button on your Pico while you plug the other end of the micro USB cable into the board. Then release the button after the board is plugged in.
A disk volume called RPI-RP2 should pop up on your desktop. Double-click to open it, and then drag and drop the UF2 file into it. If you’re having problems, see Chapter 4 of our Getting Started guide for more information.
Your Pico is now running your LoRaWAN application, and if you want to you should be able to see some debugging information by opening a USB Serial connection to your Pico. Open a Terminal window and start minicom.
$ minicom -D /dev/ttyACM0Sending data
However, you’ll need to turn to the Network console to see the real information. You should see an initial join message, followed by a number of frames. Each frame represents a temperature measurement sent by your Pico via LoRaWAN and the Gateway to The Things Network application.
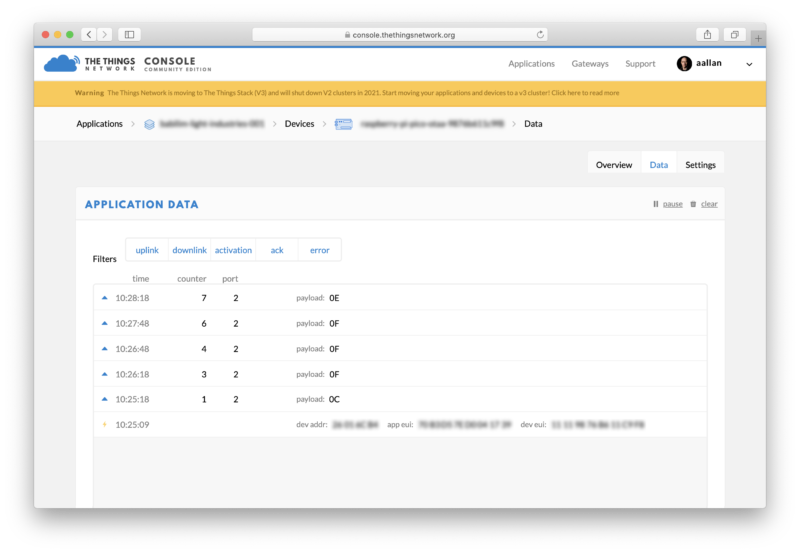
The payload value is the temperature measured by the Raspberry Pi Pico’s internal temperature sensor in hexadecimal. It’s a bit outside the scope of this article, but you can now add a decoder and integrations that allow you decode the data from hexadecimal into human-readable data and then, amongst various other options, save it to a database. To illustrate the power of what you can do here, go to the “Payload Formats” tab of your application and enter the following Javascript in the “decoder” box,
function Decoder(bytes, port) { var decoded = {}; decoded.temp = bytes[0]; return decoded;
}
then scroll down and hit the green “save payload functions” button.
Returning to the “Data” tab you should see that the payload, in hexidecimal, is now post-pended with the temperature in Celcius. Our simple decoder has taken our payload and translated it back into a Javascript object.
Sending commands
As well as sending temperature data, the example application will also let you toggle the LED on your Raspberry Pi Pico directly from The Things Network console.
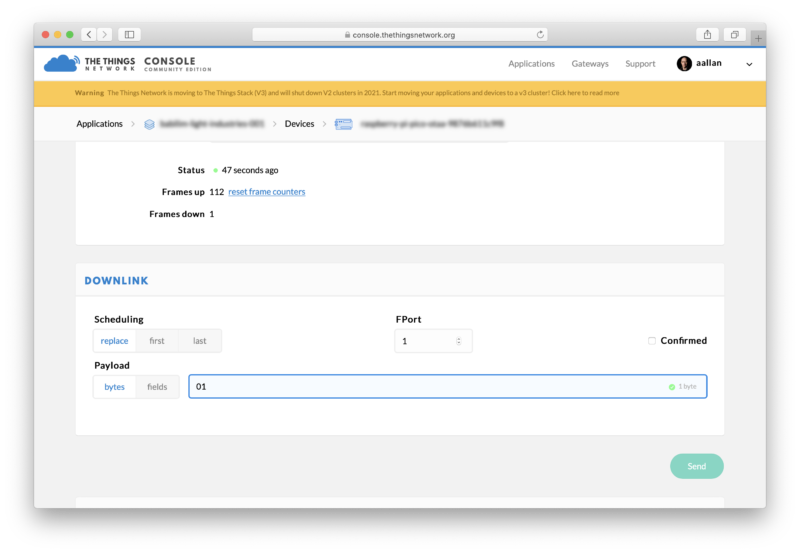
Go to the Device page in the Network Console and type “01” into the Downlink Payload box, and hit the “Send” button. Then flip to the Data tab. You should see a “Download scheduled” line, and if you continue to watch you should see the byte downlinked. When that happens the on-board LED on your Raspberry Pi Pico should turn on! Returning to the Network Console and typing “00” into the Payload box will (eventually) turn the Pico’s LED off.
Remember that LoRaWAN is long-range, but low-bandwidth. You shouldn’t expect an instant response to a downlinked command.
Where now?
The OTAA example application is a really nice skeleton for you to build on that will let you take data and send it to the cloud over LoRa, as well as send commands back from the cloud to your LoRa-enabled Pico.
There will be more discussion around the Things Network and a live demo of LoRaWAN from a Raspberry Pi Pico during this week’s Arm Innovation Coffee at 10:00 PDT (18:00 BST) this Thursday (29 April).
Wrapping up
Support for developing for Pico can be found on the Raspberry Pi forums. There is also an (unofficial) Discord server where a lot of people active in the community seem to be hanging out. Feedback on the documentation should be posted as an Issue to the pico-feedback repository on GitHub, or directly to the relevant repository it concerns.
All of the documentation, along with lots of other help and links, can be found on the Getting Started page. If you lose track of where that is in the future, you can always find it from your Pico: to access the page, just press and hold the BOOTSEL button on your Pico, plug it into your laptop or Raspberry Pi, then release the button. Go ahead and open the RPI-RP2 volume, and then click on the INDEX.HTM file.
That will always take you to the Getting Started page.
Website: LINK