The past few months have given us ample opportunity to stare at the creatures that reside outside. In issue 33 of Hackspace Magazine, out today, Rosie Hattersley looks at ways to track them.

It’s been a remarkable spring and early summer, and not just because many of us have had more time than usual to be able to appreciate our surroundings. The weather has been mild, the skies clear, and pollution levels low. As a result, it ought to be a bumper year for plants and wildlife. Unfortunately, the lockdown limited opportunities for embracing unexpectedly good weather while simultaneously making us more aware of the wildlife on our doorsteps.
“It’s a great time to take a fresh look at the world around us”
If you’re the outdoorsy type who likes to get out and stare intently at feathered friends from the comfort of a large shed on the edge of a lagoon, you may have spent the past few months getting to know suburban birds during your exercise walks, rather than ticking off unusual species. As things finally open up, it’s a great time to take a fresh look at the world around us, and some of the projects focused on the creatures we share it with.

Make your own nature cam
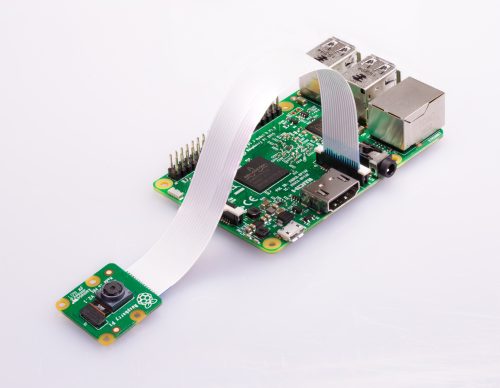
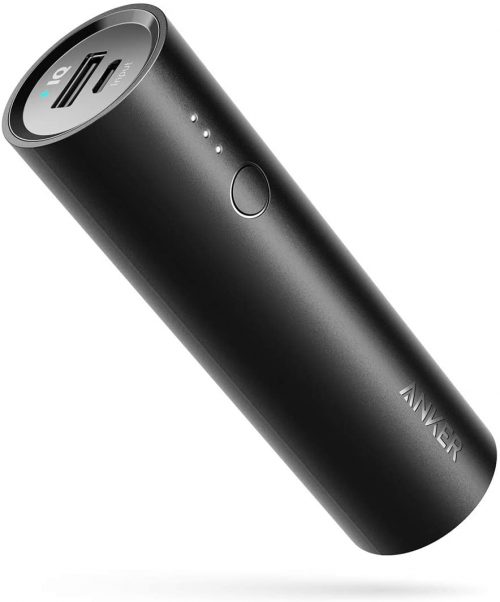
Equipped with a Raspberry Pi connected to a camera and USB power bank, we are able to spy on the wildlife in our garden. The Raspberry Pi Camera Module V2 is a good option here (it’s less intrusive than the newer High Quality Camera, though that would make a superb critter-cam). It’s important not to disturb wildlife with lighting, so use an infrared module, such as the NoIR Camera Module, if you want to snap evening or night-time wildlife activity. Connect the Camera Module to the Camera port on Raspberry Pi using the cable provided, then gently pull up the edges of the port’s plastic clip and insert the ribbon cable. Push the clip back into place and the Camera Module will remain attached. Try our ‘Getting started with the Raspberry Pi Camera Module‘.
Set up your Raspberry Pi and let it perform any OS updates needed. (The Raspberry Pi Imager tool can help)
You’ll need a keyboard and mouse to set up the Raspberry Pi, but you can disconnect them at the end. Insert the updated microSD card and use a regular power supply to start it up (keep your power bank on charge separately while you set things up). Go through the Raspberry Pi setup, making sure you change the default password (since it will be accessible to anyone), and connect to your wireless network. It helps if you can access this network from the garden.
Turn on the interface for the camera, and enable SSH and VNC so you can access Raspberry Pi OS remotely when it’s sitting out in the garden. To do this, open Menu > Preferences > Raspberry Pi Configuration and click on Interface, then set Camera, SSH, and VNC to Enabled (see this documentation). Click Yes when advised that a reboot is needed.
Next, test the camera. Open a terminal window and enter:
raspistill -o Desktop/image.jpgA preview window will appear. After a few moments, it will save an image to the Desktop. Double-click the image.jpg file to open it.
You can use Python to take pictures and shoot video. This is handy if you want to create a time-lapse or video camera. This Raspberry Pi Project guide explains how to control the camera with Python.
Note that recording video will quickly fill up your storage space and drain the battery. A better idea is to leave the preview running and use VNC to view the camera remotely. A neater option is to hook up your Raspberry Pi to YouTube (as explained in this Raspberry Pi infrared bird-box project).
Open a web page and go to studio.youtube.com. Sign in, or set up a YouTube account. You will need to enable permission to live-stream. This involves providing YouTube with your phone number. Click Settings, Channel, and ‘Feature eligibility’, expand ‘Features that require phone verification’, and click ‘Verify phone number’. Type in your phone number, then enter the code that YouTube sends you as a text message. For security reasons, it will take 24 hours for YouTube to activate this feature on your account.
Get your key and add to terminal
On the left-hand side of the screen you should see a menu with the My Channel option available:
In the middle of the screen you should see the Video Manager option. On the left you should see a Live Streaming option. Look for and select the ‘Stream now BETA’ option.
Scroll down to the bottom of the page and you should see the ENCODER SETUP option.
Here there is a Server URL and a Stream name/key. The key is shown as a line of asterisks, until you click the Reveal button. Keep the key secret and don’t share it online. Copy your Stream Key to a text document (password-protect it, ideally).
Open a terminal window and enter this command (replacing <key goes here> with your own key:
raspivid -o - -t 0 -w 1280 -h 720 -fps 25 -b 4000000 -g 50 | ffmpeg -re -ar 44100 -ac 2 -acodec pcm_s16le -f s16le -ac 2 -i /dev/zero -f h264 -i - -vcodec copy -acodec aac -ab 128k -g 50 -strict experimental -f flv rtmp://a.rtmp.youtube.com/live2/<key goes here>With this running on Raspberry Pi, you can view the stream from your camera on YouTube on any computer. This infrared bird-box project explains more about the command options.
You’ll want this script to execute on startup. Create a file for your startup script and add the aforementioned raspivid stream command to it:
sudo nano /etc/init.d/superscriptMake the script executable:
sudo chmod 755 /etc/init.d/superscriptAnd register the script to run at startup:
sudo update-rc.d superscript defaultsYou can see details of scripts running at startup here.
Shut down Raspberry Pi and fit the computer and Camera Module inside a case (if you are using one). Position Raspberry Pi in your garden and power it with the USB power bank. It will connect to your wireless network, and run the YouTube streaming key.
Navigate to your channel on YouTube at any time to see the action taking place in your garden.
Get HackSpace magazine issue 33 — out today
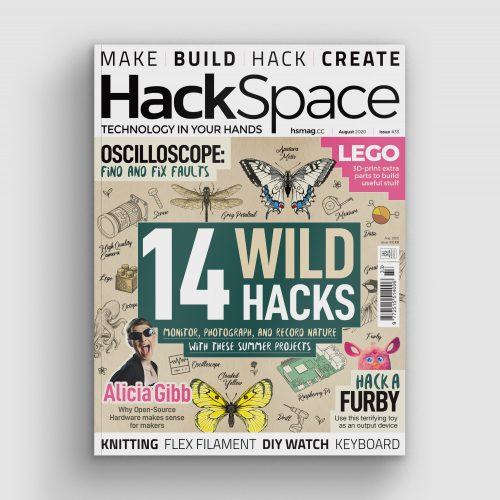
HackSpace magazine is out now, available in print from the Raspberry Pi Press online store, your local newsagents, and the Raspberry Pi Store, Cambridge.
You can also download the directly from PDF from the HackSpace magazine website.
Subscribers to HackSpace for 12 months to get a free Adafruit Circuit Playground, or choose from one of our other subscription offers, including this amazing limited-time offer of three issues and a book for only £10!
Website: LINK