Want to catch up on the latest news and updates, get answers from Twitch Developer experts, just say hi, or make some new friends? Join any or all of our live streams!
New show announcement!
TwitchDev Weekly: Every Thursday at 11am PT
Hang out with the Developer Advocacy team, Matt Auerbach and Jon Bulava, every Thursday at 11am PT to ask your Twitch developer questions! We also use this time for special guests and demonstrating new technical content aimed at helping you get started developing on Twitch faster and easier.
Monthly Developer Update: Every 3rd Tuesday at 10am PT
Every third Tuesday of the month, we do an hour-long show catching you up on product announcements and updates, upcoming events, community shoutouts, and anything else going on in the Twitch Developer world.
$ npm start twitchdev-aws: Every Wednesday at 10am PT
Twitch Developer Advocacy is partnering with Amazon Web Services (AWS) Technical Evangelism to build a Question & Answer Twitch Extension using AWS services during a multi-episode broadcasting series. The series will contain eight broadcasts and walk you through the process of planning to launching a production Extension. The first episode with air on February 27 at 10am PT from the Twitch Studio in San Francisco!
We even have special guest streams like this one, where Jeff Fritz, Program Manager for Microsoft and prolific live coder on Twitch, discussed live streaming software development best practices.
Check it out now!
While we try to maintain the same schedule, some weeks and months are different, so visit our Events page to see what’s coming up and follow our channel for notifications for when we go live!
Back in March 2017, PogDroid was maintained by a very small team of engineers, and covered the most basic functionality of Twitch: browse and watch a stream with Chat.
Old PogDroid, before the big makeover
Mobile, and Android in particular, was getting more and more users, and the company decided it was time for a serious investment in PogDroid. The plan was to give the app a fresh new look, and build up some important features that were missing. The team grew only a little bit, but were tasked to take on this big project.
As with most apps maintained by a very small team, the code structure was a mess. It became clear that such a big redesign compounded with adding new features could not be built cleanly on top of the current foundation. There was no common pattern to build screens, not a single unit test, and a lot of core classes were more than 3,000 lines of code long, with very complex state management, handling everything from network requests to UI rendering.
We all agreed that in order to make PogDroid what we were dreaming of, we first needed to rethink its foundations.
Step 1: Agree on a common architecture pattern
The first thing we did is come up with a common design pattern to build features and screens. We wanted this design pattern to be:
easy to understand
hard to get wrong
flexible enough to be applied to any feature or screen
easy to unit test
We quickly settled on a straightforward MVP pattern that looks like this:
With these layers in mind, it became easy to categorize the type of classes we needed for every feature:
Typical classes living in the Data Layer:
API
Repository
Models
Typical classes living in the Presentation Layer:
Presenter
Tracker
Typical classes living in the View layer:
AdapterBinder (wrapper that manages our RecyclerView adapter)
ViewDelegate (wrapper that inflates and holds our actual Android views)
With this design pattern and injected dependencies (manually, with static create methods for now), writing unit tests for the data and presentation layer became extremely easy, removing any excuse for not testing your code.
The team quickly adopted the pattern and started rewriting all our main screens in this fashion, adding unit tests in the process! It was also easy to onboard new team members to write consistent code with the rest of codebase.
Having a common pattern that everybody agreed on really accelerated the pace of development of new features and screens, and the team got really good at it. In only three months, we had completed the redesign of the app along with big new features, with around 70 percent of our main screens rewritten from scratch, and about 15 percent unit test code coverage. By this point, the team had tripled, but was still quite small.
Nothing makes us happier than seeing your Chat flooded with custom emotes for your community. In fact, we love it so much, we’re making it even easier to unlock them.
Starting today, we’re adding more emote slots to help Affiliates and Partners provide even more benefits to your community and subscribers, and help express what’s unique about your community by nurturing a shared language.
Here’s what’s changing:
AFFILIATE EMOTE UPDATE
We launched the Affiliate program with one emote slot for each subscription tier and we’ve heard consistently that you wanted more emotes. So we’re doing something about it.
Beginning today and rolling out over the next four months, Affiliates can unlock up to five Tier 1 emotes, with one additional emote each for Tier 2 (up to six total) and Tier 3 (up to seven total) subscribers.
You can unlock these additional emote slots by reaching different Subscriber point thresholds. If your Subscriber Point total has decreased over time, fear not. We will calculate your available emote slots by using your maximum Subscriber Point total.
When you meet the threshold over the next few months, we will review new emotes as you submit them.
Stay tuned to @TwitchSupport for exact rollout times for the additional emote slots in March, April, and May.
PARTNER EMOTE UPDATE
We’re also helping Partners provide even more benefits as your communities grow.
Previously, Partners were granted two Tier 1 emotes when they achieved Partner status. Beginning today, we are increasing that number from two to six. That means Partners with 0–64 Subscriber Points will automatically unlock six emote slots. Emote thresholds for 65+ Subscriber Points are unchanged.
Coming right off the best TwitchCon ever in San Jose, we knew it would take something big to make this year’s event ever better. So we went straight to our most powerful and trusted source of information: all of you.
Every year, we survey thousands of TwitchCon attendees about what you liked and what we could work on for next time. And as it turns out, Twitch really loved San Diego, so we’re going back for round two. On September 27–29, join us in the San Diego Convention Center for a TwitchCon 2019 that’ll make TwitchCon 2016 look like an opening act.
San Diego, CA is the perfect city to cover in purple. The convention center is located in San Diego’s beautiful Marina district, and right next to the Gaslamp Quarter — a lively neighborhood with affordable hotels and great food. Did we mention incredible weather? Plus, the Anchorman jokes are just too easy, even if that movie is now 15 years old… :NotLikeThis:
We’re bringing all the good stuff you love about Twitch to life over one unforgettable weekend. You can meet and hang out with with your favorite streamers from chat. You can bond over esports, board games, or new games to play. You can learn how to start streaming or demo new features to try on your own channel. The whole community is invited, and we’d love for you to join us.
If you can’t make it to California, no worries, we’re still streaming the keynote, panels, and much more on Twitch. And there’s plenty of room for everyone in chat.
As we get closer to September, we’ll have plenty to share about the Call for Content, confirmed speakers and activities, ticket sales, and more The best ways to stay informed are to sign up for our newsletter on twitchcon.com and to follow us @TwitchCon on Twitter. If you already know you’re down to attend, we’ve also secured some early deals on hotels that you can book right now. Stay tuned for more soon!
Looking for loot? You’ve come to the right place. Here’s a taste of what Twitch Prime members will be receiving just for being members throughout February.
Apex Legends
Heard about the next evolution in battle royale, Apex Legends? Well, we have a surprise for you! Starting today, Twitch Prime members will have access to an EXCLUSIVE Pathfinder skin and 5 Apex Packs!
For the first time, get exclusive bonus loot in MapleStory 2 with Twitch Prime!
Coming soon, link your Nexon and Twitch Prime accounts to claim some exclusive items in MapleStory 2, including a Flying Fan flying mount, White Rabbit outfit, Tamed Lil Boogie ground mount, and seven days of MapleStory 2 Premium Club!
Vainglory
Coming soon, Twitch Prime members will be able to unlock 6 heroes & 2 emojis to celebrate Vainglory cross-platform launch!
Keep an eye out for other loot coming soon in League of Legends, Neverwinter, The Grand Tour Game and more!
Be sure to follow us on Twitter @TwitchPrime to stay updated on all the in-game loot available to Twitch Prime members and where you can find your favorite streamers checking it out.
And if you missed our recent releases, don’t forget to check out the other exciting offers we have available to Twitch Prime members:
NBA 2K19
For a limited time in NBA 2K19, Twitch Prime members can up their game with 25,000 Virtual Currency and 5 MyTEAM Packs!
Neverwinter Mottled Rage Drake Bundle
Get the Neverwinter Mottled Rage Drake Bundle starting today with your Twitch Prime membership! Bundle includes:
Mottled Rage Drake Mount
30 days in-game VIP
3x Epic Insignia Choice Pack
Rank 13 Enchantment Choice Pack
RuneScape
Twitch Prime members can get a free 14-day RuneScape and Old School RuneScape membership along with exclusive loot:
Exclusive Amara Outfit
Exclusive Chinchompa Plushie
2 Umbral Chests (guaranteed super-rare prizes)
15 Treasure Hunter Keys
40 Hearts of Ice
200 RuneCoins
FINAL FANTASY XIV Online Starter Edition
Get the PC version of the FINAL FANTASY® XIV Online Starter Edition free with your Twitch Prime membership until May 3 and begin your journey as the Warrior of Light!
Warframe
Twitch Prime members can get Trinity Prime, Vectis Prime, Fang Prime, an exclusive Prime Sugatra, and the exclusive Spektaka Prime Syandana for free!
Free Games with Prime
March into February with this month’s Free Games with Prime
We’re two months into the new year and that means more Free Games with Prime. In February, Twitch Prime members can claim and play these games:
· The Flame in the Flood A rogue-like river journey through the backwaters of a forgotten post-societal America. Forage, craft, evade predators. From the mind of the Art Director of BioShock and a team of game industry veterans from BioShock, Halo, Guitar Hero, and The Rock Band series comes The Flame in the Flood.
· Dear, Esther Dear Esther immerses you in a stunningly realized world, a remote and desolate island somewhere in the outer Hebrides. As you step forwards, a voice begins to read fragments of a letter: ‘Dear Esther…’ — and so begins a journey through one of the most original first-person games of recent years.
· Downwell Downwell is a curious game about a young person venturing down a well in search of untold treasures with only his Gunboots to protect him.
· Draknek & Co Puzzle Collection Includes 3 challenging puzzle games: Sokobond, A Good Snowman Is Hard To Build, and Cosmic Express.
Sokobond is an elegantly designed puzzle game about chemistry.
A Good Snowman Is Hard To Build is an adorable puzzle game about being a monster and making snowmen.
Cosmic Express is a puzzle game about planning the train route for the world’s most awkward space colony.
Once you claim a game, they’re yours to keep forever!
What is Twitch Prime?
Twitch Prime is a premium experience on Twitch that is included with Amazon Prime. Benefits include monthly games and in-game loot, a Twitch channel subscription every 30 days AND all the benefits of Amazon Prime. See all current Twitch Prime offers here.
Check out the full list of Amazon Prime benefits in: US, UK, Canada, Germany, France, Austria, Belgium, Italy and Spain. You can try it for free for 30 days right here, and when you do, you get all the Twitch Prime benefits instantly just by linking your Twitch account to your Amazon account.
What is the best 3D printer file format? Which format should you use? We explain and compare the four most common 3D printing file formats: STL, OBJ, AMF, and 3MF.
What is a 3D Printer File Format?
3D printers require a 3D file of an object
To print a three-dimensional object, a 3D printer needs a digital blueprint of the object. This is just a file that stores all the relevant data about the object such as geometry, color, texture, and materials. There are several file formats that can hold such data. These formats are known as 3D file formats. Examples include STL, COLLADA, OBJ, FBX, X3D, etc.
Not all 3D file formats are 3D printer file formats though.
3D printer file formats are a subset of 3D file formats that are used for 3D printing. Even though almost all 3D file formats can theoretically be used for 3D printing, only a few formats have emerged as go-to formats for 3D printing. This has happened for some historical, practical, and design reasons which we will discuss later.
The result is that only these formats have respectable support across the 3D printing toolchain and therefore, everyone ends up using them when they want to 3D print something. These common 3D printer file formats are respectively STL, OBJ, AMF, and 3MF.
Why does a 3D Printer File Format Matter?
Why should you care about those three letter extensions anyway? Does it make a difference?
We think it does for two reasons.
Reason #1: The File Format Decides What Information Goes to the 3D Printer
Your 3D printer file is the carrier of information from the CAD model to the printer. Not all 3D printer file formats can carry all kinds of information.
If you are primarily printing with a single material and in a single color, STL will do the job. But the moment you move to multicolor printing, you have to ditch STL because it is simply not capable of storing colors.
Color is just one aspect of 3D printing. There are plenty of other factors like materials and precision. Depending on your print job, you would have to select a 3D printer file format that is capable of transmitting the necessary information to the printer.
Reason #2: The 3D Printer File Formats and Tools are Tightly Coupled
Not all file formats are compatible with all the 3D printing software and hardware.
For example, the CAD software Blender supports importing and exporting STL files but has no support for the 3MF 3D printer file format. Should you want to use the 3MF format in the future (it has many features that you might want), you have to ditch Blender and move to another CAD software (like Solidworks) with the required capabilities. Not only does this cost you money, but also a lot of time for learning and adapting to a new tool.
This also holds for Slicers like Cura or Simplify3D.
Because of these two reasons, it’s a good thing to be informed about the different 3D printer file formats and their features, strength, weaknesses, applications, and compatibility.
But how to get informed? Well simply read on. We have covered everything you need to know about the different 3D printer file formats in the following sections.
3D Printer File Format #1: STL (The De-facto Standard)
Ask a lot of 3D printing professionals which format they use, and you will most likely get the same answer every time – “STL”.
As of today, STL is the undisputed champion among 3D printer file formats. STL’s history goes back to the invention of 3D printing itself. The first 3D printer was invented by Chuck Hull in 1987 at 3D Systems. The same guy was behind the STL file format.
Chuck Hull, the inventor of the first 3D printer, was also behind the STL file format
Ever since its invention, it has remained the de facto standard in the 3D printing industry. The format specification has remained the same for 30 years. In spite of its age and limitations, most 3D printing workflows today continue to use this format (and this format alone) because of the strong support it enjoys in every piece of software and hardware in the 3D printing toolchain.
STL 3D printer file format features in a nutshell
STL is one of the simplest open source file formats. It supports both ASCII (larger file size, human readable) and binary (smaller file size) encodings.
It can encode a 3D model’s geometry but has no support for storing any other interesting object properties. You cannot store information about colors, textures or materials.
Till recently, most 3D printers were only capable of printing models with a single material. Therefore, a file format that stores just geometry was sufficient.
In the last few years, multi-color 3D printing has rapidly gained traction. While it is still not mainstream, we believe it will be in a few years. STL files will be unusable with these printers.
STL also uses a very simple-minded approach called “tessellations” to store geometry. This has turned out to be both a boon and curse.
Tessellation is the process of tiling a surface with one or more geometric shapes such that there are no overlaps or gaps. If you have ever seen a tiled floor or wall, that is a good real-life example of tessellation.
The tiled wall and floor are simple real-life examples of tessellation
The STL 3D printer file format uses triangular tiles to cover the surface of a 3D model. The vertices and normals of these triangles are stored in the file to encode the geometry of the model.
Tessellations of a cube and a sphere with triangular facets
The fine triangular mesh is approximately encoding the surface geometry of this 3D model (source: i.materialize)
The triangles can be made arbitrarily small to approximate curved regions. However, the smaller the triangles, the larger the number of triangles required to cover the surface. Storing information about a large number of triangles can take a lot of space, leading to large file sizes. Therefore, precision comes at the cost of size in this 3D printer file format.
The perfect spherical surface on the left is approximated by tessellations. The figure on the right uses big triangles, resulting in a coarse model with small file size. The figure on the center uses smaller triangles and achieves a smoother approximation at the cost of a much larger file size (source: i.materialize)
As the fidelity of 3D printing reaches micron level accuracy, the large file sizes are soon going to be a big problem.
So why is STL 3D printer file format so popular?
There is no doubt that STL is a simple and old 3D printer file format. So why do people continue to use it?
The answer is: precisely because it’s old and simple. As the file format was used in the first-ever 3D printer (1987), it quickly became a 3D printing standard. Manufacturers other than 3D Systems adopted it too because it was the most rational choice back then.
The first commercial 3D printer, SLA-1, used the STL format
As almost all hardware manufacturers bet on this 3D printer file format, CAD software manufacturers had to follow to satisfy demand. Over two decades, almost every major CAD software has included Import and Export support for the STL format. The simplicity of the 3D printer file format helped in this process, as writing parsers for STL is quite easy.
Soon, STL became a ubiquitous part of every software and hardware component in the 3D printing toolchain. If a new 3D printing product appeared, STL would be the first format to be supported, ensuring that the product works well together with other parts of the workflow. This is still true today.
As the entire workflow became STL compatible, 3D printing enthusiasts and practitioners naturally started choosing STL over other formats which did not have equivalent support.
STL became the de facto standard for 3D printing. Most 3D printable models are also shared as STL on the internet. Scores of sophisticated supporting software, such as STL file repair tools, came into existence. The internet became flooded with documentation, Q & A, troubleshooting information, and tutorials related to the STL 3D printer file format.
All these factors are responsible for making STL such a successful format for 3D printing. People still overwhelmingly choose it for 3D printing today and we think that this trend would continue for at least five more years.
Shortcomings of the STL 3D printer file format
While enjoying the best support from manufacturers among 3D printer file formats, STL is a sorely outdated file format. It doesn’t help that the format hasn’t been updated a single time since its invention. The needs of 1987 are not the needs of 2017. Here are the shortcomings of the 3D printer file format that people complain about most loudly.
STL 3D printer file format stores a lot of redundant information
The easiest way to show this is via an example. Here is a comparison listing file size of the same model (~63,000 triangular faces) saves as different 3D file formats.
PLY (binary): 1.1M
X3DB (binary): 1.3M
OBJ (ASCII): 2M
PLY (ASCII): 2M
X3D (ASCII): 2.1M
VRML (ASCII): 2.7M
STL (binary): 3M
STL (ASCII): 11M
As you can see, STL is the most bloated format in the list. This happens because STL stores the normals to the triangles (even though this is redundant information). When the normals are not available, it insists on a default (0, 0, 0) value, which also unnecessarily takes up space.
STL 3D printer file format is slow and error-prone
In spite of being the most bloated format, STL actually stores less information than its counterparts! It does not store information about the connectivity of the triangular faces tiling the surface. Without connectivity, the file essentially represents a bunch of triangles floating in space, also referred to as “triangle soup”. Software that read STL files typically has to guess or compute connectivity information. This step is slow and error-prone.
STL 3D printer file format has little or no checking mechanism for watertight geometry
Anyone who has used STL files knows that there is no guarantee if a file will print properly. 3D printing requires watertight geometry, but many STL files have holes or overlapping triangles. The 3D printer file format does not enforce many checks on the geometry, so people have to resort to STL repair software to check and repair it manually.
This STL file, for example, does not have a closed geometry. You need to repair it first to be able to 3D print it.
STL 3D printer file format is incapable of storing color, material and texture information
Many 3D printers are now capable of printing multicolor objects with graded material compositions. However, STL files cannot encode any information other than geometry. So STL is utterly unusable with these advanced printers.
STL 3D printer file format doesn’t contain scale information
In STL, there is no field for storing the units used in the model. It could be mm, cm, inches or feet for all you know.
Where to get STL downloads, readers and repair software?
One of the strengths of the STL 3D printer file format is that there is no dearth of downloadable models and supporting software. If you are interested in playing with STL files, the following STL resources may interest you.
Downloads
Thingiverse is the biggest repository of STL files
There are many repositories, marketplaces and search engines on the web containing literally millions of free STL files. Thingiverse is probably the largest STL file repository on the internet – so check it out. You can also refer to our regularly updated list: 33 Best Sites for Free STL Files & 3D Printer Models in 2019.
Because the format is open, there is nothing to prevent you from changing the contents of a file using a software like FreeCAD.
There are several programs which can help with repairing a broken STL file. For example, Netfabb is a great tool for repairing the most common STL file problems.
3D Printer File Format #2: OBJ (The 2nd Most Widely-Used)
Since the STL 3D printer file format cannot store color information, the OBJ format is the preferred 3D printer file format for multicolor printing.
The OBJ Format is the Dominant Multicolor 3D Printing Format
The OBJ 3D printer file format was originally used by 3D graphics designers as a neutral interchange format for 3D graphics. It was later adopted by the 3D printing community when 3D printers got the capability of printing in multiple colors and materials.
OBJ is not the only 3D graphics format that was suited for the job though. FBX and COLLADA were worthy candidates. So why did the community adopt OBJ instead of the other 3D graphics file formats?
The two factors that worked in the favor of the OBJ 3D printer file format are its open source license and simplicity.
This meant that it was way easier for CAD manufacturers to write consistent parsers for importing and exporting OBJ files than for its closest competitor FBX (proprietary format) or COLLADA (complicated specification). As a result, it emerged as the winning candidate for multicolor printing.
OBJ 3D printer file format features in a nutshell
The OBJ 3D printer file format is an open source specification. The 3D printer file format supports both ASCII (human readable, larger file size) and binary (smaller file size) encodings.
OBJ files can encode a 3D model’s geometry along with information about color, materials, and textures.
It offers a lot of flexibility in how it encodes geometry. You can use tessellations with polygons to cover the object surface (just like STL), which means that, once again, you have to strike a balance between file size and precision
But if you wish, you can also use more advanced schemes like free-form curves and free-form surfaces. These schemes are able to encode a curved geometry faithfully without losing any information. In addition to being precise, they lead to far smaller files compared to the more basic methods.
Freeform Curve on a 3D Model Surface
NURBS Surface
The OBJ 3D printer file format also lets you store color and texture information in a companion file format called the Material Template Library (MTL) format. It has the file extension MTL. The .OBJ file, when paired with the corresponding MTL file, can render a multicolor textured model.
You can encode colors and textures in an OBJ file
MTL files can define material properties like ambient color, diffuse color, specular color, transparency etc.
In addition to supporting these material properties, the MTL format also supports texture maps, which is a more convenient method of specifying colors and textures. In texture mapping, every point in the 3D model’s surface (or the polygonal mesh) is mapped to a 2-dimensional image. The coordinates of the 2D image have attributes like color and texture. When rendering the 3D model, every surface point is assigned a coordinate in this 2-dimensional image. The vertices of the mesh are mapped first. The other points are then assigned coordinates by interpolating between the coordinates of the vertices.
Illustration of how texture mapping is used to encode color and texture information of one side of a cube
Who uses the OBJ 3D printer file format and why?
If the STL 3D printer file format supported color, texture, and material related information, then people would most likely stick to STL and there wouldn’t be any need for using the OBJ format.
But, as it turns out, it can’t. So with the advent of multicolor 3D printing, people had to find a worthy alternative. The alternative turned out to be OBJ.
With time, it has gained decent support across the 3D printing toolchain (CAD and Slicers), though not as much as the STL 3D printer file format.
The OBJ 3D printer file format is also widely used in industries which are unforgiving when it comes to precision, such as the aerospace and automotive industries. As we discussed before, this format can encode geometry faithfully using free-form surfaces and curves without sacrificing file size. The STL 3D printer file format can’t do that. Therefore, precision engineering disciplines use the OBJ format for high precision 3D printing.
3D modeling in the area of aeronautics engineering requires precise encoding of surface geometry.
Shortcomings of the OBJ 3D printer file format
The biggest problem with the OBJ 3D printer file format is that it is much more complicated than the STL format, and repairing a broken OBJ file can sometimes give you a headache. There’s not a lot of great online tools for editing and repairing OBJ file, which compounds the problem.
Another common frustration is the fact that OBJ files come in pairs (a .OBJ file along with a .MTL file). In companies where the progression from design to printing involves hundreds of people, the MTL files often get lost or separated from its parent OBJ file, leading to a lot of confusion.
The OBJ 3D printer file format also isn’t supported as much as the STL format. For example, you might have to use plugins to export OBJ files with Solidworks. So before you start using the OBJ format, make sure your setup supports it.
Where to get OBJ downloads, readers and repair software?
So where should you go if you want to download, read or repair OBJ files? Here’s a rundown:
Blender and many other CAD software can open OBJ files
Fortunately, opening an OBJ file is not too complicated. Most CAD software will be able to open an OBJ file and let you view it. In particular, you can try Solidworks, Fusion 360, Blender, Rhino, Cinema4D, and Unity. You can also view OBJ files online without the hassle of downloading and installing software on your machine. Autodesk360Viewer, 3DViewerOnline, 3D-Tool are online 3D model viewers that support the OBJ 3D printer file format.
Repairing OBJ files
Netfabb and many other software can repair OBJ files
There are some programs which can help with repairing a broken OBJ file. For example, Netfabb Basic, Meshmixer and Meshlab are all great tools for repairing the most common OBJ file problems.
The AMF 3D printer file format was introduced in 2011 as a replacement for the STL file format. At the time it was dubbed “STL 2.0”. The aim was to address many of the shortcomings of the STL 3D printer file formats. As we already discussed, STL is bloated, slow, error-prone and incapable of storing color, material and texture information.
To fix these issues, the ASTM was tasked to come up with a modern file format native to additive manufacturing. They eventually came up with the AMF 3D printer file format. It is an XML based format with native support for geometry, scale, color, materials, lattices, duplicates, and orientation. In all technical aspects, it is superior to the STL file format.
That’s awesome, right? Or is it?
The bad news is that the 3D printing industry has been rather slow to adopt the AMF format, in spite of its technical superiority. In the meantime, Microsoft came up with the 3MF format, which also aims to be an alternative to the STL 3D printer file format. They did things differently than the ASTM. Instead of keeping the development process to a select few experts, they set up a Consortium which includes many big names in the industry to govern the development and progress of the 3MF format. For a while, the industry was abuzz with excitement about this new file format.
While we know that the STL 3D printer file format will be replaced eventually, we don’t know if AMF or 3MF will be the one to do it.
We will come to the 3MF format soon. But before that, let’s look at the AMF 3D printer file format a little more deeply.
AMF 3D printer file format features in a nutshell
AMF addresses the issues in STL by using an XML format (human readable) with a hierarchy of five elements, object, material, texture, constellation, and metadata.
The XML formatting ensures that the file is easy to read, write and process.
It describes object surfaces with triangular meshes, just like STL. But there is one important difference. It allows curved triangles in addition to planar straight triangles – and it makes all the difference. Using curved triangles, you can describe a curved surface without using too many facets. This means that AMF can handle curved surfaces while staying lean on file size.
The AMF format uses curved triangles, which means precise encoding without sacrificing file size
It has support for all the modern requirements of 3D printing. RGBA colors, graded colors and texture mappings are supported. It can natively handle mixed and graded materials, sub-structures, microstructures, porous, and stochastic materials.
You can print dual material objects (like the one shown in the picture) using the AMF format
The “constellation” feature allows manufacturers to specify the relative pattern of the objects within the file. This allows multiple objects to be arranged within the file, specifying their location and orientation.
The AMF format allows you to put multiple objects in the same file using the constellation feature
But to ensure that all 3D printers, old and new, can work with an AMF file, it allows printers to pick and choose information necessary for its operation. For example, if a printer is only capable of working with one material, multi-material information is simply ignored. This capability applies for all elements including color, texture, and composition.
With the AMF 3D printer file format, you can specify the scale of the design in different units. The absence of this feature is a source of great frustration for STL users.
Finally, it has extensive metadata fields including name, author, company, description, volume, tolerances, and much more.
Shortcomings of the AMF 3D printer file format
There is no doubt that AMF is much better suited to modern 3D printing than STL. But the biggest problem with using AMF today is its limited adoption.
Some say that the 3D printer file format came out way too early. In 2011, the majority of manufacturers employed extrusion based processes which only used one material. They also didn’t produce full-color parts.
This meant that they were perfectly happy with STL’s limited capabilities. Okay, not perfectly happy. You can never be perfectly happy with the STL format. But the problems caused by STL didn’t provide enough justification to change the entire pipeline to support AMF.
As a result, adoption has been slow – very slow. The CAD software manufacturers didn’t help as they decided to wait until AMF reaches critical mass among equipment manufacturers.
As of today, Solidworks and the Autodesk suite supports it. Stratasys has also signaled its cooperation, even though they might move away and focus on 3MF as they are a part of the 3MF Consortium. Online 3D printing services like Shapeways and Materialize has started accepting AMF files too.
Among Slicers, Cura has support for AMF. Simplify3D still doesn’t.
Maybe if we wait a bit longer, this is no longer going to be a problem. But to work with AMF right now, you need to ensure that all the software and hardware in your toolchain are capable of working with it.
AMF became an ISO standard in 2013. It is widely held to have gone into a standards body too early as well, having some features not clearly defined and other features missing. Most importantly, they did not consult the main players in the 3D printing industry before turning it into an official standard- a mistake that has been capitalized on by its competitor, the 3MF format.
Where to download, read, and edit AMF files?
If you want to download AMF files directly, you are out of luck. There aren’t many AMF designs available for download on the internet. Users of AMF usually start with an STL file, import it as AMF and then add additional properties via an editor. The open source AMF Editor is perfect for this job, allowing users to import STL and edit the resulting AMF file.
3D Printer File Format #4: 3MF -(A new road forward)
Nice try, AMF. But the 3MF 3D printer file format might yet be the actual “STL killer”.
As we discussed, the biggest weakness of the AMF format wasn’t technology. The technology is great and solves most of the problems people have with STL. The real problem was adoption.
ASTM, the developers of the AMF standard, did not consult the key players in the 3D printing industry. Since they were not directly involved, the major brands were very slow in adopting the standard.
Microsoft, the creators of the 3MF 3D printer file format, did it differently. For a few years, they developed the 3MF 3D printer file format internally (alongside Windows 8 and 10 development) with the goal of creating a seamless, high-quality experience for 3D printing consumers and manufacturers.
Then they changed the game plan. In 2015, Microsoft announced the 3MF Consortium, a body that will govern further development and progress of the 3MF format. They included all the big names in 3D printing as founding members. Autodesk, Stratasys, Ultimaker, Materialize, Shapeways, 3D Systems, Dassault Systems, Siemens, HP, GE, you name it – they are all in there!
Founding members of the 3MF Consortium include all the big names in the 3D printing industry
Thus, for the first time, we have a modern 3D printing native file format that is ratified by all the important stakeholders. If this translates to accelerated adoption, then 3MF would have solved both the technical and adoption problem.
Not surprisingly, the 3MF 3D printer file format has been at the center of great publicity and buzz. If 3MF can solve the adoption problem faster than AMF (and it seems very likely that it will do so), it may easily become the next big 3D printer file format after STL.
3MF 3D printer file format features in a nutshell
Design goals
The 3MF format is loosely inspired by the AMF format. According to the 3MF Consortium, the design goals of the 3MF 3D printer file format are:
Complete: Containing all of the necessary model, material and property information in a single archive
Human readable: Using common structures such as OPC, ZIP, and XML to ease development
Simple: A short, clear specification, making development easy and validation fast
Extensible: Leveraging XML namespaces allow for both public and private extensions while maintaining compatibility
Unambiguous: Clear language and conformance tests ensure a file is always consistent from digital to physical
Free: Access to and implementation of the 3MF specification is and will always be free of royalties, patents and licensing
Features
3MF is an XML-based format. The 3MF consortium decided the benefits of human readability for ease of development outweighed the performance gain from going to a binary format.
It features geometry representation similar to STL (triangular meshes), but in a more compact and size-friendly format than AMF 3D printer file format. As an example of its space-saving features, multiple identical objects can be placed referencing the same mesh.
Duplicate objects do not take up any additional space in the 3MF file format
3MF ensures that the files are 100 % manifold with no cracks or overlapping triangles avoiding problems common in other formats standardized for animation and VR rather than 3D printing. The Holy Grail in 3D printing is having a ready-to-print file which requires no adjustment or fixing – and 3MF seems capable of doing just this.
Geometry problems may become a thing of the past with the 3MF format
Just like AMF, it can encode information about the model’s color, material, and textures.
The 3MF 3D printer file format also introduces the concept of a “single archive” or “3D payload”. The file defines all standard, optional, and mandatory parts, with complete model information contained in a single archive. The payload consists of a 3D model(s), core document properties, digital signatures, 3D print settings known as “PrintTicket”, thumbnail images of all models, and 3D texture information.
The goal is to make 3D printing as simple as document printing – select a printer from the list, choose options, and print.
The application converts the model to .3MF and encapsulates it in an OpenXPS package. It’s then extracted by the print driver, converted into a readable format, and sent to the 3D printer. The .3MF file not only solves Microsoft’s print pipeline but also provides the same advantages for everyone across the board.
Shortcomings of the 3MF 3D printer file format
The 3MF 3D printer file format is still in its infancy and therefore does not enjoy widespread adoption. But since all the companies that need to adopt the format are already in the 3MF Consortium, adoption seems to be just a matter of time. You can check the level of adoption anytime.
The biggest concern with the 3MF 3D printer file format is how free and open source it will be. Many people are skeptical because the format came from Microsoft. As we all know, Microsoft is notorious for its dubious and unfair business practices.
Concerns were raised over whether 3MF will become a proprietary Trojan horse for larger companies to monopolize and grind out competition or would it be released as open source? Would this open the door to DRM issues, resulting in 3MF derivatives that would be subject to lawsuits?
Fortunately, one of the design goals of the 3MF format says explicitly “Access to and implementation of the 3MF specification is and will always be free of royalties, patents and licensing”. Furthermore, Microsoft has made part of the code base available on GitHub. Anyone can contribute code to this repository.
You can also get free access to the 3D Printing SDK and 3MF 3D printer file format specifications anytime by contacting [email protected]
While 3MF has done many things right till now, doubts still remain over patent details and source code rights backed by a consortium of conglomerates
Where to download 3MF readers, writers and validators?
You can access the code that reads STL/OBJ/3MF files and writes 3MF files on GitHub. In addition, a web service to validate and repair 3MF files is available here. You can find much more on this 3D printer file format in the official 3MF website.
Other file formats used in 3D printing
Almost all 3D file formats can be theoretically used for 3D printing
So far, we have talked about the STL, OBJ, AMF and 3MF formats. These are the most important 3D printer file formats.
But as we mentioned earlier, you can theoretically use any 3D file format for 3D printing. And people do use all kinds of formats. VRML, X3D, FBX, IGES, STEP, you name it. They have all been used for 3D printing at some point or another.
But these file formats are not really made for 3D printing. So while a fringe continues to use them, they will most likely never see any critical adoption.
Formats like VRML, X3D, and FBX are not designed for manufacturing: they have a lot of information on rendering effects such as lighting and fog but are missing true material properties and their implementations are often inconsistent.
CAD formats like IGES and STEP are far too complicated. They include higher order representations like NURBS, which is not really necessary for 3D printing applications. As the AMF and 3MF formats have shown, all you need is triangles. IGES and STEP are also convoluted specifications and writing consistent parsers for import and export support is not so easy.
This is why even though you will hear about people using these formats for 3D printing, all you really need to know is the big four: STL, OBJ, AMF, and 3MF. At least until another 3D printer file format comes out.
Which 3D printer file format should you use?
We have discussed four major 3D printer file formats with different capabilities and adoption. So which one should you choose?
It depends. Every 3D printing manufacturer and consumer has different needs and technical debt. But here is a general guideline:
Choose STL 3D printer file format if
You want flexibility in terms of the software and hardware in your 3D printing pipeline. Almost any piece of software and hardware commonly used in 3D printing will support STL, so you will be able to use your favorite CAD programs, Slicers, and Repair tools without any problems.
You want to be able to download plenty and plenty of ready-to-use 3D models.
You require good documentation and support in case something goes really wrong.
Your 3D printer has limited printing precision and is the precision bottleneck in your pipeline. So you don’t care too much about precise representations of your CAD model.
Choose OBJ 3D printer file format if
You do multi-color 3D printing.
You want plenty of ready-to-use models available online.
You do high precision 3D printing where it is important to have a precise representation of your CAD model.
Choose AFM3D printer file format if
You want precision, multiple colors and multiple materials (including graded materials) all at once.
Choose 3MF3D printer file format if
You want plug and play 3D printing. You wonder why 3D printing is so complicated and you are frustrated that you can’t simply press print from the CAD interface to start printing.
You want to avoid frustrations related to bad geometry, model repair, and print failures.
Conclusion
At this point in time, STL, OBJ, AMF, and 3MF seem to be the most important 3D printer file formats. They all have their own strengths, weaknesses and have varying levels of compatibility with 3D printing software and hardware. STL is the predominant format, OBJ is preferred for multicolor printing, while formats like AMF and 3MF are trying to provide a more capable STL for modern 3D printing.
For 3D printing consumers and manufacturers, it is imperative to know and understand the key differences between these formats. Don’t forget: the choice of format affects your toolchain, production efficiency and the quality of your prints.
We hope this article helped you learn a bit more about your file format choices. If you found this article useful, share it with other 3D printing enthusiasts and spread the word. Do you have some questions or remarks? Let us know in the comments below!
Check out 2019 guide to 3D printed drones with resources, materials, and ideas. In fact, all you need to start 3D printing your own drone parts.
While it’s not yet common to fabricate electrical components like motors, sensors or even electronics – but watch this space – it’s entirely possible to 3D print drone parts like the frame, landing gear, and propellers. And these are usually the parts that break easily.
Have we piqued your interest? Read about the pros and cons of 3D printed drones, plus a guide to the best resources to be found online. Right here, you can jump to the topics directly:
Sections
3D Printed Drone Parts: Why You Should 3D Print Them
What‘s the benefit of 3D printed drone parts? If you’re not an experienced RC pilot, crashing and breaking parts of your aerial vehicle can be expensive. Instead of buying new parts at a hobby shop, you can 3D print your own spare parts as needed.
With your own 3D printer to hand, part designs can be easily upgraded and further developed to improve the performance of your quadcopter. On top of that, 3D printed drone parts are quickly interchangeable and you can do it yourself. You can even have the parts manufactured by a professional 3D printing service – if you want to get the best price for a special item, please consult Craftcloud – All3DP’s 3D Printing &Price Comparison Service.
Building your own RC vehicle out of 3D printed parts serves as a great opportunity to learn about how it works and how it reacts to modifications you make.
3D Printed Drone Parts: Things to Consider First
First, 3D printing takes time. It can take up to several hours to print a small sized part of sufficient quality.
Moreover, becoming an expert in 3D modeling and 3D printing requires skills you have to develop and practice. In the early stages, a beginner may experience frustration when designing the parts they need.
But don’t worry, there are plenty of tutorials online, plus websites where you can find. STL files of 3d printable drone parts which you can download and print without having to create them yourself.
Other than the above, there aren’t many reasons why you shouldn’t just go ahead and 3D print your own parts!
3D Printed Drone Parts: The Parts You Can 3D Print
The good thing is: You can 3D print almost every part of a drone except the electronic components. Here are some components:
Propellers
FrameLanding gear
Landing gear
Camera mounts
Antenna holder
Protective equipment (i.e. prop guards)
Remote casing
Battery pack casing
Even some commercial drone manufacturers are using 3D printing. For example, Southern Californian company Blue Robotics uses 3D printing for their submarine drones. Their creations are open source, the digital blueprints are available for everyone who wants a 3D printed drone.
3D Printed Drone Parts: The Best Resources
There are many resources online that not only offer 3D printed drone parts for existing makes and models but also instructions how to build your own 3D printed drone parts.
You’ll need to buy the electronic components in most cases, but a significant chunk of the parts can be fabricated on any 3D printer.
Resources for 3D Printed Drones:
Watch the amazing mechanism that moves the landing struts up when in mid-air (to lower the center of gravity) and down while landing… It’s a really sophisticated piece of design.
3D Printed Drone Parts: 3D Printing Accessories
Aside from vital components, there is a huge variety of extra things you can add to your quadcopter. There are functional accessories… and then less functional accessories.
One might make a flying Helicarrier from The Avengers movie out of their drone (which would be awesome). Others will stick to more practical applications like 3D printed propeller guards, cases for transportation and mounts for various cameras used on FPV drones (which is also awesome).
The possibilities are limited only by your imagination.
3D Printed Drone Accessories #1: Protect your Vehicle
Parts you can 3D print range from optional accessories to add-on protective equipment like prop guards. The latter are useful for small indoor quadcopters like the Hubsan X4 and gear protectors for the very popular Parrot AR versions.
Every part that will commonly bump into obstacles (including the ground) may need replacement at some point. If you 3D print drone spares, you won’t suffer from much downtime when this occurs.
3D Printed Drone Accessories #2: 3D Printed Drone Mounts
Of course, we’re not referring to mounting the drone onto something, that would be pointless. Rather, the idea is to mount accessories onto the drone.
And if you’re planning on getting started with FPV drone racing, 3D printed parts like a camera mount as well as mounts for the live video transmitter or maybe an additional antenna holder are highly useful.
If you want to know more, please consult this article.
3D Printed Drone Accessories #3: Boost the drone’s range with 3D Printed Parts
There are many ways you can come up with iterations of existing parts that may or may not improve your drone – and it’s fun to experiment for sure!
For different use cases, different designs will prove worthwhile. For the hobbyist that buys a fully assembled quadcopter (like the DJI Phantom or Inspire models), they’ll still appreciate a simple 3D printed range booster that, acting as a parabolic reflector with some metallic tape, will increase the range of the remote control threefold.
Elsewhere, the tech enthusiast that builds his own drone from scratch can improve the accuracy of his onboard electronics by eliminating general shakiness with a 3D Printed Anti Vibration Mount, which still conducts major movements that come from actual changes in flight.
3D Printed Drone Parts: The Best Materials
Choosing the right material is vital because every gram of weight will cost you flight time. Why? Because the heavier the drone, the faster the drain on the drone’s battery. At the same time, it would be foolish to try to navigate properly with a wobbly construction made from shoddy parts.
There are many “high-grade” 3D printing filaments available. They are sold as extra-strong and durable alternatives to the widely used PLA and ABS. You can also spend extra cash on some enhanced filament spools with carbon fiber. So, should you print in nylon, PET or rather use some exotic stuff you haven’t even heard of yet?
3D Printed Drone Parts – Material #1:PET/PETG
PET / PETG is stable and shockproof, but it requires a heated print bed, is relatively expensive, and quite heavy.
In conclusion, you can almost always print in PLA when you’re an absolute beginner and should transition to ABS when you’re ready for the big leagues. Advanced 3D printing and drone pros will also enjoy printing with Nylon.
3D Printed Drone Parts – Material #2:TPU/TPE
Because it is flexibel and absorbs vibrations.
3D Printed Drone Parts – Material #3: PLA
PLA is easy to work with, has no odor, and is cheap and widely available. However, it’s not UV or heat-resistant.
3D Printed Drone Parts – Material #4: ABS
ABS is tough and stable, lightweight, and has better temperature resistance. It’s also cheap and widely available. However, you need a heated print bed for optimal results, and there are the dreaded toxic fumes to consider.
3D Printed Drone Parts – Material #5:Nylon
Nylon has amazing strength and temperature resistance and is lightweight, but it’s tricky to print with.
If you want more information on filaments, please continue here.
TheBest 3D Printed Drones
Here’s a short collection of the best drones and quadcopters you can 3D print:
3D Printed Quadcopter #1: PIXXY (Pocket drone / FPV quad)
The Pixxy is of the smallest FPV miniature quadcopters you can build yourself. It only weighs 4 gram, can be easily stored and relatively easy to manufacture. You need some simple soldering skills, the parts widely available in common online hobby and toy shops. The cost for this 3D printed drone shouldn‘t exceed USD $100.
3D Printed Quadcopter #2: Hovership MHQ2 (Quadcopter)
Being one of the most popular designs of 3D printed drones, this redesigned MHQ2 folding mini quadcopter is built like a tank! Building on the success of the original MHQ frame, it offers improved functionality, durability, and stability of this frame.
This beauty of a 3D printed drone can go really fast: The Firefly is a fully featured racing quad with amazing flight characteristics. If you’re into DIY racing drones, this is one to consider.
3D Printed Quadcopter #4: Rey’s Speeder Bike (Quadcopter)
This is custom quadcopter inspired by Rey’s Speeder Bike from new Episode 7 Star Wars The Force Awakens trailer. This is one of the 3D printed drones that just look beautiful – but beware, there’s a lot of work to do until Rey takes off.
3D Printed Quadcopter #5: Foldable Brushed Microquad
It looks like a flying circuit board, right? Well, that’s pretty much what it is. This 3D printed drone is foldable to 83 x 58mm, consists of affordable components and is relatively easy to build, if you have some DIY experience.
Speedrunning is nothing new to the Twitch community; in fact, it’s a formula that complements the Twitch platform perfectly. If you’re not familiar with speedrunning, it’s where skilled gamers smash through levels in a battle against the clock while viewers get to watch the best-of-the-best gamers flex their chops. It’s a win-win for all involved.
Recently, with the help of an Extension built by Warp World, speedrunning has evolved. Some of the most successful Extensions take the viewing experience from somewhat passive to a new level of dynamic by enabling viewers to join in on the action — and that’s exactly what the Crowd Control Extension does for speedrunning.
When streamers have the Crowd Control Extension enabled, viewers can literally help (or hinder!) the game by dropping in a range of in-game items. For example, while playing The Legend of Zelda: A Link to the Past, viewers can gift armor, a heart, or Blue Potion refill to assist Link in a time of need.
The Crowd Control Extension allows you to drop in-game items while your favorite streamers are playing.
“The way we see it, audience interactivity is the future of speedrunning and game streaming, so we’re making sure that Crowd Control enables streamers to interact with and connect with their audiences in never-been-done ways,” says Matt (Jaku) Jakubowski, CEO of Warp World.
This might feel risky — to trust that the viewers’ actions will enhance the game versus derail it, so to keep the flow of incoming items manageable and fun for the streamer, viewers exchange Twitch Bits for Crowd Control Coins in order to unlock the different in-game effects. Items which carry a stronger effect on the game require more Coins, which effectively limits over usage.
The Extension adds a “new dimension” to the interaction between the streamers and their audience as well as to the games themselves. When the streamer is using Crowd Control they are no longer just playing the game, but rather playing alongside their community.
The Crowd Control Extension is integrated with a handful of retro speedrunning favorites, including Super Mario World and Zelda: A Link to the Past, but the Warp World team is working hard to get more games and platforms supported, both retro and modern titles.
In fact, today Jaku and team are announcing support for Pokemon Red & Blue in conjunction with a 3-day charity event for Direct Relief, a non-profit organization with a mission to improve the health and lives of people affected by poverty or emergencies. The Pokethon stream will be the first to showcase the Pokemon integration and will donate their 20% developer share of Bits received to Direct Relief. The GA release for Crowd Control Pokemon support will come immediately after their run.
Watch and support the Pokemon Red & Blue Direct Relief Charity event on https://pokethon.net/
Origin of Warp World
In October 2015, Jaku, CEO of Warp World, was streaming Super Mario Maker, a Mario spin-off which allows players to create and play their own custom Super Mario courses, share them online as well as download and play courses designed by other players, and realized there was not an easy and/or practical way to accept viewer levels via Chat. All “solutions” required users to go to another website, which may or may not have verification that the level they submitted was actually valid.
In turn, Jaku decided to create his own solution, Warp World, a service for streamers to accept Super Mario Maker-level requests from viewers in their Chat. It was geared toward solving multiple problems, but the primary goal was to provide a solution that was easy for both the streamer and viewer alike. It was quickly adopted and embraced by the Super Mario Maker community. It became an essential tool for the Super Mario Maker streamer community and that community is where Jaku recruited many early Warp World staff members like GrandPooBear, xwater and Chudbreeder.
As Jaku’s streaming community grew so did Warp World, but Jaku quickly realized that Warp World needed to expand outside of Super Mario Maker. So the development company started building other tools and services for streamers. At its core, Warp World is a company of streamers and developers. They use their knowledge and insights to bring unique tools and experiences to the Twitch community that you won’t find anywhere else.
Crowd Control IRL
As Crowd Control neared release, Jaku and team decided they wanted to showcase their closed Beta at an event, since at its core, the Extension was made for the crowd. They partnered with recognized Twitch streamers from the Randomizer, Retro and Speedrunning communities to showcase Crowd Control to their communities and viewers. It had an awesome reception, and it kept people hyped for the Open Beta.
Next, they hosted a “Live! from TwitchCon: Crowd Control Showcase” campaign with streamers at Warp World’s TwitchCon booth. Streamers were invited to demo a game on stream with the Extension active and people live at TwitchCon could interact with the game from the booth as well as the viewers who were watching back home.
That same weekend Crowd Control was featured at Mario Master’s Colosseum, a three-day marathon that raised over $100K for Direct Relief.
The Crowd Control Race Feature is still in the works, but they’ve already teamed up with communities like speed gaming and Super Mario World to showcase the feature on crowdfunding events.
“We’ve seen a huge amount of positive responses from viewers and streamers alike. The amount of game ideas, effect ideas, and overall feedback we have been given by users have been tremendous,” Jaku says.
To add icing on the cake, streamers have seen a significant increase in Twitch Bits used on their channel when the Extension is active. Warp World reported that in October 2017, the month they launched, over a million Bits passed through the Crowd Control Extension. This is core to the ongoing growth and momentum the Warp World is riding.
What’s Next?
The Warp World team is heads down focused on adding more games and new features to the Extension, having just shipped mobile compatibility which was a highly requested feature from launch. They are also actively in talks with certain members of game communities to help get more games supported as soon as possible. They have some big plans for some future Extensions on Twitch, because as Jaku says,
“We see them [Extensions] being a crucial part to the growth of the platform and our company in 2019. Our primary goal for this year is to work with new and interested developers to bring additional unique, Twitch game experiences and also see those games with a ‘Supports Crowd Control’ as a listed feature.”
The wait is over. It’s finally time to begin the 2019 Overwatch League season! Day 1 kicks off today at 4PM PST with a rematch of last year’s Grand Finals: the Philadelphia Fusion and London Spitfire, and it’s all going down on the /overwatchleague channel. Catch the action with a limited free trial of the newly updated Command Center.
Command Center is the best part of this year’s Overwatch League All-Access Pass — a feature The Verge called “a robust new spectating tool that should make matches much easier to understand.” Watch your way from the first-person perspective of any pro player, or from the POV of your favorite roles, or from a slew of viewing combinations. You can start your free trial of Command Center, lasting two full match days, directly from the Overwatch League channel.
2019 Passholders also get additional benefits, including 200 Overwatch League tokens, ad-free viewing, team-themed emotes, and more. The cheering has already begun in chat, so get yours now and start participating in solo and community challenges to unlock emotes, badges, and more.
Stage 1 — Week 1 matches are happening every day from Feb 14–17. Join us at /overwatchleague and we’ll see you in chat.
Roses, chocolates, and um, battle royales? Yes, Valentine’s Day is almost here and we’re spreading the love all over Twitch.
Join us on February 14th as we highlight streamers on the Twitch front page who have found love on Twitch or helped others do the same. I’m not crying, you’re crying.
Here’s the full Valentine’s schedule:
Awkwards_Travel 5–7am PT
Follow along with Tallulah and Gaspard as they take you with them across the world for a look into the lives of full-time travelers. Always surrounded by a good time, you definitely don’t want to miss the lovely shenanigans these two get into.
ortoPilot 11 am-2 pm PT
Having helped two of his viewers with a proposal during a stream, we could consider Ortopilot our own Twitch cupid. With his trademark sultry voice, he’s here to bring in Valentine’s Day the only way he knows how, by singing. Stop by and experience the musical experience that is Ortopilot.
Geoff 2–4 pm PT
Proposing in a game of Super Monkey Ball 2 isn’t easy, but Geoff managed to pull it off and bring us to tears as MissKaddyKins was taken surprise by his proposal. Come check out the lovely couple as they show the world what kind of love they have to give.
Kickole 6–8 pm PT
Love comes in all forms and Kickole fell in love all over again when her partner proposed in the cutest way possible, with video games! Come watch this lovely duo show you what true love looks like on Twitch.
BizSnes 8–10 pm PT
Being turned into a living video game console can be pretty rough, but with someone by your side it’s a whole lot better. BizSnes showed us what love really is with his beautiful proposal and he’s here to show you that despite his plastic exterior, there really is a heart of gold inside.
JOEYKAOTYK 10 pm — 2 am PT
Traveling the world can be quite the adventure, but with JOEYKAOTYK’s travel streams you’re in for a truly special treat. After proposing to his girlfriend live to his audience, the two have been happy seeing the world together and taking you all along for the ride.
The Twitch Developer team is coming to meet our community of developers and builders across the world this year!
We will kick off the tour in Tel Aviv this April and join the rest of the Twitch community in Berlin during TwitchCon Europe. Then we head to Paris and London — with more cities around the globe being announced soon.
Come learn about why working with Twitch and Twitch technologies like Extensions, Drops, and Twitch Prime make sense for your game, and see how building streamer tools help engage the streamer and viewer communities on Twitch. These technologies are a fundamental part of engaging the Twitch community and creating unique interactive experiences.
You can also meet with the TwitchDev team, share your ideas, give feedback on the product roadmap, and connect with your local Twitch Developer community.
In each city, you will also have the opportunity to hear from special guests and local partners who will dive into what Twitch brings to the table for the entire community.
Spots are limited — secure yours now.
Upcoming Events
Click to learn more and reserve your ticket today.
If there’s one thing Twitch loves almost as much as gaming, it’s anime. And also arguing about anime. That’s why we’re excited to announce that this year’s Crunchyroll Anime Awards are being exclusively streamed on Twitch. And this time, everyone is invited to co-stream the show with their communities.
The show airs live from San Francisco on Saturday, February 16 at 6pm PT. Tune in to see winners crowned in categories like Best Fight Scene, Best Director, Best Animation, Anime of the Year, and many more. You can even make predictions on who you think will win with the Crunchyroll Anime Awards 2019 Extension and rep your community on the leaderboard.
Co-Streaming the Show
The official broadcast will air on /crunchyroll, but many Twitch streamers will be co-streaming the awards and adding their commentary to the proceedings. If you haven’t tried co-streaming yet, it’s a great way to connect streamers and their communities around things they love besides what they normally stream. You can see a full list of streamers who have signed up to co-stream the Awards at the bottom of this post. And if you’re interested in having your channel listed below you can sign up here to be included on our next update.
If you want to learn more about how to co-stream, head on over to Twitch Creator Camp for more info.
Crunchyroll Anime Awards Extension
Knowing who wins each award is great, but correctly guessing who will win is even better. Especially when you can brag about it online. So don’t forget to try the Crunchyroll Anime Awards Extension when you watch the show. You can predict winners for every category and make sure whatever community you’re watching with gets represented on the leaderboard.
Crunchyroll is also offering a special prize for co-streamers who use the Extension. The co-streamers and their communities who guess correctly on each category during the Anime Awards will be entered to win up to 1,000 one-month Crunchyroll Premium memberships to be split among the voters.
Here’s the list of Twitch partners and affiliates who have indicated they’ll be streaming the show:
If you’ve neglected to remember the fact that it is soon to be Valentine’s day; don’t fret as there is still time to whip up something on your 3D printer which should suffice as a gift.
Below are some of the most romantic prints for you to choose from which are free to download and print, but perhaps don’t tell your loved one that part.
3D Print for Valentine’s Day #1: Infinity Heart Pendant
What is it? This design was made for a wedding but works perfectly well for a Valentine’s Day gift too.
Where can I get it? You can find the pendant files here, or if you’d like to print it in metal check out our All3DP price comparison service.
3D Print for Valentine’s Day #2: Valentine with Bare Conductive Electric Paint
What is it? The designers said: “Light up your Valentine’s geeky heart, with our 3dprinted AdaBot card, using LEDs and Bare Conductive Paint. Turning the gears applies pressure to the batteries hidden inside a heart, lighting up the LEDs.”
Where can I get it? You can find this design on Thingiverse.
3D Print for Valentine’s Day #3: MailBot – The Robot Note Mailbox
What is it? Mailbot is a 3D printed mini robot mailbox for little notes. The designer said: “There’s mail, and then there’s the mail you actually love to get.” Mailbot can be kept anywhere such as; your desk, office, car, and everywhere in between!
Where can I get it? You can find this cute little guy here.
3D Print for Valentine’s Day #4: Heart Charms or Hearticles
What is it? Heart Charms! They can easily be linked together in different ways. If you’d prefer a bracelet, a necklace or even a ring from just one closed charm, there are many choices. The hearticles come in different sizes, some are closed, some have an opening on the side and some on the bottom. This sweet little idea makes nice jewelry.
Where can I get it? You can find the downloadable files here on Pinshape.
3D Print for Valentine’s Day #5: Heart Wings Cookie Cutter
What is it? With this OogiMe Valentine’s Day Collection cookie cutter, you can easily surprise your loved one. The estimated print time is just 44 minutes, and depending on how good you are in the kitchen, estimated baking time can vary.
Where can I get it? You can find this fabulous design here.
3D Print for Valentine’s Day #6: Heart Light
What is it? For anyone who likes pink heart lighting, this gift is the perfect choice. The heart light is one which casts beautiful mood lighting, perfect for Valentine’s Day.
Where can I get it? Find this gorgeous print here.
3D Print for Valentine’s Day #7: Male Valentines Duck
What is it? This little guy has been described as: “the ancient forefather of the almighty Duck Dynasty”. Sharing a bubble bath with him may make Valentine’s Day feel a lot less lonely. Hopefully.
Where can I get it? This super cute heart pendant can be found here, with a free download too.
3D Print for Valentine’s Day #9: “Hole in My Heart” Cookie Cutter
What is it? Of this slightly different print, the designer said: “I wanted to create something fun for Valentine’s day and ended up with a heart shaped cookie cutter with a difference.”
Where can I get it? If you’re looking for an alternative present option, then you can find this idea on Thingiverse.
3D Print for Valentine’s Day #10: Cupic
What is it? The Cupic’s are a great idea for anyone wanted to share any romantic food on Valentine’s Day. The designers said: “Lovers desert for two? Valentines party? Meet CUPIC, our most romantic food-pick. Dispose after one use.”
Where can I get it? You can find this sweet little idea on 3DShook, and download the print for free, here.
3D Print for Valentine’s Day #11: Valentine Vase & Dish Set
What is it? The Valentine Set comprises of heart inspired vases in short and tall varieties with an optional heart-shaped base, and a matching three section heart shaped candy dish too.
Where can I get it? These classic looking dishes can be found on Pinshape.
3D Print for Valentine’s Day #12: “I Love You”-Box
What is it? A circular trinket/present box with the words “I LOVE YOU” embossed in the style of Morris/Goudy around the outside. There is a plain lid, or if you prefer, a lid with space for an insert of your loved one’s initial printed separately and pressed in.
3D Print for Valentine’s Day #14: Simple Heart Bracelet
What is it? To go with your loved one’s heart ring is a simple heart bracelet too. Perhaps you could make a whole jewelry collection from your 3D printer?
Where can I get it? Check out this beautifully simple design on MyMinifactory.
3D Print for Valentine’s Day #15: Support Bouche
What is it? Moving away from the heart theme is this sweet yet functional idea. The Support Bouche is used to hold up your smartphone or tablet – something romantic yet useful.
Where can I get it? You can check out this cheeky idea on Cults3d.
3D Print for Valentine’s Day #16: Couple Egg Cups
What is it? This interesting idea could be a great way to serve breakfast in bed on Valentine’s Day. The designer said: “Need a special gift for the upcoming Valentine’s day? How about this 3d printed couple? One for him, one for her.”
Where can I get it? Check out this sweet idea here.
3D Print for Valentine’s Day #17: Heart Gear Keychain
What is it? If you want an understated present, then check out this 3D printed design which works as a key ring. The whole print only takes about 40-60 minutes and can be done in a single print with no raft or supports.
Where can I get it? The geared heart works with a hand crank and is available to download on Thingiverse, but a motorised version is also available here too.
3D Print for Valentine’s Day #19: “You’re the one” Sound Wave
What is it? If you’re not really into hearts, but still want to find an equally cheesy present, then perhaps the “you’re the one” sound wave will fit the bill. The designer said, of this little token: “I recorded the words “you’re the one”, took that into Reaper to visualize the waves it made and designed a printable Sound Wave using Sketchup. The original idea was to put this in a box frame with the words as a gift but I’ve not gotten that far! Valentine’s gift perhaps?”
Where can I get it? You find a 3D printed necklace at Shapeways.
Disclaimer:
All3DP GmbH makes 3D printing available to everyone.
If you choose to buy an item through one of All3DP’s articles, we do not charge any fee or additional price on top of our partners fulfillment price. We are paid on a commission, which means that we receive a small percentage from our partners.
Also, we are not selling the models. By comparing the prices of our 3D printing services, we simply are pointing you to the lowest 3D printing price available. If you would like to know more, please visit our Terms of Service.
Also, the editorial team of All3DP only conveys models that are under Creative Commons 4.0 Licence. All3DP will never convey STL files which are marked with the non-commercial use licence (CC NC). Also, according to CC BY, we give attribution where needed. If you are the designer of a model and want to be removed from All3DP’s price comparison service, please send a mail to [email protected].
This week’s launch of Apex Legends is about to get a whole lot bigger.
We’re teaming up with Respawn Entertainment for the Twitch Rivals Apex Legends Challenge, featuring 48 Twitch streamers competing live for $200,000 in prizes. This two-part competition goes down on Feb 12th and 19th, and it’s the perfect chance to see which your favorite streamers are leading the pack in the new Battle Royale shooter that’s taking Twitch by storm.
Each event features 16 three-player squads. Streamers from North America and EMEA are representing their territories, with a total of 48 competitors. Each squad will compete to earn the most points, with 5 points awarded for each match victory and 1 point awarded for each kill. To win, streamer squads have to show they’ve mastered the unique abilities of the game’s roster of Legends, plus they’ll have to make the most of Apex Legend’s new additions to the Battle Royale genre, like Smart Comms for improved call-outs and Respawn Beacons for defying death.
We’ll guide you through the competition on /TwitchRivals as we keep tabs on each day’s action and point totals. But as always, you can watch and chat directly on the channel of any participating streamer if you want hang out alongside their community. So be sure to hit the follow button on /TwitchRivals and we’ll see you in the Outlands soon.
FAQ:
Q: When do these competitions take place? A: They’ll happen on February 12th and February 19th.
Q: Which streamers are participating? A:48 streamers will be participating, including:
Q: Where can I watch? A: Follow our spotlight broadcast on /TwitchRivals or head directly to the channel of any streamer who’s competing in the event.
Q: Where can I find more detailed information about the competition and competitors? A: The official Twitch Rivals website is your best source for information, including the event schedule, format, and competing streamers.
Q: How can I learn more about Apex Legends? A: Visit the Apex Legends website or follow the official /PlayApex Twitch channel.
Last year the NBA G League brought real-life professional hoops to Twitch for the first time. Basketball fans watched the game’s rising stars dazzle on the hardwood and many streamers co-streamed the broadcasts to their communities with their commentary and play-by-play. Even more used the official NBA G League Extension to make picks and take home bragging rights. This year the NBA G League is back on Twitch and there’s more of everything.
Co-streaming the games
This season, NBA G League games will air every Friday and Saturday from February 8 through March 23 on /nbagleague. That’s where you can tune in to watch the games with their original audio and play-by-play. But, this is Twitch and watching isn’t enough. That’s why co-streaming is enabled for every single game and everyone is invited to give it a spin. (For those who haven’t tried it yet, co-streaming is a great way to connect streamers with their communities around things they love. Streamers can put their unique spin on a broadcast other than what they normally stream to create a novel experience for everyone.) If you’re a streamer and want to give co-streaming a try, you can find a commentary-free broadcast to use on your co-stream at /nbagleaguecostreams.
Official G League Extension
You can also get in the game with the new and improved official G League Extension. It’ll let you view stats during games, earn points for tuning in and earn even more points when you ‘boost’ players you think will fill the stat sheet, and this year you can earn points as a community to rep your favorite co-streamer on the leaderboard. You’ll also get the chance to vote on the Twitch MVP of every match who will be interviewed on the court after the game.
Where to watch
You can watch the original broadcast at /nbagleague, or you can choose to watch Twitch Partners and Affiliates who are planning on co-streaming the NBA G League this year. So, if you’re looking for a more unique take on the action or just want to enjoy the game with a community you’re a part of, take a look at who’s co-streaming this week’s games:
Friday, February 8: Rio Grande V. vs South Bay at 7pm PT
RuneScape, the epic MMO that just celebrated its 18th birthday, has teamed up with Twitch Prime this Valentine’s Day to offer you complimentary access to an adventure like no other. Starting today, February 5th, Twitch Prime members will have access to a free 14-day membership to RuneScape and Old School RuneScape featuring more quests, more skills, and more loot!
In addition to the 14 days of membership to both games, the Twitch Prime Valentine’s Pack offers you access to everything in RuneScape, plus:
Exclusive Amara Outfit
Exclusive Chinchompa Plushie
2 Umbral Chests (guaranteed super-rare prizes)
15 Treasure Hunter Keys
40 Hearts of Ice
200 RuneCoins
Start your adventure today by claiming this offer here.
What is Twitch Prime?
Twitch Prime is a premium experience on Twitch that is included with Amazon Prime. Benefits include in-game loot, free games, a free monthly channel subscription AND all the benefits of being a Prime member.
You can try it for free for 30 days right here, and when you do, you get all the Twitch Prime benefits instantly just by linking your Twitch account to your Amazon account.
Yes, I understand the title is a little dry and not very interesting; however, let’s focus on the task at hand.
Let’s remove as many dependencies on non-Twitch services as we can!
Top Clip — Remastered
Me, yes, ME!
Some know who I am, but for those who don’t, let me run a quick introduction. I’m LuckyNoS7evin (Lucky Number Slevin) or Andy in real life. I’m a developer and have been since I was eight, professionally it’s been 14 years. I have worked primarily in the web development field and for the past two years have been streaming on Twitch while doing extra development.
So what do I know about Twitch Extensions? Well, that’s a long story which starts in September/October 2017 when Extensions were first released and runs through several TwitchDev associated streams, speaking at TwitchCon Developer Day 2018, judging the TwitchCon 2018 Extension Hackathon, and now guest writing for the TwitchDev blog. I have two live Extensions, there are two to three in the pipeline, and I have consulted on several other Twitch Extension projects.
Enough about me, let’s get on with why you’re here: learning how to remove as many of the dependencies on other services as you can when building a Twitch Extension.
The Request
In July 2018, I was asked if I wanted to take over the administration and development of the Top Clip Twitch Extension. At the time, I was busy and didn’t really need more projects, but ended up taking it on anyway. The original developer couldn’t spend the time he wanted on the Extension, as a child was incoming and a major bug in the EBS (what Twitch calls server side code or Extension Backend Service) was creating a memory leak. The idea was simple; investigate the issue in the EBS, get the Extension up and running, create new artwork, and then release to the world.
The Bug — A Memory Leak
The memory leak ended up being an issue in the way the video URL was being retrieved from Twitch. A Chromium instance was run using Puppeteer, the clip embed URL was loaded into memory and the video “src” attribute was then scraped from the final in-memory render of the page. This on a Twitch scale is impossible to do at a cost suitable for a free Extension, making it a non-viable option to keep running the Extension in this way. I managed to find a fix for this with an easier way to get the source video.
Initial Re-release
Once a solution was found to the memory leak, it was time to get everything up and running, which went smoothly and worked as expected. I could have at this point stopped…however, that’s not me.
Version 2.0
After the initial re-release, the Extension was being rendered around 100,000 times a day, and the EC2.micro instance was never spiking above the 10 percent mark. I soon realized that this would never change — and me being the guy who tries to find a bargain in everything — started to investigate a way of further reducing the cost. To nothing!
Around the same time as the re-release of Top Clip, the Configuration Service was released by Twitch. This gave me the ability to save settings that the broadcaster selects on a service Twitch provides and something Top Clip was handling itself.
A combination of storing the settings using the Twitch Configuration Service and calling the Twitch API from the viewer’s browser meant I could remove the dependency on my EC2.micro instance completely. I hear people shouting at their screen now, asking themselves how to call Twitch API locally from the users browser? The answer is simple: create a Twitch Application from the development dashboard and use that ClientId in your API calls from the client side. As only two API calls are made on load with no further calls after that point we are good to go.
So there we have it: an Extension re-written to have no dependency on external services not provided by Twitch!
What Now?
As of the 4th Jan 2019, Top Clip is completely independent of any external services that are not supplied by Twitch and the cost to the developer (me) is now — nothing.
A new feature was added during the redevelopment called “Broadcaster Choice” where, alongside the Top Clip, a broadcaster can now choose one of their own clips to be displayed. I have further changes in the pipeline with improvements, fixes, and adding more to the Extension. At every point, I’m going to be thinking, “Do I really need an EBS for this or can I do without?”
Final Word
Although I have told you the story of the evolution of the Top Clip Extension, I hope that you can take away from this that there are several factors that are important when developing a Twitch Extension.
The first and most important is Scale: make sure your Extension can handle thousands of renders a day/minute/second in random bursts.
Cost: don’t be caught out by how much running an Extension may cost. There are programs run by Twitch which allow you to apply for Amazon Web Services (AWS) credits. Think outside of your normal thought patterns. Where you think you need to add services, think hard about if that is completely necessary.
Finally, have fun creating what you want and what you think streamers and viewer want; you may fail in your first attempts, but something will click.
A huge part of what makes Twitch special are the diverse voices that make up our community. In honor of Black History Month, this February, we’re doubling down on celebrating black creators and their communities by featuring tons of streams on the homepage. We’d love for you to join us.
We’re also honoring Black History Month by working with the community to help raise money for Code2040, an organization that’s closing the access gap for Black and Latinx engineering talent in tech. Plus we’re hosting a Black History Month trivia night at Twitch HQ and much, much more.
Ready to get involved? Here’s how you can join in:
Watch Highlighted Streams
Check out the front page to see a different featured streamer every day, starting right now. You can find the full schedule below. Just double check the start time (they’re all in PT), jump into chat, and say HeyGuys.
All month long, we’re working with Tiltify to raise money for Code2040, an organization dedicated to empowering Black and Latinx people in the tech industry. You can donate or start fundraising yourself right here: https://tiltify.com/code2040.
If you can’t donate, you can still show your support by sharing the link above on social, telling people in your community, or asking your favorite streamer to start their own campaign. Every little bit helps.
Share Your Story
What does Black History Month mean to you? If you’ve got a story, we want to hear it! Tell us your story on social media using #TwitchUnity and #BlackHistoryMonth. We’ll share some of our favorites with all of you on Twitch Weekly, every Friday in February at 1PM PT on /twitch.
Black History Month at Twitch
We’re pulling out all the stops to celebrate Black History Month at Twitch HQ, and one that you can participate in is our Black History Month trivia night! Join us on February 22nd from 5–6PM PT on /twitchoffice.
On Twitch we don’t just watch. Everyone and everything from the streamers, viewers, chatters, and the content you stream all play a part in creating an experience that could only happen on Twitch. It’s our shared interests that hold everything together.
Co-streaming is a great way to connect with your community around the things you love besides what you normally stream. With a co-stream, you can put your unique spin on a broadcast other than your own to create a novel experience for everyone.
If you’re interested in co-streaming on your channel, you can read more at Creator Camp, or get detailed directions on how to do it here.
Co-streaming is enabled for many special events and Twitch-licensed content throughout the year, including things like marathons, award shows, and conventions. If you’re ready to give co-streaming a spin, here are some upcoming co-streamable events.
Sports:
NBA G League (Fridays & Saturdays, Jan 25-Mar 23): Twitch has partnered with NBA G League, the NBA’s official minor league, to broadcast 16 games over the course of the season. You can also use the official extension with your community so viewers can earn points for tuning in, predicting player stats, and ruling the leaderboard while repping your community.
Sign-up to get your name in the announcement blog here.
Original broadcast with commentary and full schedule: /nbagleague
Co-streamable broadcast (without commentary) and full schedule: /nbagleaguecostreams
Broadcast not available in China
Impact Wrestling (airing Fridays, Jan 11-Mar 1): Twitch enters the ring every Friday at 7pm PST with the flagship show from Impact Wrestling. Follow every match and add your commentary to the action for a truly Twitch experience with your community.
Broadcast not available in Sub Saraha Africa, UK, and Mexico.
Award shows:
Crunchyroll Anime Awards (airing Feb 16): Crunchyroll is bringing their annual Anime Awards to Twitch. This year it will be in San Francisco and you and your community can play the extension to predict winners to increase your channel’s score, with a leaderboard tracking the highest scoring communities.
Sign-up to get your name in the announcement blog here.
Inspector Gadget (airing Jan 26-Feb 3): A rebroadcast of Season 1’s 1980s animated TV series about a famous cyborg police inspector, his niece, dog, and their crime solving antics.
Shaw Brothers Kung Fu Marathon (airing Feb 4–9): Shaw Brothers, a film production company with iconic hits like Five Deadly Venoms, Crippled Avengers, and King Boxer, is bringing 44 classic kung fu movies from the 70s to Twitch.
Co-streamable broadcast and full schedule: /gammaray_tv
The work you do — from moderating chat to helping new viewers get up to speed with a channel — plays a crucial role in making Twitch a more welcoming place. We see you and everything you do to support the communities you love.
Your skills are top notch, but we want to give you the support you deserve to do your jobs even better and more easily. Today we’re doing that by introducing new moderator tools built right into chat. You might remember that we announced this at last year’s TwitchCon — and it’s available now! On your channel, or on channels you moderate, you’ll now see channel-specific details about each user in chat that will help you make more informed moderation decisions without leaving Twitch.
How Does It Work?
Starting today, you can click a username in chat or use the new /user chat command to open a person’s profile card. From there, you’ll be able to:
Share channel-specific comments about your moderation choices: you can explain why you did or didn’t take a moderation action and collaborate with your fellow mods without leaving Twitch.
See when they made their account: you’ll know at a glance if someone has been around for a while or if they’re using a brand new account.
View the user’s channel-specific chat, timeout, and ban history: when you’re on the fence about taking moderation actions, you can check whether someone generally brings a positive or not-so-positive attitude to the channel.
And we’re just getting started. We’re going to continue supporting channel moderators by making updates based on your feedback, so let us know how to make these tools the most useful for you. Last December we updated chat so you can delete a single message without timing out the user who sent it, and earlier this month we put all the settings that channel moderators can control on a single settings page. Keep an eye out for more updates throughout 2019.
We’re inviting the entire Twitch community to join us in thanking all the channel mods who give back to their communities every day. To kick things off, check out what these streamers had to say about their channel mods.
Benefits will be available until October 31, 2019 unless otherwise specified.
*Discount codes for merchandise on shop.overwatchleague.com will be available from January 31, 2019 to October 31, 2019. The discount code will be delivered by email within 14 days after purchase. Offer good for one-time use. Your purchase and enjoyment of some benefits such as the merchandise discount and Overwatch tokens may be subject to additional third-party legal terms. You are bound by such third-party legal terms and we encourage you to read them.
For Twitch Prime benefits, ensure your account is linked with Amazon prior to purchase. The Bits will be credited to your account within 1 day. This is a limited time offer available to Twitch Prime members only. Offer good while supplies last. Twitch reserves the right to modify or cancel the offer at any time. Offer is non-transferable and may not be resold. If you violate any of these terms, the offer will be invalid. Offer limited to one per customer and account. Redemption of Bits is subject to the Bits Acceptable Use Policy found here. Offer void where prohibited and limited to one per customer and account.
Value of the Overwatch League Tokens is calculated based on price of tokens in USD.
Once you have selected your three team based emotes available as a subscriber, you will not be able to change your selection.
Celebrating a new year is one of the few events in which almost every culture in the world takes part in some way shape or form. And while it’s always exciting to be at an event IRL, there is something particularly new and exciting about celebrating online in a shared real-time experience with a global community.
Many streamers ring in the new year with their own communities, and this year — in partnership with Red Bull — Ninja (Twitch’s most followed streamer) brought in the new year with his global community at one of the world’s most iconic NYE parties, Times Square in New York City. It was a fitting end to a wild year for Ninja, his loyal viewers, Twitch, and the gaming industry as a whole.
Ninja and friends ring in the new year in Times Square.
To enhance the viewing experience in true Twitch form, the Ninja New Year’s Eve broadcast featured an interactive Trivia Extension that presented a series of questions to viewers. Guessing correctly resulted in a bounty for viewers: free Bits. Throughout the New Year’s Eve event, Twitchmade available an unprecedented pool of 10 million Bits across Ninja’s and his co-hosts’ channels.
The Extension featured Ninja and Fortnite-related trivia questions. (Disclaimer: This Extension is not endorsed by Epic and does not use any game or player data.)
This event and the Extension execution was a stellar example of how to execute a highly engaging and entertaining, shared real-time experience on Twitch.
While not every event and Extension will have access to the elements that went into the Ninja NYE broadcast, here are a few key learnings and best practices any live event that includes an Extension on Twitch should consider:
Outline Extension Value to Both Viewers AND Streamers: Prior to development, put yourself in the shoes of all who will engage with the Extension and make sure it’s not overtly geared to providing value to only the streamer or the viewer, but properly enhances the experience for all involved. Twitch viewers are eager to not just watch but also engage and interact via desktop or mobile, and conversely, streamers are eager for new ways to level up their live stream experience.
Make Sure You Scope and Scenario Plan, and Then Do It Again: Once aligned on the primary goals of the Extension, rigorously prioritize. Scenario plan for both positive and negative outcomes as much as time will allow, beginning with the end of the stream and working backward to the event kick-off. Outline a run-of-show document not just for the stream itself, but also for the content of the Extension and different stages of audience interaction. Anticipate large spikes and dips in interaction and engagement as viewers flow in and out of the stream.
Have a Real-time Communication Strategy: There are often many fluid elements and stakeholders, so the project or team lead should be well defined and ensure that other relevant team members are informed of all progress and notified about how each element could affect them. Ensure there is an on-call team to troubleshoot Extension issues, monitor Twitter chatter, and anticipate and resolve any speed bumps that that may arise during the event itself.
Watch a full walkthrough of the Ninja NYE Extension in action.
Behind every live event Extension, there’s a hidden hero — the developer, of course. For the Ninja NYE Trivia Extension, that hero was Muxy, a company with a solid Extension portfolio that develops a range of high-performing streamer tools, including a comprehensive back-end solution for extension development called the MEDKit. We talked with Muxy CEO, Peter Bonnani, about how they built the Extension and some of the lessons they learned.
Q&A withPeter Bonnani, CEO of Muxy
Can you tell us why you’re excited about this Extension?
The idea that we could manage determinations about how to award a pool of Bits to viewers via the Extension appealed to us. It’s something many of our clients have asked for in the past but has not been something we’ve been able to do up until this point. The other exciting thing was the fact that the stream itself was ambitious and live from Time Square with Ninja.
Can you briefly describe your development process? Including how you came up with the idea, how long it took, what you did to test or troubleshoot, etc.
The development process for this Extension was very rushed. We were contacted just a couple days before Christmas and already had some staff out of office visiting their families for the holidays. Myself and the remaining team in Austin had to work quickly with Twitch to determine the scope of what could be delivered on this timeframe. Luckily, we already had our MEDKit platform to do most of the heavy lifting on the backend.
In this particular case, we were able to leverage many things that were built into the MEDKit APIs to deliver the trivia experience and had to do a little magic on the backend; viewers had the opportunity to obtain Bits through the Extension and Twitch fulfilled the winning viewers. Since we didn’t know the size of the potential audience, we worked with Twitch engineers to load test the backend system at 1.2 million trivia answers in the 90-second timeframe. The first few iterations revealed some minor bottlenecks that we were able to fix before show time.
Describe the technology behind this Extension (i.e., MEDKit).
All of the more than 20 Extensions we’ve built since Extensions launched in 2017 have run on our Muxy Cloud backend and are built using our MEDKit Extension framework. It allows us and any developer who uses it to not have to rely on building their own Extension Backend Service (EBS), which dramatically shortens development time. We also don’t typically have to worry about load issues when using our framework as we’ve designed and hardened it over the last two years and offer it as a service to other developers.
We were able to make use of existing endpoints for polling that we recently augmented with trivia support. Everything went very well with the Extension from a technical standpoint, and we didn’t seem to need all the hardening we did to the Muxy Cloud backend; however, that hardening is now available to any developer wishing to build an Extension using our backend. If you’re more of a frontend person and looking to build an Extension, please check out our services and let us take care of the backend while you focus on your product.
What learnings or best practices would you share about developing Extensions for large, live events?
Twitch traffic is bursty. We’ve designed MEDKit to be able to handle this type of load at affordable pricing. If you’re trying to build your own backend, do extensive load testing with very high bursts of traffic versus moderate traffic over a sustained period of time. Also, whenever you’re doing an Extension that is coupled to the event’s run of show, don’t be tempted to make planned events timed, because the run of show always seems to slip. To combat this for high-profile installs, we have all events that are pushed out to the Extension controlled from a single admin panel, so that they can make adjustments on the fly.
Um dir ein optimales Erlebnis zu bieten, verwenden wir Technologien wie Cookies, um Geräteinformationen zu speichern und/oder darauf zuzugreifen. Wenn du diesen Technologien zustimmst, können wir Daten wie das Surfverhalten oder eindeutige IDs auf dieser Website verarbeiten. Wenn du deine Einwillligung nicht erteilst oder zurückziehst, können bestimmte Merkmale und Funktionen beeinträchtigt werden.
Funktional
Immer aktiv
Die technische Speicherung oder der Zugang ist unbedingt erforderlich für den rechtmäßigen Zweck, die Nutzung eines bestimmten Dienstes zu ermöglichen, der vom Teilnehmer oder Nutzer ausdrücklich gewünscht wird, oder für den alleinigen Zweck, die Übertragung einer Nachricht über ein elektronisches Kommunikationsnetz durchzuführen.
Vorlieben
Die technische Speicherung oder der Zugriff ist für den rechtmäßigen Zweck der Speicherung von Präferenzen erforderlich, die nicht vom Abonnenten oder Benutzer angefordert wurden.
Statistiken
Die technische Speicherung oder der Zugriff, der ausschließlich zu statistischen Zwecken erfolgt.Die technische Speicherung oder der Zugriff, der ausschließlich zu anonymen statistischen Zwecken verwendet wird. Ohne eine Vorladung, die freiwillige Zustimmung deines Internetdienstanbieters oder zusätzliche Aufzeichnungen von Dritten können die zu diesem Zweck gespeicherten oder abgerufenen Informationen allein in der Regel nicht dazu verwendet werden, dich zu identifizieren.
Marketing
Die technische Speicherung oder der Zugriff ist erforderlich, um Nutzerprofile zu erstellen, um Werbung zu versenden oder um den Nutzer auf einer Website oder über mehrere Websites hinweg zu ähnlichen Marketingzwecken zu verfolgen.

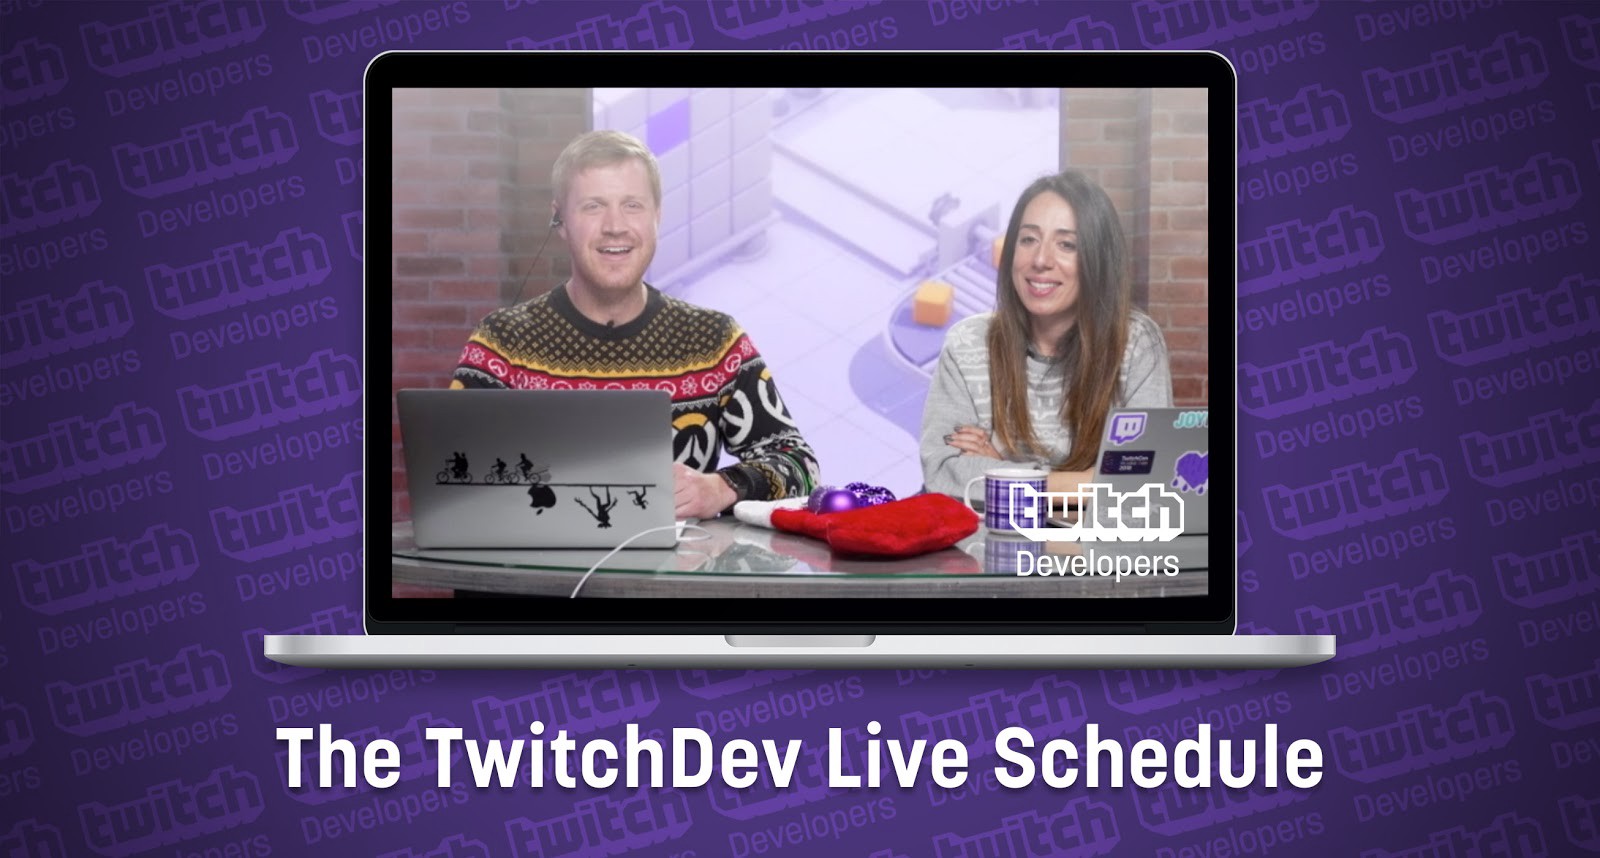

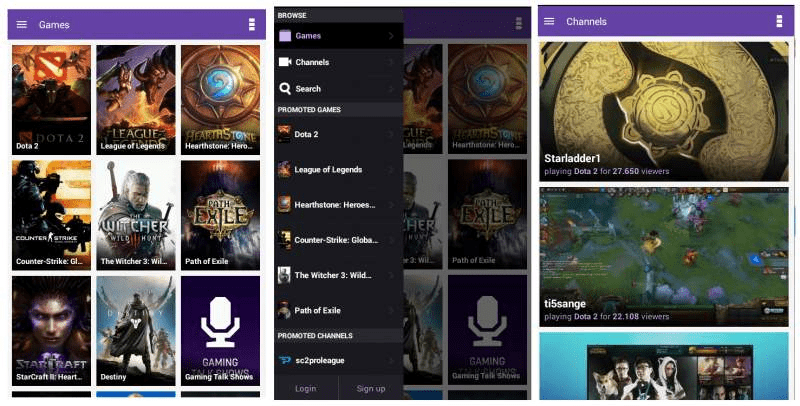


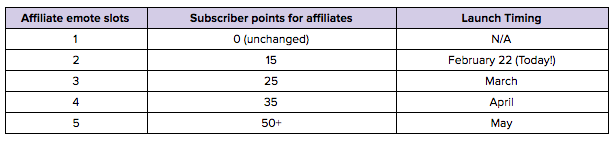
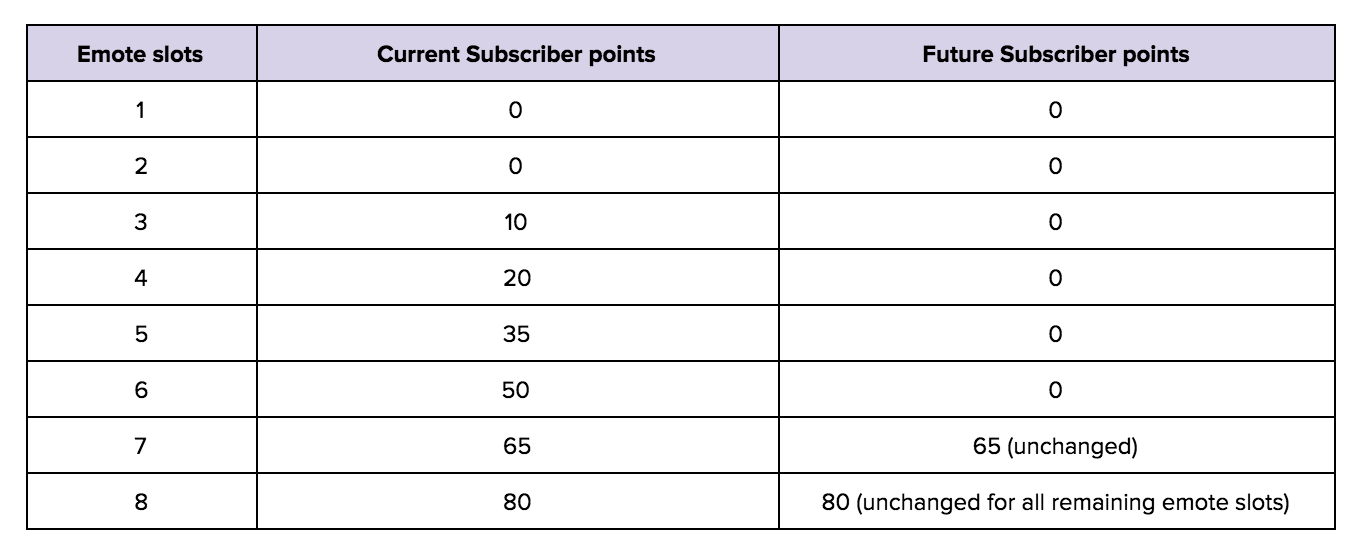


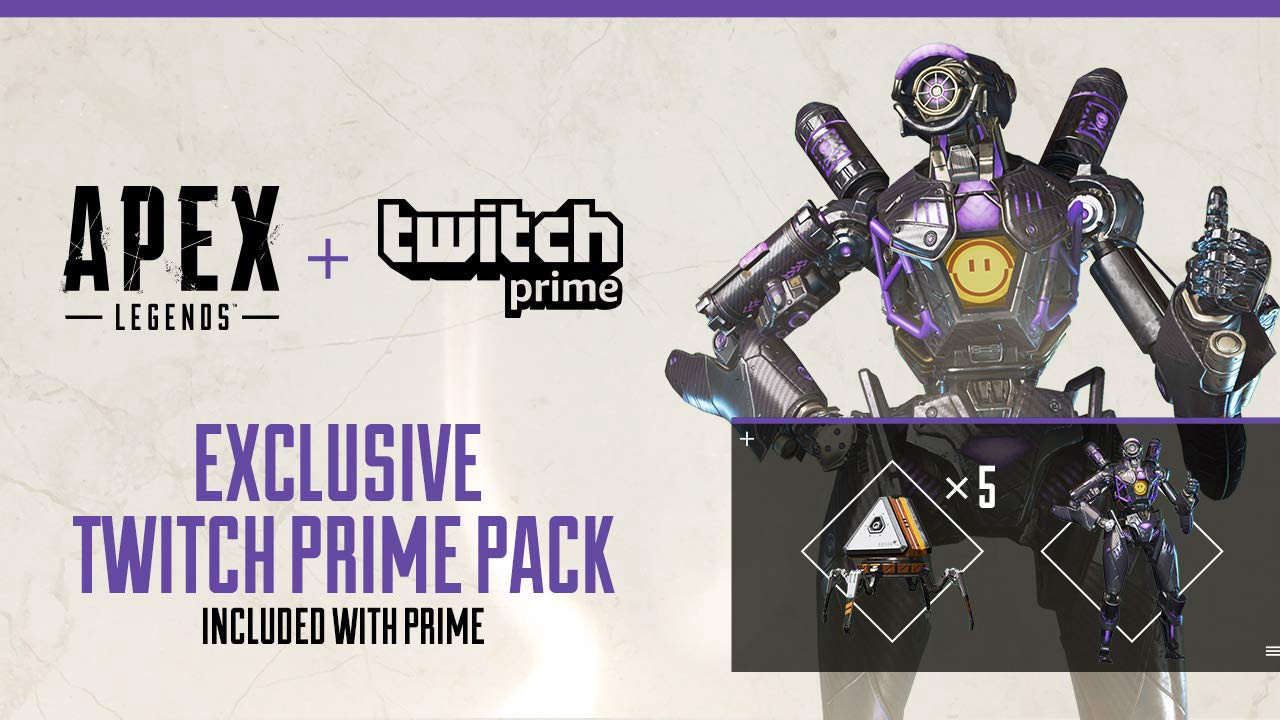
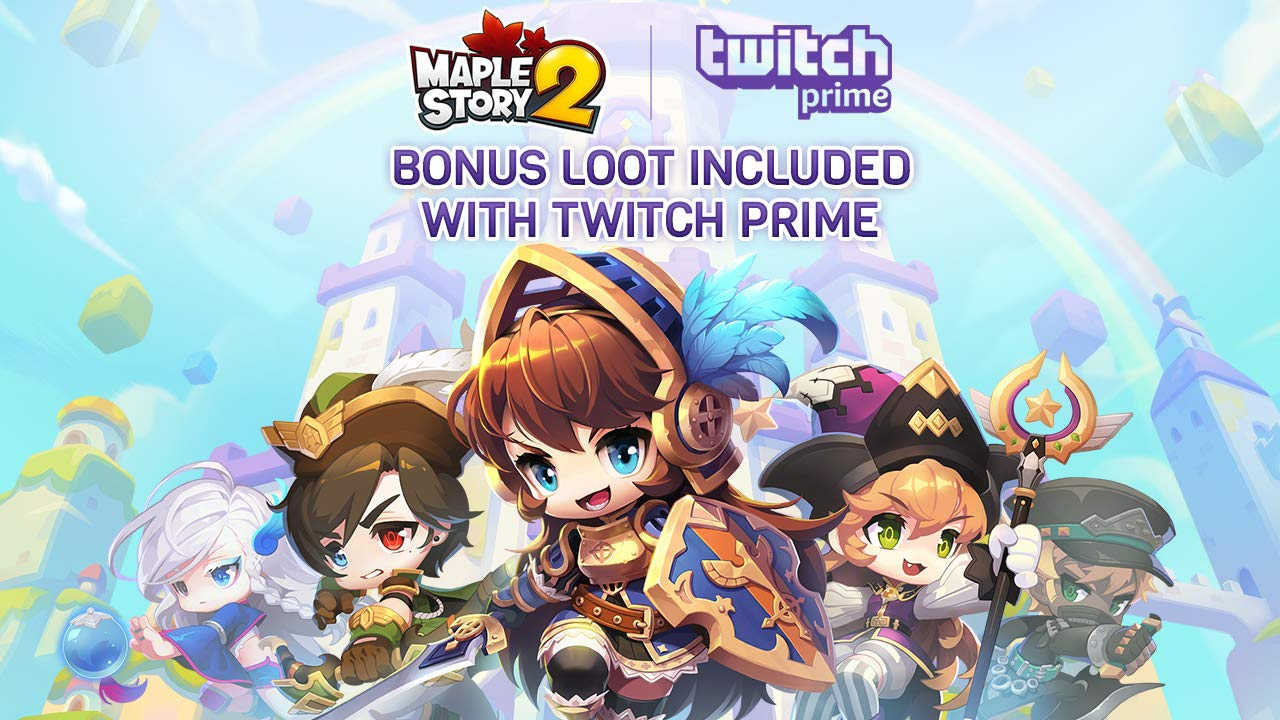
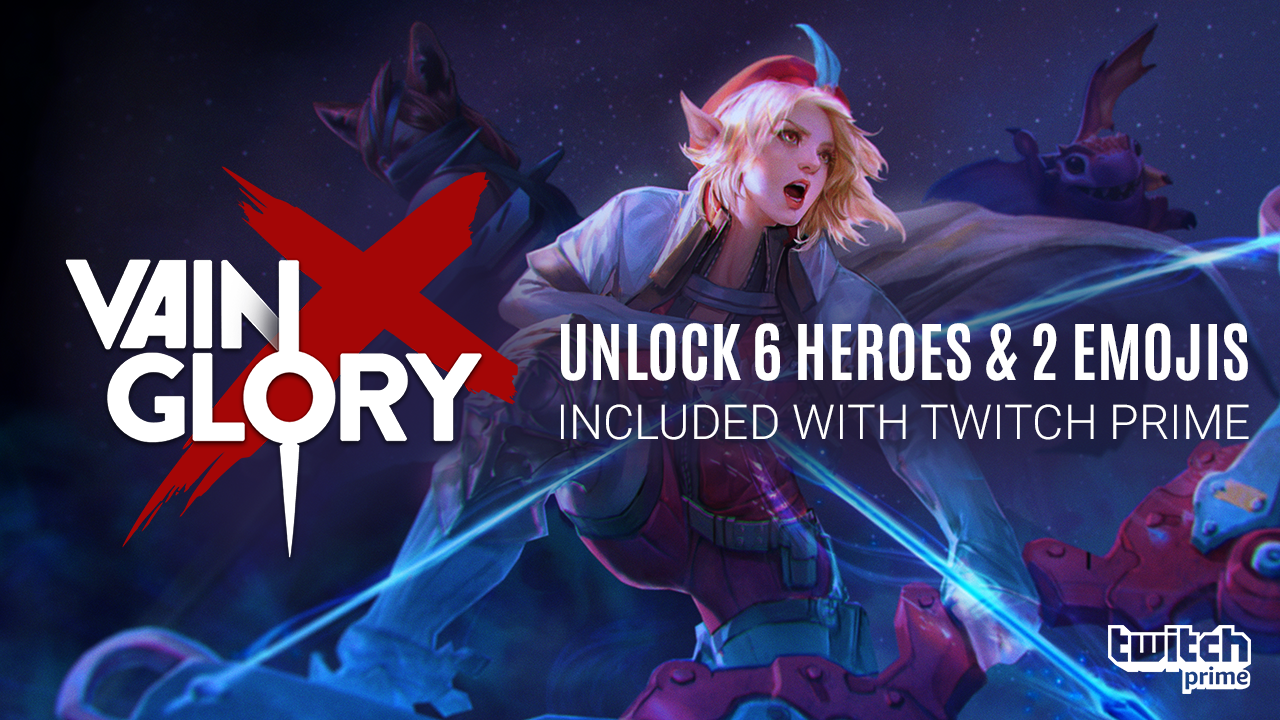
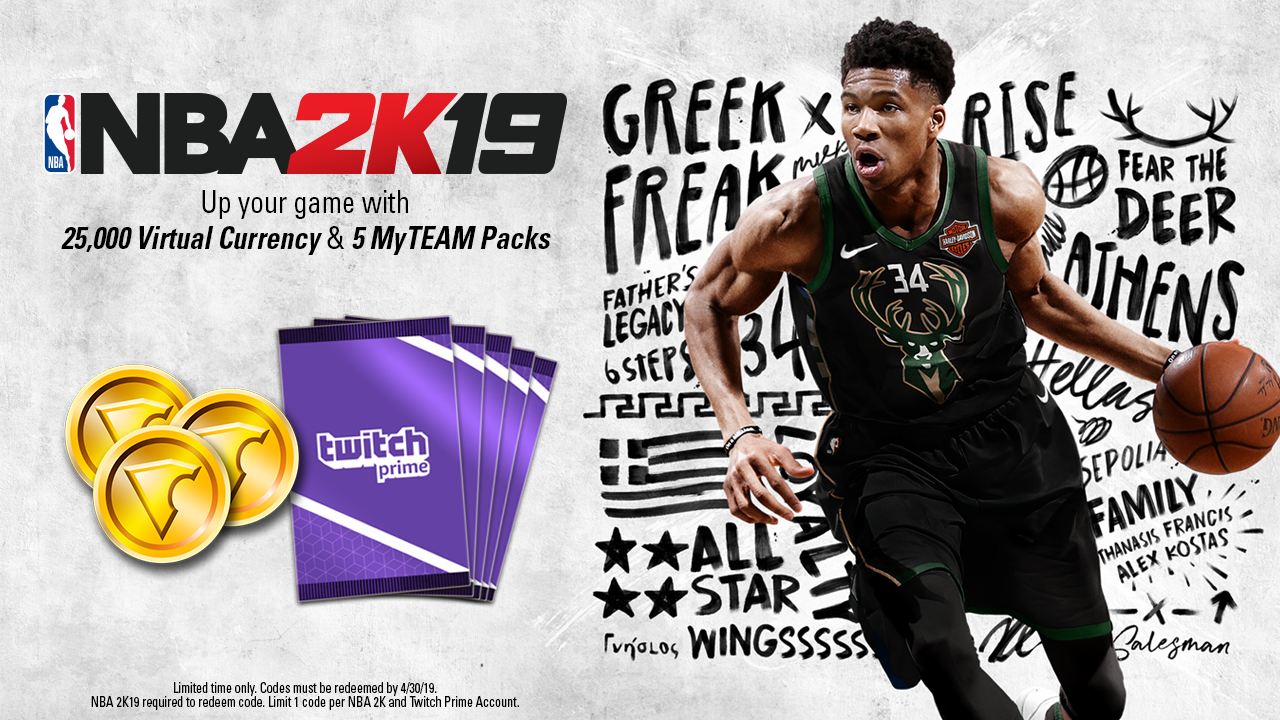
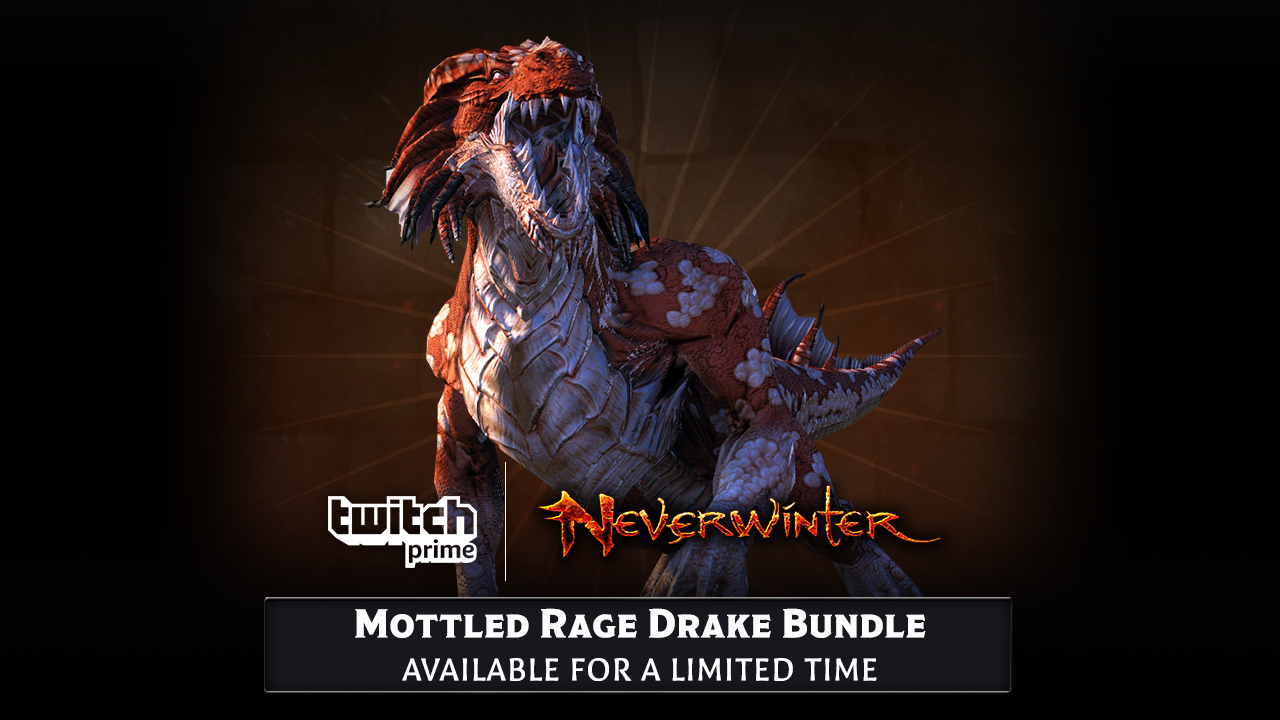

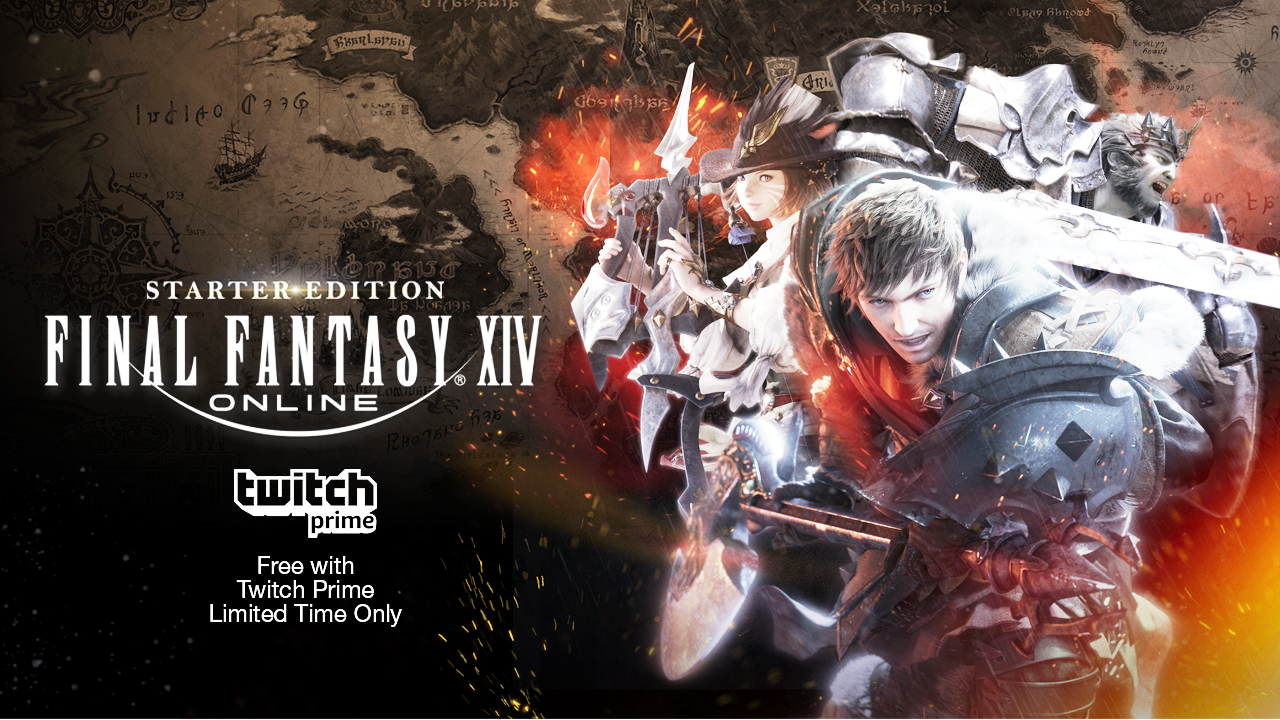
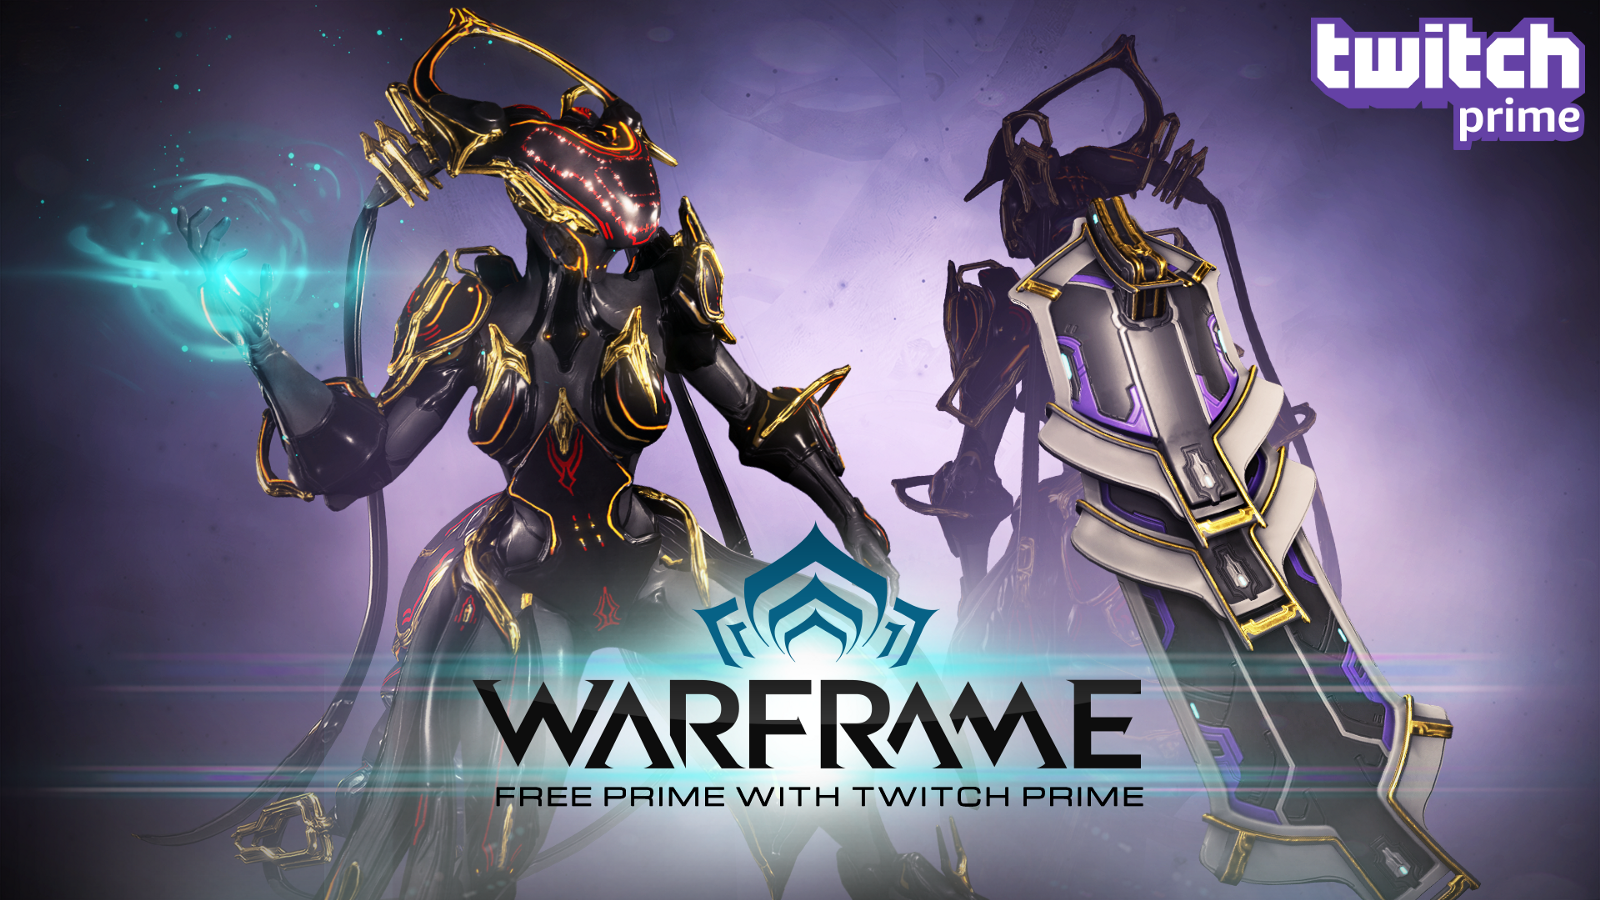

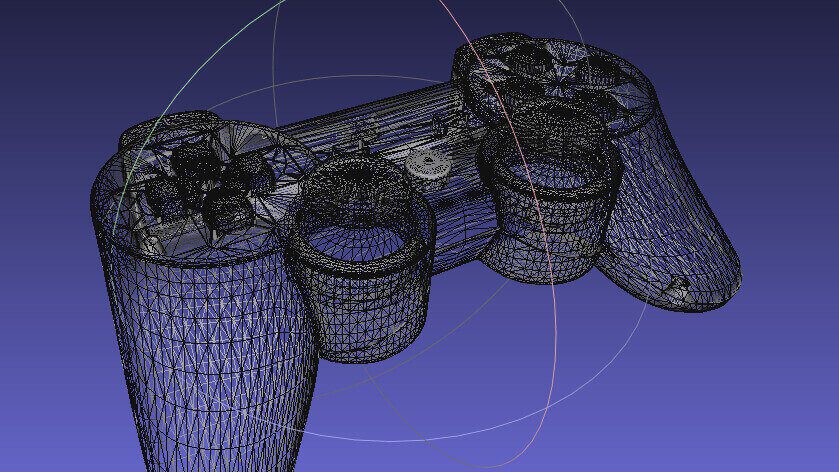

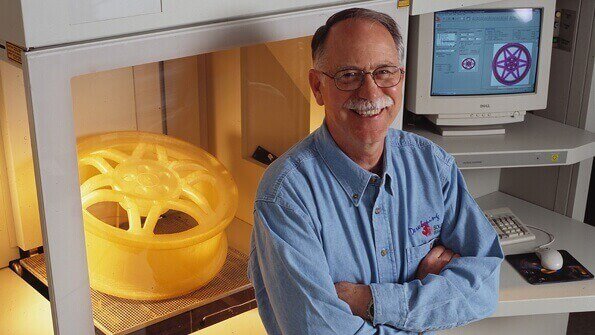

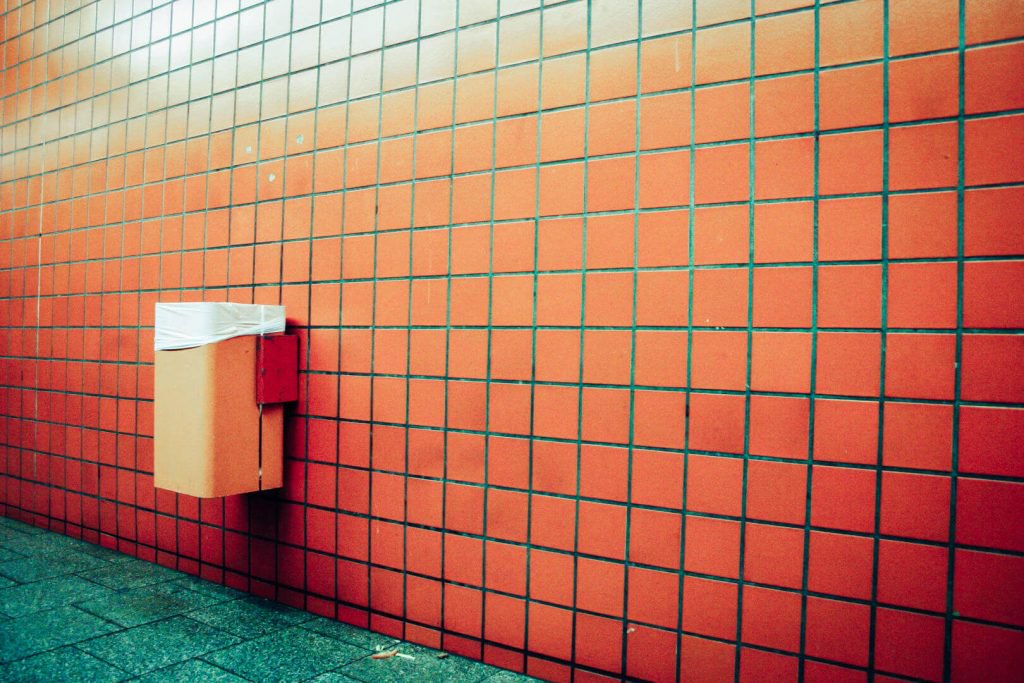

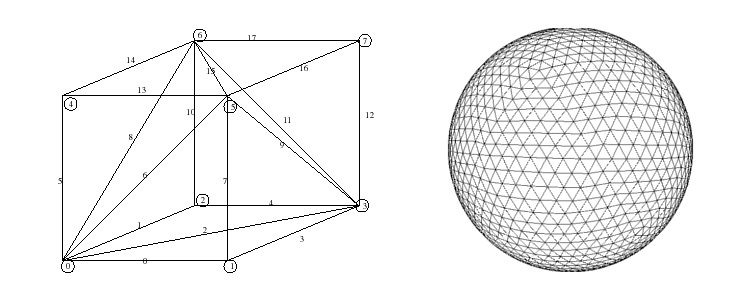

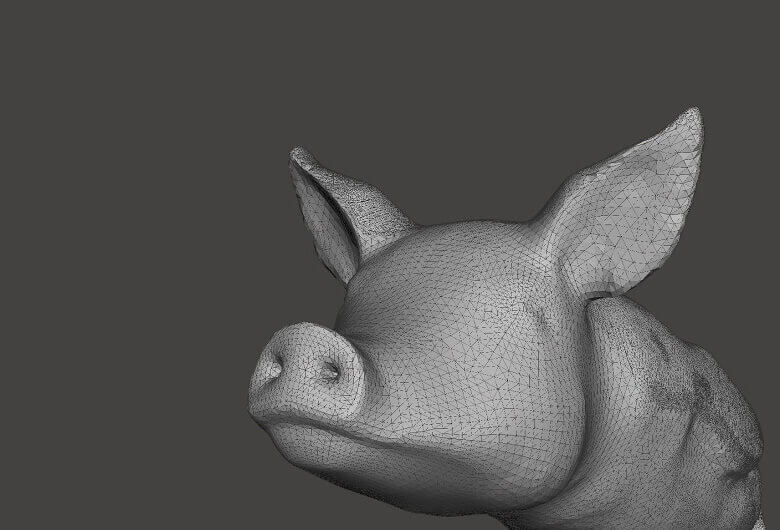

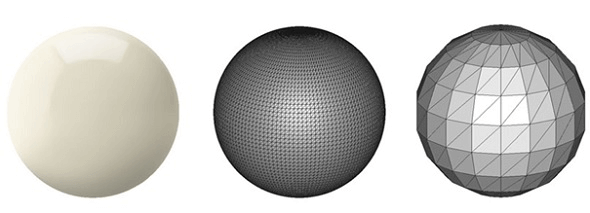

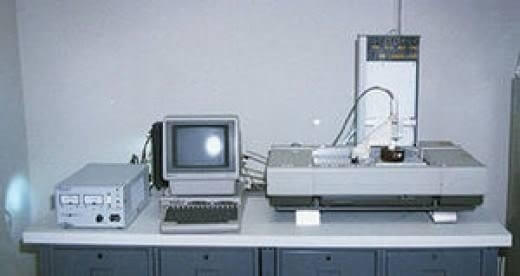

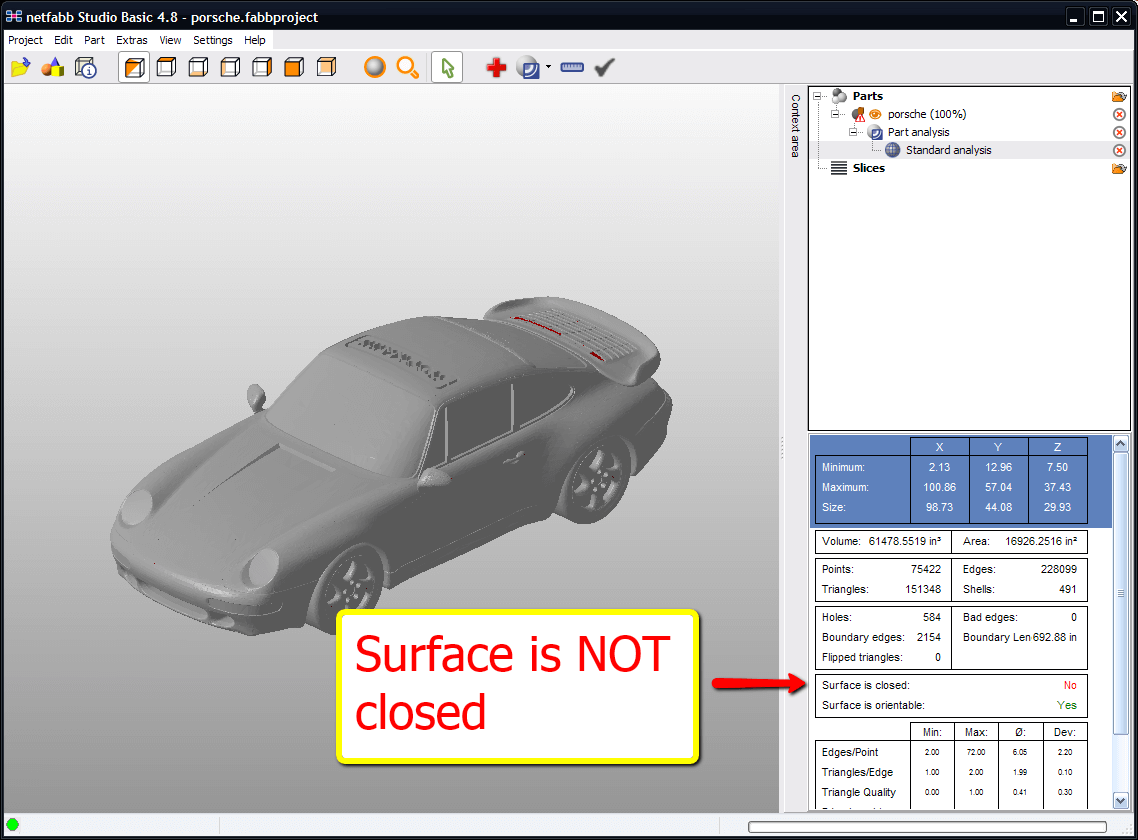

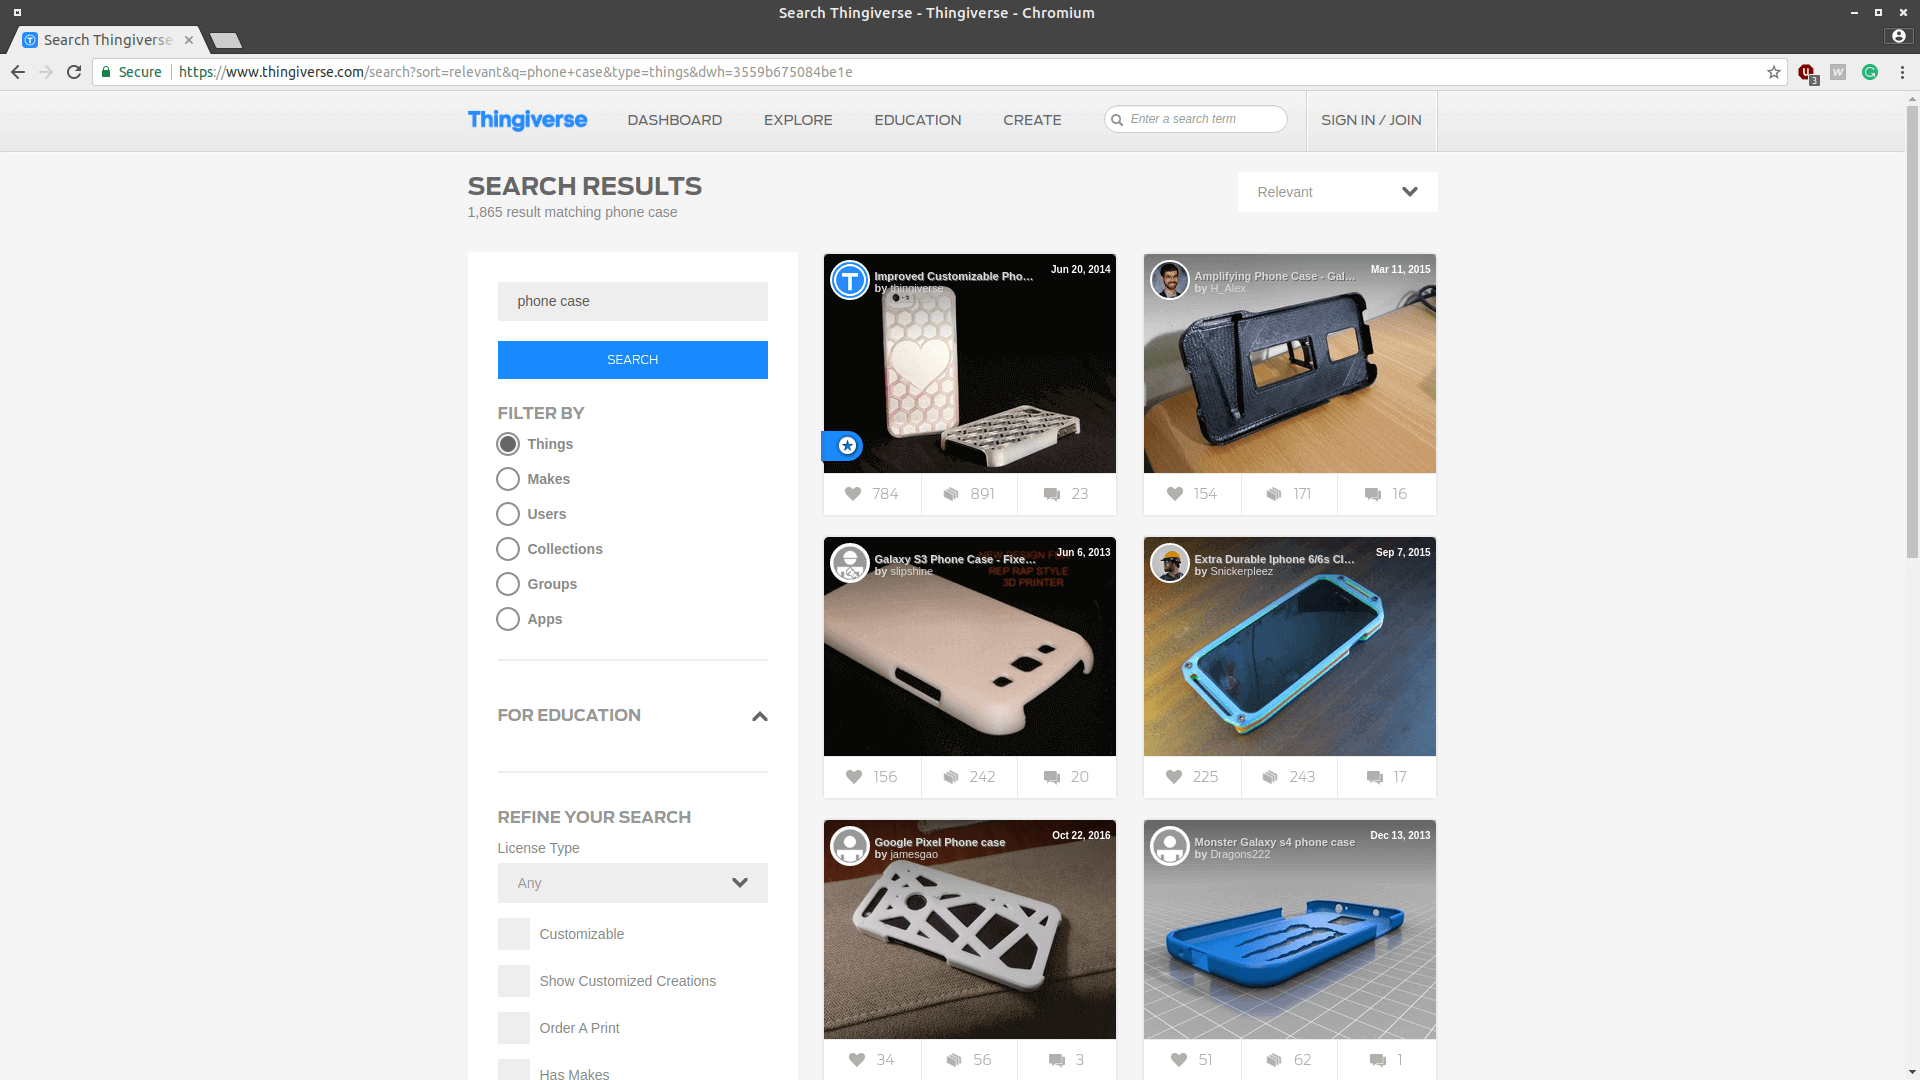

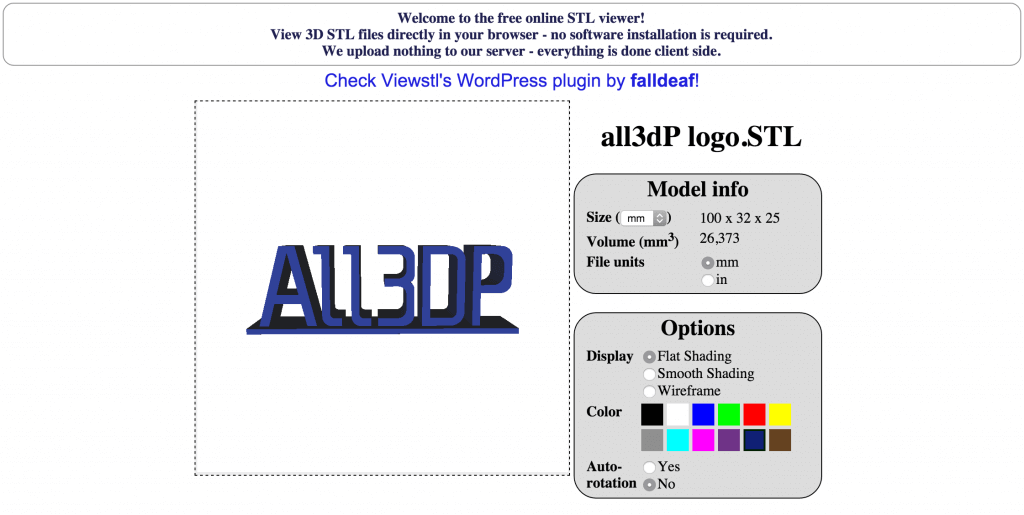

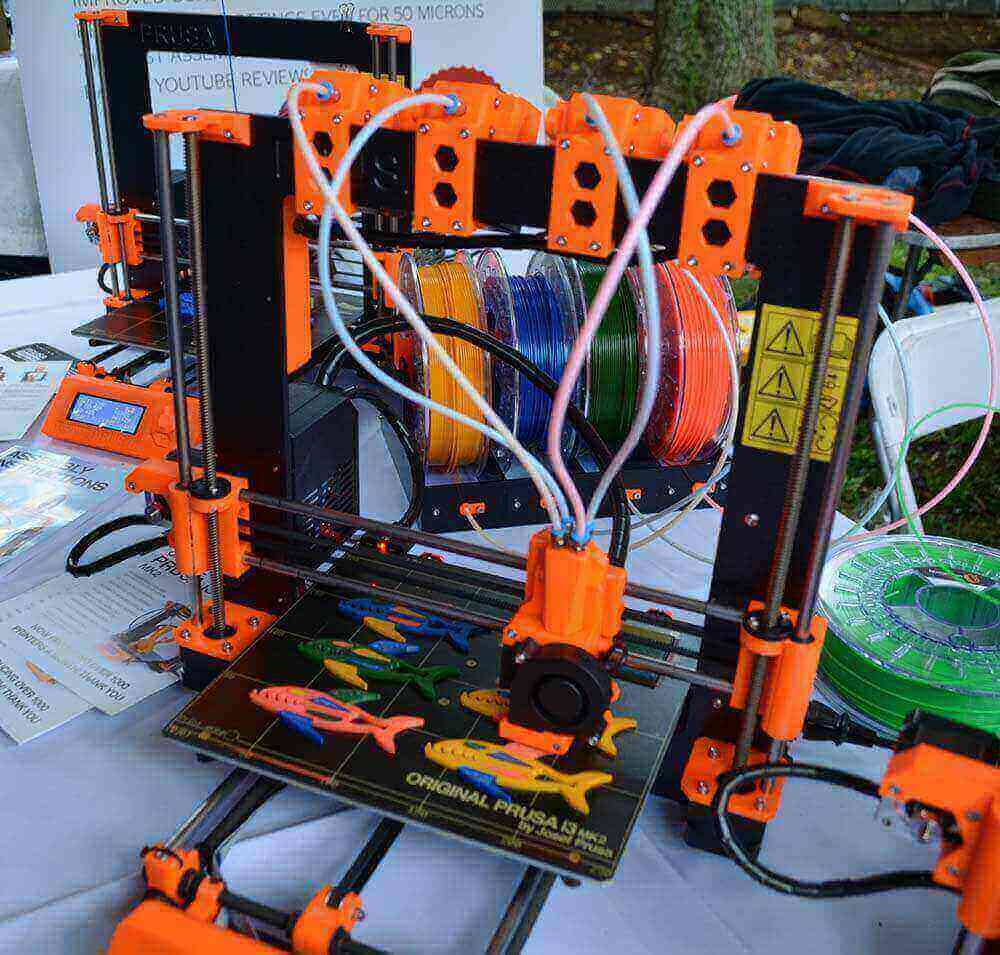
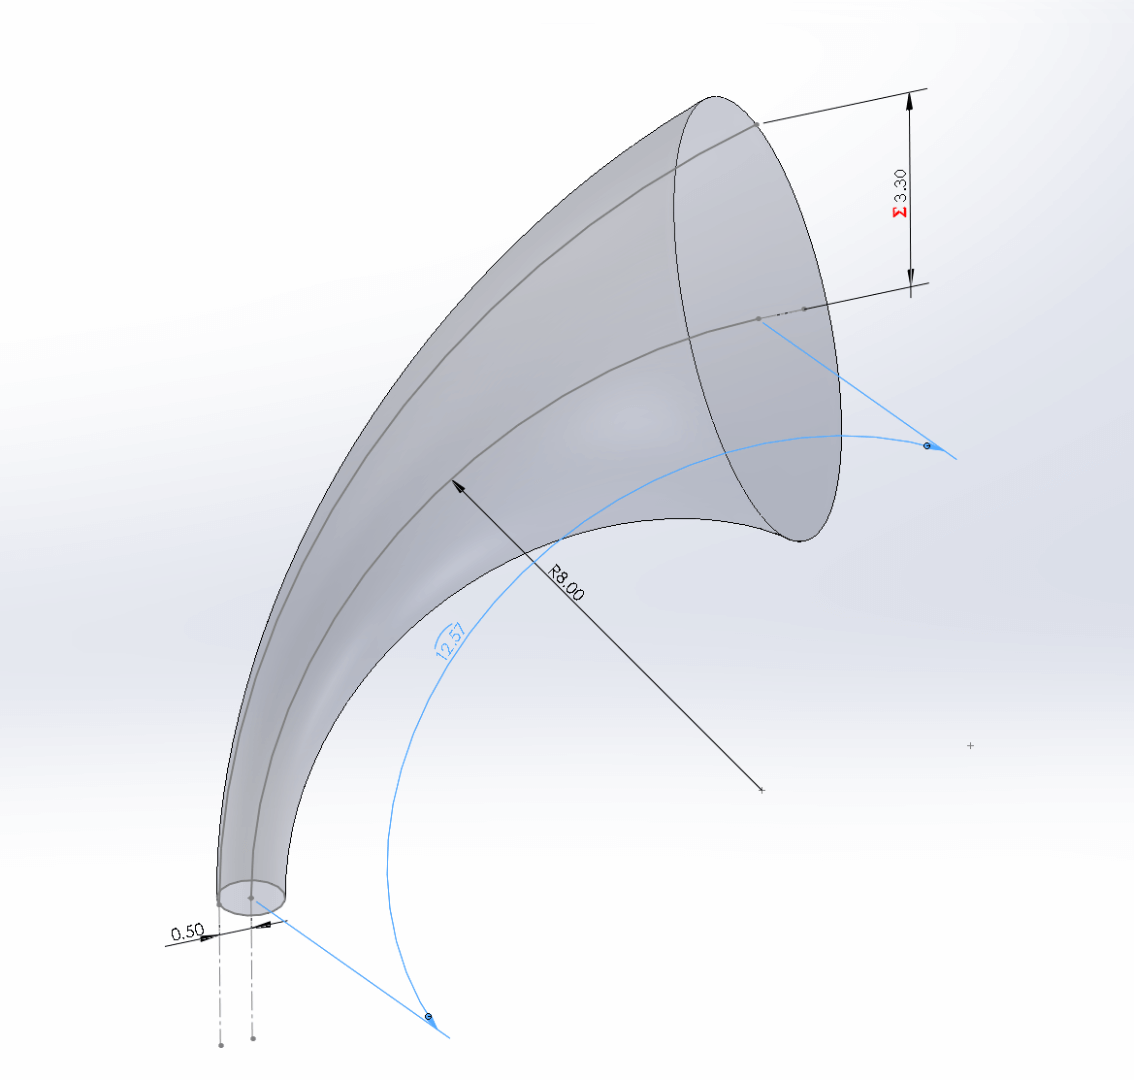
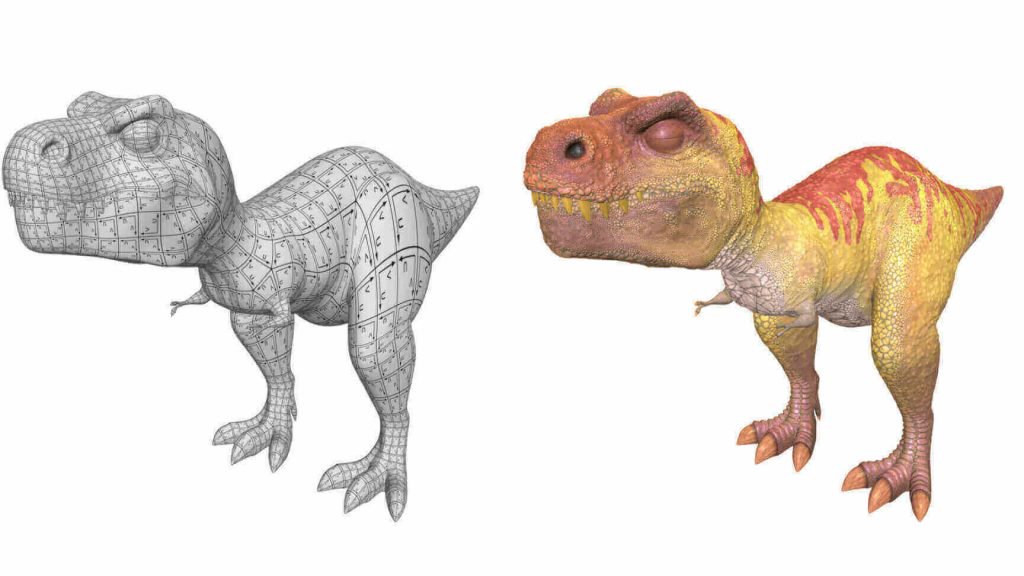
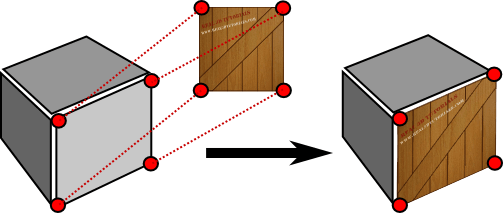

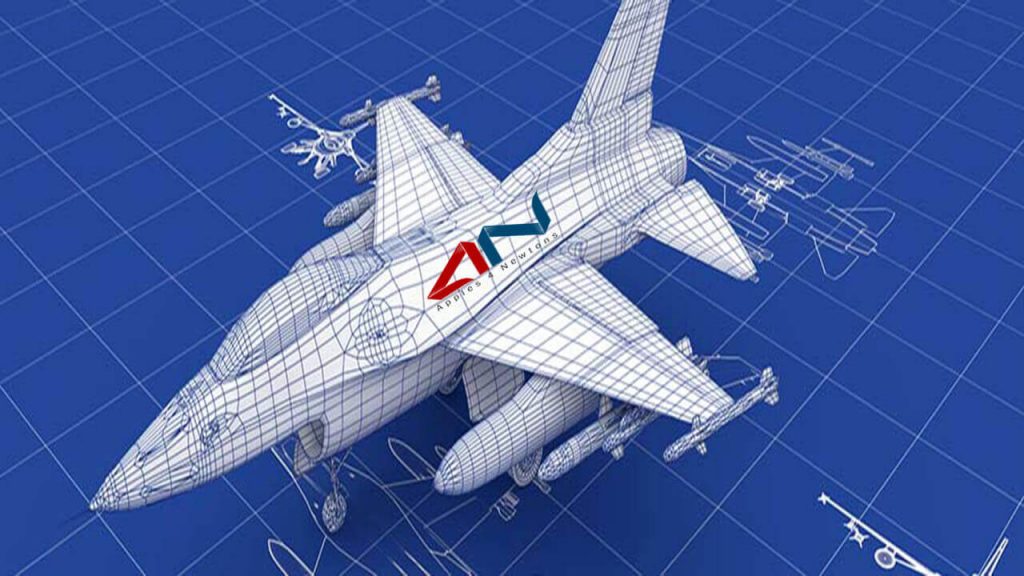

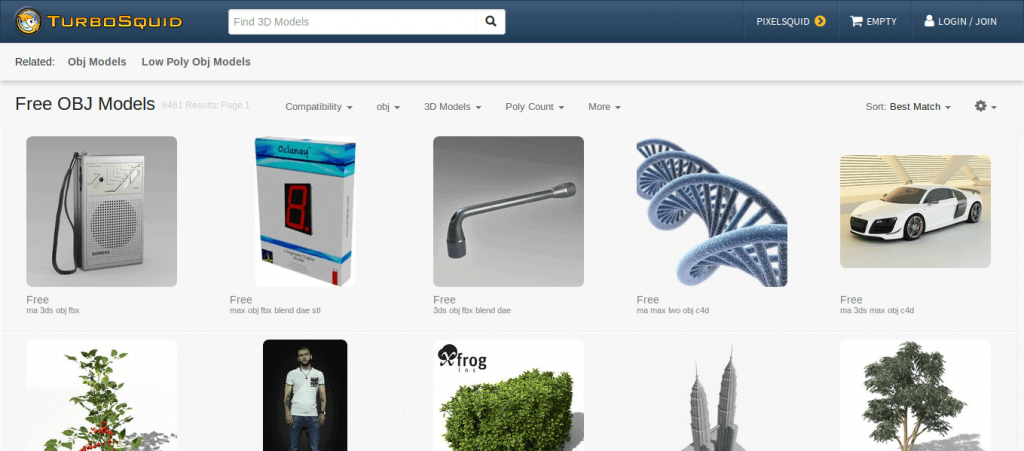

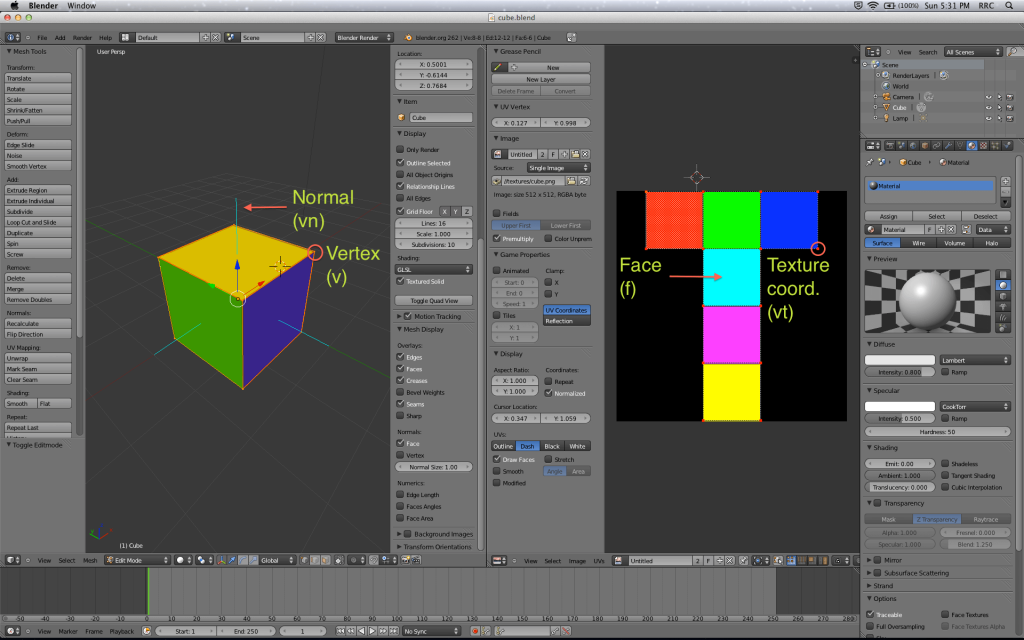
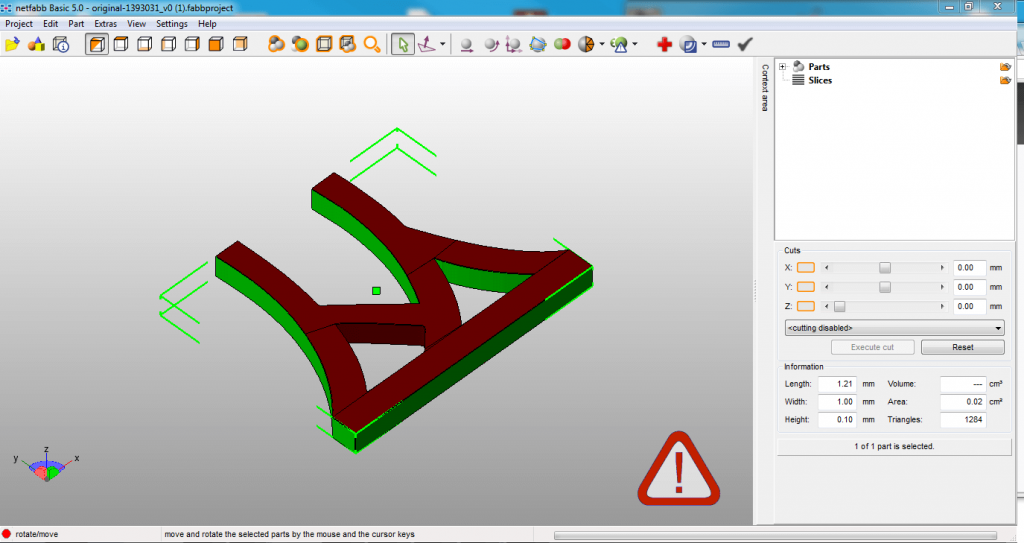

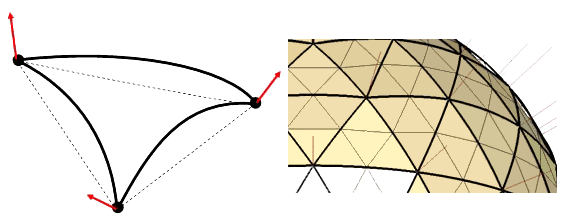

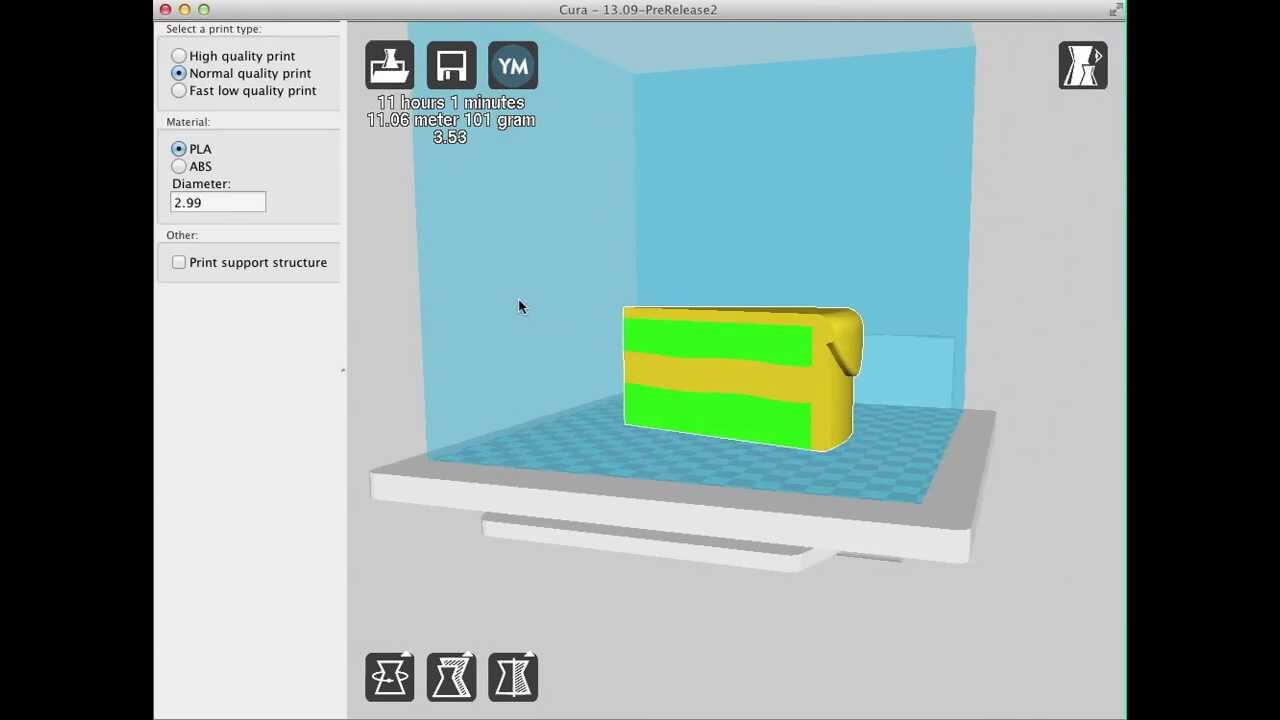

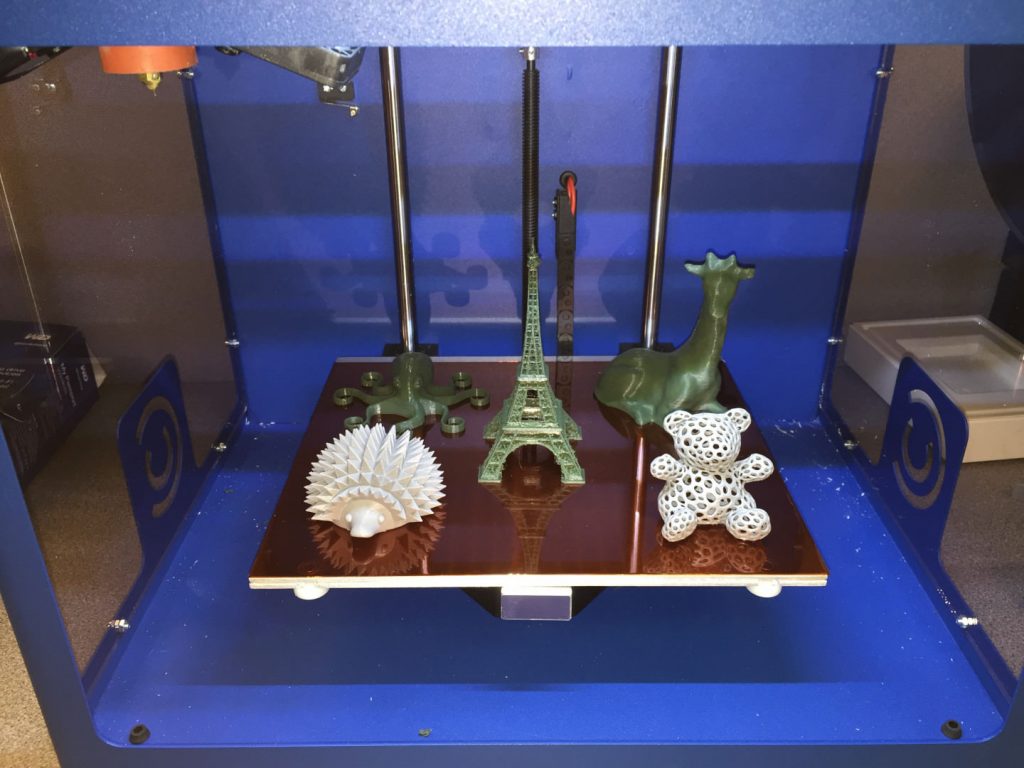


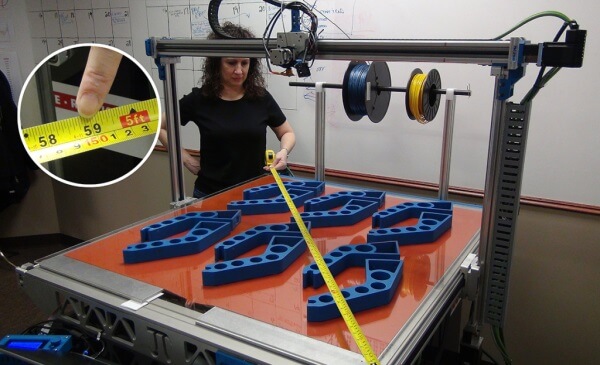


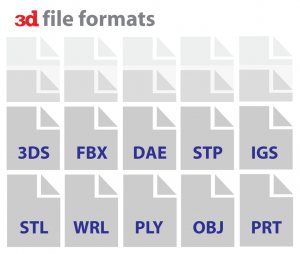

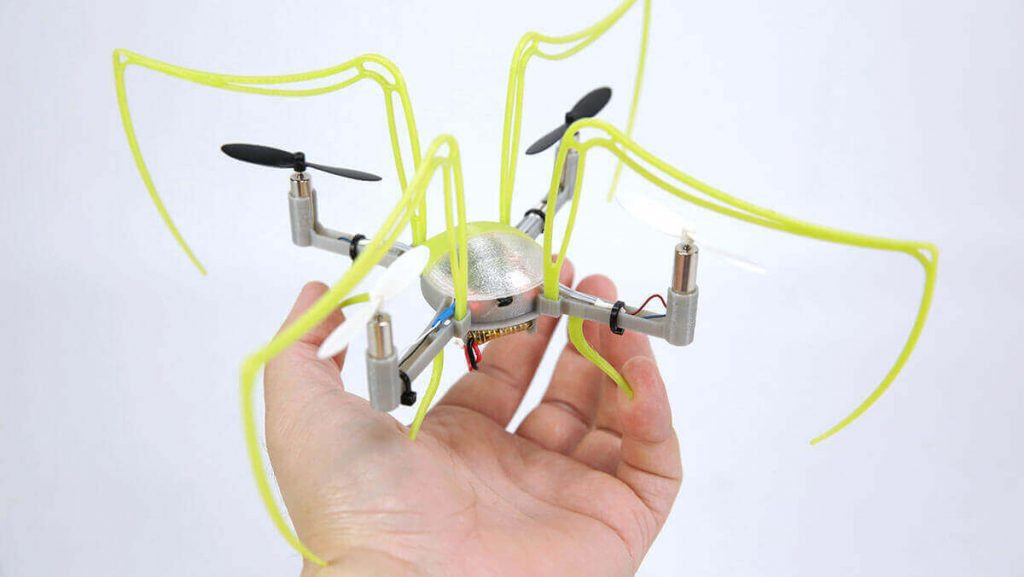

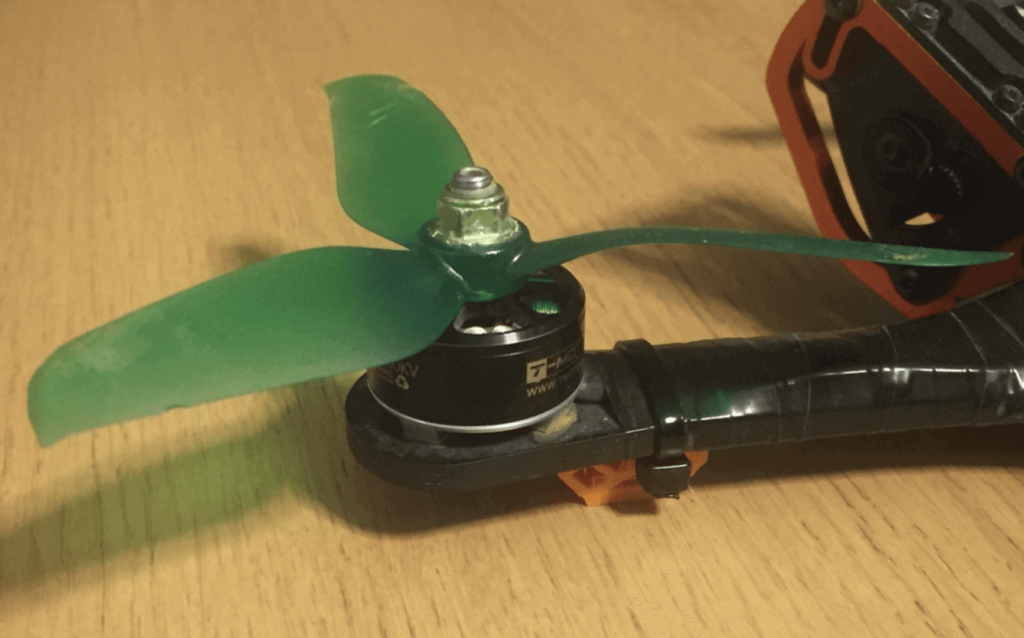
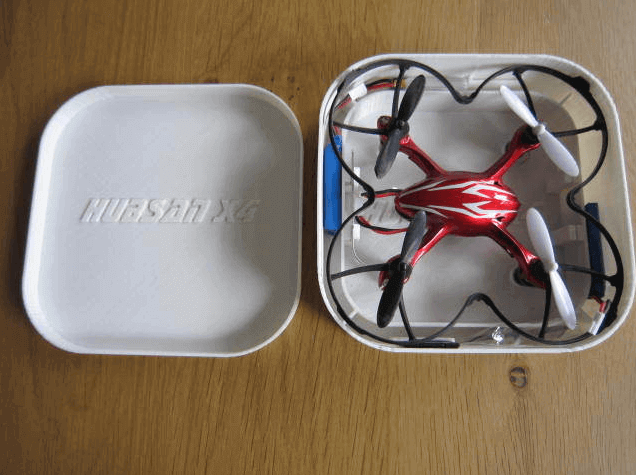


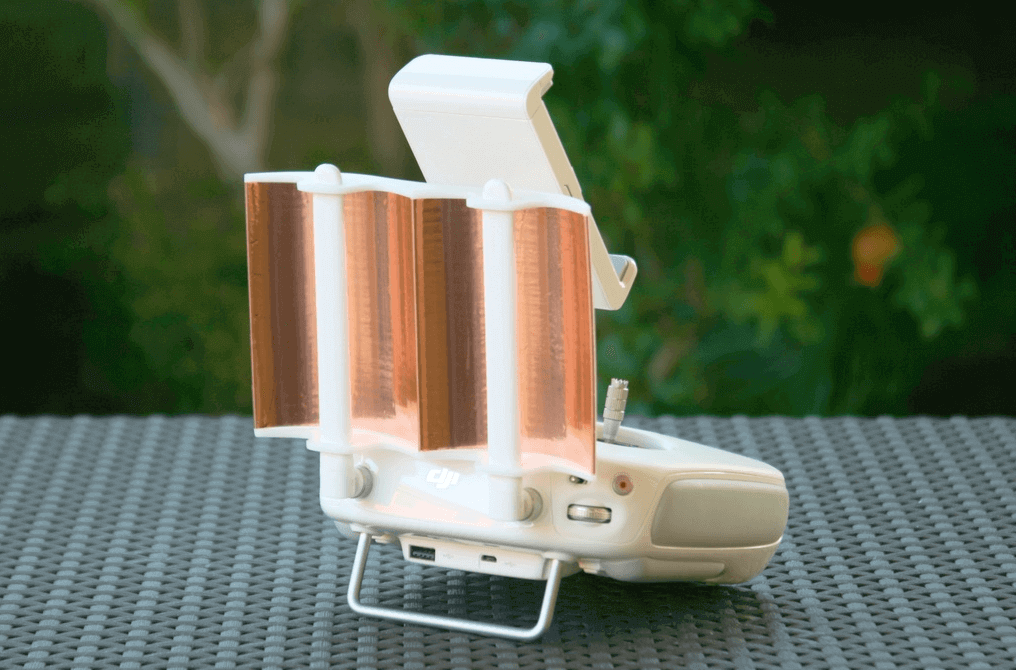


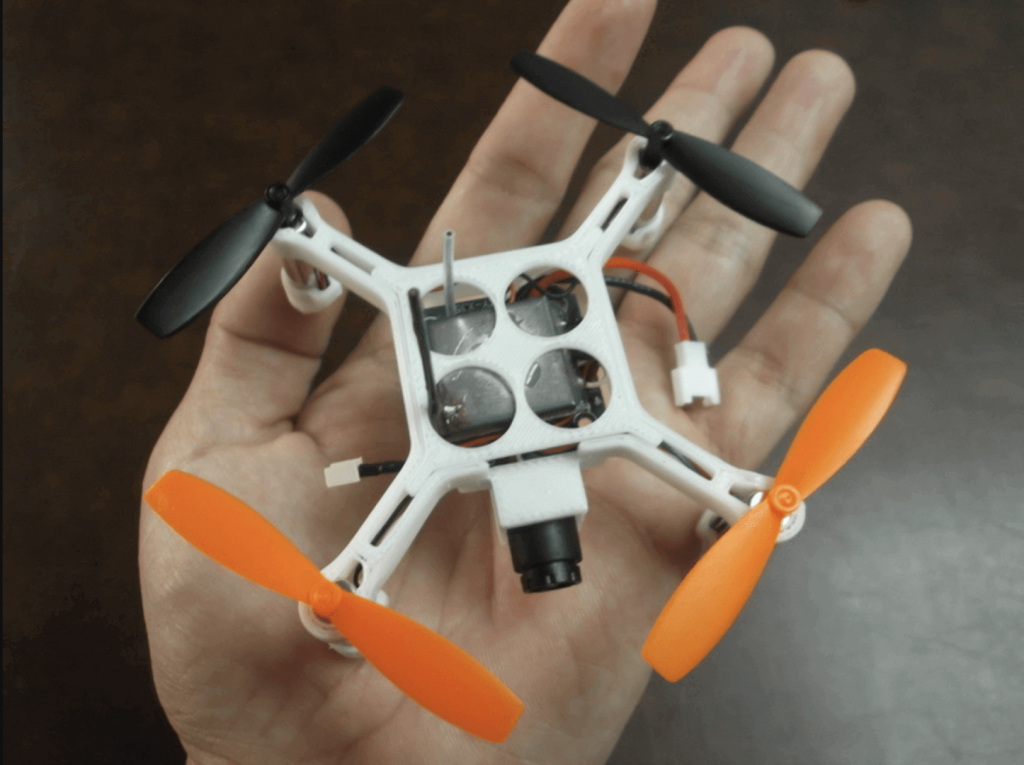
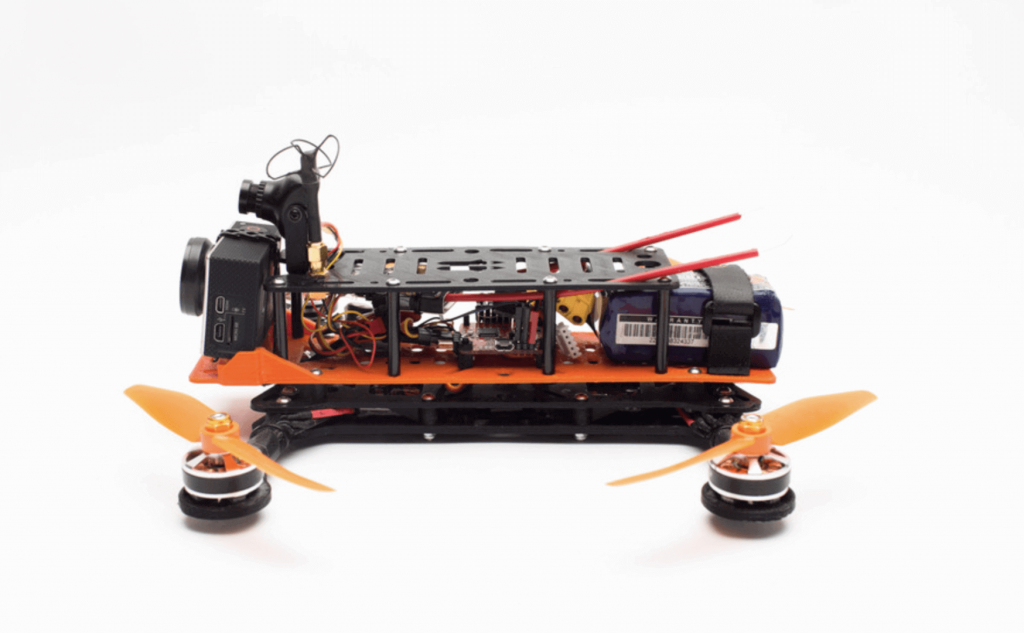
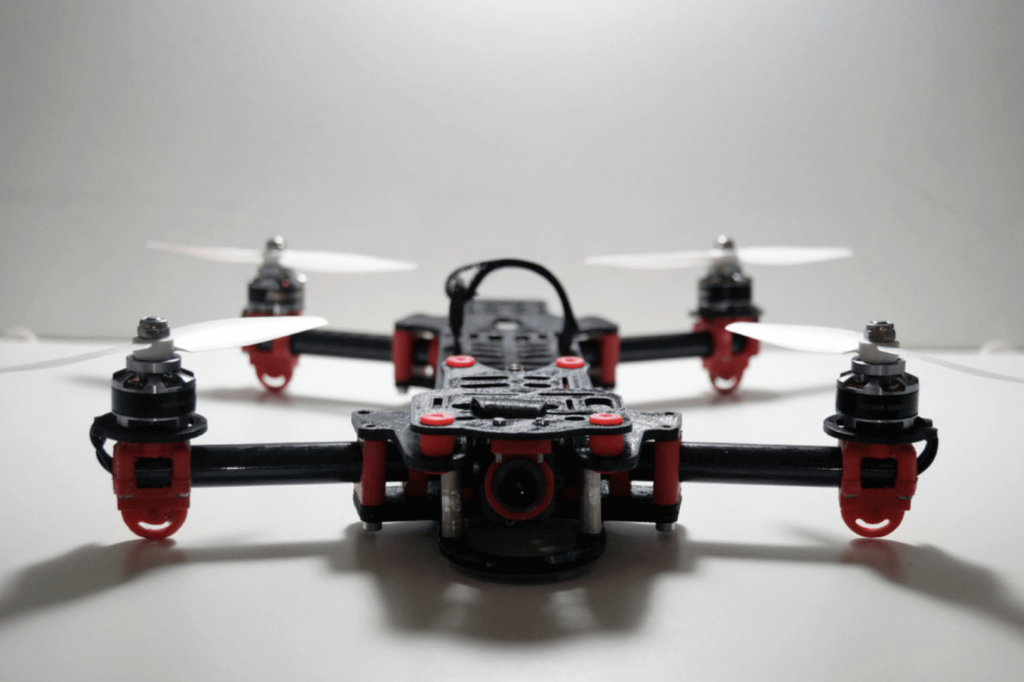
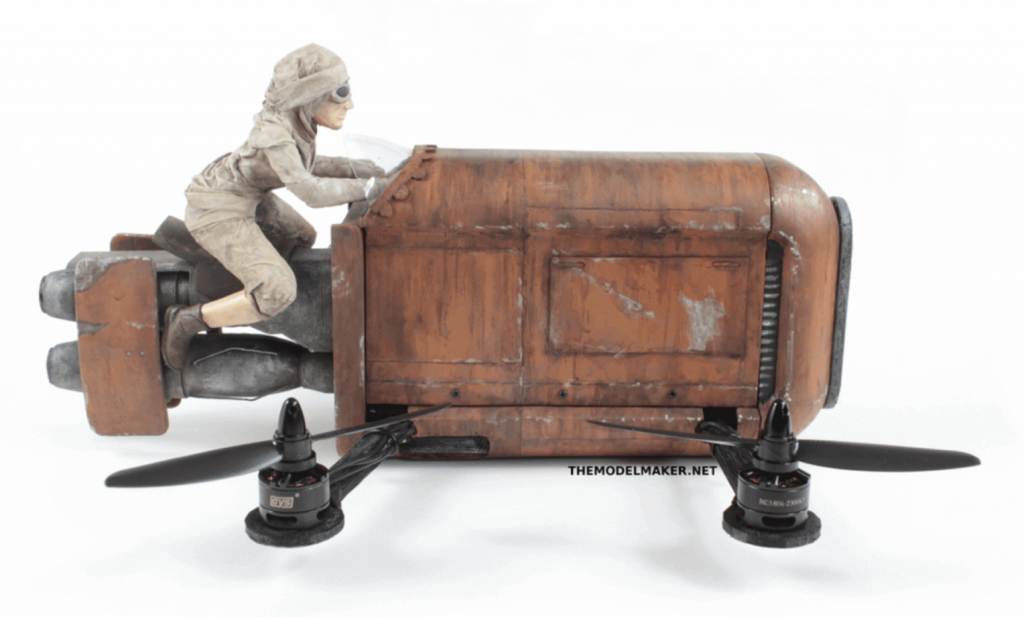


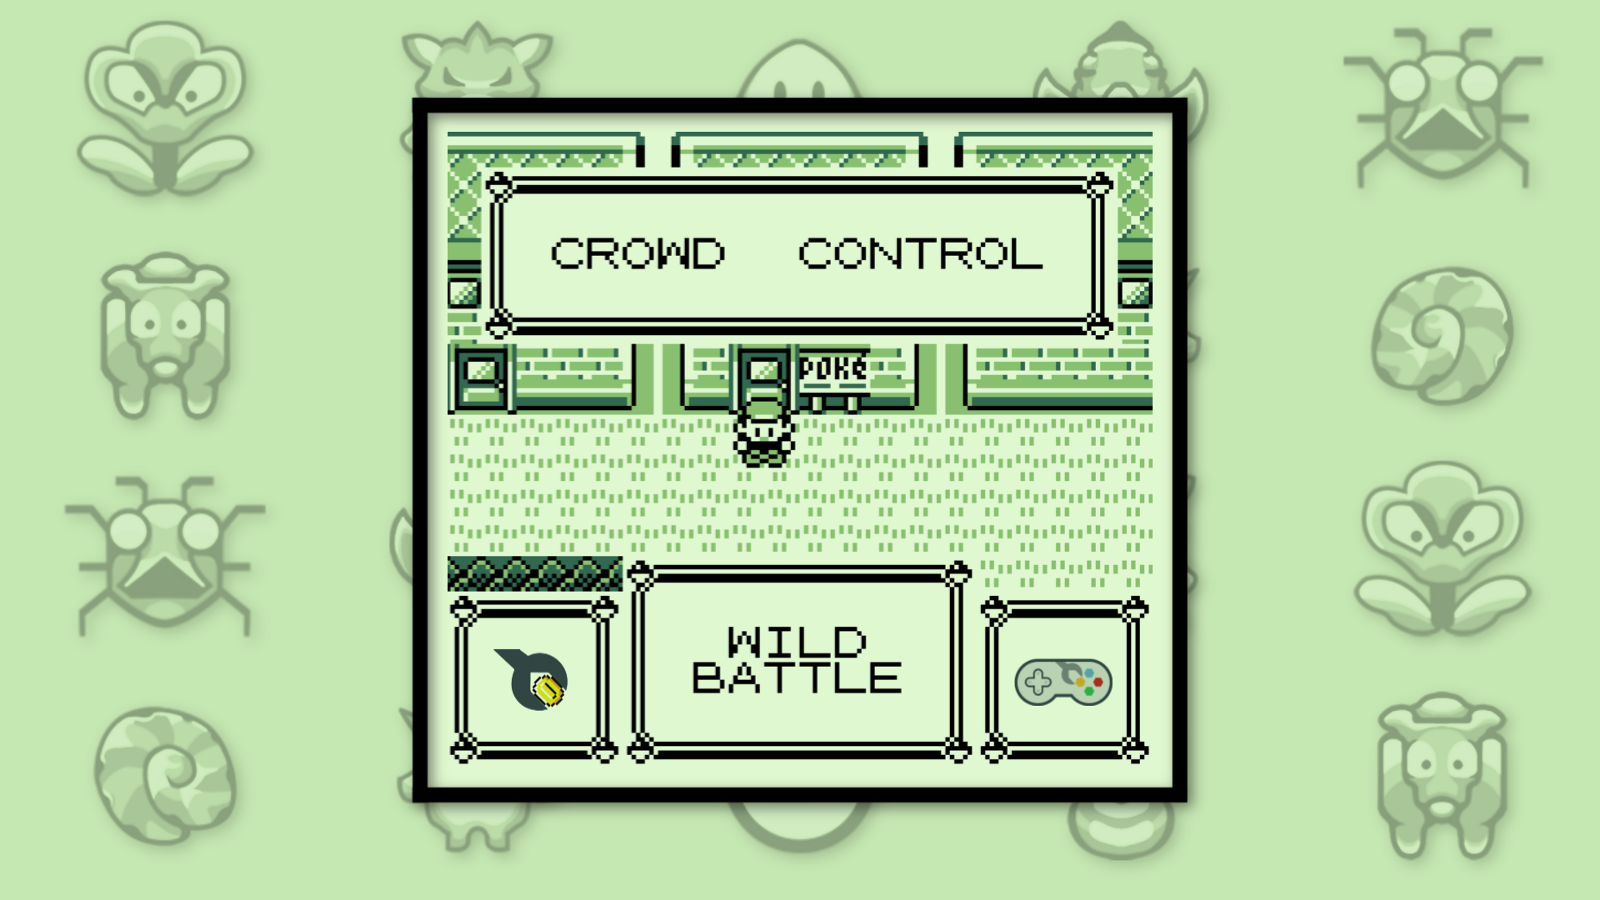


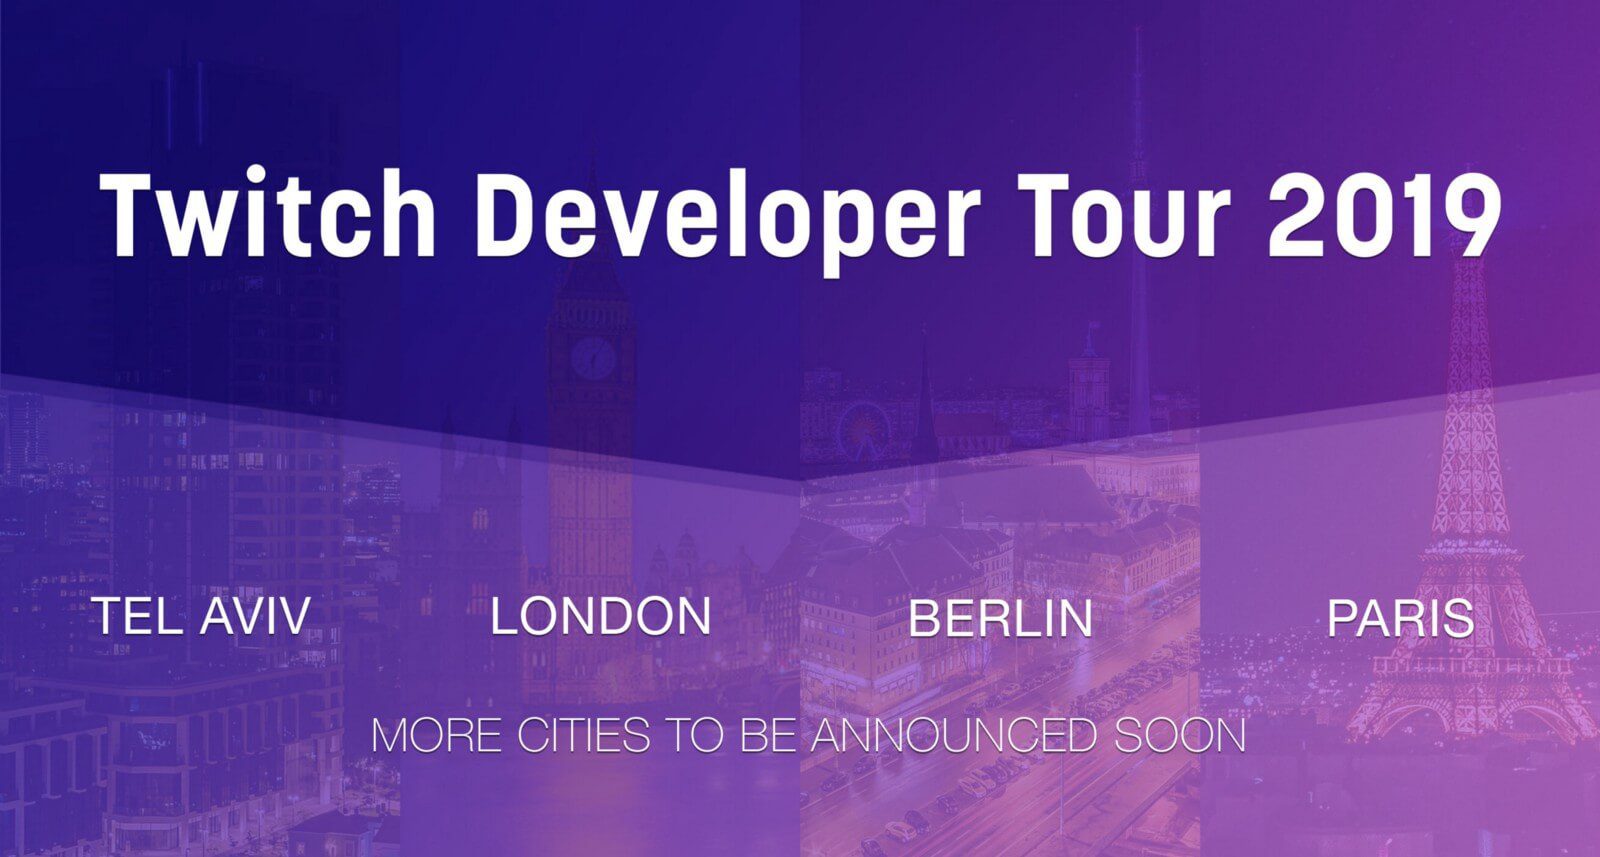


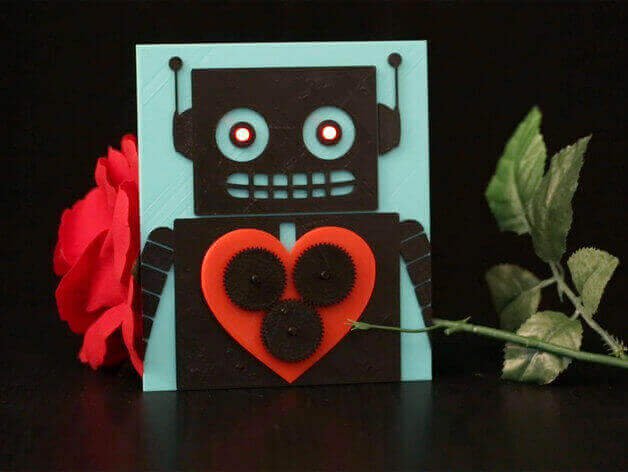

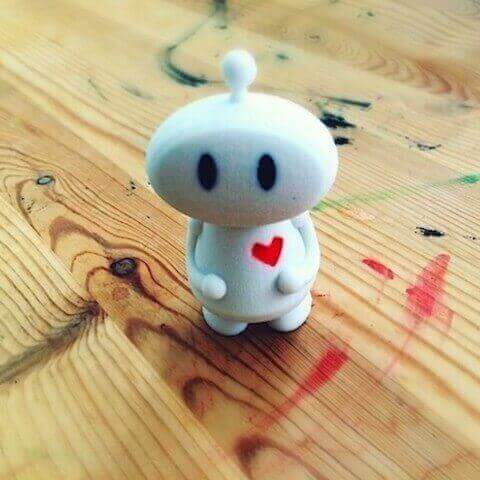

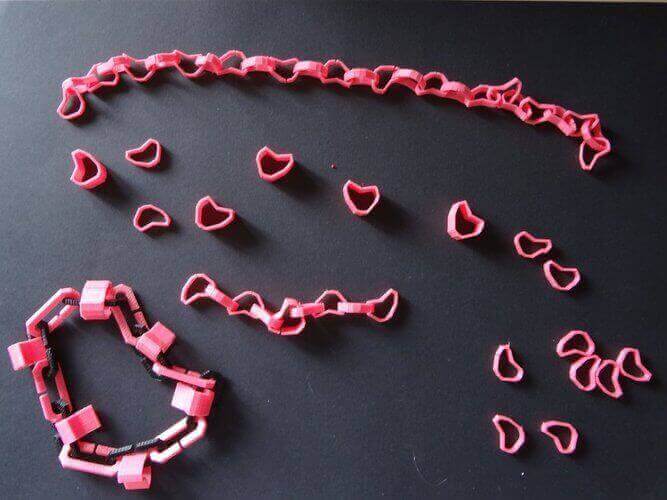


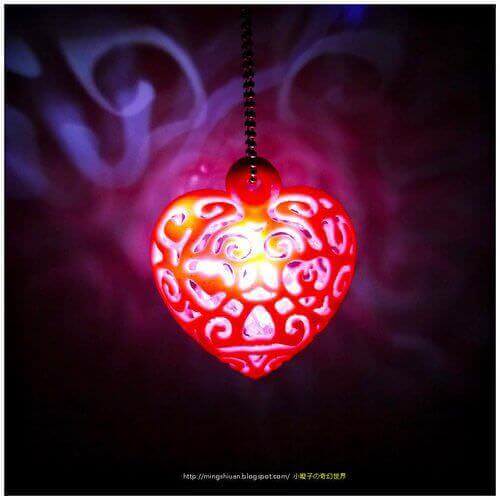


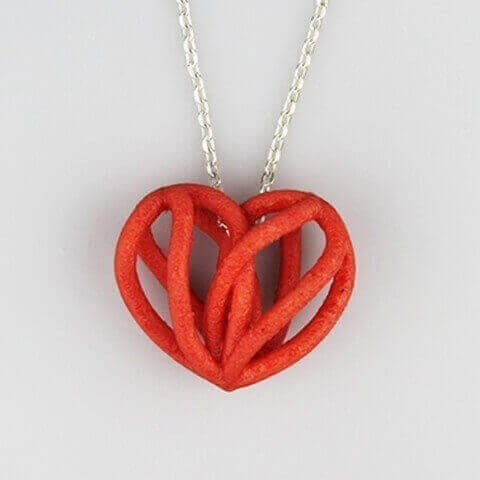

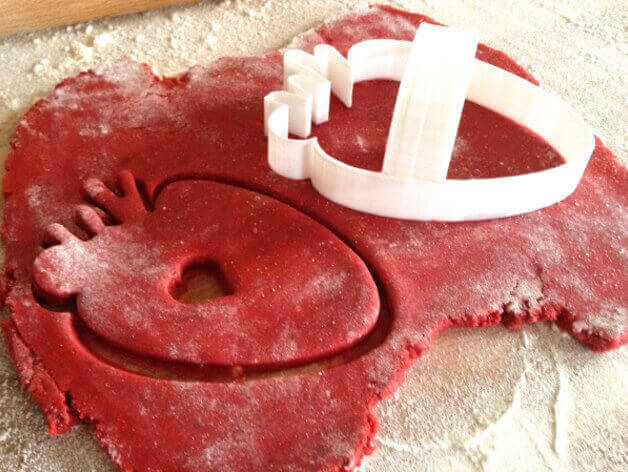


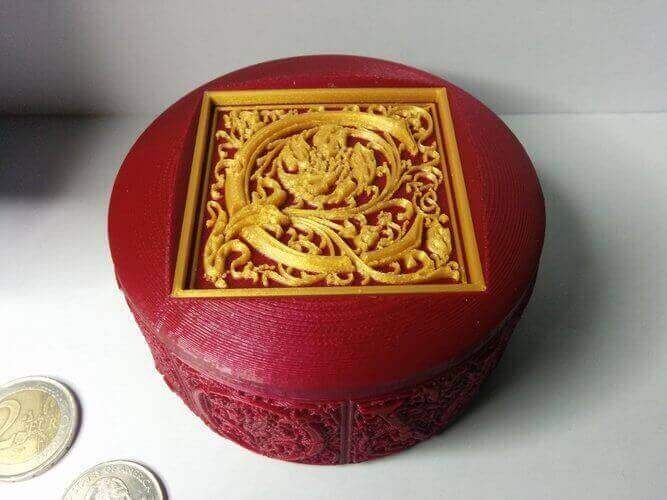
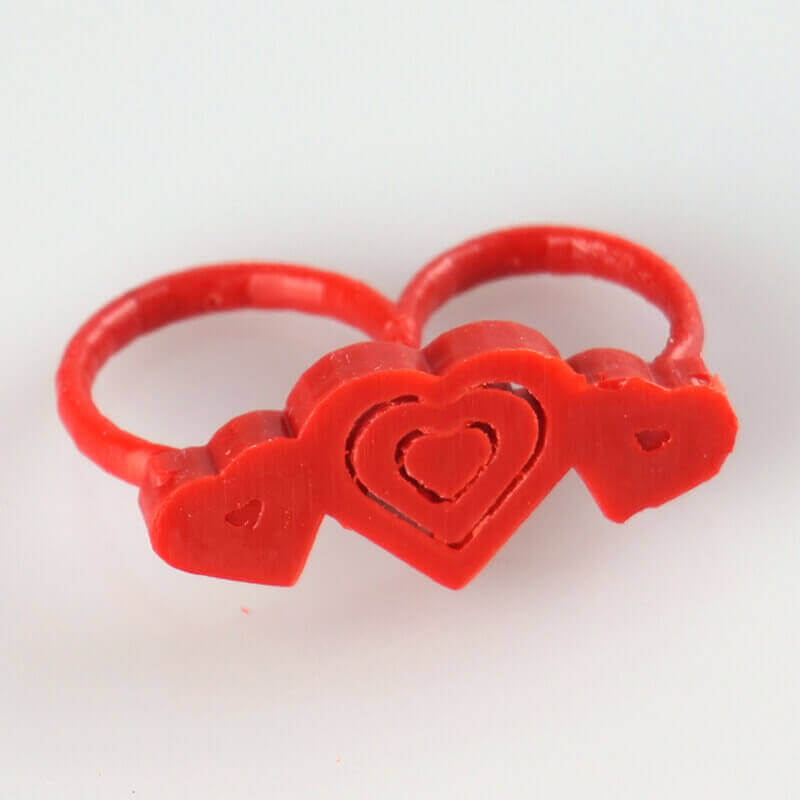
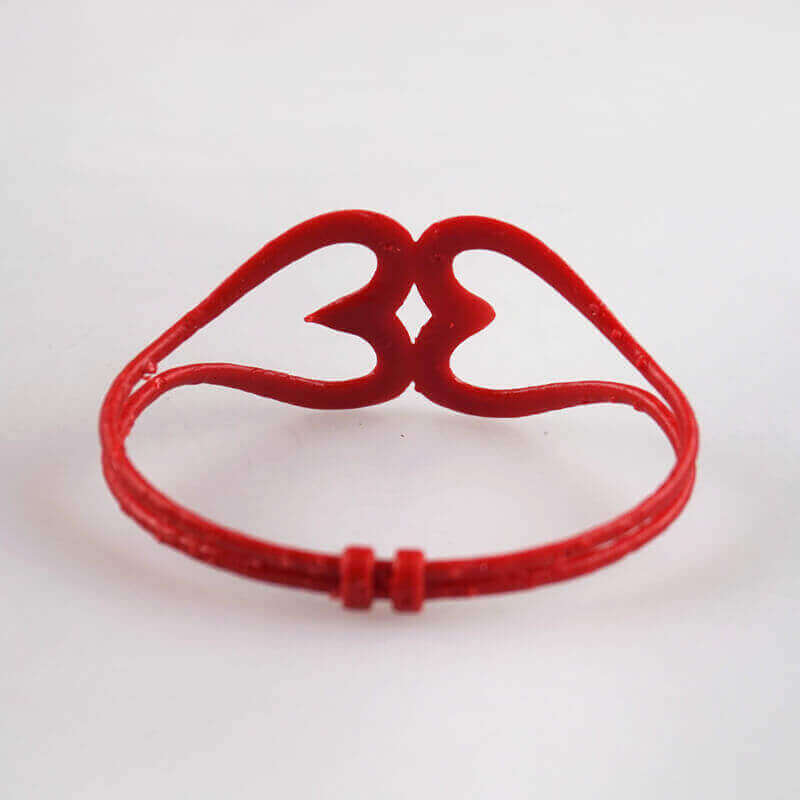

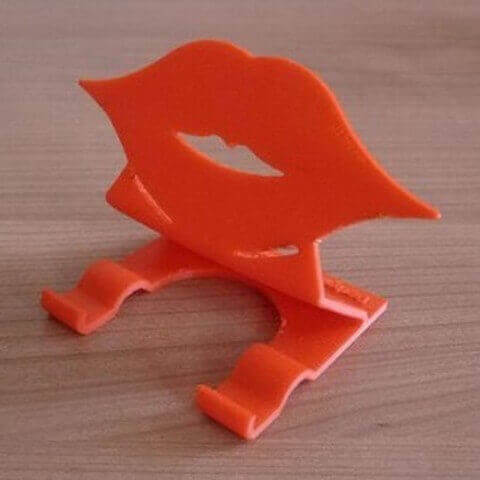


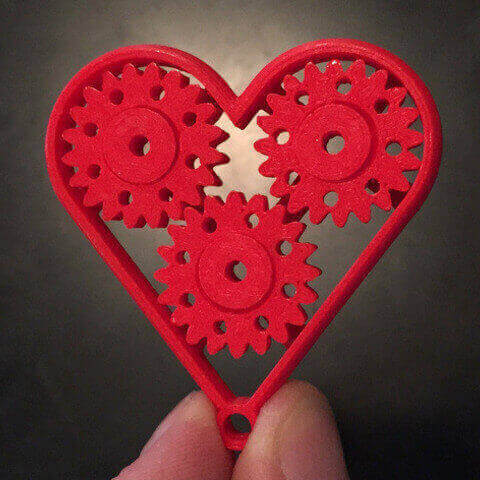

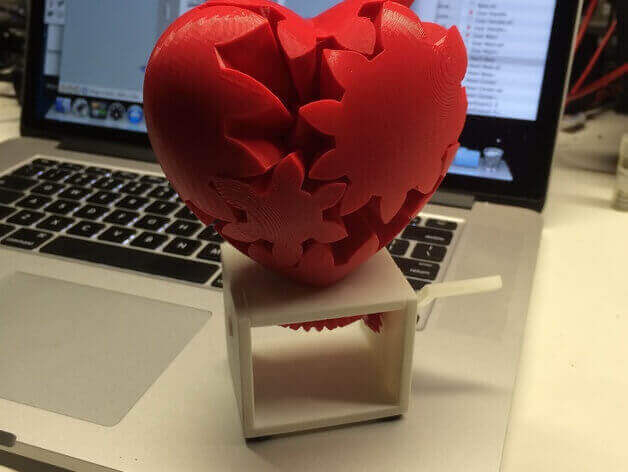

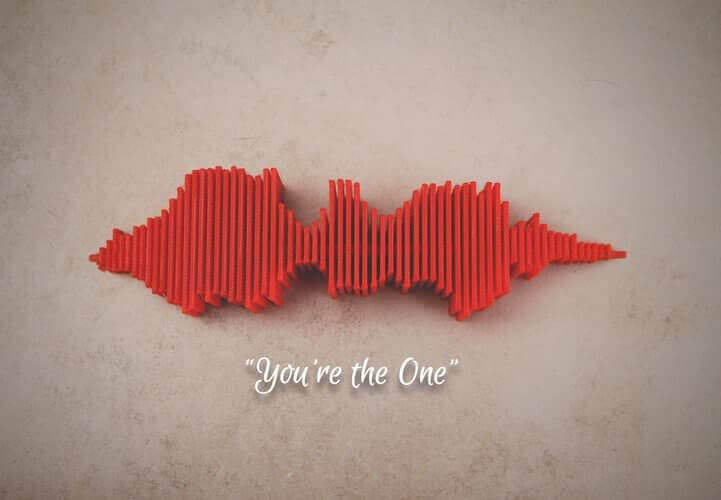


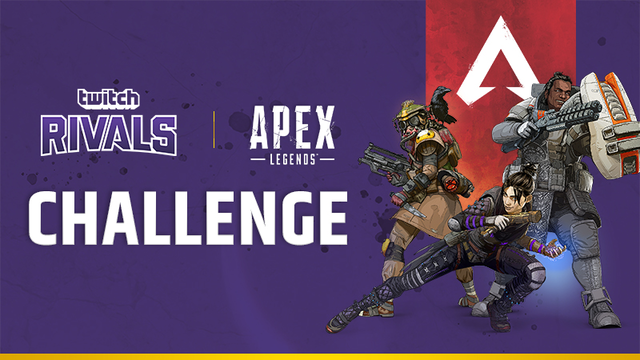


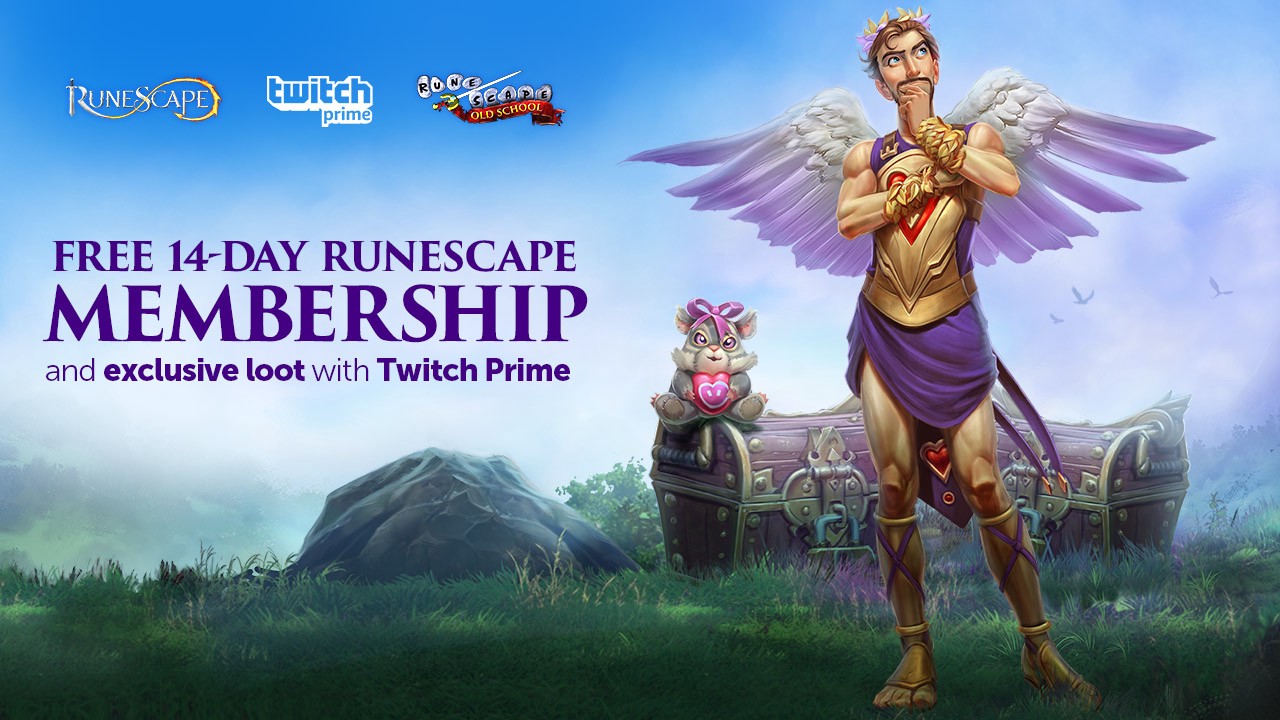


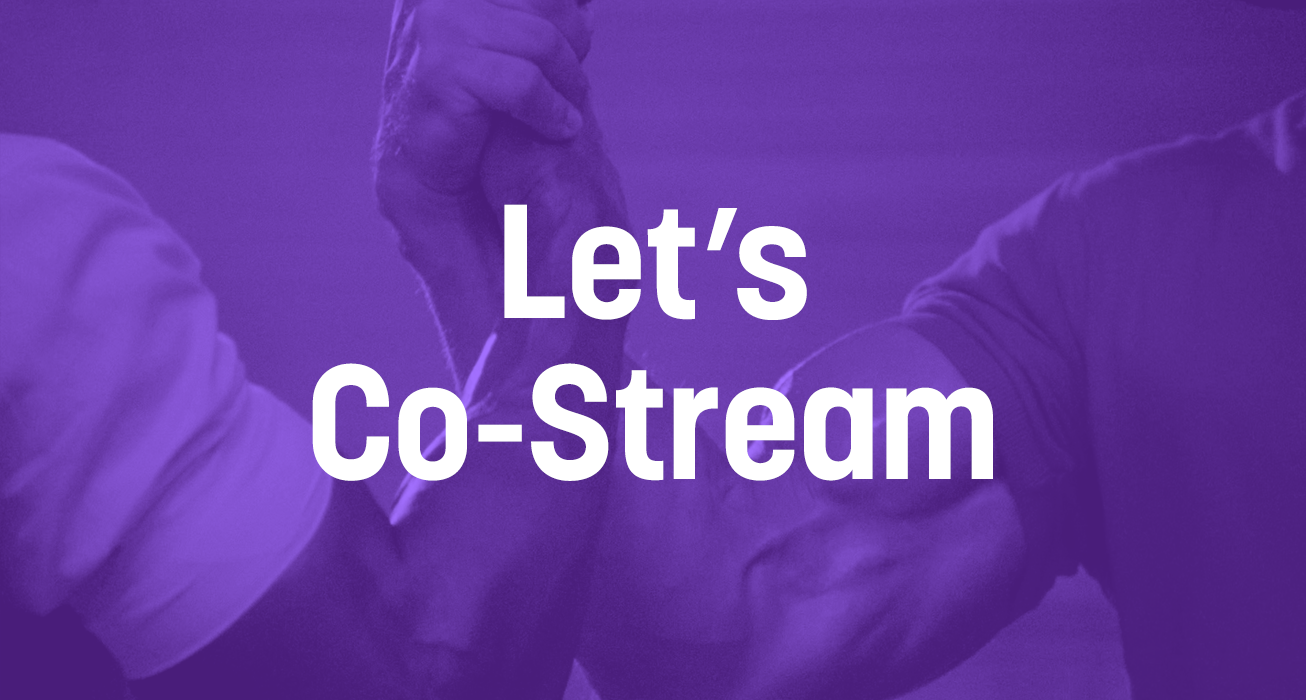


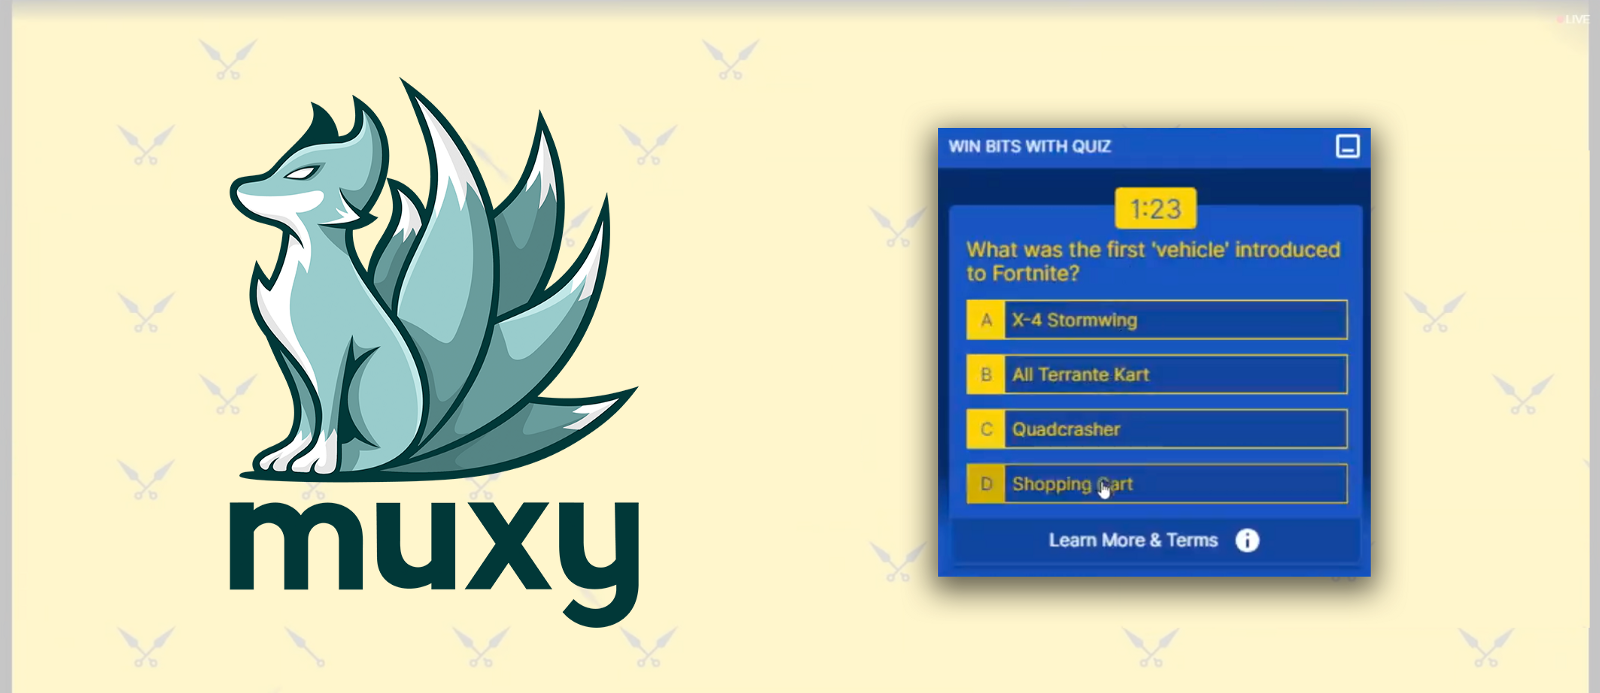
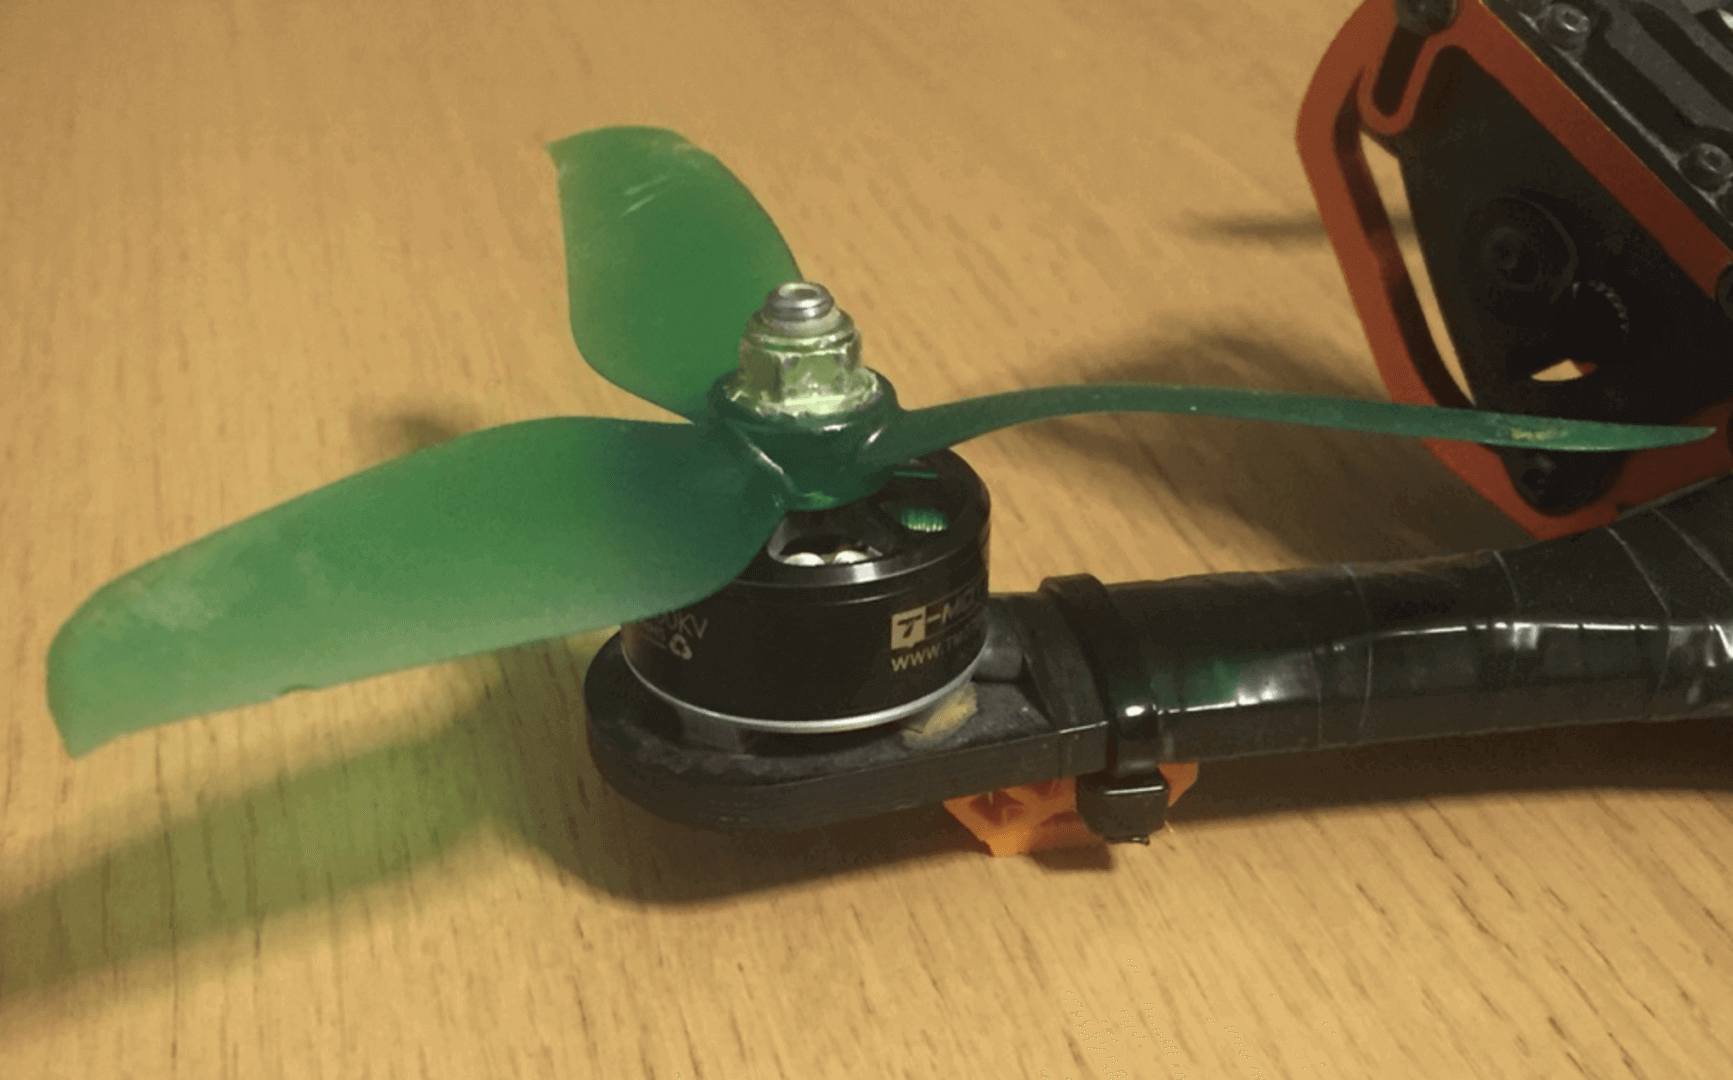
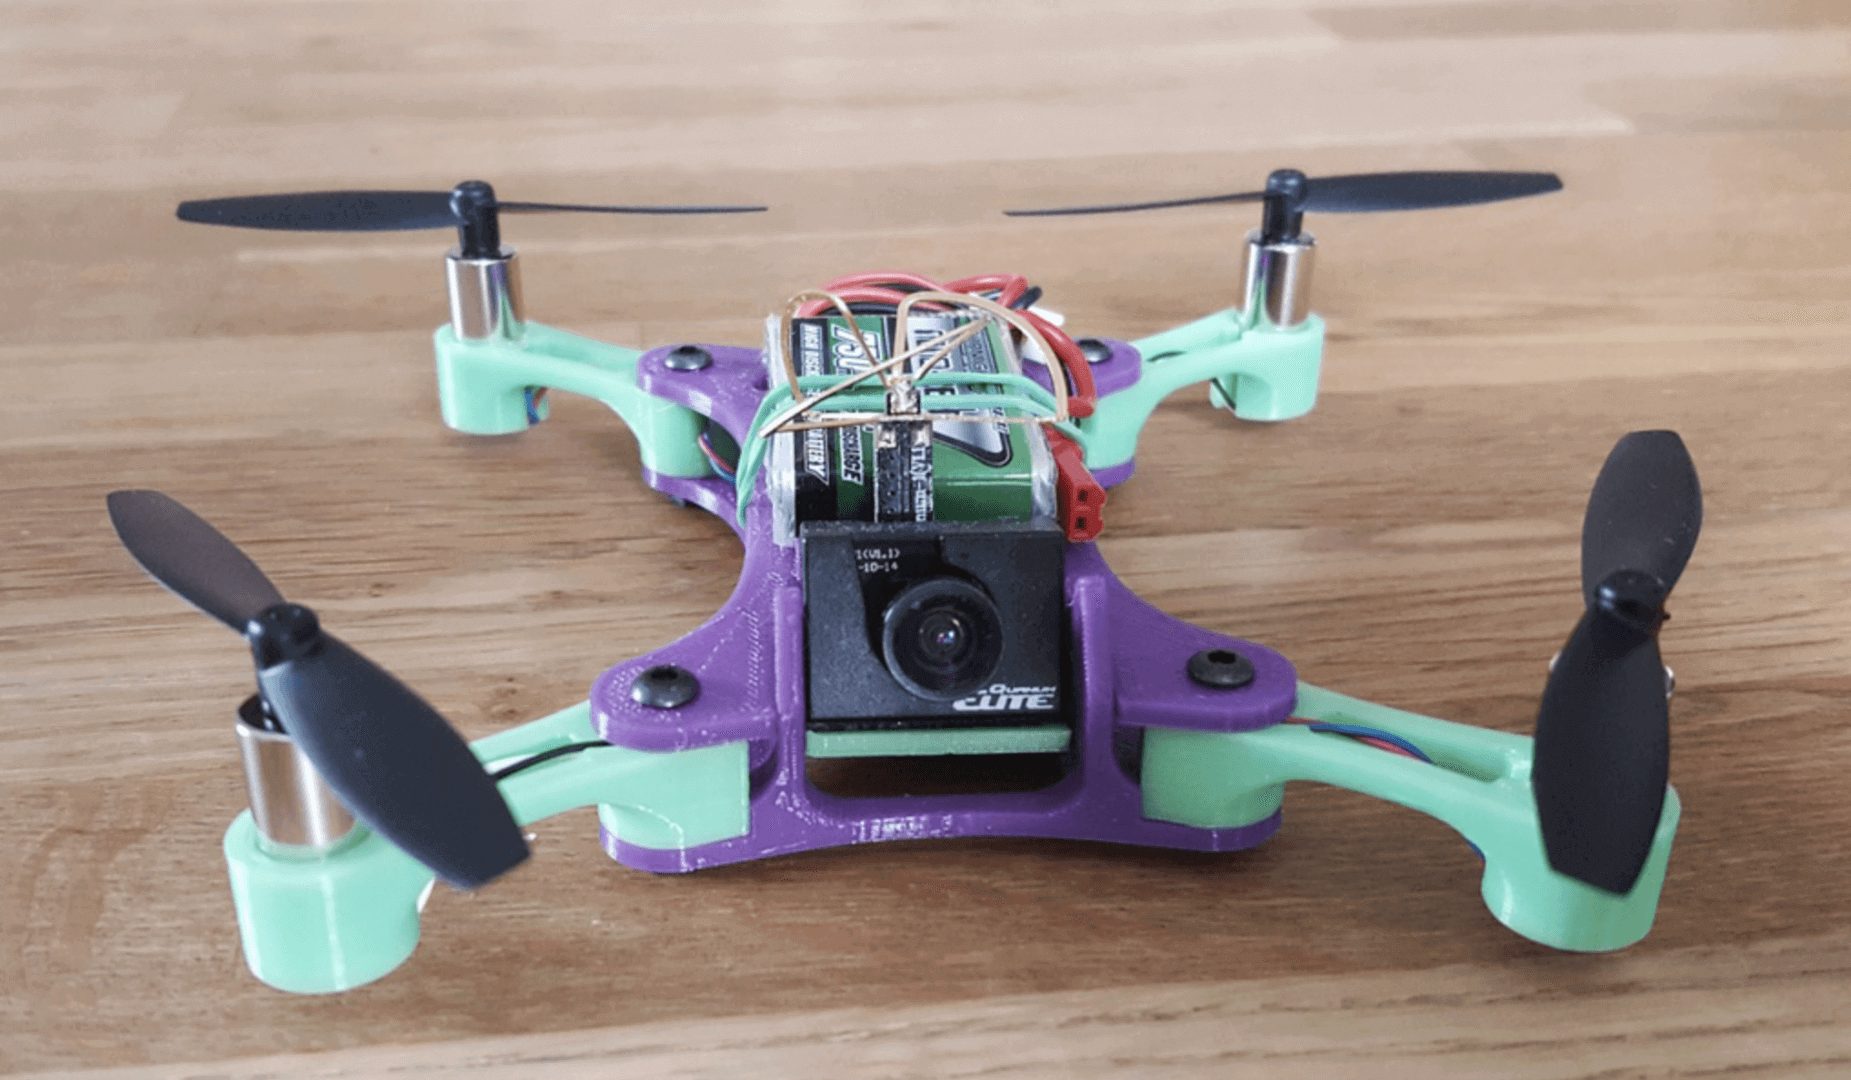