Schlagwort: Uno
-

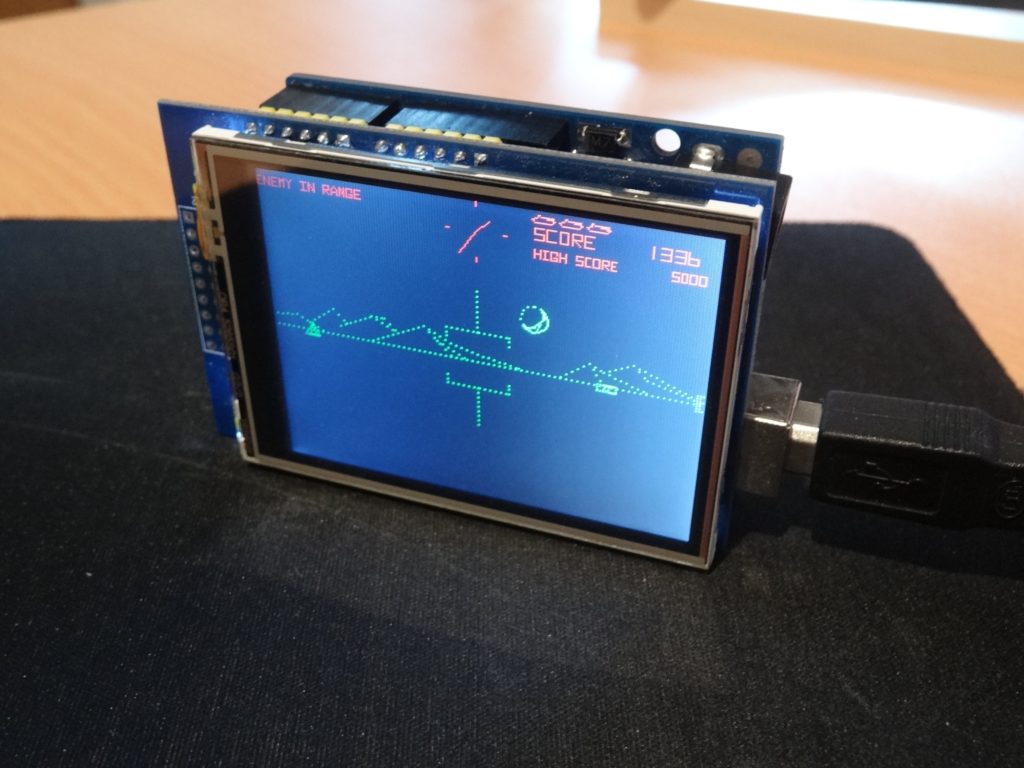
LittleZone is a tribute to the 1980 video game Battlezone
Reading Time: 2 minutesArduino Team — June 6th, 2022 Back in 1980, the video game Battlezone was released, and it marked a major advancement in the world of computer graphics since it was the first game with a 3D first-person perspective. In it, the player must pilot a tank around a battlefield and fire at…
-

Using The Force to open a door
Reading Time: 2 minutesArduino Team — May 28th, 2022 In the Star Wars Universe, the Jedi and Sith use The Force for battle and mayhem. But in the real world, people would use The Force for much more mundane everyday tasks. Obi Wan even does this in the prequel trilogy when he closes a door…
-

Mobiot is a system that lets anyone automate everyday objects
Reading Time: 2 minutesArduino Team — May 25th, 2022 So many tasks within a house can be reduced to a series of somewhat simple movements that are repeated each time that task is done, thus making it a prime target for automation. To make this process far easier than the traditional one of designing a…
-

This sun tracker uses an Arduino to increase solar panel efficiency
Reading Time: 2 minutesArduino Team — May 24th, 2022 With the rapid pace of solar panel installations over the course of the previous decade, there has been an ongoing challenge of trying to improve their efficiency. Apart from the typical silicon crystal photovoltaic cells, there are also more efficient/expensive cells known as concentration photovoltaics (CPV),…
-

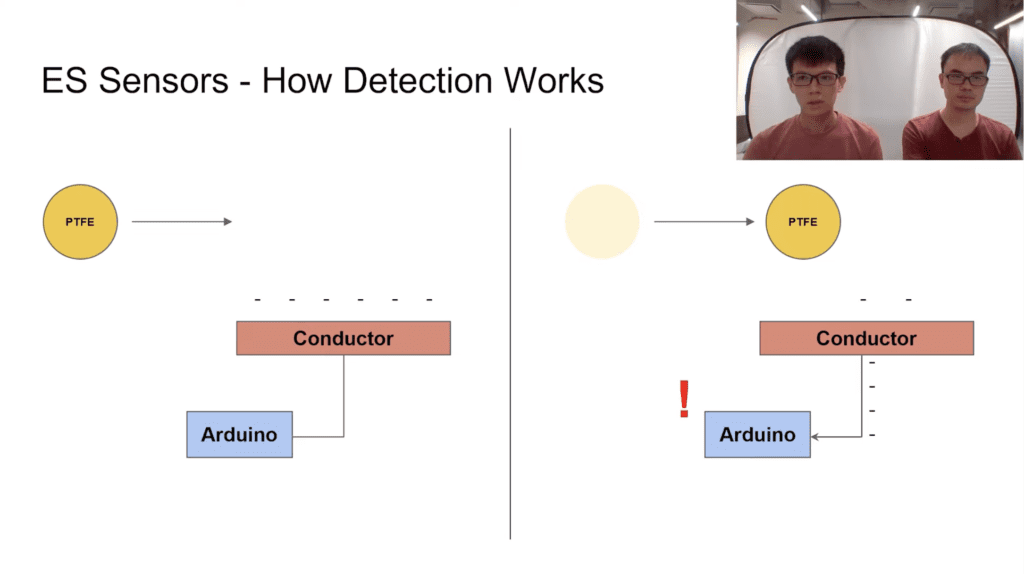
ESsense turns an ordinary conductor into a contactless motion sensor
Reading Time: 2 minutesArduino Team — May 23rd, 2022 When imagining motion sensors, devices such as accelerometers, infrared detectors, and LiDAR units probably come to mind. But due to the complexity and oftentimes high costs of these parts, researchers Joseph Liew and Keng Wei Ng from the National University of Singapore wanted to create a…
-

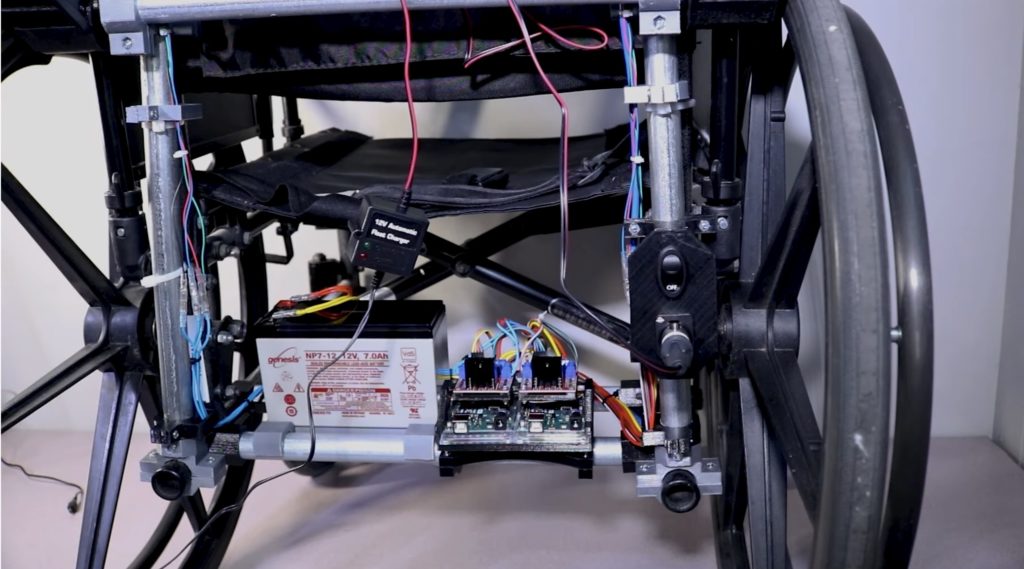
Motorize a manual wheelchair with this adaptable electronic system
Reading Time: 2 minutesArduino Team — May 15th, 2022 Motorized wheelchairs can be very expensive, and for those who are unable to afford them, getting around the house can become a challenge. This is what inspired Wesley Gardner from element14 Presents to design a series of wheelchair modifications that can improve a person’s mobility. Gardner began by coming up…
-

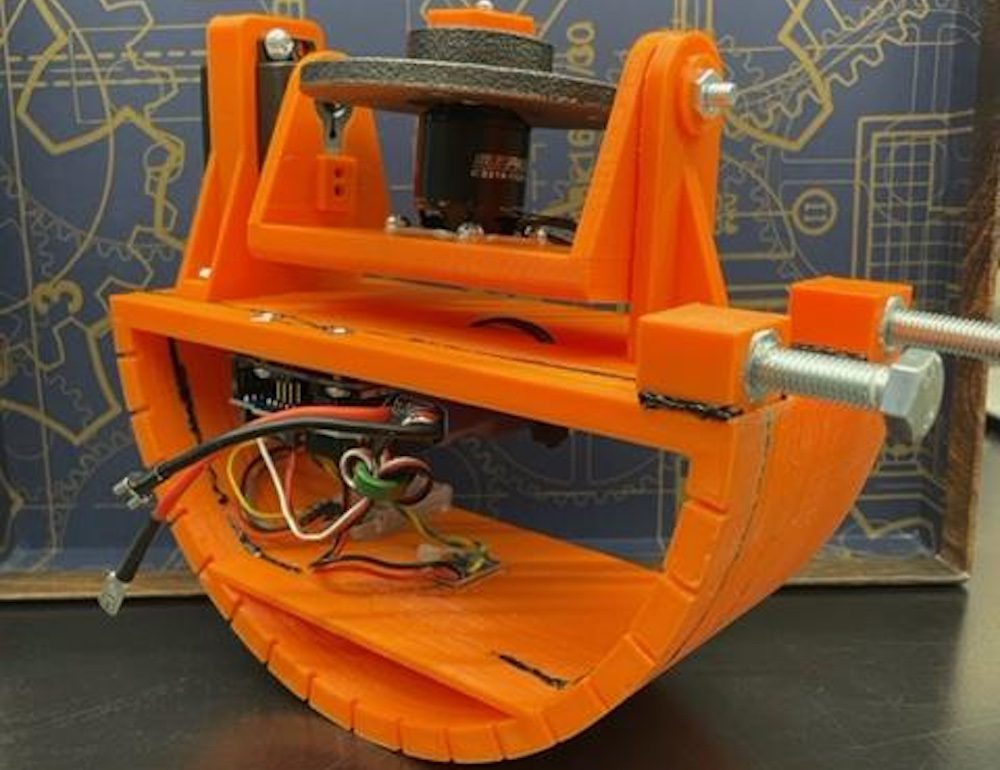
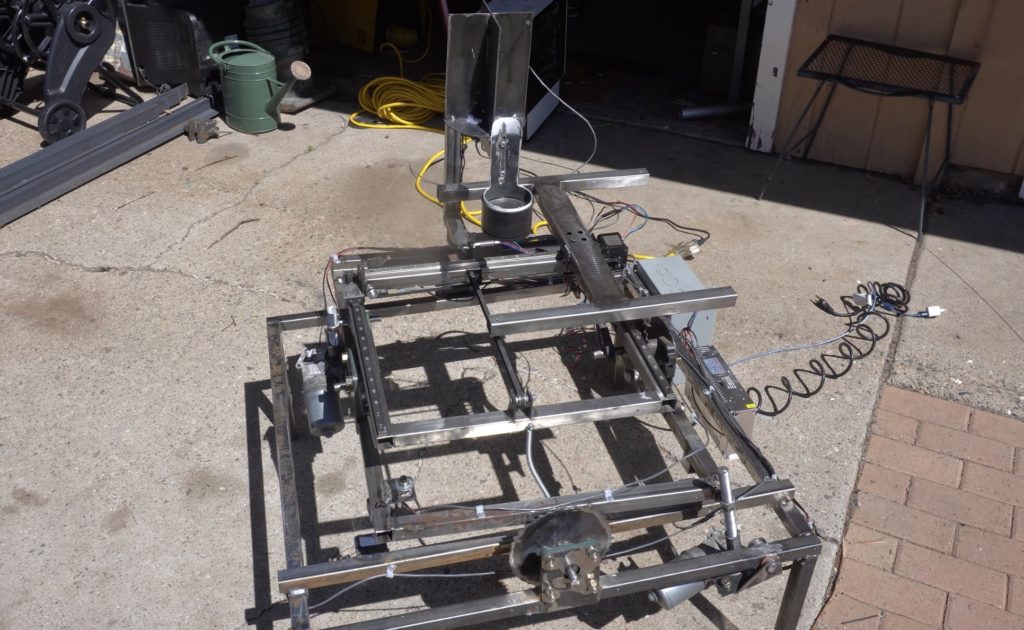
This gyroscopic stabilizer aims to reduce boat roll in waves
Reading Time: 2 minutesArduino Team — May 5th, 2022 Boats are notorious for their constant swaying back and forth when set adrift on a body of water, leading to sea sickness for those unlucky sufferers and forcing items to be securely stored to prevent them from moving around unintentionally. So, as part of their course…
-

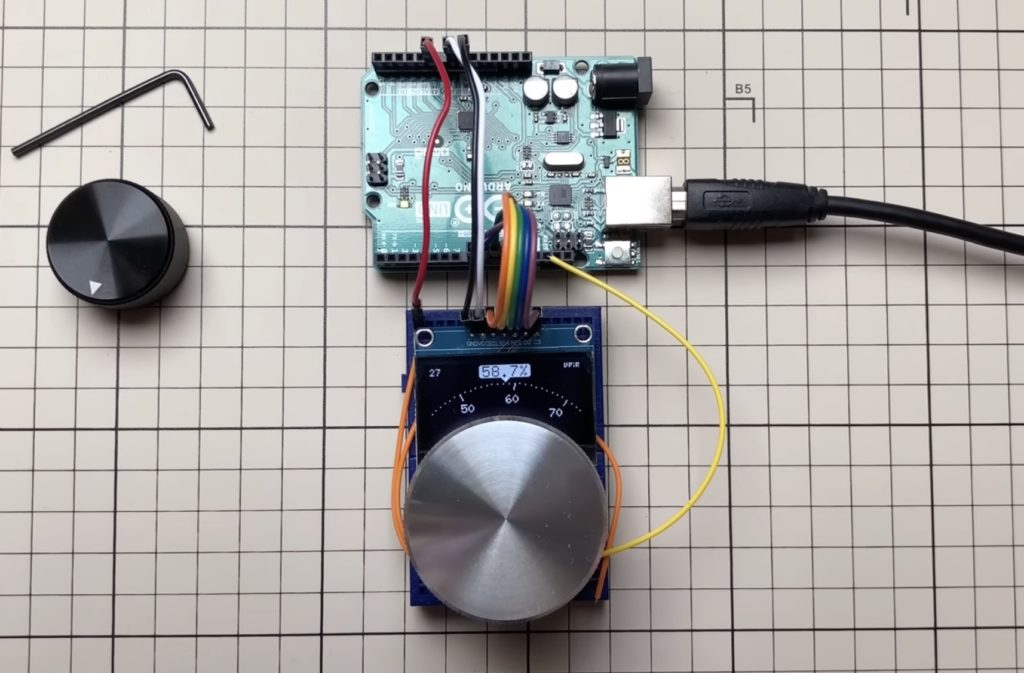
Take things up a notch by turning the humble OLED into a rotary dial
Reading Time: 2 minutesArduino Team — May 3rd, 2022 The 128×64 I2C/SPI OLED display is often included in a myriad of projects that need some way to show data, including text, shapes, or basic graphs. YouTuber ‘upir’ was able to take this concept one step further by turning his graphic OLED screen into a virtual circular dial…
-

Arduino-controlled CNC engraver uses solar power
Reading Time: 2 minutesArduino Team — April 28th, 2022 Usually when we use the term “solar power,” we are referring to indirect energy use: photovoltaic solar panels collect energy from the sun and then either pass it along to a device or store it for later use. But some systems can use power from the…
-

Reset your Canon printer’s maintenance cartridge with this hack
Reading Time: 2 minutesReset your Canon printer’s maintenance cartridge with this hack Arduino Team — April 6th, 2022 Printers are notorious for high operating costs. Usually those come in the form of expensive ink cartridges, which require replacement even when they still contain some ink. But some printers, including Canon Pixma G models, take this…
-

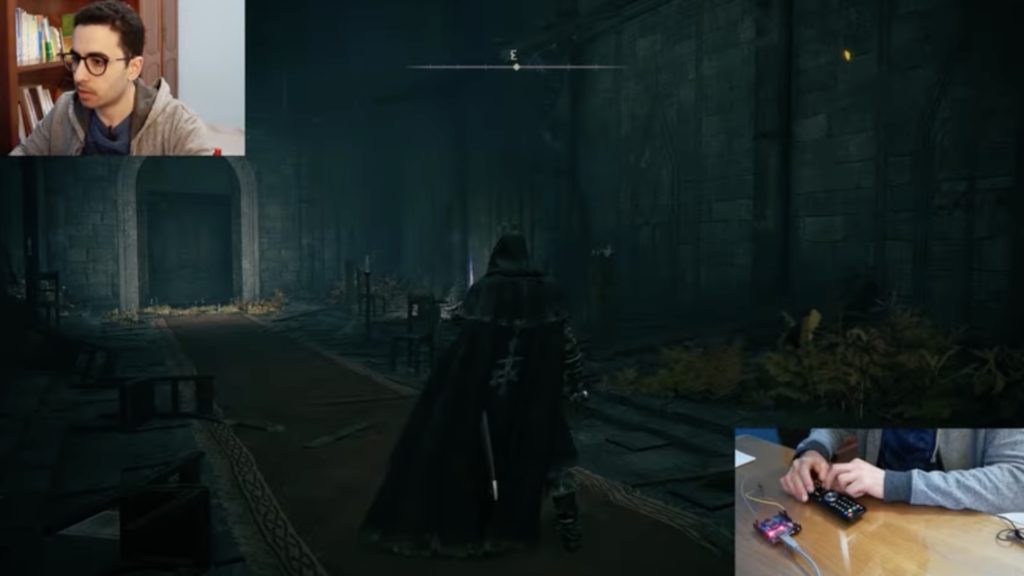
Playing Elden Ring with a TV remote
Reading Time: 2 minutesArduino Team — April 1st, 2022 In case you’ve been living under a rock and haven’t heard of it, Elden Ring is currently the hottest game in the world. It’s an open world RPG made by From Software — the same company that is infamous for making the incredibly difficult Demon’s Souls, Dark Souls, and Bloodborne games. Elden Ring is…
-

These special windshield wipers move to the beat of a car’s stereo
Reading Time: 2 minutesThese special windshield wipers move to the beat of a car’s stereo Arduino Team — March 28th, 2022 Having your windshield wipers move to the beat of your favorite song can be a fun moment while driving, which is why YouTuber Cranktown City wanted to ensure this would always be the case…
-

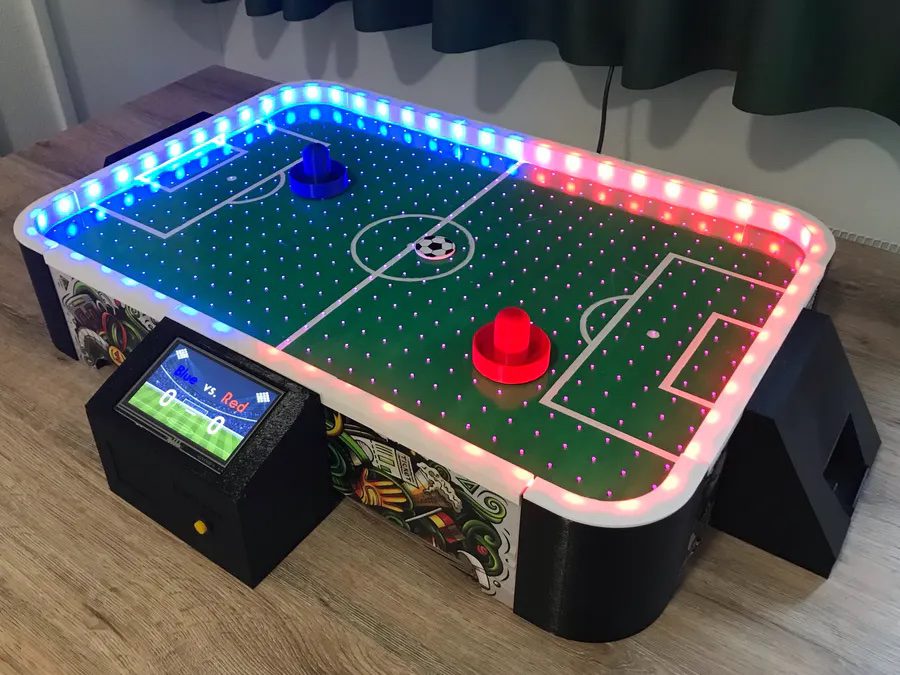
This homemade table puts a soccer spin on air hockey
Reading Time: 2 minutesArduino Team — March 2nd, 2022 The classic tabletop game of air hockey has existed in its current form for decades, and while it can be fun initially, the lack of exciting components can make it dull after a while. So, in order to exercise his creative and technical skills, Silas Hansen decided to…
-
Sorting beads the easy way
Reading Time: 2 minutesArduino Team — February 16th, 2022 If you want to measure the blueness of an object, you can shine a pure blue light at it and then measure the reflected light intensity with a photodiode. Do the same for red and green light, and you can get an RGB color value. Conversely,…
-

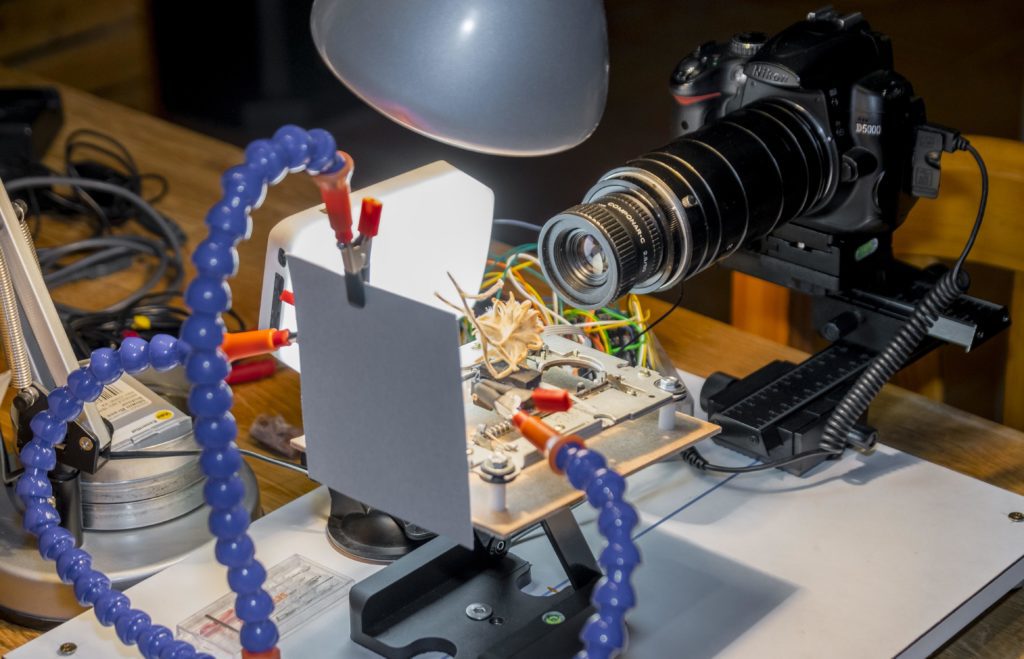
Capture macro photos with this Arduino-powered platform
Reading Time: 2 minutesArduino Team — January 25th, 2022 Getting that perfect up-close macro shot is touch, especially since even the smallest movement can throw off a focused image or make the subject leave the frame. This need for stability and precision is what drove Kike Glez (AKA ‘TelekikeG’ on Instructables) to build a motorized photography platform that…
-

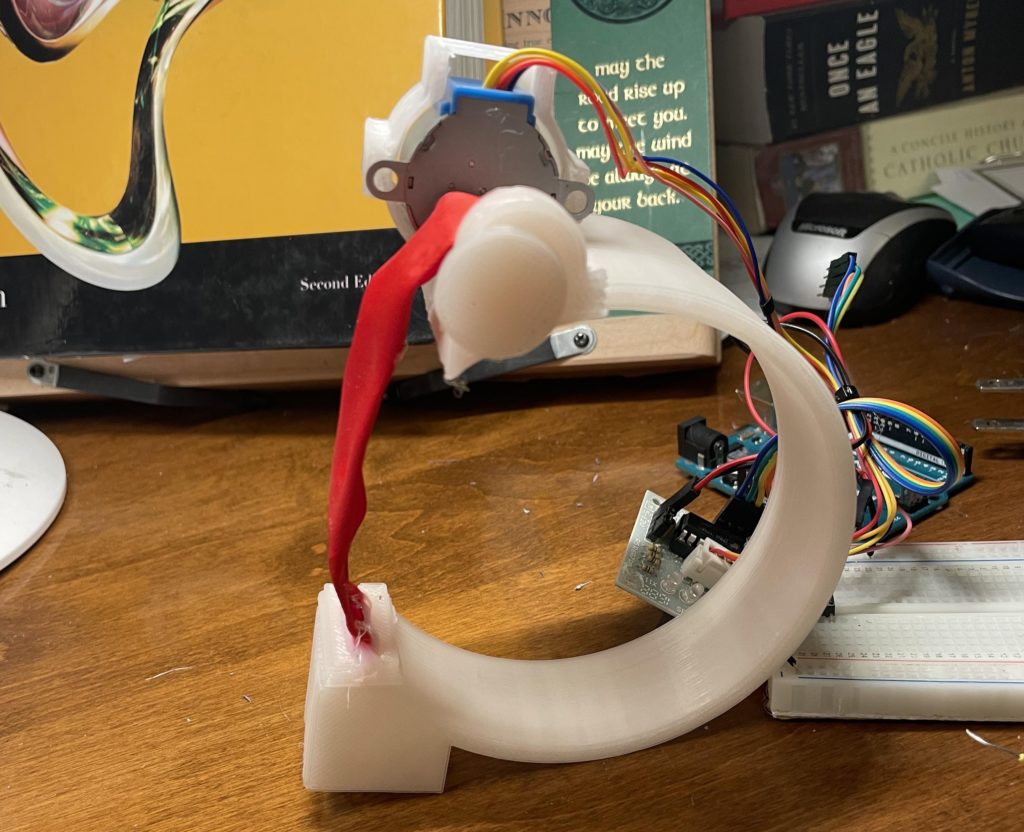
AutoStrap is a self-tightening strap that’s like something out of Back to the Future
Reading Time: 2 minutesAutoStrap is a self-tightening strap that’s like something out of Back to the Future Arduino Team — January 18th, 2022 For wearable devices, attaching them to an arm or leg can be an annoying process since the straps used often have complicated tightening/locking mechanisms. This is what inspired one Instructables user who…
-

AIfES releases exciting new version of TinyML library for Arduino
Reading Time: 2 minutesArduino Team — January 17th, 2022 Last July AIfES (Artificial Intelligence for Embedded Systems) from the Fraunhofer Institute for Microelectronic Circuits and Systems (IMS) was launched. This open source solution makes it possible to run, and even train, artificial neural networks (ANN) on almost any hardware, including the Arduino UNO. The team…
-

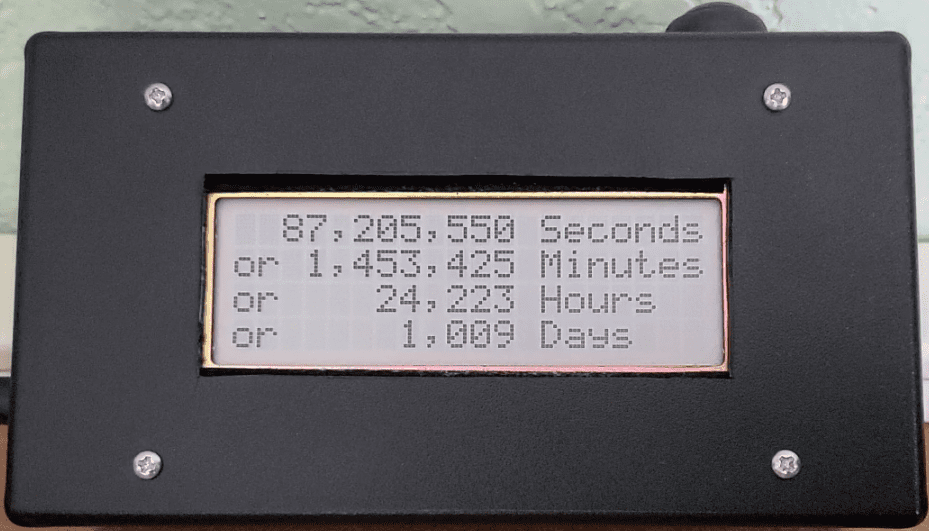
This clock counts down to retirement
Reading Time: 2 minutesArduino Team — January 14th, 2022 For most people, the idea of retiring is a very exciting thought. Finally, after decades of hard work, you can clock out for the last time and spend the rest of your life relaxing and enjoying your leisure years. RdRnr318’s coworker updates her whiteboard every day…
-
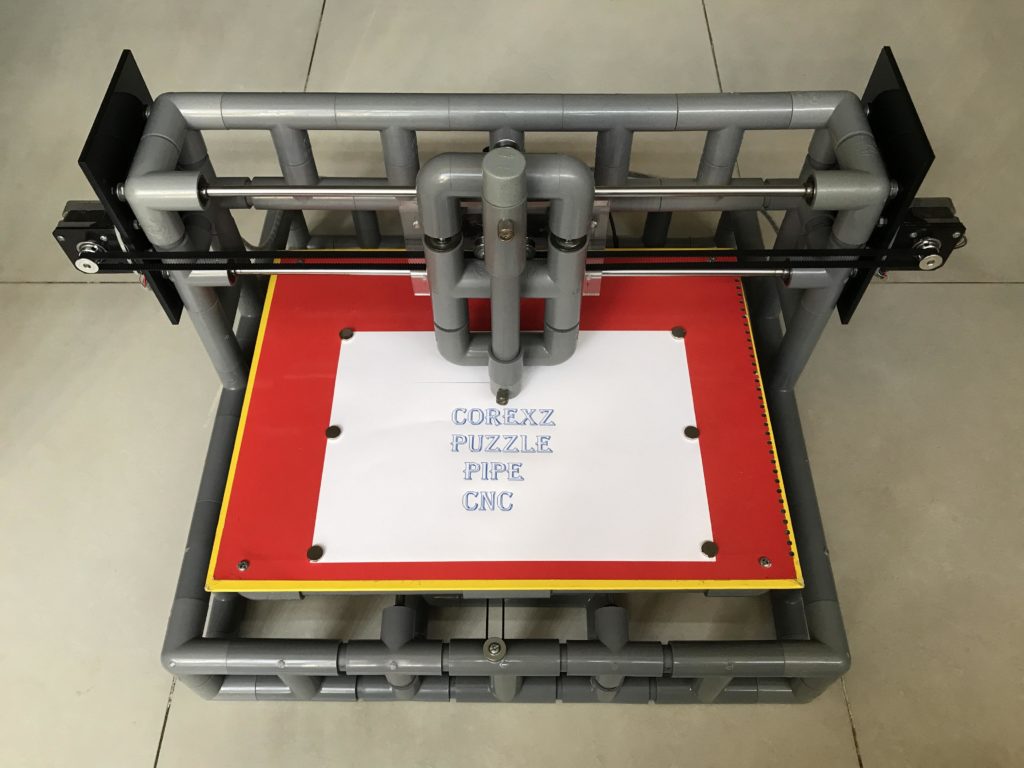
PVC pipe plotter prints pretty pictures
Reading Time: 2 minutesArduino Team — January 5th, 2022 Instructables user tuenhidiy wanted to create a new kind of CNC plotter that was unlike nearly all of the others you’ve seen. Rather than use aluminum extrusions or wood, this machine is constructed from various pieces of PVC pipe all cut to exact lengths, hence its…
-
Neatly fold your t-shirts with an Arduino-powered robot
Reading Time: 2 minutesArduino Team — January 3rd, 2022 Folding t-shirts isn’t a fun process for many people, and even worse, it’s difficult to get them looking the exact same way when the pile of folded clothing is completed. So in order to make it easier, mechanical engineering students Pietro Oppici, Corentin Vandebroek, Stefano Pontoglio, and…