Schlagwort: Uno

  • Build a light painting device with Arduino and LEDs

    Build a light painting device with Arduino and LEDs

    Reading Time: 2 minutes

    Build a light painting device with Arduino and LEDs

    Arduino TeamApril 9th, 2018

    Graffiti with spray paint is generally impolite and illegal, but as hacker “Reven” shows in his write-up, you can get a very similar effect with long exposure photography and carefully-timed LEDs.

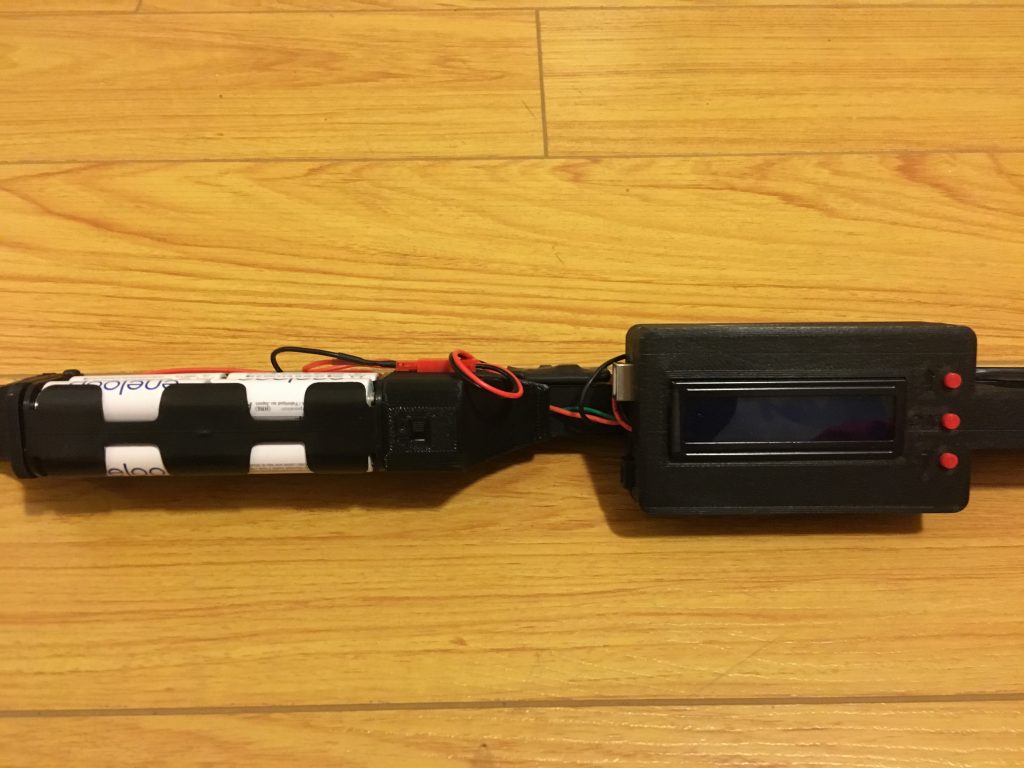
    Instead of blindly moving a light point about to make this effect, he built his own handheld light painter using an Arduino Uno and a custom enclosure—shared on Thingiverse—to hold everything.

    The project’s Arduino sketch can be found here, and adds a 16×2 LCD display to a light painting device conceived of by Phil Burgess for Adafruit, which enables to control the brightness of the LED strip as well as select and load various images from a micro SD card.

    This has been done before, many, many times; and even commercially. But I wanted to build my own, both to learn in the process and because commercial options were out of my budget. I chose adafruit’s implementation as a starting point, because it worked on the hardware I already had and they have provided detailed instructions. I also wanted some additional features: I wanted to add a display and a menu system to be able to choose the image to display and adjust the settings (like brightness or speed). I also wanted to be able to turn off the brightness balancing that adafruit’s sketch did, because frame or animation painting wasn’t something I really needed. And most importantly, I adjusted the project to the materials I had at hand.

    With this fantastic build in hand, Reven can now produce beautiful light graffiti wherever it’s needed!


    Website: LINK

  • Designing a fake dynamic price tag

    Designing a fake dynamic price tag

    Reading Time: 2 minutes

    Designing a fake dynamic price tag

    Arduino TeamApril 5th, 2018

    Wile we know on some level that prices adjust to market conditions, with Amazon now owning Whole Foods, one could perhaps see a day when this happens electronically and instantaneously.

    To get a preview of what this might look like, maker “msbirfday” decided to create a random price generator based on an Arduino Uno and a 16×2 LED display. This was then disguised as an official price tag, and set up in a store to observe how shoppers reacted.

    The unit blends in nicely, and while employees might get annoyed at the device, it’s certainly an ingenious prank.

    Amazon’s recent acquisition of Whole Foods Market made us wonder: what’s stopping dynamic pricing from stepping into the physical world of retail? What if the prices in a supermarket were just as flexible as those online?

    Check out how it was made here, and see it in action in the video below!

    [youtube https://www.youtube.com/watch?v=z8l4fS0Mlns?feature=oembed&w=500&h=281]


    Website: LINK

  • Quadruped robot made entirely out of cardboard

    Quadruped robot made entirely out of cardboard

    Reading Time: < 1 minute

    Quadruped robot made entirely out of cardboard

    Arduino TeamApril 4th, 2018

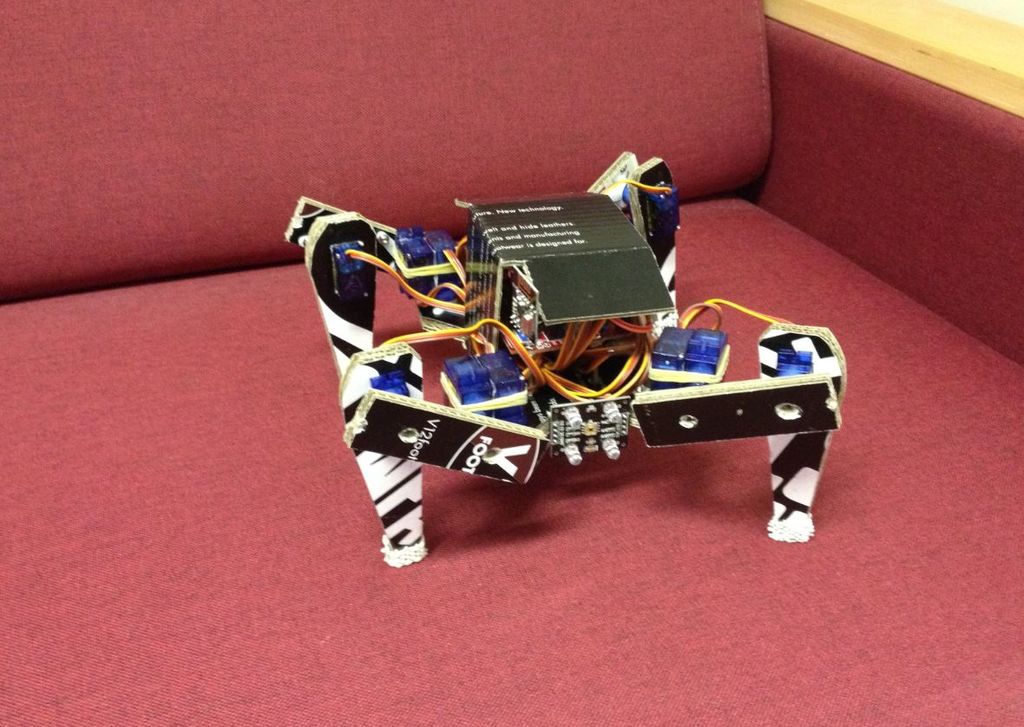
    Walking robots can be a lot of fun, but many people would logically think that they need CNC equipment or a 3D printer to make this sort of bot. Creator “Raz85,” however, shows that this isn’t actually required, and built a quadruped using a structure comprised entirely out of corrugated cardboard.

    Each of the four legs are driven using 9g micro servos, controlled by an Arduino Nano. A human operates the spider-inspired robot with a remote consisting of an Arduino Uno and a small joystick module, while pair of NRF24L01 radio transceivers provide a link between the robot and controller.

    Despite its simple construction, the quadruped moves around impressively well…

    [youtube https://www.youtube.com/watch?v=UFnqBFXOsVk?feature=oembed&w=500&h=375]


    Website: LINK

  • Traktorino is an open-source DIY MIDI controller for DJs

    Traktorino is an open-source DIY MIDI controller for DJs

    Reading Time: 2 minutes

    Traktorino is an open-source DIY MIDI controller for DJs

    Arduino TeamApril 3rd, 2018

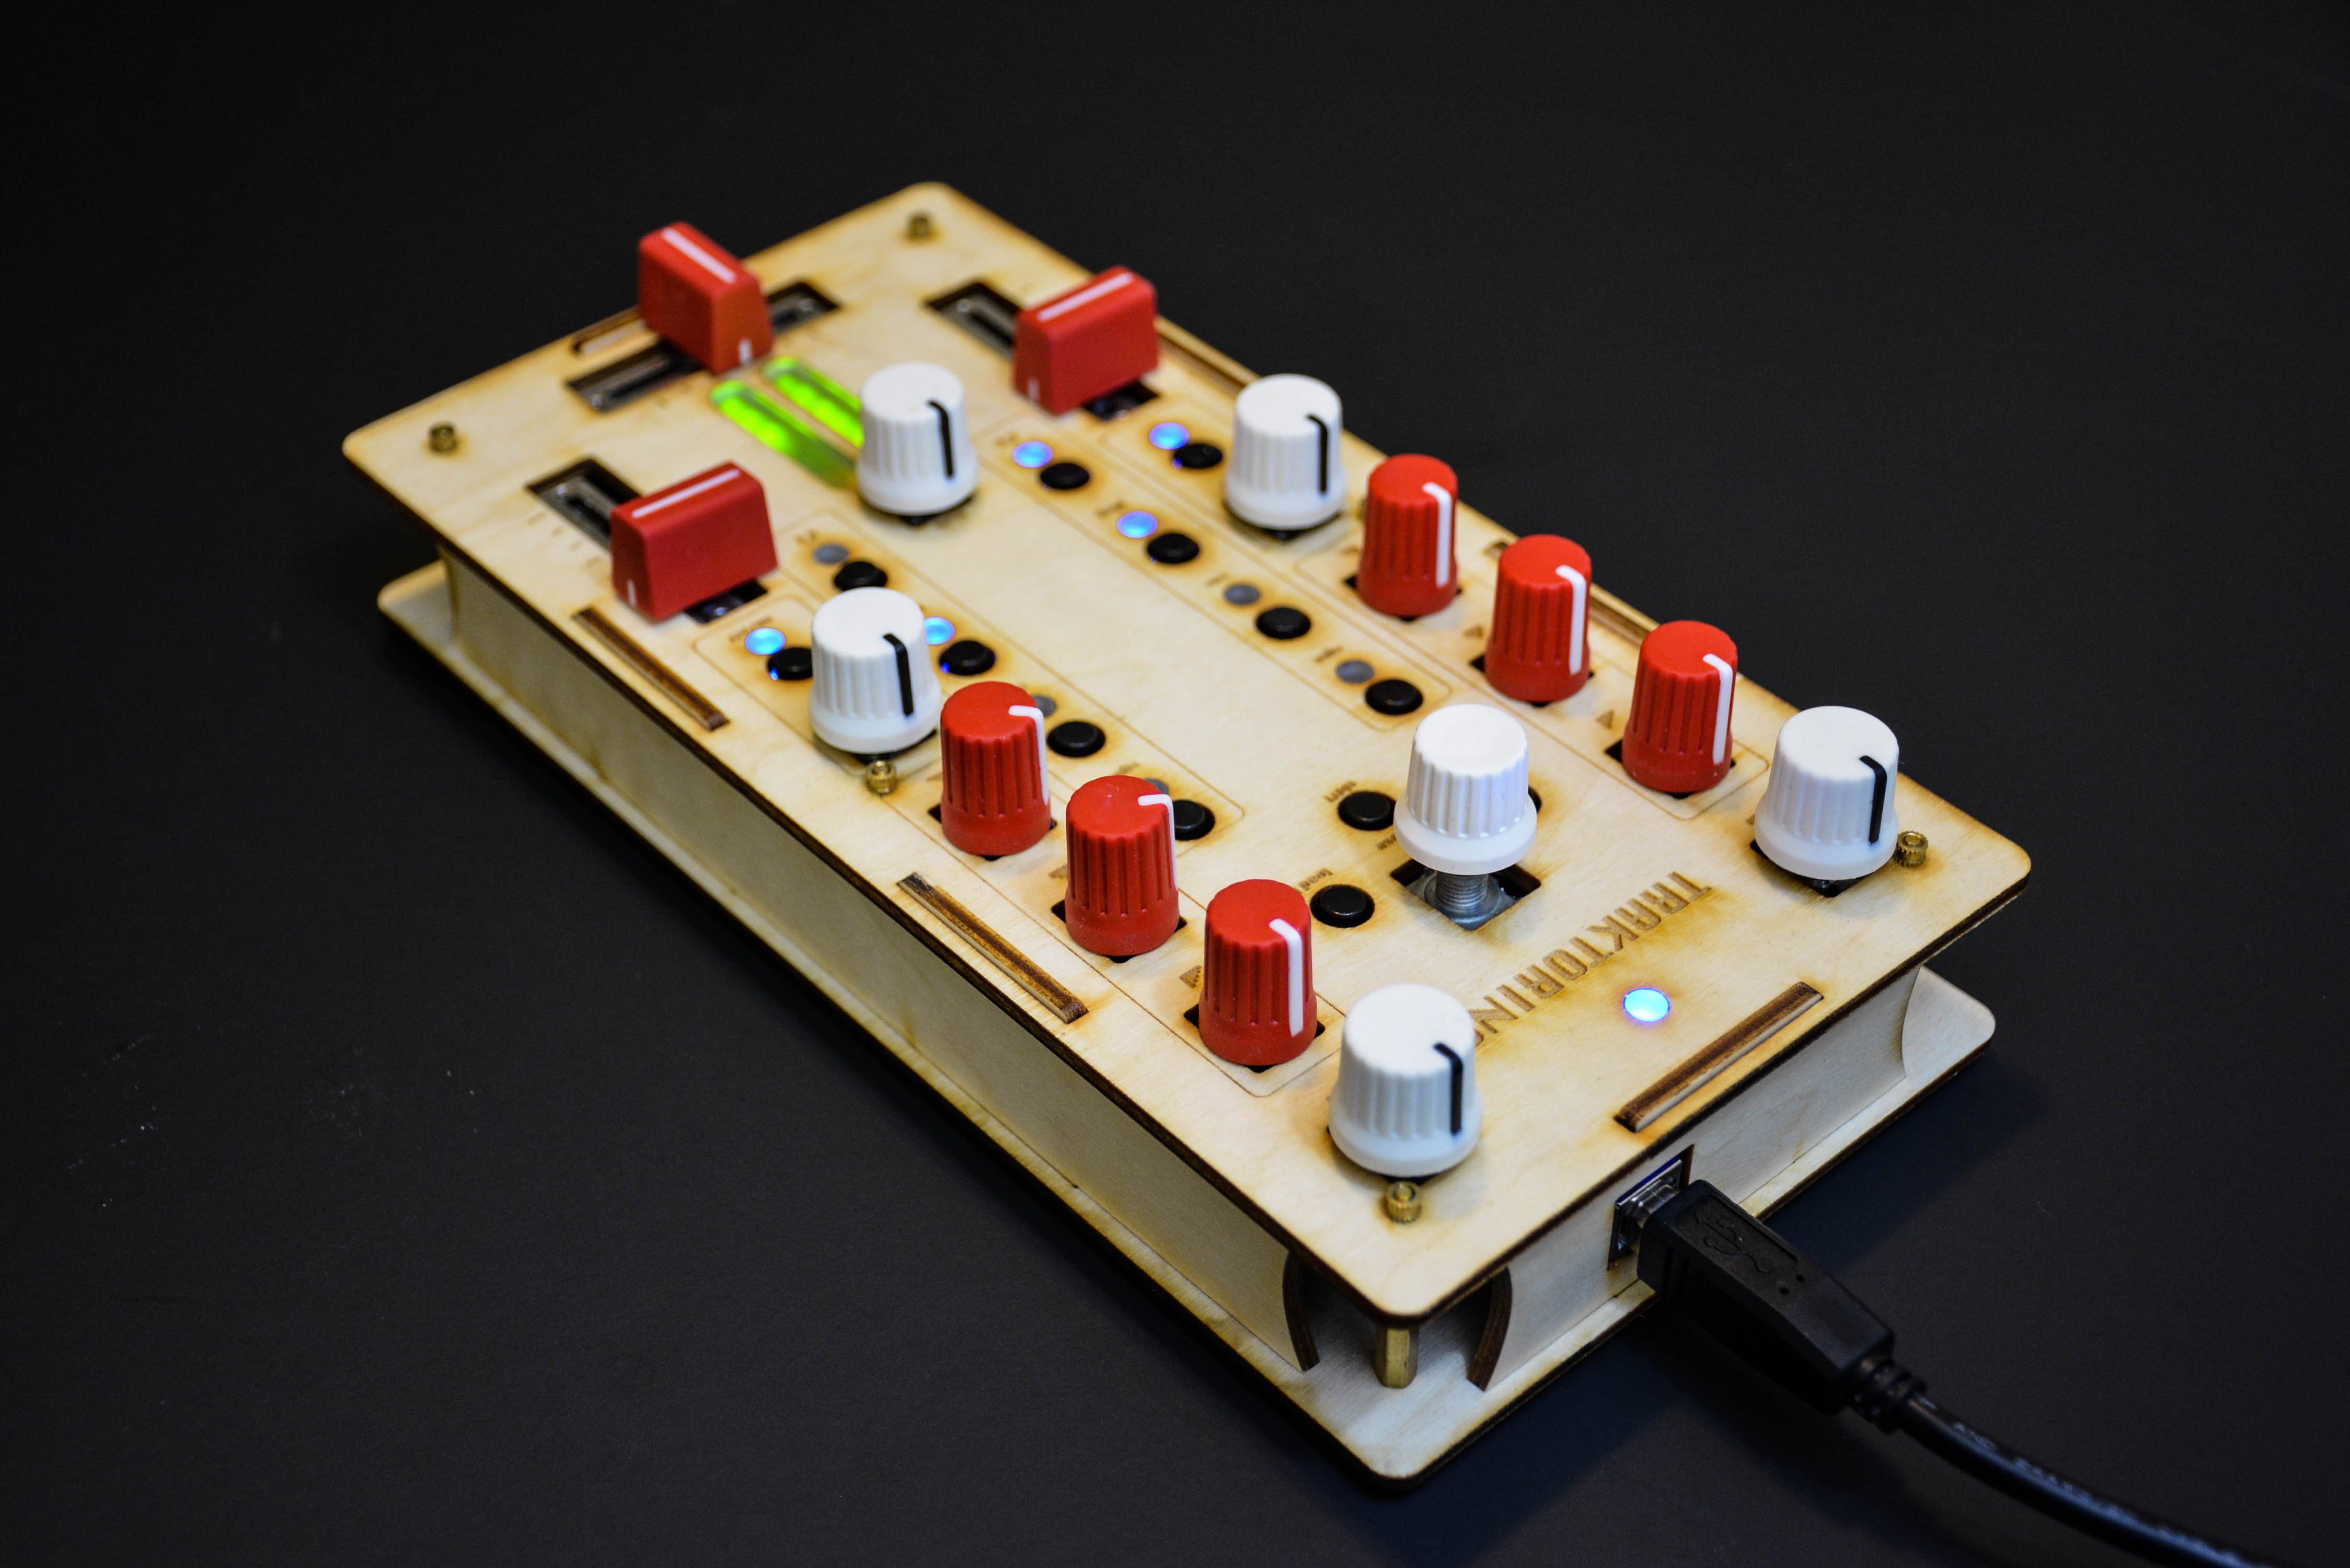
    A keyboard and mouse is a great user interface system for general computing tasks, but in other situations custom knobs, sliders, and lights would certainly be more fun. If you enjoy making digital music, then you should check out this low-cost, Arduino-based MIDI controller by Músico Nerd

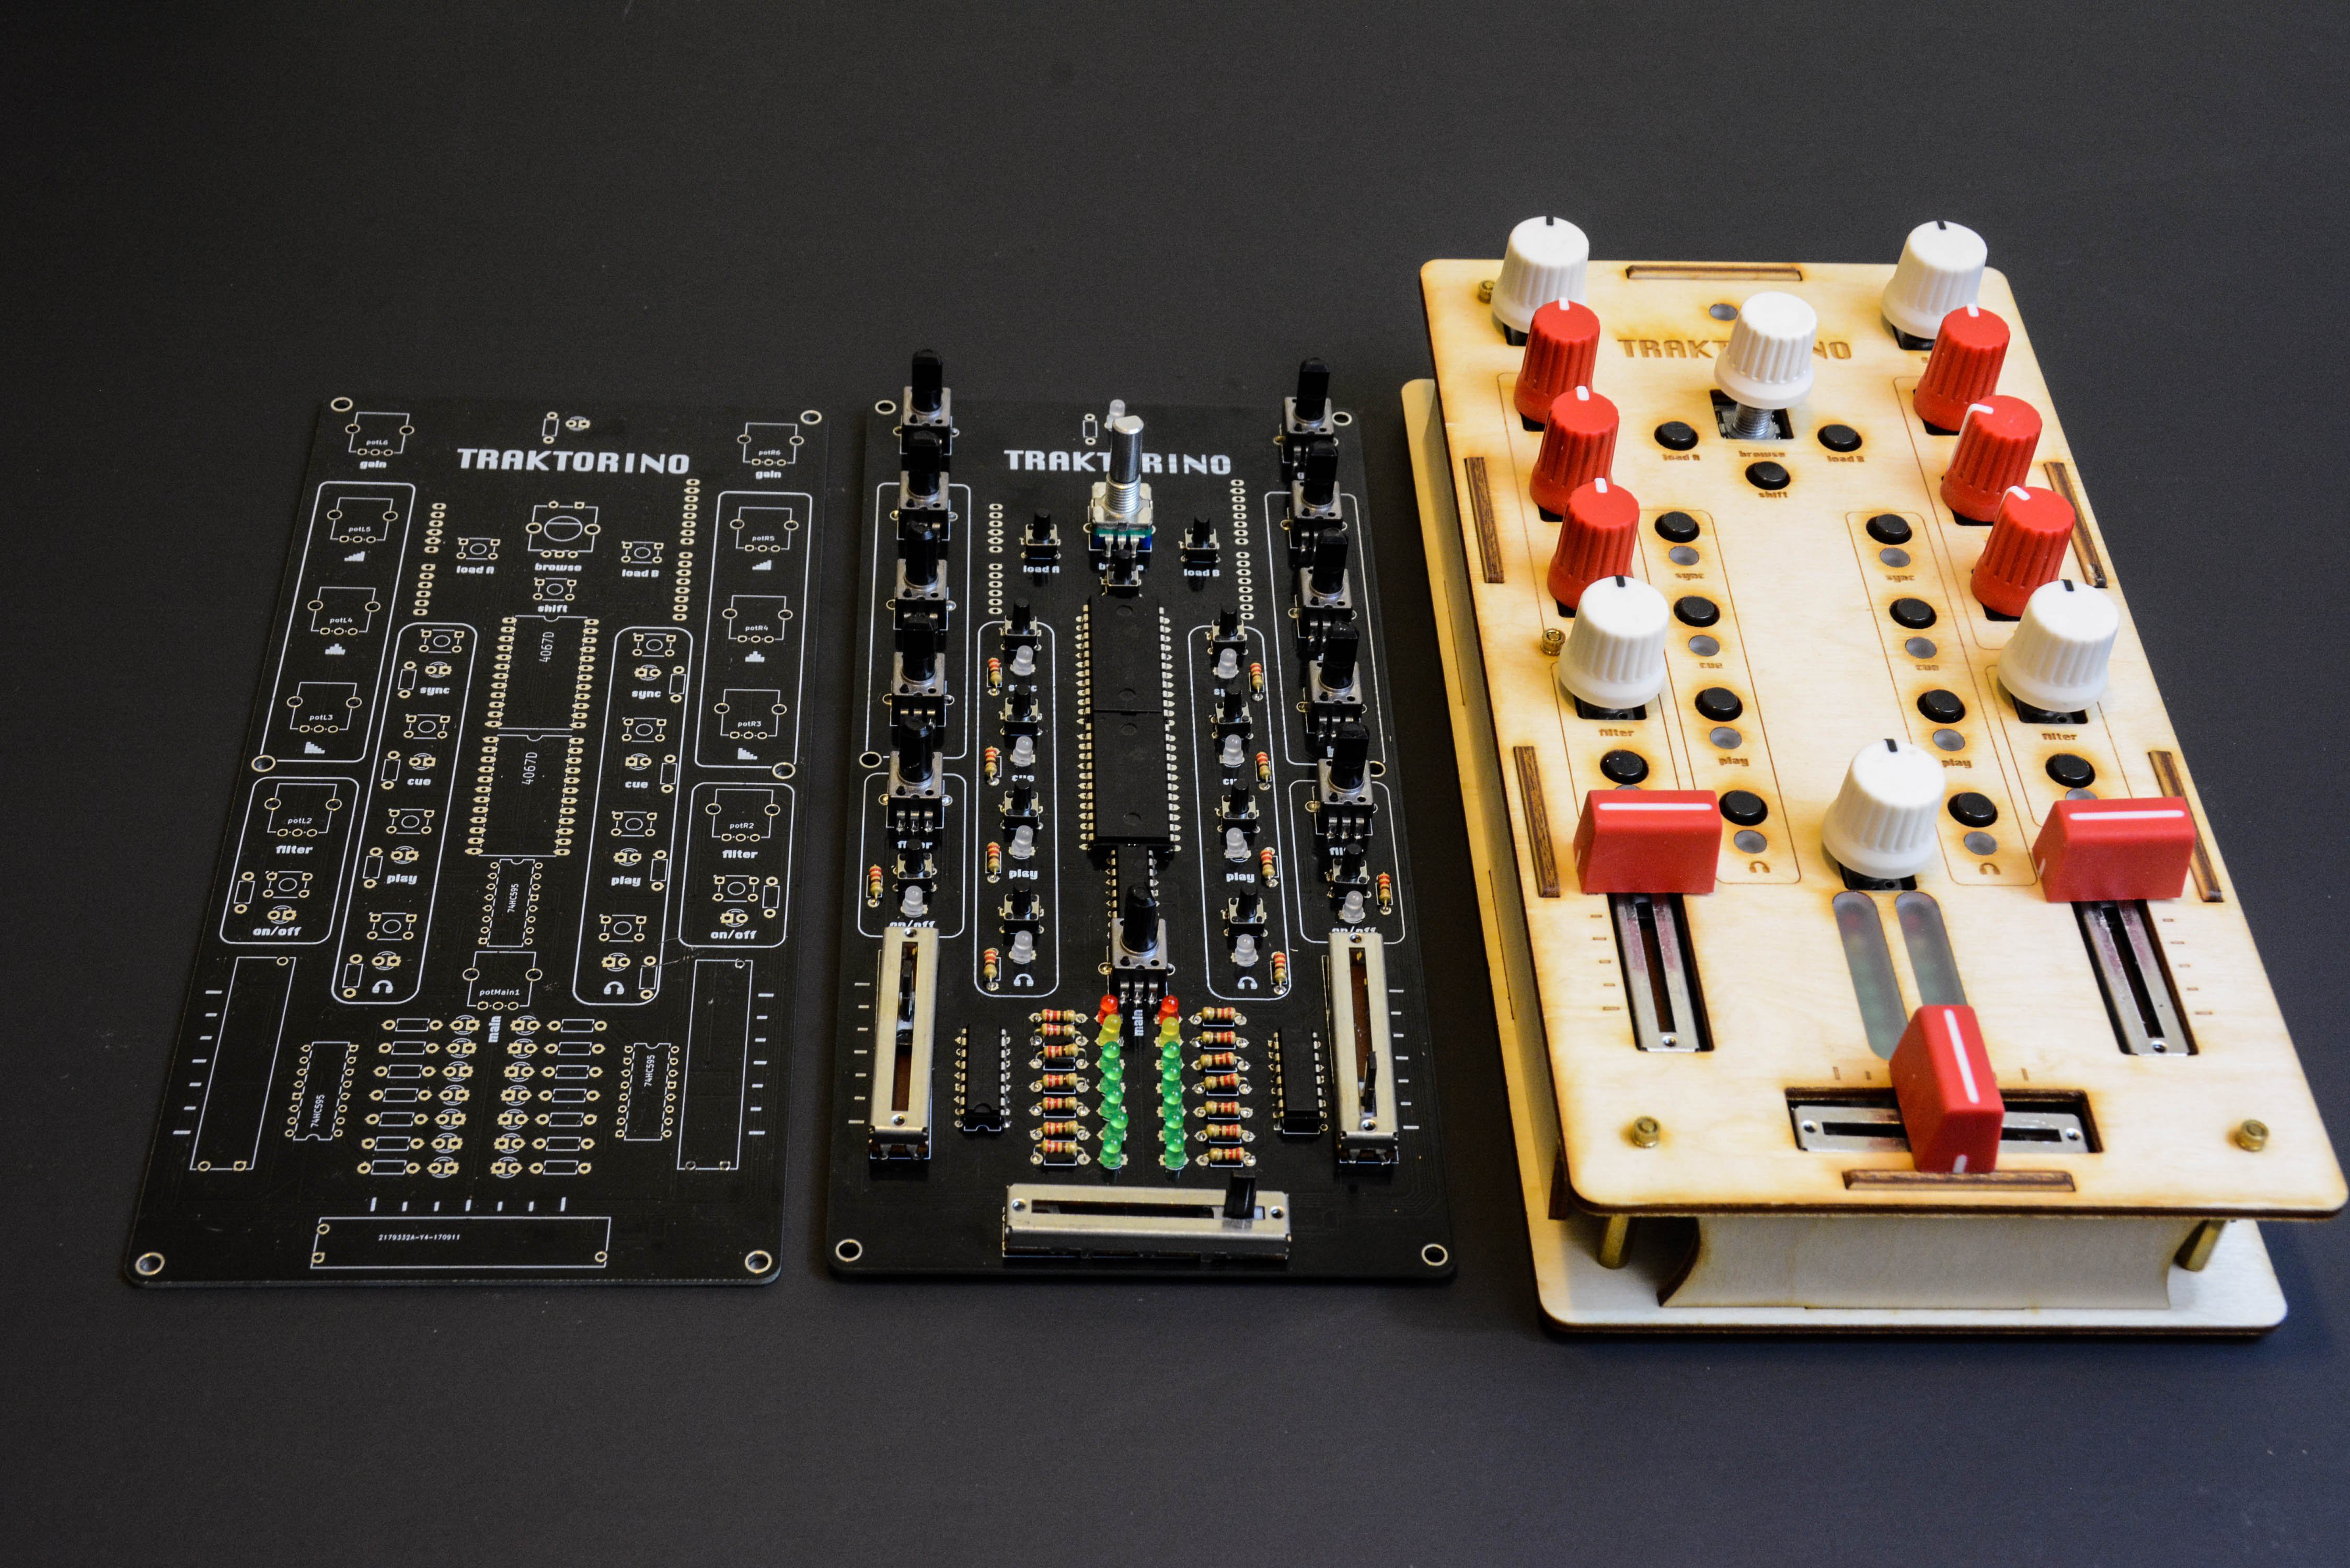
    The Traktorino gives you access to a plethora of knobs and sliders, as well as LEDs for custom feedback in a laser-cut package. Internally, the device acts as an Arduino Uno shield, and is designed to control Traktor DJ software by default. It also supports other MIDI programs, and perhaps could even be adapted to work with other applications as well.

    The Traktorino is a MIDI class compliant device, designed for controlling Traktor. It has several features and custom made mappings, so you can take the most of the software. However, it can do much more than that. The Traktorino can control any software that accepts MIDI, like Ableton Live, Serato, FL Studio, Logic, etc.

    More information and build files can be found here and on GitHub. You can see it in action in the video below!

    [youtube https://www.youtube.com/watch?v=eT9N1NJRlqc?feature=oembed&w=500&h=281]


    Website: LINK

  • This window blinds controller follows the sun

    This window blinds controller follows the sun

    Reading Time: < 1 minute

    This window blinds controller follows the sun

    Arduino TeamApril 3rd, 2018

    Blinds let you see out and let the light into your dwelling, then flip them down when you need privacy or darkness. They do, however, have their disadvantages in that the cords constantly get mixed up and tangled, and—most importantly—they’re not automated!

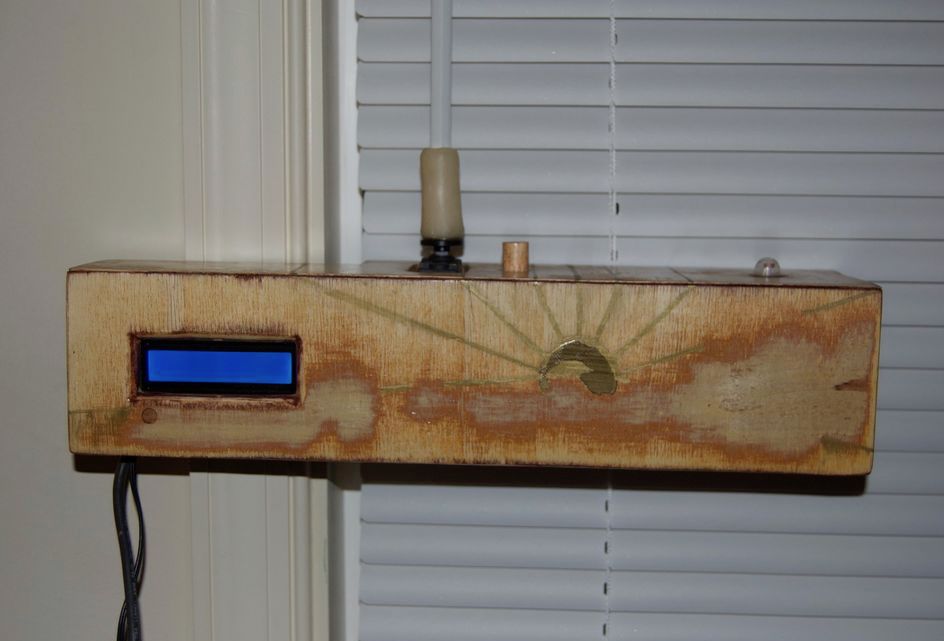
    While we’ve seen several mods to the holder assembly for automation, cmp3mt’s device puts a different spin on things, holding the control rod with a sleeve made out of polymer clay, allowing it to turn with a continuous rotation servo.

    The setup is powered by an Arduino Uno and features an LCD display for user feedback. A button is used for manual control, or it can operate via a timer or even based on a light-dependent resistor that enables it to open and close with the sun.


    Website: LINK

  • Check the time on a glow-in-the-dark plot clock

    Check the time on a glow-in-the-dark plot clock

    Reading Time: < 1 minute

    Check the time on a glow-in-the-dark plot clock

    Arduino TeamMarch 26th, 2018

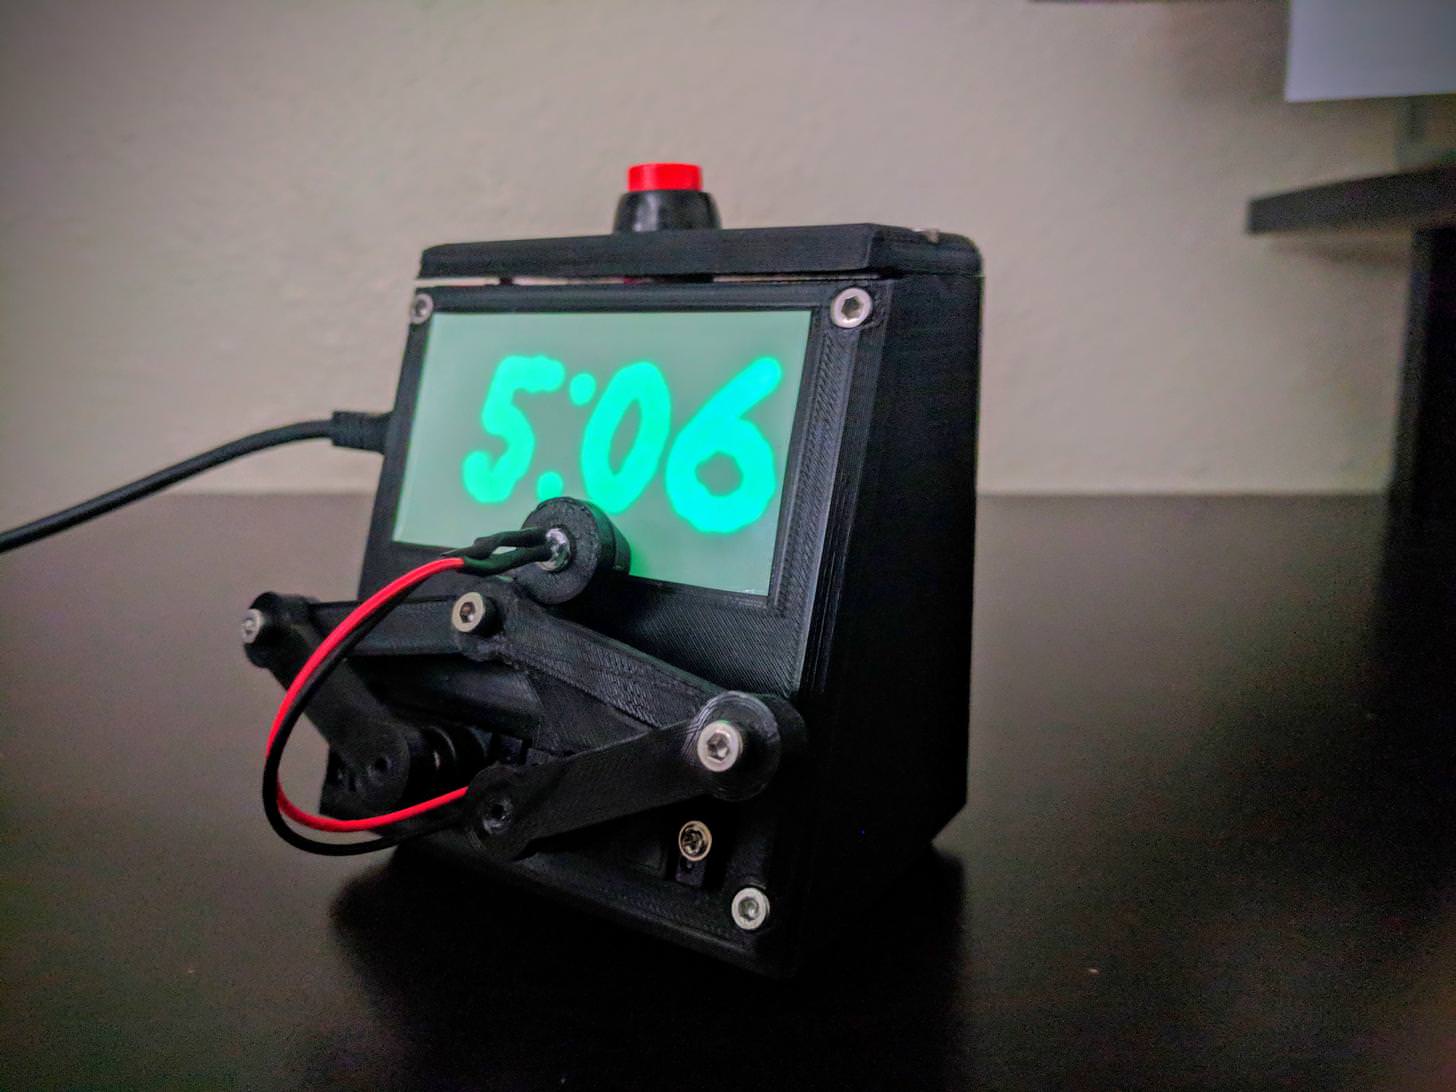
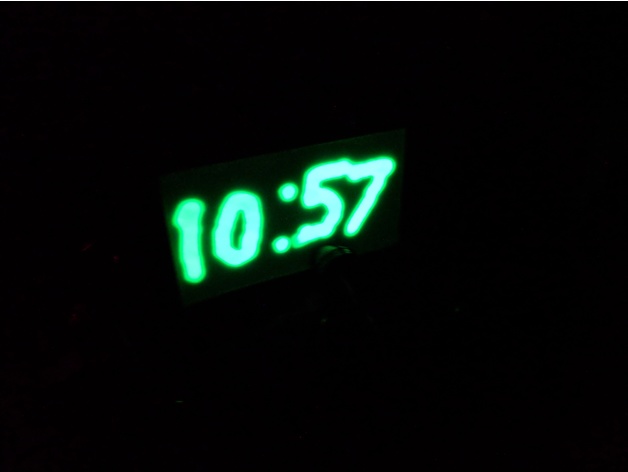
    If you thought plot clocks that write on a tiny whiteboard were cool, this project takes things to the next level, jotting down the time not with a dry-erase marker, but with a UV LED on a glow-in-the-dark sticker.

    The device itself uses an Arduino Uno for control, along with a RTC module for timekeeping, and a pair of servos that move the LED with custom linkages.

    In addition to an awesome looking glow-surface, the clock has been upgraded with a full 3D-printed enclosure. For a quick overview of the project, you can check it out on Imgur. If you’d like to build your own, all the Arduino code and print files are available on Thingiverse.

    [youtube https://www.youtube.com/watch?v=-MnolVyKqvo?feature=oembed&w=500&h=281]


    Website: LINK

  • A beautifully finished Arduino temperature and humidity sensor

    A beautifully finished Arduino temperature and humidity sensor

    Reading Time: 2 minutes

    A beautifully finished Arduino temperature and humidity sensor

    Arduino TeamMarch 21st, 2018

    Jay and Jamie wanted a temperature and humidity sensor for their workshop. Instead of buying something off the shelf or hooking up an Arduino with the proper sensor and breadboard, they went the extra mile.

    The duo crafted a beautiful walnut enclosure—compete with a 3D-printed logo and a clever opening for the temperature display using an LCD screen. Humidity is indicated by the color of a NeoPixel ring, which shines through the artwork via a frosted plastic as a diffuser.

    It’s immaculate on the outside, while hot glue is used extensively inside to hold everything in place. An Arduino Uno powers the build, attached by a handy plastic case.

    We live in Central Texas where we get massive swings in humidity and temperature in the spring, which can be disastrous for certain woodworking projects. This cool project helps alert us when the humidity is changing or starts to get high so we can take precautions like moving our wood projects into the house, or not doing any milling during the high humidity weather. It also looks awesome and has our sweet logo.

    Be sure to check out their write-up here and the entertaining video below for lots of tips and tricks to make your project look excellent!

    [youtube https://www.youtube.com/watch?v=gXCL2NKkvbo?feature=oembed&w=500&h=281]


    Website: LINK

  • Building interactive plant lamps with Arduino

    Building interactive plant lamps with Arduino

    Reading Time: 2 minutes

    Building interactive plant lamps with Arduino

    Arduino TeamMarch 15th, 2018

    As part of a physical interaction and realization course at KTH Royal Institute of Technology, a team of students decided to build an interactive installation called “Alone Together

    Their setup consists of sensor-equipped, networking artificial plants. The leafy plant model, dubbed “Thorulf,” uses flex sensors to detect leaf movement, while “Svamp” mushrooms employ circular force sensors for interaction.

    Arduino Uno boards, along with Bluetooth modules and a computer running an openFrameworks server, allow the plants to communicate. When one plant is bent, it signals its partner to light up with a fun LED pattern as seen in the video below.

    We imagine a series of plants all around the Library, assigned to one another to communicate. Our concept could even be applied over the web, so that the plants could be long distances apart, and used to communicate from one country to another, similar to the “friendship lamp” concept. In this case, the light interaction could be changed, so that the plant stays lit up when touched.

    More details on the project can be found here.

    [youtube https://www.youtube.com/watch?v=LcF-5bZ3rXw?feature=oembed&w=500&h=281]


    Website: LINK

  • Access doors with a color card locking system!

    Access doors with a color card locking system!

    Reading Time: 2 minutes

    Access doors with a color card locking system!

    Arduino TeamMarch 12th, 2018

    When you swipe a card through a reader, you expect it to read a magnetic stripe on one end. In other circumstances cards might contain an RFID chip, but what if the card only had a pattern of colors on it?

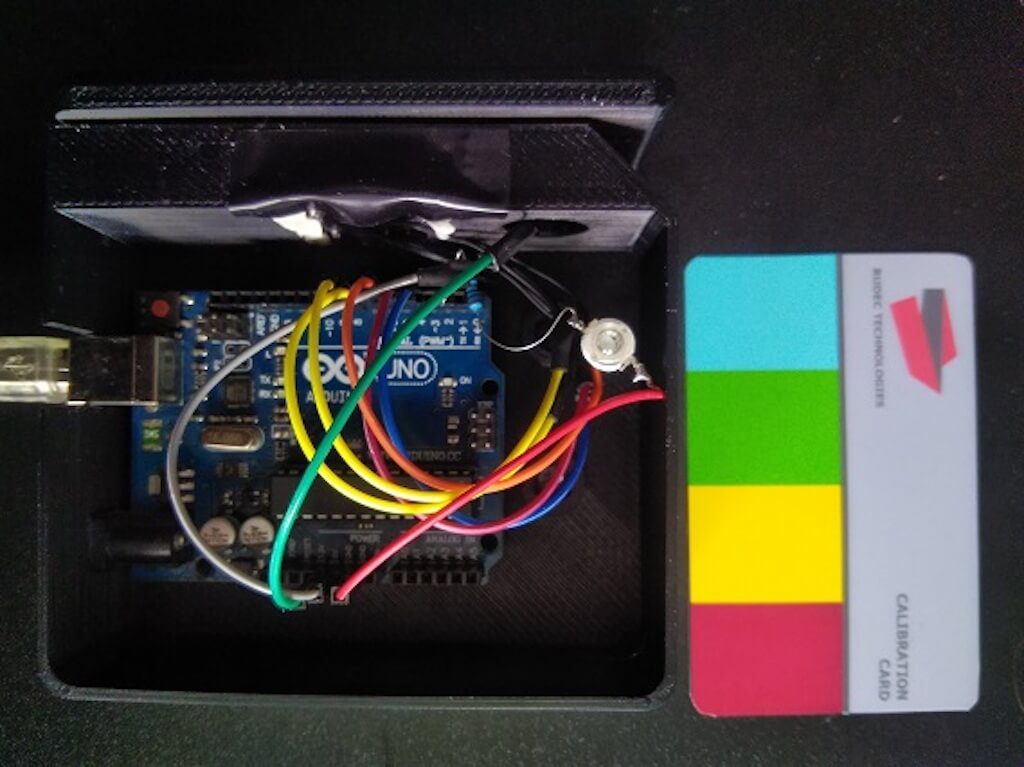
    That’s the idea behind the Color Lock system by Rudec Technologies. The cards have a pattern of four colors printed on one side, which are read by an array of LEDs and a TCS230 color sensor when pulled through a slot. An Arduino Uno then takes this information and lights up an LED if the correct sequence is recognized.

    This is a door locking system that uses a card with a preset color sequence printed on it to unlock the door. The system is still in the prototyping stage, i’m waiting for the actual lock part to arrive in mail to continue developing this. The idea behind this system is to avoid using RFID authentication, as it can be ‘stolen’ without contact, and this system offers a simple physical object that you use to authenticate yourself – think of it as an updated physical key. The system can offer much more than the conventional keys: if you lose your key, you simply print a new one, you can use a number of different keys for the same lock (or just one if you choose), the system logs all entries with timestamps (useful for tracking access), you can use your regular printer to print new keys, you can unlock it via Wi-Fi when paired with your phone or another device, the system can be used to authenticate in various situations (doors, cabinets, computers, entry points etc.

    It’s an interesting concept that could be taken in a variety of directions depending on security needs. A clip of the prototype can be seen below!


    Website: LINK
  • Connect Pour!

    Connect Pour!

    Reading Time: 2 minutes

    Connect Pour!

    Arduino TeamMarch 6th, 2018

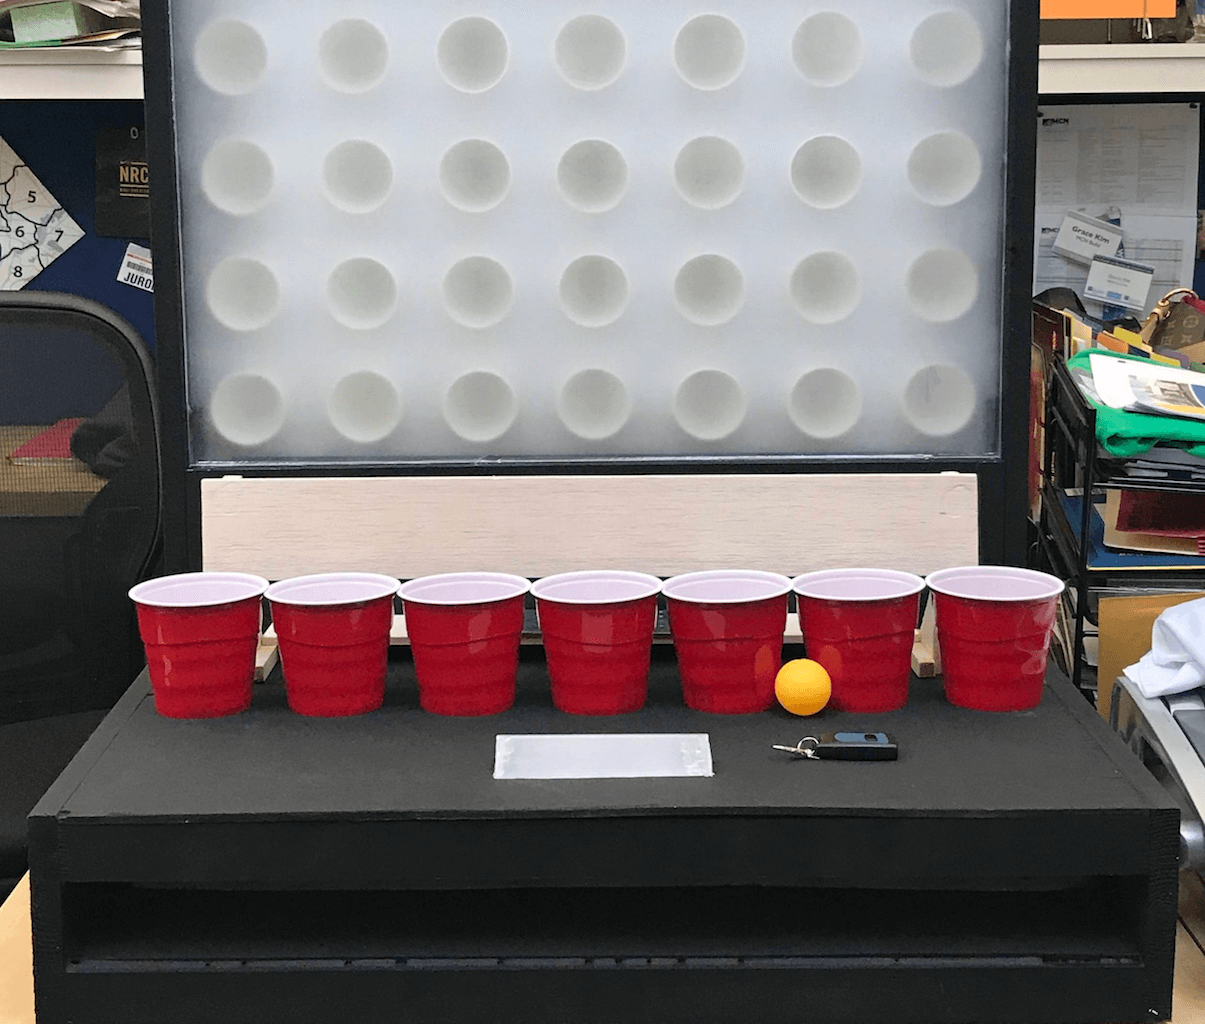
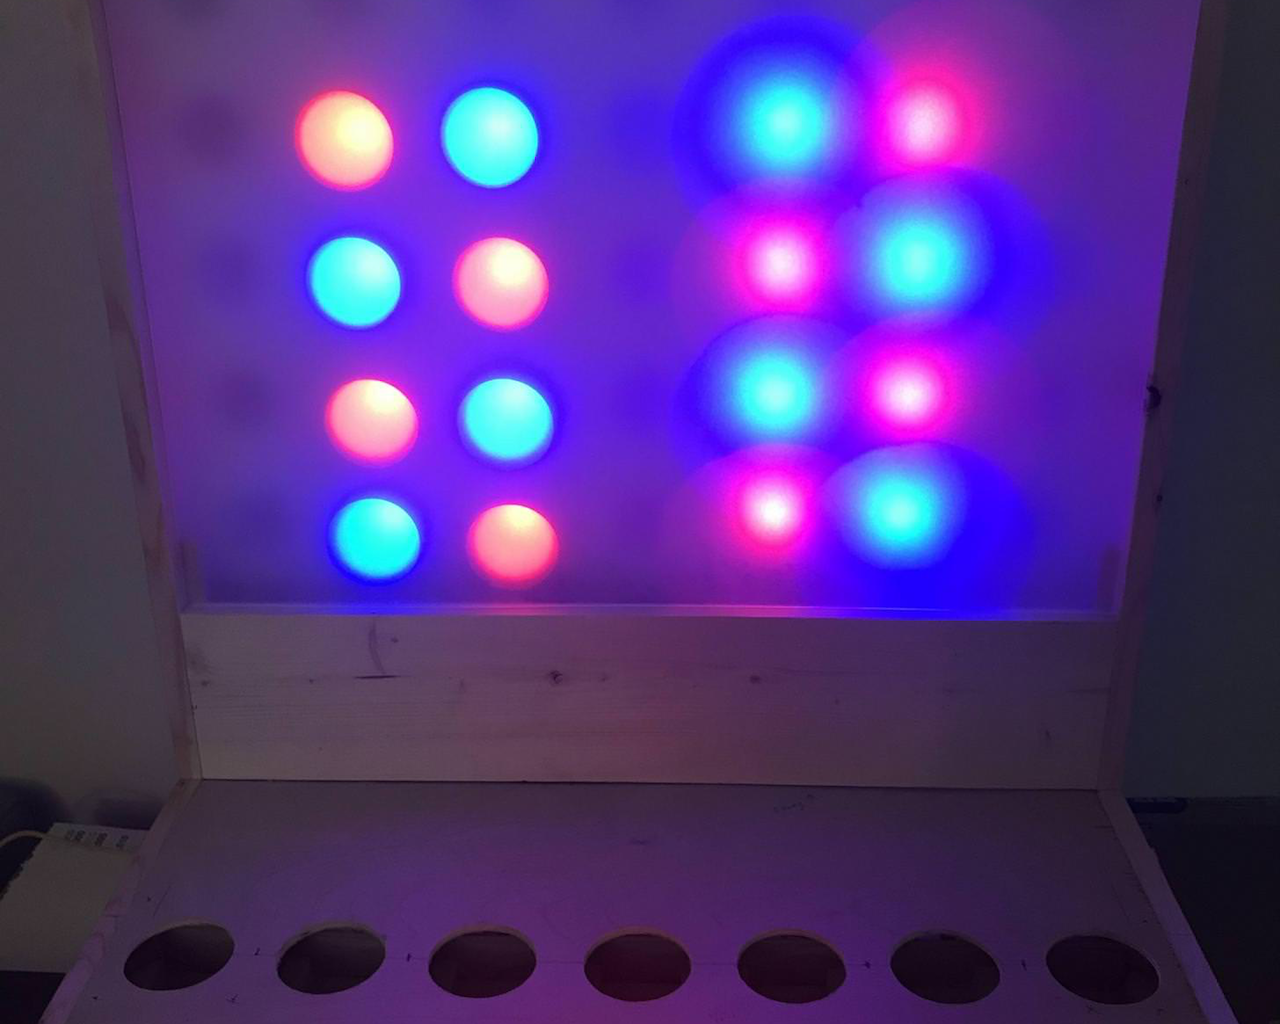
    What do you get when you combine Connect Four with beer pong? Connect Pour, of course! After inspiration from a much larger basketball version, this hacker decided to make a game that allows you to throw ping pong balls into Solo cup targets. When one is hit, a vertical board stacks a light to represent a stacked checker above the cup in question.

    An Arduino Uno powers the device, and lighting is provided by an RGB LED strip. Scores are tracked using an IR break beam sensor, and a button or RF remote can alternate player turns if you don’t hit anything.

    I wrote the code of the game myself  and works basically as follows:

    — the Arduino checks infrared beam break sensors under the plastic cups and a “pass button”

    — if the state of the sensors/button changes from no beams being broken or buttons being pushed to a beam being broke or  a button being pushed

    — the Arduino updates the game state updates the LEDs including the bar in the front (which indicates which player’s turn it is)

    — repeat

    Connect Pour looks like a lot of fun, though you may need some extra cups, as those on the machine no longer have bottoms! You can find more details on the build here.


    Website: LINK

  • A DIY hardware watchdog for your mining rig

    A DIY hardware watchdog for your mining rig

    Reading Time: 2 minutes

    A DIY hardware watchdog for your mining rig

    Arduino TeamMarch 2nd, 2018

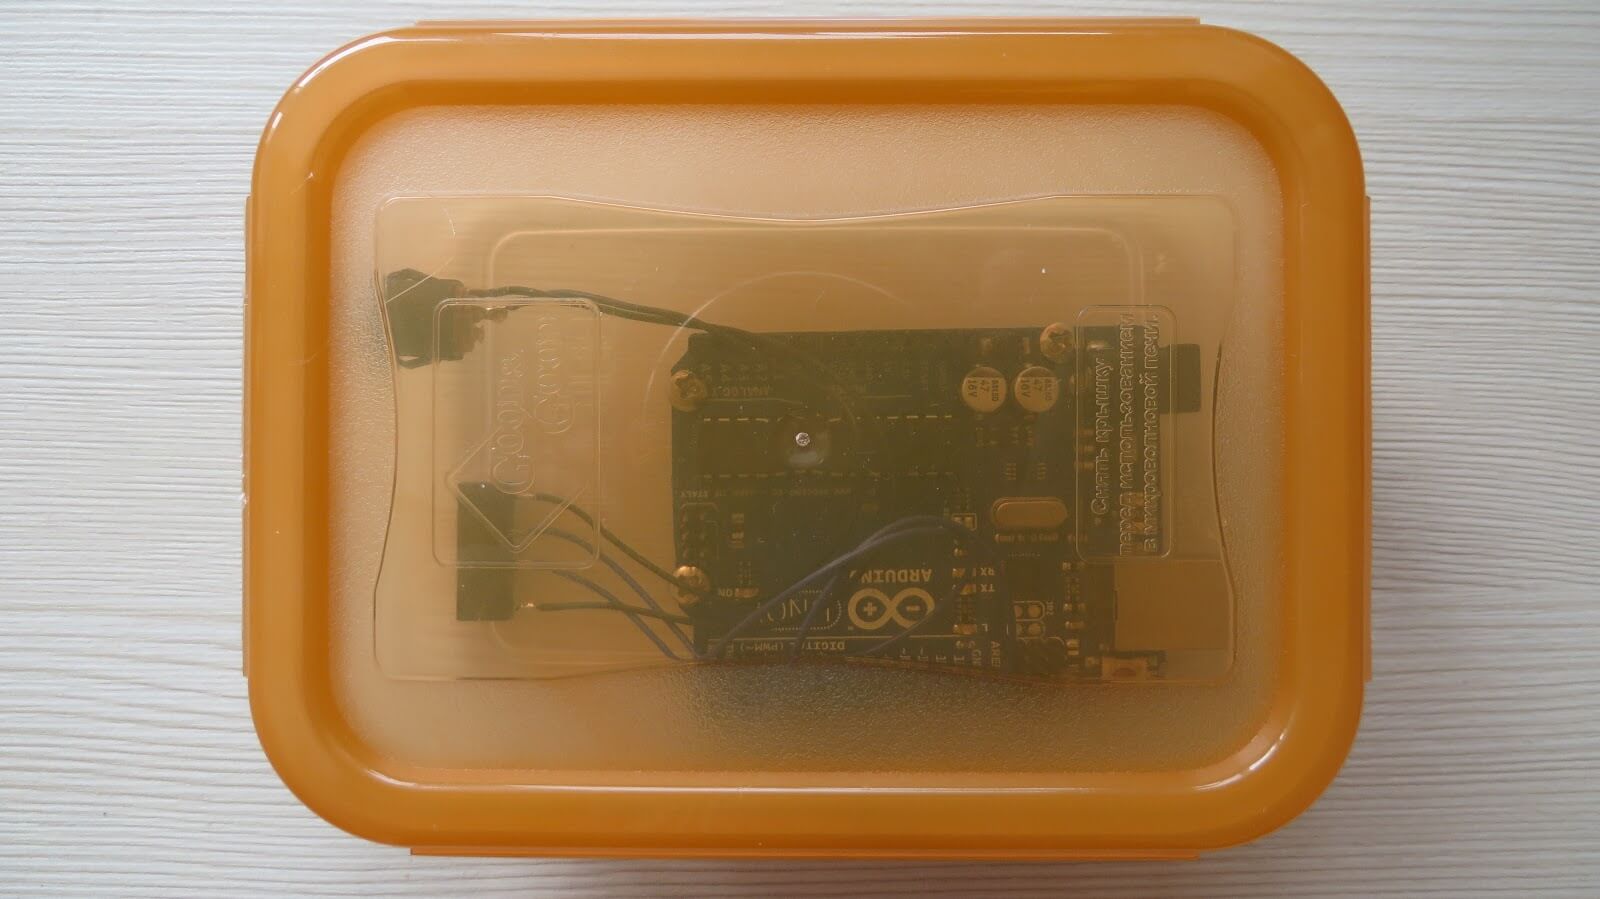
    Vadim Panov wanted a way to automatically restart a PC that was simple and cheap to make.

    For this task, he turned to an Uno due to its wide availability; however, any Arduino board with at least one digital I/O pin and a USB-enabled serial port will work.

    The device sends a “hello” string to the PC, to which it expects a “HELLO” back from the PC—running its own corresponding Java program—within 10 seconds. If it doesn’t receive this string, it assumes that the computer is frozen, and uses a reed relay to trigger the motherboard reset pin.

    Panov’s idea could be used to monitor and reset cryptocurrency rigs, but could be adapted to other PC setups as needed.

    Here’s how it works: the PC-side program tries to connect to every single serial port in your system within a period of 30 seconds (including the ports that appear during this process). To each port it’ll send the handshake string “hello” and monitor the input, expecting to receive uppercase “HELLO” back. When the handshake is finished, it’ll send ping strings once each five seconds.

    The watchdog program on Arduino scans the input for “ping” strings. If no such string has been received within 10 second period, the watchdog will forcibly restart your PC.

    Therefore, this scenario where you manually run it will be “one-off”, i.e. once the PC has been restarted, the watchdog will be stuck in the pre-handshake state. To make it work all the time, add the Java program to the startup list of your operating system of choice.

    You can read more here and check it out in action below!


    Website: LINK
  • Test your aim in this carnival-style IR target game

    Test your aim in this carnival-style IR target game

    Reading Time: < 1 minute

    Test your aim in this carnival-style IR target game

    Arduino TeamMarch 2nd, 2018

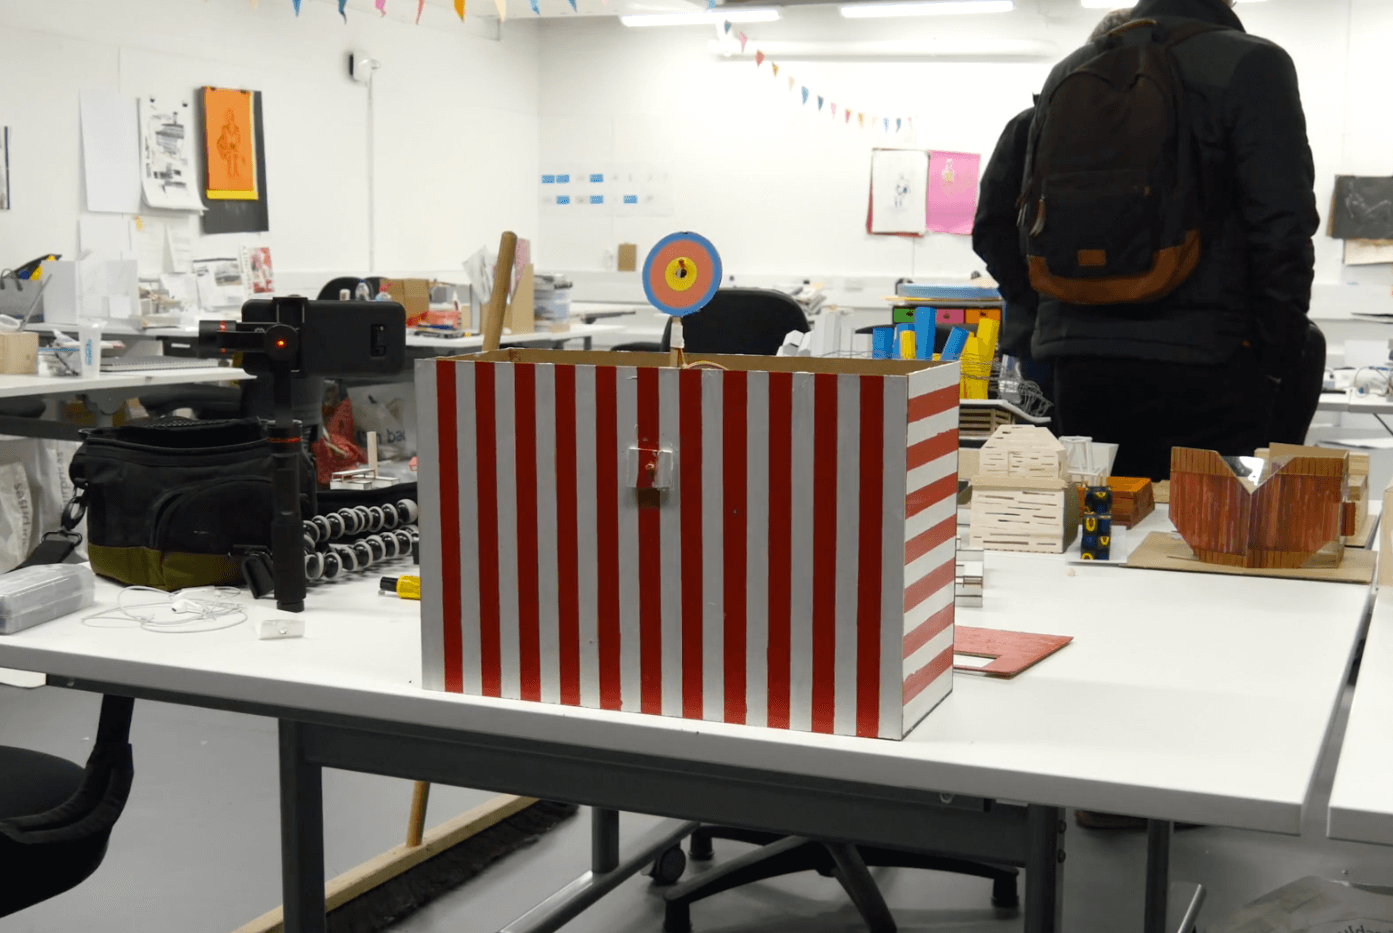
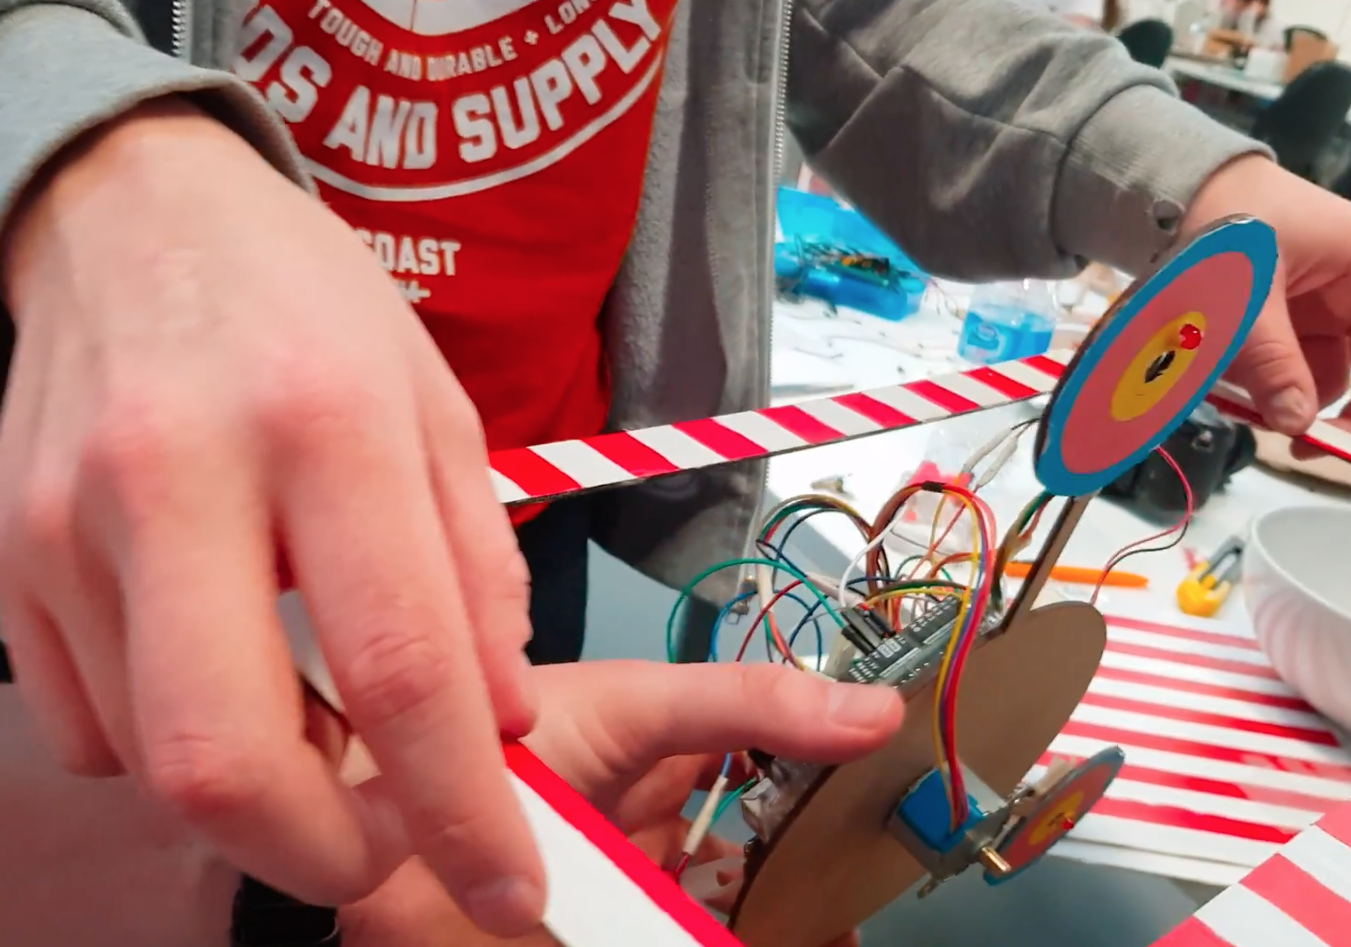
    For a class assignment, Matt Robb along with teammates Kara and Andrew needed to make a project using an Arduino and various other components. What they came up with was a carnival-style game that uses a stepper motor to rotate three targets containing IR sensors out of a nicely-painted cardboard box.

    An Arduino Uno provides control for the game. When hit with a signal from an IR remote, an LED on the target goes out, a buzzer beeps, and it momentarily stops spinning.

    It looks like it was a lot of fun to build and play, so be sure to check it out in the video seen here!


    Website: LINK
  • Strange vocal interactions with ‘you, me and all these machines’

    Strange vocal interactions with ‘you, me and all these machines’

    Reading Time: 2 minutes

    Strange vocal interactions with ‘you, me and all these machines’

    Arduino TeamFebruary 22nd, 2018

    Moscow-based artist ::vtol:: is back again with an interesting interactive exhibit entitled “you, me and all these machines.” His latest work, a collaboration with Lovozero, allows two participants to produce otherworldly vocals together.

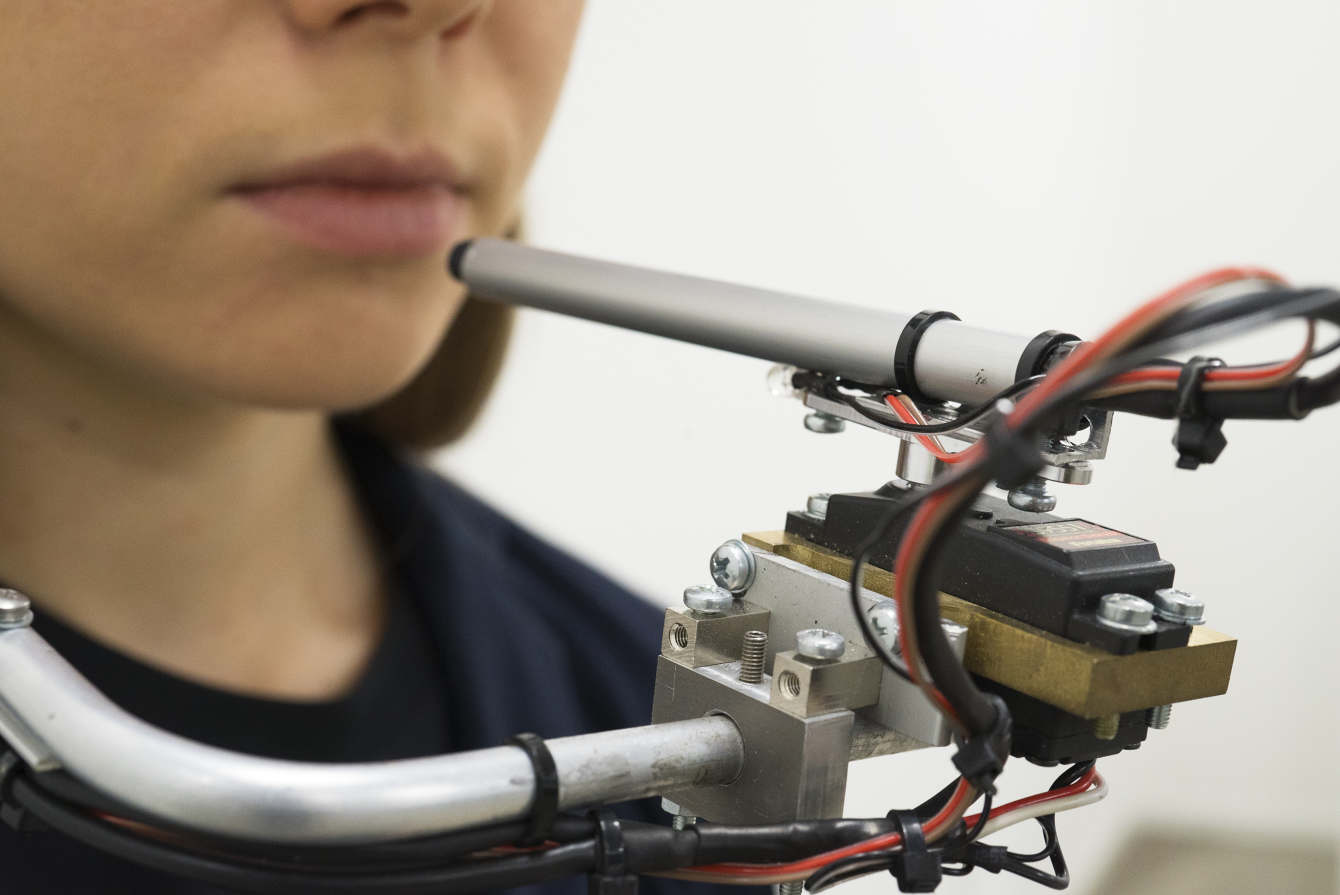
    One participant wears the device, which points a directional microphone under the control of the other participant at her mouth using a servo motor. An array of LEDs signal the vocalist in a manner agreed upon before the performance.

    The head-mounted system is controlled by an Arduino Uno, and is meant to display the subtle interaction between two participating artists, as they must work together to produce the desired output.

    “You, me and all these machines” is a performance for voice and electronic devices. The vocalist puts on his or her head a specially designed wearable interface tool to interact with the voice and display a visual score. Technically, the device consists of several elements: a narrowly directional microphone driven by a motor; an LED strip that shows the vocalist score; remote control with a joystick used by the second participant to control the interface.

    Shifting the microphone against the mouth makes it possible to achieve interesting sound effects, and makes it easier to manipulate the vocalist’s voice. The LED line consisting of 10 diodes is a very primitive, but effective and convenient way of interacting with the vocalist, and the way of interpreting the values is predetermined before each performance. During the performance, a sound canvas is formed, thereby changing the dynamics, consisting of a set of looped fragments created within voice and interface processing elements, without using other methods to generate sounds.

    Check out “you, me and all these machines” in the video below!


    Website: LINK
  • Designing an Arduino-powered split-flap display

    Designing an Arduino-powered split-flap display

    Reading Time: 2 minutes

    Designing an Arduino-powered split-flap display

    Arduino TeamFebruary 22nd, 2018

    If you’d like a split-flap display with numbers and letters, options tend to be quite expensive. This though was no problem for hacker “scottbez1” who reports that after “only” two-plus years of work, he has produced a split-flap assembly that plugs into an Arduino Uno as a sort of external shield.

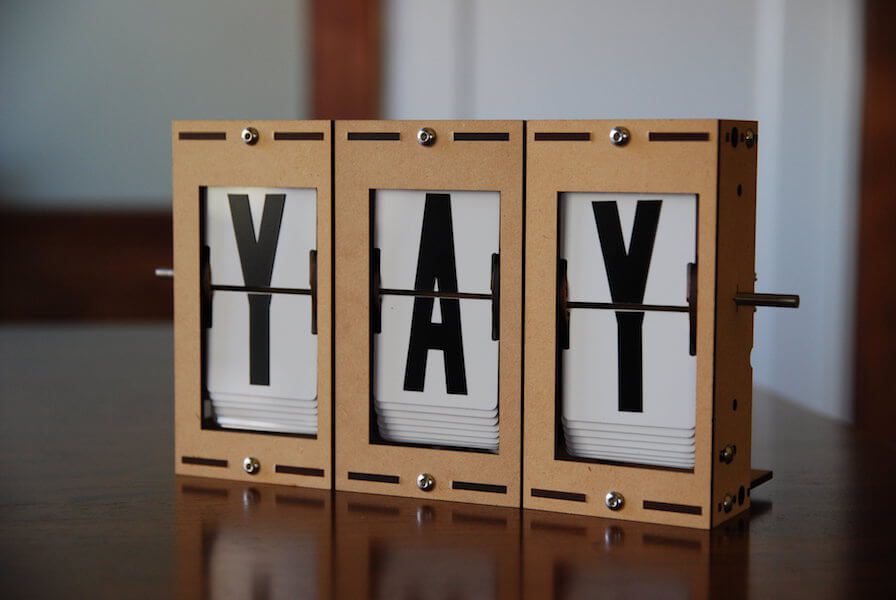
    The device employs inexpensive stepper motors to click through letters, numbers, and even some punctuation, using cutout PVC ID display stock to show the characters. Cleverly, the PCB he designed for it can function as a motor driver or be split in two to function as a sensor board.

    I’ve always loved these electro-mechanical displays, but you can’t buy them for a reasonable price, so I figured I’d try making them myself (plus it’s more fun that way!). Ultimately I wanted to design a split-flap display that can be built at home in small/single quantities and can be customized and put together by an intermediate hobbyist for not too much money.

    The design I settled on uses PVC ID badge cards for the flaps, store-bought vinyl stickers for the letters, and is driven by a cheap 28BYJ-48 stepper motor. The enclosure and moving parts are all made from laser-cut MDF, which can be easily ordered online. To control them, I designed a driver board that can be hand-soldered and plugs into an Arduino like a shield.

    The entire build story can be found here and more details including Arduino code are available on GitHub. If you’d just like to see and hear it flapping away, check out the video below!


    Website: LINK
  • Levitate water drops with RGB LEDs and Arduino

    Levitate water drops with RGB LEDs and Arduino

    Reading Time: 2 minutes

    Levitate water drops with RGB LEDs and Arduino

    Arduino TeamFebruary 19th, 2018

    Water normally falls from the sky to the ground, the time fountain from hacker isaac879 appears to work much differently. As shown in the video below, water droplets somehow levitate from a circular orange apparatus to a blue one on top.

    The trick here is that the water isn’t actually falling up, but appears that way by carefully controlling the flashing of RGB lights using an Arduino Uno. If the lights flash at the same rate as the water drops, they appear to stand still, while if the light is flashed more slowly, they appear to rise.

    This is the prototype RGB LED Time Fountain I designed and built. It uses RGB LED strip lights to strobe a stream of water drops to make them appear as if they are levitating. By strobing the different colors out of phase with each other some incredible effects can be created.

    An Arduino Uno controls the timing of the RGB strobe and the PWM of the pump. Bluetooth communication was achieved using an HC-05 Bluetooth module and the “Arduino bluetooth controller” app by “Giumig Apps.”

    Be sure to check out the video to see it in action, especially the bit around 3:40 where drops appear to rise out of a cup while it’s getting filled with water.


    Website: LINK

  • Video game head tracking with Wii Remote camera

    Video game head tracking with Wii Remote camera

    Reading Time: < 1 minute

    Video game head tracking with Wii Remote camera

    Arduino TeamFebruary 14th, 2018

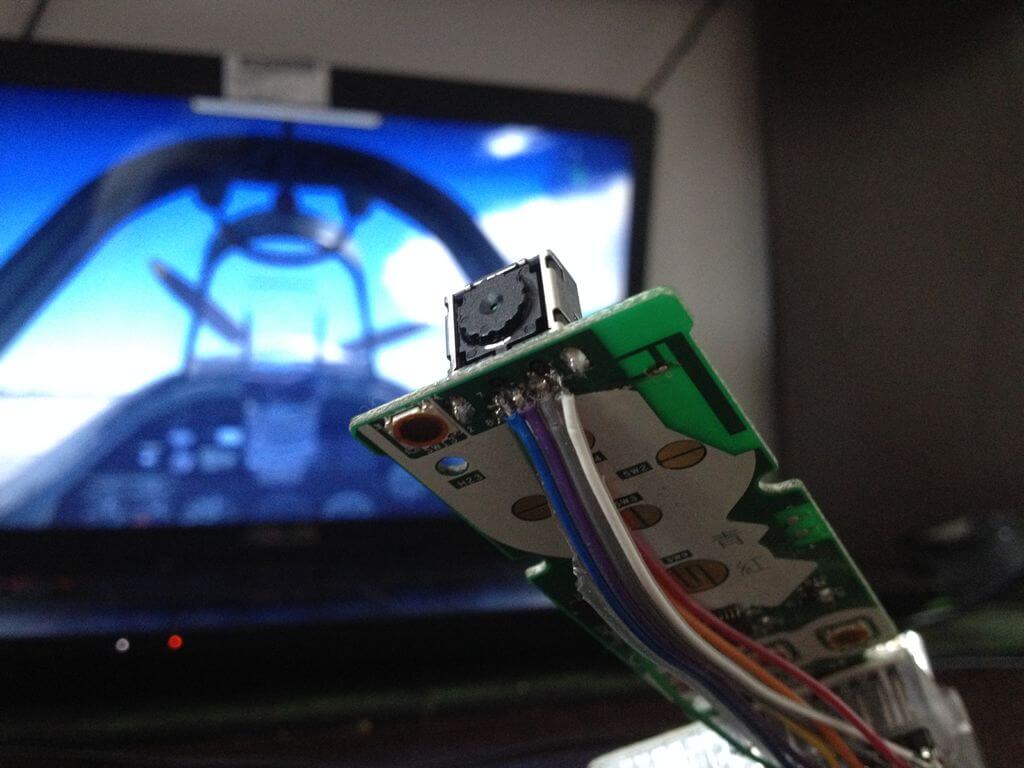
    While the Nintendo Wii has been on the market for well over 10 years, its controllers continue to provide a variety of tools for hacking. One component you may want to consider for your next hack is the camera from the Wii Remote, which senses the position of nearby infrared light spots and outputs them as X/Y coordinates via I²C.

    While that may instantly set off multiple use ideas, if you need inspiration, be sure to check out this setup by Jack Carter. He mounted one of these cameras to the top of a computer screen, and uses it to track an IR LED mounted to the top of his headset.

    From there, an Arduino Uno translates this information as joystick inputs to the computer, which is then configured to control an in-game camera as seen in the video here.


    Website: LINK

  • Automatic guitar strumming with Arduino Uno and chopsticks

    Automatic guitar strumming with Arduino Uno and chopsticks

    Reading Time: < 1 minute

    Automatic guitar strumming with Arduino Uno and chopsticks

    Arduino TeamJanuary 31st, 2018

    If you like to make music, but don’t consider yourself particularly talented, YouTuber Make It And Fake It has come up with an innovative solution.

    Her device uses an Arduino Uno, along with a hobby servo motor to move a pair of chopsticks that holds the pick. This means that the guitar can literally strum itself, and thanks to a small control box, she can even select from one of three rhythm patterns.

    If you’re wondering what this could be used for, the answer comes at 1:40 in the demonstration video, where Make It And Fake It is shown drinking tea, playing another instrument, and even texting her mom while still producing music from the guitar. Code for the build can be found on GitHub.


    Website: LINK
  • Dotter is an Arduino-powered dot matrix printer

    Dotter is an Arduino-powered dot matrix printer

    Reading Time: < 1 minute

    Dotter is an Arduino-powered dot matrix printer

    Arduino TeamJanuary 29th, 2018

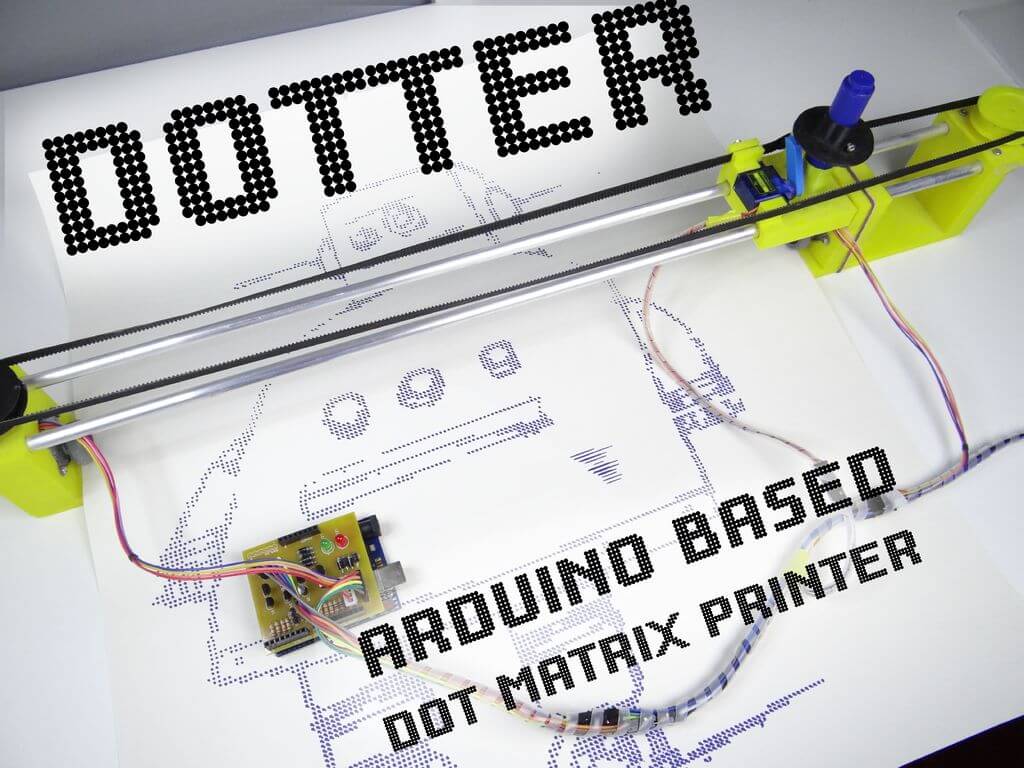
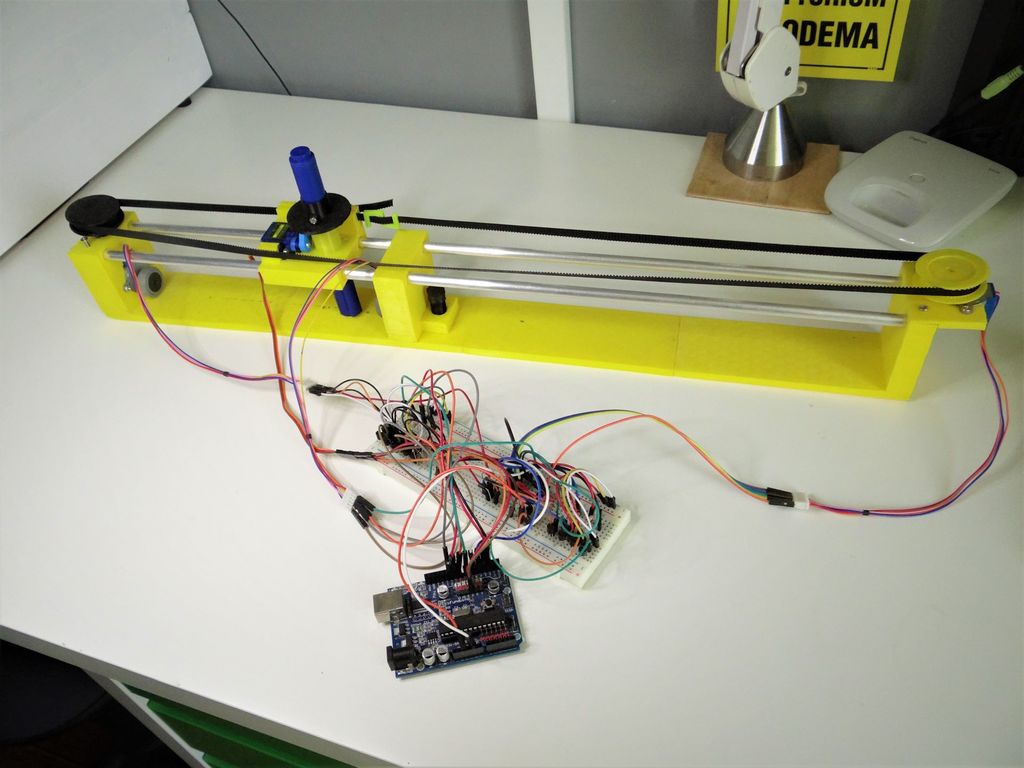
    While largely supplanted by more modern forms of printing, dot matrix printers still have their fans. Few, however, are more dedicated than Nikodem Bartnik, who constructed his own model that pulls paper up to 55cm wide and as long as he needs under a gantry that stamps each pixel with a marker.

    The device is controlled via an Arduino Uno, which takes input from a Processing sketch running on a computer to obtain the image to be printed.

    It uses a pair of stepper motors to advance the paper, as well as a third to position the marker to be stamped. A servo motor pushes the marker down as needed, producing a print that, as seen at 5:15 in the video below, is accurate and stylishly pixellated.


    Website: LINK

  • This Arduino infinity mirror lights up to music

    This Arduino infinity mirror lights up to music

    Reading Time: < 1 minute

    This Arduino infinity mirror lights up to music

    Arduino TeamJanuary 23rd, 2018

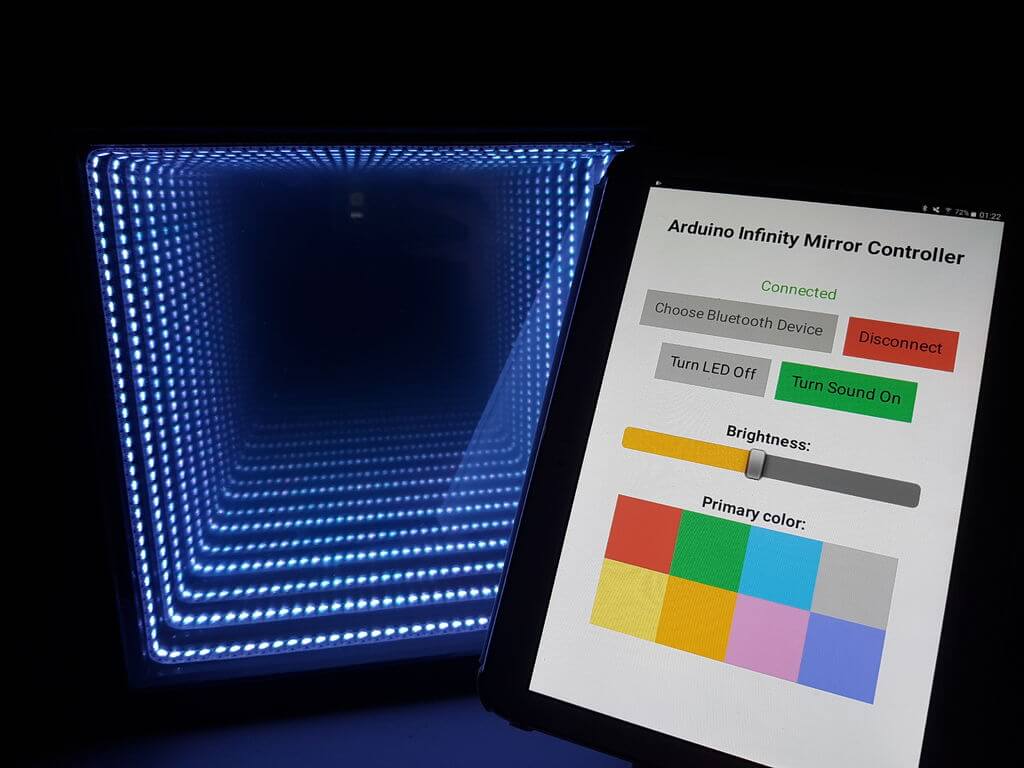
    Infinity mirrors, which make light appear to stretch to infinity by bouncing light between two mirrors, are incredible to observe. Hacker “Evocate” decided to go the extra mile and not only illuminate the inside of his mirror arrangement, but used an Arduino Uno and a sound sensor to enable it to react to sound.

    In addition to this sound sensitivity, a Bluetooth app controls color and brightness, allowing him to customize the device on the fly.

    The mirror also has a built-in microphone which detects sound/music and reacts accordingly by generating eye-catching light strobes on the beat of the music! Simply start up the app, connect to Bluetooth and see the magic happen!

    If you’d like to build your own, full instructions along with Arduino and app code are available here. Or you can simply check it out in action below!


    Website: LINK

  • Robotic playing card dealer made with cardboard

    Robotic playing card dealer made with cardboard

    Reading Time: < 1 minute

    Robotic playing card dealer made with cardboard

    Arduino TeamJanuary 16th, 2018

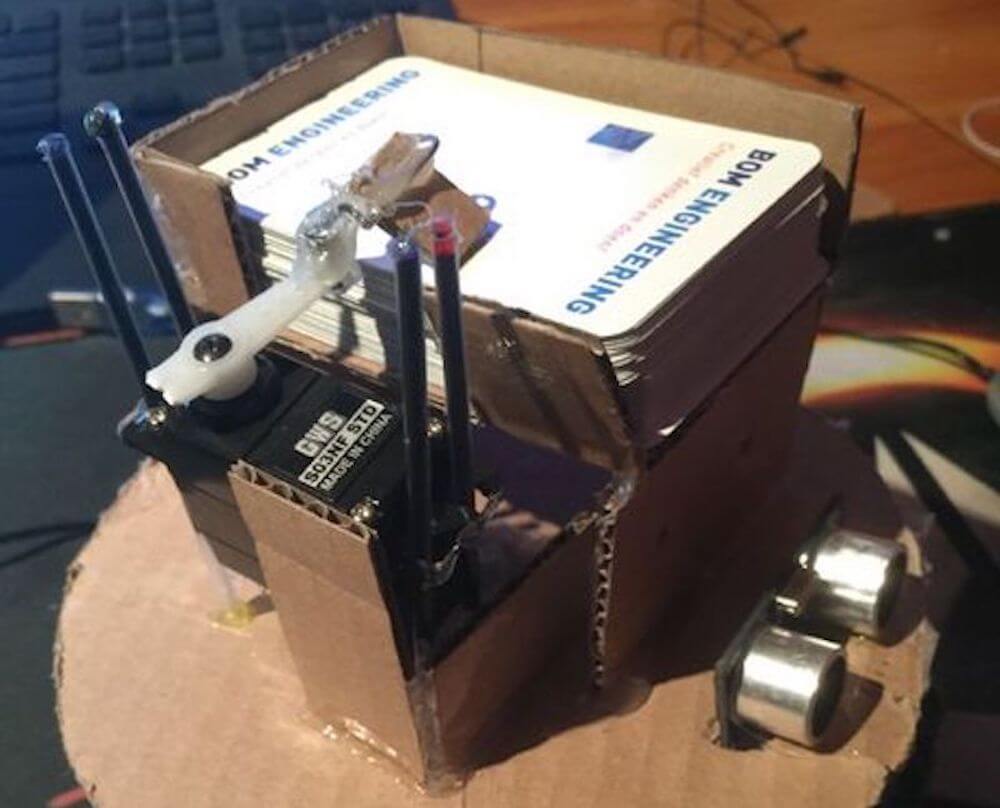
    Ruben, aka “Ruubz0r,” a mechanical engineering student, was tasked with building a smart object. As he enjoys card games, he decided to make a playing card distributor.

    The resulting device uses a single servo to slide cards off of a deck, along with a stepper motor and ultrasonic sensor to aim it at the human recipient. An Arduino Uno provides the brains of the operation.

    The system is made out of wood and cardboard, and while it may not be ready for casino use, it’s a great example of what can be done with readily available materials. Check it out in action in the video seen here!


    Website: LINK

  • Automatically open doors with Arduino!

    Automatically open doors with Arduino!

    Reading Time: < 1 minute

    Automatically open doors with Arduino!

    Arduino TeamJanuary 12th, 2018

    Tired of doing the mundane task of opening your door? This hack from Sieuwe Elferink takes care of that for you, using an Arduino Uno for control.

    When someone comes within 50 cm of an ultrasonic sensor attached to the door, the Arduino uses an H-bridge relay to power a windshield wiper motor, which opens and closes it via a linkage setup. Another sensor is implemented on the opposite side of the door, allowing hands-free travel both ways!

    Want to build your own? You can find instructions here, while code is available on GitHub.


    Website: LINK

  • Add colorful effects to your 1980s boombox with Arduino and LEDs

    Add colorful effects to your 1980s boombox with Arduino and LEDs

    Reading Time: < 1 minute

    Add colorful effects to your 1980s boombox with Arduino and LEDs

    Arduino TeamJanuary 5th, 2018

    While ’80s-style boomboxes have their own unique character, per hacker “Dancorp’s” excellent mod, it’s clear that they could be improved dramatically with programmable LEDs.

    This build uses a capacitive filtering arrangement to feed line out signals from the boombox into an Arduino Uno, which then controls three LED strips.

    Two of these strips are arranged around the speaker cones, emitting beautiful LED effects to go along with the music playing, while the third can be used to light up the built-in VU meters.

    A schematic along with Arduino code are available on Dancorp’s write-up. It looks like a fairly accessible project, especially given the extra space available in electronics from that era.


    Website: LINK