Schlagwort: Uno

  • 5 Arduino projects to get you Halloween-spired

    5 Arduino projects to get you Halloween-spired

    Reading Time: 2 minutes

    5 Arduino projects to get you Halloween-spired

    Arduino TeamOctober 28th, 2019

    October 31st is almost here and we’re all super excited, because this is the perfect time for some DIY fun! Nothing to wear? Not a problem! Need a spook-tacular decoration? We’ve got just the thing.

    To help get you into the spirit, we’ve selected a handful of Halloween-themed projects from the Arduino Project Hub that will surely catch the attention of trick-or-treaters (or send them screaming into the night.)  

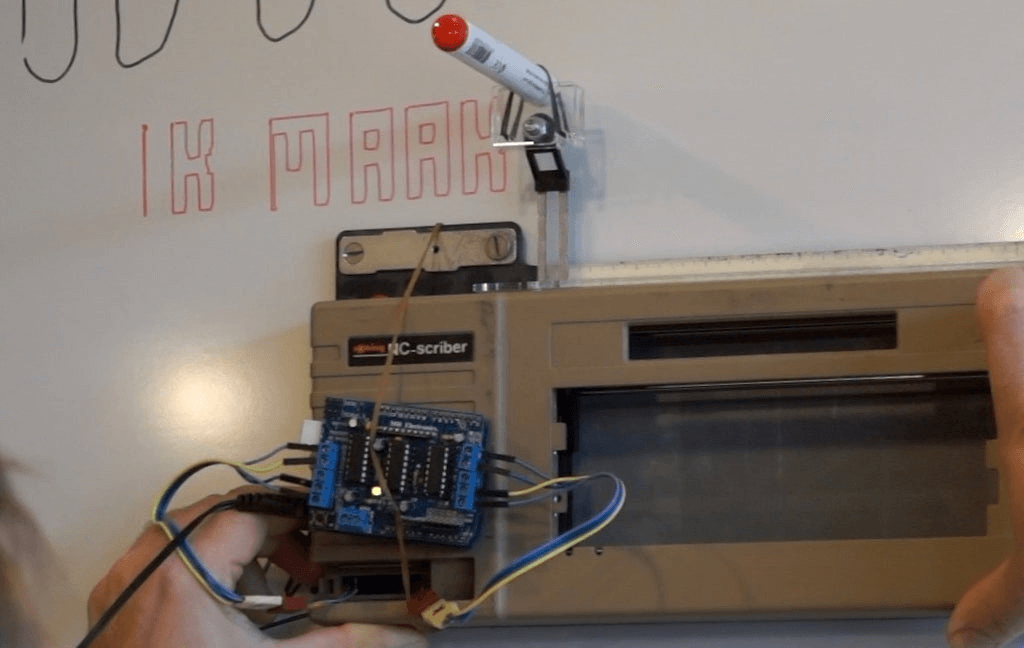
    Make your Echo Dot a bit more interesting than a hockey puck using an Arduino Uno, a Motor Shield, a 3.5mm TRS splitter, and an amplified speaker.

    [youtube https://www.youtube.com/watch?v=4DigawnHFQQ?feature=oembed&w=500&h=281]

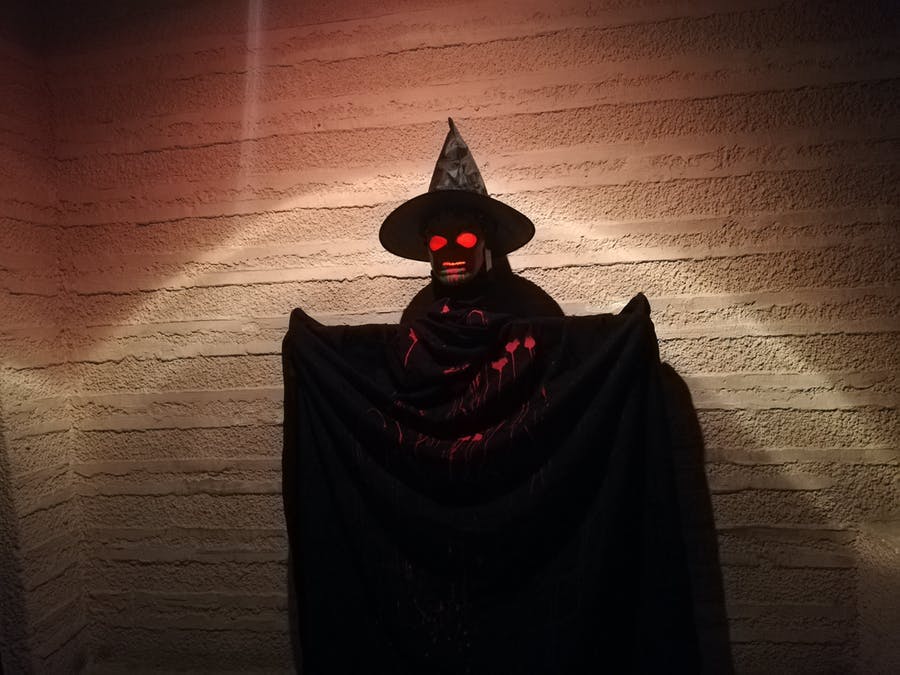
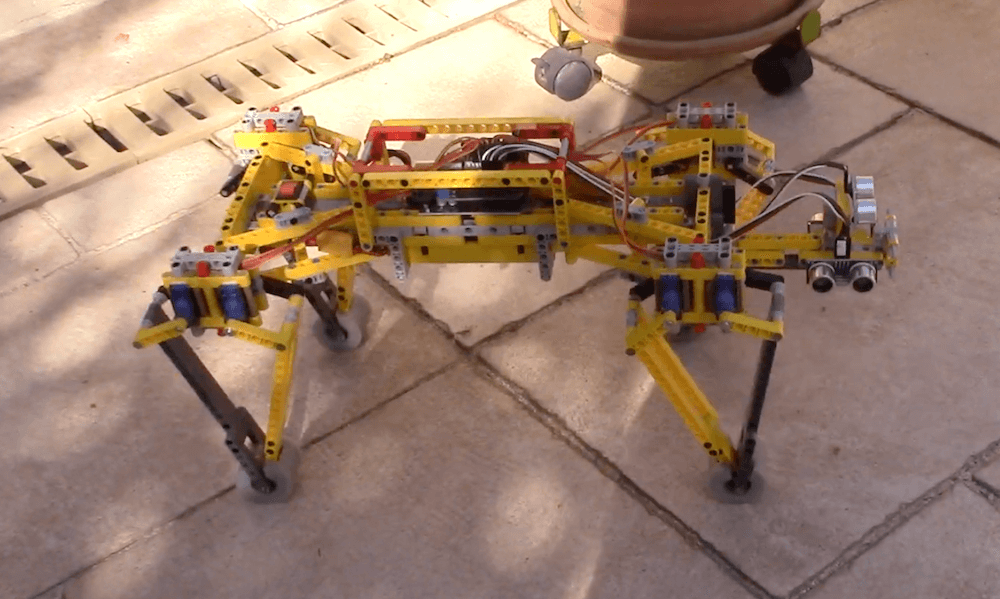
    This Arduino Mega-based robot can be operated remotely from your smartphone or move about autonomously, complete with creepy lights and a terrifying soundtrack.

    [youtube https://www.youtube.com/watch?v=cz-JMVZ8wHg?feature=oembed&w=500&h=281]

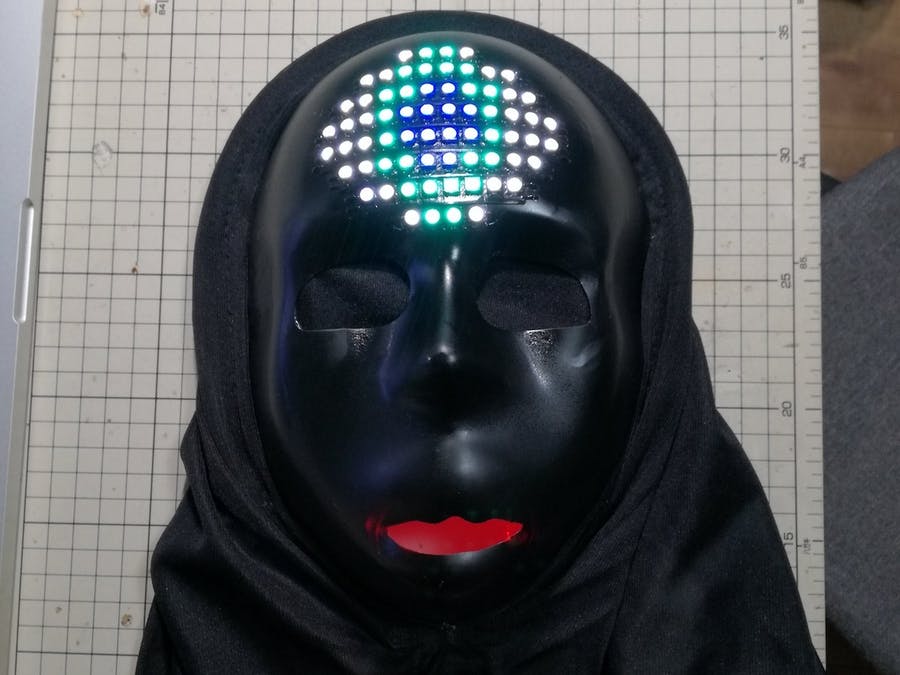
    Stand out as you walk through the neighborhood by customizing a store-bought mask with an eye made of LEDs and a mouth that flashes red. 

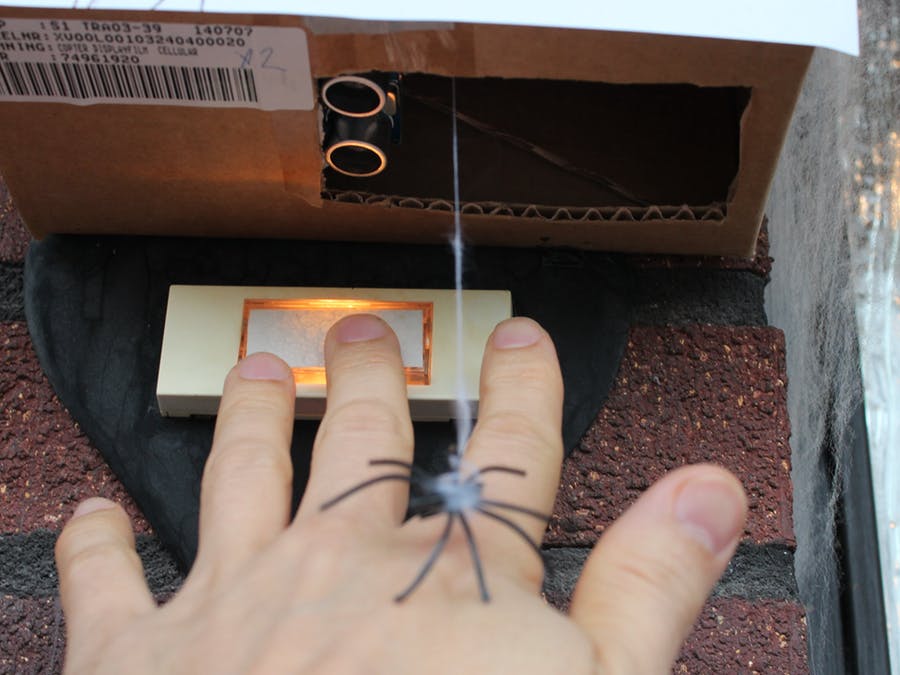
    Here’s a quick, last-minute scare prank for your porch. Drop a fake spider on anyone that tries to ring your doorbell via an Arduino Uno, an HC-SR04 ultrasonic sensor, and a servo. 

    [youtube https://www.youtube.com/watch?v=k5KjmB5nf54?feature=oembed&w=500&h=281]

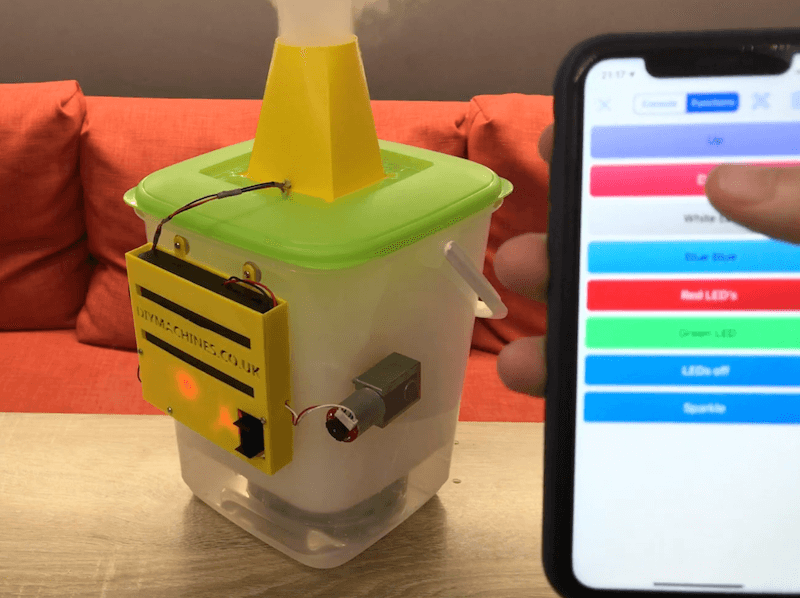
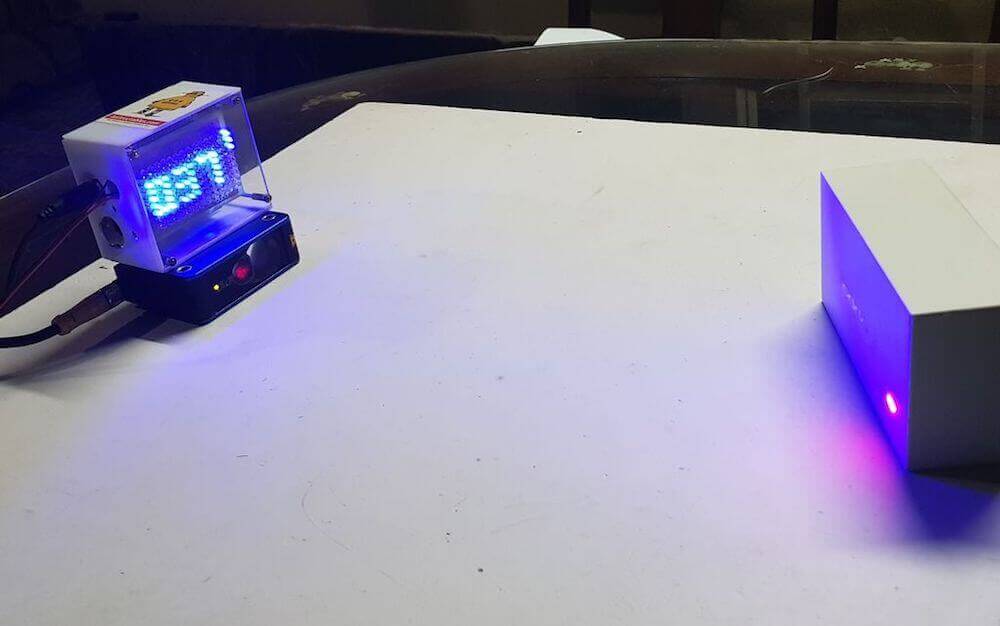
    Add some special effects to your party with a 3D-printed, Arduino Nano-powered fog machine that’s controllable over Bluetooth. 

    [youtube https://www.youtube.com/watch?v=IhL9i5he0LY?feature=oembed&w=500&h=281]

    Have a project of your own? Be sure to share it with us! 

    Website: LINK

  • Wall-mounted world map shines brightly with fiber optics

    Wall-mounted world map shines brightly with fiber optics

    Reading Time: 2 minutes

    Wall-mounted world map shines brightly with fiber optics

    Arduino TeamOctober 23rd, 2019

    Apparently not content with looking at a map in a book or on a computer screen, YouTuber ShareAHack.com decided to CNC cut and mount a projection of the world onto his apartment’s wall! 

    The build was completed in sections and pieced together to form the model, with moss-covered land masses and cities represented by fiber optic LEDs.

    Illumination is provided by a series of LED units, which combine white and yellow light that is transmitted to small drilled-out holes via a large number of fiber optic strands. An Arduino controls the lighting via N-channel MOSFETs, allowing it to randomly vary the output for a pleasing and realistic effect. 

    Files for the project are available here, though be warned that it took around six months to finish!

    [youtube https://www.youtube.com/watch?v=HA-YVgOBqGc?feature=oembed&w=500&h=281]

    Website: LINK

  • Marriage proposal using custom reverse geocache box

    Marriage proposal using custom reverse geocache box

    Reading Time: 2 minutes

    Marriage proposal using custom reverse geocache box

    Arduino TeamOctober 14th, 2019

    Software engineer Josh Robertson decided to come up with his own take on a marriage proposal, building a reverse geocache device for the job that uses not one, but two Arduino Uno boards

    The unit, which is made out of a wine box, is unlocked by three servos that actuate rods to release a trio of clasps. His not-yet-fiancé had to first input the correct sequence on a keypad, then turn potentiometers to the right position, and finally traipse to the accurate location—sensed via GPS—for it to open up.

    As the project’s I/O requirements went beyond a single Uno, Robertson linked a pair together using the I2C protocol, allowing the master to read GPS coordinates and control a small LCD screen, while the second Arduino takes care of user input and servo actuation. 

    The result was a “yes” to the proposal, and while we can’t guarantee the same outcome if you build one yourself, more info on the contraption is available here. Congrats, Josh!

    Website: LINK

  • The Arduino Audio Meter is a programmable ‘guitar pedal’

    The Arduino Audio Meter is a programmable ‘guitar pedal’

    Reading Time: 2 minutes

    The Arduino Audio Meter is a programmable ‘guitar pedal’

    Arduino TeamOctober 14th, 2019

    Normally guitar pedals take in a signal from your instrument, then some modification to an amplifier. ElectroSmash’s open source device, however, looks like a guitar pedal, connects to a guitar and amp like a guitar pedal, but actually leaves the signal unmodified. Instead, it displays a variety of info about what you’re playing on its 16 x 16 LED matrix.

    The Arduino Audio Meter uses an Uno for control and analysis, and acts as a VU meter by reading the incoming audio and creating LED animations. It also features a tuner function, visual metronome, frequency detector, and a simple lamp, which could all certainly be useful when playing. 

    User input (besides the1/4-inch audio jack) is via a potentiometer and encoder, and it even has a few games available for it if you need to blow off some steam between sets! Build kits are available here if you’d like to make your own.

    [youtube https://www.youtube.com/watch?v=IUKeNdt1Qo0?feature=oembed&w=500&h=281]

    Website: LINK

  • Watch this guitarist perform an acoustic set with his own robotic drummer

    Watch this guitarist perform an acoustic set with his own robotic drummer

    Reading Time: 2 minutes

    Watch this guitarist perform an acoustic set with his own robotic drummer

    Arduino TeamOctober 11th, 2019

    As shown in the video below, Tristan Calderbank is a very talented singer and guitar player, but what’s perhaps most interesting about his performance is the percussion section. Instead of a person (or an entire band) standing beside him, a robotic shaker, tambourine, snare drum and bass drum all play together under MIDI control.

    Each device is activated by an HS-311 servo—or two in the case of the snare—powered by an Arduino Uno and MIDI shield. Signals are sent to the Arduino by a laptop running Ableton Live, and servo velocity can be varied to further control sound. 

    A write-up on Calderbank’s build process can be found here, including what didn’t work, plus info on sound isolation from the servos. Arduino code is available on GitHub.

    [youtube https://www.youtube.com/watch?v=Eu26OUg4D1I?feature=oembed&w=500&h=281]

    [youtube https://www.youtube.com/watch?v=CkNWcZZPlKg?feature=oembed&w=500&h=281]

    Website: LINK

  • Control a swarm of drones with this wearable tactile device

    Control a swarm of drones with this wearable tactile device

    Reading Time: 2 minutes

    Control a swarm of drones with this wearable tactile device

    Arduino TeamOctober 1st, 2019

    If you fly drones for fun—or perhaps even for work—you know that piloting them can sometimes be a difficult tasks. Imagine, however, trying to control four drones simultaneously. While also “challenging,” researchers at the Skolkovo Institute of Science and Technology in Russia have come up with a new approach for commanding such a swarm using only arm movements.

    SwarmTouch takes the form of a wrist and finger-mounted device, with an array of eight cameras tracking its position. When the operator moves their arm, the drones react to the hand motion and the other flying robots in the group, as if there was a mechanical system linking each one together. 

    Feedback is provided by an Arduino Uno connected to the control station via an XBee radio, which tells the operator whether the swarm is expanding or contracting using vibration motors on a wearer’s fingertips. The setup is on display in the video below and its research paper can be found here.

    We propose a novel interaction strategy for a human-swarm communication when a human operator guides a formation of quadrotors with impedance control and receives vibrotactile feedback. The presented approach takes into account the human hand velocity and changes the formation shape and dynamics accordingly using impedance interlinks simulated between quadrotors, which helps to achieve a life-like swarm behavior. Experimental results with Crazyflie 2.0 quadrotor platform validate the proposed control algorithm. The tactile patterns representing dynamics of the swarm (extension or contraction) are proposed. The user feels the state of the swarm at his fingertips and receives valuable information to improve the controllability of the complex life-like formation. The user study revealed the patterns with high recognition rates. Subjects stated that tactile sensation improves the ability to guide the drone formation and makes the human-swarm communication much more interactive. The proposed technology can potentially have a strong impact on the human- swarm interaction, providing a new level of intuitiveness and immersion into the swarm navigation.

    [youtube https://www.youtube.com/watch?v=CX2mOAT3anM?feature=oembed&w=500&h=281]

    Website: LINK

  • Measuring a mini steam engine’s speed with Arduino

    Measuring a mini steam engine’s speed with Arduino

    Reading Time: 2 minutes

    Measuring a mini steam engine’s speed with Arduino

    Arduino TeamSeptember 30th, 2019

    Joop Brokking has been experimenting with a miniature candle-powered steam engine. It’s an amazing little device, able to push a piston over and over to turn a flywheel, releasing the steam via a mechanically-controlled valve. But just how fast does it go?

    Of course, there are a plethora of ways to determine its speed, but Brokking chose to do so using an Arduino Uno, a potentiometer and an LED that’s arranged over the piston assembly. 

    The light source is programmed to pulse on and off, with a frequency that can be adjusted using the potentiometer. He then aligned this pulsing with the piston’s cyclic rate, visually “freezing” the device in time. This frequency and RPM numbers are output over the serial monitor, giving him a speed of around 1850 RPM.

    [youtube https://www.youtube.com/watch?v=WSZ6QDU-eXY?feature=oembed&w=500&h=281]

    Website: LINK

  • These LEGO linkage walkers wander under Arduino control

    These LEGO linkage walkers wander under Arduino control

    Reading Time: 2 minutes

    These LEGO linkage walkers wander under Arduino control

    Arduino TeamSeptember 27th, 2019

    YouTuber Oracid1 has developed a unique family of four-legged robots, dubbed “FiveBarQuads.”

    The quadrupeds all feature ultrasonic sensing for navigation and a body made out of LEGO components — and as seen in the first video below, his latest (and largest) version is able to navigate quite nicely on its own. It’s even able to traverse a grate and maneuver around a potted plant, though chair legs are understandably a bit tricky.

    The robots use an Arduino Uno for control along with a total of 16 micro servos in its shoulders (four each) in order to move the limbs. Two servos are employed to actuate each upper linkage for the legs, which are attached to bottom sections, and finally to the feet portion through a series of joints. This allows for an interesting locomotion capability that could be applicable in a variety of situations.

    [youtube https://www.youtube.com/watch?v=CPP0dnm1N3E?feature=oembed&w=500&h=281]

    [youtube https://www.youtube.com/watch?v=XhwKra9lX_I?feature=oembed&w=500&h=281]

    [youtube https://www.youtube.com/watch?v=dyPRMdeFZL4?feature=oembed&w=500&h=281]

    Website: LINK

  • Logging refrigerator temperature with Arduino

    Logging refrigerator temperature with Arduino

    Reading Time: 2 minutes

    Logging refrigerator temperature with Arduino

    Arduino TeamSeptember 25th, 2019

    What really happens when you open the refrigerator door? Sure, you know intuitively that cold air escapes, but just how much? And how fast does the food inside actually heat up? To find out, Ryan Bates came up with his own data logging setup using an Arduino Uno, a custom sensor shield, and a microSD card reader.

    His device uses a photoresistor to tell when the door has been opened, as well as a DHT22 temperature/humidity sensor to log the air temperature and door status. Along with this, TMP36 sensors are placed around the fridge to get a more granular look at temperatures, including one attached to a pickle jar. 

    The results seen in the video below are quite interesting, and more information on the build can be found here if you’d like to try something similar.

    [youtube https://www.youtube.com/watch?v=RkxqKmEyWRI?feature=oembed&w=500&h=281]

    Website: LINK

  • DrumKid is a handheld aleatoric drum machine

    DrumKid is a handheld aleatoric drum machine

    Reading Time: 2 minutes

    DrumKid is a handheld aleatoric drum machine

    Arduino TeamSeptember 17th, 2019

    Hearing live music is certainly enjoyable, but if the musician is using a drum machine, things can eventually get static. To add a bit more spontaneity into this class of robo-musician, Matt Bradshaw has created DrumKid — a handheld, battery-powered unit that uses random numbers to determine the rhythm and sound of a beat.

    The device goes through a drum sequence, with a series of LEDs to indicate its progression, but also inserts randomly generated drum hits to the original beat. It features a variety of controllable parameters to alter how it sounds when played live via four knobs and six buttons.

    The DrumKid was developed on an Arduino Uno and breadboard, then transferred to a PCB for the final version that will be for sale later this year. More info on the build is available in Bradshaw’s project write-up, while code and design files are on GitHub if you’d like to make your own!

    [youtube https://www.youtube.com/watch?v=PbklWwytfTM?feature=oembed&w=500&h=281]

    Website: LINK

  • Exploring a classic physics problem with Arduino

    Exploring a classic physics problem with Arduino

    Reading Time: 2 minutes

    Exploring a classic physics problem with Arduino

    Arduino TeamSeptember 11th, 2019

    As described in this project’s write-up, “The brachistochrone curve is a classic physics problem, that derives the fastest path between two points A and B which are at different elevations.” In other words, if you have a ramp leading down to another point, what’s the quickest route?

    Intuitively—and incorrectly—you might think this is a straight line, and while you could work out the solution mathematically, this rig releases three marbles at a time, letting them cruise down to the Arduino Uno-based timing mechanism to determine the result.  

    The ramps are made out of laser-cut acrylic, and the marbles each strike a microswitch to indicate they’ve finished the race. The build looks like a great way to cement a classic physics problem in students’ minds, and learn even more while constructing the contraption!

    [youtube https://www.youtube.com/watch?v=1BdO8J0iynY?feature=oembed&w=500&h=281]

    Website: LINK

  • Three dozen servos create animated artwork

    Three dozen servos create animated artwork

    Reading Time: < 1 minute

    Three dozen servos create animated artwork

    Arduino TeamSeptember 6th, 2019

    Servo motors form the basis of many Arduino projects, but few use them in as interesting a manner as Doug Domke’s piece of electronic art.

    The device features 36 servo motors arranged on a pegboard to produce various patterns, and can even be used in an interactive mode where it follows a person’s hand around with the help of ultrasonic sensors. 

    Everything is driven by an Arduino Uno along with three 16-channel PWM control modules, and popsicle sticks show the servo movement to onlookers. 

    Details, including Arduino code, can be found in the Domke’s write-up. To really appreciate this project’s visuals, be sure to take in the coordinated movements in the video below! 

    [youtube https://www.youtube.com/watch?v=lnrVmhRN2gM?feature=oembed&w=500&h=281]

    Website: LINK

  • Designing a modular and ambidextrous four-fingered robot hand

    Designing a modular and ambidextrous four-fingered robot hand

    Reading Time: 2 minutes

    Designing a modular and ambidextrous four-fingered robot hand

    Arduino TeamSeptember 4th, 2019

    Gray Eldritch (AKA The Technomanc3r) has been working on a robotic hand for some time now, and has settled (so far) on a design with three independent servo-actuated fingers and a thumb. He’s also implemented a wrist assembly to rotate it back and forth, with an Arduino Uno hidden inside for an entirely self-contained gripper unit.

    Each of the three fingers is controlled by a single MG996R servo, as is the wrist, while the thumb adds a second SG90 servo to allow it to move on two axes. The fingers are modular, so they can be swapped out as needed, and you even change the thumb position for ambidextrous operation. 

    It remains to be seen what Eldritch plans to do with the gripper, but it looks brilliant by itself in the video below.

    [youtube https://www.youtube.com/watch?v=Ocl3HEsCcv4?feature=oembed&w=500&h=281]

    Website: LINK

  • d.i.d. is a scalable 3D-printed pen plotter

    d.i.d. is a scalable 3D-printed pen plotter

    Reading Time: 2 minutes

    d.i.d. is a scalable 3D-printed pen plotter

    Arduino TeamAugust 29th, 2019

    While computer printers are readily available, if you’d like a plotting device that drags a pen, marker, or whatever you need across paper to create images, your options are more limited. To fill this gap, studioprogettiperduti has come up with the d.i.d, or Deep Ink Diver.

    This scalable pen plotter uses a frame made out of 3D-printed parts, as well as aluminum extrusion, which could be lengthened to support the size of paper that you need. A timing belt pulls the writing carriage back and forth, while a roller advances the paper. 

    Control is handled by an Arduino Uno and a CNC shield, with a version of grbl that accommodates a servo used to lift the pen.

    The materials and electronics used for the plotter are all standard and easy to source. The main frame is made of aluminum extrusion and 3D-printed connections. The motors are all standard NEMA 17 stepper motors and a single SG-90 servo motor. Everything is driven by a cheap Arduino Uno control board that handles the transition from g-code to movement. Furthermore, the software used to create G-code, Inkscape, is open source as well.

    Website: LINK

  • Desktop USB drum for some serious finger tapping

    Desktop USB drum for some serious finger tapping

    Reading Time: < 1 minute

    Desktop USB drum for some serious finger tapping

    Arduino TeamAugust 27th, 2019

    When you need a distraction, or perhaps even now, you may turn to tapping on your desk. While a good way to keep your hands active, or pass a few uninteresting seconds, if you want to get serious with your finger drumming, then the “Arduino USB Drum” by creator colonelwatch may be just the thing.

    The 3D-printable device hooks onto the edge of the table, and reads taps on its pads with a pair of strain gauges. Signals are amplified and passed along to an Arduino Uno—including tap intensity—which sends MIDI data to a computer via serial. 

    Code and other build info are available on GitHub, and you can see a video of it in action here.

    Website: LINK

  • These interactive drawing machines are inspired by Japanese zen gardens

    These interactive drawing machines are inspired by Japanese zen gardens

    Reading Time: 2 minutes

    These interactive drawing machines are inspired by Japanese zen gardens

    Arduino TeamAugust 27th, 2019

    Artist Jo Fairfax has created automated drawing machines inspired by carefully manicured Japanese rock gardens, AKA zen gardens. The mesmerizing artwork uses magnets and motors that move underneath a bed of iron filings, generating soothing shapes as viewers come near via motion sensor.  

    An Arduino Uno is utilized for the device, or rather devices, and you can see a square “magnet garden” in the first video below, automatically producing a circular pattern. A (non-square) rectangular garden sketches a sort of snake/wave pattern in the second clip. 

    The build is reminiscent of sand drawing machines that rotate a metal marble through magnetic force, but does away with a visible source of movement as the filings react directly to the magnetic field as it’s applied.

    An Arduino Uno is programmed to set off a mechanism with integrated magnets below the platform of iron filings. each time a viewer approaches the machine, it starts to ‘draw’ and agitate the black particles, moving them around the platforms. Slowly the drawings become three dimensional and the sense of the magnets’ tracing becomes visible. 
     
    The charged iron filings create varying geometric clusters that shape the zen gardens. The drawing machines reveal the forces acting on them, imitating grass and sand that react to the natural force of the wind. the gesture of the viewer’s movement that activates the machine coupled with the magnetic power makes the artwork become a dialogue of forces… elegant and subtle, just like a zen garden.

    Website: LINK

  • Here’s a low-cost air hockey table you can make yourself

    Here’s a low-cost air hockey table you can make yourself

    Reading Time: 2 minutes

    Here’s a low-cost air hockey table you can make yourself

    Arduino TeamAugust 26th, 2019

    If you’d like to bring the air hockey arcade experience home with you, then look no further than this project by Kousheek Chakraborty and Satya Schiavina, or ‘Technovation.’ 

    Cleverly, the scaled-down game table uses a household vacuum cleaner blower attachment to provide air pressure, sending little jets of air through a grid of laser-cut holes on the acrylic playing surface.

    LED lights embedded in the sides add a bit more excitement to the build, and points are tallied with an Arduino Uno-based LCD score display. A pair of buttons are used to register a points for either player, hopefully eliminating arguments over who is ahead as the game progresses!

    [youtube https://www.youtube.com/watch?v=nLU8pFqxcTU?feature=oembed&w=500&h=281]

    Website: LINK

  • Vintage LED display prototype revived with Arduino

    Vintage LED display prototype revived with Arduino

    Reading Time: 2 minutes

    Vintage LED display prototype revived with Arduino

    Arduino TeamAugust 22nd, 2019

    Patrick Hickey has been collecting retro LED indicators and displays for decades, and his rarest item is an HP 5082-7002—a 5×7 dot matrix LED display in a beautiful gold and (possibly) sapphire enclosure. This device is so rare, in fact, that he believes it to be a prototype, somehow relegated to eBay for gold salvage.

    Hickey wasn’t able to find any reference to the unit—much less a datasheet—even after extensive research. Instead, he went to work reverse engineering the HP 5082-7002 following the tracks of the PCB to work out how the rows and columns are connected. 

    He then designed a test shield for an Arduino Uno with sockets on which the mystery device could sit. With this piece of hardware built, he can now create simple pictures and animated sprites on it using pulsed Arduino outputs.

    I followed the tracks to work out which pins are connected rows and columns, and set out to build a test shield for an Arduino Uno.  I decided to drive them as “rows” of 5. The max output of Arduino I/O pins is rated at 40mA, so in theory, I could simultaneously power up to 5 LEDs in parallel at 8mA using 1 pin. In practice, using strobe/multiplexing, the duty cycle is much less: 1/7 or 1/5 depending if you drive by rows (7) or columns (5) respectively. The 5 current limiting series resistors are 470 Ohms (¼ Watt). My preference is to use carbon composition resistors (e.g. Allen Bradley). I love the “retro look” of them and I think they compliment the vintage LEDs.  

    I had already written Arduino code for testing some TIL-305 matrix displays, so it was relatively simple to transpose the pins in my sketch for this configuration. The test code permits animations of up to 150 different alphanumeric characters/symbols, and (of course) some animated sprites inspired by retro video games.

    Website: LINK

  • 1980s plotting device turned into a handheld whiteboard tool

    1980s plotting device turned into a handheld whiteboard tool

    Reading Time: < 1 minute

    1980s plotting device turned into a handheld whiteboard tool

    Arduino TeamAugust 21st, 2019

    Writing on a whiteboard isn’t an easy task for many people, including instructor ‘Kenyer,’ whose lettering can be on display for a semester or more. Rather than accept his imperfect penmanship, he modified a 1980s-era Rotring NC-Scriber—originally meant for mechanical drawing use—to do this for him.

    His project runs on an Arduino Uno and motor shield, along with custom mount for erasable markers. Phrases are programmed via the setup section of the sketch, but he hopes to implement the device’s keyboard for control with the help of a different motor driver in the future. 

    You can see it plotting away in the video below, while code and additional info can be found in Kenyer’s write-up.  

    [youtube https://www.youtube.com/watch?v=nOOa1COw-SY?feature=oembed&w=500&h=281]

    Website: LINK

  • Simulating a flip clock on an Arduino-driven LCD screen

    Simulating a flip clock on an Arduino-driven LCD screen

    Reading Time: 2 minutes

    Simulating a flip clock on an Arduino-driven LCD screen

    Arduino TeamAugust 20th, 2019

    Although flip clocks may be extremely interesting electromechanical devices, with rolling flaps to show what time it is, they’re also fairly complicated if you want to build one yourself. Mark Wilson, however, took a different approach with his project, simulating the output on a 320×240 LCD display.

    The clock is powered by an Arduino Uno and a DS3231 RTC module, allowing it to show the time, date, a blinking colon, and even the days until the trash/recycling needs to be put out. Alternate screens are available as well, including a Pong clock, triangle clock, and cube clock, which can be individually selected or set to randomly cycle if you so desire. 

    For its housing, Wilson chose a minimal acrylic/standoff design that seems to suit it well, and you can see it in action in the short demo clip below.

    [youtube https://www.youtube.com/watch?v=JB12y5fYdpQ?feature=oembed&w=500&h=281]

    Website: LINK

  • Automating a chop saw with Arduino

    Automating a chop saw with Arduino

    Reading Time: 2 minutes

    Automating a chop saw with Arduino

    Arduino TeamAugust 15th, 2019

    YouTuber “Absorber Of Light” needed to cut thousands of tiny aluminum pieces with a chop saw, and after paying someone to do this for him, decided to instead automate the process. 

    His system is controlled by an Arduino Uno, and moves strips of aluminum under the saw using stepper motor and threaded rod assembly—a sort of very simple CNC. Once in position, a second stepper activates a linear actuator via a physical H-bridge relay setup with cams and microswitches. This actuator pushes the saw into the aluminum strip, cutting it to an impressive ±.002 in, or ~.05 mm tolerance.

    You can see it in action in the video below and find the project’s code in the description.

    Cutting thousands of these small pieces of aluminum with the help of an Arduino and a couple of stepper motors. They will eventually become brackets to fasten computer monitors to metal enclosures.

    The brackets measure .750″ x .547″ x .125″, tolerance is quite decent at + or – .002″ I tried to keep the code as simple as possible because I’m not much of a programmer and didn’t want to spend too much time on it. The loop is triggered by the Arduino reset button. The linear actuator is controlled by an H-bridge with 4 simple switches activated by one of the steppers.

    [youtube https://www.youtube.com/watch?v=bl16CQJarpQ?feature=oembed&w=500&h=281]

    Website: LINK

  • Arduino and industrial distance sensor communicate via RS-485

    Arduino and industrial distance sensor communicate via RS-485

    Reading Time: 2 minutes

    Arduino and industrial distance sensor communicate via RS-485

    Arduino TeamAugust 5th, 2019

    After obtaining an industrial distance sensor, TUENHIDIY decided to use it as the basis for an interesting visual indicator.

    The device communicates with an Arduino Uno via an RS-485 module, and outputs distance values in the form of a 9 x 14 pixel display made out of discrete LEDs soldered onto an LoL Shield.

    As shown in the video be low, it does a good job of sensing how far an object is from it on a table, and the 126 LEDs provide a nice brilliant display. 

    Code for the build can be found on GitHub if you’d like to make something similar. Seeing as though the sensor used here will set you back close to $1,000, you may want to also consider alternatives like an HC-SR04 ultrasonic module instead! 

    Website: LINK