This faux candle lights, flickers, smokes, and smells like the real thing
Arduino Team — March 6th, 2019
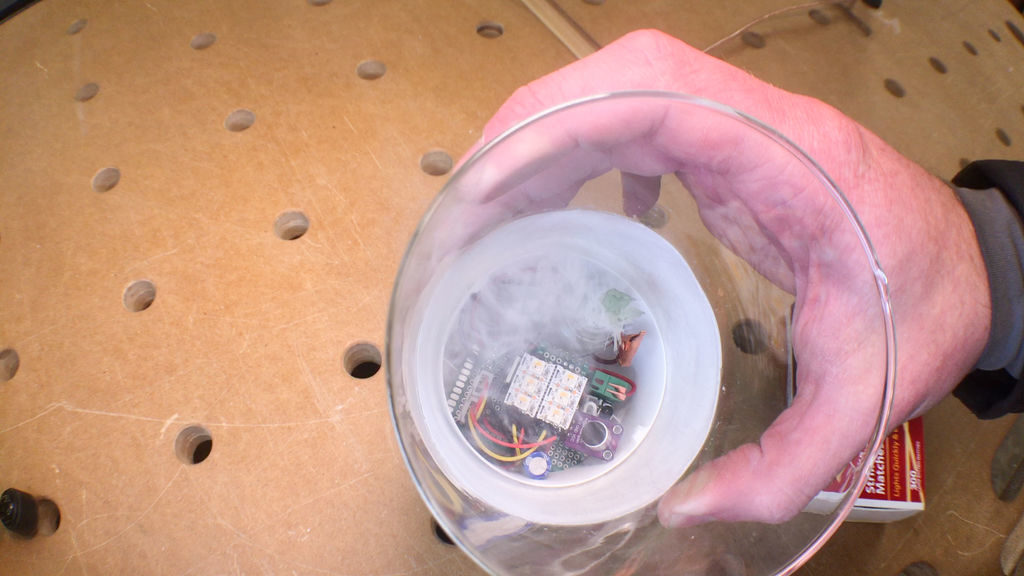
Keith of “Keith’s Test Garage” wanted an LED candle. While somewhat realistic flicking units are easy to find, he was in search of something much more like the actual thing, and after several years of work has come up with a rather amazing replica.
The device’s wax-embedded glass enclosure houses an Arduino, along with a series of six RGBW LEDs inside that randomly flicker away to simulate a flame. This effect is triggered via a real match, which is sensed by an IR module. To stop the effect, one literally blows out the candle through a microphone input that picks up on this action.
Most impressively however, upon putting out the faux flame, a length of resistive wire heats up glycerin and smelling oil on a wick, producing a puff of smoke to end the light performance.
Maker Jeremy S. Cook has experimented with both CNC machinery and light painting in the past, and decided to combine these two skills into a new artistic device.
His setup uses a web app found here to program a CNC router as a sort of dot matrix printer. But instead of a pen, pencil, brush or other marking utensil, it uses a button as an input to the onboard Arduino Nano when pressed to the router’s surface.
From this input, the Arduino then commands a diffused RGB LED to “mark” the surface with light, painting an image on the camera’s exposed sensor.
Code and print files are are available on GitHub if you’d like to try your own light art experiments!
Electronic dummy load is a work of readily-available art
Arduino Team — March 5th, 2019
As seen here, Juan had some problems with his power supply, and while he wanted to “simply” build another one, he didn’t let the power supply go to waste. Instead he converted it into an adjustable dummy load based on the design by Dave Jones’ shown below.
This device, however, is no mere duplication of Jones’ and adds an Arduino for control, allowing for voltage, current, power, and temperature monitoring. The enclosure was designed in Fusion 360 and 3D-printed, and the front panel overlay in Inkscape.
Other interesting tricks include using a readily available DC motor for input instead of an encoder, along with an array of 7-segment displays that don’t quite all match, but act as functional outputs nonetheless.
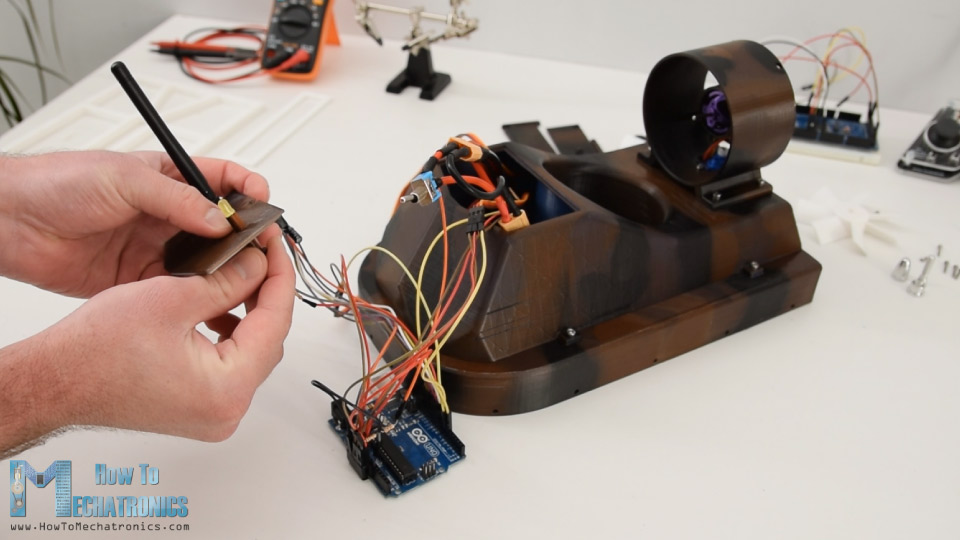
If you’ve ever considered building your own RC hovercraft, be sure to check out the latest project from “How To Mechatronics.”
The build shows how to assemble one using a variety of 3D-printed parts, a pair of brushless DC motors for hover airflow and forward motion, and a servo for steering.
An Arduino Uno along with an nRF24L01 module are employed for control, and as demonstrated in the video below, it slides across a basketball court with the greatest of ease!
More info is available on How To Mechatronics’ write-up, including CAD/3D printing files, a parts list, and Arduino code.
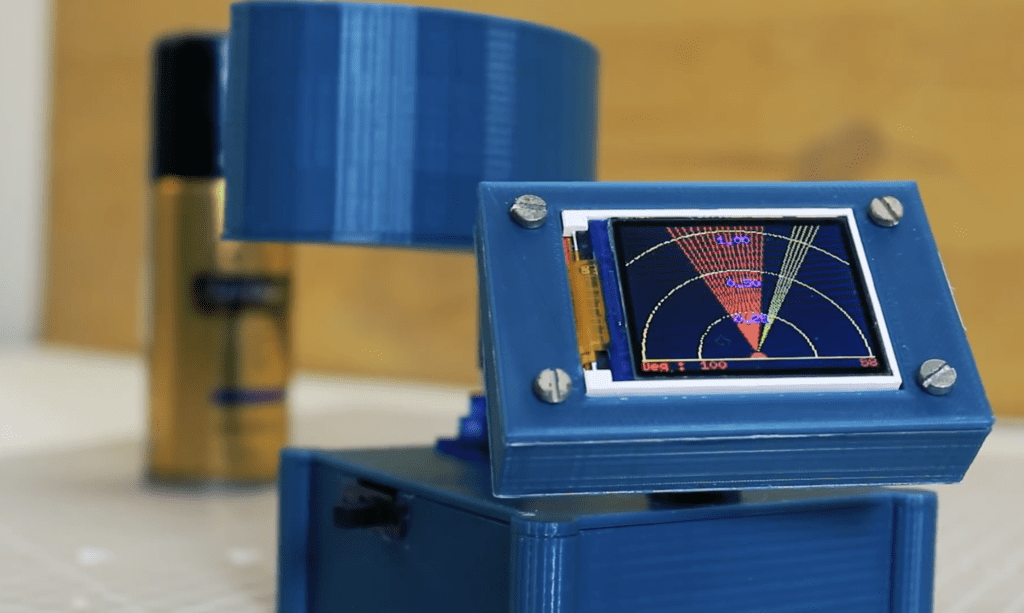
Ultrasonic sensors, which emit a high frequency sound wave then listen for its return to determine an object’s distance, are useful in a wide variety of robotics projects. If you’d like a visualization of how the sensor views an area, this “radar” from Mr Innovative presents a fun option.
The 3D-printed console features a small SG90 servo to pan the sensor over a space, picking up obstacles in its path. The readings are then transmitted to an Arduino Nano, which displays object info on a TFT screen set up to look reminiscent of a radar screen.
I have made a mini compact radar with display for that I have used HC-SR04 ultrasonic sensor, this sensor emit ultrasonic sound which came back to sensor after reflecting from an object, all the data visualization is displayed on 1.8″ ST7735 display, if any object detect by radar it’ll show in display in red line.
The build could function either as a great teaching tool, or perhaps the basis for a panning robot sensor. Print files can be found here, and code is available on GitHub.
While channel surfing might increasingly seem to be a thing of the past, Kevin Darrah demonstrates that it’s possible to control your streaming computer with a traditional TV remote.
His simple solution reads IR signals with an IR detector module, which can then be passed along and translated into USB keypresses for computer control.
You can see his experimental Arduino Leonardo setup in the video below, which takes advantage of the board’s ATmega32U4 chip to emulate USD keyboard functions directly.
Fun project here that could have a lot of uses – basically a TV remote to USB translator, so could think of a lot of ways to use something like this. For me, I just wanted an easy way to channel surf using the same TV remote that came with the TV. For this, I just read in the IR codes form the remote, then map them to key-strokes to do different things. I could see the up/down left/right keys being used to drive the mouse around… lol, that might be my next project!
The bulk of the clip, however, is around a discussion on decoding IR signals and the programming involved (code available here), starting at about 6:00 in.
Have some geometric fun with a 3D-printed, light-up icosahedron
Arduino Team — February 28th, 2019
Regular icosahedrons are 20-sided polyhedrons formed out of equilateral triangles. As such, the geometry behind making one is slightly complicated, but the results in the case of this light-up device appear to have been well worth it.
The project’s write-up does go over how to actually model these faces in CAD but also provides the 3D print files if you’d like to skip to building your own. Two versions were made, including a super-sized playable die that illuminates RGBW LEDs under Arduino Nano control, and a second icosahedron large enough to be used as a lamp shade!
A demo/explanation is seen in the first clip below, along with a better look at the electronics in the breadboard video.
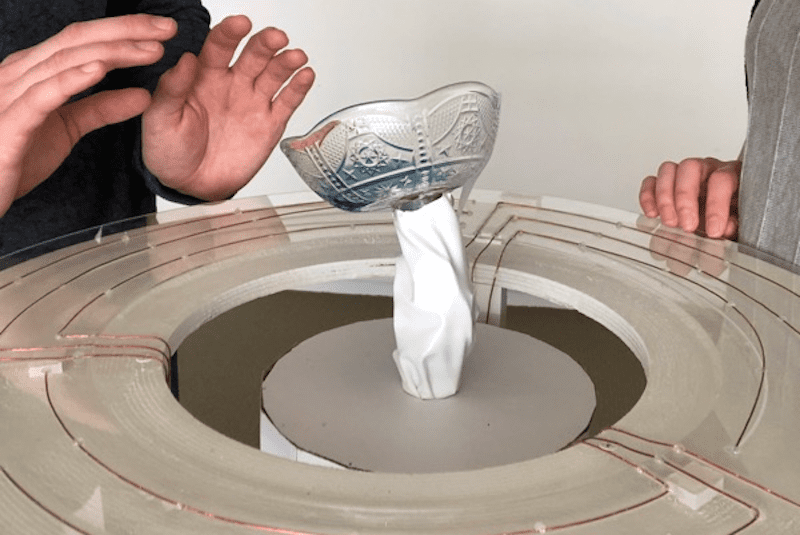
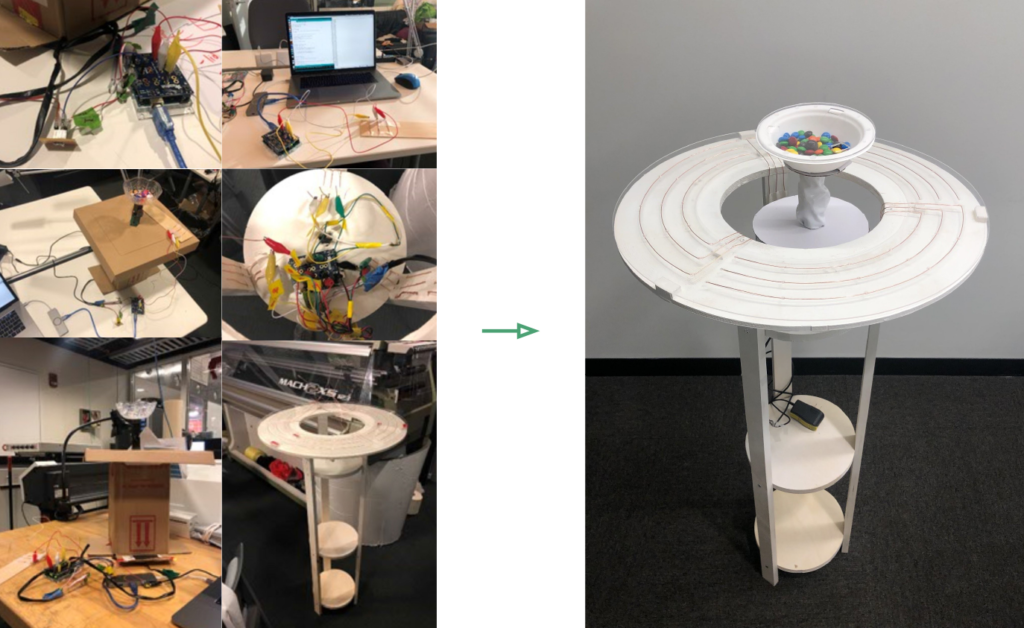
Depending on your personality, you may tend to dominate a discussion, or metaphorically slink back into the corner, waiting for a turn to speak that never comes. MIT Tangible Media Group’s SociaBowl, however, aims to change this as “a dynamic table centerpiece to mediate group conversations.”
SociaBowl takes the form of a circular standing table, with a rather curious servo-actuated bowl in the center. Copper wires embedded in the table’s acrylic surface, along with a capacitive touch shield pick up user inputs.
An Arduino Uno then translates into bowl motion, which can mean a reward for thoughtful speakers when the bowl is filled with candy, or in another implementation, the possibility of water inside spilling if one chats for too long.
Interactive video games take many forms, but for the most part, each player has a separate controller that manipulates an onscreen character, vehicle, or other singular element. What if, as in real life, multiple players have to work together with physical objects to control a sailing ship?
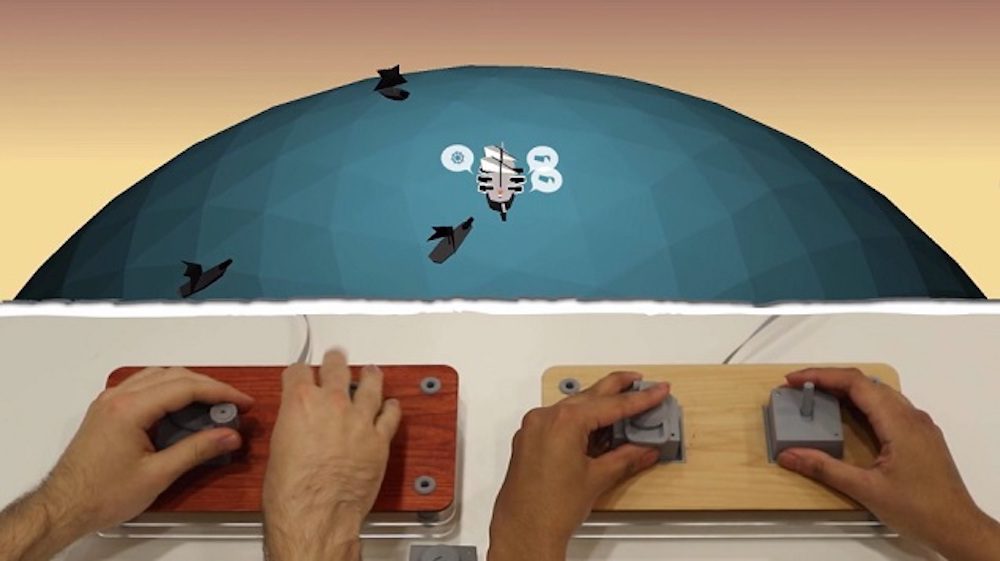
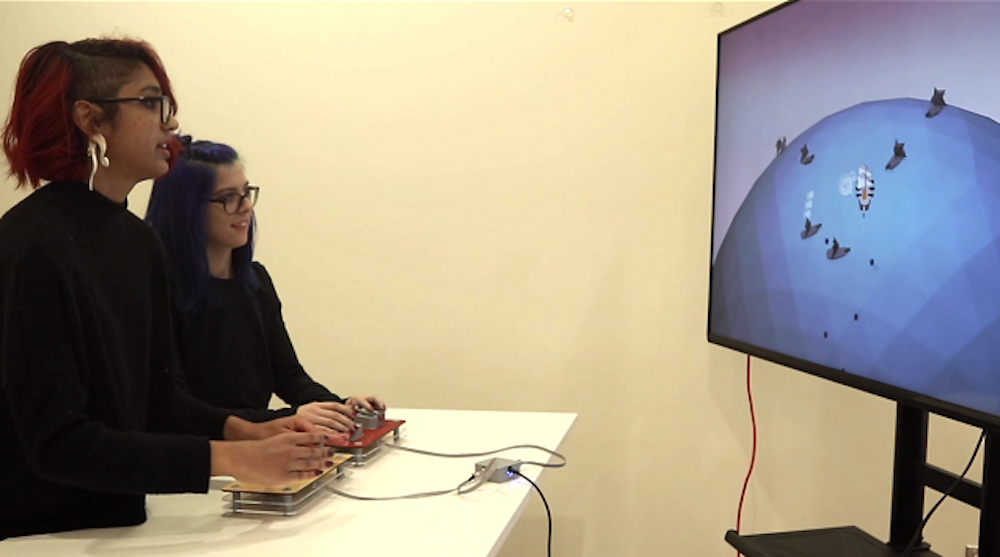
That’s the idea behind HOT SWAP: All Hands On Deck by Peter Gyory and Celment Zheng. In it, two players guide various parts of a ship using five different control elements. What makes this really interesting is that each player’s input device has room for two of these control elements, which must be swapped for actions such as steering and to load cannons. Input information is passed to the game via an Arduino Micro.
It’s like if we took a regular game controller, popped off all of the inputs, and made it so you could only use a couple of them at a time. There are two controllers, with each consisting of two input slots. Each controller controls one side of the ship, port or starboard. There are five actions total in the game, each executed with a dedicated physical input: a crank to raise and lower the sails, a wheel for turning the rudder, a hatch for loading the cannons, a wick for firing the cannons, and a flame button for dousing the fire.
There is only one of each input, which makes them a shared resource that players must trade back and forth as they play. There is this old Milton Bradley kids board game from the ’90s called Perfection where players must fit shapes into holes before a timer is up and the board shakes to make everything pop out. HOT SWAP is like if Perfection had a screen attached and had a goal outside of putting shapes into slots.
All of the code is done with JavaScript and the library Three.js, which we bundle into a desktop application using Github’s Electron. The brain of the controller is an Arduino Micro, which mostly just passes data along.
The inputs are created with the Mechamagnets technique that Clement has been developing through his research; all 3D-printed in PLA with neodymium magnets embedded in them. The actual “hot swapping” is facilitated by pogo pins that line up with our custom PCBs for each input. Also, lots of chocolate croissants.
More details on the build are available via this interview as well as in the video below.
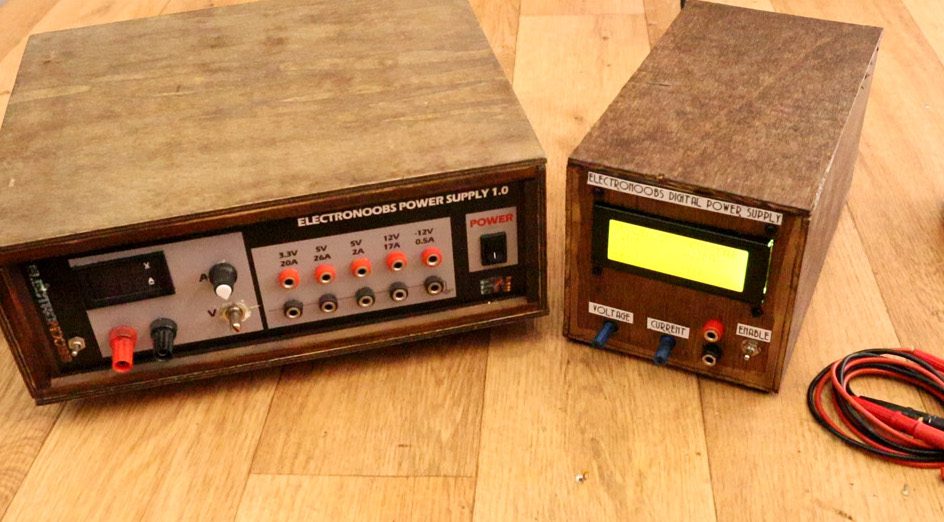
If you want a DC power supply that works well, there are a number of places to buy such a device. If, however, you want to learn how one operates, and perhaps build your own, the video below by YouTuber Electronoobs will show you how to accomplish this feat.
His project uses a transformer to step power down from the 230VAC available in Spain, along with a rectifier to produce DC current, and a capacitor to keep the output steady. An Arduino Nano produces a PWM signal that controls a MOSFET on the buck converter circuit, tuning the output voltage and current as needed based on user inputs.
Details can be found on Electronoobs’ website here, though you’ll want to use extreme caution when dealing with mains power. Also, the design will need to be modified if your country uses something other than 230VAC.
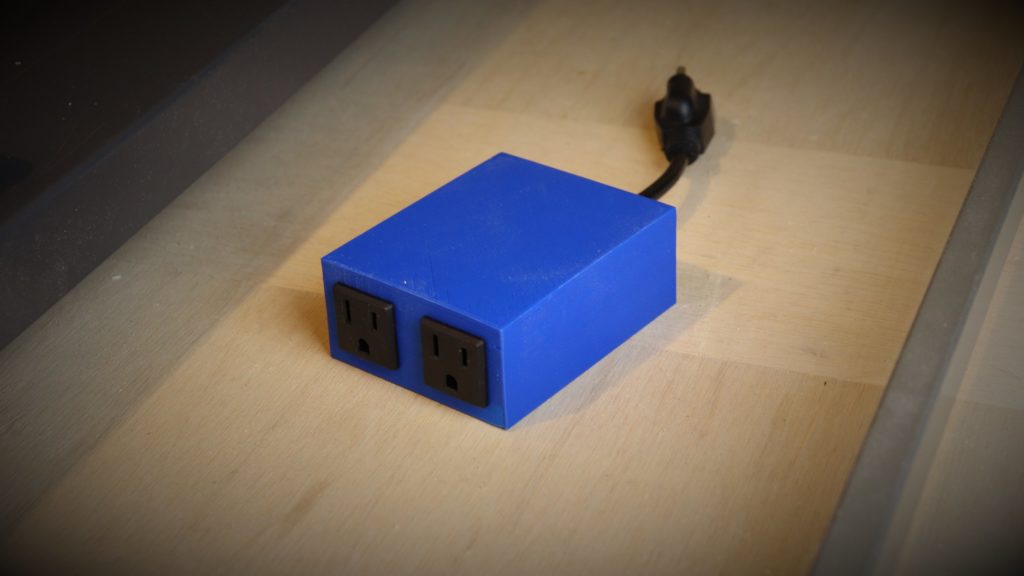
Woodworking with power tools creates dust. Lots of it. Hooking a vacuum up to your tool helps greatly, but only if it’s actually running. Annoyed with turning on his vacuum system every time he had to make a cut, Zach Hipps decided to automate the process.
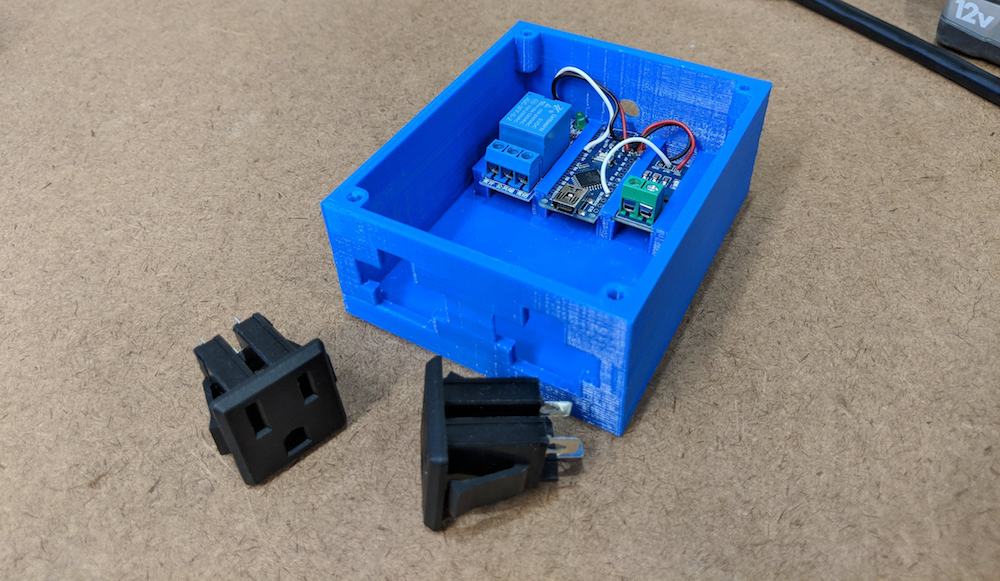
What he came up with uses an ACS712 current sensor to detect when power is flowing to his table saw, and an Arduino Nano for control. When current is sensed, it triggers the vacuum using a relay, then holds it on until five seconds after the device is turned off.
If I’m going to be able to automatically turn on the shop vac, I need to be able to detect when the tool is turned on and running. Without modifying the tool, the best way to do this is to get a current sensor like the ACS712 which I also got on eBay for a couple of bucks. This sensor can read alternating or direct current up to 20 Amps which is perfect for what I’m going to be using it for. The sensor outputs an analog voltage between 0 and 5 Volts that is proportional to the current it senses. I can read that analog voltage output with one of the ADC pins on the Arduino. Once I sense that the tool is running, I need to be able to turn on the shop vac. For that I’m going to use the relay module. A simple high or low logic signal from one of the Arduino’s digital pins is all that is needed to turn on the relay.
After I had the two modules soldered to the Arduino, I decided to model and 3D print an enclosure that will secure everything in place. With the enclosure done, I can wire in the AC power receptacles. One receptacle for the tool and one for the shop vac. Having these will make it easy to move this around my garage and plug in various tools. I bought an extension cord to use for this project and cut off about 8 inches of the male end.
The Arduino team is in Barcelona this week for Mobile World Congress! MWC is one of the biggest technology events in the world, so we’re really excited to be invited to participate in the Mobile IoT Experience’s developer expert zone by event organizers GSMA.
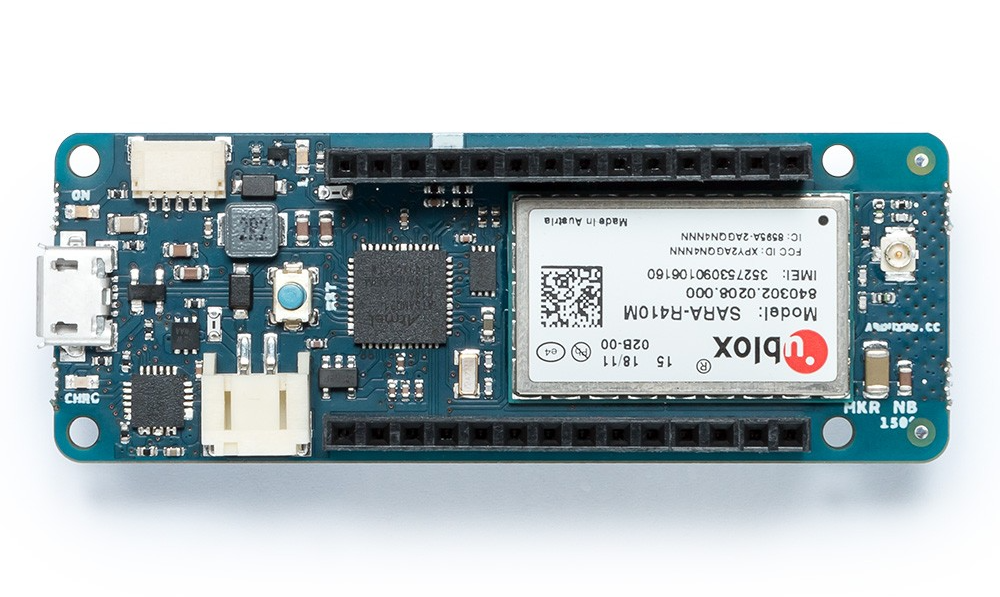
Come find us at Hall 4YFN Fira Montjuic Hall M8 Stand 9 — we’ll be showing how create an LTE Cat-M / NB-IoT connected sensor with the new MKR NB 1500. Arduino Senior Engineer Martino Facchin will also be giving the keynote talk on Monday, February 25th in the Training Zone.
Like all MKR boards, the MKR NB 1500 was designed with security in mind, so we’ll discuss how to use certificate-based authentication and TLS to secure data from your device (and make it easier!) via the Arduino IoT Cloud and other clouds like Microsoft Azure IoT Hub.
Arduino has helped millions innovate by making IoT technology simple — it started with makers and education, but Arduino is now also used by developers in hundreds of companies across the globe. We’ve been partnering with technology providers like Arm, as well as operators including Telstra, Telefonica, and Vodafone to make cellular IoT even more accessible. We want connecting and securing devices to be as straightforward as possible — so people can focus on making their IoT applications.
As previously announced, the Arduino IoT Cloud is an easy to use Internet of Things application platform that enables developers to go from unboxing their board to a working device in just minutes.
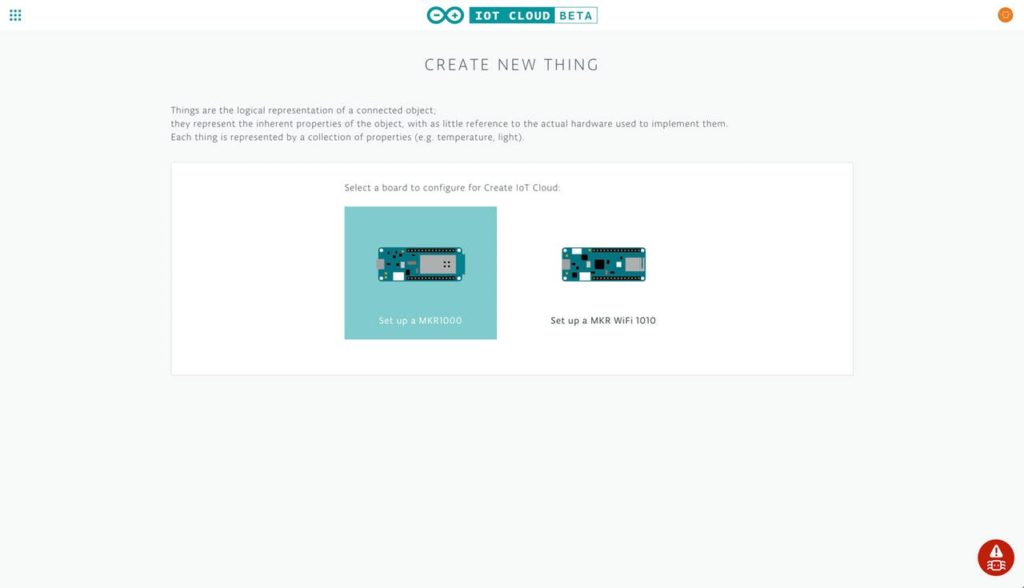
To help you get started, we’ve put together a quick project that’ll walk you through connecting a MKR1000 (or MKR WiFi 1010) to the Arduino IoT Cloud.
By the end of the tutorial, you’ll be able to control and monitor your board over the Internet using the Arduino IoT Cloud site.
First, we’ll add the board to the Arduino IoT Cloud as a Thing — a representation of the board in the cloud. We’ll then give the Thing a set of Properties which represent sensors, LEDs, motors, and many other components in the project that you’ll want to access from the cloud.
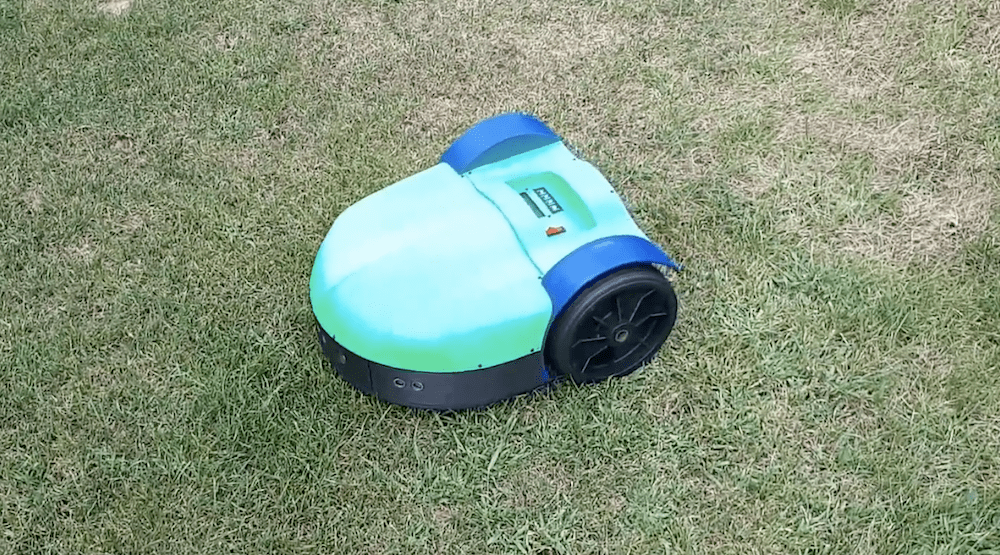
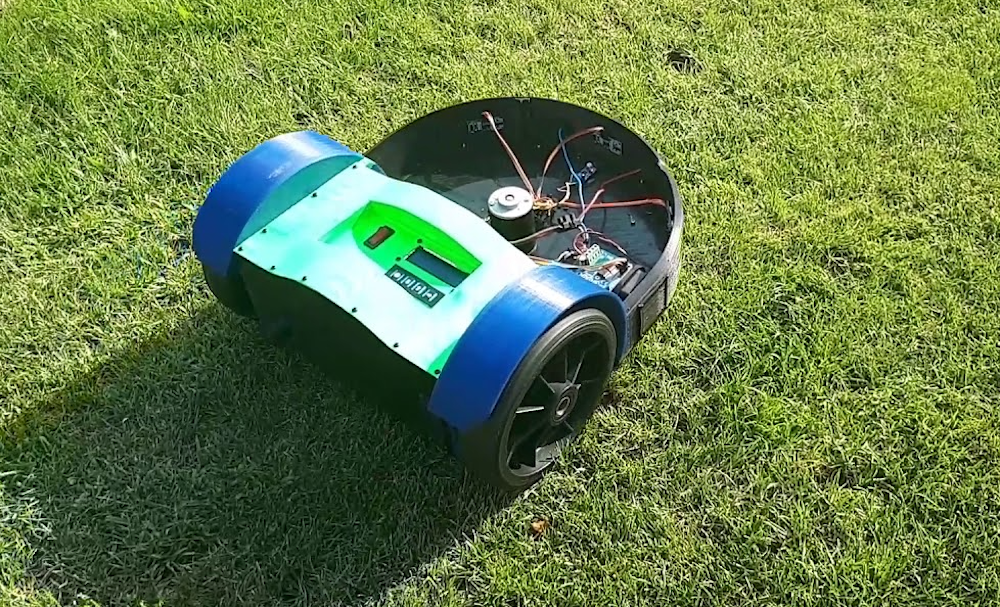
Do you enjoy mowing your lawn? No? Well now you can ‘simply’ print a robot to do it for you, based on German mechanical engineer Philip Read’s design. His Roomba-esque device uses a pair of gearmotors for movement, an array of three ultrasonic sensors for obstacle avoidance, and a perimeter wire/sensor to keep it within the designated boundary.
An Arduino Mega is employed as the main processing unit for the robotic mower, however a separate Nano onboard helps measure battery voltage as well as current when charging. Meanwhile, an Arduino Uno along with a motor driver are used to control the perimeter wire setup.
Extensive build info is available on the project’s write-up, and a short demo can be seen in the video below.
Fully autonomous robot lawn mower. The mower project includes the mower itself a boundary wire control station and an optional charging station. The mower navigates within the boundary wire which is positioned (pinned) around the perimeter of the garden. Once the mower senses the perimeter wire, it stops reverses and moves off in a new direction. The mower also has 3 sonar sensors to detect objects in the mowers path. Once the mowers battery is exhausted, the mower uses the boundary wire to navigate itself back to the charging station. All this can be customised in the Arduino software or completely re-written to your personal preferences.
Commercial mowers with this specification cost upwards of 600€ ($680).
Obviously, you’ll want to use such a device in an area devoid of kids or pets
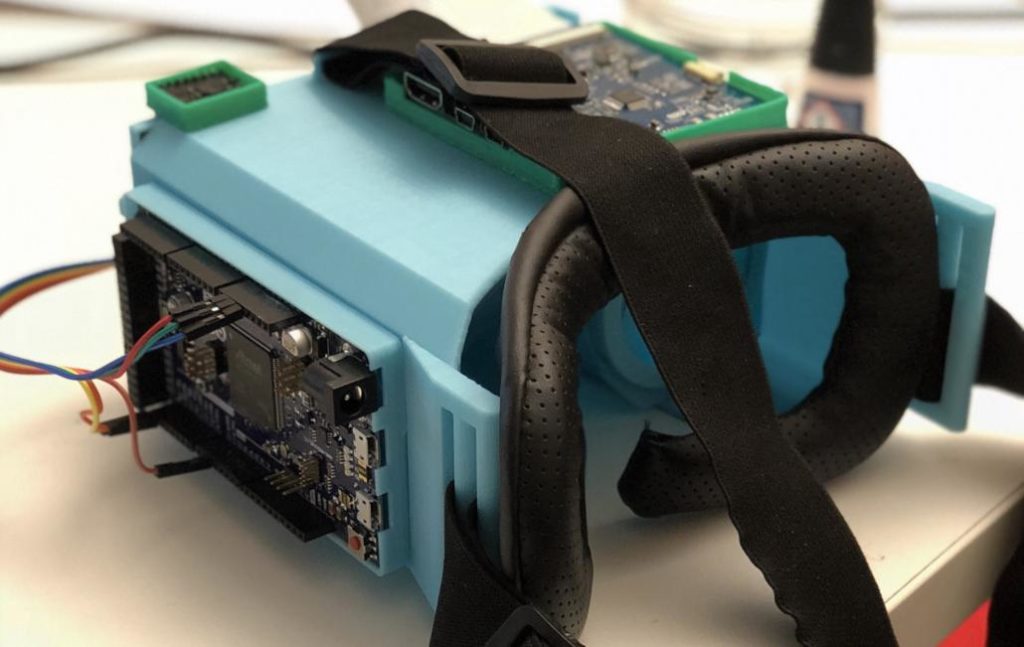
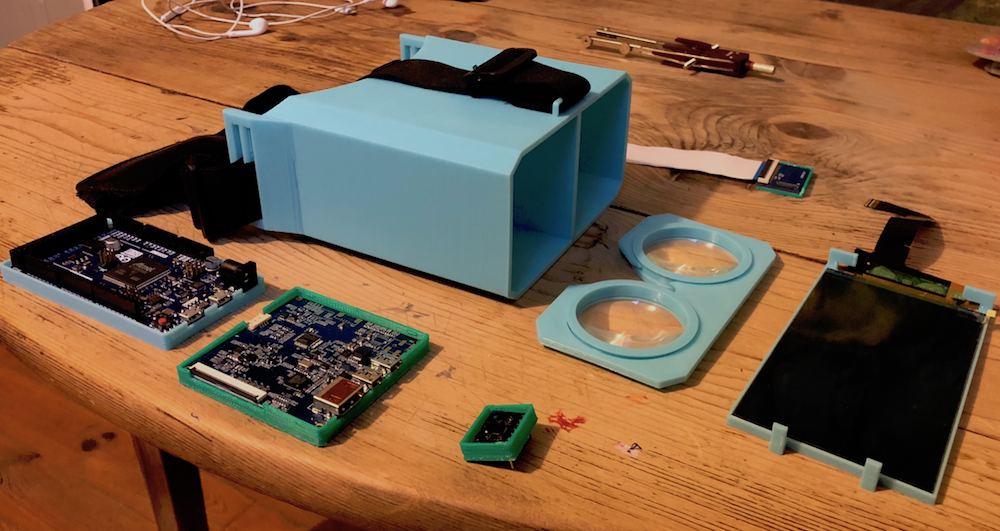
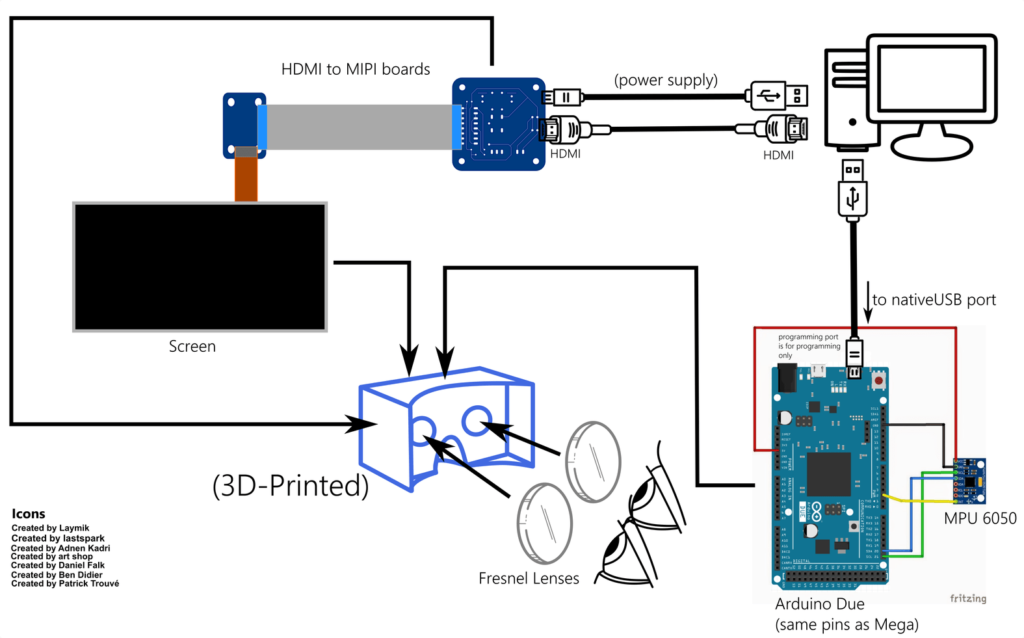
Relativty is a low-cost VR headset you can build yourself
Arduino Team — February 20th, 2019
While you’ve been hearing about virtual reality for the last 20 years or so, today the hardware required to build such a rig is finally to the point where it’s within the reach of consumers. As seen here, Relativty is a SteamVR-compatible headset that can be made for around $100.
Relativty uses a 3D-printed frame to house its 2560 x 1440 LCD screen, along with a pair of 80mm Fresnel lenses to properly focus the image. Control is accomplished via an Arduino Due and an MPU-6050 accelerometer, which feeds head-tracking info to an external gaming system.
At this point, the device is clean though fairly basic, and will hopefully be the start of a truly excellent open source project as features are added.
Arduino Day Community Challenge: Submit your projects, win hardware and coupons!
Arduino Team — February 20th, 2019
We at Arduino believe that the combination of our technology and your passion make it possible to have an impact on everyone’s everyday life. Ingenuity, innovation, and social good are the cornerstones of our community, and we want to celebrate those traits with a contest whose winners will be announced on Arduino Day.
The Arduino Day Community Challenge aims to award the best community projects that can have a lasting effect on some or all of us. Seven winning entries will be selected, one in each of the following categories:
Social innovation
Kids and education
Home automation
Environment and space
Robotics
Audio and visual arts
Small scale manufacturing and startups
Prizes include boards, hardware, and other goodies valued up to €1,000. If you want to apply, please fill out this form by March 3rd. Aside from a description, you will need to upload a photo or video of your work. The winners will be revealed on Arduino Day during the live stream from our official celebration in Milan.
And remember: we are seeking inspirational, problem-solving projects that represent the core values of Arduino Dayandcan improve the lives of others! Let’s make a difference, together.
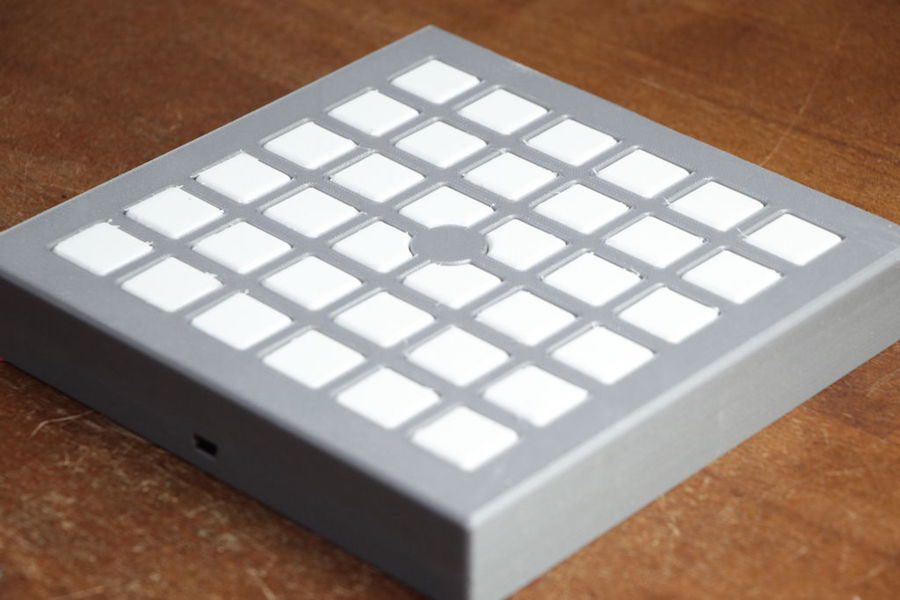
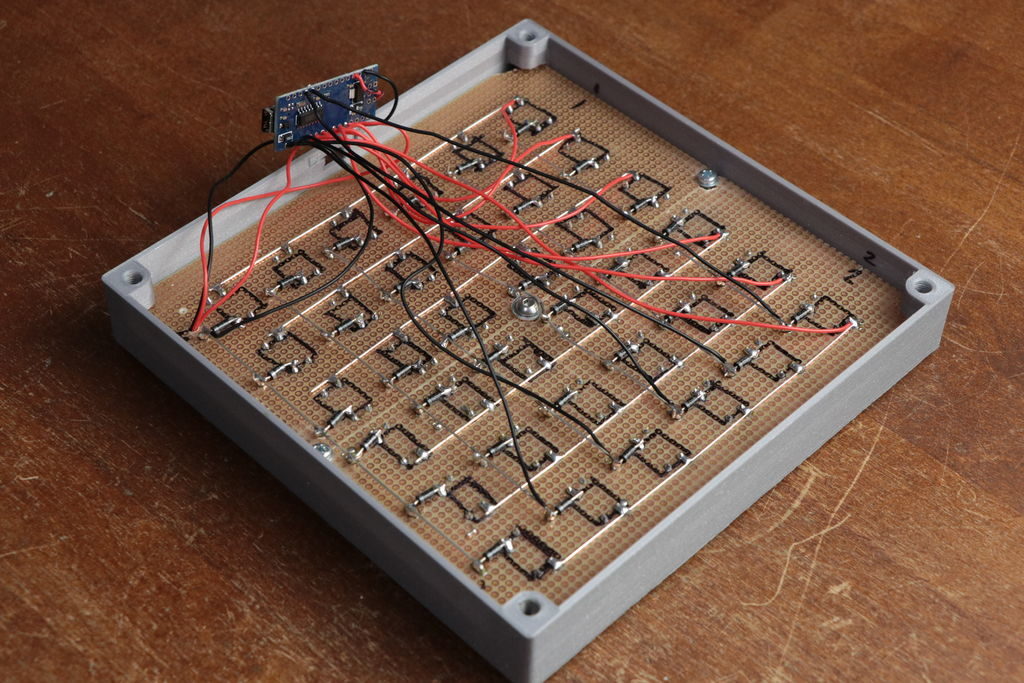
Make your own MIDI keyboard matrix (or just buy one?)
Arduino Team — February 19th, 2019
If you’ve ever seen a MIDI pad with dozens of light-up buttons producing electronic music, you may have considered building one using an Arduino. As shown in GreatScott!’s latest write-up, you can indeed create your own Novation Launchpad-like device using a Nano for control, but the real question is should you?
In the video below, GreatScott! shares how made a 6×6 pad, using a 3D-printed body and buttons arranged in a matrix to save I/O, along with WS2812B LEDs. He also goes over the MIDI protocol, which he was able to implement using loopMIDI and Hairless MIDI to serial bridge for Arduino interface.
While the DIY option may or may not be right for you, the concepts presented could be applied to a wide range of electronic musical interface projects.
In this episode of DIY or Buy I will be showing you how I created my own Launchpad. That means I will show you how I combined a design idea with 3D prints, WS2812 LEDs, tactile switches and an Arduino to create a proper MIDI instrument. While building I will also tell you a bit about a keyboard matrix and in the end determine what advantages the DIY Launchpad offers.
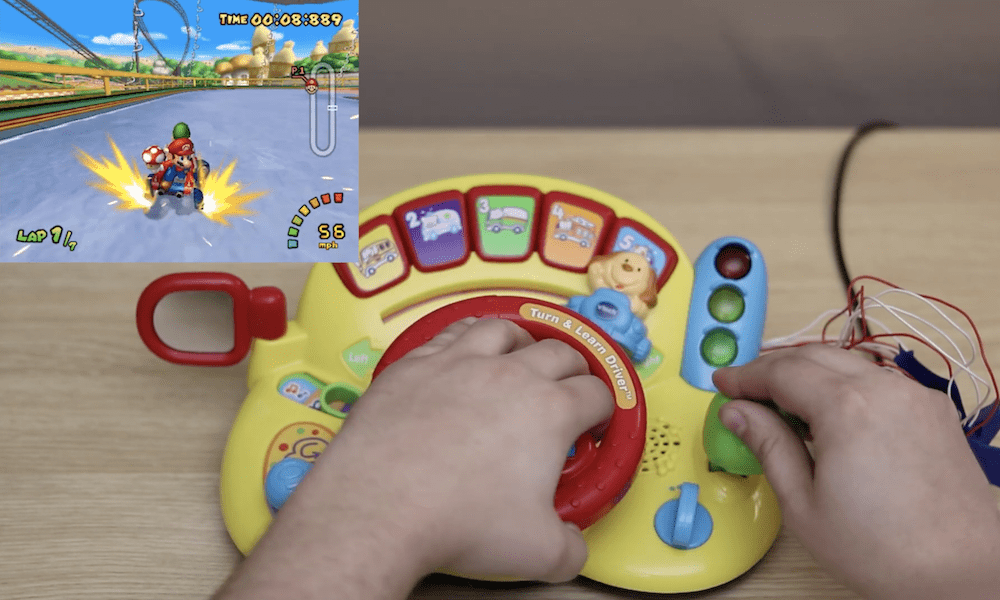
Play Mario Kart: Double Dash with a hacked VTech steering wheel
Arduino Team — February 19th, 2019
YouTuber “Insert Controller Here” has been creating gaming controllers out of a variety of objects, like bananas, mayonnaise, and meat. For his latest iteration, the YouTuber decided to convert a VTech Turn and Learn Driver into—what else?—a Mario Kart: Double Dash steering console.
As seen in the video below, the build consists of disassembling the toy, then soldering wires to the correct points to recreate steering wheel input, braking, and throttle. An Arduino Leonardo is used for the gaming interface, allowing Mario and Luigi to make it around the track by turning the wheel and applying brakes, while the accelerator is simply “shifted” into place.
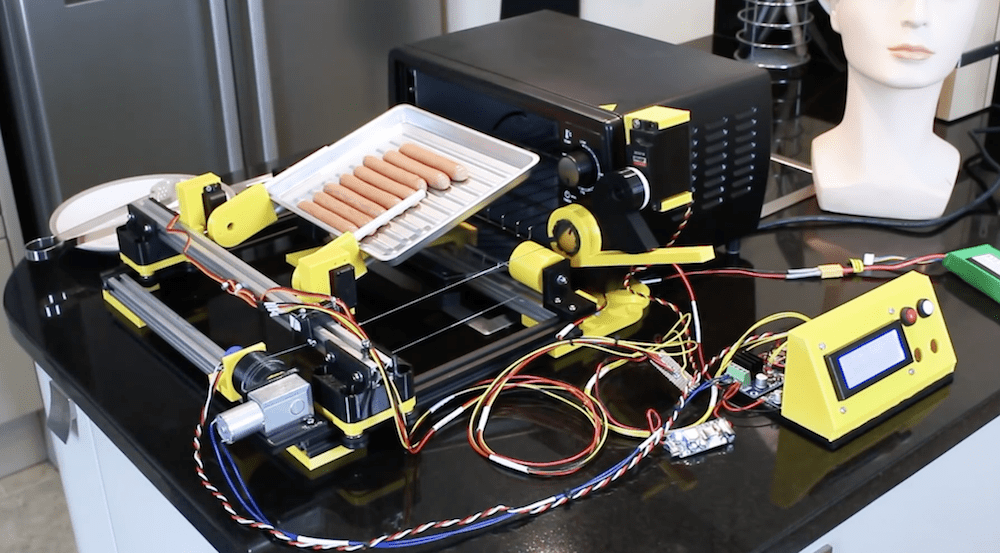
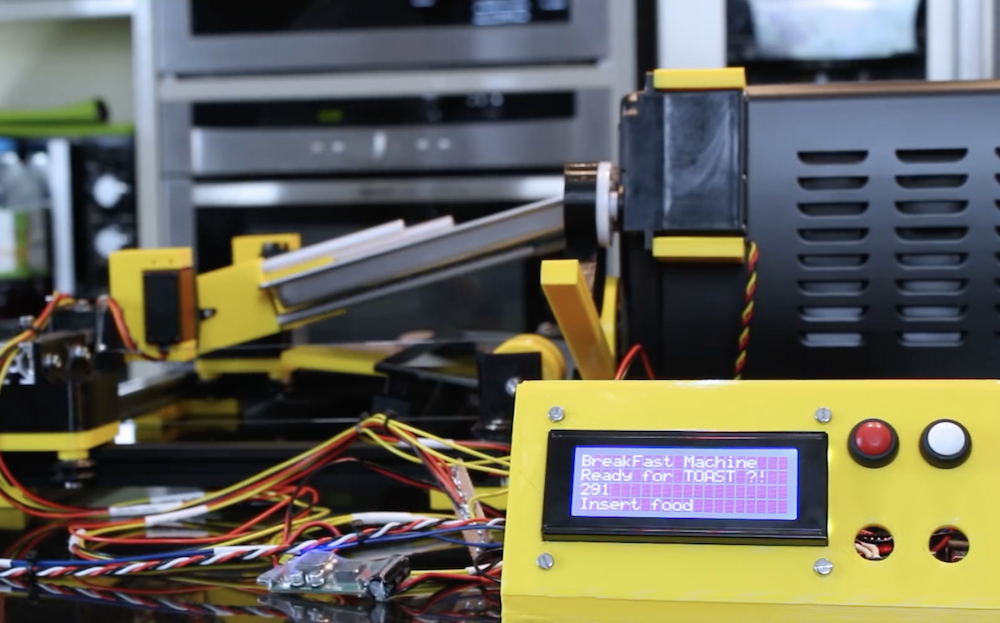
As seen in our earlier post, James Bruton has been working on a breakfast-making robot, and has now moved from boiling eggs to making toast… or apparently hot dogs/sausages as shown in the video’s demo.
What he’s come up with uses a one degree-of-freedom gantry assembly to move servo-powered forks into position. These can then manipulate a cooking tray as needed to heat food up, flipping it out into a hand-held container when done. Two other servos take care of turning the device on and opening the door.
The control setup looks extremely similar to the previous build, with control via buttons, an Arduino Mega, and a small LCD display. Bruton notes that the Mega is used here because of its multiple serial ports, which will be useful to link everything together in the future.
Mechanical tulip is a glowing work of Valentine’s Day art
Arduino Team — February 14th, 2019
Tulips come in all shapes and sizes, but Jirí Praus has created a mechanical version like nothing you’ve ever seen. It’s masterfully crafted as a gift for his wife, using bent wire to form its six petals and stem.
In order to make this present truly amazing, however, a servo-driven linkage system opens up the tulip when touched, exposing seven programmable LEDs in the center, along with 30 bright white SMD LEDs on the petals themselves.
Control for the freeform flower is accomplished via an Arduino Nano, hidden inside its wooden base. It’s a truly spectacular build, shown below illuminating the surrounding area with a brilliant light and shadow pattern.
As recently announced, Arduino Day 2019 will be celebrated on March 16th. If you plan on organizing your your own event, don’t forget to submit your proposal by March 3rd!
We have already received a hundred submissions from all across the globe and will continue to update our map regularly with new events — we are hoping to make it even bigger and better than last year!
As we prepare for the festivities, we have an important announcement for our community: the Arduino team will be holding this year’s official event at Milano Luiss Hub for Makers and Students in Milan, Italy.
The Official Arduino Day program will include an exhibition area with Arduino projects, a talk area, and an activity space for kids. The event is organized in collaboration with Manifattura Milano, a local initiative dedicated to craftsmanship, urban manufacturing and Industry 4.0 promoted by Milan Municipality – Labour Policies Department.
We are currently seeking makers, speakers and activities for the Official Arduino Day in Milan. If you are able to physically attend and/or want to showcase your creations and their impact on your community, please fill out this form by March 3rd. Additionally, we are looking for volunteers to help out during the event, welcoming guests and assisting visitors. If you are interested in this opportunity, please feel free to complete this application. The call for local makers and volunteers will be powered by WeMake.
On Arduino Day, we will also support LoRa and the City, a hackathon organized by Codemotion and A2A, that will take place in Milan at Casa dell’Energia from March 16th to 17th. If you want to join the hackathon as an individual or a group, apply here — the winners of the two challenges (urban mobility and monitoring and energy and sustainability) will receive a €3,000 Amazon coupon.
Stay tuned over the next few weeks as we will be providing updates on the Official Arduino Day agenda. In the meantime, don’t forget to apply on the Arduino Day website and share your celebration on social media using the hashtag #ArduinoD19.
Come annunciato di recente, il 16 marzo celebreremo Arduino Day 2019; se volete festeggiare con noi e organizzare un evento community, avete tempo fino al 3 Marzo per mandare la vostra proposta attraverso questo form!
Abbiamo già ricevuto un centinaio di candidature da tutto il mondo e continueremo ad aggiornare regolarmente la nostra mappa con nuovi eventi: speriamo di renderlo ancora più grande rispetto agli scorsi anni!
Mentre ci prepariamo per la festa, abbiamo un annuncio importante per la nostra community: Official Arduino Day, ovvero quello organizzato dal team Arduino, per il 2019 si terrà al Milano Luiss Hub for Makers and Students a Milano!
Il programma prevede un’area espositiva con progetti Arduino, un’area talk e uno spazio per con attività gratuite per i più piccoli. L’evento è organizzato in collaborazione con Manifattura Milano, l’iniziativa dedicata all’artigianato, alla produzione urbana e all’Industria 4.0 promossa dal Comune di Milano – Assessorato Politiche del Lavoro.
Call for maker and volunteers! Stiamo cercando maker e speaker per l’Official Arduino Day a Milano. Se puoi partecipare fisicamente all’evento e vuoi mostrare il tuo progetto o raccontare l’impatto che ha avuto sulla tua comunità, completa questo form entro il 3 Marzo. Stiamo anche cercando volontari e volontarie che diano una mano durante l’evento, dando il benvenuto ai nostri ospiti, oppure aiutandoci con le attività. Se ti interessa questa opportunità, compila questo form. La call for maker and volunteers di Milano e dintorni è supportata da WeMake.
Durante Arduino Day, daremo supporto ad un’altra iniziativa a Milano, LoRa and the City, un hackathon che avrà luogo presso la Casa dell’Energia tra il 16 e il 17 Marzo. Se vuoi partecipare come singolo o con il tuo gruppo, clicca qui – in palio per le due sfide dell’hackathon (Urban Mobility and monitoring and Energy and Sustainability) ci saranno due buoni da 3000 € per Amazon.
Continua a seguirci, durante le prossime settimane condivideremo tutti i dettagli dell’agenda di Arduino Day. Nel frattempo, non dimenticarti di mandare la tua application attraverso il sito di Arduino Day e di condividere i festeggiamenti sui social con l’hashtag #ArduinoD19.
If you ever wondered about building your own multimeter, YouTuber Electronoobs shows us just how to do so with an Arduino Nano.
Aside from the Nano, he’s using a 128×64 OLED screen to display stats and battery level, and a 16-bit ADC for precise measurements. Power is provided by a small onboard LiPo battery, and he’s even included a charging module to help keep things topped off. Everything is housed inside a custom 3D-printed case.
The device doesn’t just measure voltage, resistance, and current, but is capable of reading capacitance and inductance as well—measurements that you wouldn’t necessarily expect on a commercial meter. If you’d like to create your own, the schematic and code are available on Electronoobs’ site.
Um dir ein optimales Erlebnis zu bieten, verwenden wir Technologien wie Cookies, um Geräteinformationen zu speichern und/oder darauf zuzugreifen. Wenn du diesen Technologien zustimmst, können wir Daten wie das Surfverhalten oder eindeutige IDs auf dieser Website verarbeiten. Wenn du deine Einwillligung nicht erteilst oder zurückziehst, können bestimmte Merkmale und Funktionen beeinträchtigt werden.
Funktional
Immer aktiv
Die technische Speicherung oder der Zugang ist unbedingt erforderlich für den rechtmäßigen Zweck, die Nutzung eines bestimmten Dienstes zu ermöglichen, der vom Teilnehmer oder Nutzer ausdrücklich gewünscht wird, oder für den alleinigen Zweck, die Übertragung einer Nachricht über ein elektronisches Kommunikationsnetz durchzuführen.
Vorlieben
Die technische Speicherung oder der Zugriff ist für den rechtmäßigen Zweck der Speicherung von Präferenzen erforderlich, die nicht vom Abonnenten oder Benutzer angefordert wurden.
Statistiken
Die technische Speicherung oder der Zugriff, der ausschließlich zu statistischen Zwecken erfolgt.Die technische Speicherung oder der Zugriff, der ausschließlich zu anonymen statistischen Zwecken verwendet wird. Ohne eine Vorladung, die freiwillige Zustimmung deines Internetdienstanbieters oder zusätzliche Aufzeichnungen von Dritten können die zu diesem Zweck gespeicherten oder abgerufenen Informationen allein in der Regel nicht dazu verwendet werden, dich zu identifizieren.
Marketing
Die technische Speicherung oder der Zugriff ist erforderlich, um Nutzerprofile zu erstellen, um Werbung zu versenden oder um den Nutzer auf einer Website oder über mehrere Websites hinweg zu ähnlichen Marketingzwecken zu verfolgen.