Schlagwort: tech articles

  • John Sheehan interview

    John Sheehan interview

    Reading Time: 3 minutes

    What is your history with being a maker?

    As a kid, I was always taking things apart to see how they worked. Most of those things even got put back together. Taking after my older brother, I started tinkering with electronics when I was a teen. Continuing to follow in my brother’s footsteps, I ended up with an undergraduate degree in computer engineering. I got back into electronics during the start of the maker movement when I first learned about the Arduino. I also got heavily involved with a local makerspace for several years that expanded my interest in the process of making, learning the tools, and collaborating with other people.

    Showing off the projects and promoting the group at a Maker Faire

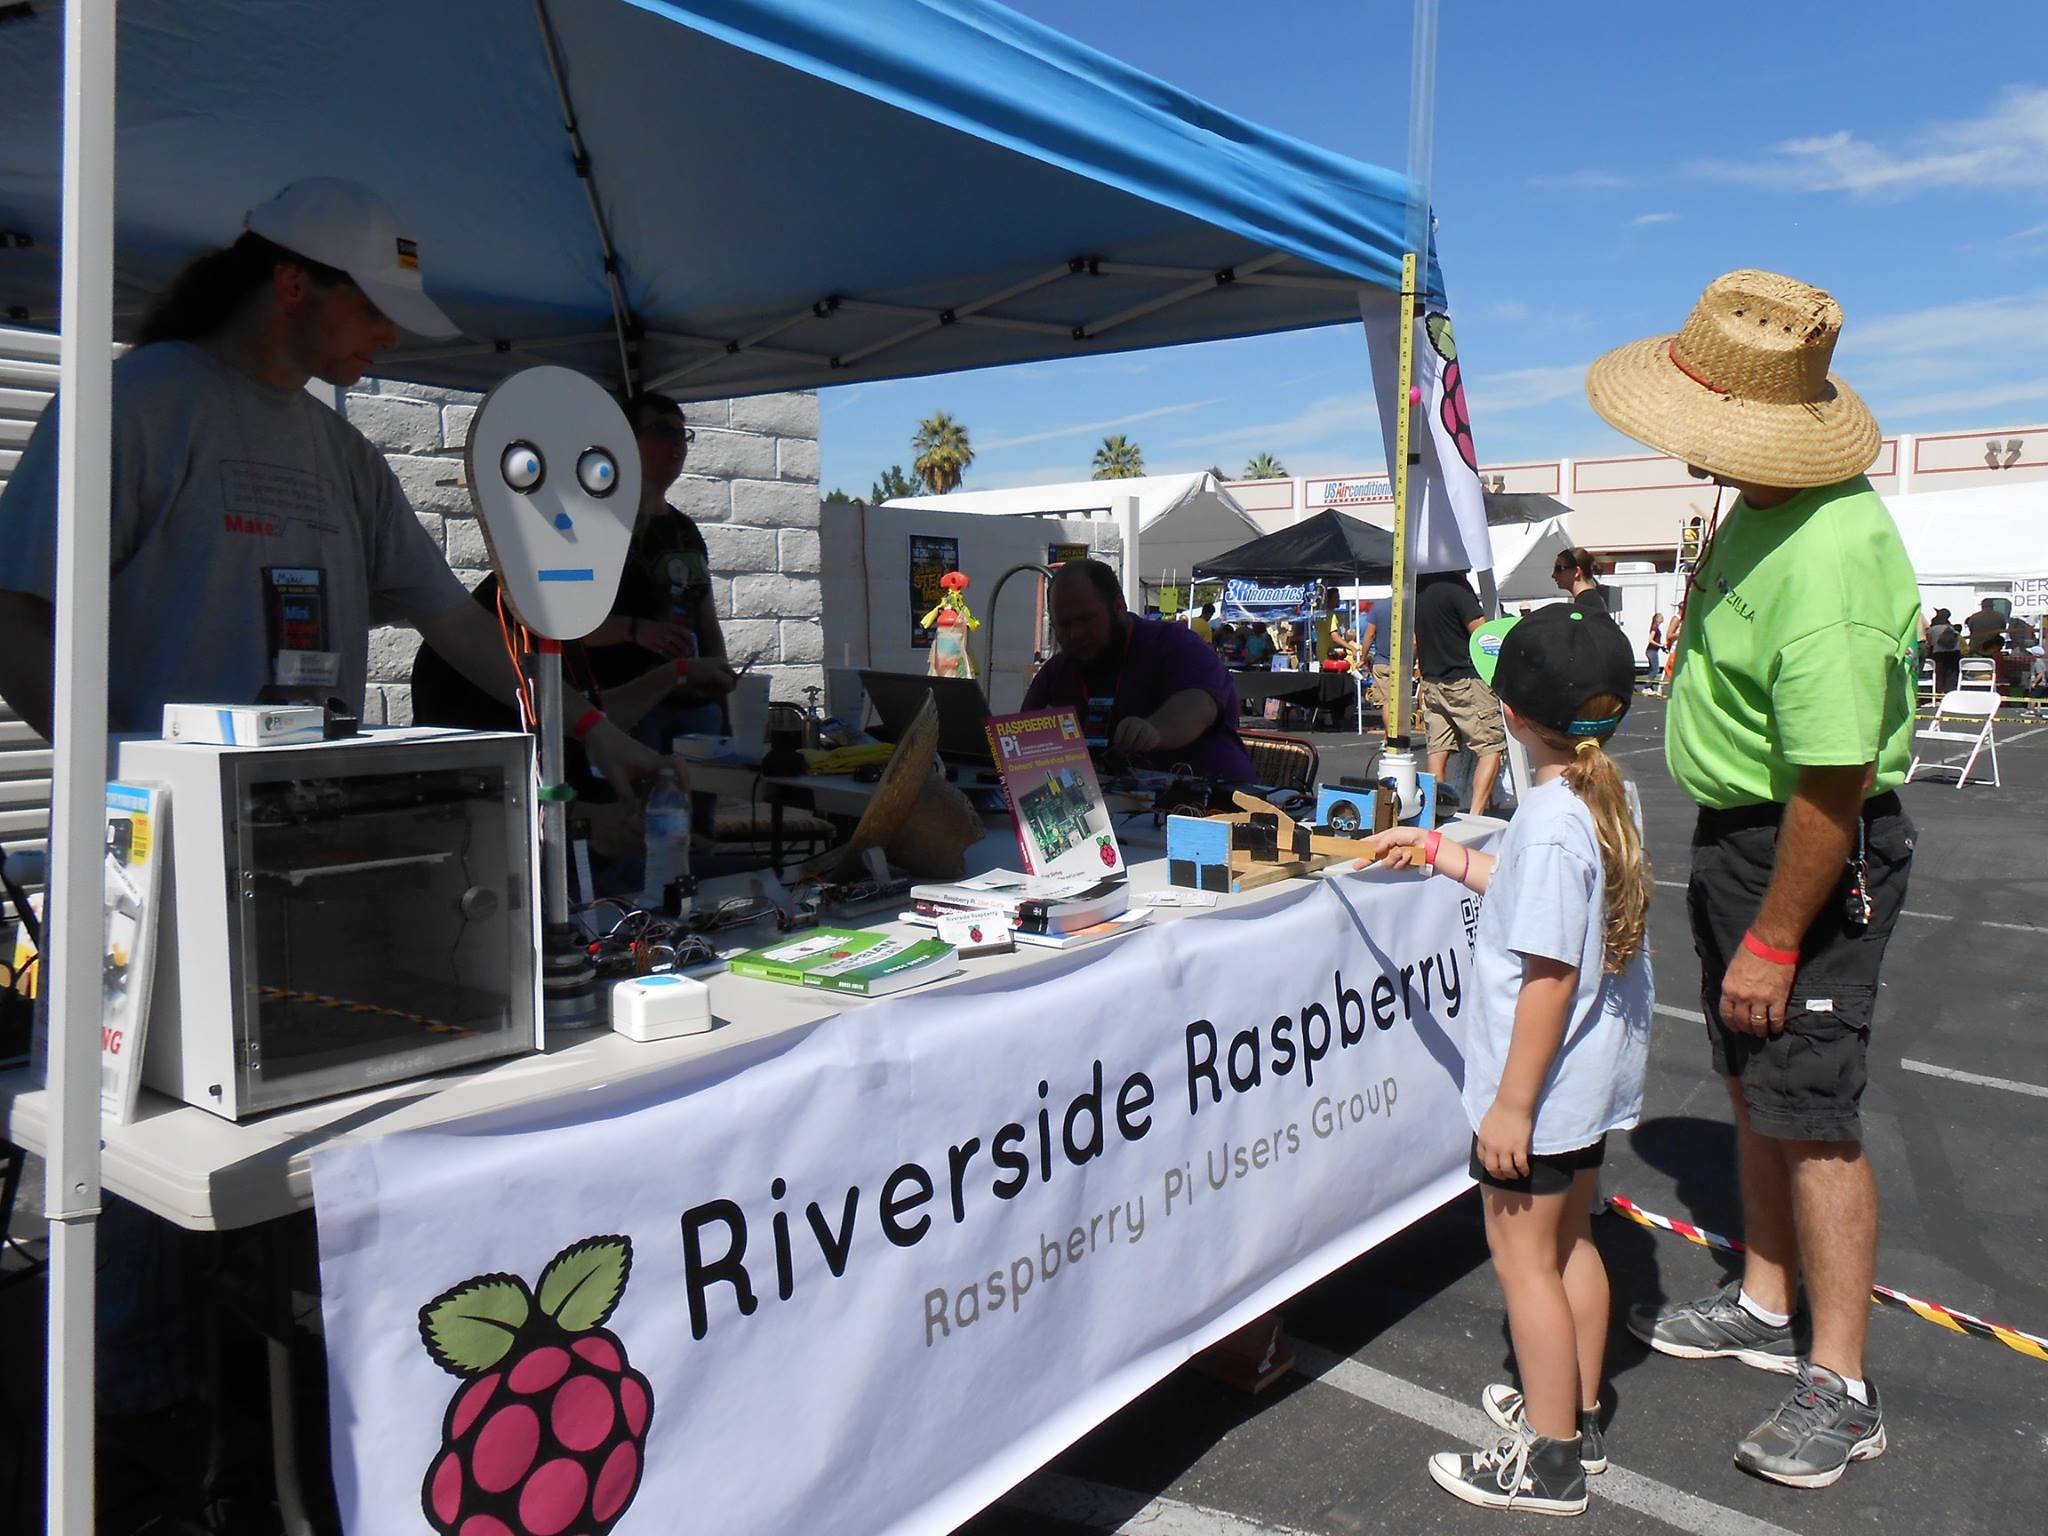
    What is Riverside Raspberry Pi Meetup?

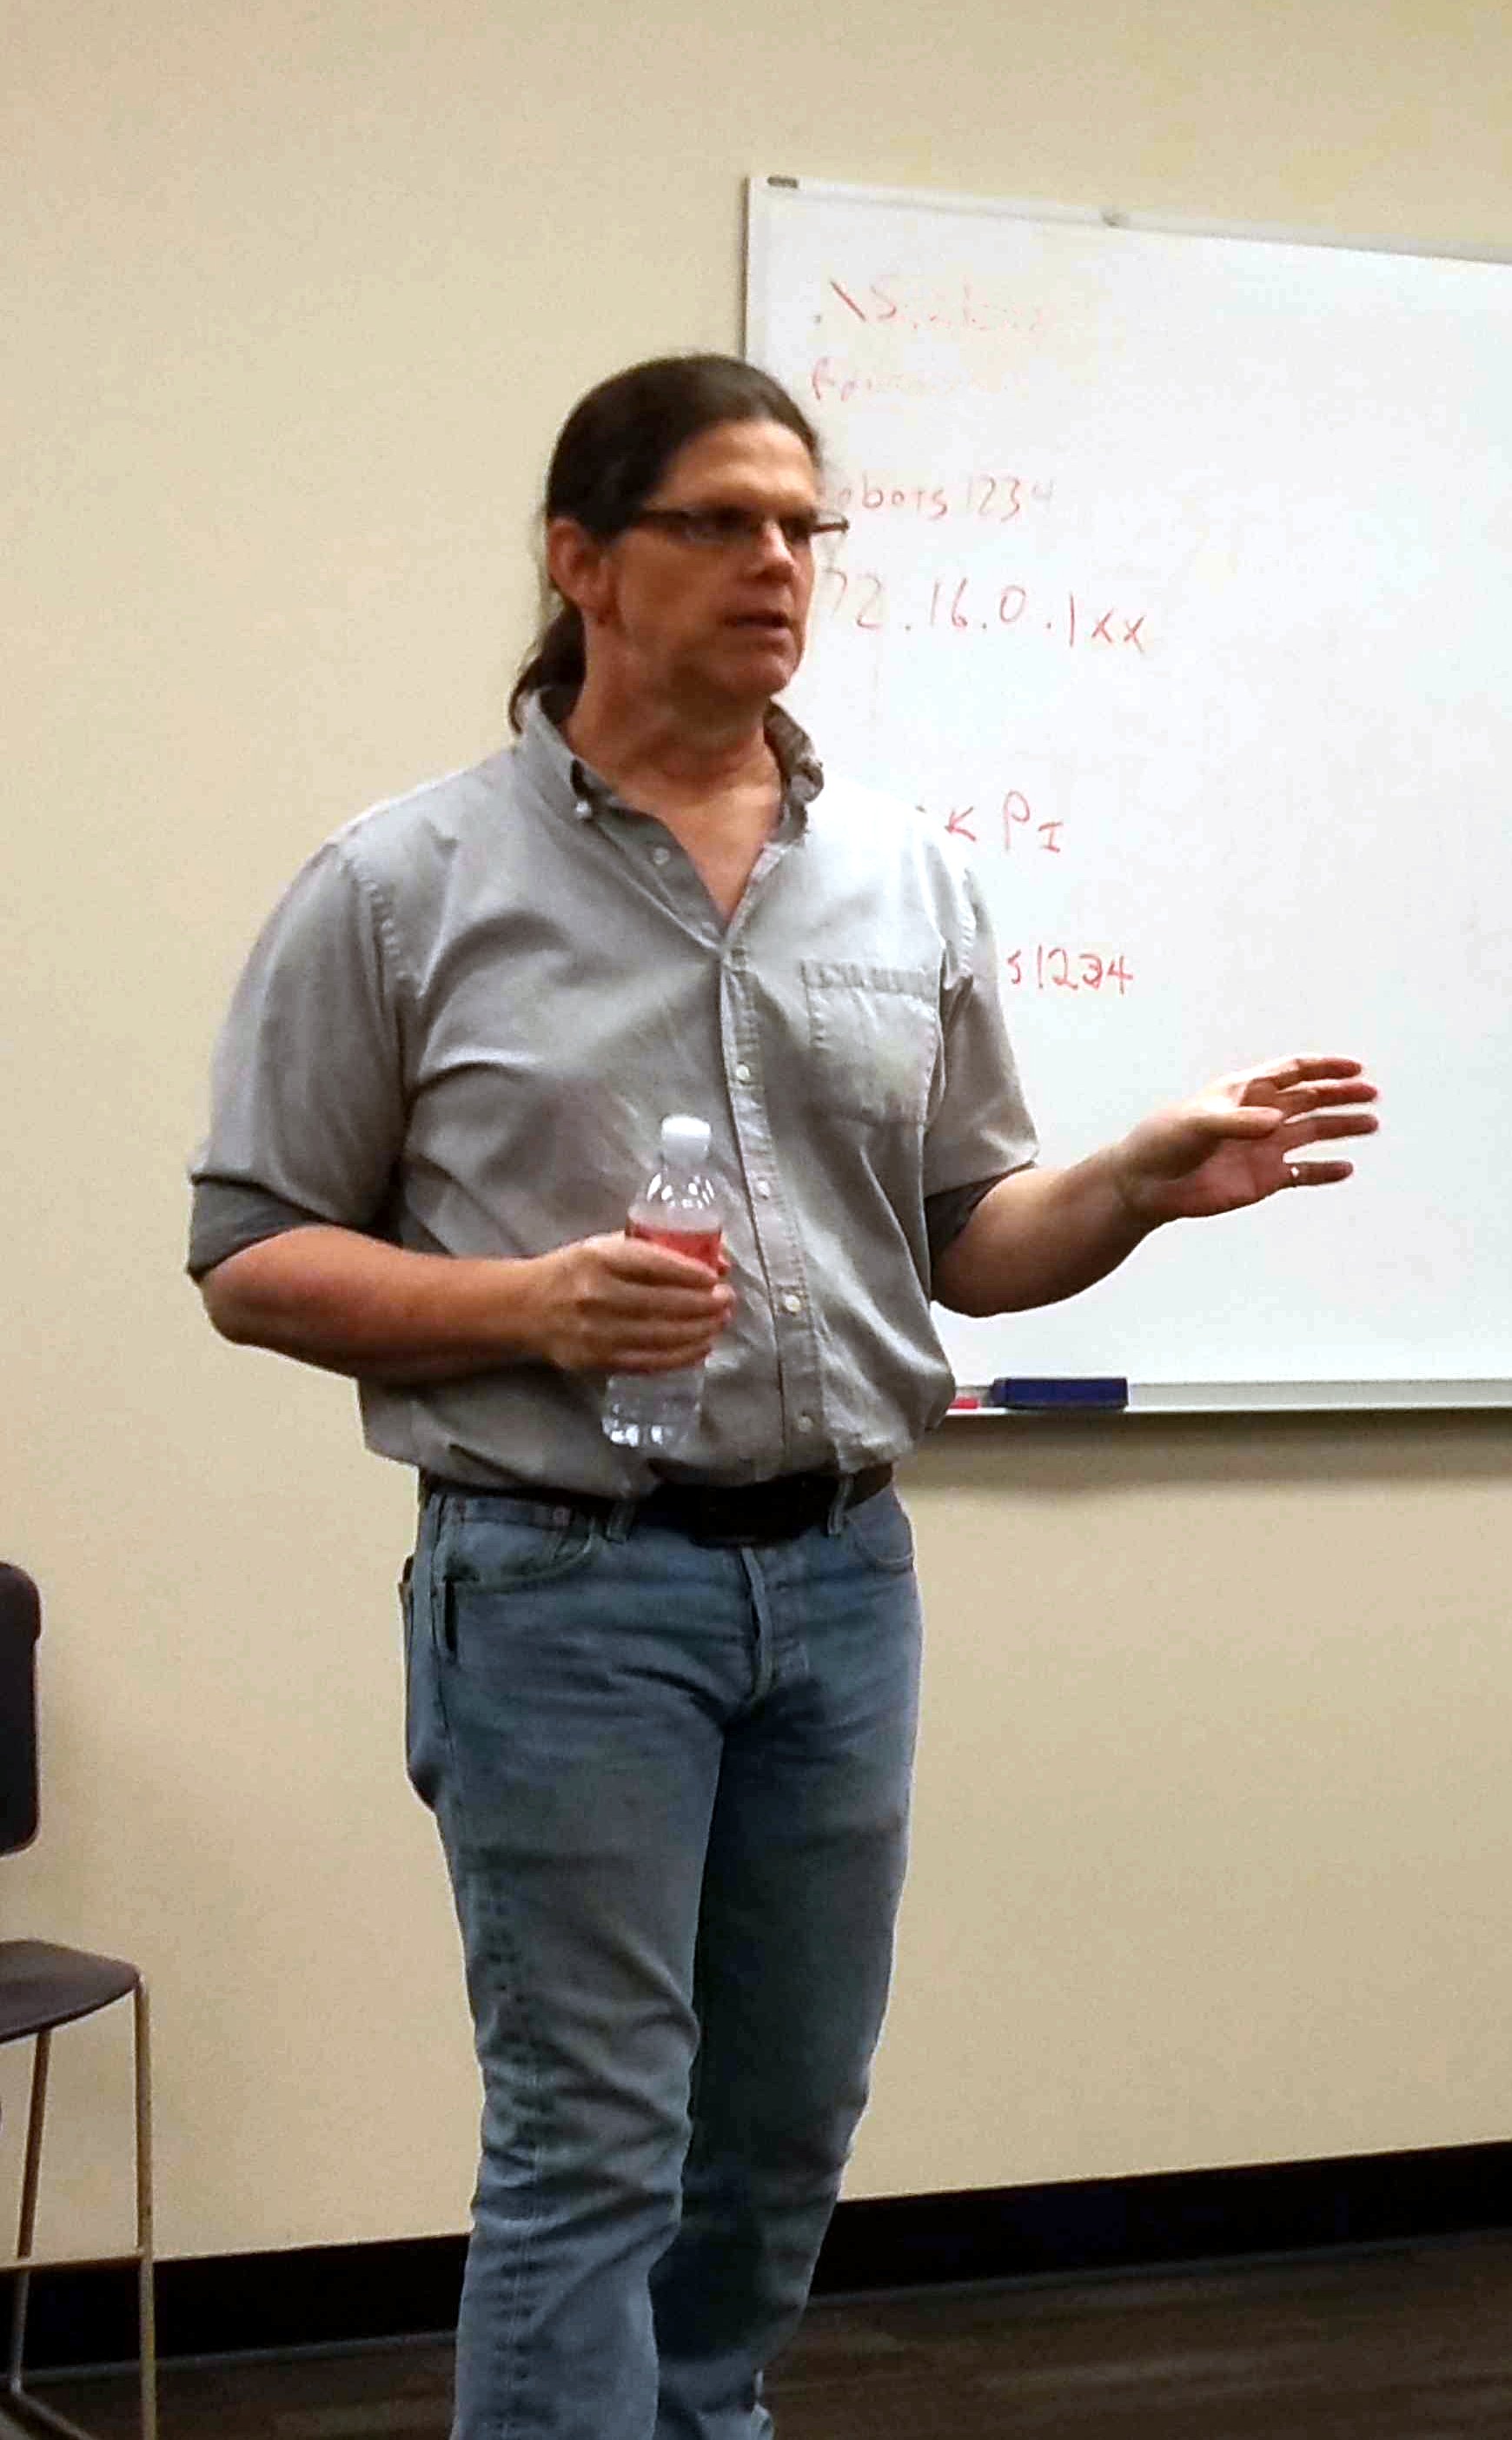
    The meetup is an informal monthly meetup for bringing people together that are interested in electronics and embedded software development. But, despite the group name, it is not only for the Raspberry Pi platform. It is as much of a social group as it is a tech group. I try to have formal tech presentations every once in a while, but we more frequently just have open discussions about what everyone is working on, the problems they are facing with their projects, or just sharing the latest news about new maker tech. I do encourage members to contribute talks for the group whenever they can.

    What kind of attendees do you get?

    Many people who attend the meetup are mostly either new to the Raspberry Pi platform, or are just starting to learn about electronics. But we also have regulars who have been working with or tinkering with embedded platforms for years. Ages range from high schoolers to retirees. Most have at least a little bit of experience in some kind of programming, but not always. The membership is pretty diverse in terms of experience and goals, but we are very open to newcomers.

    Hi, John!

    What are some of your favourite moments from the meetups?

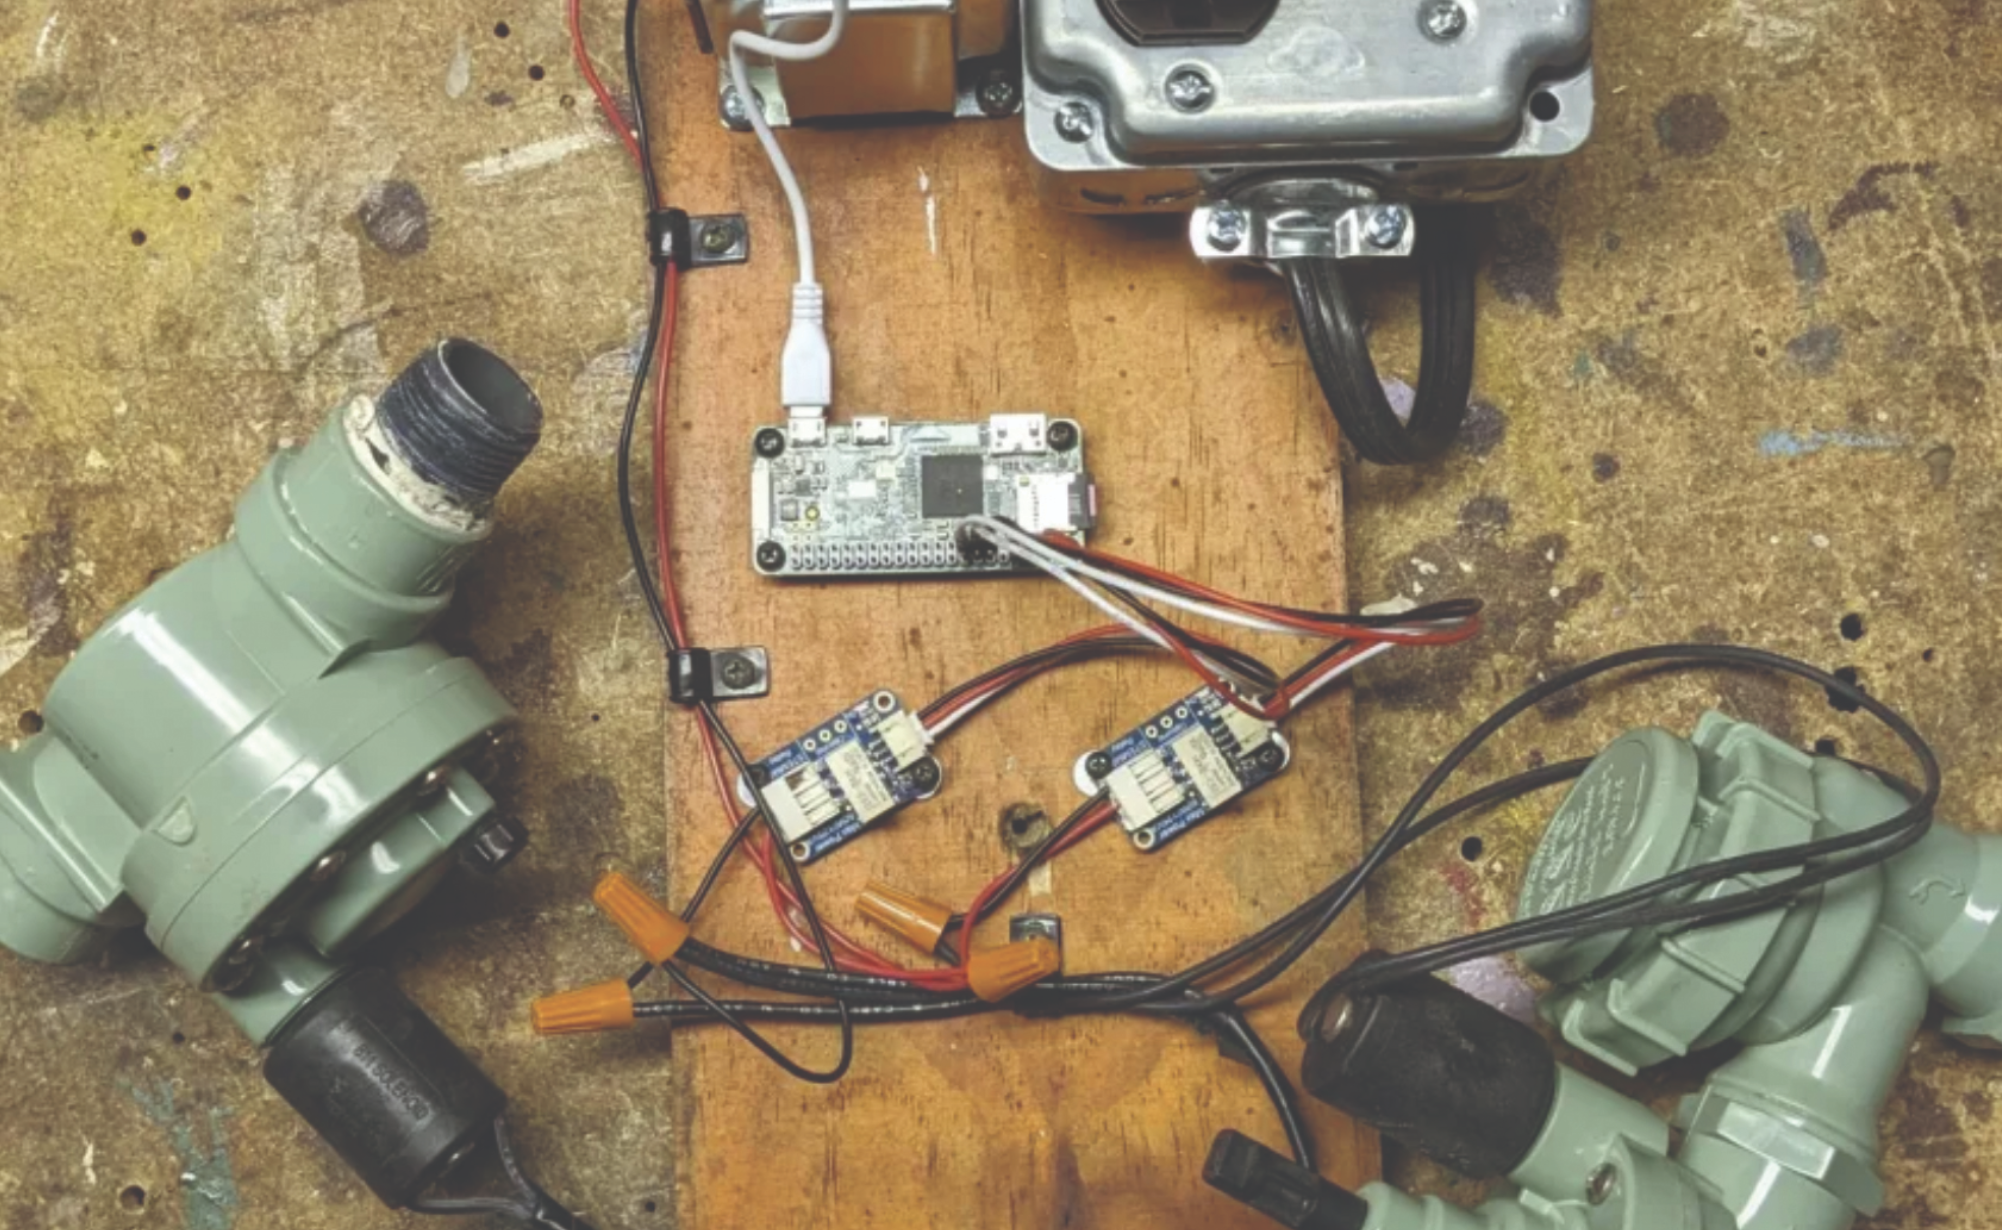
    Really, any time someone brings in a project to show off that they have been working on is my favourite part of belonging to the group. I don’t even care if it is someone’s first project where they just have a blinking LED on a breadboard. I want to hear about it and share in their excitement because I remember being there myself. My reason for having the group is to share what I know and to learn from others. I believe that inspiration is contagious.

    Any future events planned?

    We meet on the second Monday of every month in Riverside, CA, US. We have snacks. We also try to have a table at local events a few times a year and have members show off their projects, though that schedule varies. We collaborated with a few local school districts several years ago to put on a full Raspberry Pi Jam, and I’d like to do that again sometime as well.

  • TouchBerry Pi Panel PC 10.1 review

    TouchBerry Pi Panel PC 10.1 review

    Reading Time: 3 minutes

    The touchscreen is surrounded by quite a large bezel which forms part of the protective case. With a lot of metal parts, it’s a pretty hefty unit that feels really solid – and heavy, at 1.67kg. Six mount points (two top and bottom, one either side) enable it to be mounted using the supplied brackets and bolts.

    By default, the case has an IP (ingress protection) rating of 20, for protection against solid objects up to 12mm, but you can pay a little extra (€25) for IP65, which offers full protection against dust and low-pressure jets of water from all directions. Both versions have a wide operating temperature range of 0°C to 50°C, with humidity of 0% to 90%. The unit also has a shock resistance of 80m/s2 in the X, Y, and Z directions.

    The browser-based dashboard for the example temperature sensor Node-RED program has gauges for three measurement units

    Powering it `up

    After connecting a 12V (2.5A) or 24V (1.25A) DC power supply to the relevant screw terminals on the right-hand side (make sure the polarity is correct!), the TouchBerry comes to life, booting into Raspberry Pi OS – there’s no physical power button.

    The pre-installed edition of Raspberry Pi OS is the older Buster version, although you could always re-flash or replace the microSD card by opening up the back of the case, a procedure which also enables you to move some jumper switches to reconfigure settings such as voltage levels for the I/O. The system runs fine, although we did experience occasional lag when trying to select items on the desktop.

    You can connect to a Wi-Fi network from the desktop or command line (although we needed to manually add a network gateway to gain internet access), or plug in an Ethernet cable for a wired connection. The latter can also be used to network the TouchBerry Pi with a dedicated PLC to add extra I/O and exchange data. Naturally, you can install extra Raspberry Pi software in the usual way.

    The only visual clue to the presence of Raspberry Pi 4 is provided by a cutouts for the latter’s USB and Ethernet ports, at the base of the unit. So you can plug in a mouse and keyboard if you want. Alternatively, you can install an on-screen keyboard.

    There are I/O (and power) connections – with removable screw terminal blocks – on either side of the unit

    Ins and outs

    As mentioned, there are two sets of screw terminal connections on either side of the device for I/O. The right-hand side covers all of the main communications protocols: I2C, SPI, RS485 (half or full duplex), and RS232/TTL.

    On the left side is the second set of I/Os, which requires an additional power supply to be connected to the 24V COM terminals there. Both the digital and analogue I/Os have self-insulation, so can be connected to power supplies with different voltages than 24V. Two analogue inputs can be used in the default 4–20mA configuration (requiring a 1kΩ resistor) or 0–10V. Three digital inputs and five digital outputs complete the set.

    While the total number of I/Os on the TouchBerry Pi is no match for the huge number featured on a dedicated PLC, there should be enough here for many basic applications. We tested it out by connecting a DS18B20 temperature sensor and displaying the data in on-screen gauges using the Node-RED low-code environment, as detailed here. A little configuration is required, but it’s fairly easy to set up and deploy.

    Verdict

    8/10

    A really solid unit with good hazard protection, a decent touchscreen, and enough I/O for simple applications.

    Specs

    Display: Capacitive touch, 10.1-inch, 1280×800, TFT/IPS, 900 nits, RTD2662 controller chip

    Connections: Screw terminals for power, I2C, SPI, RS485, RS232/TTL, 2 × analogue inputs, 3 × digital inputs, 5 × digital outputs

  • Linamp

    Linamp

    Reading Time: 4 minutes

    For his project, Rodrigo wanted to bring Winamp’s early days back to life in a more physical form so he decided to produce a music player that could easily be part of a hi-fi mini system. Specifically, he took inspiration from a Aiwa mini setup from around 1983, figuring he could create a case and have all of the functions available on a front touchscreen display.

    One thing he noticed was the simplicity of design of the old devices. “Old electronics, especially audio devices, managed to look high-tech and yet elegant,” he explains. “They managed to fit in well with people’s home décor while using relatively simple construction techniques such as sheet metal or wood. I thought that, with all the new manufacturing services we have now, It wouldn’t be too hard to replicate some of the construction techniques of my old Aiwa system, so I set out to learn how to design sheet metal parts, which was in itself a fun exercise to do.”

    This is the Aiwa stereo tuner and amplifier which inspired Rodrigo to create his own retro hi-fi device

    Physical

    Rodrigo based his build around a Raspberry Pi 4B with a 32GB microSD card. “I decided to use the Raspberry Pi because of the software support and extensive documentation and online resources,” he said. “In the past, I’ve completed projects with other single board computers and I’ve always found small details that made their usage much more complex, for example, limited documentation on how to do lower level things like interfacing with special displays, controlling the boot process, or even just supporting recent Linux kernels.

    “Since this was a hobby project, I didn’t want to spend too much time figuring out those details on other SBCs. Also I chose Raspberry Pi 4 because it was the latest model at the time I started the project. Raspberry Pi 5 was announced after I’d begun and I figured I didn’t really need that device’s performance anyway.”

    A Raspberry Pi 4 forms the heart of this build. It is connected to a generic 7.9-inch touchscreen display. Extension cables allow for rear ports

    At first, Rodrigo toyed with the idea of making the front face physical. “I wanted to add real-life buttons using a 3D printer and I was going to design a custom PCB for the interface,” he says. But he couldn’t find screens with the correct size and dimensions for the spectrum analyser and song information displays that needed to be included to remain faithful to Winamp without making the build too complex.

    “Making it physical would have made it less flexible as well,” he adds. For example, I would not be able to have the playlist view in the same display, which would make the device bigger and clunkier so I decided to go with a touchscreen.” This, he figured, would stretch across the entire front of the device and include all of the buttons as part of the UI. He reckoned his background as a software engineer meant this would prove to be relatively straightforward.

    A little more love

    Rodrigo opted for a 7.9-inch extra-wide screen and he created the case using sheet metal, sending his Onshape designs to PCBWay so they could be produced using 1mm anodised aluminium. He’d closely analysed his Aiwa system so he could figure the correct dimensions and overall look and, for convenience, he placed a power button, Ethernet port, USB-A and USB-ports and 3.5mm stereo jack at the back.

    Rodrigo is looking to create Linamp devices for sale and wants the community to help him figure the logistics by filling in survey at magpi.cc/linampsurvey

    The majority of his time was spent on the software, however. He created a custom Qt 6 app which he wrote in C++. “Replicating the layout itself wasn’t that hard, it was just a matter of getting rough dimensions at first and drafting the UI in Qt Creator using the graphical Qt Widget designer interface, and then fine tuning dimensions by comparing screenshots in GIMP,” he explains. “The complex part was replicating the spectrum analyser and getting the raw audio data to feed it. I did a lot of research and looked into other open-source projects’ code to get ideas and code to base my solution on.”

    It’s proven to be a very vivid, eye-catching solution and it doesn’t feel as if any compromises have been made. Above all, it has the intended nostalgic flavour thanks in the main to the spectrum analyser and the way the name of the song and artist scroll across the top. It also retains the intuitive UI in full, so songs can be selected and played in no time. “Linamp supports playing music CDs from a CD/DVD drive connected via USB as well, but you need to use a powered USB hub in order for the drive to work, otherwise Raspberry Pi may not have enough power for the external drive,” Rodrigo adds.

    Linamp can play MP3, M4A, FLAC files and more. You can control the output volume and balance too

    Yet despite being feature packed, Rodrigo wants more. He’s also been overwhelmed by the positive reaction from people who have seen the project and he is working on adding Spotify playback and Bluetooth. “It had an amazing response,” Rodrigo says. “I never imagined it would have been that popular, especially on YouTube, where I uploaded a quick video of how the UI works as an afterthought.” With more than 100,000 views, we don’t think we’ve heard the last of this project.

  • ArmPi FPV AI Vision review

    ArmPi FPV AI Vision review

    Reading Time: 3 minutes

    Strong arm

    We tried out the Advanced kit with Raspberry Pi 5. The arm comes ready-assembled, sitting on a solid black metal base whose rear section holds Raspberry Pi, secured with screws and pillars. Four suction cups stick the base to a desk or the floor – not the most secure of methods – but the unit itself is very sturdy.

    The breakout board is mounted on Raspberry Pi and wired from JST connectors to the arm, with some spare servo and SPI sockets. Power – for the arm and Raspberry Pi – is supplied from a 7.5V 6A DC PSU via a barrel adapter with two wires that fit into screw terminals on the breakout board.

    A smartphone app enables manual remote control and an array of fun AI modes such as block-stacking

    The arm itself has six DOF (degrees of freedom) counting the gripper on the end of it, which can be rotated via a ‘wrist’. The base servo enables the whole arm to rotate, while three vertical elbow joints, with anodised metal brackets, enable countless possible positions. The servos are of three types/sizes, each with 0.3° accuracy, 0–240° rotation range, and feedback for angle read, temperature, voltage and position. Arm movement is reasonably smooth, and not particularly noisy.

    A view to a thrill

    Mounted just behind the gripper, the HD camera offers a wide-angle 120° view. It’s connected by a long, loose cable to one of Raspberry Pi’s USB ports, with no clips to secure it to the arm, although it does pass through a cutout in the metal base.

    The camera is the key to the arm’s AI abilities. The simplest way to try these out is with the WonderPi smartphone app (iOS or Android). Once your phone is connected to the arm’s automatic Wi-Fi hotspot, you can use the app to control it remotely. The gripper, wrist, and base servos are adjusted by pressing on-screen arrows, while the others are controlled by dragging them on a graphic of the arm.

    Block-stacking makes use of computer vision and image recognition via Raspberry Pi

    The app’s AI modes are where the fun really starts. Item tracking sees the arm move to track an object of the chosen colour (red, green, or blue) held in your hand. Face recognition is self-explanatory, resulting in a gripper ‘wave’ to say hello. Item sorting and stacking modes see the arm pick up coloured (or tagged) blocks in turn and either place them on the correct squares on the paper map, or stacked up on a blank square. It’s impressive to watch in action and the app gives you an FPV camera view. If you have the optional shelf units, you can get it to do warehousing, delivering, and transferring tasks.

    The app is just a showcase for the arm’s capabilities, however: a starting point. By following an extensive array of online tutorials, you’ll learn how to program it with Python, use OpenCV for image recognition, employ ROS (Robot Operating System) and MoveIt motion planning, use inverse kinematics to reach a desired arm position, and much more.

  • Twirly Shirley

    Twirly Shirley

    Reading Time: 3 minutes

    That first turntable used a DC motor, which lacks precision, resulting in inconsistent movements which vary with the weight of the object placed on it. “We wanted something more precise,” recalls Martin, “and we wanted a remote that we didn’t keep losing, so we put it as a page on a web server.”

    In addition, they simplified the original version’s 3D-printed gearing system, which included a worm gear, to use two gears instead of three.

    With the outer gear and bearing removed, you can see the stepper motor and Raspberry Pi Pico W

    Web-based spinning

    Raspberry Pico W has a web server running on it, based on Simon Prickett’s Phewap project. On that server sits a page that shows a virtual remote. “The buttons trigger some MicroPython code that tells the turntable’s stepper motor to turn, then 3D printed gears translate the movement from the motor to the bearing, which in turn moves the turntable.” The ‘lazy Susan’-style bearing, as used in turntables for the dining table, features multiple metal balls between two circular metal plates for low-friction movement.

    Since the stepper motor they used requires a fairly hefty voltage, a 20V Power Delivery trigger board is used to step up the voltage supplied via USB-C. “Using PD triggers was one of the good bits: it makes for a much smaller build than having to try to cram a power brick in there too. They’re really cheap too, so it’s a rare win-win.”

    By taking photos at set intervals, you can create stop-motion videos of a rotating object, such as a roller-skate

    VEEB chose Raspberry Pi Pico W for the project due to “a flat refusal to use C, due to lack of skill, and the knowledge that the documentation for Raspberry Pi stuff is less sparse than for other microcontrollers,” says Martin. “When we get stuck, there’s usually someone that has run into a similar problem and documented it somewhere.”

    Learning process

    Martin reckons the project took around a year to complete, working on and off. “There were a few mini projects in there: learning enough OpenSCAD for the gears, learning enough CSS for the remote page, getting the stepper motor to work. It was one of those things that you keep going back to when you learn something new during another project.”

    The components for the project include a motor driver board and 20V Power Delivery trigger to supply the power for the stepper motor

    An impressive stop-motion video of a roller-skate and disco ball for the Twirly Shirley YouTube video was shot using a camera taking photos at set intervals, but a possible upgrade would be to use a Raspberry Pi single-board computer to automate the process. “An SBC could take photos and send requests for the turntable to move,” notes Martin. “The last thing we made used web sockets to make a Pico listen for signals being broadcast from a [Raspberry] Pi with a camera attached.”

  • Essential electronics in The MagPi magazine issue #144

    Essential electronics in The MagPi magazine issue #144

    Reading Time: 2 minutes

    Essential Electronics. 

    Essential Electronics with Raspberry Pi

    Become familiar with electronic components, circuit building, code and some great starter projects. This month’s lead feature will have you up and running with electronics and code in no time at all.

    Build a private cloud server

    Build a private cloud server

    Take control of your data by building a do-it-all email, documents, spreadsheets, email, file sharing and social media server. It’s the ultimate answer to keeping your data personal, private, and safe while discovering how cloud services work. Plus you get to save money!

    Learn to use the new AI Kit

    Get started with Raspberry Pi AI Kit

    Get to grips with ultra-fast image recognition by connecting the new AI Kit to Raspberry Pi. With 13-tera operations per second, this neural interface performs machine learning tasks at ultra-fast speeds. Add some smarts to your projects, and learn how artificial intelligence works with AI Kit and Raspberry Pi.

    Incredible photo & vision projects

    Incredible vision projects with Raspberry Pi Camera

    Put that Raspberry Pi Camera to use with these incredible vision-based projects. Adding a camera to Raspberry Pi is more than just a camera replacement, with eyes your Raspberry Pi can see and interact with the world around it.

    ArmPi FPV AI Vision

    ArmPi FPV AI Vision review

    Give your Raspberry Pi a hand! In fact, give it the whole arm with this incredible robotics arm project. We test out ArmPi, and AI-powered robotic arm for experimentation.

    Get your copy today

    Grab your copy of The MagPi magazine today! Straight from our Raspberry Pi Press Store.

  • Win one of three Home Assistant Yellows

    Win one of three Home Assistant Yellows

    Reading Time: < 1 minute

    Subscribe

  • Retro gaming magic mirror

    Retro gaming magic mirror

    Reading Time: 2 minutes

    With that in mind, he went big. And we mean really big. He took a 65-inch touchscreen and connected it to a Raspberry Pi 5 computer, figuring games would look amazing across such a large display. It also enabled David to create a full-length mirror, despite it posing issues of its own.

    “Working with such a large display was a challenge due to the physical weight of moving and manipulating it,” he explains. “I think it weighed 48kg so I really shouldn’t have been lifting it on my own. I was afraid I would break it by letting it flex, cracking the screen.”

    Looking good

    Initially, David tested the concept using a Raspberry Pi 3 computer and an official Raspberry Pi seven-inch touchscreen. He played around with PINN, a version of the NOOBS operating system installer, and sought to get everything working with RetroPie before ordering the larger equipment.

    “Unfortunately, the curse of the early adopter struck, with RetroPie and PINN not having official support for Raspberry Pi 5 at the time,” David says. “It took some time to get PINN working at all and, even then, I think Raspberry Pi 5 support was questionable.” David switched to Recalbox which was installed on one partition. Another partition was used for the magic mirror functions.

    “I wanted the mirror to play as many gaming platforms as possible,” David says. “To achieve this I figured I needed the most processing power, and the Raspberry Pi 5 seemed the best way to go. So far it has proved more than capable of emulating games on many platforms without much trouble.”

    On reflection

    David also added motion-sensing using a PIR sensor. When someone walks in front of the sensor, the screen turns on. When the person moves away, it turns off. The display also turns off at night and comes back on in the morning, using the Raspberry Pi OS’ Magic Mirror app to show the weather forecast, a calendar and more. The build also includes an RS232 converter so that the Raspberry Pi’s Universal Asynchronous Receiver/Transmitter (UART) can be converted for serial communications.

    When you want to play, controllers can be connected via Bluetooth Low-Energy or USB, and the games look a treat on such a large screen. There is still room for improvement, however. “I still need to get around to reapplying the mirror film again,” he says. “I’d also like to spend more time with the plugins to the magic mirror platform, maybe even develop a couple of my own to make the best use of the screen real estate available. Maybe in the future there is scope for a camera, facial recognition and a multi-user experience.”

  • Puttr indoor putting practice green

    Puttr indoor putting practice green

    Reading Time: 4 minutes

    Like many great ideas, Puttr came about because of some enforced downtime during lockdown. Entrepreneur and founder of several successful start-ups Matthew Allard had been on the golf team at university, and lockdown had him contemplating an at-home putting game that he and his son could both enjoy. Matthew had a personal interest in how software and computers can interact with the real world, and having taken post-graduate courses in embedded systems was keen to make use of what he’d learned.

    One thing Matthew knew already was that “putting practice is boring and lonely” (don’t they have crazy golf courses in the US?) yet it accounts for 42% of time golfers put in. Creating a means to connect fellow golfers and ‘gamify’ putting could transform this rote activity and allow members of the golfing community to challenge each other with online tournaments.

    Putting mat and chute roll up and are storage in the self-contained Puttr box

    Hits and misses

    Matthew originally aimed to track made and missed putts via an app using sensors in the hole of an at-home putting mat hooked up to GPIO pins. However, he soon discovered this approach was limited: “I could detect when a ball went in the hole, [but] I couldn’t detect missed putts.” Next, Matthew tried break-beam IR sensors to get more precision and measure missed putts, as well as ‘makes’, but “quickly realised that any sun exposure would cause false positives in the break-beam”.

    A friend tipped him off about Raspberry Pi, and Matthew soon saw he could use computer vision and a wide-angle lens to detect the location of the physical hole, then track any golf ball that passed its field of view. Once a ball has entered or exited, it sends the full ball path data over Bluetooth to a connected app on an iOS or Android device, he explains. Details of each putt are logged, with the user able to access stats on their performance and optionally share it with other Puttr users.

    Creating a putt-tracker involves mounting Raspberry Pi 4, an infrared lens and wide-angle camera lens in a case

    Raspberry Pi quickly proved a great choice, since it offered an operating system with all the tools he needed for the software along with good value hardware that worked well together. “Many suppliers tried to talk me into creating my own board [but] there were many reasons to use Raspberry Pi.” The camera connection, Bluetooth, Wi-Fi, and processor were all included. Matthew was also encouraged by the strong community keen to help with any troubleshooting he might need, given this was his first ever Raspberry Pi project.

    Embrace the light

    At first, Matthew stuck with his infrared break-beam idea, testing it in his garage in the evenings after long days at his day job. There were “a ton of tweaks” to get the computer vision to work well under different lighting conditions. Eventually, it seemed as though the beams were working just as he expected. “I would get a break when the ball enters the ramp, and another one when and if it entered the hole. Perfect!”

    Replicating results when demonstrating the embryonic Puttr game to his son was less successful. In fact, it didn’t work at all in daylight. Matthew eventually realised that sunlight hitting the beam’s receiver was preventing the circuit being broken even when a ball passed through it because it emits infrared rays of its own: “Apparently I missed that in school!” Connecting Raspberry Pi 4 to a GATT server (for Apple devices) as a headless Bluetooth peripheral meant code pairing was not an option. Instead, Matthew created a Bluetooth Write Characteristic that can receive a Wi-Fi SSID and password specifically for the task. He then wrote all the computer vision code and app software to make Puttr work.

    The Puttr app automatically connects the mat to the phone or tablet via Bluetooth and records statistics for each player’s putting average.

    Prototyping involved laser-cutting Baltic birchwood, and Matthew’s first foray into 3D design and printing using CraftCloud to create the box used as both ball tracker and holdall, the ramp, and ball return chute. The clever design is portable, with the mat rolling up inside.

    Matthew praises the “stable, tested OS, camera interface, Bluetooth and Wi-Fi, and says choosing Raspberry Pi meant R&D took at least a year less than choosing a different setup with costs that would have been much higher. New versions and applications are already planned. Since launching 18 months ago (after a successful Indigogo crowdfunder), the Puttr app has logged more than a million putts. The clever take on pitch and putt now has worldwide league tables, games and challenges, with a subscription model for golfers keen to pit their skills against others.

  • CrowPi Compact Raspberry Pi Educational Kit review

    CrowPi Compact Raspberry Pi Educational Kit review

    Reading Time: 2 minutes

    Box of delights

    Elsewhere on the board you’ll find a USB-C power input, speakers, an LED display, GPIO pins, an RFID chip, plenty of sensors and switches and LEDs, and more besides. In the box there’s also a startling array of extra components, including a pair of SNES-like gamepads, a US-style power plug (with a three-pin adapter for UK sockets), servo and stepper motors, an IR remote, LEDs, a small stylus, headphones (3.5mm, so there’s nowhere to plug them in on a Raspberry Pi 5 board) and more. A GPIO ribbon cable is meant to bridge the gap between the Raspberry Pi’s pins and those on the carrier, but one wasn’t included in the package sent to us for review. Something that will fit is pretty cheap and easy to get online, but it would have been nice to have had it included.

    It takes a bit of force to successfully mate your Raspberry Pi 5 board with the CrowPi carrier, as the cables put up some resistance to getting it in exactly the right place, and once it’s screwed down the microSD slot is inaccessible. You might also need to rely on Wi-Fi for networking, as the USB cable goes across the Ethernet port, though you may be able to negotiate a fit with a slim cable. Having a power connection enter vertically at the top right of the motherboard feels clunky too – it would have been so much tidier to have it pierce the casing at the rear.

    A screw loose

    A version of the Raspberry Pi OS with appropriate drivers is available from the CrowPi website – a 3.9GB download – and while the board booted first time, it threw an error when we tried to use the Recommended Software tool and the Terminal (the Terminal text is tricky to read on such a small screen, but that’s not Elecrow’s fault) to install new programs. There was also a loose screw in the case, which fell out when we tried giving it an experimental shake.

    These problems are ones that can be fixed via software patches or by updating the package contents for future orders, and don’t affect the fact this is a convenient and well-made electronics board with prolific features. What they do mean is that, in its current state, it’s slightly difficult to recommend the CrowPi Compact Raspberry Pi Educational Kit, which is a shame, as it could be brilliant.

  • Raspberry Pi goes public

    Raspberry Pi goes public

    Reading Time: 2 minutes

    Evolution

    “This is a watershed moment for Raspberry Pi,” Eben posted on Raspberry Pi dot com that morning. “And the start of a new phase in our evolution: access to the public market will enable us to build more of the products you love, faster. And the money raised by the Raspberry Pi Foundation in the IPO will support its ambitions for global impact in its second decade.”

    Philip Colligan, CEO of the Raspberry Pi Foundation wrote in a post a couple of weeks ago just how that would work: “To date, Raspberry Pi Ltd has donated nearly $50m from its profits to the Foundation, which we have used to advance our educational mission combined with over $60m in funding from philanthropy, sponsorship, and contracts for educational services,” he wrote. “From the Foundation’s perspective, an IPO provides us with the ability to sell some of our shares to raise money to finance a sustainable expansion of our educational activities. Put simply, instead of receiving a share of the company’s profits each year, we will convert some of our shareholding into an endowment that we will use to fund our educational programmes.”

    What’s next

    There’s been a whole lot of work behind the scenes for this for some time now – I’ve only caught glimpses on my monthly visits to Raspberry Pi Towers – so hopefully some of that pressure has now been alleviated. I’ll find out on my next visit.

    Anyway, I thought I’d talk about it here as for various reasons we’ve not had a chance to mention it elsewhere in the magazine [lots of exciting new opportunities to end up in front of a judge – Ed]. Also, my car got returned the following day and now I sort of regret not having got up early for it. Ah well – onwards.

  • The Dicemaster 2000

    The Dicemaster 2000

    Reading Time: 4 minutes

    From the start, Chris had an idea of what he wanted from the device. “I knew what I wanted to achieve – for my friend to press buttons, for virtual dice to be rolled and the result to be announced,” he says. “From there it was just about figuring out which components to use and how to lay them out efficiently. This needed to be hand-held, so a compact design was a must.”

    To that end, Chris modelled the device on a gamepad. “I tried to imagine a controller, like an Xbox controller,” he says. “I sought to work out how it would look, feel and where the thumbs would rest. I wanted to make something that was comfortable and felt familiar and I also needed it to operate without being plugged in so I chose a Raspberry Pi Pico and used an 18650 battery shield to power it along with the other components.”

    The different modes make life even easier. A die pool can be saved and loaded to a microSD card which is inserted in the top of the device.

    Roll with it

    Selecting the Raspberry Pi Pico meant the dice roller could be compact and use minimal power. “It’s instantly on and it was able to handle the different components I needed, such as a microSD card reader, an audio amp with speaker and a litany of buttons,” Chris says.

    Those buttons would be 3D printed with Braille so that his friend would be able to read their various functions and control the device effectively and independently. “Adding Braille wasn’t very difficult,” Chris says. “I designed flat button caps then added the Braille numbers to them in Blender, the free open-source 3D computer graphics software.”

    Board games often make use of non-traditional dice – in other words, they’re not always familiar cubes with six marked faces. The standard polyhedral dice set also includes those with four, eight, ten, 12 and 20 sides (the entire set being referred to as d4, d6, d8, d10, d12 and d20). “I needed to have a button for each one,” Chris says. He also added two extras: Reset and Roll.

    The case took some time to perfect, but it’s been designed to be comfortable to hold while giving easy finger access to the buttons

    Writing the project in CircuitPython, he created a device that would allow his friend to press one of the numbered buttons to add it to the die pool. When the dice are ready to be rolled, it’d be a case of pressing Roll and listening to the result when it’s announced. “In addition, there are some long press modes,” Chris adds. “If you hold the d4 button for a few seconds, you will enter quiet mode which plays chimes rather than speaking out every die entered and describing what it’s doing. It still announces the results of the roll, but it can cut down on time and I added it in case the normal mode was too distracting to other players at the table.”

    Holding down d6 saves the current die pool. “This is useful if you’re playing something like Dungeons & Dragons and constantly need to roll that big 8d6 fireball [that’s eight d6 dice being rolled at once],” Chris continues. “Long-pressing d8 will load the saved die pool from the microSD card, and that means the saved pool will persist across uses.” Long-pressing the d10 enters percentage mode which, rather than rolling dice, will simply give a percentage between one and 100.

    Play the game

    Coding all of this was a challenge. “Interfacing with the audio amp was tricky and I wish the device was a bit easier to understand in terms of audio quality, but this may have been due to everything being built on a prototype board,” Chris laments. He also found it difficult to perfect the controller shape. “The housing was 3D printed in a single colour and the top was painted red. I had a good friend of mine help with the ergonomics of it. There was also a lot of soldering,” he adds.

    The device makes use of a Raspberry Pi Pico board connected to a protoboard which is wired to the buttons and a PAM8302 2.5 Class D single channel amp

    Even so, it’s been worth the time and effort. Chris’ friend loves using the device and he finds it allows him to fully participate in games. It’s also comfortable to hold, easy to use and very effective. What’s more, you can replicate it because Chris has made the code open source and he has also shared the 3D files on Printables. In that sense, it’s capable of helping many other people with a visual impairment.

    Chris is certainly happy overall even though he would have done some things differently. “If there is one part of this project I wish I had done, it would have been to design a custom PCB using something like KiCad – if only I’d had issue 138 of The MagPi when I started! It probably would have helped a lot with audio issues and made for a cleaner build overall. It’s definitely on my list of things to learn for future projects.”

  • Build a robot explorer in The MagPi magazine issue #143

    Build a robot explorer in The MagPi magazine issue #143

    Reading Time: 3 minutes

    Use Raspberry Pi robotic kits, sensors, and components to make a science-smart rover!

    Robot Explorers

    Turn Raspberry Pi into a rugged robot, equipped with wheels or legs, and you can explore the surface of a planet (or your backyard) and use sensors to analyse your environment. This month, we’ve got a guide to the best robotic parts, equipment, and sensors to use.

    This 3D-printed controller has buttons in Braille to help visually impaired board gamers get involved

    Dicemaster 2000

    We love this game controller for visually impaired people. The buttons are 3D printed with Braille enabling the maker’s friend to take part in a gaming group. Dicemaster showcases maker skills with Raspberry Pi’s electronics to produce a fun, but seriously useful, controller.

    This wonderful project lights up letters to tell the time

    Colour Word Clock

    Gurgle Apps has been making fun electronics projects for years now. The three siblings Amelie, Caleb and Zivya are back again with a kit that you can build yourself – the Colour Word Clock. It uses LEDs to light up letters in a 3D-printed case that spells out the time.

    Part mirror, part information screen, and a lot of retro gaming!

    Retro Gaming Magic Mirror

    David Edwards wanted to make a Magic Mirror, and he also wanted an arcade machine but didn’t have the space (or permission) to build one. The solution was this fabulous build that combines both concepts into one device. A 65-inch display turned into a magic mirror that plays as many different systems as possible. 

    We set up Raspberry Pi's new M.2 HAT+

    Using M.2 HAT+ with Raspberry Pi

    The new M.2 HAT+ enables you to add super-fast SSD storage cards to Raspberry Pi, alongside other devices like the AI accelerator in the AI Kit. This month Nate shows us how to attach M.2 HAT+ to Raspberry Pi and set it up to expend Raspberry Pi 5 using the PCI-express compatible connector.

    We celebrate the makers who've made something big with Raspberry pi

    Raspberry Pi Success Stories

    Raspberry Pi has been used as the bedrock for many homespun projects that turned into successful business ideas. It makes us so happy to see Raspberry Pi help people build a successful company from scratch, and some big-name companies have used Raspberry Pi to breathe life into their product range. Our Success Stories feature showcases some of the best business ideas around.

    Learn electronics with the CrowPi Compact

    Learn electronics with CrowPi Compact

    The CrowPi is a smart electronics kit that now serves up components to Raspberry Pi 5. Experimenting with electronics is an excellent, fun, and rewarding hobby and this kit will help you get started.

  • Win one of five Raspberry Pi AI kits

    Win one of five Raspberry Pi AI kits

    Reading Time: < 1 minute

    Subscribe

  • Audiophile Pi

    Audiophile Pi

    Reading Time: 3 minutes

    As someone interested in giving old tech a new lease of life, the idea came naturally. “I was inspired by the many high quality network audio streaming devices sold by the major stereo component brands such as Sony, Cambridge Audio, NAD and so on but I couldn’t justify the cost,” he explains.

    “I figured they just play back digital audio so I started looking at DIY options. I knew I wanted a standard-sized stereo component and decided an old stereo tuner would be reasonably-priced because they are not in very high demand, even among audiophile collectors.”

    The original Sony ST-JX411 case has been retained and provides plenty of room for the new components

    Treble buy

    Alan purchased three Sony ST-JX411s so that he could mix-and-match the best looking parts (“most were dented and dirty,” he says). He liked its look and noted it had space for a decent-sized LCD. “The Sony tuner has a retro vibe but doesn’t look too dated, and it fits in with much of my second hand stereo equipment,” he says. “I also thought that a repurposed tuning knob would be a nice touch for a streaming player – few attractive modern tuners have one.”

    The front panels were important. “I wanted to play a playlist or start and stop the device without using a web interface on my computer or phone,” he explains. “Another requirement was for an alphanumeric display for the currently playing song, title and file format. Since my amplifier already had a digital-to-analogue converter [DAC], I wanted quality digital audio – S/PDIF – too.”

    Alan, who has connected his streamer to a Loxjie A30 amplifier, is considering re-labelling the front buttons

    For the audio quality, Alan chose a HiFiBerry Digi2 Pro which uses the I2S sound port for S/PDIF audio output (without a DAC, he’d have opted for a DAC HAT such as the Raspberry Pi DAC Pro). To connect everything together, he used a small proto PCB board with some male headers. “That way I could use female-to-female jumpers to connect to the Pi GPIO pins,” he says.

    Setting the tone

    Alan retained the logic board which houses the front-panel buttons. “The main challenges related to reverse-engineering these buttons and I’m not sure I would have accomplished the project without a schematic diagram I found online,” Alan continues. As it was, Alan was able to read row and column values, reducing the number of wires from 17 to 11. He also replaced the logic board’s vacuum fluorescent with a new alphanumeric LCD, and Raspberry Pi’s ports were extended to the tuner’s back panel.

    To control the functions, Alan used the open-source project moOde. “I had already been using moOde on Raspberry Pi 4 and I was happy with its features and audio quality,” he says. “I also liked the simplicity of the moOde API, so I didn’t have to spend much time figuring that out.”

    The back of the unit remains as neat as it did when it was made thanks to the use of Adafruit panel mount extensions

    So how does it fare? Great, as it happens. “It works very well, with no issues,” Alan says. “And since I’m using the original board passively – that is with no power applied – there’s not as much to wear out or go wrong. I now use the music streaming player almost every day and the audio quality is indistinguishable from the original source material, at least to my ears.”

  • Mini Dexed

    Mini Dexed

    Reading Time: 3 minutes

    Mini Dexed ports the concepts of the digital synthesiser to Python and Raspberry Pi, and is the brainchild of Simon Peter (aka Probono), who describes it as a ‘Dexed FM synthesiser similar to 8x DX7 (TX816/TX802) running on a bare-metal Raspberry Pi (without a Linux kernel or operating system)’ to produce eight tones. Voices can be programmed using a DX series editor using MIDI sysex.

    Emphasising the importance of Yamaha’s DX7, composer and MusicRadar journalist OSC Steve argued: “it’s possible to categorise 1980s music into two eras; the pre-DX7 era and the post-DX7 era, such was the widespread use of this new instrument and its distinct timbral character”.

    DIYElectroMusic created a USB version of the DX7

    Bringing DX7 to life

    Probono has been experimenting with Raspberry Pi, for home automation and 3D printing as well as digital music, since its launch in 2012. He began the Mini Dexed project because he was keen to make a “real musical instrument” rather than something that felt like a computer. He is in awe of the original developers of FM synthesisers and says Mini Dexed “stands on the shoulders of giants”. To recreate their sounds he was looking for a commonly available, inexpensive microcontroller with lots of computing power and is “using Raspberry Pi more like an embedded microcontroller than a regular computer”. Quick boot times, small code size and overall simplicity are further hallmarks. The project began in 2022 during a discussion in the Circle project, when Probono asked for guidance on how to go about integrating an existing synthesiser engine. Another maker, Rene Stange produced Circle, a library for code that runs it in a bare-metal Raspberry Pi environment, while Holger Wirtz ported the Dexed synth engine for use with microcontrollers, creating a framework specifically for this scenario.

    Different instrument voices can be called up

    Future sounds

    Mini Dexed is a flexible platform for experimenting with electronic sound. Once it had been ported for microcontroller use, Probono deliberately built Mini Dexed around Raspberry Pi and commonly available, inexpensive hardware components. He says a Raspberry Pi Zero 2 version could be created for less than €50. Hardware choices and whether to use a dedicated audio DAC are down to individual makers’ preferences, while suitable connections for the audio partly depend on which Raspberry Pi you’re using. Those that can be configured to use USB Gadget Mode instead of USB Host mode (currently Raspberry Pi 3 and 4 but not yet 5) allow MiniDexed to be used as a USB MIDI device and accept audio streaming from MIDI keyboards, for example. “As someone who is interested in experimental music, I could imagine hooking up all sorts of sensors via MIDI to Mini Dexed, in order to create an immersive soundscape that changes as its surroundings change.”

    Mini Dexed has also been extended to work with external DACs (making it usable with Pico and Raspberry Pi 1 and 2, too) as well as adapted to support 16 voices by blogger Kevin, who has contributed to this fantastic synth’s development and raised its profile. Probono specifically mentions the potential of Raspberry Pi Pico which Kevin was able to implement: see magpi.cc/picodexedgit or magpi.cc/dx7usbdongle.

    Mini Dexed aims to replicate the iconic 1980s synthesiser sound

    “While the project can be built without any extra hardware, a simple display and a rotary encoder and/or some buttons make it much easier to use, and an inexpensive digital to analogue converter increases sound quality significantly.” Probono says “The real cost is the time invested into developing, building, refining, testing, discussing – and the MiniDexed community collectively has put in, and is still putting in, a lot of time and effort, which I am very grateful for.”

    “I am still trying to wrap my head around how to design sound from scratch using FM, it’s probably a learning journey for a lifetime.”

  • NASsie

    NASsie

    Reading Time: < 1 minute

    We got an email from Jeff Loeliger about a very cool project he’s been working on recently.

    “When you have several computers and lots of files around the house it is useful to have a NAS – network attached storage – device to share files, stream media with Plex, and back things up,” Jeff writes. “My current system is an old QNAP TS-251 and a very old, and unsupported, QNAP TS-110. I wanted something new and faster, which sounded like a project for the Raspberry Pi. It has a compact completely 3D-printed case with a custom pHAT interface board.”

  • sprinklR irrigation

    sprinklR irrigation

    Reading Time: 3 minutes

    Harsh environment

    Portland, Oregon-based Mark has an urban garden that needs to be irrigated each summer. Judging from the description of his irrigation system, the garden is a little larger than the 30-foot back lawns often attached to suburban UK homes. Commercially available timers provide reliable irrigation, but Mark found they don’t last: “If you forget to bring them in during the winter, they freeze and break. After a few years, the plastic valves wear out and they jam closed (bad for plants) or jam open (bad for water bills). They don’t adjust to rain or hot weather.” Pricier, more robust timers plus web connectivity to check the weather forecast work better but still fail. Mark had several Raspberry Pi boards at home, and decided to put them to good use. Having written extensively about Raspberry Pi as well as coding using R (see his blog at niemannross.com), the combination seemed obvious, although R is a less common choice of programming language. “My preferred language is R, which I can run from a Linux operating system, but not from MicroPython or C. Irrigation only happens once a day, so I don’t need speed. What I need is the most convenient way to express my logic to Raspberry Pi.” Using Raspberry Pi Zero WH as the controller “makes it easy to connect to the internet and the headers provide a convenient way to connect relays and buttons,” he explains.

    Components and code were tested over several days in a prototype design

    Bits and pieces

    Creating his irrigation system involved assembling lots of fairly standard components and a certain amount of planning. Prior knowledge of plumbing and electronics is helpful, Mark observes. The planning aspect required Mark to work out how much rainfall was likely to offset the total number of gallons of water his garden would need and how long the valves would need to be open at a time. He calculated the rate at which his house pipes could pump water to the irrigation valves (and the putative number of gallons per hour) as well as the voltage required for the relays to deliver it.

    Mark designed a robust replacement for a commercial irrigation system

    To see whether his idea would work Mark began by screwing irrigation valves, two servos and Raspberry Pi needed to power the system, as well as a Raspberry Pi Zero, on to a piece of wood. “There isn’t any water connected to the system at this point – I’m only trying to test the electronics and develop and test the code.”

    After writing and testing the code on Raspberry Pi he “ran it with the relays for days without any valves connected, then tested the plumbing in a sink before I attached it to the board”.

    Daily irrigation helps keep plants in Mark’s garden healthy

    The US Environmental Protection Agency estimates 28 million US homes have an automated watering system, and that households can reduce their water usage by roughly 7,600 gallons a year using a weather-based system to gauge requirements. Mark wanted to see whether he got realistic readings, and how well the system performed, before deciding to risk linking it up with his water meter for billing. He continues to tweak and update it and is delighted with just how well his $75 irrigation system is performing.

  • CrowVi portable monitor review

    CrowVi portable monitor review

    Reading Time: 3 minutes

    Plug and play

    All versions of the CrowVi (from £92/$115) are able to be used out of the box with no extra set up – touchscreen models require you to use the USB-C port (not the power one) so the connected Raspberry Pi (or PC) can detect the inputs – but all models just need power and a HDMI connection.

    There’s no battery installed in the CrowVi so you’ll have to provide external power, portably with a mobile battery or powered by the device you’re connecting it to at home if you don’t have a spare plug. To cut down on cables and power sources, CrowVi suggests daisy chaining power by using the USB-C data port on the display to power a Raspberry Pi while out and about. You won’t be able to get Raspberry Pi 5 up to full power this way, however it will run well enough.

    As an aside, we understand the touchscreen is much like a standard touch display and is not sensitive enough for drawing, but does have the functions you’d otherwise expect from a smartphone or tablet.

    The cover can be removed if you don’t plan to use it

    Out and about

    With unseasonable warmth during the review period, we were able to take the screen out and test it in the most extreme of conditions: direct sunlight. IPS displays do tend to have better visibility out in the sun and this screen performed fine, just as you’d expect any display to work. Make sure to crank up the brightness but find shade if you can.

    As for power draw, a beefy power bank was able to keep everything running fine for a couple hours. Brightness levels and speaker use will affect this, so using external speakers or headphones will also change power draw.

    The colours and responsiveness of the screen are great too. The image is sharp, and it was as good as any monitor we use at home. The cover is very stiff, and the magnets attaching it very strong, to make sure the display is held in place when propped up – it may be a touch too stiff at the bend and we weren’t always sure it was in standing position. Over time, though, it has loosened up enough.

    The sturdy construction feels and looks great too – and as we’re home bodies we’re currently looking into how we can integrate it as a third screen in our set up, which is pretty high praise we think.

    If your smartphone supports display out, it’s a great way to have a portable video player

    Verdict

    8/10

    A great monitor in its own right that performs well out of the house and well enough in direct sunlight

    Specs

    Display: 13.3-inch, 1920×1080 IPS LCD

    Dimensions: 312mm × 198mm × 9mm

    I/O: USB-C power, USB-C data, Mini HDMI in, 3.5mm audio jack

  • Summer time

    Summer time

    Reading Time: 2 minutes

    I’ve never had any real melancholy for summer ending – aside from, I suppose, having to go back to school when I was a kid – but while reading the game’s text I think I came close to understanding why people do.

    I do like summer though; after months of cold and dreary rain, it’s lovely to have a bit of sun. It also helps that I live near the beach so I can go for sunny and beautiful walks. I’m also pretty good with a barbecue if I do say so myself.

    At the time of writing this Final Word, the aurora borealis had appeared all over the UK thanks to Earth being in the path of a solar storm and… I missed it. I had no idea it was happening until I was snuggled up in bed on a Friday night and friends from Scotland and northern England started sharing photos. Good for them, I thought! It wasn’t until the morning I found out it had also reached my end of the country.

    Suit your needs

    I went out the following night to try and catch a glimpse but unfortunately for me – and the hoard of locals convening at a dark corner of the beach – there was nothing to see apart from some pretty stars.

    People had been taking photos on smartphones with night shot features, and that made me realise that a long-exposure Raspberry Pi camera would have worked perfectly… just like in the many astrophotography features I’d written. Unfortunately it was too late for photography that night, but it got me thinking about other outdoor activities I do which could be improved with a Raspberry Pi, rather than forcing myself to do something new just to use the SBC.

    Last year I decided on a near-whim to go hiking in the Peak District with some friends. It was a very wet August weekend so I’m glad I didn’t take a Raspberry Pi with me, but I understand there is a ton of geocaching you can do in the area. I’ve never played around with a geocache project, so if I revive the concept this year I might just have to make a Raspberry Pi-powered one.

    Staying in

    Unfortunately I also like staying home a lot. Maybe I need to invent a Raspberry Pi-powered air conditioner for myself as it is getting extremely roasty-toasty at home these days. I’m also always very interested in some minor gardening, whether it be herbs or some flowers, so perhaps this is the year I finally make an automated plant watering system.

    Well, with all that planning out of the way, maybe I can start thinking about Autumnal projects. Those long months of sunshine and heat can get oppressive…

  • Build a Raspberry Pi 5 media player in The MagPi magazine issue #142

    Build a Raspberry Pi 5 media player in The MagPi magazine issue #142

    Reading Time: 3 minutes

    Take advantage of Raspberry Pi 5's PCI-express compatible socket, an SSD drive and a remote control to build the ultimate do-anything media player

    Build a Raspberry Pi 5 Media Player

    Free your films, videos, and music with our ultimate SSD-powered Raspberry Pi media player. You get complete control over your movies, the ability to stream from all the big players, and access obscure services like public domain films and homebrew games. It’s a complete winner of a system.

    We interview Raspberry Pi's silicon design team about developing its own computer chip technology

    How Raspberry Pi built a silicon design team

    Raspberry Pi has built an ASIC (application-specific integrated circuit) team in Cambridge to design and produce custom silicon chips for its products for nearly ten years. This month we celebrate by chatting to the ASIC team at Raspberry Pi about how they build chips from scratch. It’s a fascinating deep dive into the world of silicon chip development.

    Discover incredible summer projects for your garden, holiday, and day-out adventure!

    Summer Projects

    Take to the great outdoors with our guide to amazing projects for your garden, campsite, beach, or just when going on an adventure. Just because the sun is shining it doesn’t mean you have to put Raspberry Pi down for the day. Take it with you and see what you can do outside.

    Recreate a classic Yamaha DX7 synthesizer with Mini Dexed

    Mini Dexed

    This great Mini Dexed project recreates a classic Yamaha DX7 synthesizer with Raspberry Pi and a DAC (digital analogue converter). The classic sound of this keyboard is behind lots of big music hits, and now it can be all yours.

    Keep a cat entertained with this mini 5-inch television build that plays videos of squirrels

    Cat TV

    This tiny telly built from a Raspberry Pi 5 and 5-inch display keeps a cat amused. Becky uses this project to show her cat streams of birds and squirrels. The full project is housed in a 3D-printed case that is easy to recreate.

    Control a myCobot 280 Pi robot arm by waving around a Wii remote

    Control a robot arm with a Wii remote

    How cool is this? Wave a classic Wii remote around and your robot arm will follow suit. This industrial myCobot 280 Pi from Elephant Robotics is a detailed arm designed for an industrial setting. Last month we showed you how to set it up; this month we’ll show you how to wave it around. 

    Recover data from age-old floppy drives, CDs and even ZIP drives (remember those?)

    Rescue your backups

    This month, KG looks at rescuing hard-to-read media, from forensic disk imaging tools that attempt to recover data from your drive, bit by bit. They take a close look at recovering data from CDs and floppy disks, helpful physical and software tools, and even help you get equipped to recover data from Iomega’s Zip disk super-floppy formats.

  • Win! 1 of 10 M.2 HAT+

    Win! 1 of 10 M.2 HAT+

    Reading Time: < 1 minute

    Subscribe