Schlagwort: sound
-

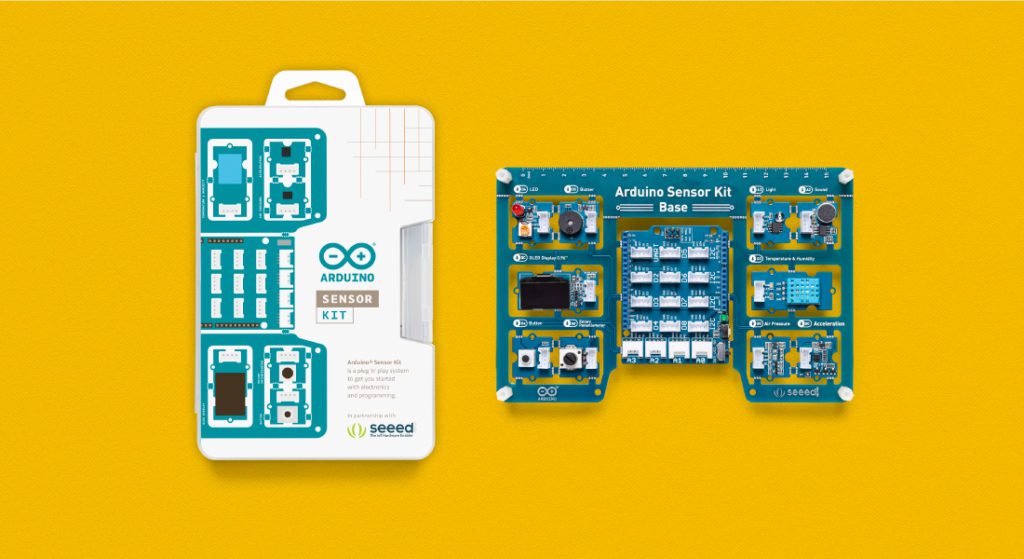
10 most popular modules and sensors for the Arduino UNO all on one board
Reading Time: 2 minutes10 most popular modules and sensors for the Arduino UNO all on one board Arduino Team — December 1st, 2020 Getting started with electronics and sensing the world around you is now easier than ever with the new all-in-one Arduino Sensor Kit from Arduino, in partnership with Seeed. The 10 most popular…
-

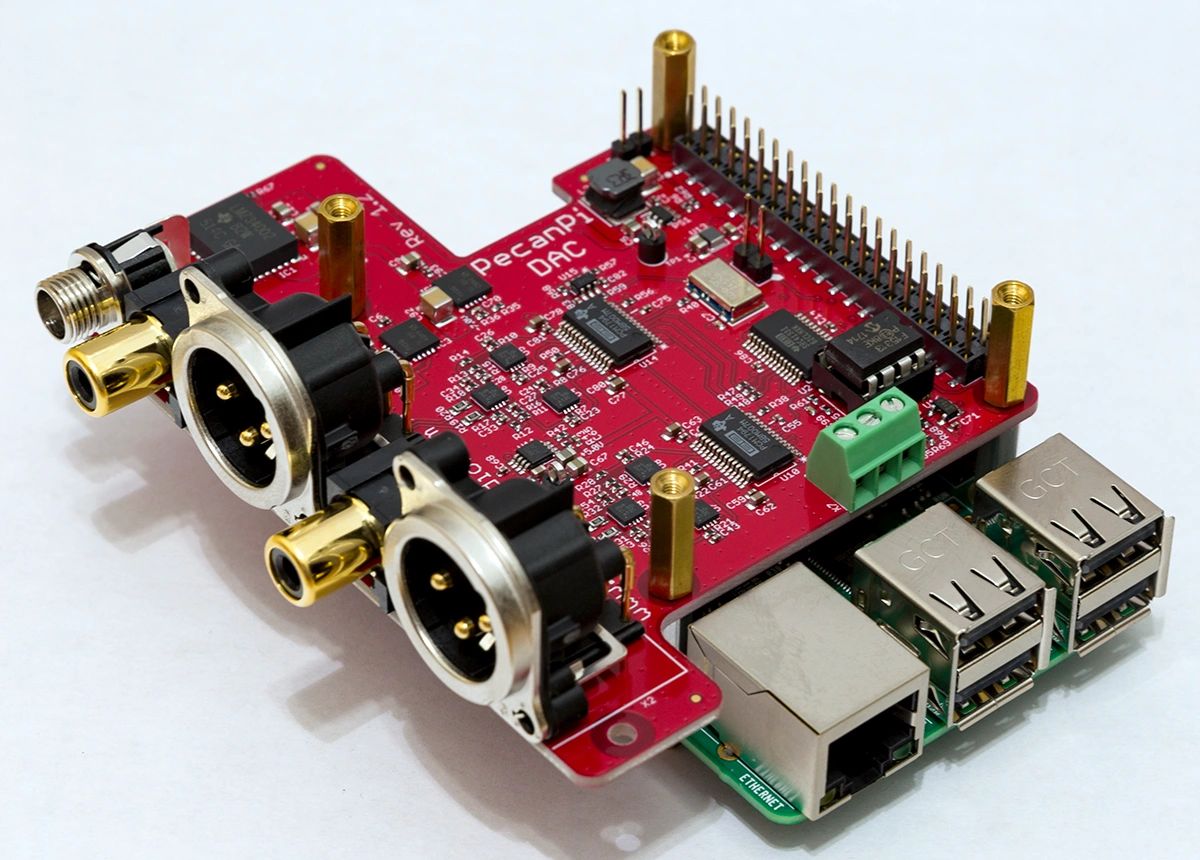
How to play sound and make noise with your Raspberry Pi
Reading Time: 9 minutesIf your amazing project is a little too quiet, add high-fidelity sound with Raspberry Pi and the help of this handy guide from HackSpace magazine, written by PJ Evans. The PecanPi HAT features best-in-class components and dual DACs for superior audio reproduction It’s no surprise that we love microcontrollers at HackSpace magazine.…
-

Raspberry Pi interactive wind chimes
Reading Time: 2 minutesGrab yourself a Raspberry Pi, a Makey Makey, and some copper pipes: it’s interactive wind chime time! Perpetual Chimes Perpetual Chimes is a set of augmented wind chimes that offer an escapist experience where your collaboration composes the soundscape. Since there is no wind indoors, the chimes require audience interaction to gently…
-

Play multiple sounds simultaneously with a Raspberry Pi
Reading Time: 2 minutesPlaying sound through a Raspberry Pi is a simple enough process. But what if you want to play multiple sounds through multiple speakers at the same time? Lucky for us, Devon Bray figured out how to do it. Play multiple audio files simultaneously with Raspberry Pi Artist’s Website: http://www.saradittrich.com/ Blog Post: http://www.esologic.com/multi-audio/ Ever…
-

Drake Breaks World Record Playing Fortnite
Reading Time: 2 minutesUnless you’ve been living under a rock for the past few months Fornite: Battle Royale has been taking the online multiplayer PvP arena by storm, even big-named artists like Drake are obsessively playing it. When the 6 God isn’t going around donating large amounts of money to help better peoples lives (shout…
-

PS4 Startup Beep/Fan Noise
Reading Time: < 1 minuteHere is a video showing the PS4′s startup beep and the fan noise, due to the stupid intro and outro videos in this clip, don’t watch with headphones: Official Source: http://www.vg247.com/2013/09/25/check-out-ps4s-startup-beep-and-fan-noise/ http://www.youtube.com/watch?v=RZX4NzQ2084&feature=player_embedded