Schlagwort: robotics

  • Learning with Raspberry Pi — robotics, a Master’s degree, and beyond

    Learning with Raspberry Pi — robotics, a Master’s degree, and beyond

    Reading Time: 5 minutes

    Meet Callum Fawcett, who shares his journey from tinkering with the first Raspberry Pi while he was at school, to a Master’s degree in computer science and a real-life job in programming. We also get to see some of the awesome projects he’s made along the way.

    I first decided to get a Raspberry Pi at the age of 14. I had already started programming a little bit before and found that I really enjoyed the language Python. At the time the first Raspberry Pi came out, my History teacher told us about them and how they would be a great device to use to learn programming. I decided to ask for one to help me learn more. I didn’t really know what I would use it for or how it would even work, but after a little bit of help at the start, I quickly began making small programs in Python. I remember some of my first programs being very simple dictionary-type programs in which I would match English words to German to help with my German homework.

    Learning Linux, C++, and Python

    Most of my learning was done through two sources. I learnt Linux and how the terminal worked using online resources such as Stack Overflow. I would have a problem that I needed to solve, look up solutions online, and try out commands that I found. This was perhaps the hardest part of learning how to use a Raspberry Pi, as it was something I had never done before, but it really helped me in later years when I would use Linux more than Windows. For learning programming, I preferred to use books. I had a book for C++ and a book for Python that I would work through. These were game-based books, so many of the fun projects that I did were simple text-based games where you typed in responses to questions.

    A family robotics project

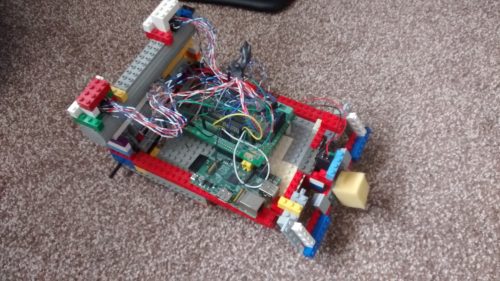
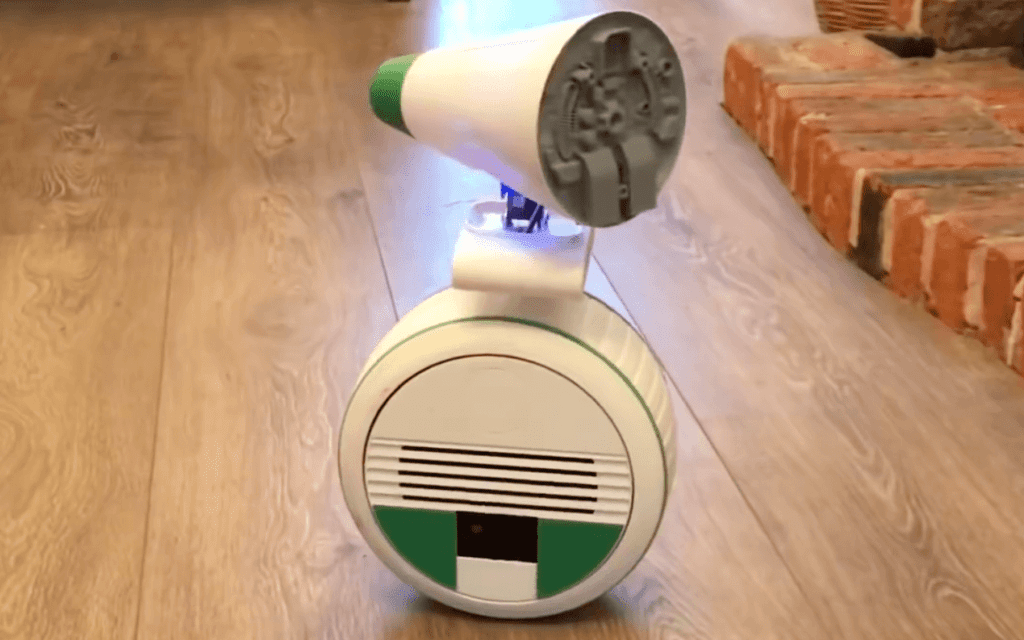
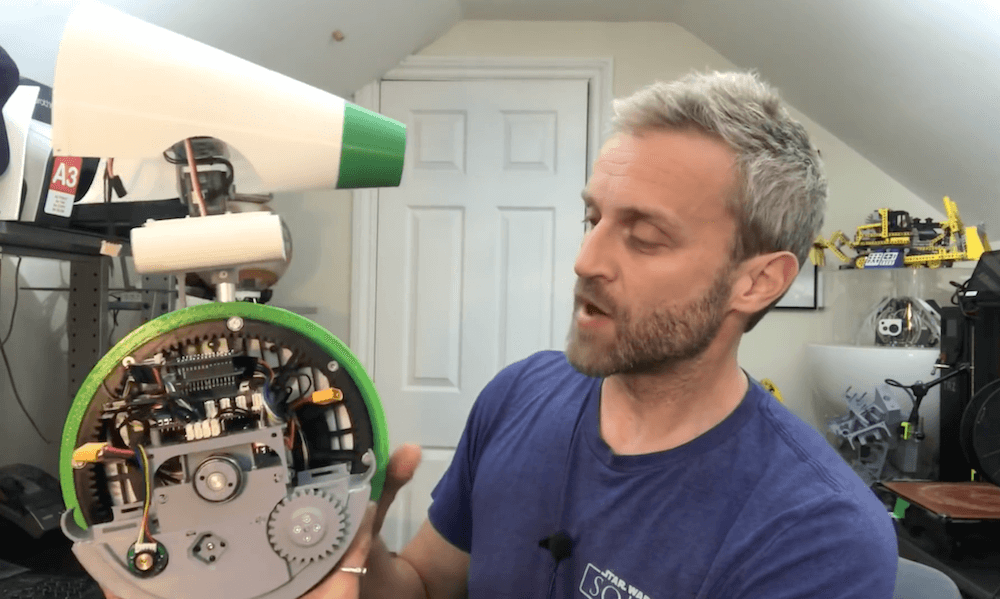
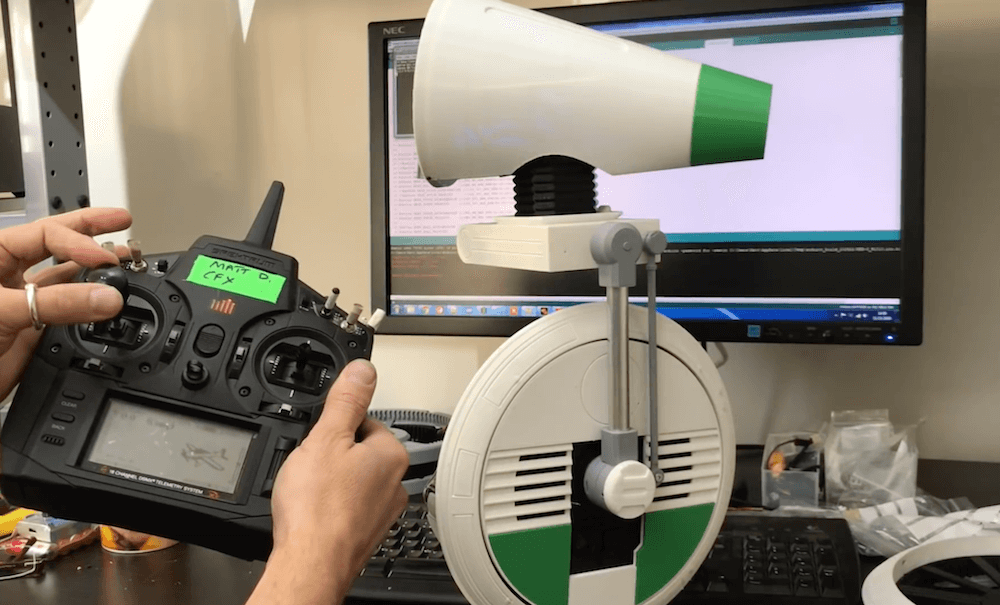
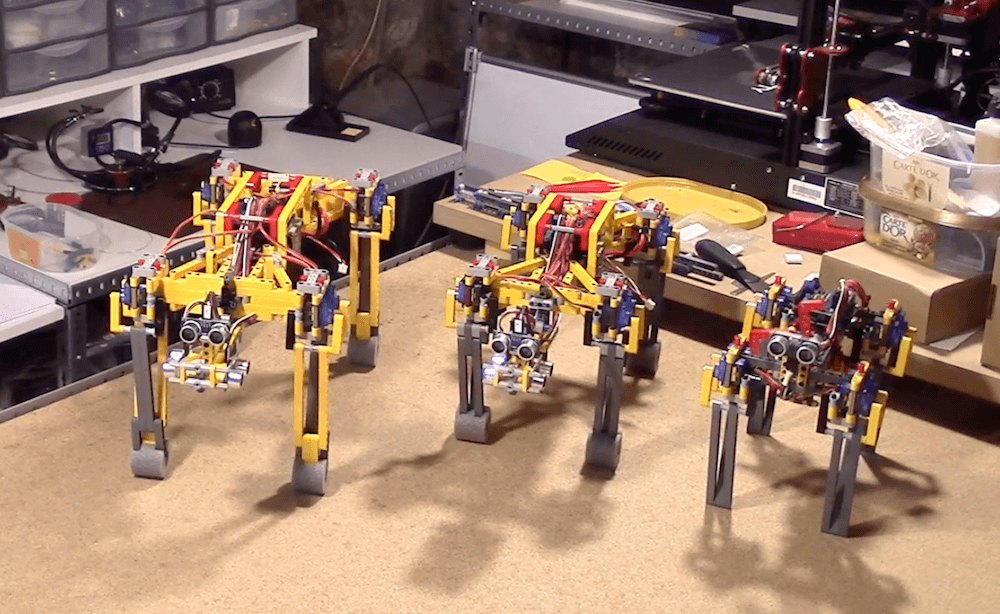
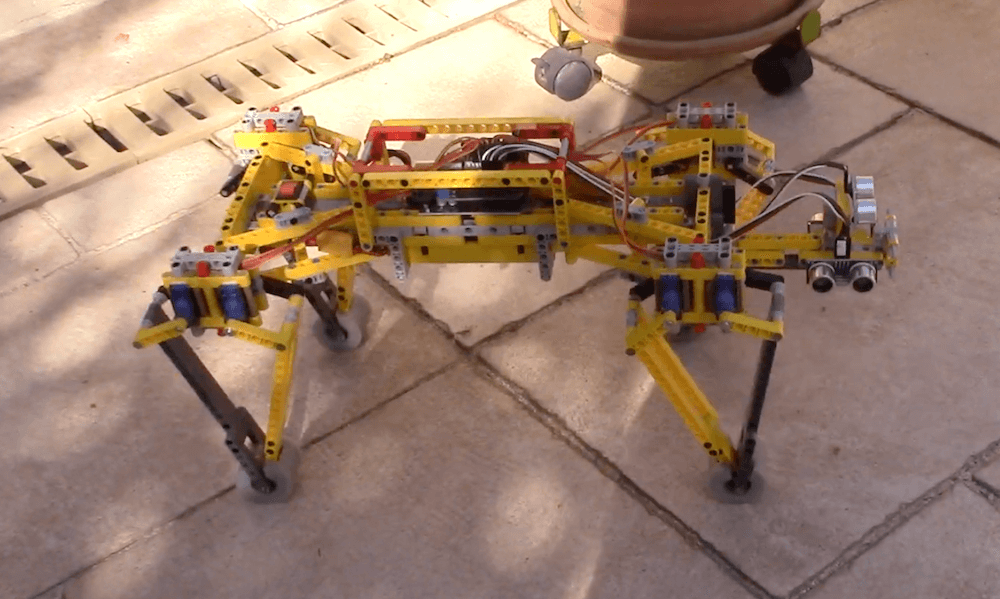
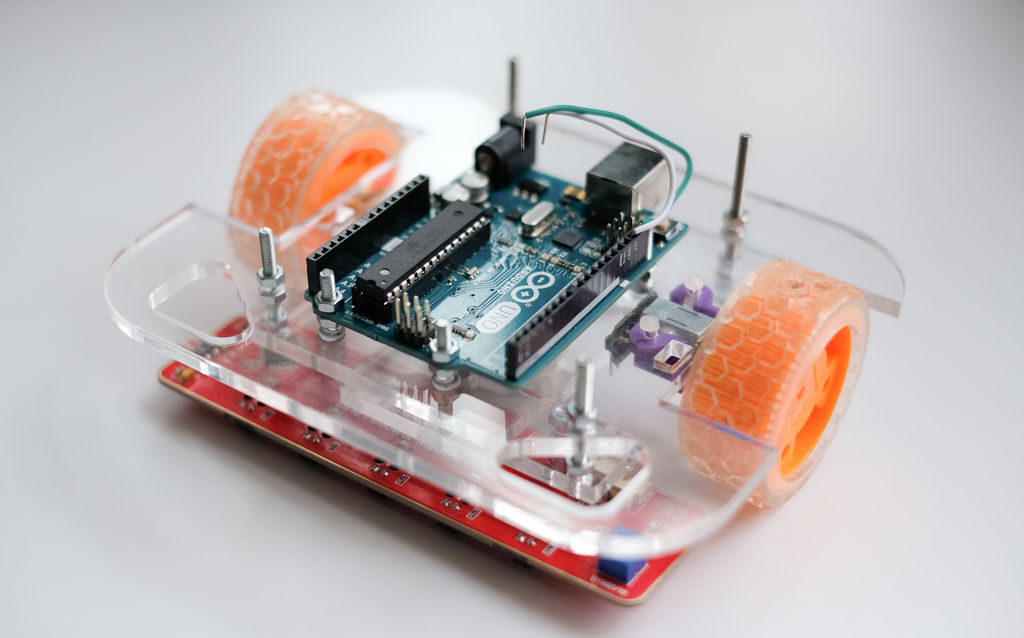
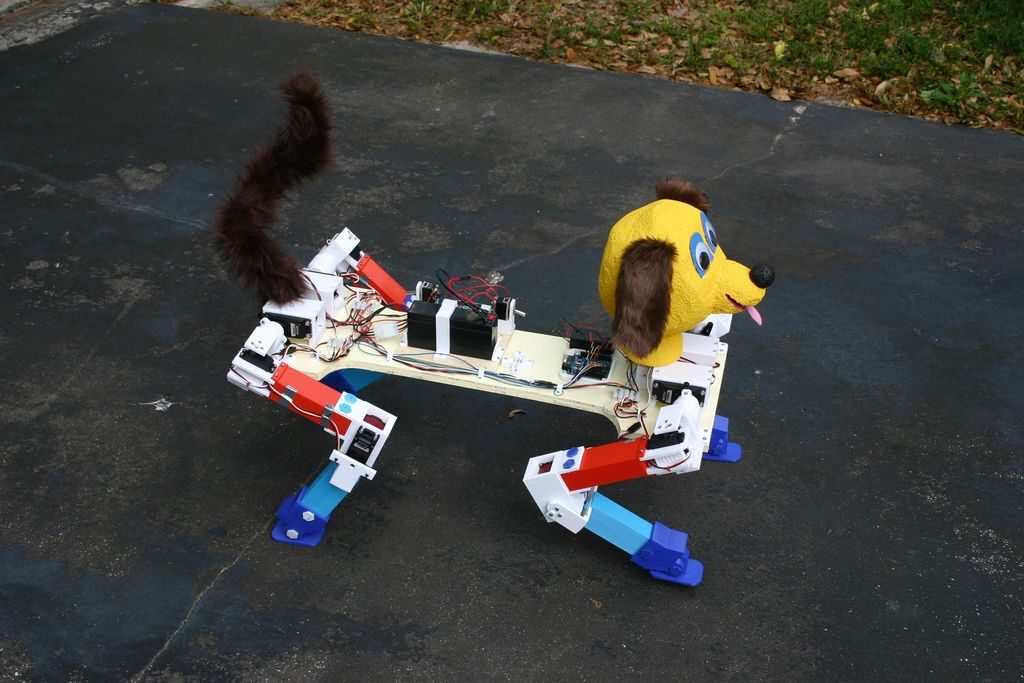
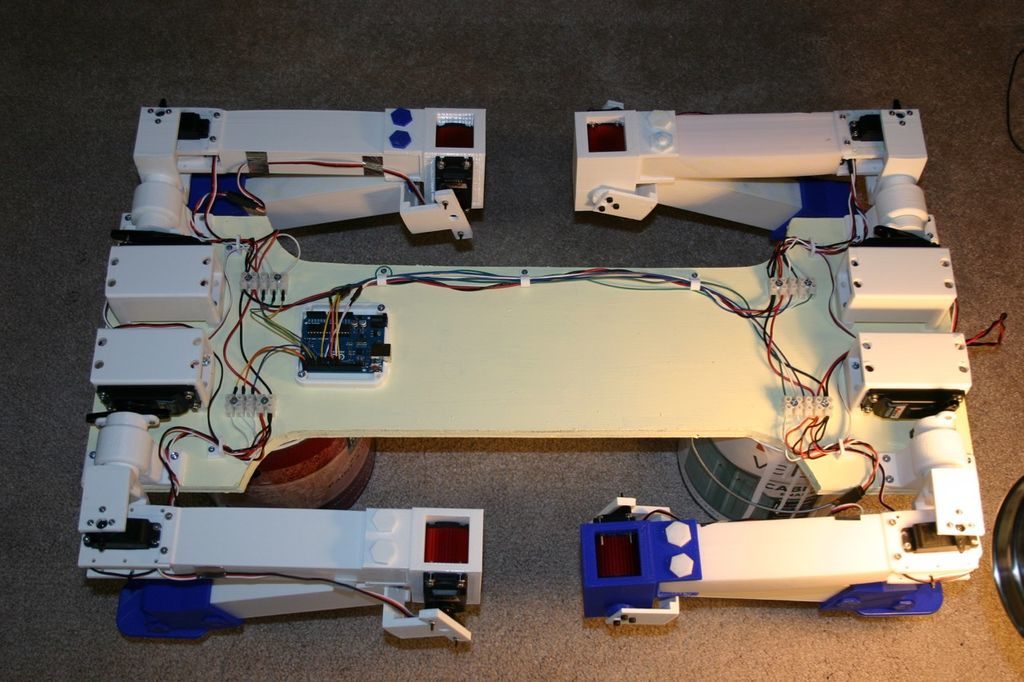
    The first robot Callum made using a Raspberry Pi

    By far the coolest project I did with the Raspberry Pi was to build a small robot (shown above). This was a joint project between myself and my dad. He sorted out the electronics and I programmed the robot. It was a great opportunity to learn about robotics and refine my programming skills. By the end, the robot was capable of moving around by itself, driving into objects, and then reversing and trying a new direction. It was almost like an unintelligent Roomba that couldn’t hoover, but I spent many hours improving small bits and pieces to make it as easy to use as possible. My one wish that I never managed to achieve with my robot was allowing it to map out its surroundings. This was a very ambitious project at the time, since I was still quite inexperienced in programming. The biggest problem with this was calibrating the robot’s turning circle, which was never consistent so it was very hard to have the robot know where in the room it was.
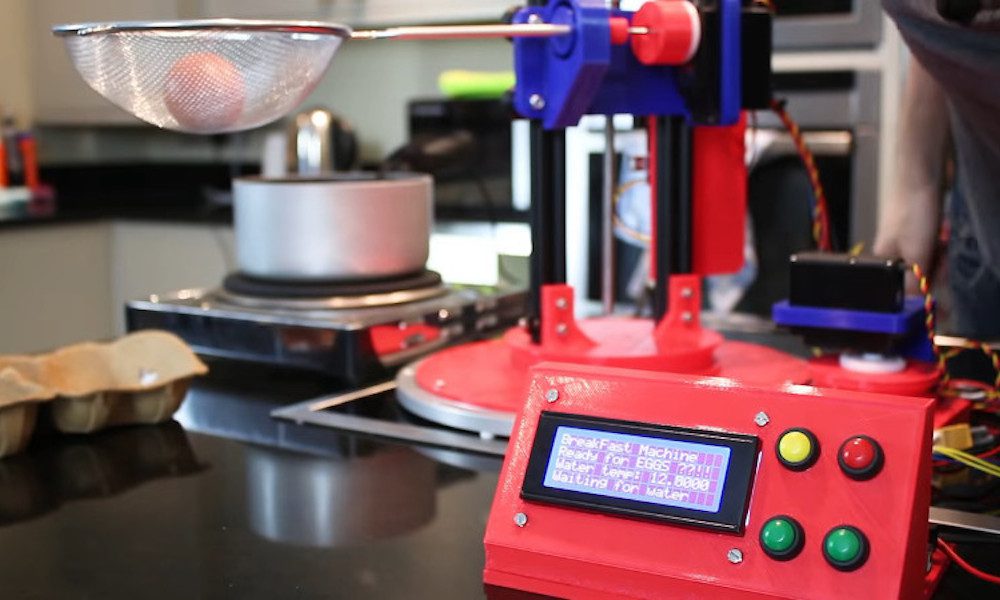
    Sense HAT maze game

    Another fun project that I worked on used the Sense HAT developed for the Astro Pi computers for use on the International Space Station. Using this, I was able to make a memory maze game (shown below), in which a player is shown a maze for several seconds and then has to navigate that maze from memory by shaking the device. This was my first introduction to using more interactive types of input, and this eventually led to my final-year project, which used these interesting interactions to develop another way of teaching.

    Learning programming without formal lessons

    I have now just finished my Master’s degree in computer science at the University of Bristol. Before going to university, I had no experience of being taught programming in a formal environment. It was not a taught subject at my secondary school or sixth form. I wanted to get more people at my school interested in this area of study though, which I did by running a coding club for people. I would help others debug their code and discuss interesting problems with them. The reason that I chose to study computer science is largely because of my experiences with Raspberry Pi and other programming I did in my own time during my teenage years. I likely would have studied history if it weren’t for the programming I had done by myself making robots and other games.

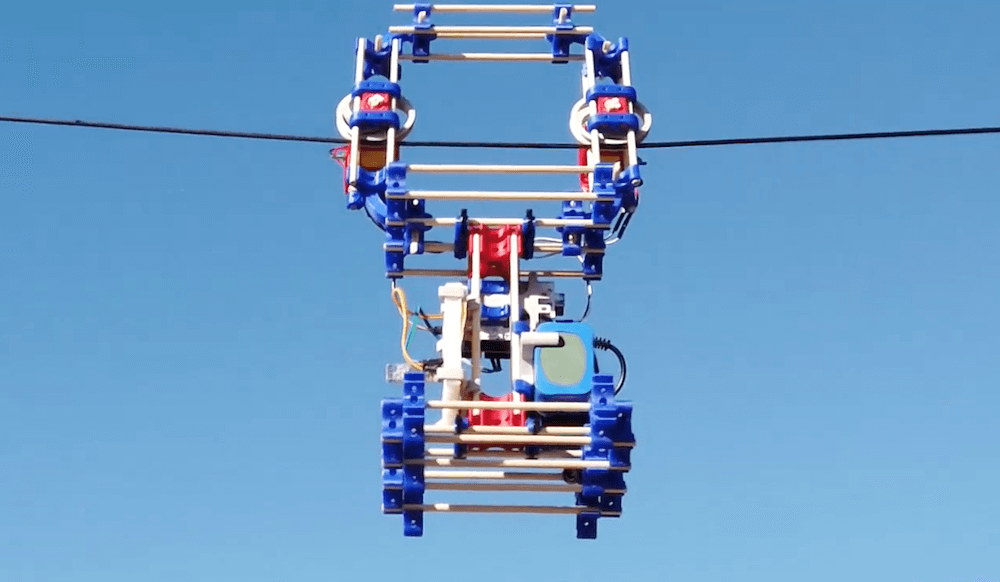
    Raspberry Pi has continued to play a part in my degree and extra-curricular activities; I used them in two large projects during my time at university and used a similar device in my final project. My robot experience also helped me to enter my university’s ‘Robot Wars’ competition which, though we never won, was a lot of fun.

    A tool for learning and a device for industry

    Having a Raspberry Pi is always useful during a hackathon, because it’s such a versatile component. Tech like Raspberry Pi will always be useful for beginners to learn the basics of programming and electronics, but these computers are also becoming more and more useful for people with more experience to make fun and useful projects. I could see tech like Raspberry Pi being used in the future to help quickly prototype many types of electronic devices and, as they become more powerful, even being used as an affordable way of controlling many types of robots, which will become more common in the future.

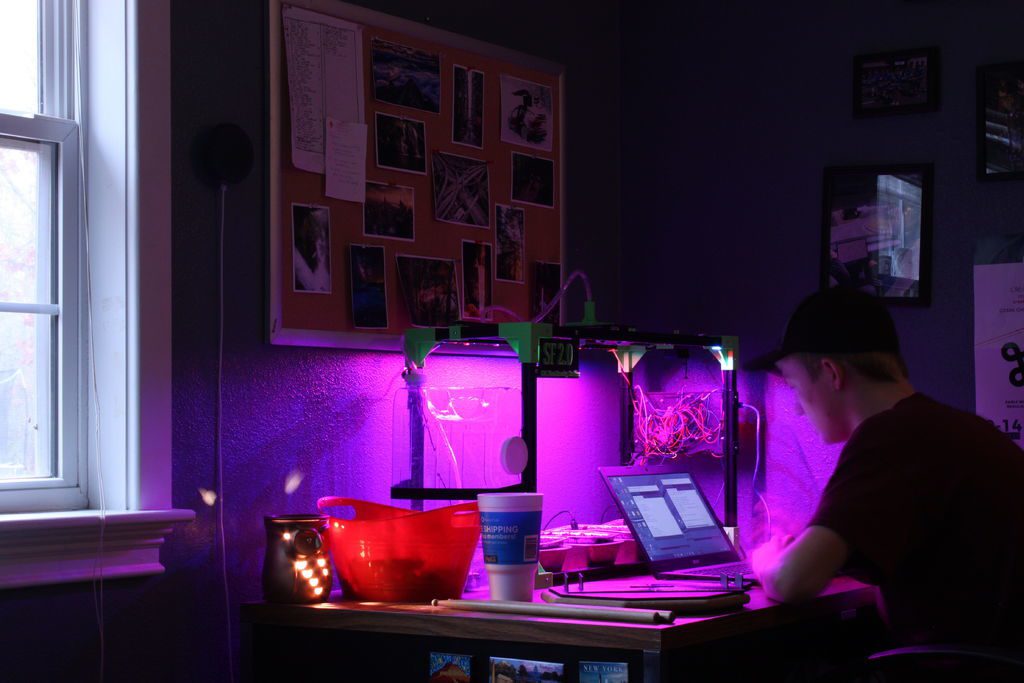
    Our guest blogger Callum

    Now I am going on to work on programming robot control systems at Ocado Technology. My experiences of robot building during my years before university played a large part in this decision. Already, robots are becoming a huge part of society, and I think they are only going to become more prominent in the future. Automation through robots and artificial intelligence will become one of the most important tools for humanity during the 21st century, and I look forward to being a part of that process. If it weren’t for learning through Raspberry Pi, I certainly wouldn’t be in this position.

    Cheers for your story, Callum! Has tinkering with our tiny computer inspired your educational or professional choices? Let us know in the comments below. 

    Website: LINK

  • Meet TELEBOT, the terrifying telepresence robot

    Meet TELEBOT, the terrifying telepresence robot

    Reading Time: 2 minutes

    Meet TELEBOT, the terrifying telepresence robot

    Arduino TeamJune 1st, 2020

    The Internet has been perhaps more important than ever to keep us connected these days. Available technology, however, apparently wasn’t good enough for brothers Hunter and Josh Irving, who built their own telepresence robot using parts on-hand during their own two-person hackathon.

    The robot they came up with, dubbed TELEBOT, features a partially 3D-printed face along with a set of chattering teeth and eyes recycled from an antique doll. An Arduino Uno is used to take audio signals from remote “guests” via a standard 3.5mm cable, simulating their facial expressions with servos that drive TELEBOT’s mouth and LED-lit eyes. 

    The duo also made TELEBOT’s “body” out of an adjustable lamp for manual movement. And, as an added bonus, the device is capable of glowing in the dark and can be customized with a wizard, cowboy or top hat. 

    While it might not be the most comforting robot you’ve ever seen, it looks like a fun build! 

    [youtube https://www.youtube.com/watch?v=XXLaeMre5Ac?feature=oembed&w=500&h=281]

    Website: LINK

  • GoodBoy is a robot dog that runs on Arduino

    GoodBoy is a robot dog that runs on Arduino

    Reading Time: < 1 minute

    GoodBoy is a robot dog that runs on Arduino

    Arduino TeamMay 27th, 2020

    Daniel Hingston wanted to build a four-legged walking robot for several years, and with current coronavirus restrictions he finally got his chance. His 3D-printed robodog, dubbed “GoodBoy,” is reminiscent of a miniature version of Boston Dynamics’ Spot, which helped inspire the project. 

    It’s extremely clean, with wiring integrated into the legs mid-print. Two micro servos per leg move it in a forward direction, controlled by an Arduino Uno.

    Obstacle avoidance is provided by a pair of ultrasonic sensor “eyes,” allowing it to stop when something is in its path. An LDR sensor is also implemented, which when covered by its human minder commands it to present its paw for shaking.

    Be sure to check out a short demo of GoodBoy below! 

    [youtube https://www.youtube.com/watch?v=uE5hZhkQkwI?feature=oembed&w=500&h=281]

    Website: LINK

  • This mouth mechanism is controlled by your typing

    This mouth mechanism is controlled by your typing

    Reading Time: < 1 minute

    This mouth mechanism is controlled by your typing

    Arduino TeamApril 21st, 2020

    Will Cogley, known for his awesome animatronics, has created a robotic mouth that’s already a work of art and could form the basis of something even more amazing. 

    The device features an array of servo mechanisms to actuate its jaw, forceps, cheeks, and a tongue. The cheek assemblies are particularly interesting, employing two servos each and a linkage system that allows it to move in a variety of positions.

    For control, the project uses a Python program to break typed sentences up into individual sounds. It then sends these to an Arduino, which poses the mouth in sequence. Cogley has also experimented with microphone input and hopes to explore motion capture with it in the future.

    [youtube https://www.youtube.com/watch?v=mEAz-72ZjKE?feature=oembed&w=500&h=281]

    Website: LINK

  • Meet Aster, the 3D-printed humanoid robot

    Meet Aster, the 3D-printed humanoid robot

    Reading Time: 2 minutes

    Meet Aster, the 3D-printed humanoid robot

    Arduino TeamNovember 29th, 2019

    If you’d like to build your own vaguely humanoid robot, but don’t care about it getting around, then look no farther than Aster

    The 3D-printed bot is controlled by an Arduino Uno, with a servo shield to actuate its 16 servo motors. This enables it to move its arms quite dramatically as seen in the video below, along with its head. The legs also appear to be capable of movement, though not meant to walk, and is supported with a column in the middle of its structure.

    Aster’s head display is made out of an old smartphone, and in the demo it shows its eyes as green geometric objects, an animated sketch, and then, somewhat shockingly, as different humans. Print files for the project are available here and the design is actually based on the more expensive Poppy Humanoid.

    [youtube https://www.youtube.com/watch?v=-cr56cqPjIE?feature=oembed&w=500&h=281]

    Website: LINK

  • Improve human-robot collaboration with GhostAR

    Improve human-robot collaboration with GhostAR

    Reading Time: 2 minutes

    Improve human-robot collaboration with GhostAR

    Arduino TeamNovember 26th, 2019

    As robotics advance, the future could certainly involve humans and automated elements working together as a team. The question then becomes, how do you design such an interaction? A team of researchers from Purdue University attempt to provide a solution with their GhostAR system.

    The setup records human movements for playback later in augmented reality, while a robotic partner is programmed to work around a “ghost” avatar. This enables a user to plan out how to collaborate with the robot and work out kinks before actually performing a task.

    GhostAR’s hardware includes an Oculus Rift headset and IR LED tracking, along with actual robots used in development. Simulation hardware consists of a six-axis Tinkerkit Braccio robot, as well as an Arduino-controlled omni-wheel base that can mount either a robot an arm or a camera as needed.

    More information on the project can be found in the team’s research paper.

    [youtube https://www.youtube.com/watch?v=YQMQQe4y7qE?feature=oembed&w=500&h=281]

    With GhostX, whatever plan a user makes with the ghost form of the robot while wearing an augmented reality head mount is communicated to the real robot through a cloud connection – allowing both the user and robot to know what the other is doing as they perform a task.
    The system also allows the user plan a task directly in time and space and without any programming knowledge.

    First, the user acts out the human part of the task to be completed with a robot. The system then captures the human’s behavior and displays it to the user as an avatar ghost, representing the user’s presence in time and space.

    Using the human ghost as a time-space reference, the user programs the robot via its own ghost to match up with the human’s role. The user and robot then perform the task as their ghosts did.

    Website: LINK

  • This YouTuber recreated the D-O droid from Star Wars: Episode 9 with Arduino

    This YouTuber recreated the D-O droid from Star Wars: Episode 9 with Arduino

    Reading Time: 2 minutes

    This YouTuber recreated the D-O droid from Star Wars: Episode 9 with Arduino

    Arduino TeamNovember 21st, 2019

    While it’s yet to make its premiere, Matt Denton has already built the D-O droid from Star Wars: The Rise of Skywalker using a MKR WiFi 1010 for control, along with a MKR IMU Shield and a MKR Motor Carrier

    The droid scoots around on what appears to be one large wheel, which conceals the Arduino boards as well as other electronics, batteries, and mechanical components. Denton’s wheel design is a bit more complicated mechanically than it first appears, as its split into a center section, with thin drive wheels on the side that enable differential steering.

    On top, a cone-shaped head provides sounds and movement, giving the little RC D-O a ton of personality. The droid isn’t quite finished as of the video below, but given how well it works there, the end product should be amazing!

    [youtube https://www.youtube.com/watch?v=NxBvnvnvBc0?feature=oembed&w=500&h=281]

    Website: LINK

  • Rolling robot transformed into a zip lining contraption

    Rolling robot transformed into a zip lining contraption

    Reading Time: 2 minutes

    Rolling robot transformed into a zip lining contraption

    Arduino TeamNovember 11th, 2019

    MOREbot is an Arduino-powered educational robotic platform that’s currently available for pre-order. While the base kit is geared (literally and figuratively) towards building a small two-motor robot, MORE Technologies CEO Canon Reeves shows off how it can be reconfigured into an RC zip lining device in the video below.

    The project uses the kit’s DC motors for traversing the cable, with O-rings that normally form the tires taken off in order to grip the top of a paracord. Everything is controlled by an Arduino Uno and a motor shield, while a Bluetooth module provides wireless connectivity. Control is via an iPad app, which simply rotates both motors at the same time as needed.

    Since the parts are all modular, Reeves is planning on adding a few other attachments including a GoPro camera mount and perhaps even a servo that lets him drop a payload like a water balloon from it.

    [youtube https://www.youtube.com/watch?v=ejZgfX6N2vg?feature=oembed&w=500&h=281]

    Website: LINK

  • Competition robot picks up (almost) all the balls

    Competition robot picks up (almost) all the balls

    Reading Time: < 1 minute

    Competition robot picks up (almost) all the balls

    Arduino TeamNovember 9th, 2019

    For the Warman Design and Build Competition in Sydney last month, Redditor ‘Travman_16 and team created an excellent Arduino-powered entry. The contest involved picking up 20 payloads (AKA balls) from a trough, and delivering them to a target trough several feet away in under 60 seconds.

    Their autonomous project uses Mecanum wheels to move in any direction, plus a four-servo arm to collect balls in a box-like scoop made out of aluminum sheet. 

    An Arduino Mega controls four DC gear motors via four IBT-4 drivers, while a Nano handles the servos. As seen in the video, it pops out of the starting area, sweeps up the balls and places them in the correct area at an impressive ~15 seconds. 

    It manages to secure all but one ball on this run, and although that small omission was frustrating, the robot was still able to take fifth out of 19 teams. 

    Website: LINK

  • These LEGO linkage walkers wander under Arduino control

    These LEGO linkage walkers wander under Arduino control

    Reading Time: 2 minutes

    These LEGO linkage walkers wander under Arduino control

    Arduino TeamSeptember 27th, 2019

    YouTuber Oracid1 has developed a unique family of four-legged robots, dubbed “FiveBarQuads.”

    The quadrupeds all feature ultrasonic sensing for navigation and a body made out of LEGO components — and as seen in the first video below, his latest (and largest) version is able to navigate quite nicely on its own. It’s even able to traverse a grate and maneuver around a potted plant, though chair legs are understandably a bit tricky.

    The robots use an Arduino Uno for control along with a total of 16 micro servos in its shoulders (four each) in order to move the limbs. Two servos are employed to actuate each upper linkage for the legs, which are attached to bottom sections, and finally to the feet portion through a series of joints. This allows for an interesting locomotion capability that could be applicable in a variety of situations.

    [youtube https://www.youtube.com/watch?v=CPP0dnm1N3E?feature=oembed&w=500&h=281]

    [youtube https://www.youtube.com/watch?v=XhwKra9lX_I?feature=oembed&w=500&h=281]

    [youtube https://www.youtube.com/watch?v=dyPRMdeFZL4?feature=oembed&w=500&h=281]

    Website: LINK

  • Robo-snake slithers across the ground under Arduino control

    Robo-snake slithers across the ground under Arduino control

    Reading Time: < 1 minute

    Robo-snake slithers across the ground under Arduino control

    Arduino TeamSeptember 13th, 2019

    What has a dozen servos, a WiFi camera, and an Arduino Mega for a brain? Nevon Projects’ snake-bot, of course! 

    This impressive robot uses a total of 12 servos for locomotion and can travel across a variety of surfaces under the control of Android app, or autonomously via a sensor mounted to a smaller servo on the head.

    The snake’s electronics are split up between a head section that houses batteries and the sensor, and a tail bearing electronics including the Arduino. 

    The project is available as a kit, or could certainly provide inspiration for your own project if you want to start from scratch. Check it out oscillating across the ground on tiny rollers in the video below, along with a surprising transformation into a square shape at just before the 1:45 mark.

    [youtube https://www.youtube.com/watch?v=UC-CfQxdCn8?feature=oembed&w=500&h=281]

    Website: LINK

  • Designing a modular and ambidextrous four-fingered robot hand

    Designing a modular and ambidextrous four-fingered robot hand

    Reading Time: 2 minutes

    Designing a modular and ambidextrous four-fingered robot hand

    Arduino TeamSeptember 4th, 2019

    Gray Eldritch (AKA The Technomanc3r) has been working on a robotic hand for some time now, and has settled (so far) on a design with three independent servo-actuated fingers and a thumb. He’s also implemented a wrist assembly to rotate it back and forth, with an Arduino Uno hidden inside for an entirely self-contained gripper unit.

    Each of the three fingers is controlled by a single MG996R servo, as is the wrist, while the thumb adds a second SG90 servo to allow it to move on two axes. The fingers are modular, so they can be swapped out as needed, and you even change the thumb position for ambidextrous operation. 

    It remains to be seen what Eldritch plans to do with the gripper, but it looks brilliant by itself in the video below.

    [youtube https://www.youtube.com/watch?v=Ocl3HEsCcv4?feature=oembed&w=500&h=281]

    Website: LINK

  • Build your own Arduino-based delta robot with Delta X

    Build your own Arduino-based delta robot with Delta X

    Reading Time: < 1 minute

    Build your own Arduino-based delta robot with Delta X

    Arduino TeamAugust 29th, 2019

    If you’ve ever seen a delta 3D printer work, you’ve certainly been amazed at the careful coordination of three motors to accurate position a carriage. While impressive in this role, delta robots can be used for much more, from laser engraving, to pick-and-place operations, to automated phone testing, or even playing the piano.

    To make these systems a bit more accessible, Doan Hong Trung has developed an open source delta robot — dubbed Delta X — based on an Arduino Mega and a RAMPS 1.4 board that can do all of these jobs and more. 

    Details on the modular kit are available here, along with many more clips of it in action. It’s slated to debut on Kickstarter soon, and you can sign up on deltaxrobot.com to be notified when it launches. Design files for the build will be released when successfully funded.

    [youtube https://www.youtube.com/watch?v=PeB19IwxBGI?feature=oembed&w=500&h=281]

    [youtube https://www.youtube.com/watch?v=6vRmNTkQTnY?feature=oembed&w=500&h=281]

    [youtube https://www.youtube.com/watch?v=fu5K6AtRAHI?feature=oembed&w=500&h=281]

    [youtube https://www.youtube.com/watch?v=Xz7AmB9xqTY?feature=oembed&w=500&h=281]

    Website: LINK

  • VR boxing robot actually punches back

    VR boxing robot actually punches back

    Reading Time: 2 minutes

    VR boxing robot actually punches back

    Arduino TeamMay 15th, 2019

    VR environments are meant to be immersive, but if you’ve ever thought what was missing is being actually pummeled by robotic fists, then James Bruton’s newest project could be just the thing. 

    Bruton recently teamed up with students from Portsmouth University to build a robot that works in the real world, and coordinates its movements with a virtual setting displayed on the human’s headset.

    The robot itself is controlled by an Arduino Mega, and features a differential (tank) drive with encoders for feedback. Shoulders can tilt from left to right, and the actual punching motion is handled by pneumatic actuators built from modified bicycle pumps. Robo-fists are covered by boxing gloves to keep humans relatively safe, and flesh-based competitors are given a small shield and sword-bat with which to fight back!

    I worked on this project with final year degree students in Computer Games Technology at Portsmouth University CCI faculty. The robot hardware is controlled over a serial interface, the team built an VR game which controls the robot, so when you get hit in VR you get hit in real life! The robot is tracked back into VR with Vive trackers so it stays in sync.

    [youtube https://www.youtube.com/watch?v=OYfzaAWIBpc?feature=oembed&w=500&h=281]

    Website: LINK

  • Clean your whiteboard automatically with Wipy

    Clean your whiteboard automatically with Wipy

    Reading Time: 2 minutes

    Clean your whiteboard automatically with Wipy

    Arduino TeamMay 8th, 2019

    If you have to do a lot of drawing on a whiteboard, you also have to clean it. Why not have a robot do this instead? That’s the idea behind Wipy, an Arduino Uno-based robot that uses magnets to stick to the board, along with grippy wheels and motors to power across your scribbles.

    Wipy employs an array of IR sensors that enable it to act as a line follower, plus a time-of-flight (ToF) sensor to detect your hand on the board. While one might assume this sensing arrangement would prevent it from erasing your work-in-progress, it annoyingly allows it to start erasing immediately when you start drawing. At least it has a cute LED face!

    Did you ever get tired of cleaning the whiteboard? Have you ever wondered how much your life would improve if a robot could do this for you? You now have the chance to make this a reality with Wipy: the overly motivated whiteboard cleaner. Wipy will properly clean your embarrassingly bad drawings, and it will even do it with a cute smile. You don’t even need to activate it! It will just clean the board when you least expect it… Uhhh…*cough cough*…we, of course, mean: when you need it most!

    – Our future friend will be able to stick to the board using magnets and is able to move through space using grippy wheels.

    – It will be able to follow a line and erase it using a line-following sensor and a sponge.

    – Wipy has the ability to measure the distance to your hand using a time-of-flight sensor.

    – We will give Wipy a cute personality using a small OLED screen.

    [youtube https://www.youtube.com/watch?v=_uObXbdwi4w?feature=oembed&w=500&h=281]

    Website: LINK

  • Automated plant tending with Arduino

    Automated plant tending with Arduino

    Reading Time: 2 minutes

    Automated plant tending with Arduino

    Arduino TeamMay 8th, 2019

    Do you like plants, but not so much tending to and watering them? If that sounds like you, then you might be interested in your own CNC growing machine. The system—created by 15-year-old maker “daily3dprinting”—is controlled by an Arduino Uno, and uses a single stepper motor to pull a watering head into position based on hygrometer readings.

    A relay is used to turn the grow light on at 6am and off at 8pm, and another to activate the unit’s water pump. A third relay is employed to power off the L298N stepper driver when not needed. 

    The project took home second place in the math and engineering category at daily3dprinting’s high school science fair, and more info on the build is available in its write-up here.

    Website: LINK

  • Bring your own robo-dog to life with Arduino!

    Bring your own robo-dog to life with Arduino!

    Reading Time: < 1 minute

    Bring your own robo-dog to life with Arduino!

    Arduino TeamMarch 27th, 2019

    Would you like a dog? Would you like a robot dog? If so, then this build by Michael Rigsby could be a great starting point. 

    Rigbsy’s robotic pet features four servo-driven legs, with two-axis shoulder movement, as well as an articulated knee joint. As seen in the video below, it’s capable of picking itself up off the ground, and can then walk using a slow side-to-side gait.

    An Arduino Uno uses the majority of its I/O pins to control the legs, and as of now, it travels forward with no directional control or sensor input. 

    Instructions for the project, along code and 3D print files, are available in Rigsby’s write-up.

    [youtube https://www.youtube.com/watch?v=kcIfsCcEjcs?feature=oembed&w=500&h=281]

    Website: LINK

  • Arduino-powered omni robot gets an upgrade

    Arduino-powered omni robot gets an upgrade

    Reading Time: < 1 minute

    Arduino-powered omni robot gets an upgrade

    Arduino TeamJanuary 29th, 2019

    When we last saw this omni robot by Jeremy S. Cook, it was lurching around under Arduino Nano and Bluetooth command. After much work, he finally has it to a state where it rolls nicely on a flat surface—even carrying a little strandbeest at just after 8:30 in the demo video.

    The biggest revision for the robot was new “grippier” wheels, but electronics were also enhanced, including a LiPo battery (with a voltage divider monitoring circuit), potentiometer for speed control, and LED eyes. 

    Changes were facilitated by a screw terminal board attached to the Nano, which minimized solder work, while keeping the robot’s wiring secure. More details and code are available here, while the upgrade/troubleshooting process can be seen in the video below.

    [youtube https://www.youtube.com/watch?v=uyCwNm4OX38?feature=oembed&w=500&h=281]

    Website: LINK

  • This robot is eggsactly what you need to cook breakfast

    This robot is eggsactly what you need to cook breakfast

    Reading Time: < 1 minute

    This robot is eggsactly what you need to cook breakfast

    Arduino TeamJanuary 17th, 2019

    Normally, boiling an egg involves heating water in a saucepan, then dropping an egg inside to be properly heated. James Bruton, however, now has a bit of help in the form of his breakfast-making robot. 

    The device uses two servos, along with a motor/encoder/screw assembly to rotate and lower the egg into place. It then takes it out after six minutes, and tips it out into a secondary container.

    As of now, temperature is manually controlled, but it’s tracked with a DS18B20 temperature sensor to initiate the egg lowering procedure. An Arduino Uno takes care of the lifting screw assembly, while an Arduino Mega handles everything else.

    [youtube https://www.youtube.com/watch?v=XTXuOAIRFFU?feature=oembed&w=500&h=281]

    Website: LINK