Schlagwort: raspberrypi

  • 25 Powerful Raspberry Pi Projects: part II

    25 Powerful Raspberry Pi Projects: part II

    Reading Time: 4 minutes

    Creative pursuits

    Etch-a-Sketch Art With Python

    Maker: Sunny Balasubramanian

    A classic toy featuring in many people’s childhoods, the Etch-a-Sketch allows you to draw pictures without making a mess, then wipe the board with a satisfying shake. Sunny used servos and a Raspberry Pi to take control of the dials, then used edge-finding image filters to create an Etch-a-Sketch ‘camera’.

    Emulate amazing images using an Etch-A-Sketch, servos and a Raspberry Pi

    Cubert

    Maker: Lorraine Underwood

    A beautiful 8×8×8 structure of ping pong balls, each containing a NeoPixel to create amazing colour patterns, and you can even play 3D Pac-Man. Of particular interest is Lorraine’s blog and talks on the project, where she is brutally honest about the difficulties of making such a unique object.

    Cubert is an incredible ping pong ball and NeoPixel art installation

    Network Knitting Machine

    Maker: Sarah Spencer

    One of the must-see exhibits at 2018’s Electromagnetic Field camp was ‘Stargazing’ by Sarah Spencer. This map of the universe measures a colossal 4.6 by 2.8 metres and was knitted on a hacked Brother mechanical knitting machine, controlled by an Arduino and Raspberry Pi. It’s even networked.

    The 'Stargazing' star map was created on a Raspberry Pi-programmed knitting machine

    True Compact Camera

    Maker: Martin Parker

    Raspberry Pi Zero can fit into some tiny places, but how about a vintage 110 format compact camera? Martin replaced the internals with a Raspberry Pi Zero and Camera Module. Don’t worry about film running out when your camera can take thousands of high-res snaps.

    True Compact Camera replaces film with Raspberry Pi

    Pi Clock 2

    Maker: Tim Richardson

    Tim’s clock is made up of two 64×32-pixel displays and displays information being relayed from a Raspberry Pi-controlled weather station. It features some clever energy-saving extras, such as a motion sensor to only update the screen when someone is in the room. It’s been to Parliament as part of the one-millionth Raspberry Pi celebrations.

    Pi Clock 2 displays weather information as well as the time

    Take photos from space!

    Maker: Surrey Satellites & University of Surrey

    Space is hard. Space, when you’re not SpaceX or NASA, is extremely hard, but that didn’t stop Surrey Satellites. Having secured a slot on Soyuz, they launched the DoT-1 satellite, which had a Raspberry Pi and camera on board supplied by the University of Surrey. It had a simple task: take a photo from orbit using commercially available off-the-shelf parts. We spoke to Surrey Satellites’ Director of Engineering, Rob Goddard.

    What inspired this project?

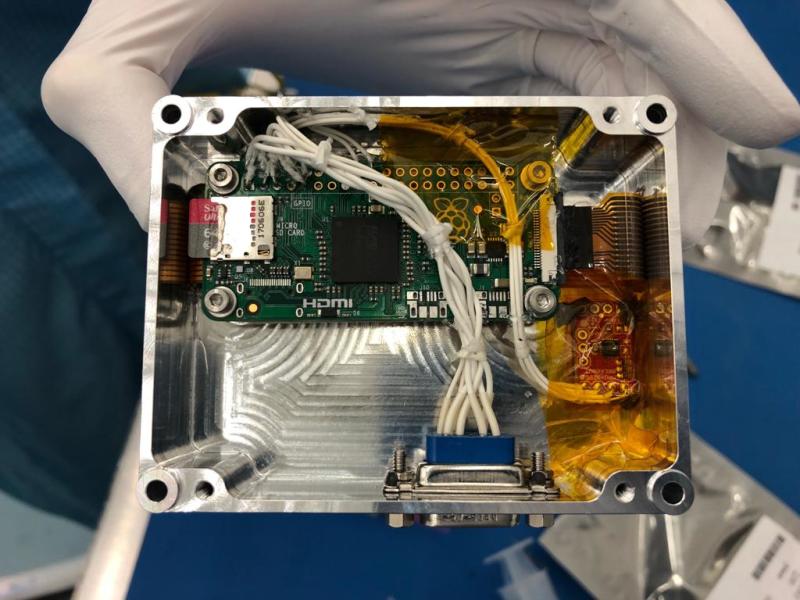
    Whilst the primary objective of the DoT-1 (Demonstration of Technology) mission was to fly the company’s next-generation avionics, there was space for some additional experimental payloads, hopefully stimulating the interest of our younger engineers. One of those experiments, designed and implemented in conjunction with the University of Surrey Space Centre, was to capture an image from space using a commercial-grade Raspberry Pi Zero computer and camera, store the data, and downlink it via a new data handling system on board the satellite.

    DoT-1 satellite internals complete with Raspberry Pi Zero and camera

    What challenges did you face?

    It was a surprisingly easy project! We performed some screening tests on three Raspberry Pi Zero computers to select the best performing over-temperature, and then packaged the computer and camera into a metal box. The standard camera lens was changed for a fish-eye lens. The remaining electronics were completely untouched.

    Are you happy with the result?

    We were certainly pleasantly surprised by the quality of both the still imagery and video capture from Raspberry PI Zero and camera. There could be some credible applications for low-cost computers and cameras of this type. We’re considering flying them as inspection cameras to confirm deployment of solar panels, or to view robotic arm movement.

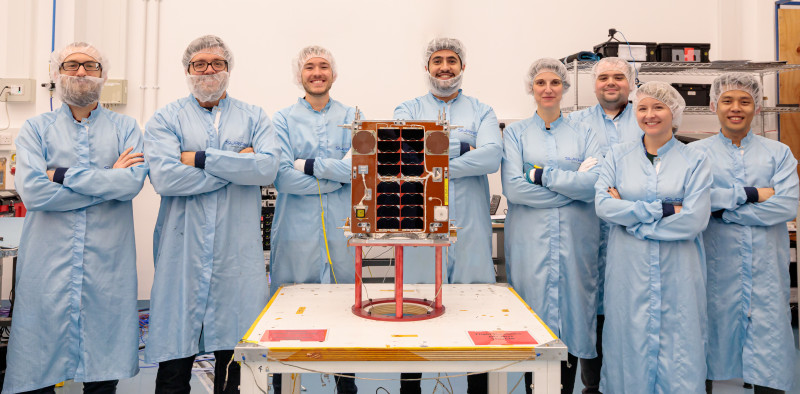
    Surrey Satellites with the Raspberry Pi-touting DoT-1 satellite

  • Raspberry Pi 4 vs Raspberry Pi 3B+

    Raspberry Pi 4 vs Raspberry Pi 3B+

    Reading Time: 5 minutes

    Raspberry Pi newcomers ask us to explain the difference between Raspberry Pi 4 and the older Raspberry Pi 3B+ models.

    Obviously, Raspberry Pi 4 is one better, but you can pick up a Raspberry Pi 3 for less money (and it’s more frequently found on sale). So should you buy the new Raspberry Pi 4, or pick up an older Raspberry Pi 3?

    The first thing to note is that there’s currently only one Raspberry Pi 4 model, but there are quite a few different Raspberry Pi 3 models. Here are some of the options:

    For the purposes of this article, we’re looking at Raspberry Pi 4 vs Raspberry Pi 3B+ (its closest predecessor). But there are many more Raspberry Pi boards available, including the smaller Pi Zero W and energy efficient Raspberry Pi 3 Model A+. As well as older Raspberry Pi 2 Model B and the Raspberry Pi 1 Model B.

    Raspberry Pi 4 vs Raspberry PI 3B+: CPU, RAM, and graphics

    Raspberry Pi 4 is a clear winner when it comes to pure specifications and hardware grunt. 

    Raspberry Pi 4 sports a faster 1.5GHz clock speed processor (up from the 1.4GHz found on Raspberry Pi 3B+). 

    Raspberry Pi 3 is no slouch, though: it also features a quad-core processor and the clock-speed of 1.4GHz is in the same ballpark.

    When it comes to RAM, though, Raspberry Pi 4 is streets ahead. As well as the entry-level 1GB configuration, you can get a 2GB model or 4GB model. When it comes to electronics and engineering projects, 1GB is often enough.

    Raspberry Pi 3 vs Raspberry Pi 4 performance

    For desktop computing, the 4GB Raspberry Pi 4 is a whole different animal to the Raspberry Pi 3B+ (see: Raspberry Pi 4 your next desktop PC in The MagPi magazine issue 85).

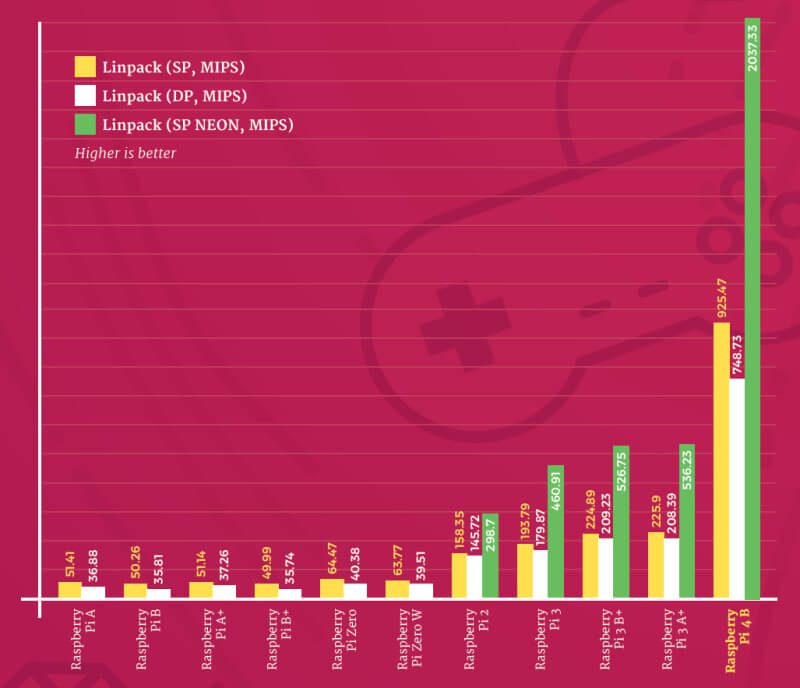
    Our extensive Raspberry Pi 4 benchmark tests show a tremendous increase in performance on the new Raspberry Pi 4 over Raspberry Pi 3B+ (and all earlier models):

    Raspberry Pi 4 Linpack benchmark test

    Raspberry Pi 4 Specs and Benchmarks

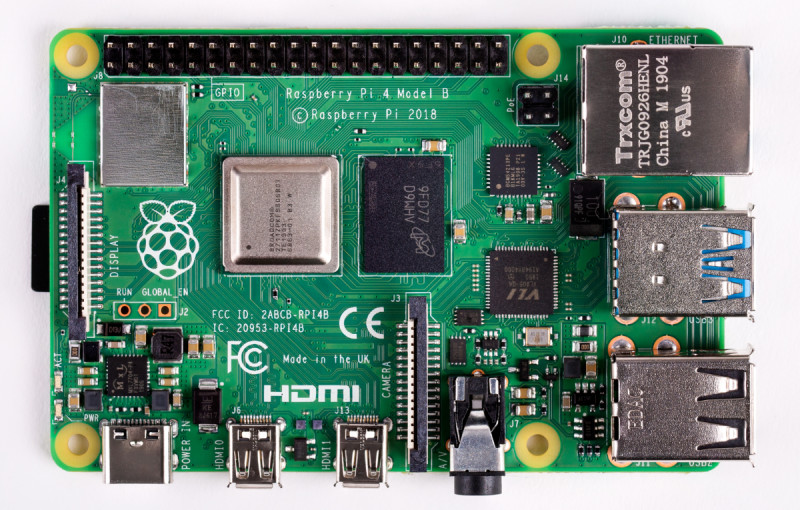
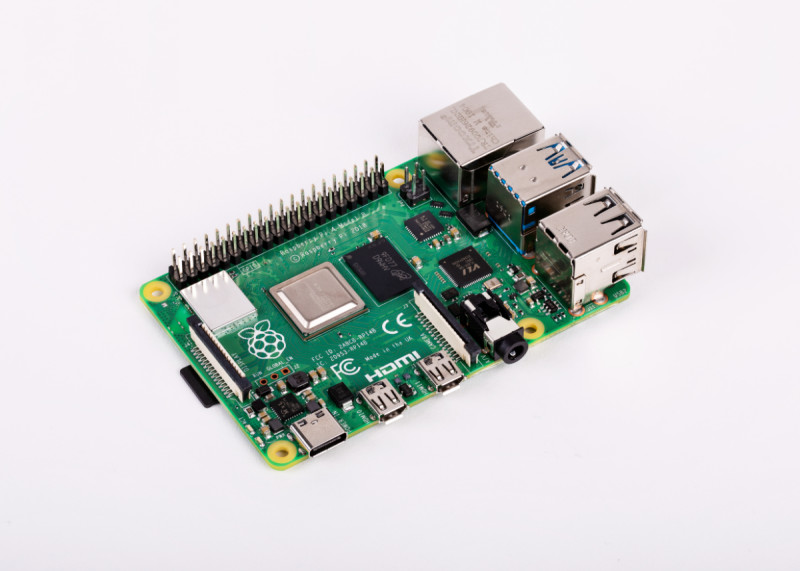
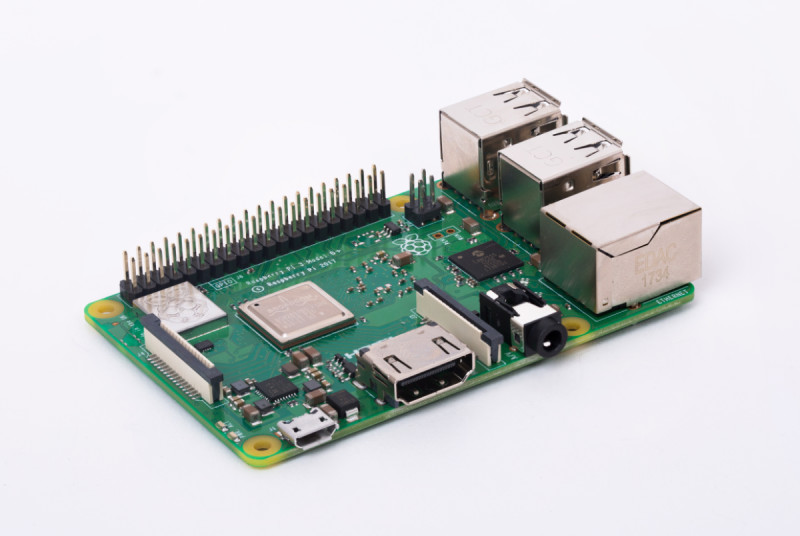
    Raspberry Pi 4 Board

    Raspberry Pi 4: CPU and RAM

    • Broadcom BCM2711, Quad-core Cortex-A72 (ARM v8) 64-bit SoC @ 1.5GHz

    • 1GB, 2GB, or 4GB LPDDR4-3200 SDRAM (depending on model)

    Raspberry Pi 3B+: CPU and RAM 

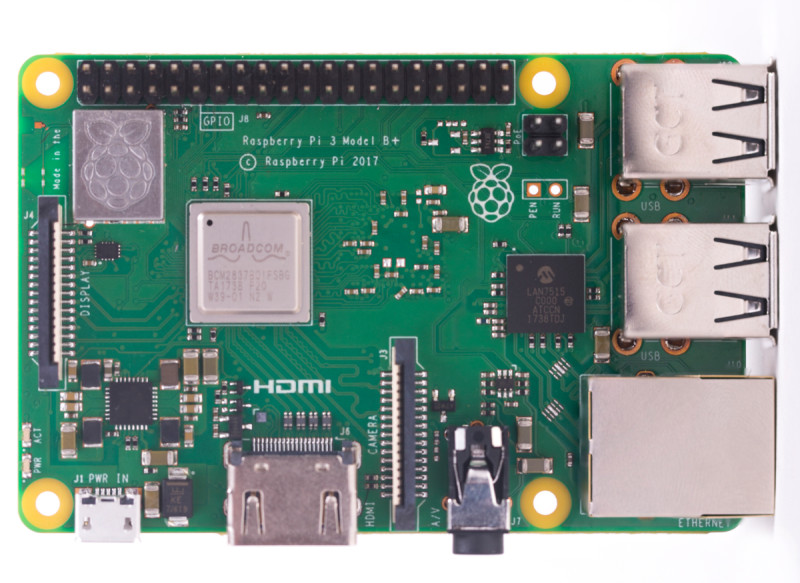
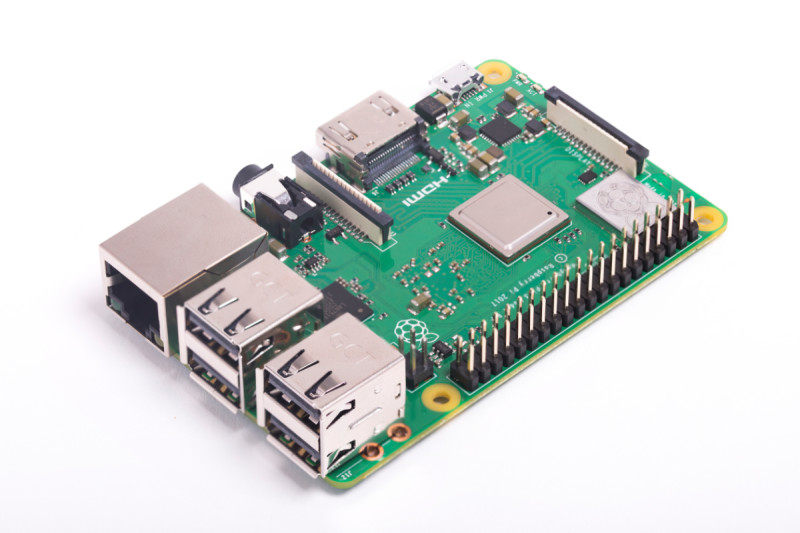
    Raspberry Pi 3B+ computer

    Connectivity and ports

    Both models of Raspberry Pi offer a range of connectivity options, including wireless LAN, Bluetooth, Ethernet, USB, and a 40-pin GPIO header (used to hook up electronic components and add specially designed Raspberry Pi HATs (Hardware Attached on Top).

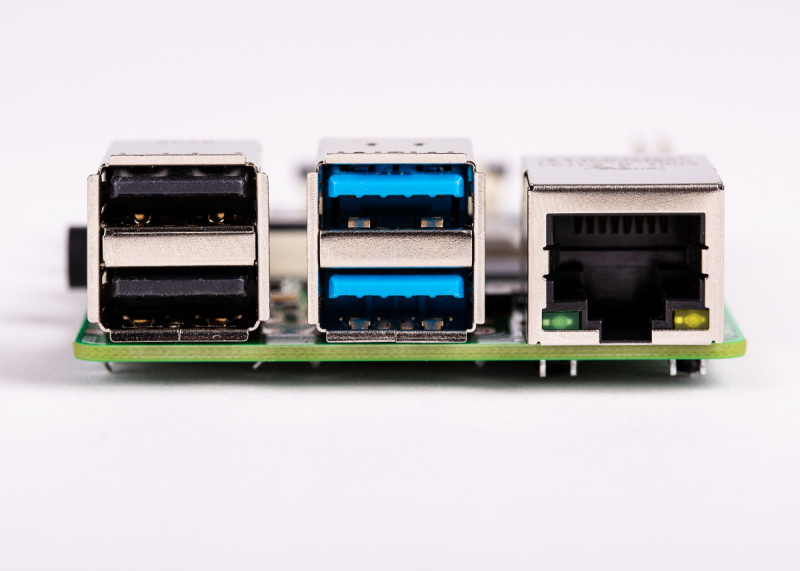
    Raspberry Pi 4 has a modern implementation of most of the connections. While wireless LAN is up-to-date on both models, Raspberry Pi 4 has Bluetooth 5.0 with improved speed, range, and capacity; much faster USB 3.0 ports; and unconstrained Gigabit Ethernet (which is constrained by the USB connection on the older Raspberry Pi 3).

    Both devices use a microSD card slot for loading the operating system and data storage.

    Raspberry Pi 4 connectivity

    • 2.4GHz and 5.0GHz IEEE 802.11ac wireless, Bluetooth 5.0, BLE

    • Gigabit Ethernet

    • 2 × USB 3.0 ports; 2 × USB 2.0 ports.

    • Raspberry Pi standard 40-pin GPIO header

    • 2-lane MIPI DSI display port

    • 2-lane MIPI CSI camera port

    • 4-pole stereo audio and composite video port

    Raspberry Pi 4 USB and Ethernet ports

    Raspberry Pi 3B+ connectivity

    • 2.4GHz and 5GHz IEEE 802.11.b/g/n/ac wireless LAN, Bluetooth 4.2, BLE

    • Gigabit Ethernet over USB 2.0 (maximum throughput 300Mbps)

    • 4 × USB 2.0 ports

    • Raspberry Pi standard 40-pin GPIO header

    • 2-lane MIPI DSI display port

    • 2-lane MIPI CSI camera port

    • 4-pole stereo audio and composite video port

    Raspberry Pi 3b+ Ports

    Display connectivity

    When it comes to display connectivity,  Raspberry Pi 4 is quite literally twice as good. It sports not one but two HDMI ports, enabling you to run two display monitors. Raspberry Pi 4 is also capable of running 4K video (4096 × 2160 pixels) at 60 frames-per-second, making it ideal for modern media playback.

    Raspberry Pi 3B+ has a single full-size HDMI connector, capable of running 1080p (1920×1080p). 

    One upside to the Raspberry Pi 3B+ is you’re more likely to already have full-size HDMI cables around the house, but micro-HDMI to full-size HDMI cables are easy to source.

    Raspberry Pi 4 dual HDMI slots

    Raspberry Pi 4 display

    • 2 × micro-HDMI ports (up to 4kp60 supported)

    • H.265 (4kp60 decode), H.264 (1080p60 decode, 1080p30 encode)

    Raspberry Pi 3 display

    Raspberry Pi 3B+ single HDMI port

    Raspberry Pi 4 vs Raspberry Pi 3B+ power

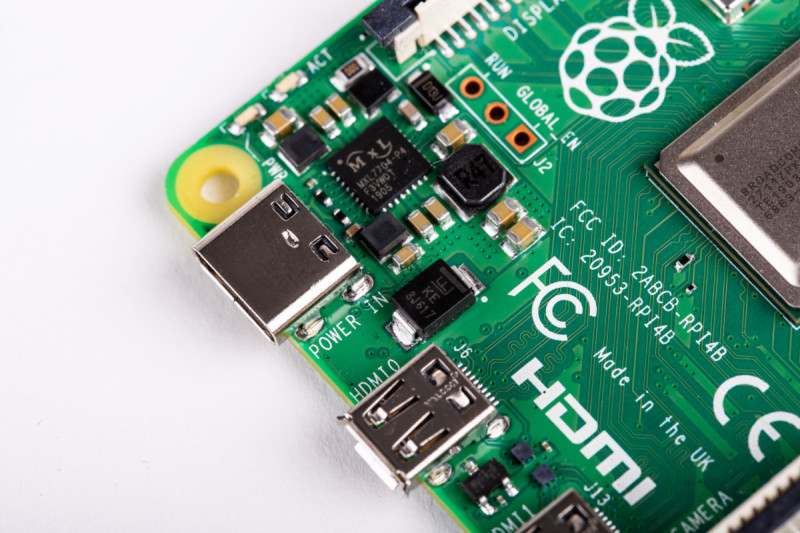
    Raspberry Pi 4 introduced a new USB-C connector for power. However, its power demands are more stringent than Raspberry Pi 3B+ (which uses an older micro-USB connector).

    Both devices support the separate Power over Ethernet (PoE) HAT if you wish to power the board directly from a power-enabled Ethernet line (handy for remote networking locations).

    Raspberry Pi 4 power 

    • 5V DC via USB-C connector (minimum 3A*)

    • 5V DC via GPIO header (minimum 3A*)

    • Power over Ethernet (PoE) enabled (requires separate PoE HAT)

    * A good-quality 2.5A power supply can be used if downstream USB peripherals consume less than 500mA in total.

    Raspberry Pi 3B+ power

    Raspberry Pi 4 USB-C power connection

    Which Raspberry Pi should I buy?

    We think both Raspberry 4 and the previous Raspberry Pi 3B+ models are great choices. You can learn about electronics and programming pretty well on both devices, although the faster processor and higher levels of RAM provided on Raspberry Pi 4 make it a much more versatile desktop computer. It also supports more demanding software, such as Scratch 3 (which only runs on the newer Raspberry Pi 4).

    It makes for a much more versatile machine, too, with better internet support. And retro game emulation is much improved on the newer Raspberry Pi.

    But if what you want is to play around with electronics and code, or build a low-cost media player, then Raspberry Pi 3B+ remains a good option (especially if you can pick one up at a reduced price). 

  • 25 Powerful Raspberry Pi Projects: Part I

    25 Powerful Raspberry Pi Projects: Part I

    Reading Time: 5 minutes

    Photo projects

    Take amazing shots with Raspberry Pi.

    Drop Pi

    Maker: David Hunt
    Take incredible shots of water droplets, using a Raspberry Pi as a controller for a solenoid valve and camera trigger. The valve is hooked up to the GPIO pins and a small piece of code opens the valve and triggers the camera. The code is timed for a valve 40 cm above the surface of the water. It’s a great example of how Raspberry Pi can be used to control an environment and camera, plus a good excuse to learn how to control valves.

    The Drop Pi takes incredible macro detail photos

    StereoPi

    Maker: Eugene Pomazov
    Since 2014, Raspbian has offered built-in support for stereoscopic photography. With two cameras attached to a Raspberry Pi, you can create 3D photographs and record 3D video. You’ll need a Raspberry Pi Compute Module (which has support for two Camera Modules). The compact and light nature of StereoPi makes it particularly useful for attaching to drones and robots.

    StereoPi enables you to take stereoscopic photos using your Raspberry Pi

    Advanced gaming builds

    Strictly for fun, these masterful makes put a smile on your face.

    Heverlee Sjoelen

    Maker: Grant Gibson
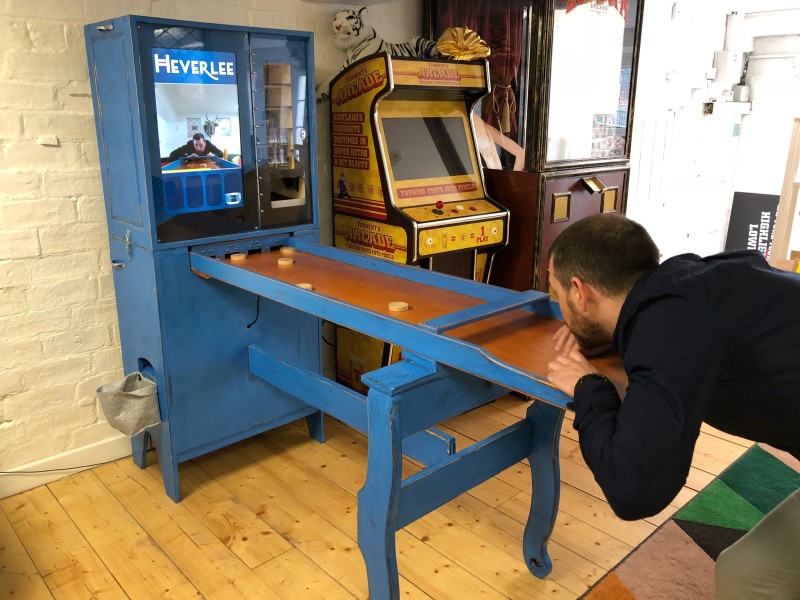
    When Belgium beer brand Heverlee approached prolific maker Grant Gibson for promotional ideas, he was reminded of Sjoelen, a shuffleboard game popular in Germany and Belgium. The result was a Raspberry Pi-powered physical game and vending machine mash-up that dispensed cold cans of beer to the winners.

    Heverlee Sjoelen is a Raspberry Pi-controlled shuffleboard game

    The Claw

    Maker: Ryan Walmsley
    Ryan’s ever-popular claw machine is often seen at Raspberry Pi events throughout the UK. An upcycled bar-top ‘grabber’ game, this one can be played over the internet. Use your computer or mobile phone to try to grab Babbage the Bear (gently) as the results are live-streamed to you.

    The Claw, a Raspberry Pi-controlled teddypicker, asks you to grab Babbage The Bear

    OutRun Bar-top

    Maker: Matt Brailsford (aka Circuitbeard)
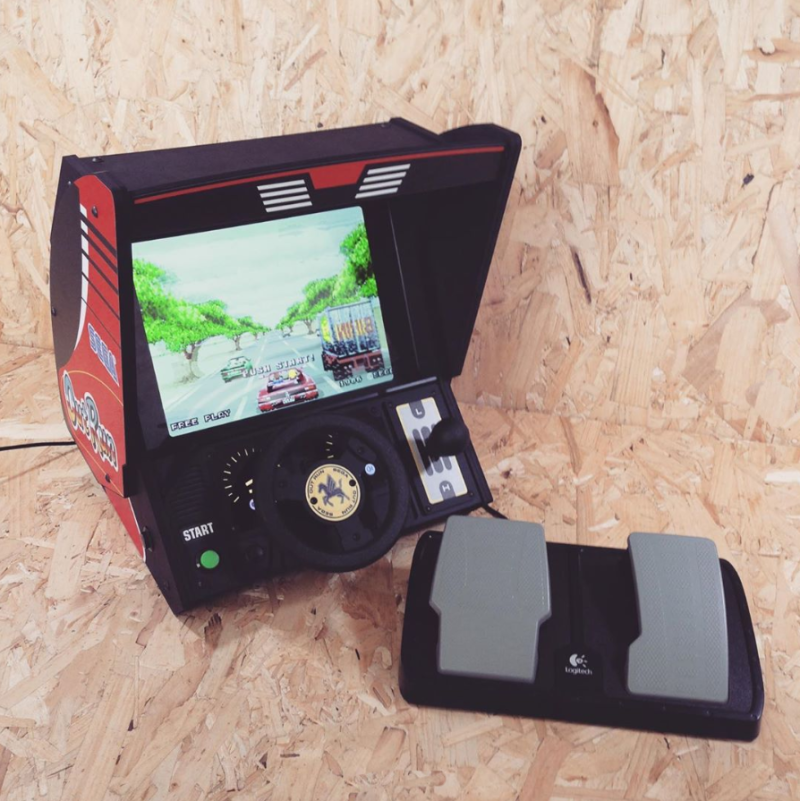
    What separates Matt from the crowd is his exquisite attention to detail. This OutRun Deluxe bar-top features fully working controls, such as gear shifting and a steering wheel. Add the pedals, repurposed from an wheel controller, and custom bodywork and this is a classy project.

    Matt's Outrun tabletop games console is fantastically faithful to the original

    Take to the seas in your autonomous yacht

    Maker: AI Coventry (Coventry University)
    Balazs Bordas, Mark Tyers, Sergiu Harjau, Shahzad Haider, also known as AI Coventry, AI Coventry is making serious progress with autonomous vehicle technology. Sergiu Harjau and team entered their aquatic vehicle, ‘The Rabb__it’, in an autonomous boat challenge in China. We asked Sergiu all about it.

    What inspired you to build a self-sailing boat?

    I first started having an interest in autonomous vehicles when I had to choose a project for a second-year module. I first built an autonomous RC Car, driven by Raspberry Pi Zero[…]. That got some traction in the university and then a lecturer offered me a spot on the autonomous boat team in Finland. We use the project as a way to broaden our skill set, both from a software standpoint but also when it comes to electrical engineering, and so far it’s been working wonderfully.

    The Rabb, AI Coventry's autonomous yacht, on the water

    What challenges did you face?

    Autonomous vehicles are a bit like chess in some ways. It’s very easy to understand how it’s all meant to work, but it’s really hard to go ‘deep’ and create beautiful systems which work without a single flaw[…]. In China, our biggest challenge which we didn’t foresee was the weather. The humidity and extreme heat rendered some of our sensors faulty, spitting out random data at unpredictable times. Even still, we pursued our goals and in the end managed to fix some of the issues and came home with a pretty good result.

    boat-team

    Are you happy with the outcome?

    Yes, in our latest trip we did way better than our past ones, but even still we weren’t perfect. We’re very happy to call it a learning experience and go from there. On the flip side, we were very organised, more prepared than any team out there if I’m honest, and that allowed us to quickly fix our issues when we needed to. In the end, we managed to get third prize, and we’re very happy with the result.

    Any improvements planned?

    We’re going to be looking at spending a little bit extra on our compass sensor to ensure it doesn’t get de-calibrated as often as it did in China. We suspected there were power lines under the lake, and that didn’t help our autonomous sailing.

    Autonomous boat designed at Coventry University and controlled by Raspberry Pi

    What plans do you have for your next vehicle?

    Since autonomous vehicles and embedded systems are two of my favourite pastime activities, my next big project will again bring the two together. I’ll be helping my lecturer Dr David Croft to deliver a hardware-software platform for a new master’s course next year: ‘Connected autonomous vehicles systems’. We’re planning on building an RC car with capabilities to become autonomous on an ROS software interface. It’s not going to be easy, to say the least, but I hope that through my other projects I have managed to gain the necessary skills to pursue yet another interesting endeavour.

    Inspired by these amazing Raspberry Pi makes? Look out for part II of our amazing projects feature tomorrow…

  • Sean Raser interview

    Sean Raser interview

    Reading Time: 4 minutes

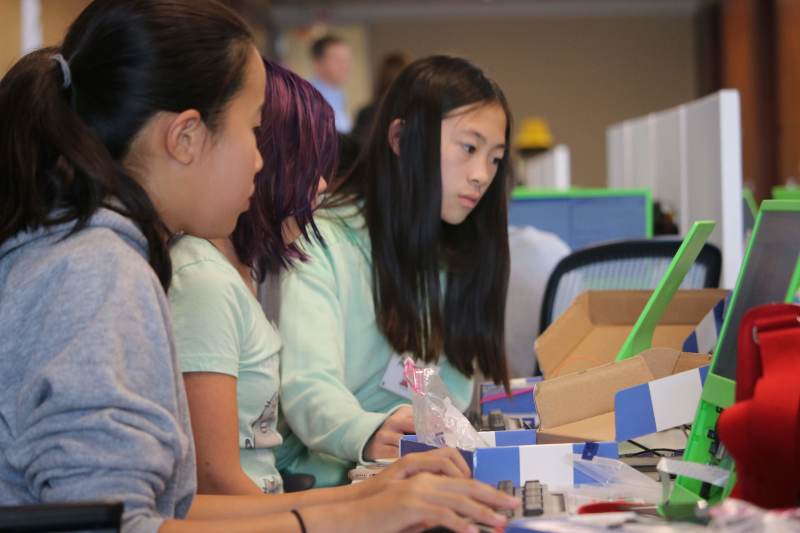
    For a lot of the people who do a lot with Raspberry Pi, they’ve been here since day one – 29 February 2012. Sean Raser, on the other hand, didn’t even learn about Raspberry Pi until early 2015, but that hasn’t stopped him from teaching about it, putting on events about it, or running a Code Club using the Raspberry Pi Foundation resources.

    Sean Raser, California-based Code Club leader and Picademy graduate

    “I have held Jams in both my local community (Castro Valley) and through my school district (San Ramon Valley Unified School District),” Sean tells us. “I also teach ‘Physical Computing with Raspberry Pi’ classes through our local Education Foundation, which take place after school, as well as during holiday breaks and summer. I am also the leader of the Castro Valley Code Club, which I started just around one year ago (right after I attended Picademy).”

    The Castro Valley Jam is his big community Raspberry Jam, with attendees from all walks of life trying out Raspberry Pi projects. Sean’s school-based Raspberry Jam is aimed more towards middle- and high-school students, though.

    Sean enjoys teaching physical computing as part of his local Education Foundation scheme after school and during school holidays

    Do you use Raspberry Pi in your high-school classes?

    I absolutely do! I have used them a few different ways. I have used them as their own separate unit, where we spent a chunk of time dedicated to Raspberry Pi mixed in with other content from the class. I first introduced them, and then afterwards I let the students work on their own projects that they either chose or found online. They had a few weeks total to spend using them.

    Another way I tried involved working them in throughout the class all year long. For example, I dedicated each Friday to Raspberry Pi. At first, they were taught how to use them, but afterwards they were free to be creative and either work on a year-long project, or many projects over the year.

    California High School, where Sean teaches, joined in on the Big Birthday weekend

    How was Picademy?

    I attended Picademy Denver 2018, and it was, and has been, the greatest workshop I have ever attended. I learned so many practical things that I could take (and have taken) right back to the class and start using right away. Many of the classes I teach outside of school are based around the Picademy lessons, and when I introduce Raspberry Pi in my high-school classes I use many similar lessons from Picademy.

    I like how most of the lessons have the participants just jump right in to the code, and explain it after they have seen it running. This was different from what I did before, but I have had a better experience with it this way. I met so many wonderful educators at Picademy that I still keep in touch with. The network of educators that you are introduced to and stay in touch with is the most amazing, beneficial part of Picademy. I would encourage anyone on the fence about applying to take the next step and apply!

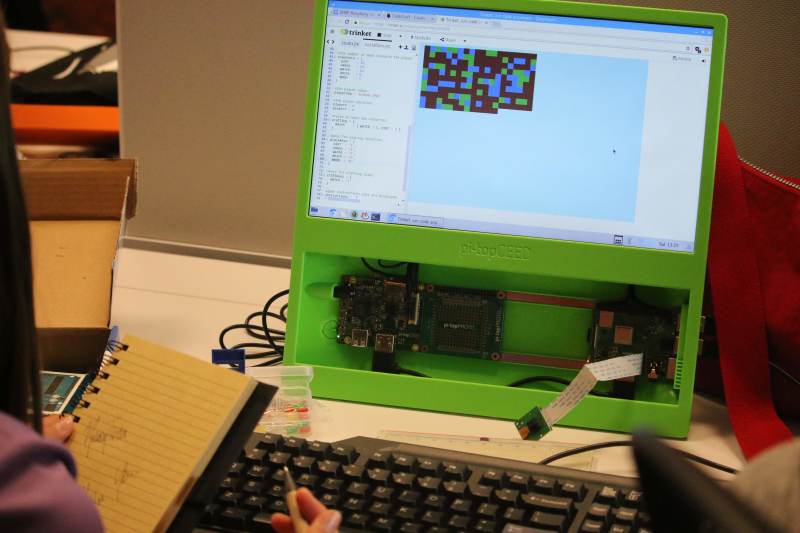
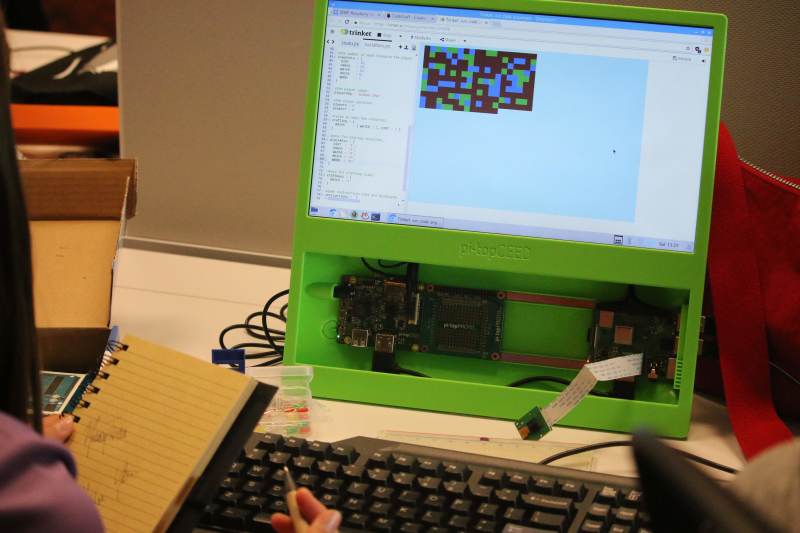
    Sean encourages people to try Raspberry Pi projects such as Trinket

    Any Raspberry Jam advice?

    When it comes to Jams, there is no right or wrong way that they have to be run or put together. I have found that they are all different, which is really what makes them such a great experience. Every situation is going to be different, and I have found that just going for it, while not always the best advice for every situation in life, has worked for me. I still get nervous the night before each Jam, but it’s a good, excited nervous. 

    Also, I have always felt absolutely great after every single Jam. They don’t always run exactly the way I had planned, and there are always bumps in the road, but at the end of the day I know that the people who attended were able to meet, talk, code, share, and learn. Who could ask for a better day than that?  

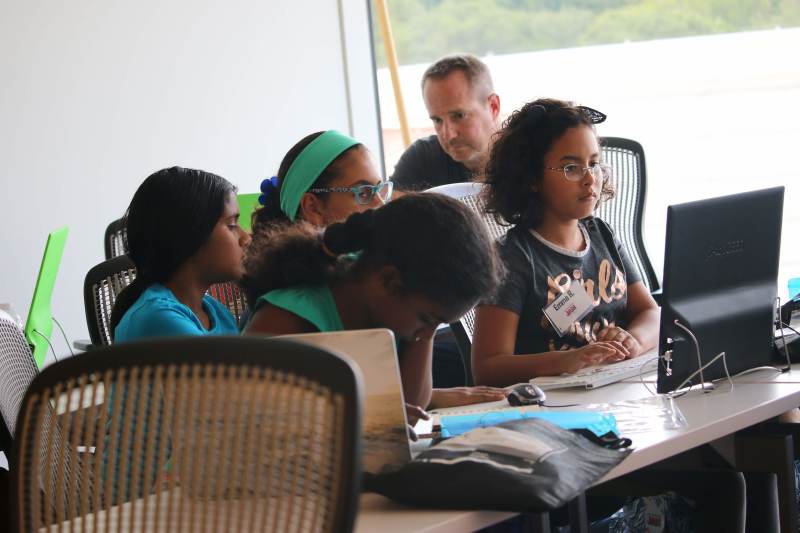
    Raspberry Jam sessions at California High School are aimed at middle- and high-school pupils

    Fun with Minecraft

    “One of my personal favourite uses I have gotten from Raspberry Pi is being able to expose my young son to coding at such a young age. He loves Minecraft, so being able to show him any basic Python programs that modify Minecraft blows him away. The Minecraft camera that can take his picture then build it in his Minecraft world blows him away.”

  • Spooktastic Halloween Costume Projects – part 2

    Spooktastic Halloween Costume Projects – part 2

    Reading Time: 3 minutes

    Read part one for more costume ideas!

    Still images don’t really do it justice, but the effect in real life is excellent

    This full-on cosplay by Mel Ridler has an electronic secret – simple LED lights for eyes that can change into flashing circles of doom. For those that know of the game Undertale, the light patterns represent how the character Sans looks when he unleashes his true power.

    This simple build makes use of a Raspberry Pi Zero connected to a NeoPixel ring that is set behind some frosted acrylic. With the touch of a hidden pocket button, you can activate the eyes, turning them blue. Another press makes them flash yellow, and a final press turns them off.

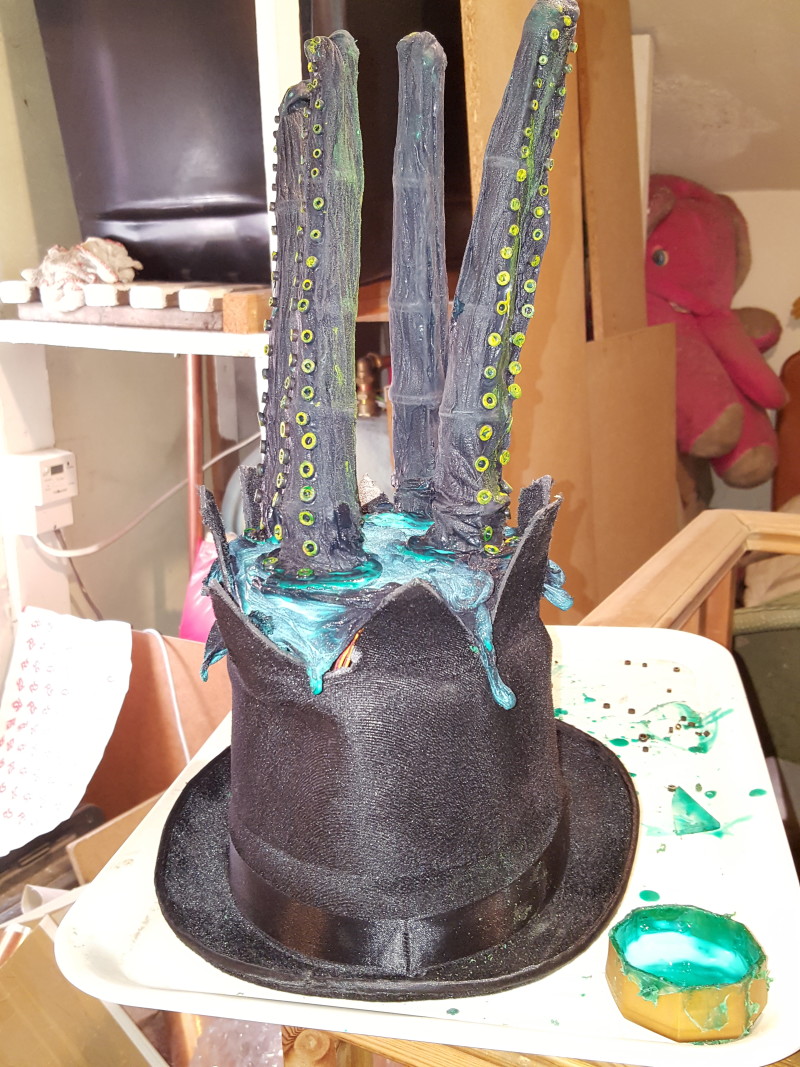
    Each tentacle is controller by servos that run on a sine wave pattern to make them move more ‘naturally’

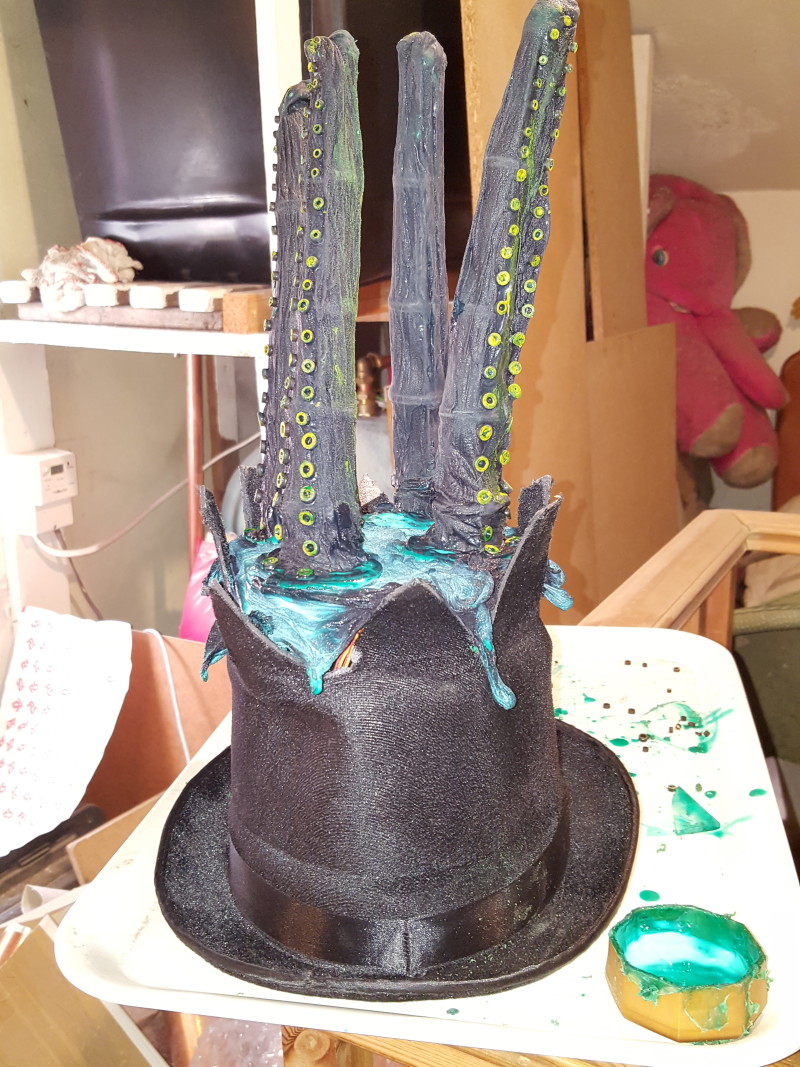
    Have you ever wanted to have tentacles growing out of your head? Probably not, we’d hope, but we can offer you the next best thing: a hat that makes it look like transdimensional tentacles are growing out of your head by Derek Woodroffe.

    It’s actually quite an ingenious build, using several servos and plastic tentacle skeletons to make the stocking-based suckers wiggle and move freely on top of the hat. Some latex, sealant, and paint bits later and you have a very weird and kinda scary hat.

    The insides are made of chicken wire

    For a costume that is essentially a series of LEDs, there is a lot going on here. It’s fully autonomous, playing a preprogrammed light display, and can connect to wireless LAN to ape the light show that the builder’s house is playing as well.

    The frame is welded together specifically to fit maker Wolfie’s granddaughter; however, you can make it fit whomever you’d like if making it yourself. It uses some custom 3D-printed parts to keep a Raspberry Pi and some batteries in place – at the time of making, it would last several hours.

    More than just a box of scraps in a cave

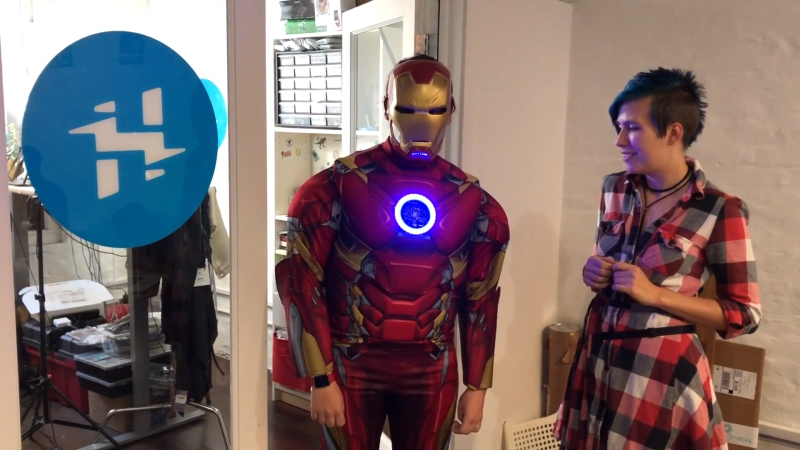
    Voice modification and LEDs are cool, but how about voice-controlled (and reactive!) LEDs? This fantastic project from the MATRIX Labs team turns a cheap Iron Man costume into a party piece that is sure to attract a few nerds.

    The voice-controlled magic is handled by Snips.ai, a customisable piece of tech that allows you to create voice assistants that work under your control. You can set keywords, train it to make sure it understand your voice, and then hook it up to your MATRIX board.

    The command-line interface is perfect as it looks like you’re an eighties hacker, and it uses less power

    The cyberpunk aesthetic will probably never go away, especially now that it’s easier than ever to install electronics into clothes, a bit like ‘The Jacket’ that maker CoreDump likes to wear at Halloween.

    It’s a pretty standard leather jacket, albeit with some serious modifications. Not just style bits like neon lights and punk spikes, but also the fully functional Raspberry Pi installed into one of the sleeves for that ‘hacking-on-the-go’ look. There’s also a hidden action camera in one of the spikes, perfect for first-person video fun.

  • VNC: Remote access a Raspberry Pi

    VNC: Remote access a Raspberry Pi

    Reading Time: 7 minutes

    There will be times when you can’t – or don’t want to – switch to your Raspberry Pi. Perhaps you’re using another computer, your Raspberry Pi is out of reach, behind your TV or a nest of cables or you’re on the road and have left your Raspberry Pi at home.
    Fortunately, with VNC (Virtual Network Computing) – free for non-commercial use and built into the Raspbian operating system – you can access Raspberry Pi remotely from any other computer, tablet, or smartphone. Either on your home network, or via the internet.
    In this walkthrough, we’ll be using VNC Viewer and VNC Server to connect on the fly to a Raspberry Pi from a Windows PC and an Android smartphone.

    What you’ll need

    • Raspberry Pi with Raspbian

    • Network and internet connection

    • VNC Server and VNC Viewer

    Step 1: Enable VNC

    First, make sure both your Raspberry Pi and the other computer you’re going to use are connected to the same network.

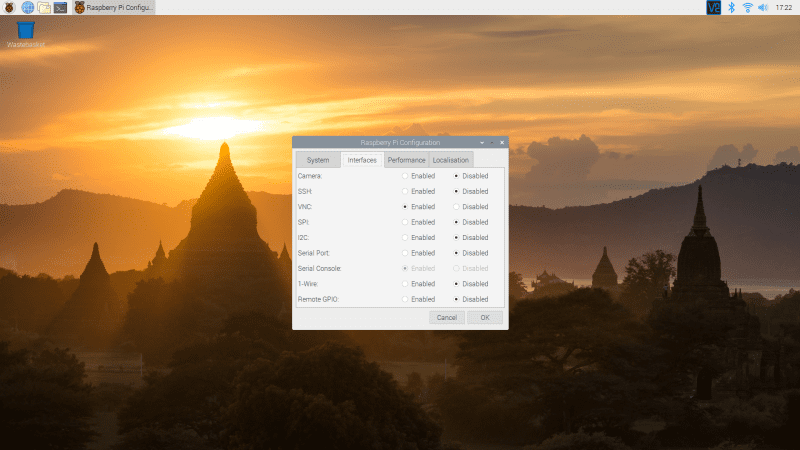
    In Raspbian, click the applications menu icon (raspberry) at the top-left of the screen and select Preferences > Raspberry Pi Configuration. 

    Screenshot of interfaces enabled in Raspbian

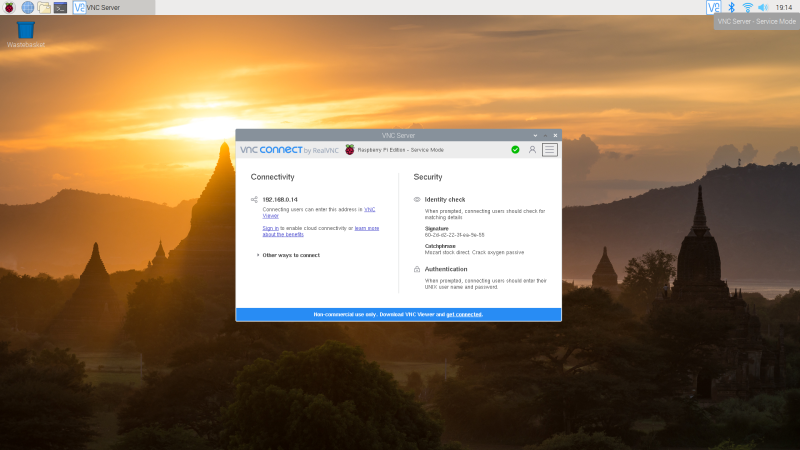
    If you haven’t changed Raspbian’s password from the default ‘raspberry’, now is a good time to do so. Click the Change Password button and enter a new one. Now click the Interfaces tab, and set the radio button next to VNC to Enabled. Click OK. A VNC button appears in the top right of the screen, at the end of the menu bar. Click it to open VNC Server. 

    Your IP (internet protocol) address will appear in the VNC Server Window (below Connectivity). Note down the four numbers; they enable you to locate your Raspberry Pi over the network.

    Step 2: Open VNC Viewer

    You’re now ready to connect to your Raspberry Pi from another computer. We’re going to use a Windows PC, but you can connect from a Mac, Linux PC, or even another Raspberry Pi on the same network. 

    Because we’re using VNC Server on Raspberry Pi, it makes sense to use VNC Viewer on the Windows PC. VNC Viewer is available for macOS, Linux, Android, and iOS platforms, along with a web interface. Head to RealMac (magpi.cc/hTpNBm) and click Download VNC Viewer. Install and open the software.

    VNC Server displays your IP address and is used to log your Raspberry Pi to VNC Connect so you can access Raspberry Pi via the wider internet

    Step 3: Connect to Raspberry Pi

    Enter the IP address of your Raspberry Pi (the four numbers displayed in VNC Server) into the search bar of VNC Viewer (the part saying ‘Enter a VNC Server address or search’). Press RETURN to connect to Raspberry Pi.

    The first time you do this, a window will appear with a warning: ‘VNC has no record of connecting to this VNC Server so its identity cannot be checked’. Click Continue.

    You need to enter the username (typically ‘pi’) and password for your Raspberry Pi. Click on Remember Password and then OK to connect to Raspbian.

    Step 4: Remote control

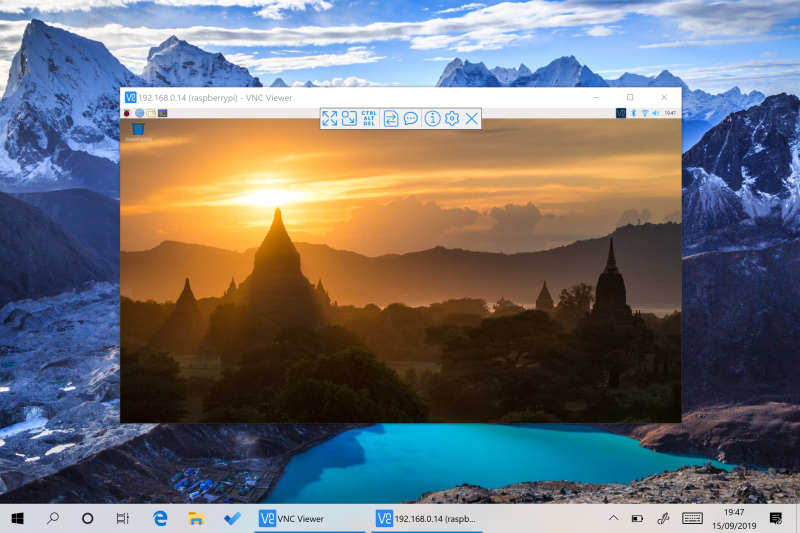
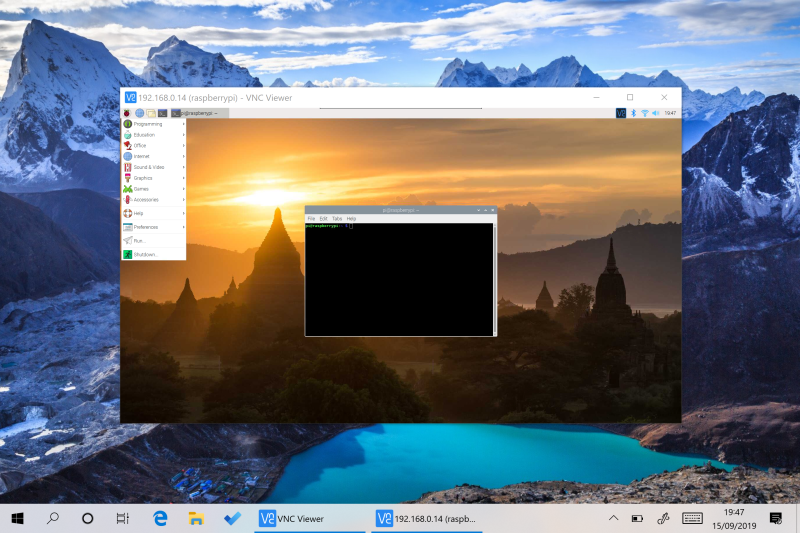
    A window appears on your Windows PC displaying the Raspbian desktop interface from your Raspberry Pi. Move the mouse around the window and you’ll see the mouse moving around on your Raspberry Pi. You can now use this window to control your Raspberry Pi over the network (just as if you were sitting in front of it).

    Hover the mouse at the top of the VNC Viewer window and a menu will drop down from the top of the screen. To the left of the Options is Enter Full Screen; click it and the preview window will take over the screen. Your Raspberry Pi display may not fit your PC display, so click the Scale button in the menu (so it’s set to Scale Automatically).

    You will now be able to open apps and use your Raspberry Pi as if you were working directly on the small computer.

    VNC Viewer displays Raspbian desktop on a Windows PC. VNC Server is running on Raspberry Pi. The floating menu bar appears when you hover the mouse near the top of the window.

    Step 5: Looking at properties

    You can access Properties from the menu at the top of the VNC Viewer preview window, but we’re going to close down the preview window to access it from VNC Connect. Click End Session in the drop-down menu and Yes to disconnect. 

    VNC Viewer now displays a small preview of your Raspberry Pi desktop in the Address Book, along with the IP address. You can double-click this at any time to reopen the connection – but first, right-click and choose Properties.

    Enter ‘Raspberry Pi’ in the Name window; this will make your screen friendlier. Now click Options. The Picture Quality setting is set to Automatic by default. If you have a slow connection, try setting it to Low; alternatively, if you have a fast connection, set it to High. 

    Finally, take a look at the Expert tab. Here you can find a variety of settings for all aspects of the system. Scroll down to find FullScreen and set the drop-down menu below from False to True. Now when you open Raspberry Pi in VNC Viewer, the preview window will automatically be in full-screen mode. Choose the options you prefer and click OK to set them.

    Step 6: Get online

    So far we’ve been working on our local network. With a RealVNC account, you can access your Raspberry Pi across the wider internet. 

    Open VNC Viewer on your PC and click the Sign In button on the top left. It’s most likely that you don’t have an account already, so click ‘Sign up online’. This will take you to the RealVNC website.

    Enter your email address and click the ‘I’m not a robot’ checkbox. Now create a password. Please choose a long and complex password that is not easy to guess. We suggest using a Diceware password generator (rempe.us/diceware). Follow the rest of the setup process and click on the email authentication when it arrives.

    Step 7: Sign in

    Now you need to sign in with the same account on both VNC Viewer on your PC and VNC Server on Raspberry Pi.

    The Sign In window should still be displayed in the Sign In window in VNC Viewer on your PC. Open VNC Server on your Raspberry Pi and click Sign In to enable the cloud connectivity link (displayed just below your IP address under Connectivity).

    Return to VNC Viewer on your PC. You’ll still see a Raspberry Pi window in the Address Book section, but below it you’ll see an option called Team (it will appear with your name). Click this to see your Raspberry Pi again. However, this is the connection using your VNC Connect account. Double-click it to launch into your Raspbian desktop and remote control.

    The difference? This account works remotely, and you can use this from other networks.

    VNC Viewer displays the Raspbian desktop interface remotely

    Step 8: Send files

    You can send and receive files from your Raspberry Pi and PC. We’ve created a blank test document in our Documents folder called test.txt

    To send the file to your Raspberry Pi, access Raspberry Pi using VNC Viewer. From the VNC Viewer preview window, click the menu at the top of the screen and choose Transfer Files. 

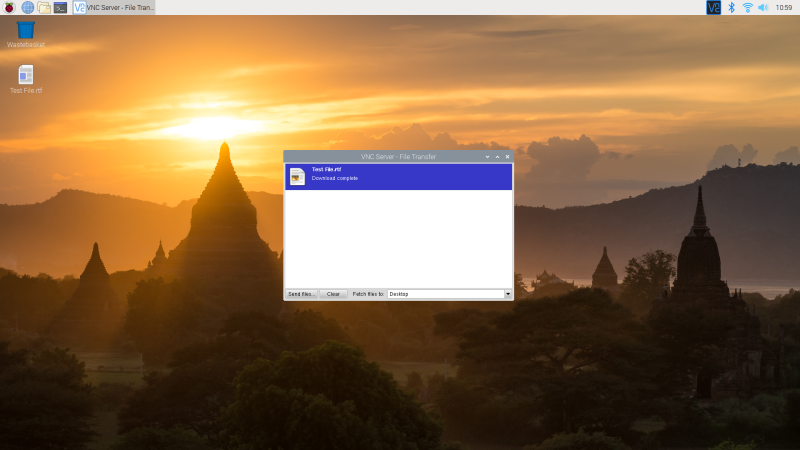
    Now click Send Files in the VNC Viewer – File Transfer window. Use the file picker to choose a file on your PC and click Open. The file will be sent to the desktop of your Raspberry Pi. A File Transfer window will appear with ‘Download complete’; close it. 

    Use VNC's File Transfer option to send and retrieve files from your Raspberry Pi

    Step 9: Retrieve files

    You can retrieve a file from your Raspberry Pi using VNC Viewer, although the process is slightly different. This time, right-click the VNC Server icon in Raspbian’s menu bar. Choose File Transfer from the drop-down menu to open the VNC Server – File Transfer window.

    Click Send Files and choose a file on your Raspbian file system. Click OK to send the file to the desktop on your Windows PC.

    Your Raspberry Pi is now set up for remote access. It’s now perfectly possible to remove the screen and keyboard from your Raspberry Pi and leave it on the network. It’ll be there waiting for you to connect from your PC whenever you’re ready.

    Step 10: Android and iOS

    It is also possible to connect to Raspberry Pi remotely from your smartphone. Use the VNC Viewer app for Android or iOS – download it from the Google Play Store or Apple App Store. Open and sign in using your VNC Connect account email and password.

    You will see your Raspberry Pi under the Team menu. Click it and enter the username and password for your Raspberry Pi. 

    When it first launches, you’ll need to run through the ‘Control the computer’ process. Click on Next and it will open the ‘How to control’ window. This screen outlines how to perform gestures such as mouse clicks from the touchscreen. Close this window and start using Raspberry Pi from your phone.

    Use the touchscreen to move the pointer around. A virtual keyboard is accessed by tapping the Keyboard icon at the top of the app window. 

    You can now access Raspberry Pi from anywhere, including your phone. A great solution for remote monitoring. 

    Top tip 1: Technical information

    You can find a wealth of detailed information on the RealVNC website. Take a look at this Technician’s Guide PDF: magpi.cc/JiSeZX

    Top tip 2: Got a Mac?

    Mac users must change the Authentication protocol to VNC password to connect using macOS’s native tools.

  • Spooktastic Halloween Costume Projects – part 1

    Spooktastic Halloween Costume Projects – part 1

    Reading Time: 3 minutes

    Luis created a latex frame of gruesome flesh to give the screen more realism

    We interviewed Luis Martin Nuez about this blood-curdling costume idea a few years ago. It’s very basically a Raspberry Pi with a Camera Module that displays what it sees on the screen live. The camera is attached to his back, with the screen on his stomach, and the preview mode is used to create the illusion that he has been shot through the stomach. Grisly.

    As this is an older project, some of the parts may be unnecessary or easy to upgrade to better versions. We also recommend you use a screen solution that is powered by your Raspberry Pi so that you can use a portable battery charger instead.
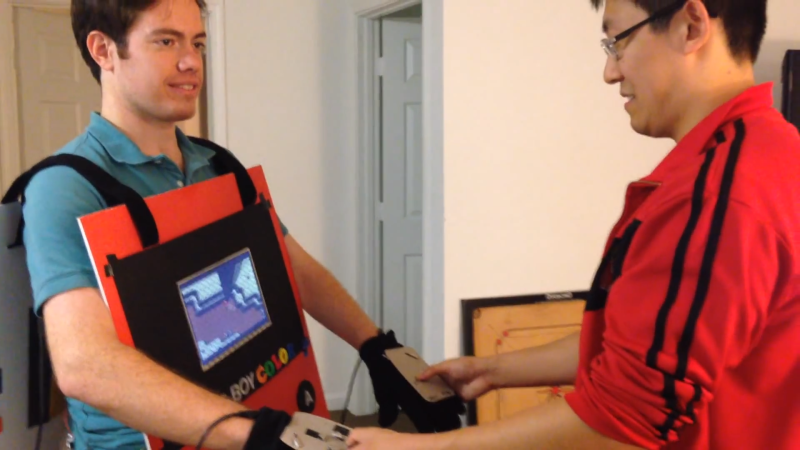
    Instead of poking at Mike, you use controls on his gloves

    The point of a Game Boy is that it’s small and you can fit it into your pocket. Turning yourself into a portable console as a costume sort of ruins that aspect of it, but at least you are then still portable.

    The costume itself (by MikeHandidate) is very simple, with a couple of cardboard sheets painted to make it look like the classic Game Boy Color. It’s got a pretty big screen though, so it may need a bit more power than your standard mobile battery. Having the gloves work as custom controllers adds an extra level of complexity to the build; however, GPIO-based buttons are supported in RetroPie, so they shouldn’t be too hard to do.

    Scary robots for scary makers

    This build combines many things we enjoy. Robots, simple electronics, googly eyes, flashing lights, and really fun, low-budget DIY construction.

    Estefannie Explains It All used several technologies to power this suit, including Arduino supplies to power LEDs around the suit, a voice changer to giver herself a more robotic persona, and a Raspberry Pi to power the screen on the chest with several functions which are powered by a series of buttons. The jaw even moves depending on how she speaks!

    And of course, it’s built using cardboard boxes and silver tape, meaning just about anyone can make the body.

    Modelling clay is used to fit the device to the mask, and to reduce feedback

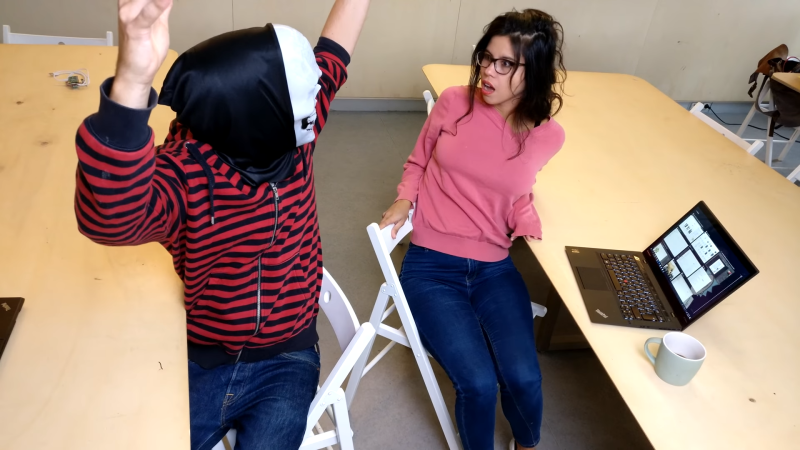
    Voice changers/amplifiers make for excellent parts in a scary costume, especially when installed in a scary skull mask like this.

    While seemingly a simple build – and it generally is – there’s a few neat parts to this project by Olivier Ros. You need to remove the microphone part of an audio board add-on, and Olivier also teaches you how to correctly install the built device so that the microphone is isolated and to reduce feedback. There’s even a button to change between voice types!

    Great Scott!

    A good Doc Brown costume can mostly be made with just a lab coat, cool shades, and a frizzy wig. A great Doc Brown costume includes custom-made props from the Back to the Future series, such as the flux capacitor that makes time travel possible, and the time circuit for setting your destination, such as Carl Monk’s outfit here.

    The circuit part of the build is fairly simple, making use of several seven-segment displays to ape the style of the films, and they’re housed in a simple box to complete the look. Carl has an exhaustive build tutorial on his website as well, if you wish to pick it apart.

    Check back for part two on Monday…

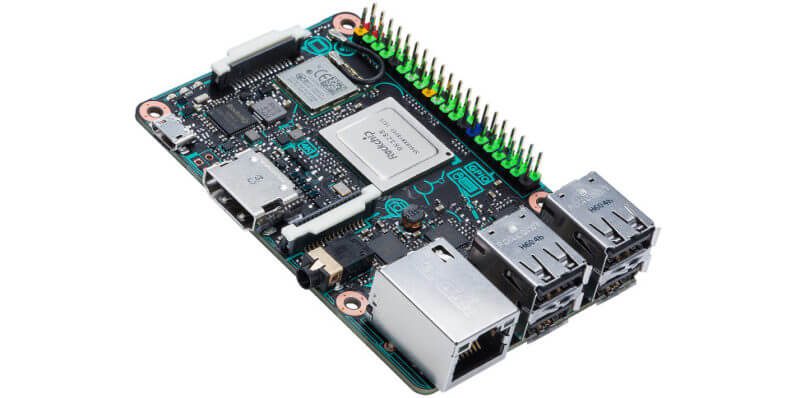
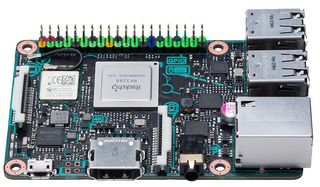
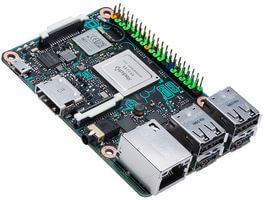
  • ASUS made a Raspberry Pi with 4K video playback!!!

    ASUS made a Raspberry Pi with 4K video playback!!!

    Reading Time: < 1 minute

    Here’re are some of the more impressive specs:

    • Quad core 1.8GHz ARM Cortex-A17 CPU
    • 2GB Dual channel LPDDR3 memory
    • 1x HDMI 2.0 port to support 4K resolution
    • Gigabit LAN and Bluetooth 4.0
    • 802.11 b/g/n Wi-Fi
    • Power supply: 5V/ 2A Micro USB (not included)

    In addition to this, the device also comes with a 40-pin internal header with 28 GPIO pins, which means you can use the tiny computer to create Internet of Things gadgets.


    http://cpc.farnell.com/asus/90mb0qy1-m0eay0/tinker-board-2gb-1-8ghz-4k-gb/dp/SC14363


    ASUS made a Raspberry Pi with 4K video playback!!!

    Source: http://thenextweb.com/gadgets/2017/01/23/asus-raspberry-pi-tinker-board-4k/

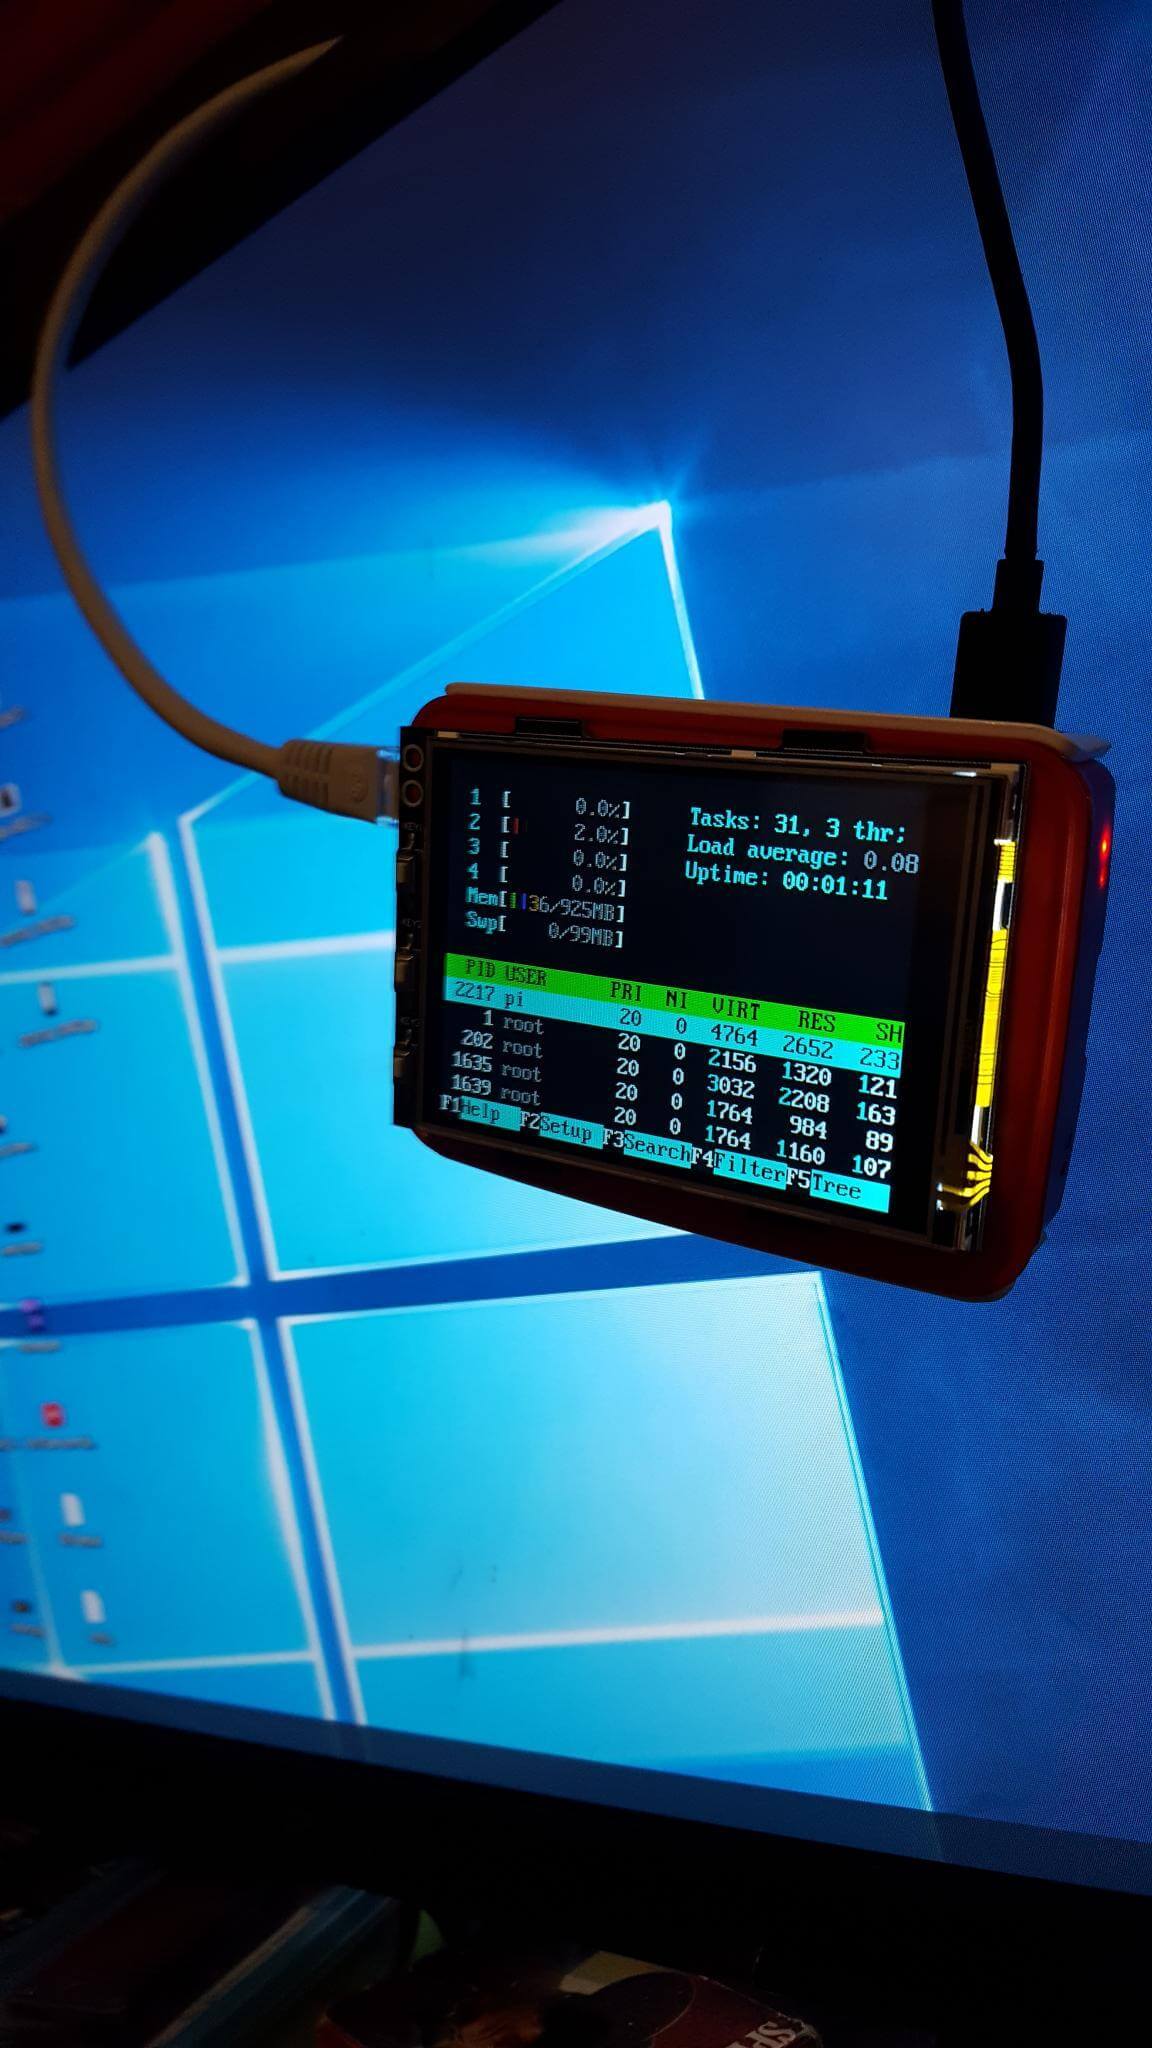
  • Raspberry Pi Server , with LED Display videoplayback test

    Raspberry Pi Server , with LED Display videoplayback test

    Reading Time: < 1 minute


    Raspberry Pi Server , with LED Display videoplayback test