Spooktastic Halloween Costume Projects – part 1

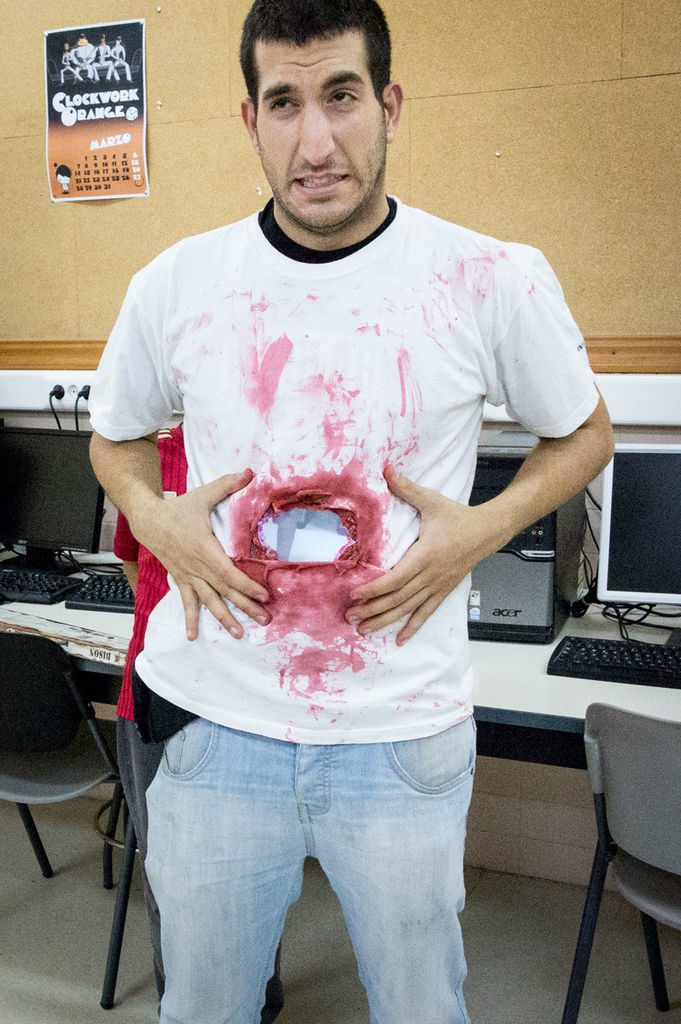
We interviewed Luis Martin Nuez about this blood-curdling costume idea a few years ago. It’s very basically a Raspberry Pi with a Camera Module that displays what it sees on the screen live. The camera is attached to his back, with the screen on his stomach, and the preview mode is used to create the illusion that he has been shot through the stomach. Grisly.
As this is an older project, some of the parts may be unnecessary or easy to upgrade to better versions. We also recommend you use a screen solution that is powered by your Raspberry Pi so that you can use a portable battery charger instead.

The point of a Game Boy is that it’s small and you can fit it into your pocket. Turning yourself into a portable console as a costume sort of ruins that aspect of it, but at least you are then still portable.
The costume itself (by MikeHandidate) is very simple, with a couple of cardboard sheets painted to make it look like the classic Game Boy Color. It’s got a pretty big screen though, so it may need a bit more power than your standard mobile battery. Having the gloves work as custom controllers adds an extra level of complexity to the build; however, GPIO-based buttons are supported in RetroPie, so they shouldn’t be too hard to do.

This build combines many things we enjoy. Robots, simple electronics, googly eyes, flashing lights, and really fun, low-budget DIY construction.
Estefannie Explains It All used several technologies to power this suit, including Arduino supplies to power LEDs around the suit, a voice changer to giver herself a more robotic persona, and a Raspberry Pi to power the screen on the chest with several functions which are powered by a series of buttons. The jaw even moves depending on how she speaks!
And of course, it’s built using cardboard boxes and silver tape, meaning just about anyone can make the body.

Voice changers/amplifiers make for excellent parts in a scary costume, especially when installed in a scary skull mask like this.
While seemingly a simple build – and it generally is – there’s a few neat parts to this project by Olivier Ros. You need to remove the microphone part of an audio board add-on, and Olivier also teaches you how to correctly install the built device so that the microphone is isolated and to reduce feedback. There’s even a button to change between voice types!

A good Doc Brown costume can mostly be made with just a lab coat, cool shades, and a frizzy wig. A great Doc Brown costume includes custom-made props from the Back to the Future series, such as the flux capacitor that makes time travel possible, and the time circuit for setting your destination, such as Carl Monk’s outfit here.
The circuit part of the build is fairly simple, making use of several seven-segment displays to ape the style of the films, and they’re housed in a simple box to complete the look. Carl has an exhaustive build tutorial on his website as well, if you wish to pick it apart.
Check back for part two on Monday…