Schlagwort: Props
-

Real-life DOR-15 bowler hat from Disney’s Meet the Robinsons
Reading Time: 2 minutesWhy wear a boring bowler hat when you can add technology to make one of Disney’s most evil pieces of apparel? Meet the Robinsons Meet the Robinsons is one of Disney’s most underrated movies. Thank you for coming to my TED talk. What’s not to love? Experimental, futuristic technology, a misunderstood villain,…
-

Build Demolition Man’s verbal morality ticketing machine
Reading Time: 7 minutesIn the 1993 action movie Demolition Man, Sylvester Stallone stars as a 1990s cop transported to the near-future. Technology plays a central role in the film, often bemusing the lead character. In a memorable scene, he is repeatedly punished by a ticketing machine for using bad language (a violation of the verbal…
-

Build your own animatronic GLaDOS
Reading Time: 2 minutesIt’s 11 years since Steam’s Orange Box came out, which is probably making you feel really elderly. Portal was the highlight of the game bundle for me — cue giant argument in the comments — and it still holds up brilliantly. It’s even in the Museum of Modern Art’s collection; there’s nothing…
-

Build your own South Park Buddha Box
Reading Time: 2 minutesEscape the distractions of the world around you and focus your attention on the thing you love the most in life: your smartphone! It’s easy with the all-new Buddha Box, brought to you by South Park and the 8 Bits and a Byte team! Introducing The All New Buddha Box | South…
-

Happy Birthday, Harry Potter: wizard-worthy Pi projects
Reading Time: 5 minutesToday marks Harry Potter’s 38th birthday. And as we’re so, so very British here at Raspberry Pi, we have no choice but to celebrate the birth of The Boy Who Lived with some wonderfully magical projects from members of the community. Build your own Daily Prophet After a trip to The Wizarding…
-

Ten awesome 3D-printable Raspberry Pi goodies
Reading Time: 4 minutes3D printing has become far more accessible for hobbyists, with printer prices now in the hundreds instead of thousands of pounds. Last year, we covered some of the best 3D-printable cases for the Pi, and since then, Raspberry Pi enthusiasts have shared even more cool designs on sites such as MyMiniFactory and…
-
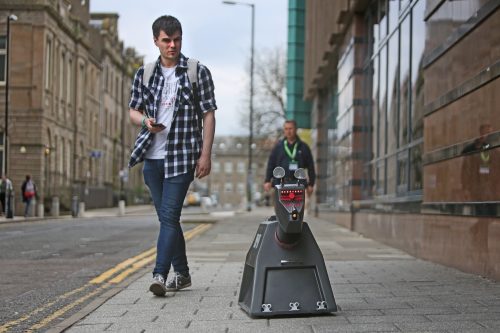
A working original Doctor Who K-9 prop
Reading Time: 3 minutesWhen Abertay University purchased some unwanted Doctor Who props from the BBC in 2011, they could never have known that their future computer science student Gary Taylor would transform a water-damaged robot corpse into a working K-9, the cutest (and snarkiest) of all the Doctor’s companions. image c/o The Courier K-9 If…
-

Build your own Star Wars droid
Reading Time: 3 minutesIt is a truth universally acknowledged…that everyone wants their own Star Wars droid. If you’re now thinking “No, not me!”, then you obviously haven’t met the right droid yet. But Patrick ‘PatchBOTS‘ Stefanski has, and that droid is L3-37 from the newly released Solo: A Star Wars Story. Release the droids Visit your…
-

Archimedes, the Google AIY Projects Vision familiar
Reading Time: 3 minuteshackster.io‘s ‘resident hardware nerd’ Alex Glow has gifted the world of makers with Archimedes, a shoulder-mounted owl that judges your emotions using the Google AIY Project Vision Kit. Say Hi to Archimedes – the AI Robot Owl Say hi to Archimedes – the robot owl with a Google AIY brain. Built with…
-

This is a really lovely Raspberry Pi tricorder
Reading Time: 3 minutesAt the moment I’m spending my evenings watching all of Star Trek in order. Yes, I have watched it before (but with some really big gaps). Yes, including the animated series (I’m up to The Terratin Incident). So I’m gratified to find this beautiful The Original Series–style tricorder build. Star Trek Tricorder…
-

The robotic teapot from your nightmares
Reading Time: 3 minutesFor those moments when you wish the cast of Disney’s Beauty and the Beast was real, only to realise what a nightmare that would be, here’s Paul-Louis Ageneau’s robotic teapot! See what I mean? Tale as old as time… It’s the classic story of guy meets digital killer teapot, digital killer teapot…
-

I am Beemo, a little living boy: Adventure Time prop build
Reading Time: 4 minutesBob Herzberg, BMO builder and blogger at BYOBMO.com, fills us in on the whys and hows and even the Pen Wards of creating interactive Adventure Time BMO props with the Raspberry Pi. A Conversation With BMO A conversation with BMO showing off some voice recognition capabilities. There is no interaction for BMO’s responses…