In the 1993 action movie Demolition Man, Sylvester Stallone stars as a 1990s cop transported to the near-future. Technology plays a central role in the film, often bemusing the lead character. In a memorable scene, he is repeatedly punished by a ticketing machine for using bad language (a violation of the verbal morality statute).
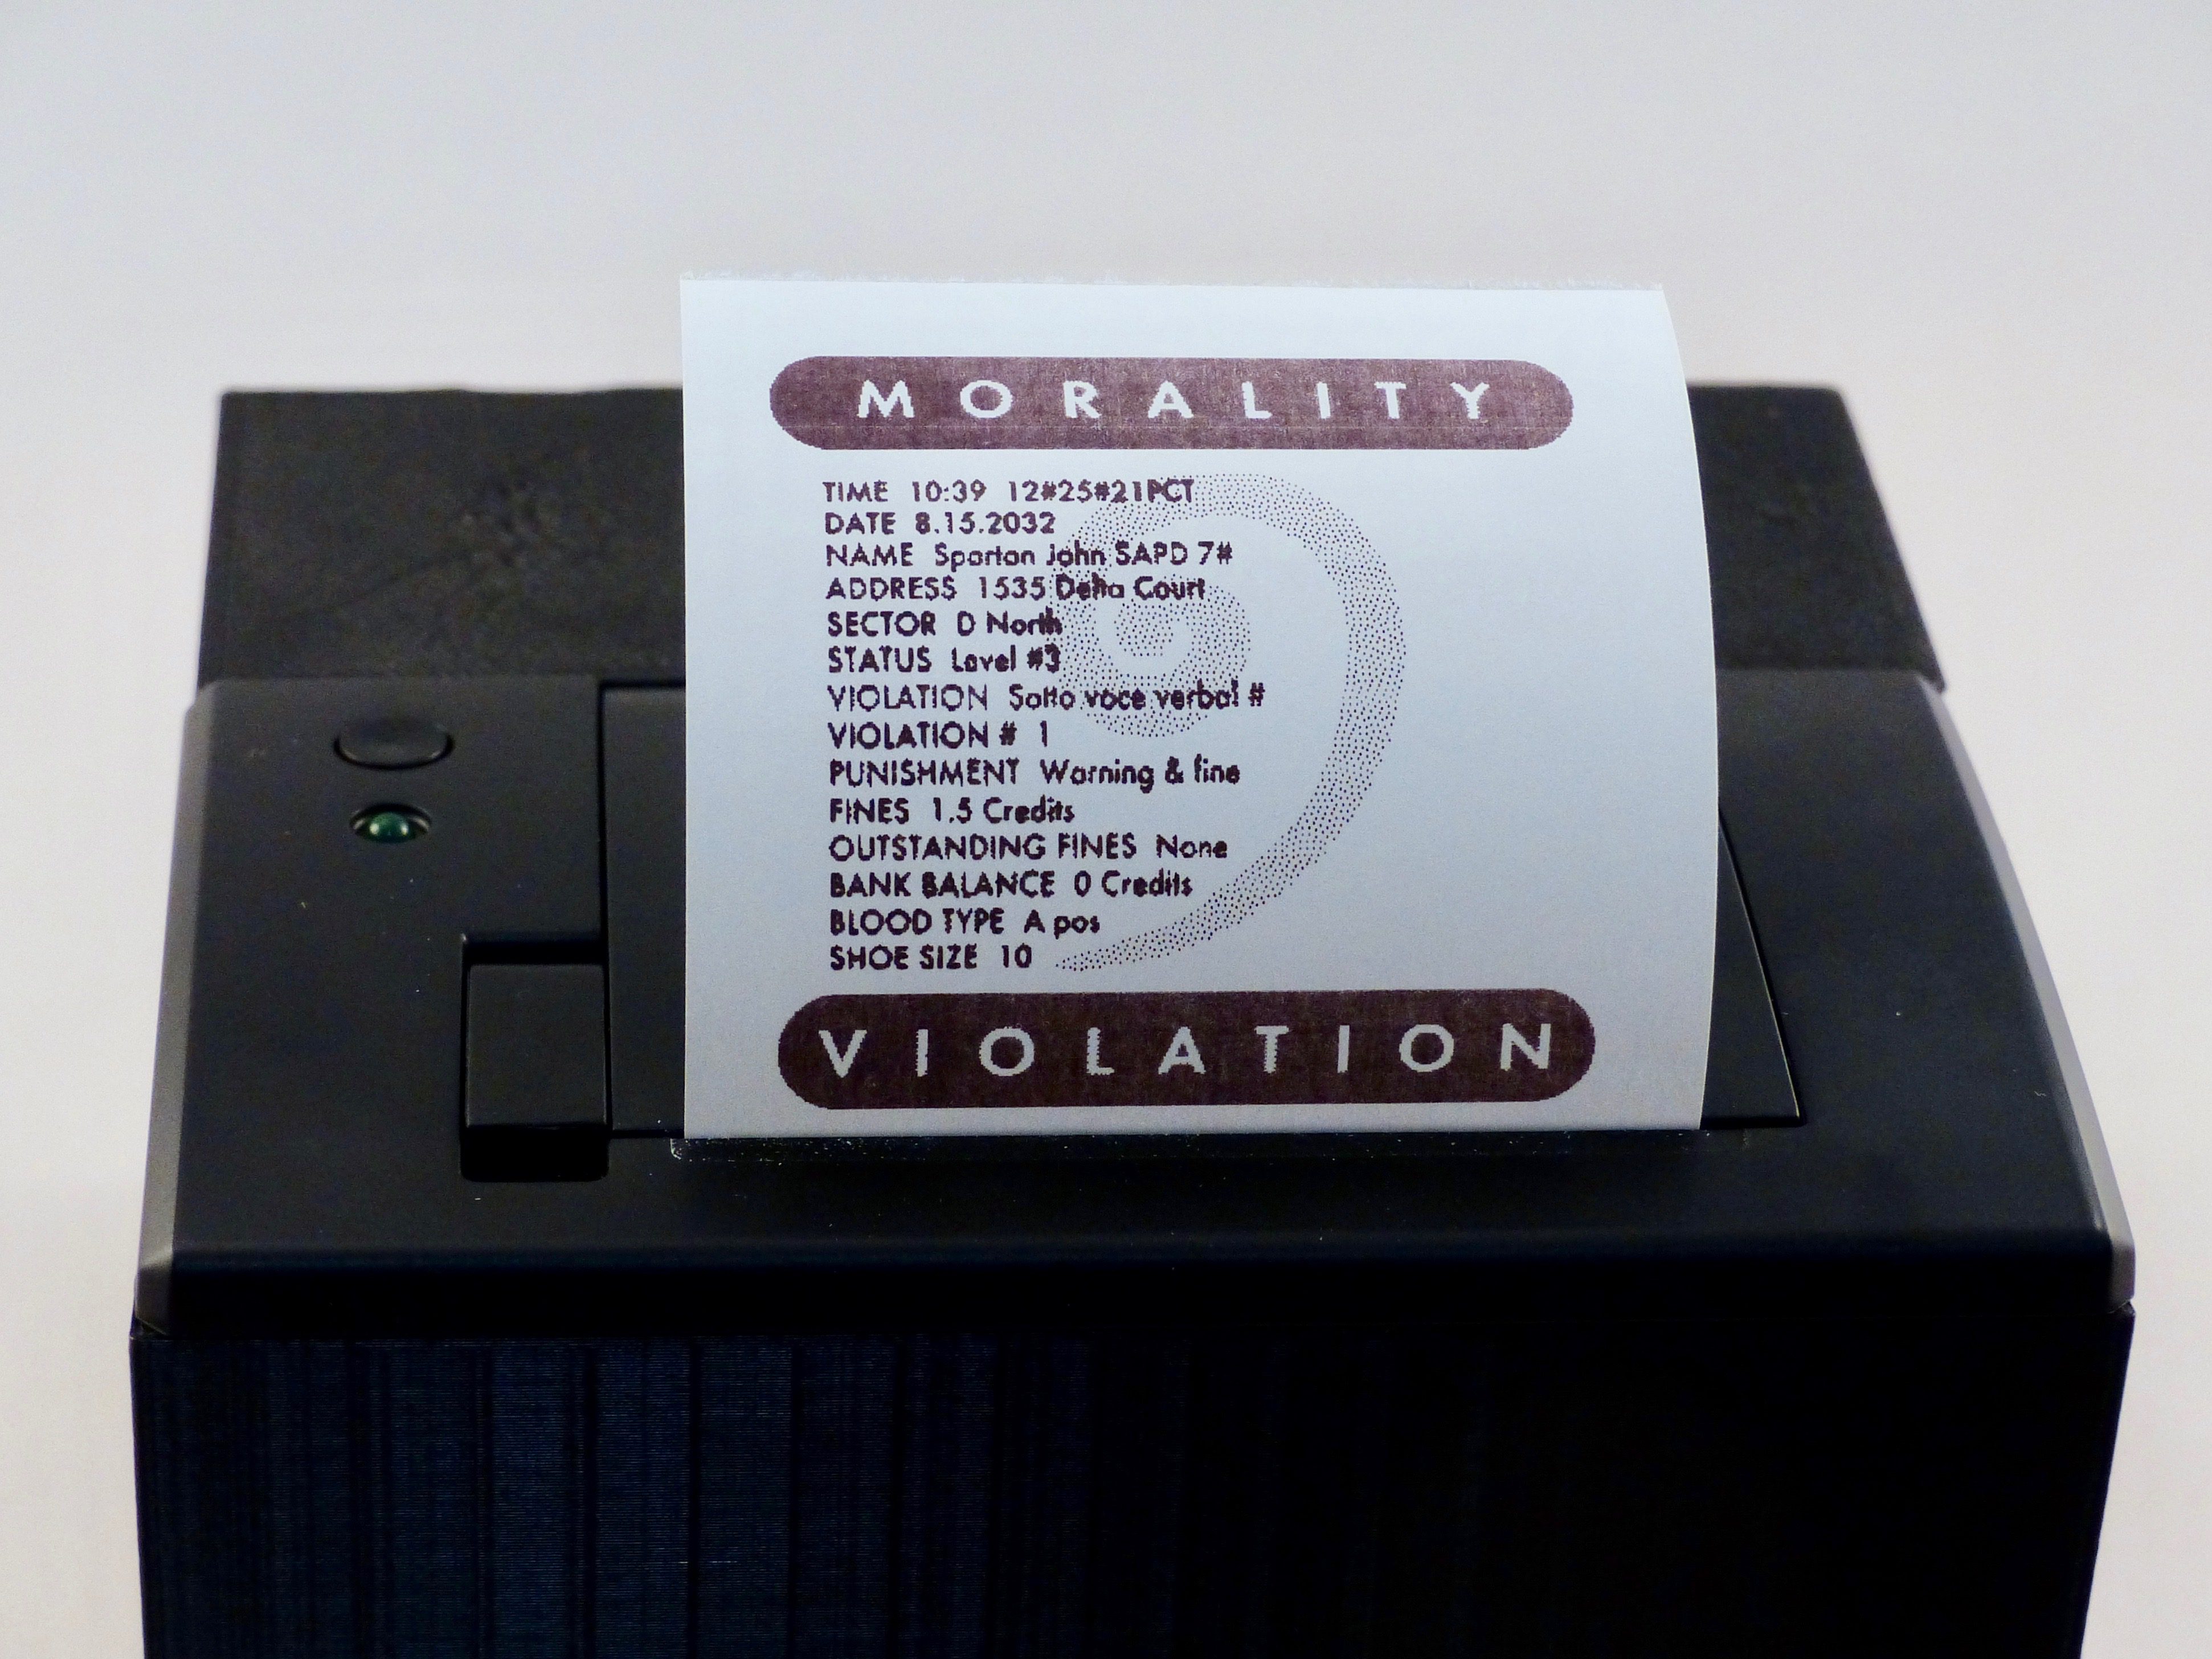
In the future of Demolition Man, an always-listening government machine detects every banned word and issues a fine in the form of a receipt from a wall-mounted printer. This tutorial shows you how to build your own version using Raspberry Pi, the Google Voice API, and a thermal printer. Not only can it replicate detecting banned words, but it also doubles as a handy voice-to-paper stenographer (if you want a more serious use).
Prepare the hardware
We built a full ‘boxed’ project, but you can keep it simple if you wish. Your Raspberry Pi needs a method for listening, speaking, and printing. The easiest solution is to use USB for all three.
After prototyping using Raspberry Pi 4 and various USB devices, we settled on Raspberry Pi Zero W with a small USB mic and Pimoroni Speaker pHAT to save space. A Pico HAT Hacker allowed the connection of both the printer and Speaker pHAT, as they don’t share GPIO pins. This bit of space-saving means we could install the full assembly inside the 3D-printed case along with the printer.
Connect the printer
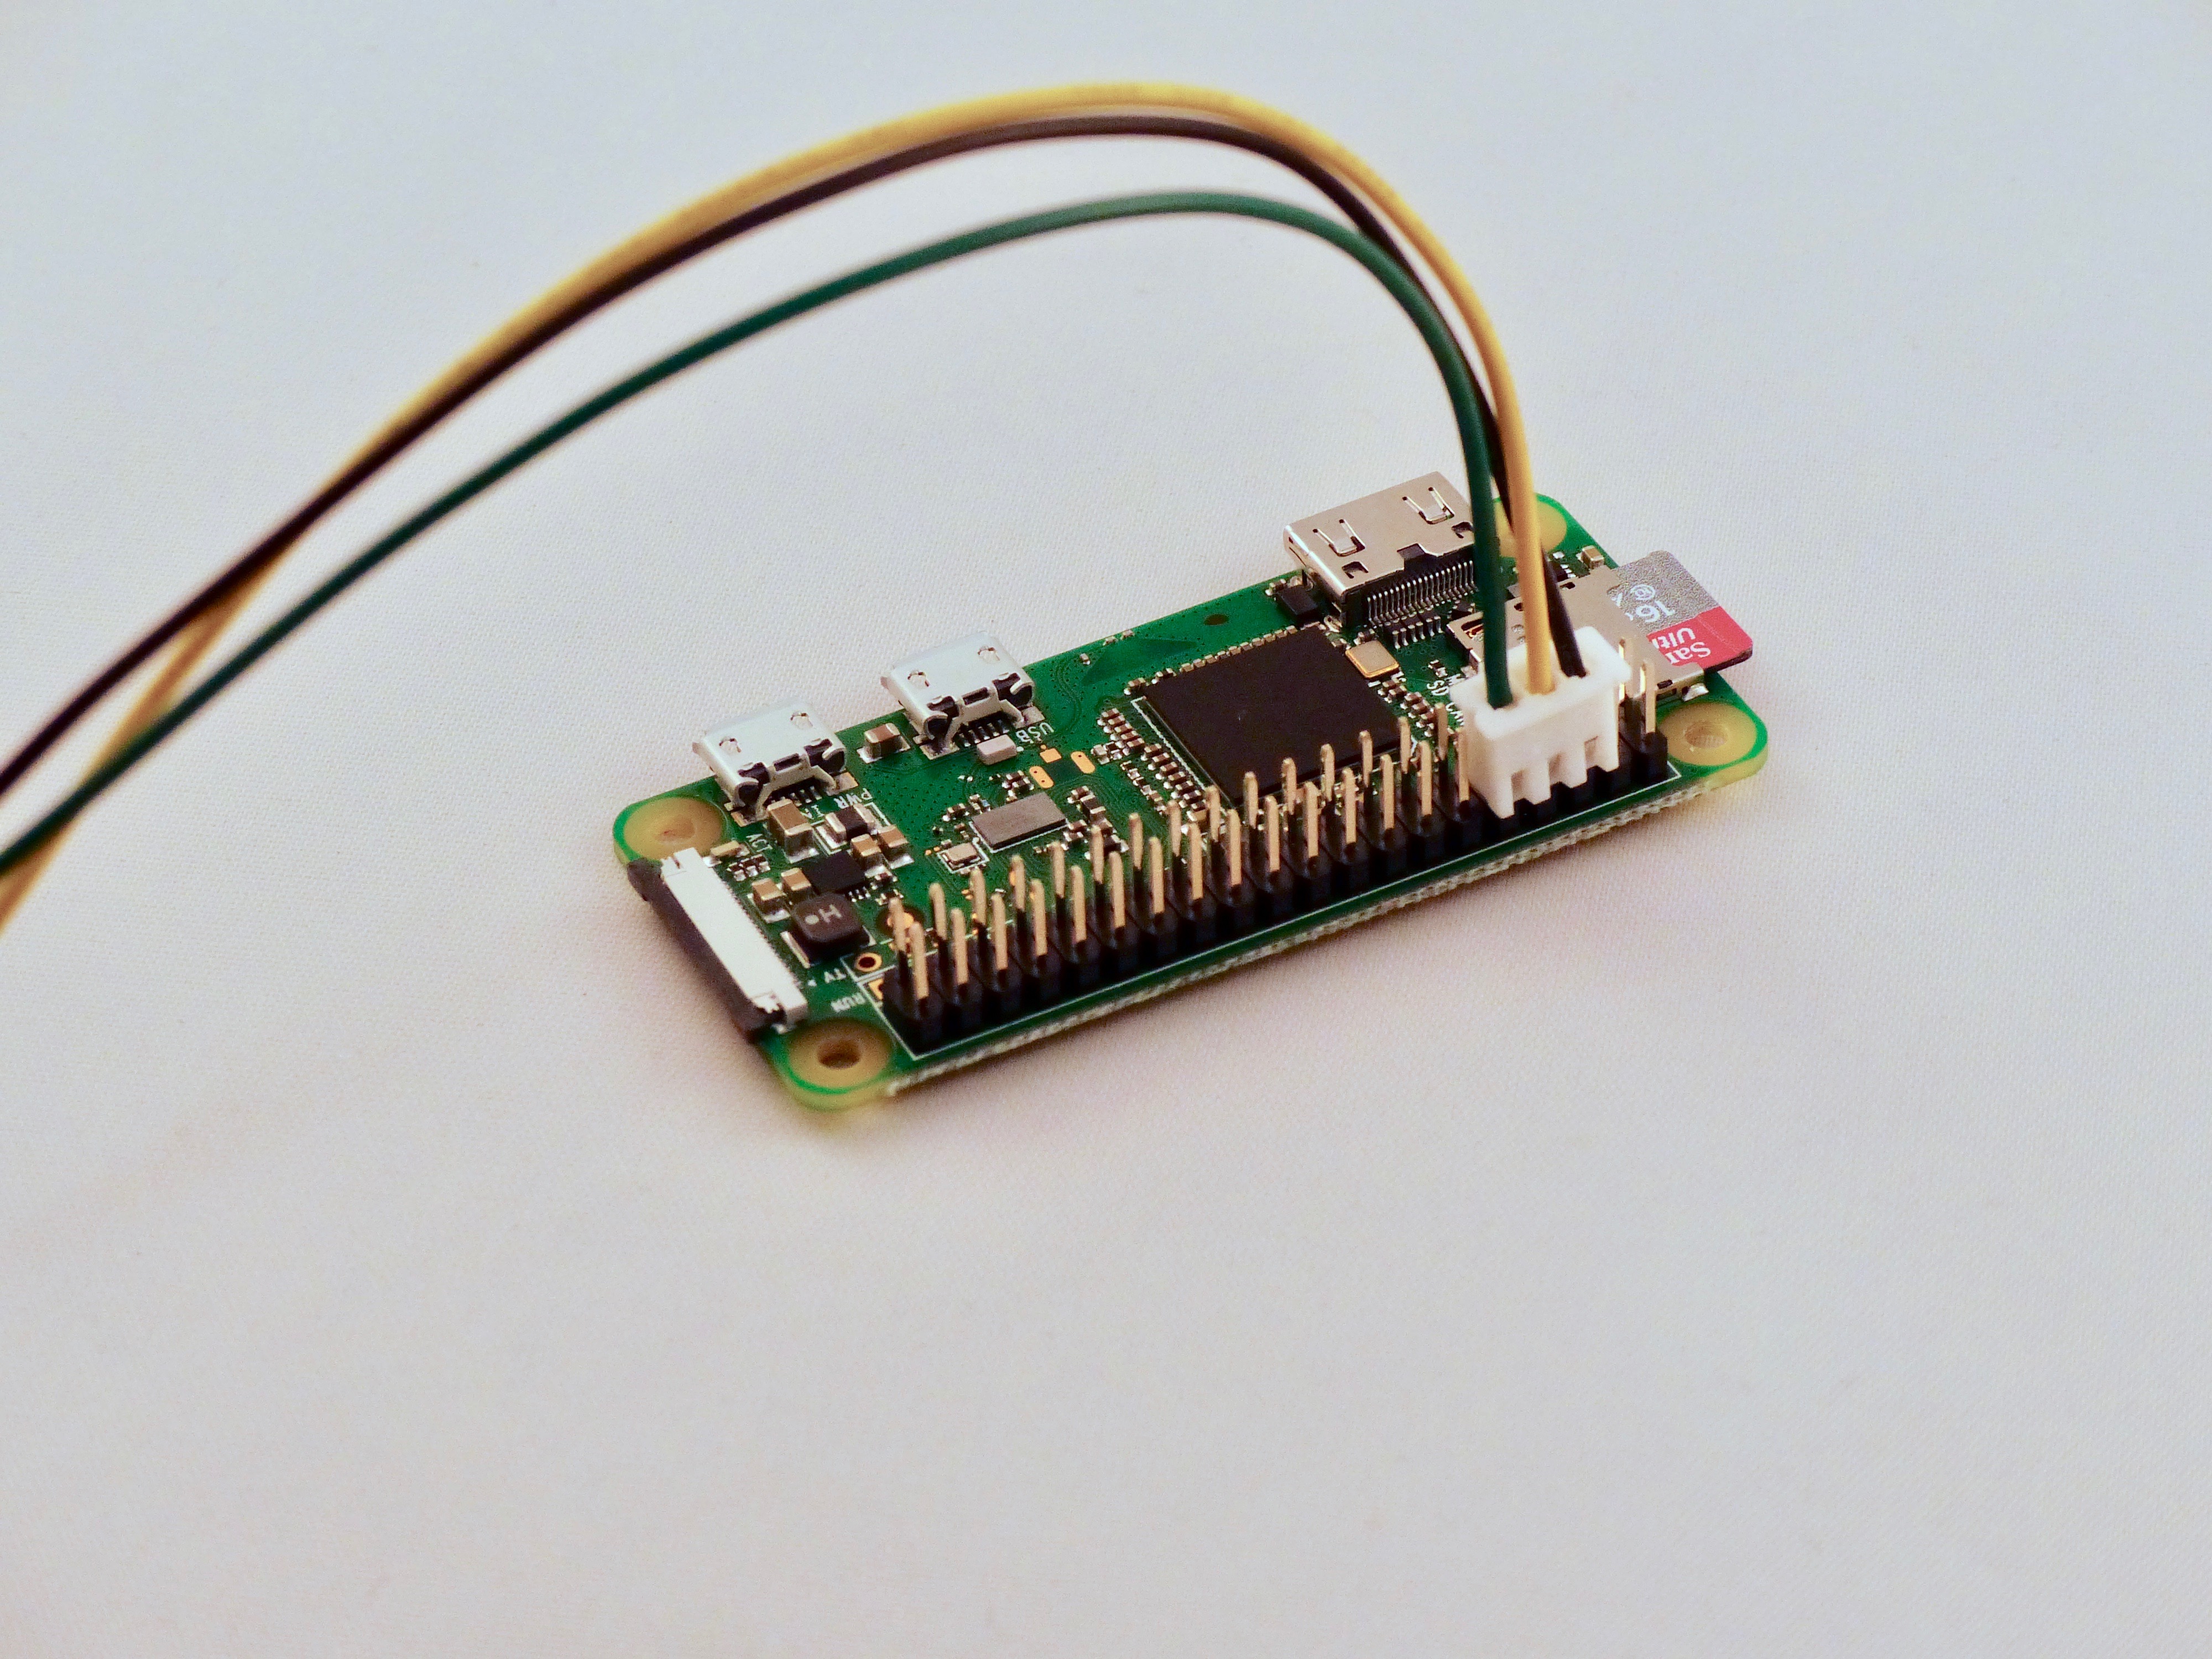
To issue our receipts we used a thermal printer, the kind found in supermarket tills. This particular model is surprisingly versatile, handling text and graphics.
It takes standard 2.25-inch (57mm) receipt paper, available in rolls of 15 metres. When printing, it does draw a lot of current, so we advise using a separate power supply. Do not attempt to power it from your Raspberry Pi. You may need to fit a barrel connector and source a 5V/1.5A power supply. The printer uses a UART/TTL serial connection, which neatly fits on to the GPIO. Although the printer’s connection is listed as being 5V, it is in fact 3.3V, so it can be directly connected to the ground, TX, and RX pins (physical pins 6, 8, 10) on the GPIO.
Install and configure Raspbian
Get yourself a copy of Raspbian Buster Lite and burn it to a microSD card using a tool like Etcher. You can use the full version of Buster if you wish. Perform the usual steps of getting a wireless connection and then updating to the latest version using sudo apt update && sudo apt -y upgrade. From a command prompt, run sudo raspi-config and go to ‘Interfacing options’, then ‘Enable serial’. When asked if you would like the login shell to be accessible, respond ‘No’. To the next question, ‘Would you like the serial port hardware to be enabled?’, reply ‘Yes’. Now reboot your Raspberry Pi.
Test the printer
Make sure the printer is up and running. Double-check you’ve connected the header to the GPIO correctly and power up the printer. The LED on the printer should flash every few seconds. Load in the paper and make sure it’s feeding correctly. We can talk to the printer directly, but the Python ‘thermalprinter‘ library makes coding for it so much easier. To install the library:
sudo apt install python3-pip
pip3 install thermalprinter
Create a file called printer.py and enter in the code in the relevant listing. Run the code using:
python3 printer.py
If you got a nice welcoming message, your printer is all set to go.
Test the microphone
Once your microphone is connected to Raspberry Pi, check the settings by running:
alsamixer
This utility configures your various sound devices. Press F4 to enter ‘capture’ mode (microphones), then press F6 and select your device from the list. Make sure the microphone is not muted (M key) and the levels are high, but not in the red zone.
Back at the command line, run this command:
arecord -l
This shows a list of available recording devices, one of which will be your microphone. Make a note of the card number and subdevice number.
To make a test recording, enter:
arecord --device=hw:1,0 --format S16_LE --rate 44100 -c1 test.wav
If your card and subdevice numbers were not ‘0,1’, you’ll need to change the device parameter in the above command.
Say a few words, then use CTRL+C to stop recording. Check the playback with:
aplay test.wav
Choose your STT provider
STT means speech to text and refers to the code that can take an audio recording and return recognised speech as plain text. Many solutions are available and can be used in this project. For the greatest accuracy, we’re going to use Google Voice API. Rather than doing the complex processing locally, a compressed version of the sound file is uploaded to Google Cloud and the text returned. However, this does mean Google gets a copy of everything ‘heard’ by the project. If this isn’t for you, take a look at Jasper, an open-source alternative that supports local processing.
Create your Google project
To use the Google Cloud API, you’ll need a Google account. Log in to the API Console at console.developers.google.com. We need to create a project here. Next to ‘Google APIs’, click the drop-down menu, then ‘New Project’. Give it a name. You’ll be prompted to enable APIs for the project. Click the link, then search for ‘speech’. Click on ‘Cloud Speech-to-Text API’, then ‘Enable’. At this point you may be prompted for billing information. Don’t worry, you can have up to 60 minutes of audio transcribed for free each month.
Get your credentials
Once the Speech API is enabled, the screen will refresh and you’ll be prompted to create credentials. This is the info our code needs to be granted access to the speech-to-text API. Click on ‘Create Credentials’ and on the next screen select ‘Cloud Speech-to-text API’. You’re asked if you’re planning to use the Compute Engine; select ‘no’. Now create a ‘service account’. Give it a different name from the one used earlier, change the role to ‘Project Owner’, leave the type of file as ‘JSON’, and click ‘Continue’. A file will be downloaded to your computer; transfer this to your Raspberry Pi.
Test Google recognition
When you’re happy with the recording levels, record a short piece of speech and save it as test.wav. We’ll send this to Google and check our access to the API is working. Install the Google Speech-To-Text Python library:
sudo apt install python3-pyaudio
pip3 install google-cloud-speech
Now set an environment variable that the libraries will use to locate your credentials JSON:
export GOOGLE_APPLICATION_CREDENTIALS="/home/pi/[FILE_NAME].json"
(Don’t forget to replace [FILE_NAME] with the actual name of the JSON file).
Using a text editor, create a file called speech_to_text.py and enter the code from the relevant listing. Then run it:
python3 speech_to_text.py
If everything is working correctly, you’ll get a text transcript back within a few seconds.
Live transcription
Amazingly, Google’s speech-to-text service can also support streaming recognition, so rather than capture-then-process, the audio can be sent as a stream, and a HTTP stream of the recognised text comes back. When there is a pause in the speech, the results are finalised, so then we can send the results to the printer. If all the code you’ve entered so far is running correctly, all you need to do is download the stenographer.py script and start it using:
python3 stenographer.py
You are limited on how long you can record for, but this could be coupled with a ‘push to talk’ button so you can make notes using only your voice!
Banned word game
Back to Demolition Man. We need to make an alarm sound, so install a speaker (a passive one that connects to the 3.5mm jack is ideal; we used a Pimoroni Speaker pHAT). Download the banned.py code and edit it in your favourite text editor. At the top is a list of words. You can change this to anything you like (but don’t offend anyone!). In our list, the system is listening for a few mild naughty words. In the event anyone mentions one, a buzzer will sound and a fine will be printed.
Make up your list and start the game by running:
python3 banned.py
Now try one of your banned words.
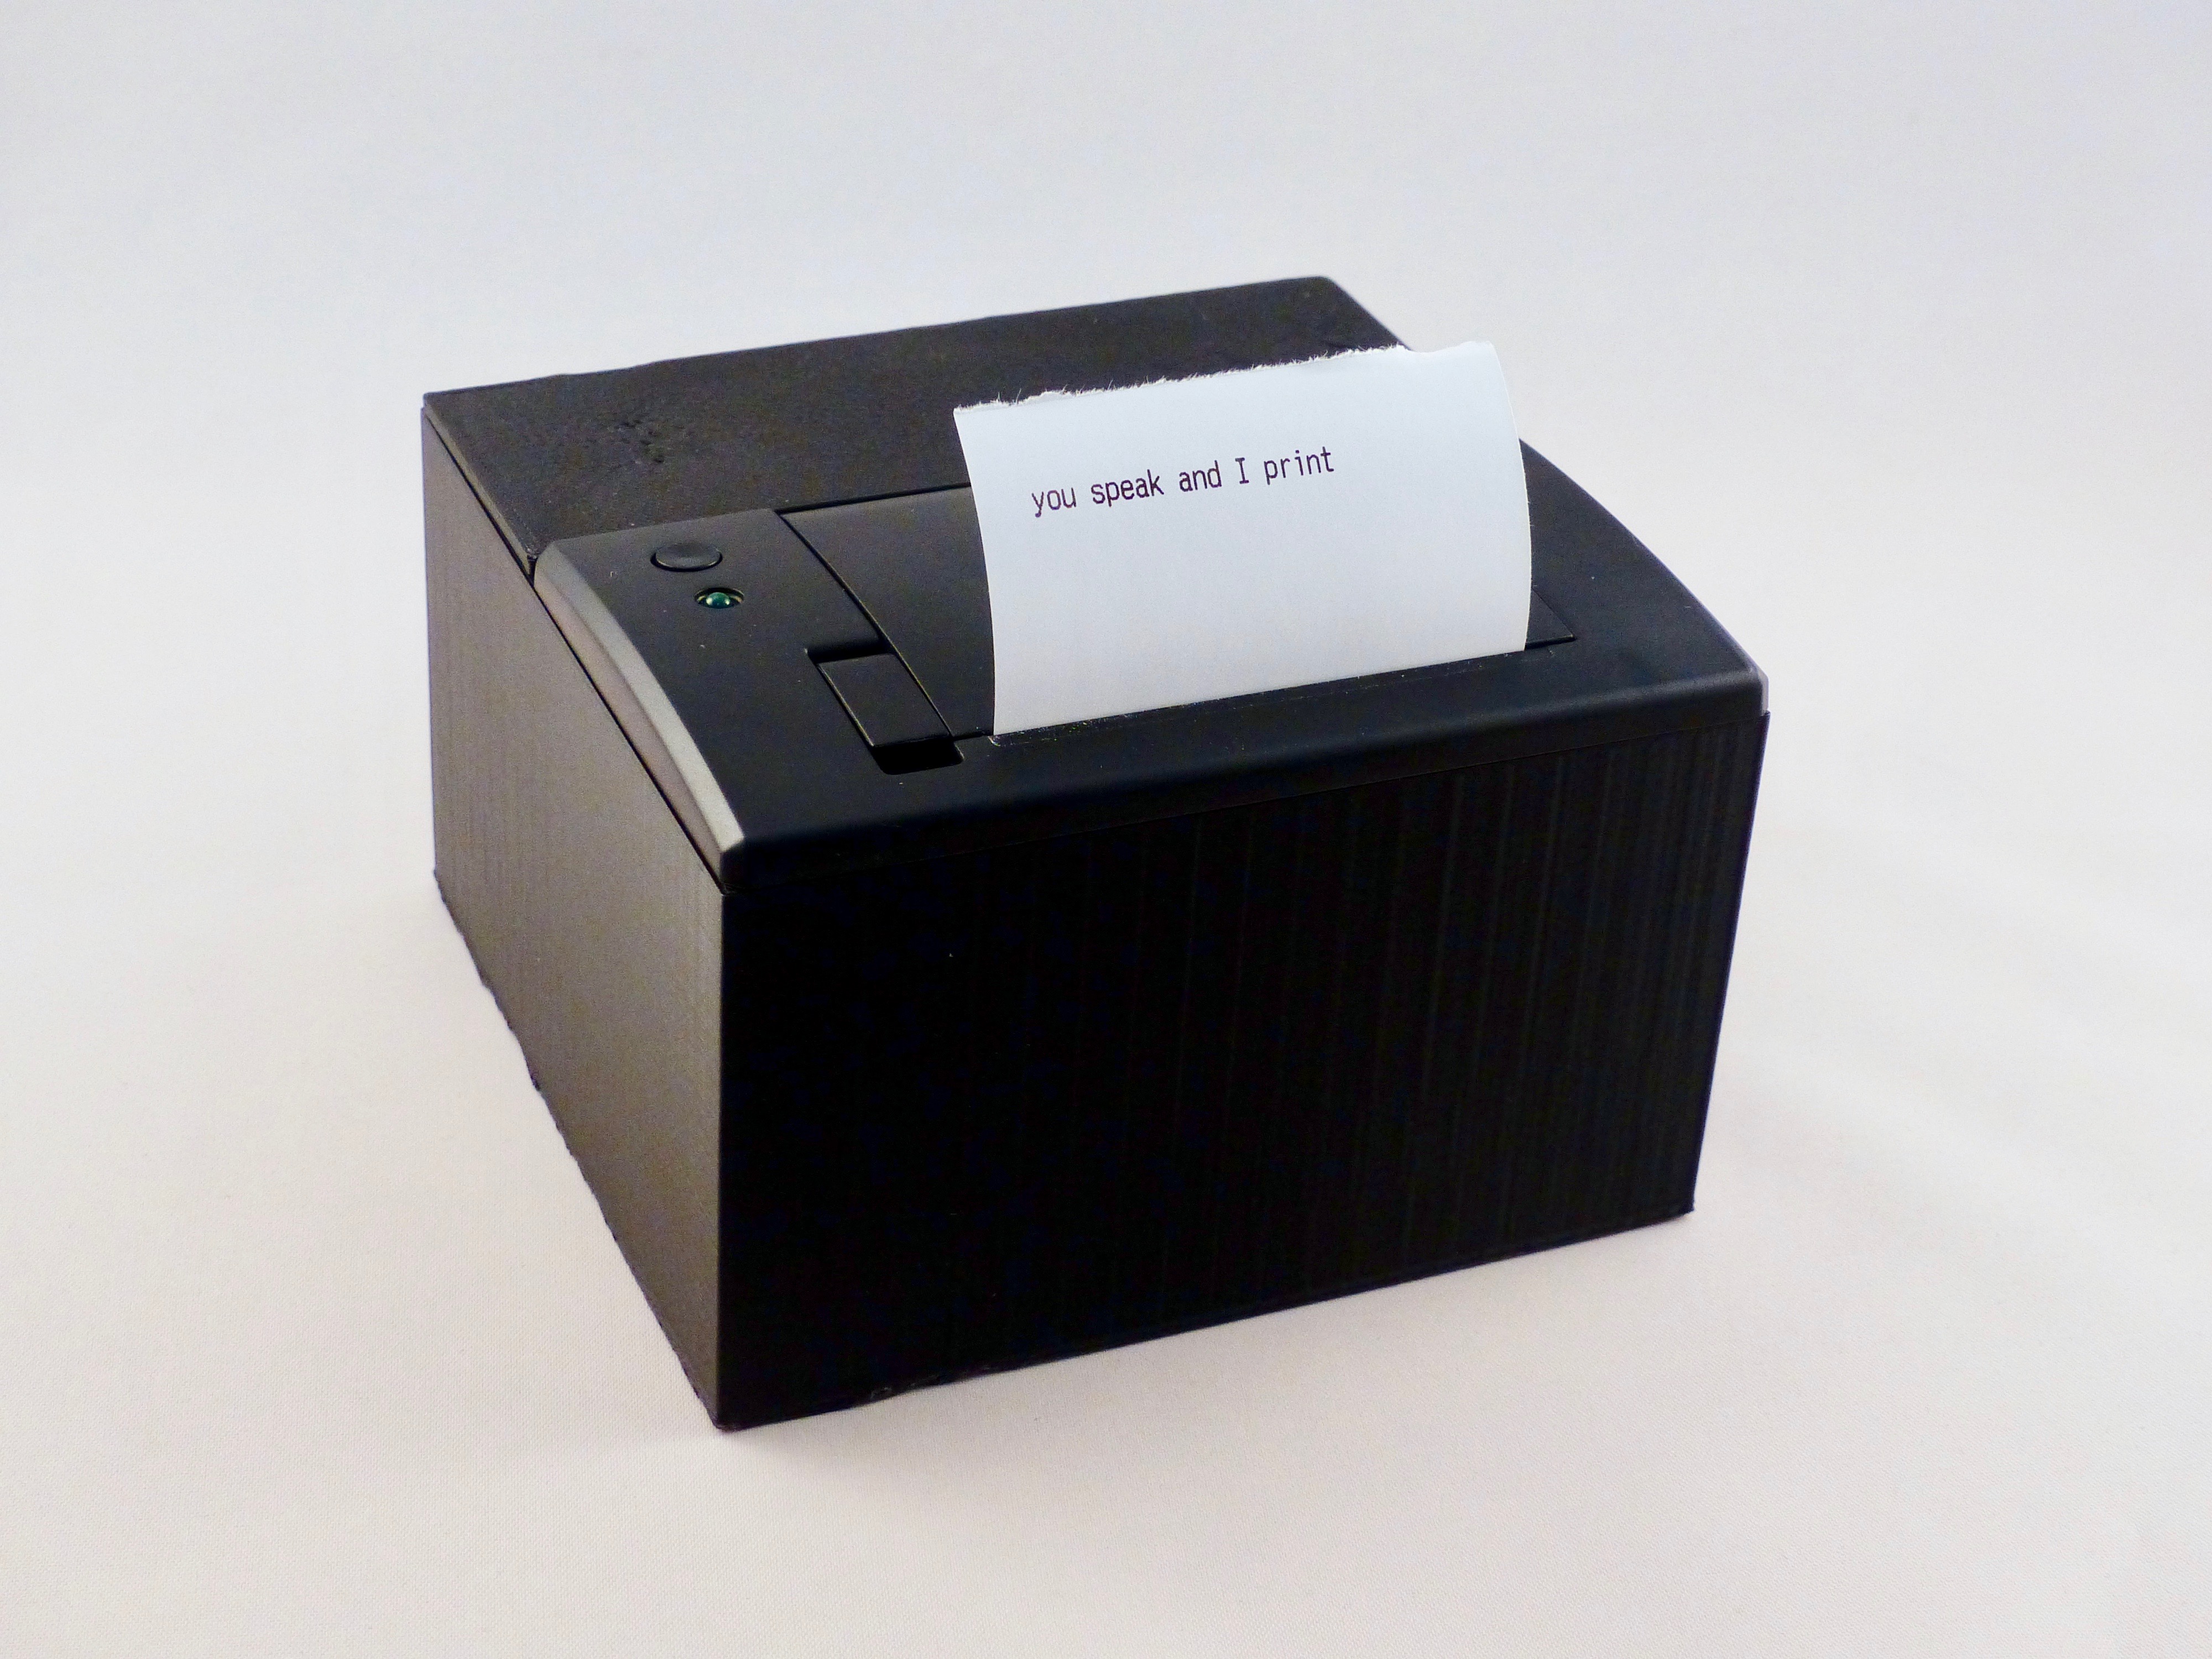
Package it up
Whatever you decide to use this project for, why not finish it up with a 3D-printed case so you package up the printer and Raspberry Pi with the recording and playback devices and create a portable unit? Ideal for pranking friends or taking notes on the move!
See if you can invent any other games using voice recognition, or investigate the graphics capability of the printer. Add a Raspberry Pi Camera Module for retro black and white photos. Combine it with facial recognition to print out an ID badge just using someone’s face. Over to you.
The MagPi magazine issue 84
This project was created by PJ Evans for The MagPi magazine issue 84, available now online, from your local newsagents, or as a free download from The MagPi magazine website.
Website: LINK
Schreibe einen Kommentar
Du musst angemeldet sein, um einen Kommentar abzugeben.