Schlagwort: Pro Mini

  • Centimeter-scale lawn mower positioning without GPS RTK

    Centimeter-scale lawn mower positioning without GPS RTK

    Reading Time: 2 minutes

    Arduino TeamJuly 27th, 2022

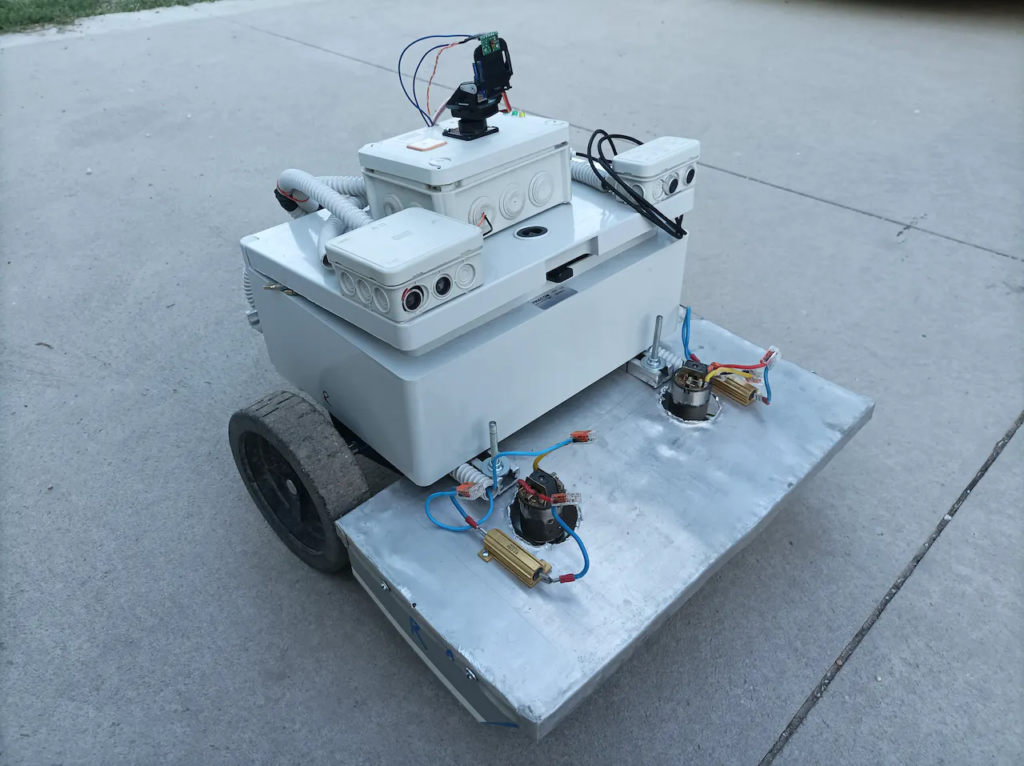
    GPS is perfect for navigating roads, because that doesn’t require much precision. But GPS is only accurate to several meters, which means that it is unsuitable for applications that require more precise positioning. GPS RTK (real-time kinematic) systems can achieve much greater accuracy, but they are complex and require a subscription to a correction service. Viktor Kurusa needed accurate positioning for his robotic lawn mower, but didn’t want to resort to GPS RTK. Instead, he used a few Arduino boards to enable UWB ranging for centimeter-scale positioning.

    UWB (ultra-wideband) is a radio technology that the FCC opened up for consumer and commercial applications in 2002. It is ideal for transmitting large amounts of data at short ranges. It is also possible to use UWB to calculate distances by measuring the ToF (time of flight) between a “tag” device and an “anchor” device. Using two anchor devices, one can triangulate the position of the tag on a 2D plane. With three anchors, one can determine the tag’s exact location in 3D space.

    Kurusa used this UWB positioning capability for his robotic lawn mower’s navigation. The lawn mower incorporates several boards: an Arduino Due, two Nanos, and four SparkFun Arduino Pro Minis. The latter four boards connect to Decawave DMW1000 UWB transceiver modules — three of them for the remote anchors and one of them for the onboard tag. The Due board acts as the primary onboard controller and runs FreeRTOS, monitors an MPU6050 accelerometer, and drives the robot’s motors through an H-bridge. One Nano board interfaces with ultrasonic sensors for obstacle avoidance and the second Nano monitors a LIDAR sensor, which the system checks if the ultrasonic sensors detect an obstacle.

    With all of that hardware working in concert, Kurusa has a robotic lawnmower with a sophisticated sensor array. It knows exactly where it is in the yard, which lets it accurately follow paths while mowing. If something unexpected enter’s the mower’s path, such as a kid’s soccer ball, the mower will detect it and attempt to navigate around it.

    Website: LINK

  • Build your own multi-function digital measuring wheel with Arduino

    Build your own multi-function digital measuring wheel with Arduino

    Reading Time: 2 minutes

    Arduino TeamJuly 20th, 2022

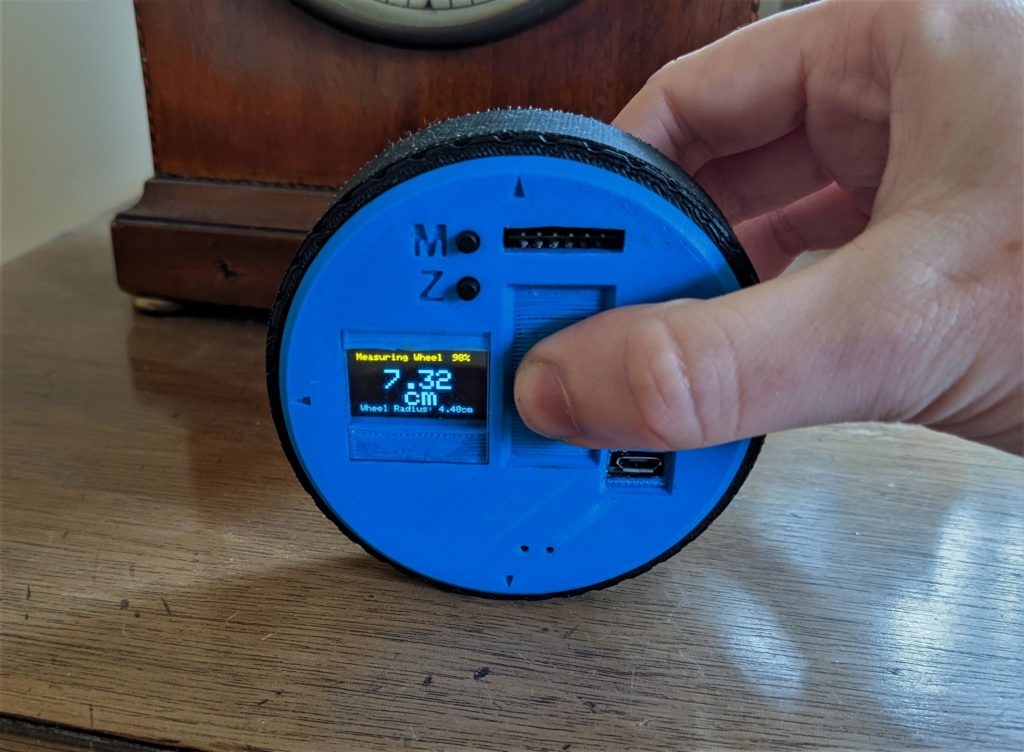
    Measurement tools, like calipers and micrometers, are just as important as your soldering iron and side cutters. But if you’re still using a measuring tape for long parts, you are subjecting yourself to unnecessary frustration. Digital measuring wheels let you easily measure almost infinite lengths by rolling the device along. There are wheels like these on the consumer market, but you can also follow AGBarber’s Instructables tutorial to create your own.

    In addition to distance measurements, this wheel has two other functions. You can roll it around the circumference of a round object, like a pipe, and the device will automatically calculate the diameter. You can also spin the wheel and it will tell you the RPM. We’re not quite sure what the RPM function’s application would be, but we’re sure that someone has a use for it. The unit is about the size of a typical measuring tape and has a big battery for portable use.

    The BoM for this project is extensive, because it uses a custom PCB. But most of those components are simple resistors and capacitors. The standout parts are an Arduino board, a 0.96″ OLED screen, a LiPo battery, a TP4056 LiPo charging board, and a computer mouse scroll wheel encoder. That encoder attaches to a gear which the device’s outer wheel spins. It tracks rotations and gives an accurate distance measurement. The body of the tool, the outer wheel, and the gear are all 3D-printable.

    If you want a fun project and a convenient way to take measurements, this is the gadget for you.

    Website: LINK

  • PocketView is an LED display that shows info through clothes and other fabrics

    PocketView is an LED display that shows info through clothes and other fabrics

    Reading Time: 2 minutes

    Arduino TeamOctober 16th, 2021

    When receiving a notification on your phone, it can be a tedious process to take the device out of a pocket, unlock the screen, and then read the message. In order to make viewing simple information much faster, University of Waterloo researchers developed a small pocketable display that can shine images and text through fabric. This means seeing the current time or directions can be done far more quickly since all the user has to do is look down. 

    The technology driving this system consists of an Arduino Pro Mini board, an HC-05 Bluetooth module for receiving data from a host phone, an 8×8 RGBW NeoPixel matrix, and a single 420mAh LiPo battery cell for power. All of these components were assembled into a single unit and placed within a 3D-printed enclosure that can easily fit into the user’s pocket. 

    After studying how LEDs interact with various types of fabrics by using an Arduino Mega, the team gathered 12 participants to see how effective their smart display, called the PocketView, was at showing important information. Once several tasks had been performed by the group, they consistently rated the LEDs to be a better viewing experience compared to looking at a phone.

    [youtube https://www.youtube.com/watch?v=yfvURj22Alg?feature=oembed&w=500&h=281]

    To read more information about the PocketView and the plans the team has for it, you can view their paper here.

    Images: Antony Albert Raj Irudayaraj, et al.

    Website: LINK

  • This strange robotic fish swims like a lamprey

    This strange robotic fish swims like a lamprey

    Reading Time: 2 minutes

    Arduino TeamAugust 12th, 2021

    Roboticists often look to nature for inspiration. That makes sense, because animals are very efficient machines, thanks to millions of years of evolution. Even our most sophisticated technology doesn’t come close to matching a common housefly. But we can get closer to mimicking nature at larger scales, as with this robot created by researchers at EPFL that does a great job of swimming like a lamprey.

    Lampreys are long, jawless fish that often get mistaken for eels. They swim through the water with a motion similar to a snake slithering across loose sand. To replicate that movement, this robot’s body contains numerous segments joined by servo motors. Each segment also has a force plate on each side. That lets the robot sense the pressure of the water against its body as it swims. An Arduino Mini board monitors the plates through force cells and controls the motors.

    This unique setup let the researchers study the ability of some vertebrates to move even with a damaged spinal cord. The “healthy” robot can coordinate the movement of all of its motors. But the robot with the simulated spinal cord injury cannot. The motors past the “injury” can only react to the force plates on their own segments. The team found that the robot was still able to swim efficiently, because the force plates provided enough information to control the motors as needed. This provides valuable information in the field of neuroscience and vertebrate nervous systems.

    [youtube https://www.youtube.com/watch?v=xqiCpvzW_zc?feature=oembed&w=500&h=281]

    Images: Kamilo Melo, BIOROB-EPFL

    Website: LINK

  • Send text messages over ham radio with the HamMessenger

    Send text messages over ham radio with the HamMessenger

    Reading Time: 2 minutes

    Arduino TeamJuly 27th, 2021

    Ham radio, or amateur radio, is a hobby enjoyed by millions of enthusiasts around the world. The FCC in the US and similar organizations in other countries provide amateur radio licenses that allow hobbyists to communicate on designated radio bands. Most ham radio operators communicate by voice, but ham radios can transmit other kinds of data. Dale Thomas built HamMessenger, which is a portable device that enables users to send text messages through their ham radios.

    If you remember the early days of the internet, you have heard for yourself that audio can carry digital data. Dial-up internet uses a modem to transmit that audio through standard phone lines. HamMessenger uses a similar methodology to encode a text message as audio. If someone listening on that frequency also has a HamMessenger device, they can decode the text message. Messages are not encrypted, so you shouldn’t use HamMessenger for sensitive information. But it’s a fun way to chat with your ham radio buddies.

    HamMessenger contains two Arduino development boards. An Arduino Mega handles most of the functionality and a separate Pro Mini acts as a MicroAPRS modem. A Neo-6M GPS radio module lets you send position information along with your text messages. The HamMessenger’s custom PCB has a small 0.96″ OLED screen to display the messages. You input text via an M5Stack CardKB keyboard. Power comes from a pair of 18650 lithium-ion battery cells. The output from the HamMessenger is an audio signal, which feeds into any ham radio — even a handheld model. Thomas plans to design an enclosure soon, but you can follow his instructions to put the rest of the hardware together right now.

    Website: LINK

  • Spinning gyroscope “boat” stabilization

    Spinning gyroscope “boat” stabilization

    Reading Time: < 1 minute

    Spinning gyroscope “boat” stabilization

    Arduino TeamMay 6th, 2021

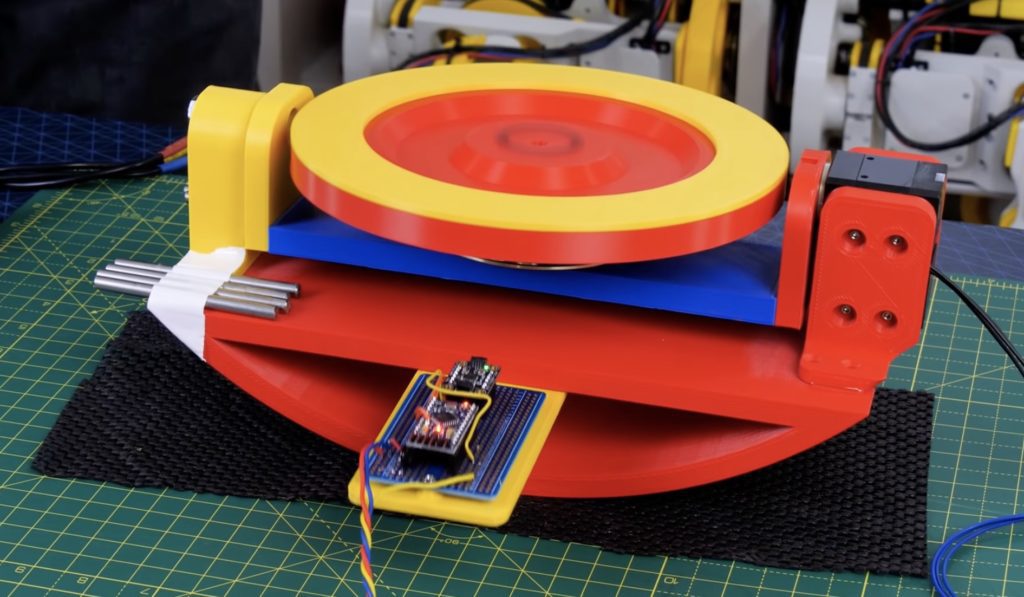
    When you use a “gyroscope” in Arduino and robotics projects, generally this means a small IMU that leverages several methods of sensing to tell how a device is moving. However, physical gyroscopes are able to employ a spinning disk stay upright mechanically. Could one be combined with advanced electronics to stabilize a robot or other craft?

    James Bruton answers this question in the video below, going from a “bare” gyroscope, to an unpowered gimbal, and finally to a simulated boat. This utilizes a powered gimbal for stabilization that’s tilted in one axis by a DYNAMIXEL servo. Angle is measured using an Arduino Pro Mini along with an MPU-6050 IMU, and the gyroscope is controlled by an Arduino Mega.

    You can check out the progression of this fun experiment in the video below, and find code/CAD info on GitHub.

    [youtube https://www.youtube.com/watch?v=UVJx8T8wTQA?feature=oembed&w=500&h=281]

    Website: LINK

  • AutoStrummer is a DIY device that strums your guitar for you

    AutoStrummer is a DIY device that strums your guitar for you

    Reading Time: 2 minutes

    Arduino TeamMay 4th, 2021

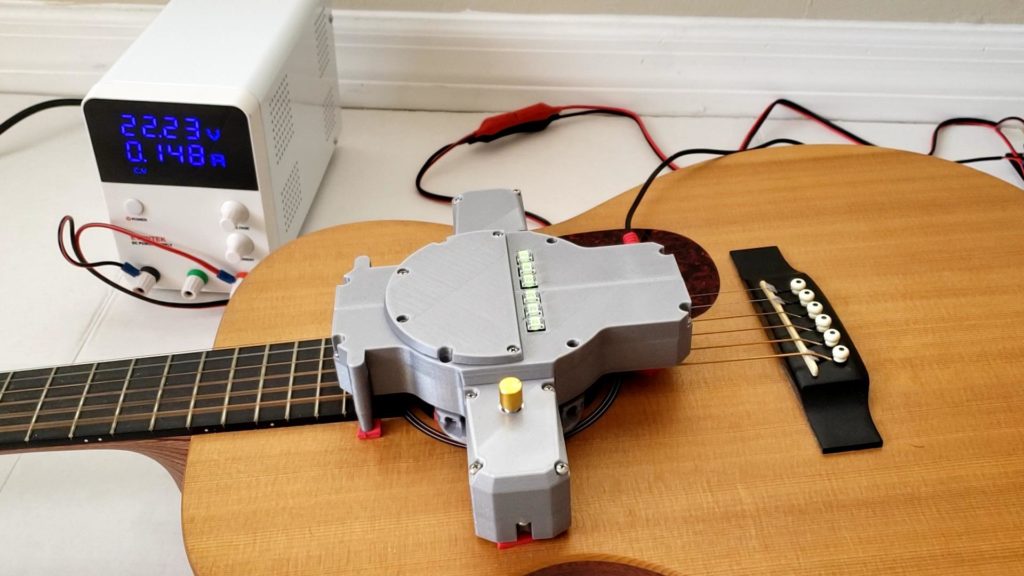
    When playing the guitar, working the fretboard is only half of the equation. The other half is plucking or strumming the strings. But some people, particularly those with disabilities, may find it difficult to do both. To help with the strumming part of the equation, Jacob Stambaugh designed this DIY AutoStrummer device.

    Stambaugh’s AutoStrummer fits into the sound hole of an acoustic guitar, so that it sits over the strings. A guitar pick, attached to an arm actuated by a stepper motor, swings back and forth to strum the desired strings. An Arduino board controls the movement of the stepper motor through a DRV8825 stepper motor driver chip. 

    The guitarist uses an array of six tactile push buttons to select which strings to strum. If both the high E and low E buttons are pressed, then the device will strum all six strings. If the D and G buttons are pressed, then it will only strum those two strings. A potentiometer lets the guitarist set the strumming tempo and the strumming pattern is configurable through a menu system.

    A 3D-printed case houses all of those components. Stambaugh designed it to fit his specific guitar, so you may need to tweak the size to fit your own guitar. He created the device for the University of South Florida’s Makecourse, and uploaded build instructions and the necessary files to Instructables so that anyone can build their own AutoStrummer.

    [youtube https://www.youtube.com/watch?v=LsnRX7V6yXg?feature=oembed&w=500&h=281]

    Website: LINK

  • Avoid eyestrain with the help of the Eyesight Guardian

    Avoid eyestrain with the help of the Eyesight Guardian

    Reading Time: 2 minutes

    Avoid eyestrain with the help of the Eyesight Guardian

    Arduino TeamMarch 4th, 2021

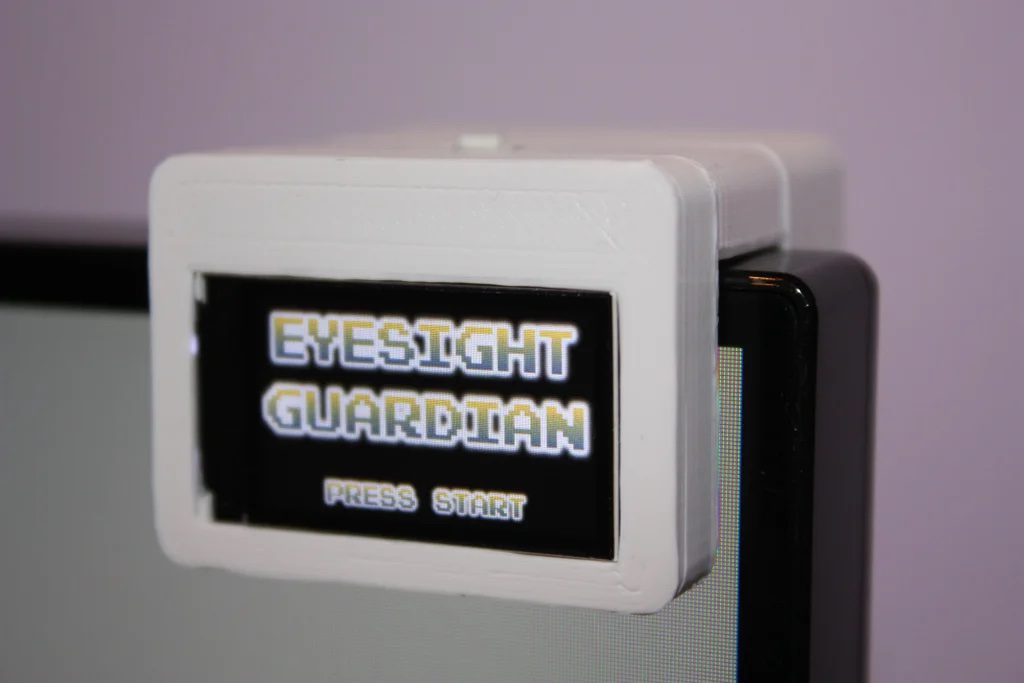
    Many of us spend all day staring at a computer screen, entering data, watching YouTube, writing blog articles, or any number of other tasks. According to Daniel Hingston, computer-induced eye strain can be a real problem, and to combat this, you should follow the 20/20/20 rule. That is for ever 20 minutes of computer time, look away at a distance of 20 feet or more for 20 seconds.

    To help remind him to do just that, Hingston invented the “Eyesight Guardian.” This little device sits on top of your computer like a webcam, and uses an Arduino board along with a small TFT display to command you to “Look away now!” every 20 minutes. The system is then restarted via the press of a button on top, again counting down the 20 minutes until it’s time for the next “eye break.”

    You can see it in action in the video below, and full build details are available in his tutorial here.

    [youtube https://www.youtube.com/watch?v=DRDmLbAgXZc?feature=oembed&w=500&h=281]

    Website: LINK

  • Controlling a gas convection heater with a custom thermostat

    Controlling a gas convection heater with a custom thermostat

    Reading Time: < 1 minute

    Controlling a gas convection heater with a custom thermostat

    Arduino TeamNovember 27th, 2020

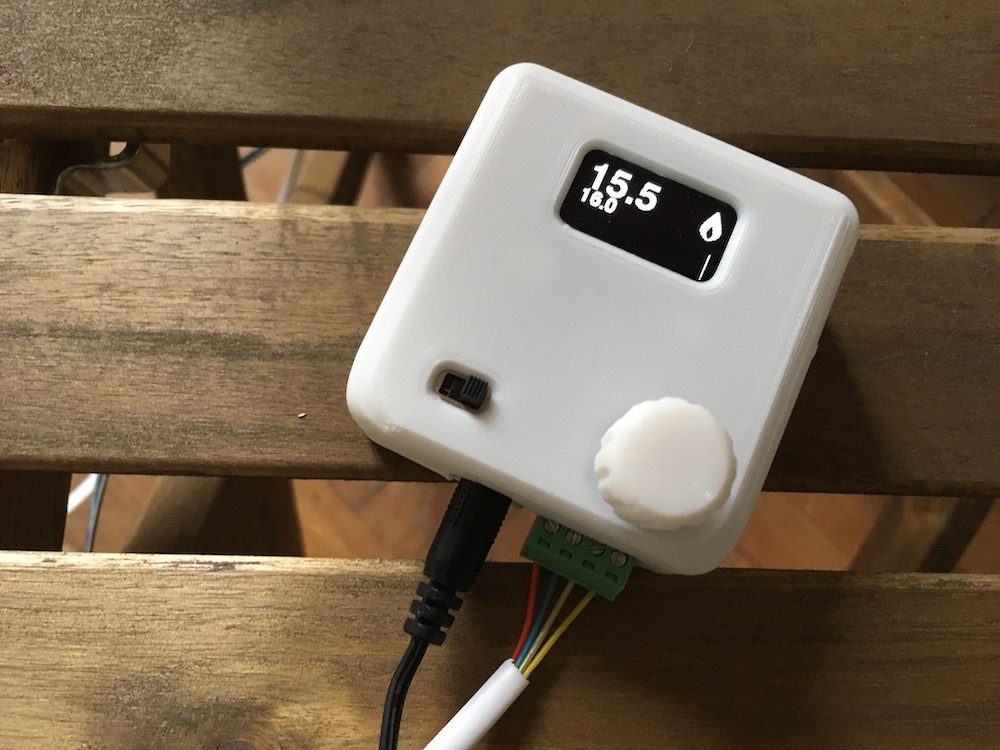
    Redditor “Higgs8” had a gas convection heater that is (or was) controlled manually, but they wanted something a bit more. To accomplish this, they came up with a small Arduino-based thermostat.

    This allows you to set the desired temperature using a potentiometer, and it senses the current temperature value via a DS18B20 thermometer unit. It then adjusts the formerly manual knob with a stepper motor and custom gear reduction in response, maintaining the desired comfort level.

    Feedback is displayed on a small OLED screen, which charts the room’s temperature over a 24-hour period. It also shows if the heater was on, letting you see if it was working properly.

    More details can be found on Higg8’s Imgur page here.

    Website: LINK

  • UCSD engineers developed electrically-controlled soft robot actuators

    UCSD engineers developed electrically-controlled soft robot actuators

    Reading Time: 2 minutes

    UCSD engineers developed electrically-controlled soft robot actuators

    Arduino TeamOctober 12th, 2019

    Engineers at the University of California San Diego have come up with a way to build soft robots that are compact, portable and multifunctional without the requirement for compressed air. 

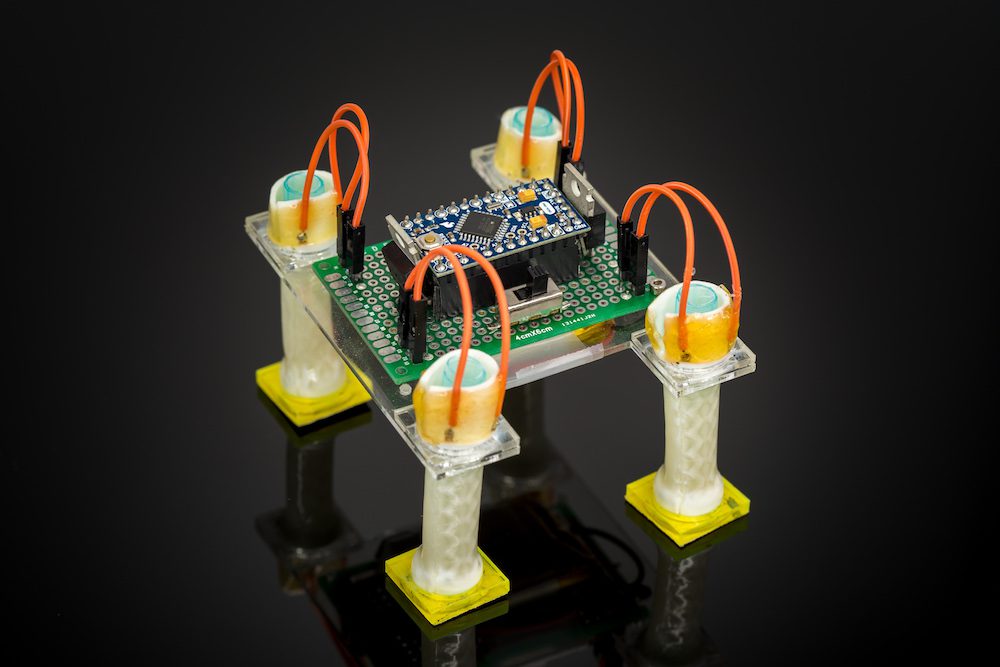
    Instead, they’re using a system of tubular actuators made out of heat-sensitive liquid crystal elastomer sheets. Heating elements are placed between two layers of elastomer, which is then rolled up into a cylinder, allowing the tubular digit to bend and contract.

    With this novel method, they’ve been able to build a three-jaw gripper, as well as a robot that walks independently with four legs under Arduino control. While the grippers are slow at this point, taking 30 seconds to bend and minutes to return to their original position, the eventual goal is to have them react at the speed of human muscles.

    [youtube https://www.youtube.com/watch?v=ikD8oywuYBg?feature=oembed&w=500&h=281]

    Website: LINK

  • Star Trek tricorder-style heart rate monitor

    Star Trek tricorder-style heart rate monitor

    Reading Time: < 1 minute

    Star Trek tricorder-style heart rate monitor

    Arduino TeamDecember 28th, 2018

    A heart rate monitor can be an important tool for tracking fitness and exertion levels, but what if you want something a bit more interesting style-wise? For a novel idea, be sure to check out the project shown below from “Taste The Code.”

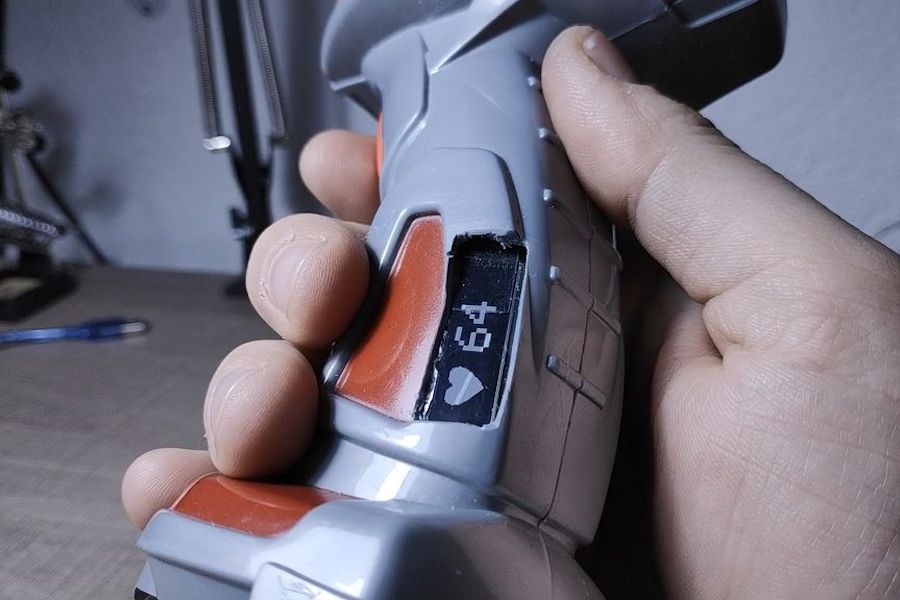
    In it, Blagojce Kolicoski turns a handle used for launching rotating toys into something reminiscent of a tricorder from Star Trek.

    The build stuffs an Arduino, a pulse sensor, and a tiny OLED display into the handle, which conveniently already had accommodations for three AA batteries. This, along with the monitor’s I2C connection, meant that wiring everything up was quite simple. 

    Want to make your own? Instructions are available here, while code can be found on GitHub.

    [youtube https://www.youtube.com/watch?v=iVN3gXZ72P8?feature=oembed&w=500&h=281]

    Website: LINK

  • Robot transforms to slide under doors and more

    Robot transforms to slide under doors and more

    Reading Time: 2 minutes

    Robot transforms to slide under doors and more

    Arduino TeamJuly 11th, 2018

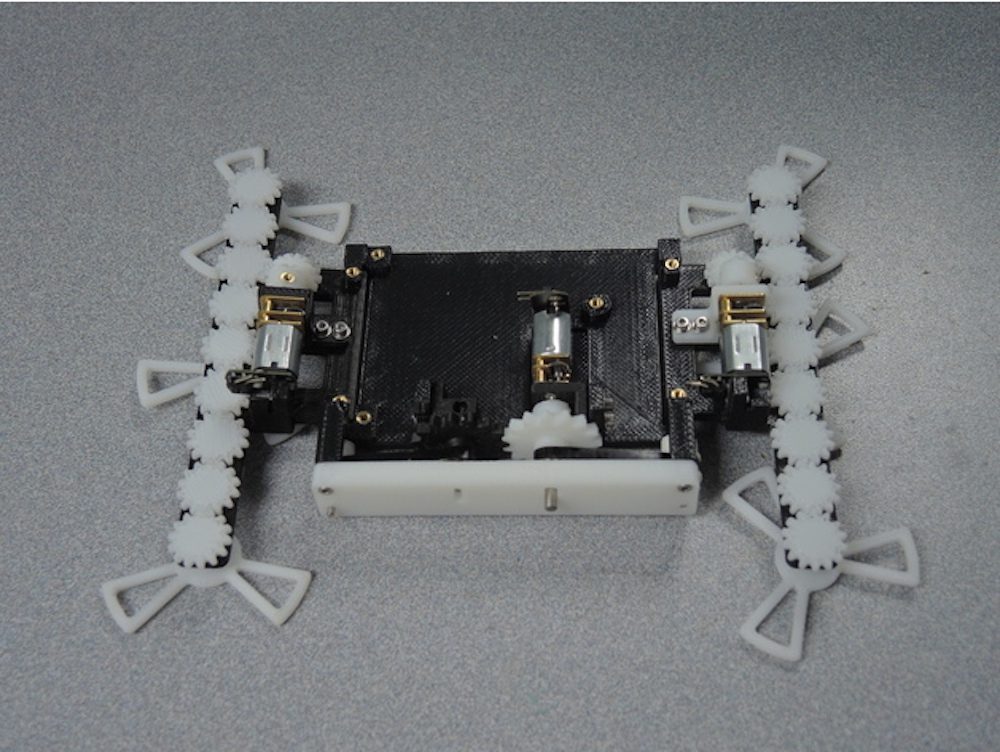
    While the STAR, or Sprawl Turned Autonomous Robot, is more than capable of traveling over obstacles with its three-pointed wheels, it can also make itself thin enough to simply slide under others as needed. This clever design uses an Arduino Pro Mini for control, and normally moves around like a tank, rolling on six wheels that are turned by two motors.

    When the task calls for it to go under something, a third motor cranks these wheels to nearly parallel with the floor, shrinking the robot down to a very slim profile—so thin, in fact, that it can actually slide under a door as seen in the video below! 

    Print files and more information on the build can be found here, while the original paper upon which this robot is based is also available.

    [youtube https://www.youtube.com/watch?v=722XO0xlWLE?feature=oembed&w=500&h=281]

    Website: LINK