Schlagwort: nfc
-

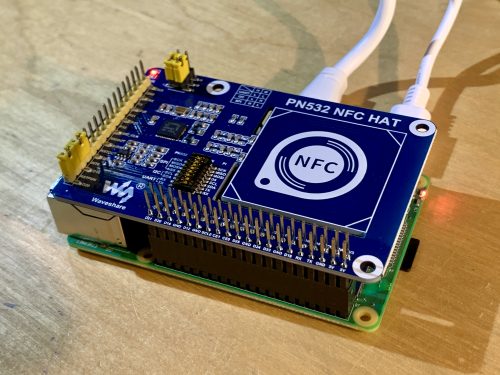
Read RFID and NFC tokens with Raspberry Pi | HackSpace 37
Reading Time: 4 minutesAdd a bit of security to your project or make things selectableby using different cards. In the latest issue of HackSpace magazine, PJ Evans goes contactless. The HAT is not hard on resources, so you can use many variants of Raspberry Pi NFC (near-field communication) is based on the RFID (radio-frequency identification)…
-

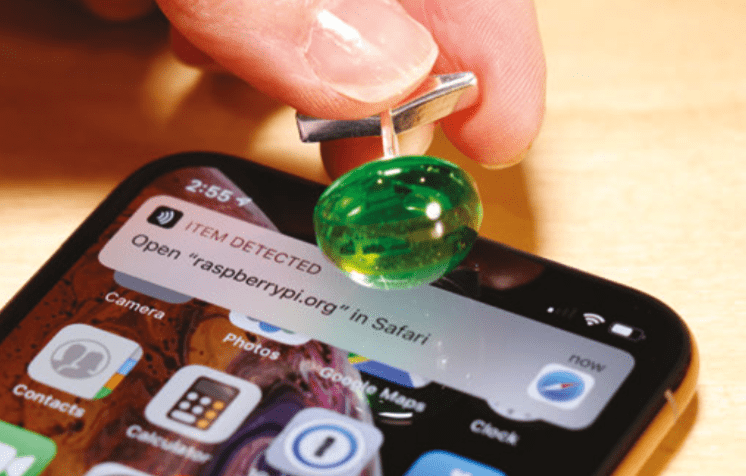
Make your own NFC data cufflinks
Reading Time: 10 minutesIn this project, we’ll make a pair of NFC data cufflinks, ideal for storing a website URL, a password, or a secret message. This project is perfect for a sartorial spy who loves dry Martinis, and anyone who can’t remember their WiFi password. NFC technology NFC stands for near-field communication, and is…
-

Artefacts in the classroom with Museum in a Box
Reading Time: 4 minutesMuseum in a Box bridges the gap between museums and schools by creating a more hands-on approach to conservation education through 3D printing and digital making. Artefacts in the classroom with Museum in a Box || Raspberry Pi Stories Learn more: http://rpf.io/ Subscribe to our YouTube channel: http://rpf.io/ytsub Help us reach a…