Schlagwort: Motion Capture
-

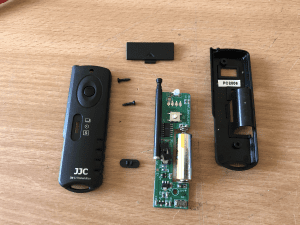
DSLR Motion Capture with Raspberry Pi and OpenCV
Reading Time: 3 minutesOne of our favourite makers, Pi & Chips (AKA David Pride), wanted to see if they could trigger a DSLR camera to take pictures by using motion detection with OpenCV on Raspberry Pi. You could certainly do this with a Raspberry Pi High Quality Camera, but David wanted to try with his…
-

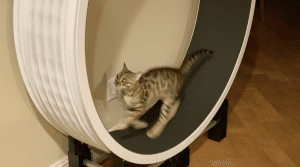
Track your cat’s activity with a homemade speedometer
Reading Time: 3 minutesFirstly, hamster wheels for cats are (still) a thing. Secondly, Bengal cats run far. And Shawn Nunley on reddit is the latest to hit on this solution for kitty exercise and bonus cat stats. Here is the wheel itself. That part was shop-bought. (Apparently it’s a ZiggyDoo Ferris Cat Wheel.) Smol kitty…
-

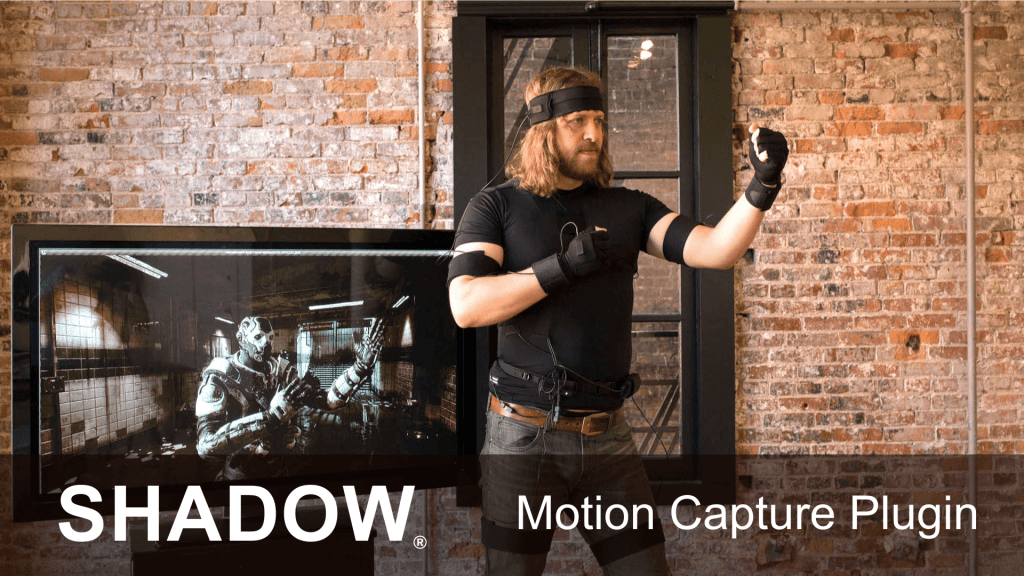
VIVE & Motion Workshop Bring Full-Body Interaction To VR
Reading Time: 2 minutesFast, high-quality mocap animation at 400 fps. Brought to you by VIVE Tracker & Shadow® Motion Capture System. Erik Bakke is the co-founder of Motion Workshop, a Seattle-based business that focuses on motion sensor technology and motion capture. We invited him to sit down and discuss his signature Shadow Motion Capture System…