Schlagwort: MIDI Instrument
-

Zen sand garden in a suitcase doubles as MIDI controller
Reading Time: 3 minutesAt the shallow end of the pool, a MIDI (musical instrument digital interface) controller can be as simple as a handful of buttons that correspond to different notes. But even as one wades into the deep end of the pool, MIDI controllers tend to still look like hunks of plastic with some…
-

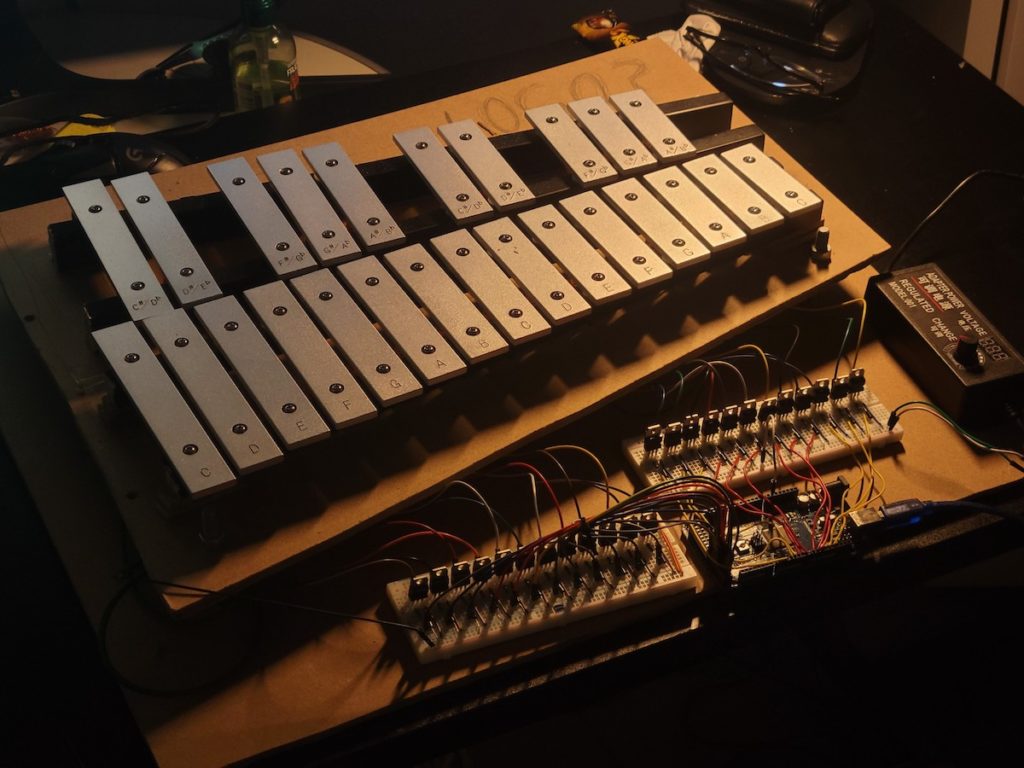
Auto Xylophone features hand-wound solenoids
Reading Time: 2 minutesArduino Team — September 15th, 2022 A xylophone is, in addition to being one of only two known English words that start with the letter X, an instrument that most of us haven’t touched since we were toddlers. But xylophones produce a very pleasing sound and their construction is about as simple…
-

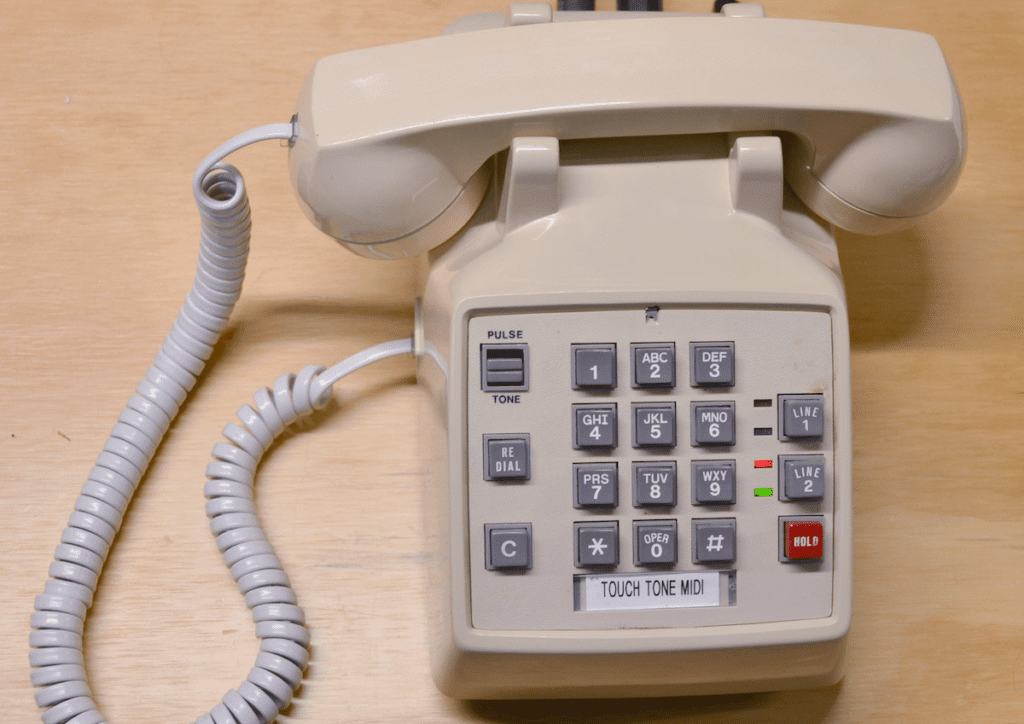
Convert an old telephone into a MIDI instrument
Reading Time: 2 minutesArduino Team — September 1st, 2022 MIDI (Musical Instrument Digital Interface) is a fantastic standard because it is versatile enough to encompass almost all instruments, but simple enough to work with using low-power digital hardware. A typical MIDI message contains three bytes. The first is a status byte that describes the action…
-

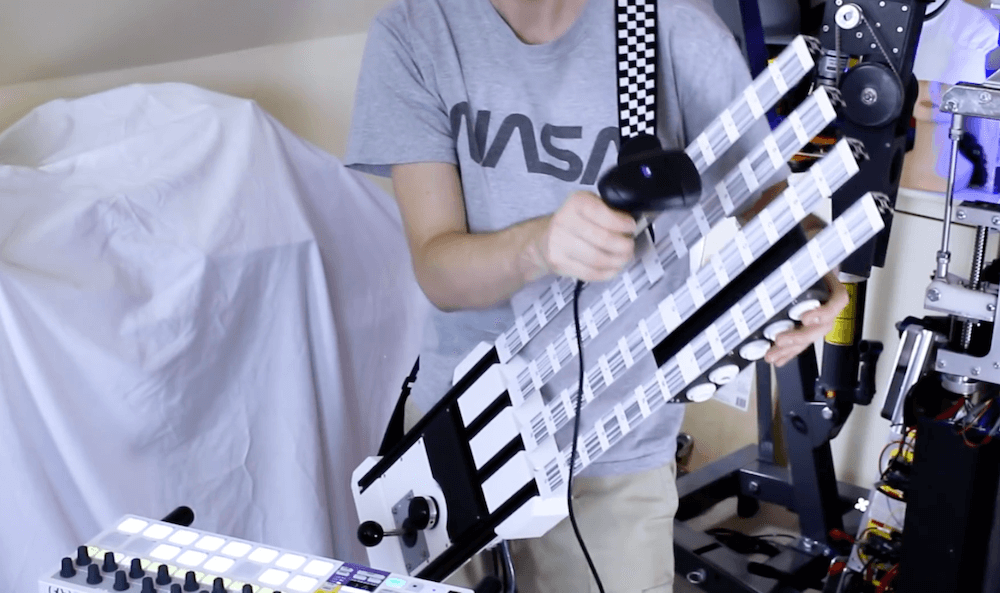
Zany MIDI guitar made from barcode scanner and Arduino
Reading Time: < 1 minuteZany MIDI guitar made from barcode scanner and Arduino Arduino Team — September 23rd, 2019 You’ve seen barcode scanners register the price for your groceries, and likely in many other applications, but did you ever consider if one could be made into an instrument? Well we now know the answer, thanks…
-

Toy piano converted into a self-playing instrument
Reading Time: < 1 minuteToy piano converted into a self-playing instrument Arduino Team — August 14th, 2019 Upon obtaining a small toy piano, Måns Jonasson went to work “Arduinoizing” it with 30 solenoids to hammer out tunes. A MIDI shield is used to pipe commands from a computer to the Arduino Mega that’s used for…
-

A 3D-printed, Arduino Due-based MIDI jammer keyboard
Reading Time: 2 minutesA 3D-printed, Arduino Due-based MIDI jammer keyboard Arduino Team — July 11th, 2019 Michael Koopman wanted to learn piano. However, after finding this pursuit frustrating, he instead decided to assemble his own 3D-printed MIDI jammer keyboard, inspired by the AXiS-49 interface pad. His instrument is controlled via an Arduino Due, with 85…
-

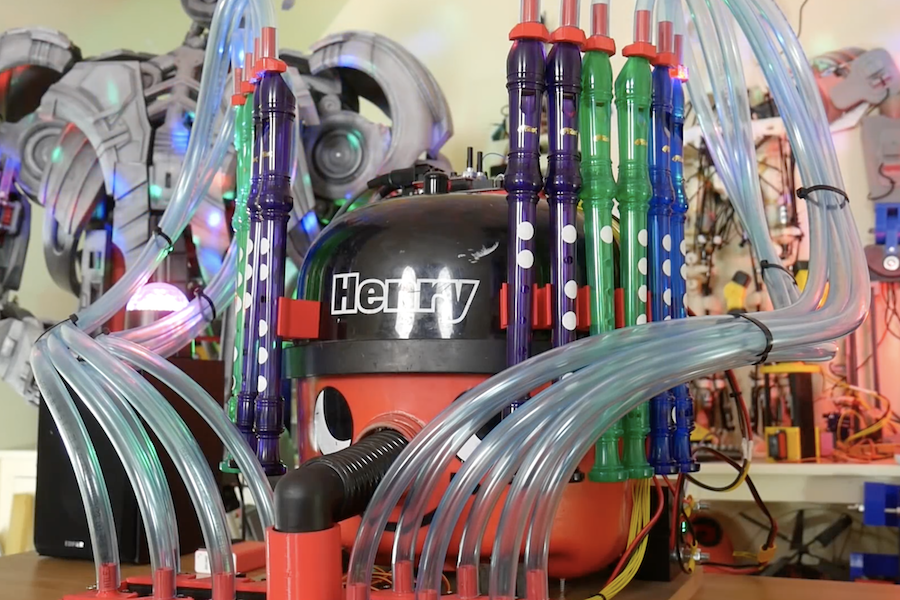
Vacuum cleaner turned into unique MIDI instrument
Reading Time: 2 minutesVacuum cleaner turned into unique MIDI instrument Arduino Team — April 9th, 2019 When you see a vacuum cleaner, most people see a useful implement to keep their carpets clean. James Bruton, however, envisioned another use—as a musical instrument. His new project, which made its appearance this year on April Fools’ Day,…
-

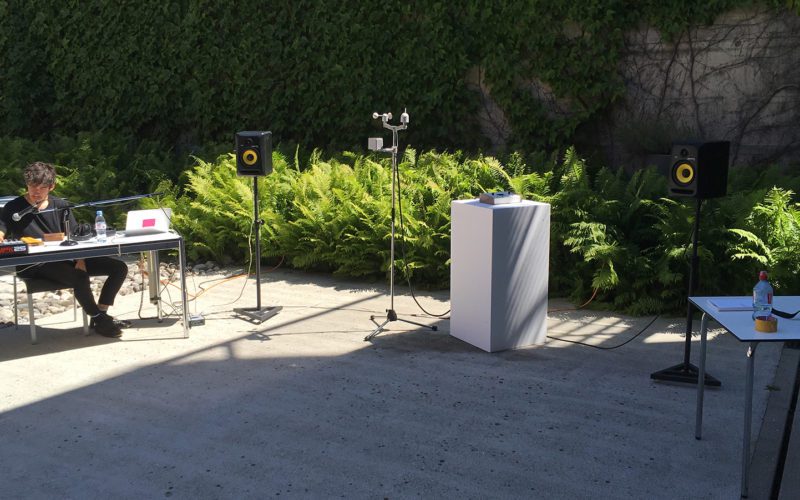
Custom weather station enhances and modifies electronic music
Reading Time: 2 minutesCustom weather station enhances and modifies electronic music Arduino Team — October 25th, 2018 While the environment is important for any musical performance, generally it’s not an active part of the show. Adrien Kaeser, though, has come up with a device called the “Weather Thingy“ that integrates climate-related events directly into electronic…