Schlagwort: mega
-

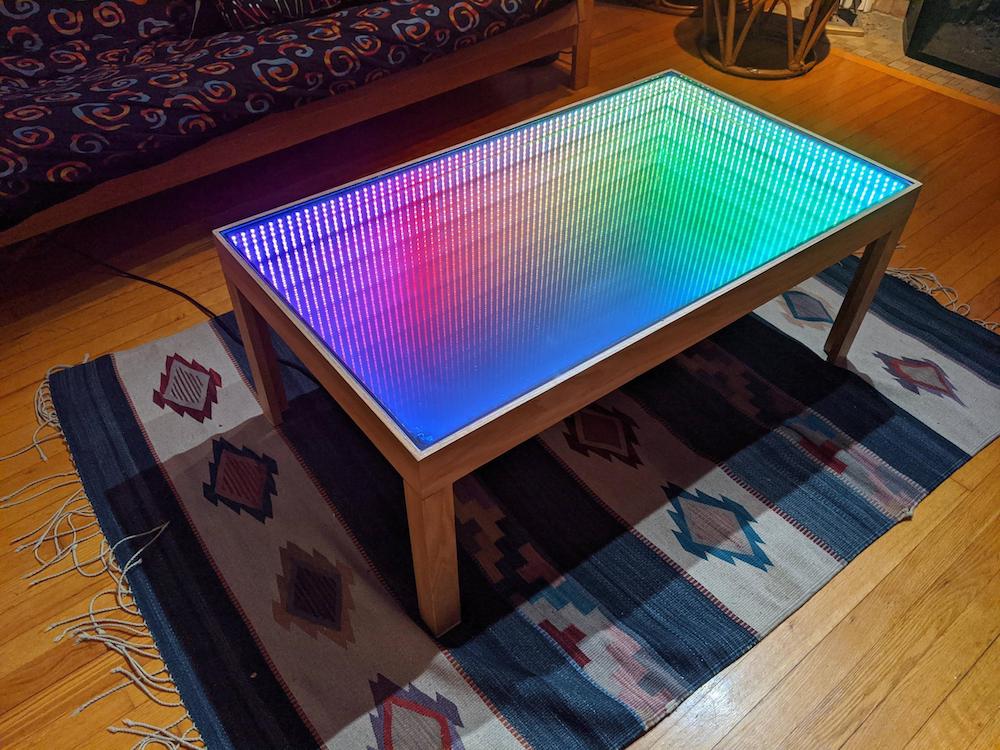
This infinity mirror coffee table puts other living room furniture to shame
Reading Time: < 1 minuteThis infinity mirror coffee table puts other living room furniture to shame Arduino Team — April 13th, 2020 Coffee tables generally sit between a couch and TV, providing a convenient place to set your cup, snack, or magazine. As proven by Redditor Procupine however, with the addition of an Arduino Mega and a “mere”…
-

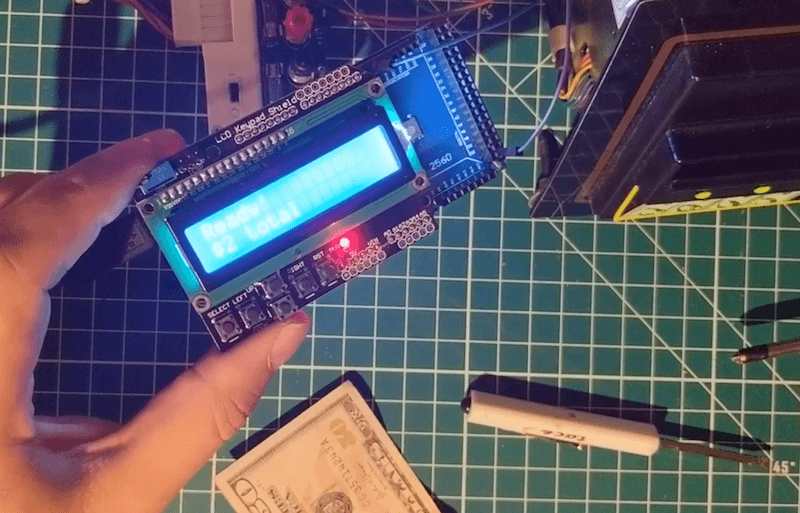
Interfacing an old arcade cash reader with an Arduino
Reading Time: < 1 minuteInterfacing an old arcade cash reader with an Arduino Arduino Team — April 2nd, 2020 After picking up a free arcade machine, YouTuber “Another Maker” has naturally been considering what to do with it. One of the more interesting components included is the 1/5/10/20 U.S. dollar bill acceptor, which he outlines…
-

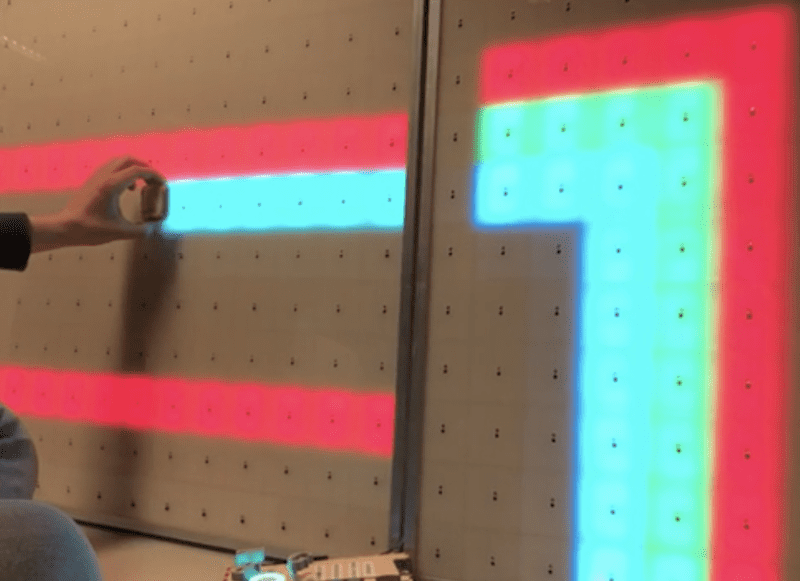
1,156 LEDs make up these dual acrylic light-up panels
Reading Time: 2 minutes1,156 LEDs make up these dual acrylic light-up panels Arduino Team — March 24th, 2020 What does one do with over 1,000 LEDs, white acrylic, and 288 IR sensors? If you’re Redditor “jordy_essen,” you create an interactive light panel. In one mode, the user pull a reflective tool across the sensors to…
-

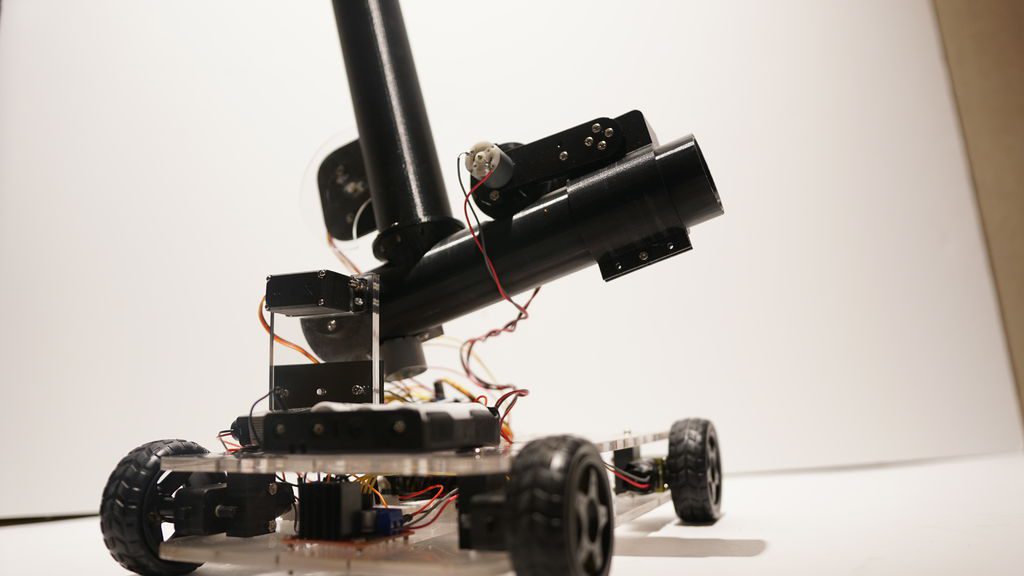
Pingo, the motion-detecting ping pong ball launcher
Reading Time: < 1 minutePingo, the motion-detecting ping pong ball launcher Arduino Team — March 11th, 2020 If you want to “enhance your athletic training regimen,” or perhaps just have a bit of fun with robotically launched ping pong balls, then be sure to check out the Pingo apparatus shown in the video below. This…
-

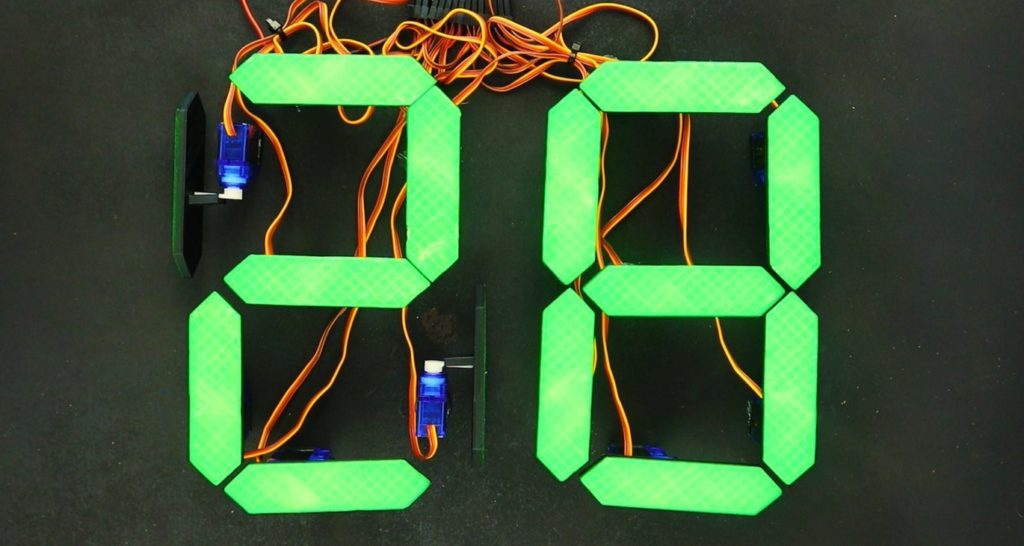
Mechanical 7-segment display made with micro servos and an Arduino Mega
Reading Time: < 1 minuteMechanical 7-segment display made with micro servos and an Arduino Mega Arduino Team — February 12th, 2020 Flip displays are an interesting piece of technology, physically moving segments into place that stay put until other information is needed. Michael Klements has been especially fascinated by these devices, and after inspiration from…
-

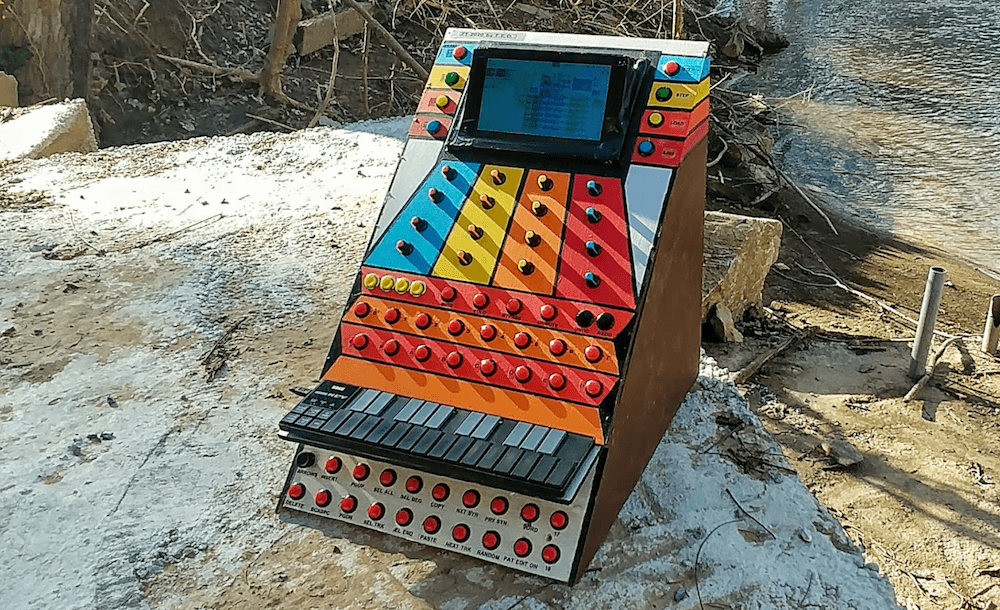
The ZT-2020 is a portable SunVox synth
Reading Time: < 1 minuteThe ZT-2020 is a portable SunVox synth Arduino Team — February 11th, 2020 SunVox synth software allows you to create electronic music on a wide variety of platforms. Now, with his ZT-2020 project — which resembles a miniature arcade game — YouTuber “fascinating earthbound objects” has a dedicated input scheme. This…
-

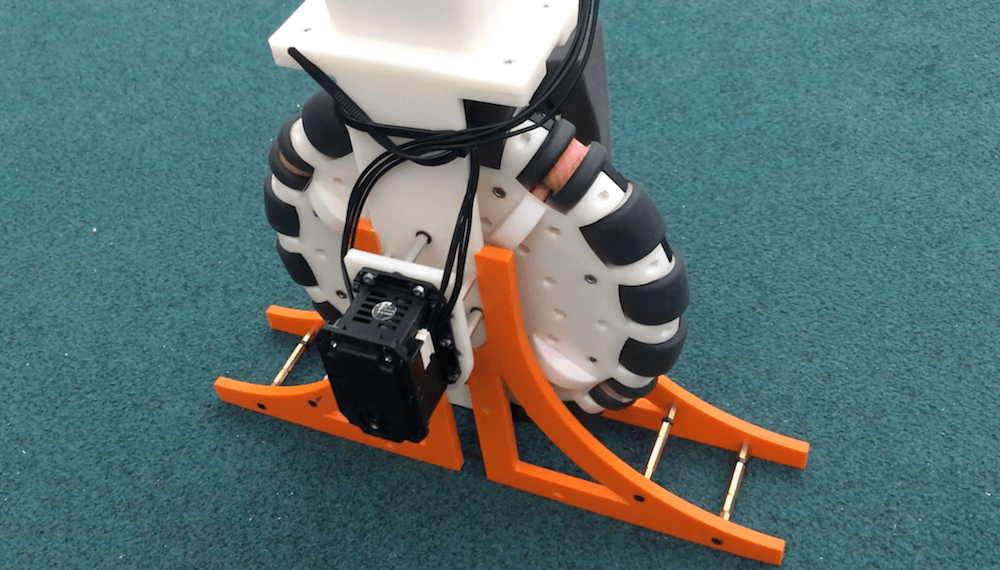
OmBURo is an Arduino-controlled unicycle robot with an active omnidirectional wheel
Reading Time: 2 minutesOmBURo is an Arduino-controlled unicycle robot with an active omnidirectional wheel Arduino Team — February 4th, 2020 Omni wheels normally contain a number of rollers arranged on their circumference, allowing them to slide left and right and perform various tricks when combined with others. The rollers on UCLA researchers Junjie Shen and Dennis…
-

Prototype room-scale, shape-changing interfaces with LiftTiles
Reading Time: 2 minutesPrototype room-scale, shape-changing interfaces with LiftTiles Arduino Team — January 27th, 2020 Shape-shifting interfaces, which could be deployed to create dynamic furniture, structures or VR environments, have great potential; however, creating them is often quite difficult. To simplify things, researchers from the University of Colorado Boulder have developed “LiftTiles,” modular blocks that…
-

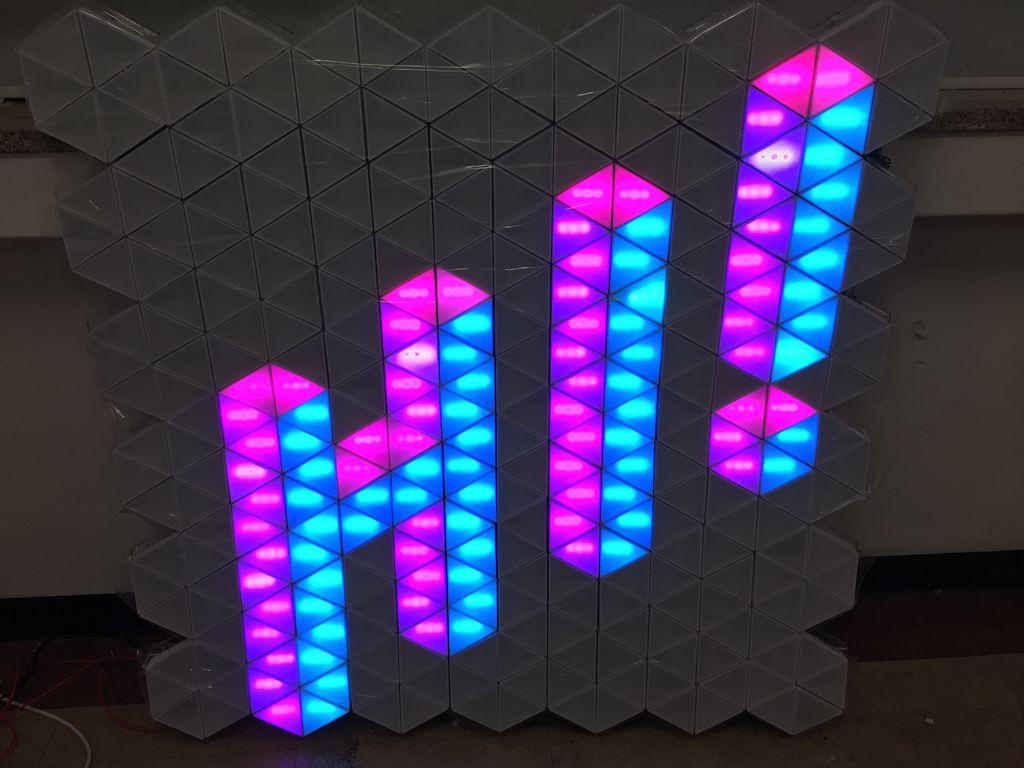
Hundreds of LED triangles combine for brilliant interactive display
Reading Time: 2 minutesHundreds of LED triangles combine for brilliant interactive display Arduino Team — January 6th, 2020 If you need another idea for how to creatively diffuse LED lighting, then look no further than the “Light Me Up!” project by Hyewon Shin, Eunjeong Ko, and Junsung Yi. Their setup uses 312 3D-printed and laser-cut…
-

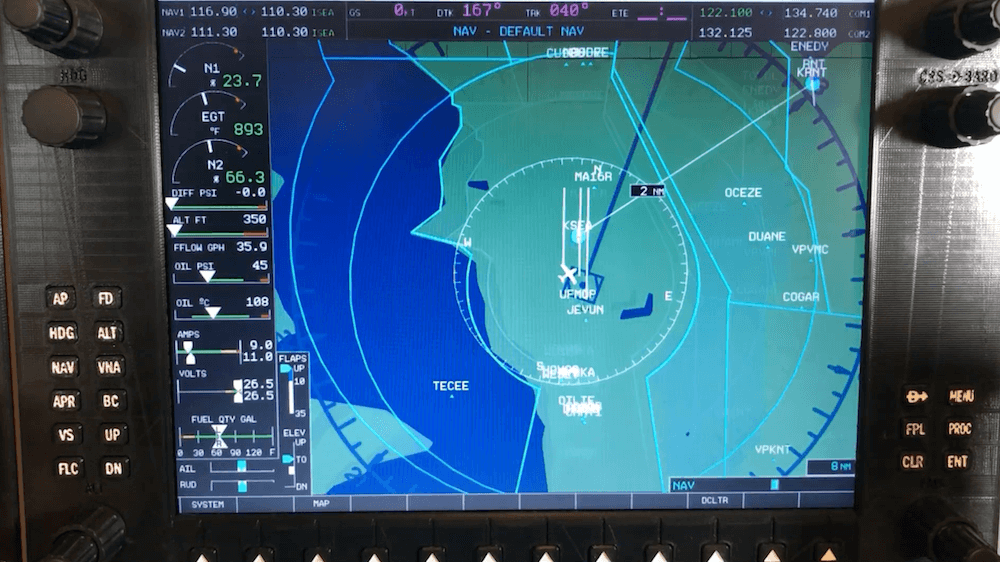
Take your X-Plane 11 experience to new heights with this 3D-printed simulator
Reading Time: < 1 minuteTake your X-Plane 11 experience to new heights with this 3D-printed simulator Arduino Team — December 17th, 2019 Apparently not satisfied with a single PC monitor, aviation enthusiast Ryan H came up with his own custom, 3D-printable cockpit setup for the Garmin G1000 avionics suite. Designed around the X-Plane 11 flight…
-

Bob Clagett made an LED Christmas tree video game for his entire town to play
Reading Time: 3 minutesBob Clagett made an LED Christmas tree video game for his entire town to play Arduino Team — December 13th, 2019 Bob Clagett likes making holiday decorations. This year, however, he wanted to create something that didn’t just look nice, but was also interactive. What he came up with is a giant…
-

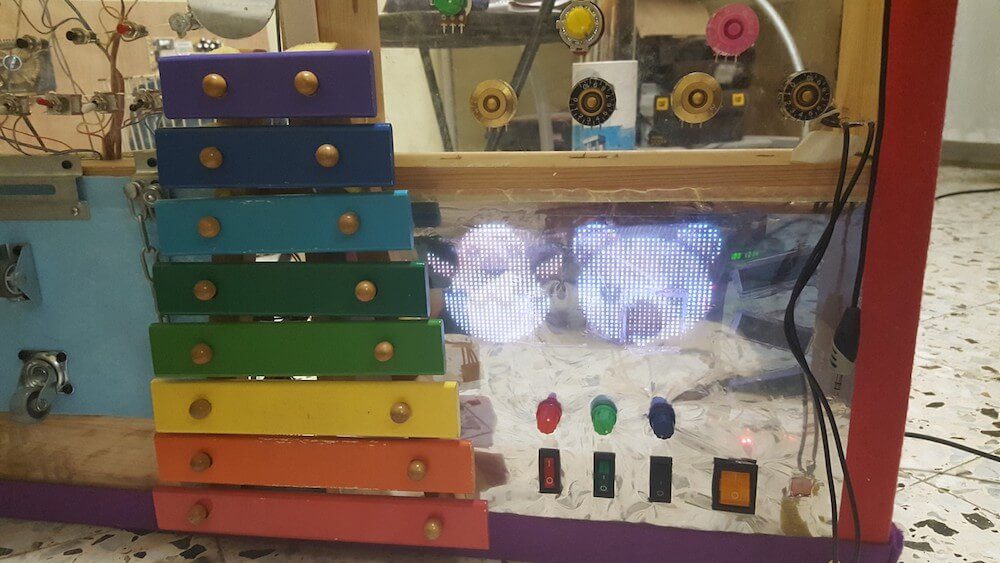
Toddler busy board gets an RGB matrix upgrade
Reading Time: < 1 minuteToddler busy board gets an RGB matrix upgrade Arduino Team — December 12th, 2019 When Amir Avni made a busy board for his then-one-year-old daughter, he left a variety of buttons and switches unconnected. While these were still likely interesting at the time, now that she’s two, he’s added an Arduino…
-

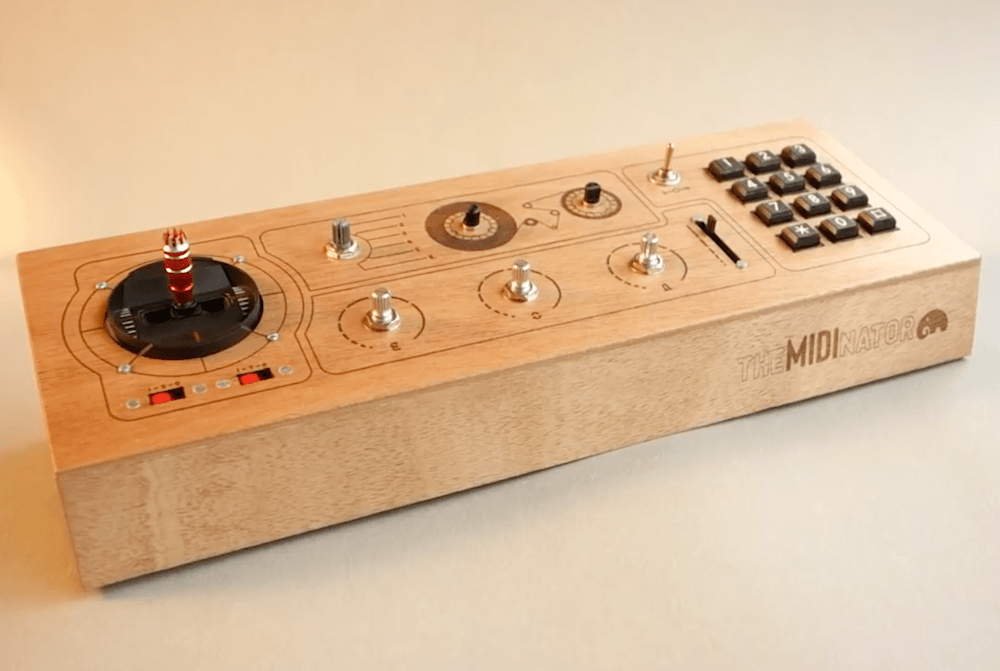
theMIDInator is a marvelous MIDI controller
Reading Time: 2 minutestheMIDInator is a marvelous MIDI controller Arduino Team — December 9th, 2019 While you may know on some level that an Arduino can help you make music, you probably haven’t seen as good an implementation as this MIDI controller by Switch & Lever. The device features a numeric pad for note input,…
-

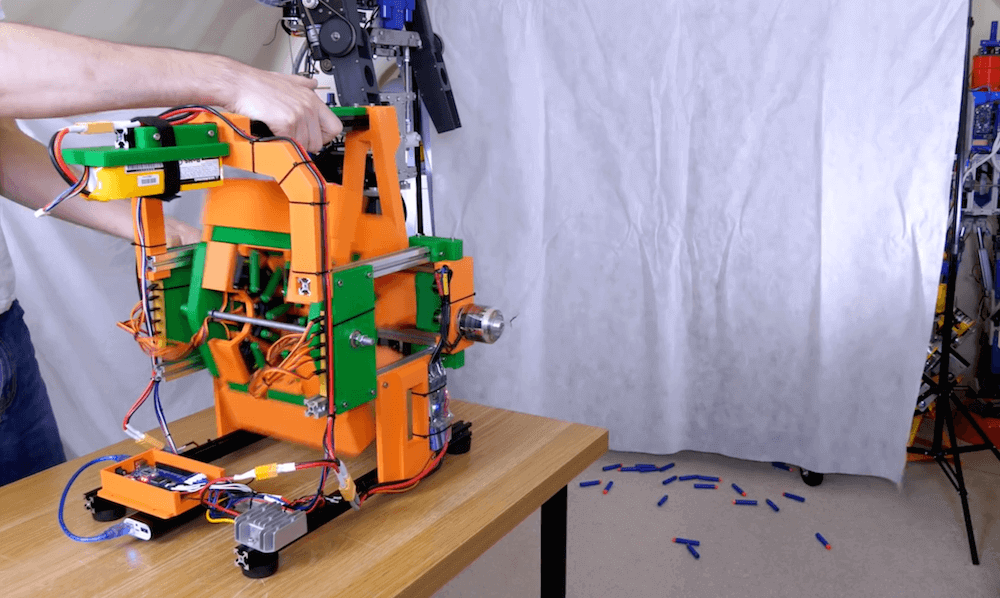
James Bruton’s 3D-printed, Arduino-powered Nerf blaster fires 10 darts at once
Reading Time: 2 minutesJames Bruton’s 3D-printed, Arduino-powered Nerf blaster fires 10 darts at once Arduino Team — December 4th, 2019 Nerf guns can be a lot of fun, but what if you want your launcher to shoot 10 projectiles simultaneously? Is so, then look no further than James Bruton’s custom blaster. His 3D-printed project employs…
-

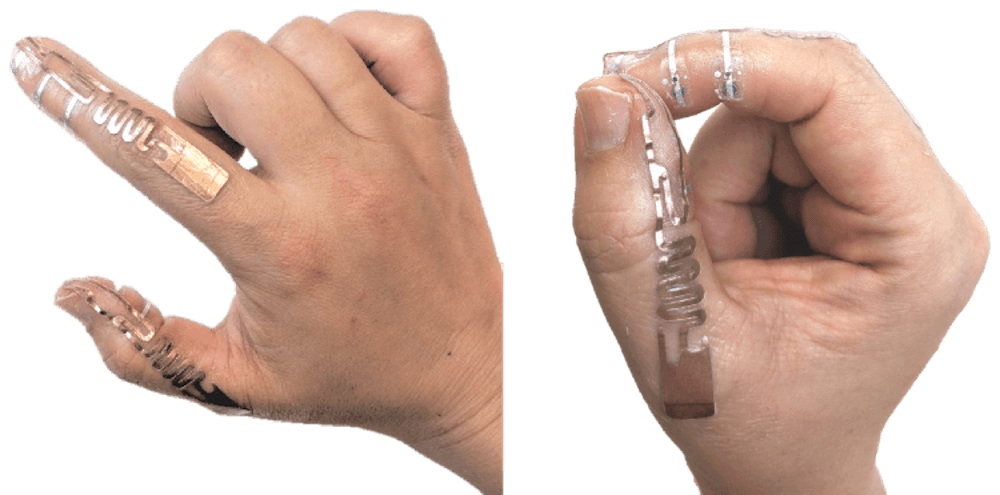
2D-RFID input at the tip of your fingers
Reading Time: 2 minutes2D-RFID input at the tip of your fingers Arduino Team — December 2nd, 2019 Researchers at the University of Waterloo in Canada have developed a novel hand-based input technique called Tip-Tap that amazingly requires no batteries. The wearable device uses a series of three custom RFID tags on both the thumb and…
-
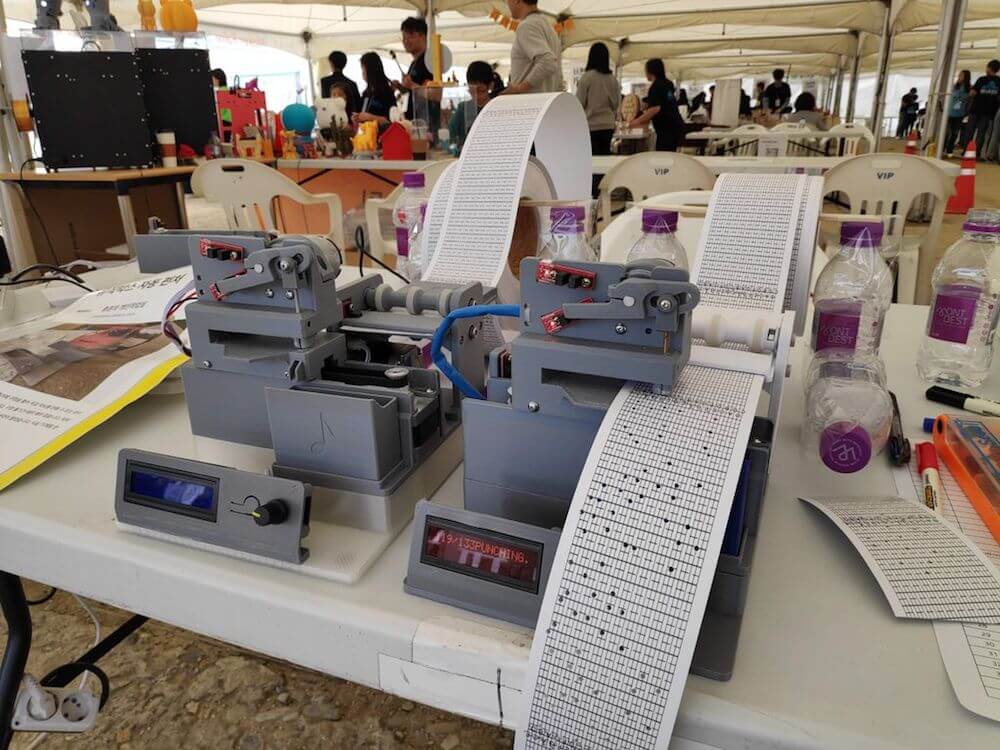
Make music with the help of an Arduino-powered hole puncher
Reading Time: < 1 minuteMake music with the help of an Arduino-powered hole puncher Arduino Team — November 25th, 2019 Maker ‘pashiran’ purchased a music box which could be programmed with punch cards, but soon found that actually creating tunes this way by hand was exhausting. His solution was to automate the process, designing a…
-

LED icosahedron shines for all the world to see
Reading Time: < 1 minuteLED icosahedron shines for all the world to see Arduino Team — November 25th, 2019 Convex regular icosahedrons contain 30 edges and 12 vertices. This makes for an interesting math problem, but as demonstrated by this project out of the LVL1 hackerspace in Louisville, Kentucky, its geometry also presents an excellent…
-

FaceWidgets blends on-face switches with the VR world
Reading Time: 2 minutesFaceWidgets blends on-face switches with the VR world Arduino Team — November 21st, 2019 When using a virtual reality (VR) system, you may need to flip a switch, touch a button, etc., which can be represented by a carefully coordinated series of pixels in front of your eyes. As a physical alternative…
-

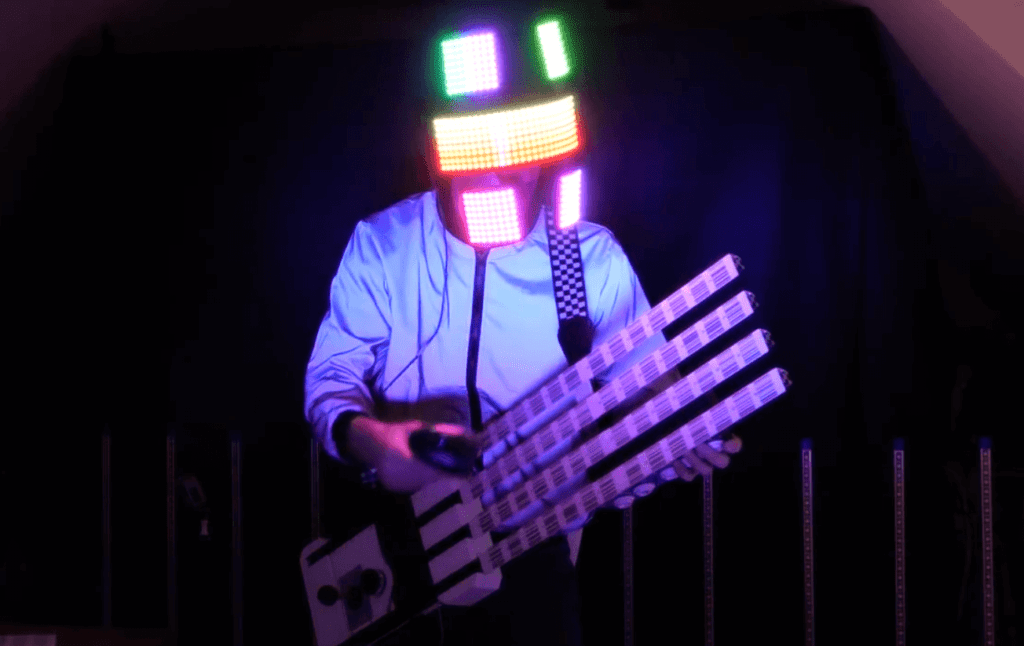
James Bruton’s 512 LED DJ helmet adds more glow to his Performance Robots show
Reading Time: 2 minutesJames Bruton’s 512 LED DJ helmet adds more glow to his Performance Robots show Arduino Team — November 13th, 2019 If you’ve ever thought that your musical performance needed more LEDs, then James Bruton’s DJ helmet may be just the thing for you. The YouTuber’s wearable device is built on the base…
-
James Bruton’s 512 LED DJ helmet adds more glow to his Performance Robots show
Reading Time: 2 minutesJames Bruton’s 512 LED DJ helmet adds more glow to his Performance Robots show Arduino Team — November 13th, 2019 If you’ve ever thought that your musical performance needed more LEDs, then James Bruton’s DJ helmet may be just the thing for you. The YouTuber’s wearable device is built on the base…