Schlagwort: IoT
-

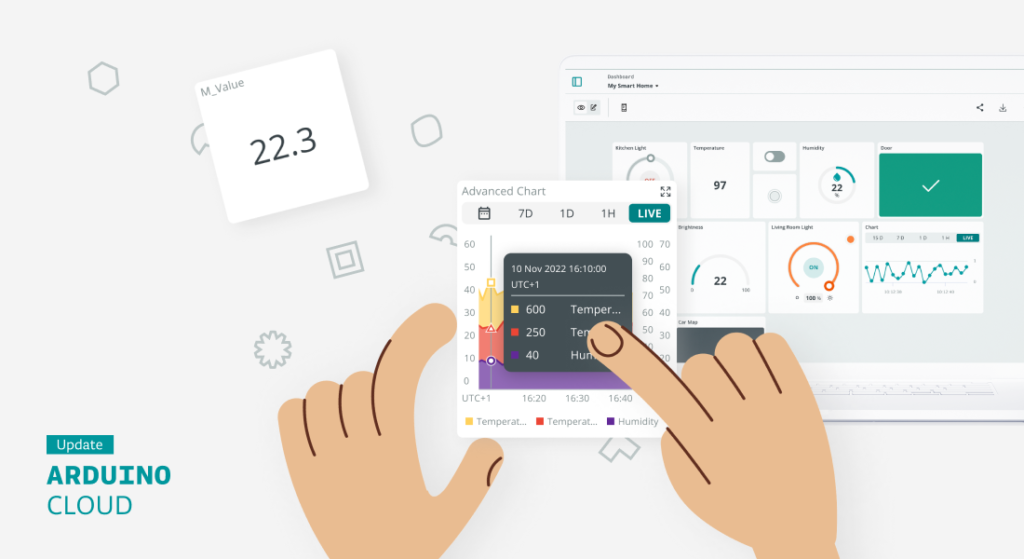
4 new IoT monitoring dashboard updates on Arduino Cloud
Reading Time: 4 minutesArduino Cloud recently received a major upgrade renewing the user interface and the Arduino Cloud editor. And as we promised it was just the beginning. This article dives into some of the new IoT monitoring dashboard features that may seem small, but pack a big punch for your connected projects. 1. Duplicate…
-

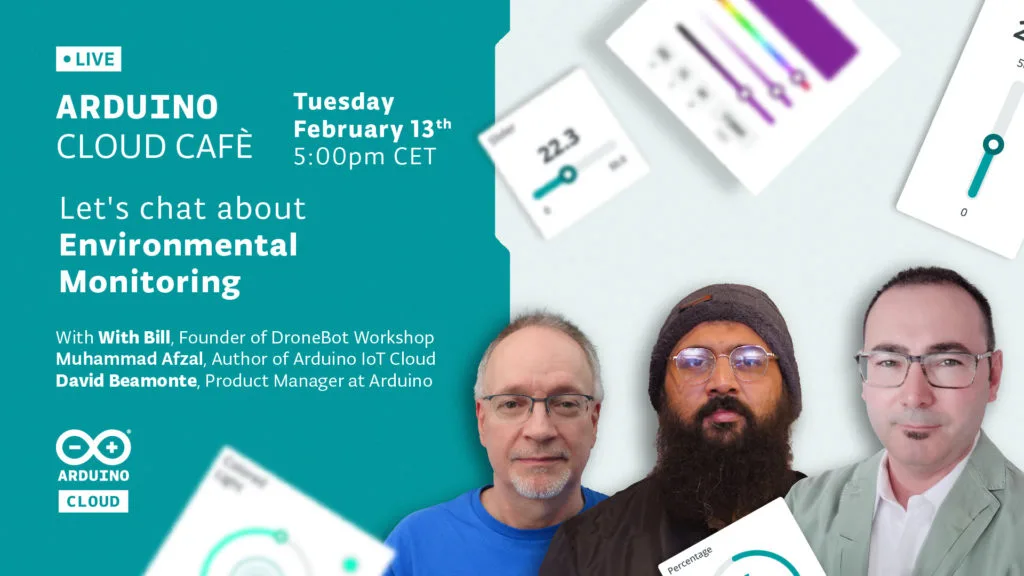
Arduino Cloud Café: Let’s chat about environmental monitoring!
Reading Time: < 1 minuteExciting news! We’re gearing up for the second edition of Arduino Cloud Café, and we’re thrilled to have you join us. Tune in on Tuesday, February 13th at 5pm CET for an engaging session on environmental monitoring. This time, we have two fantastic guests — Bill from Dronebot Workshop and Muhammad…
-

Arduino and Silicon Labs team up to make the Matter protocol accessible to all
Reading Time: 3 minutesThe world of IoT just got more exciting: Arduino and SiLabs unveil plans for Matter protocol integration. In a groundbreaking development for IoT enthusiasts and professionals alike, Arduino and Silicon Labs (SiLabs) have announced a collaboration that promises to revolutionize access to the Matter protocol. This initiative is set to unfold in…
-
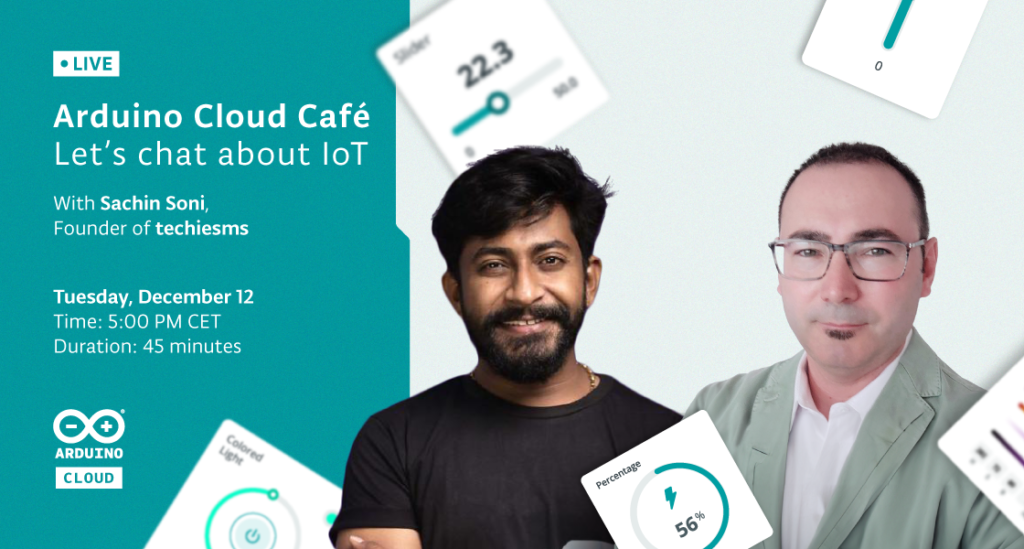
Arduino Cloud Café: Let’s chat about IoT!
Reading Time: < 1 minuteGet your coffee ready because Arduino Cloud Café is brewing! Join us on December 12th for an interactive session where we discuss the latest Arduino Cloud release, sip on some IoT insights, and answer your burning questions. We’re thrilled to welcome Sachin from Techiesms, who’ll not only share his experiences with…
-
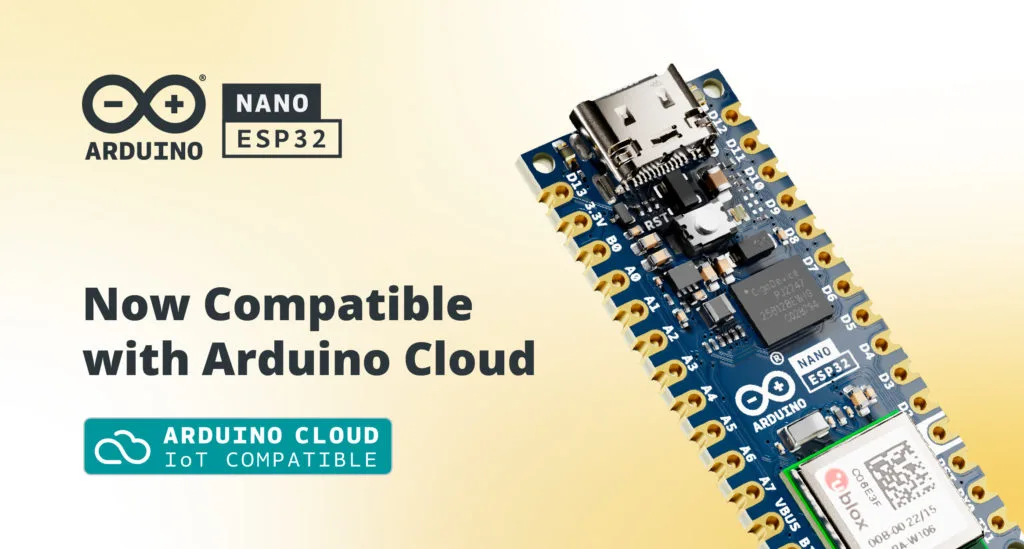
Introducing support for the new Nano ESP32 board in Arduino Cloud
Reading Time: 2 minutesGreat news for Arduino enthusiasts! The new Nano ESP32, just released on July 17th, is now officially supported by the Arduino Cloud. This powerful combo brings MicroPython and IoT capabilities right to your fingertips, simplifying all your smart devices projects. The Nano ESP32‘s native MicroPython support empowers you to code in Python…
-

The Squirrel Box aims to bring trust to smart agriculture
Reading Time: 2 minutesIt may not be as exciting as other fields, but agriculture is incredibly important to humanity and technological advances have increased yields, efficiency, and productivity many times throughout history. All of the evidence suggests that smart agriculture is going to be at the heart of the next big technological leap and that…
-

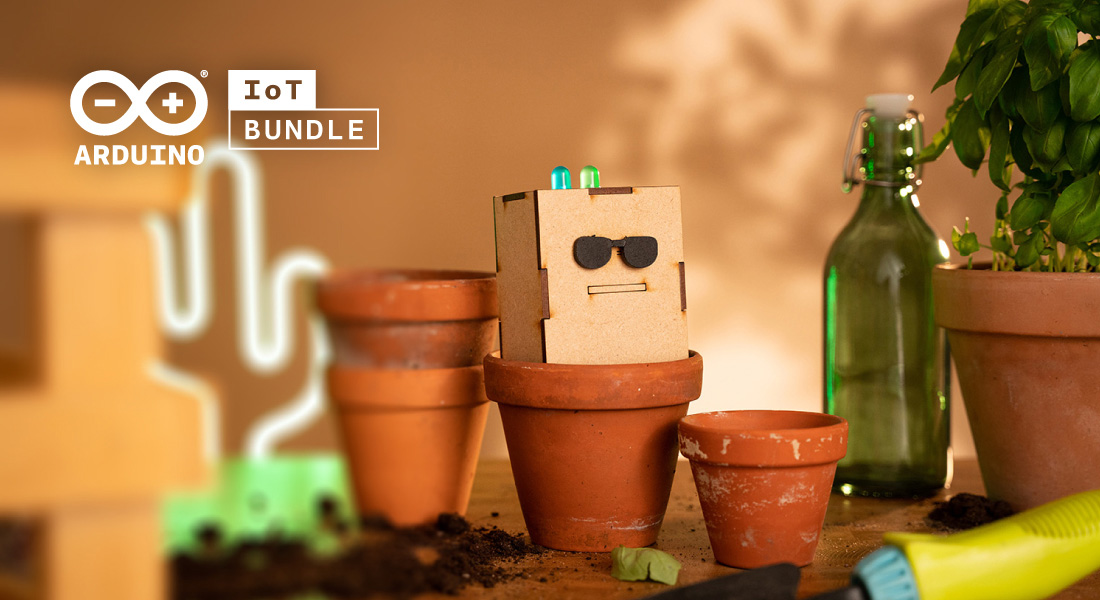
Introducing Arduino’s IoT Bundle and what it means for you
Reading Time: 4 minutesWe’re excited to announce the launch of the new Arduino IoT Bundle. This is built to help you dive into the complex and fascinating world of the Internet of Things with even more confidence and possibility — giving you the hardware, software, and components you need to create your own connected IoT…
-

Host the best BBQs ever with home automation
Reading Time: 3 minutesEverybody loves a good BBQ. Getting your family and friends together on a long summer day and evening, cooking delicious food and having a great time as smoke drifts through the air — it’s the perfect weekend activity. BBQs can also be stressful, however. Anyone who has ever tried to host one…
-

Streamline your morning routine with home automation
Reading Time: 4 minutesLet’s face it — mornings can be tough. Even the earliest risers and the most enthusiastic morning larks sometimes struggle to drag themselves out of bed and attack the day. The good news is that automation can always save things. By using home automation wisely, you can save time in the morning,…
-

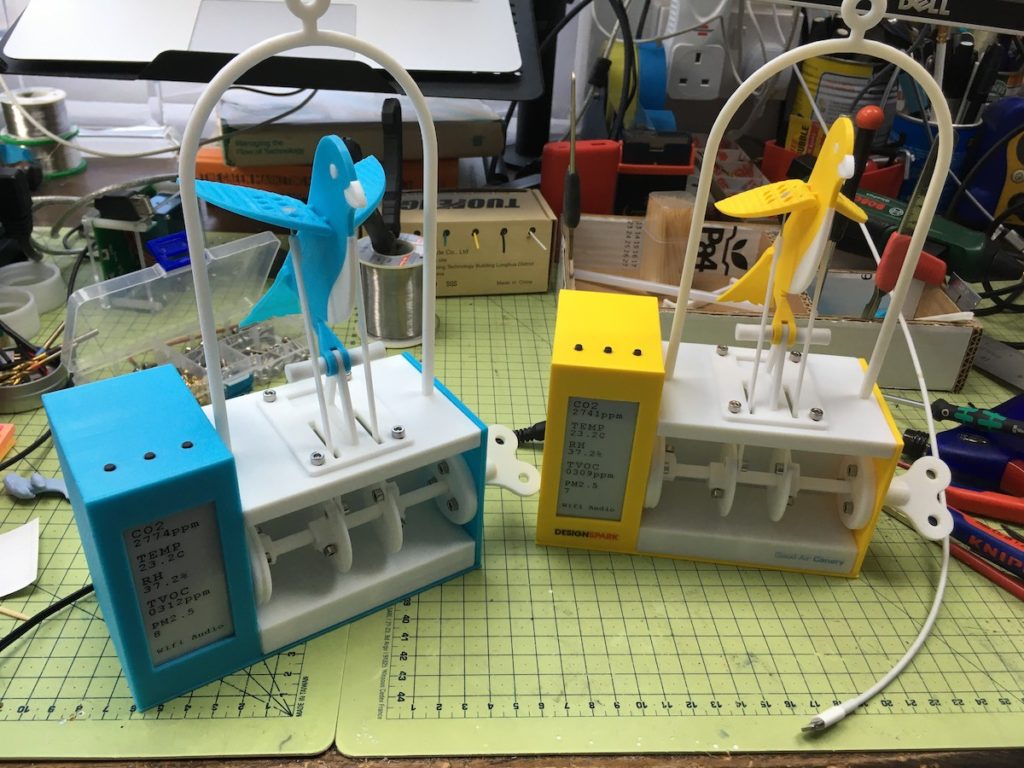
The UV Budgie shows IoT alerts in a fun way
Reading Time: 2 minutesArduino Team — September 14th, 2022 The Internet of Things (IoT) is now well-established and households around the world contain many IoT devices. Most of them were designed to blend as seamlessly as possible into their owners’ lives, which means that they tend to be unobtrusive. But “unobtrusive” is the last adjective…
-

From embedded sensors to advanced intelligence: Driving Industry 4.0 innovation with TinyML
Reading Time: 5 minutesWevolver’s previous article about the Arduino Pro ecosystem outlined how embedded sensors play a key role in transforming machines and automation devices to Cyber Physical Production Systems (CPPS). Using CPPS systems, manufacturers and automation solution providers capture data from the shop floor and use it for optimizations in areas like production schedules,…
-

What is cloud computing, and what does it do for IoT?
Reading Time: 5 minutesAt this point, asking “what is cloud computing?” has become difficult. We say it all the time. “Cloud computing” this, “in the cloud” that, “connect to the cloud” the other thing. Cloud, cloud, cloud. What, you mean you don’t know what the cloud is? This is why breaking into new technology can…
-

Say hello to Arduino Cloud, more things and two new plans
Reading Time: 2 minutesIn our quest for a fully integrated online experience, Arduino Create has been expanded over the years to include many additional features. It enables everyone to write code, compile and upload directly from the browser, connect IoT devices, and build real-time dashboards. As it grew, it called for a new name: the…
-

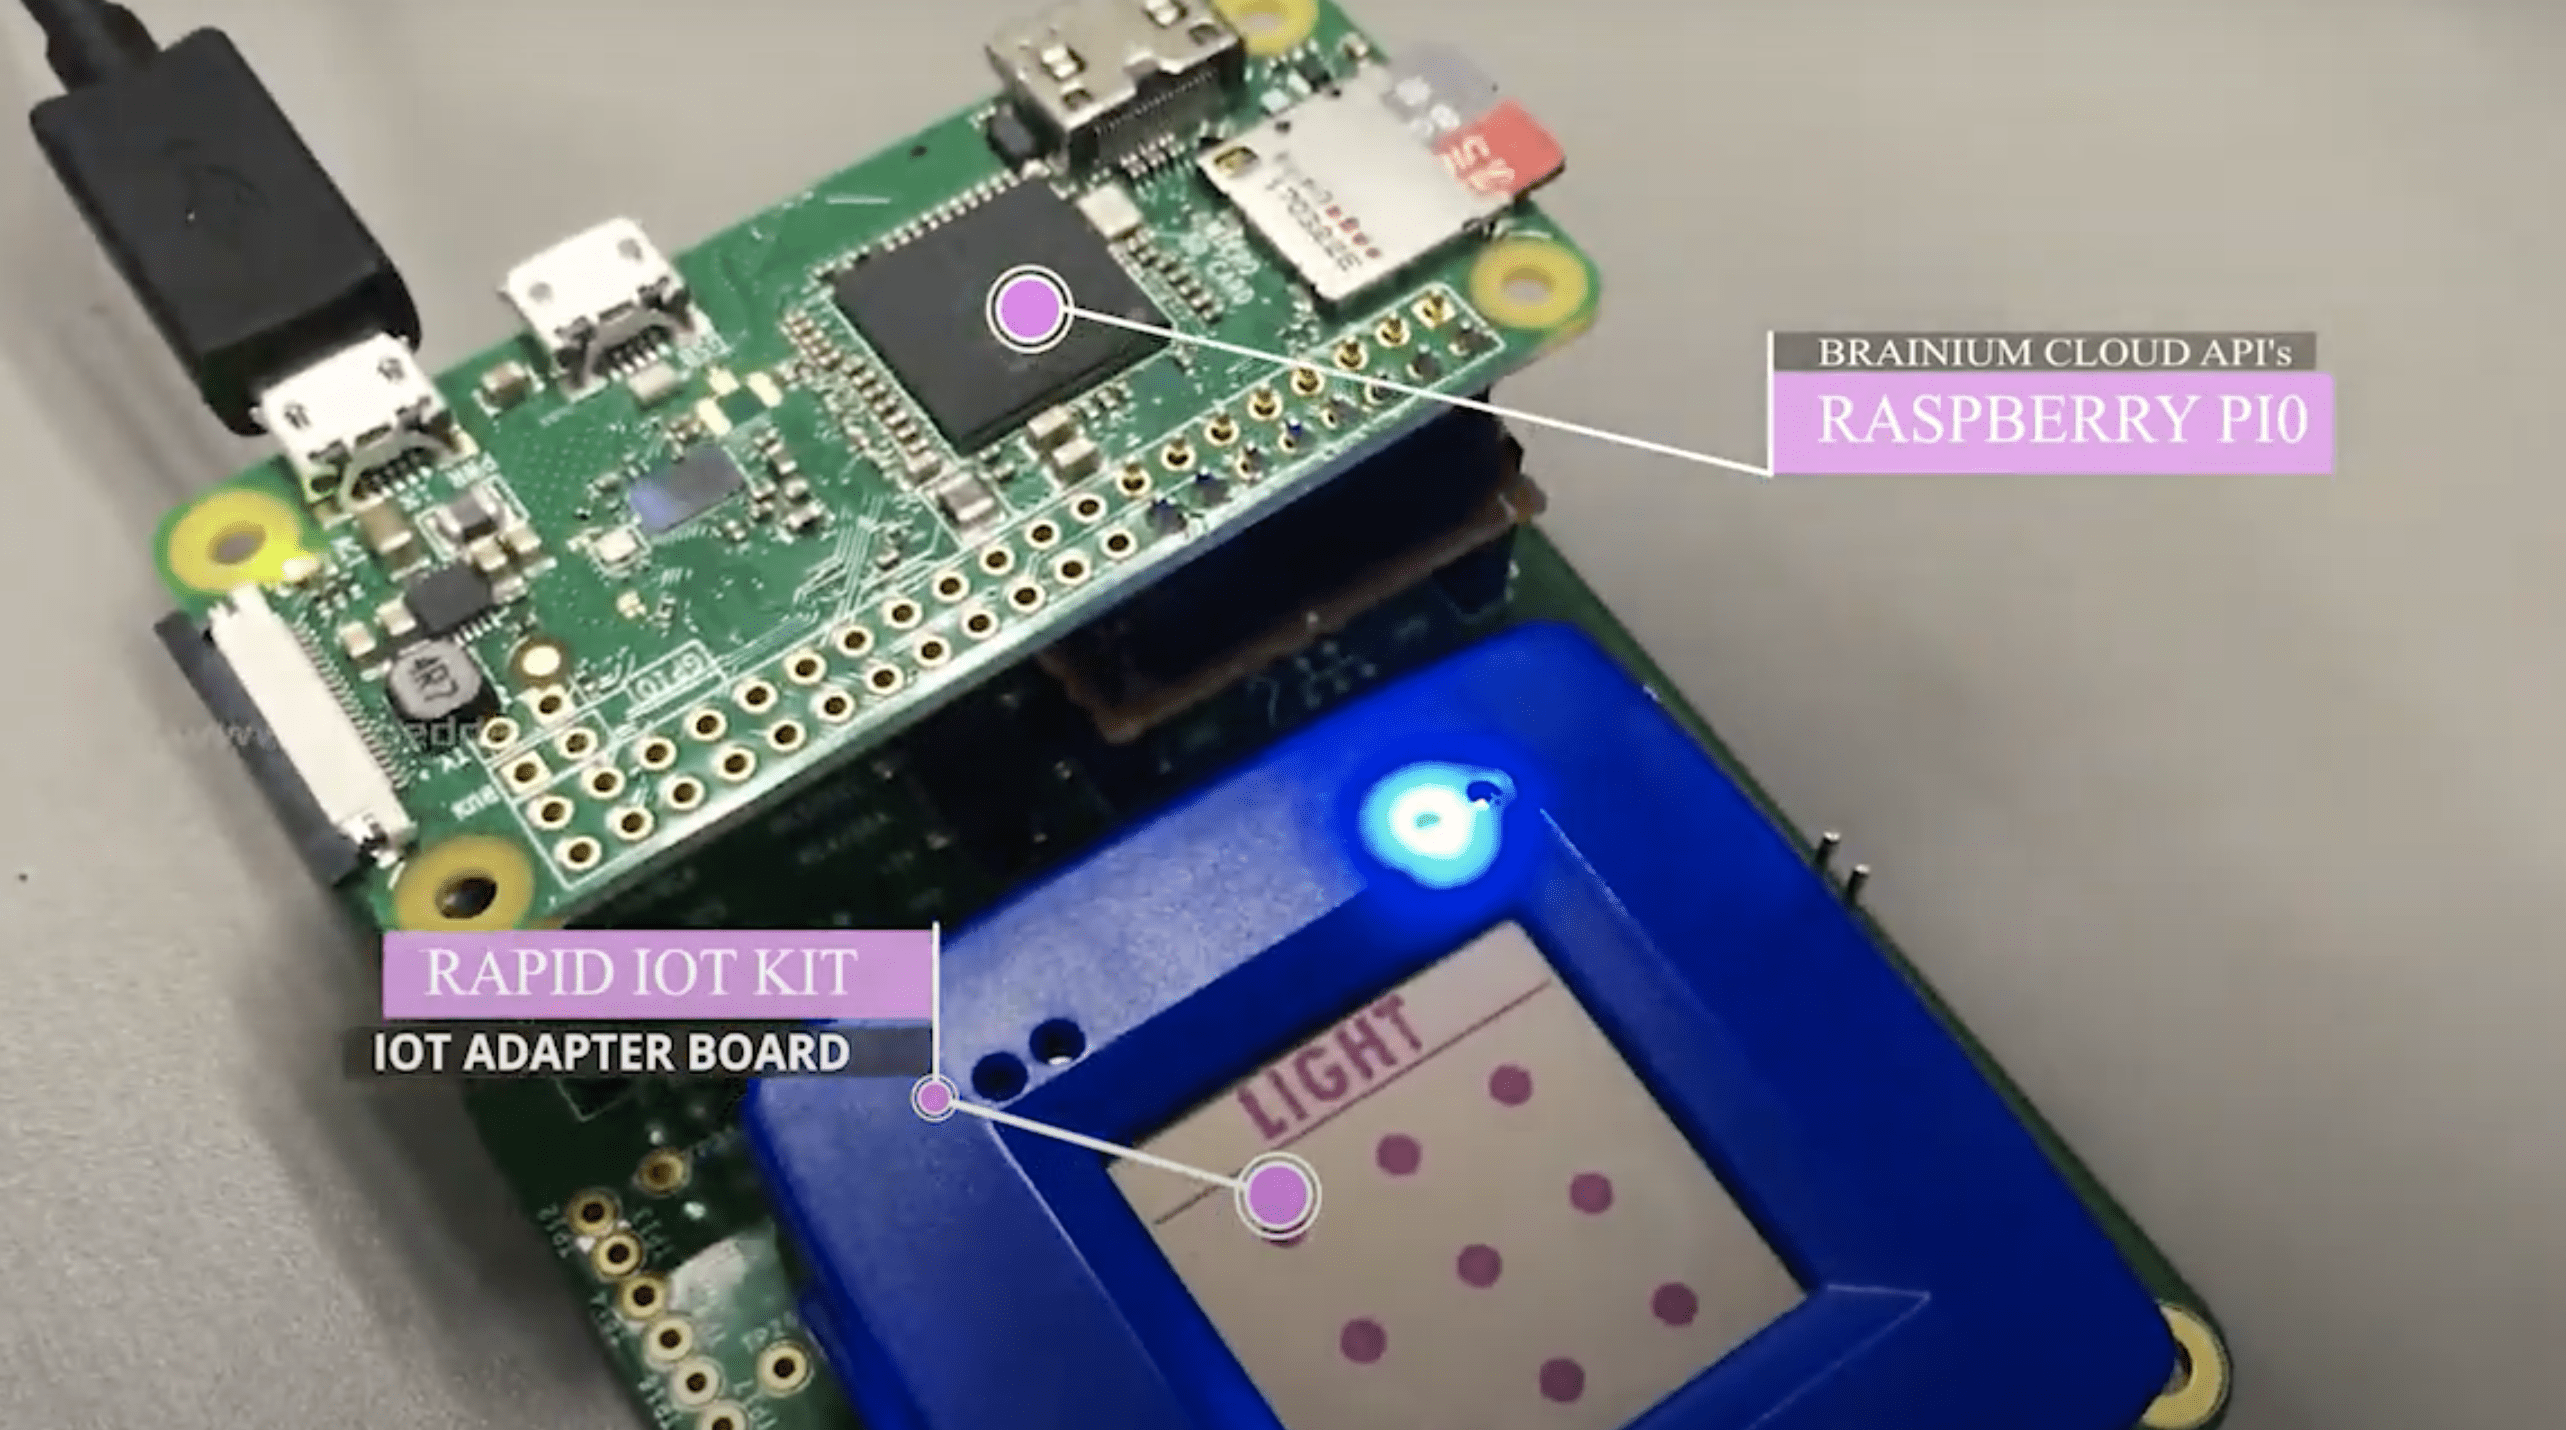
Raspberry Pi smart IoT glove
Reading Time: 3 minutesAnimator/engineer Ashok Fair has put witch-level finger pointing powers in your hands by sticking a SmartEdge Agile, wirelessly controlled by Raspberry Pi Zero, to a golf glove. You could have really freaked the bejeezus out of Halloween party guests with this (if we were allowed to have Halloween parties that is). [youtube…
-

Build an IoT device with Ubuntu Appliance and Raspberry Pi
Reading Time: 4 minutesThe new Ubuntu Appliance portfolio provides free images to help you turn your Raspberry Pi into an IoT device: just install them to your SD card and you have all the software you need to make a media server, get started with home automation, and more. Canonical’s Rhys Davies is here to…
-

Design your own Internet of Things with HackSpace magazine
Reading Time: 4 minutesIn issue 31 of HackSpace magazine, out today, PJ Evans looks at DIY smart homes and homemade Internet of Things devices. In the last decade, various companies have come up with ‘smart’ versions of almost everything. Microcontrollers have been unceremoniously crowbarred into devices that had absolutely no need for microcontrollers, and often…
-

IoT ugly Christmas sweaters
Reading Time: < 1 minuteIf there’s one thing we Brits love, it’s an ugly Christmas sweater. Jim Bennett, a Senior Cloud Advocate at Microsoft, has taken his ugly sweater game to the next level by adding IoT-controlled, Twitter-connected LEDs thanks to a Raspberry Pi Zero. IoT is Fun for Everyone! (Ugly Sweater Edition) An Ugly…
-

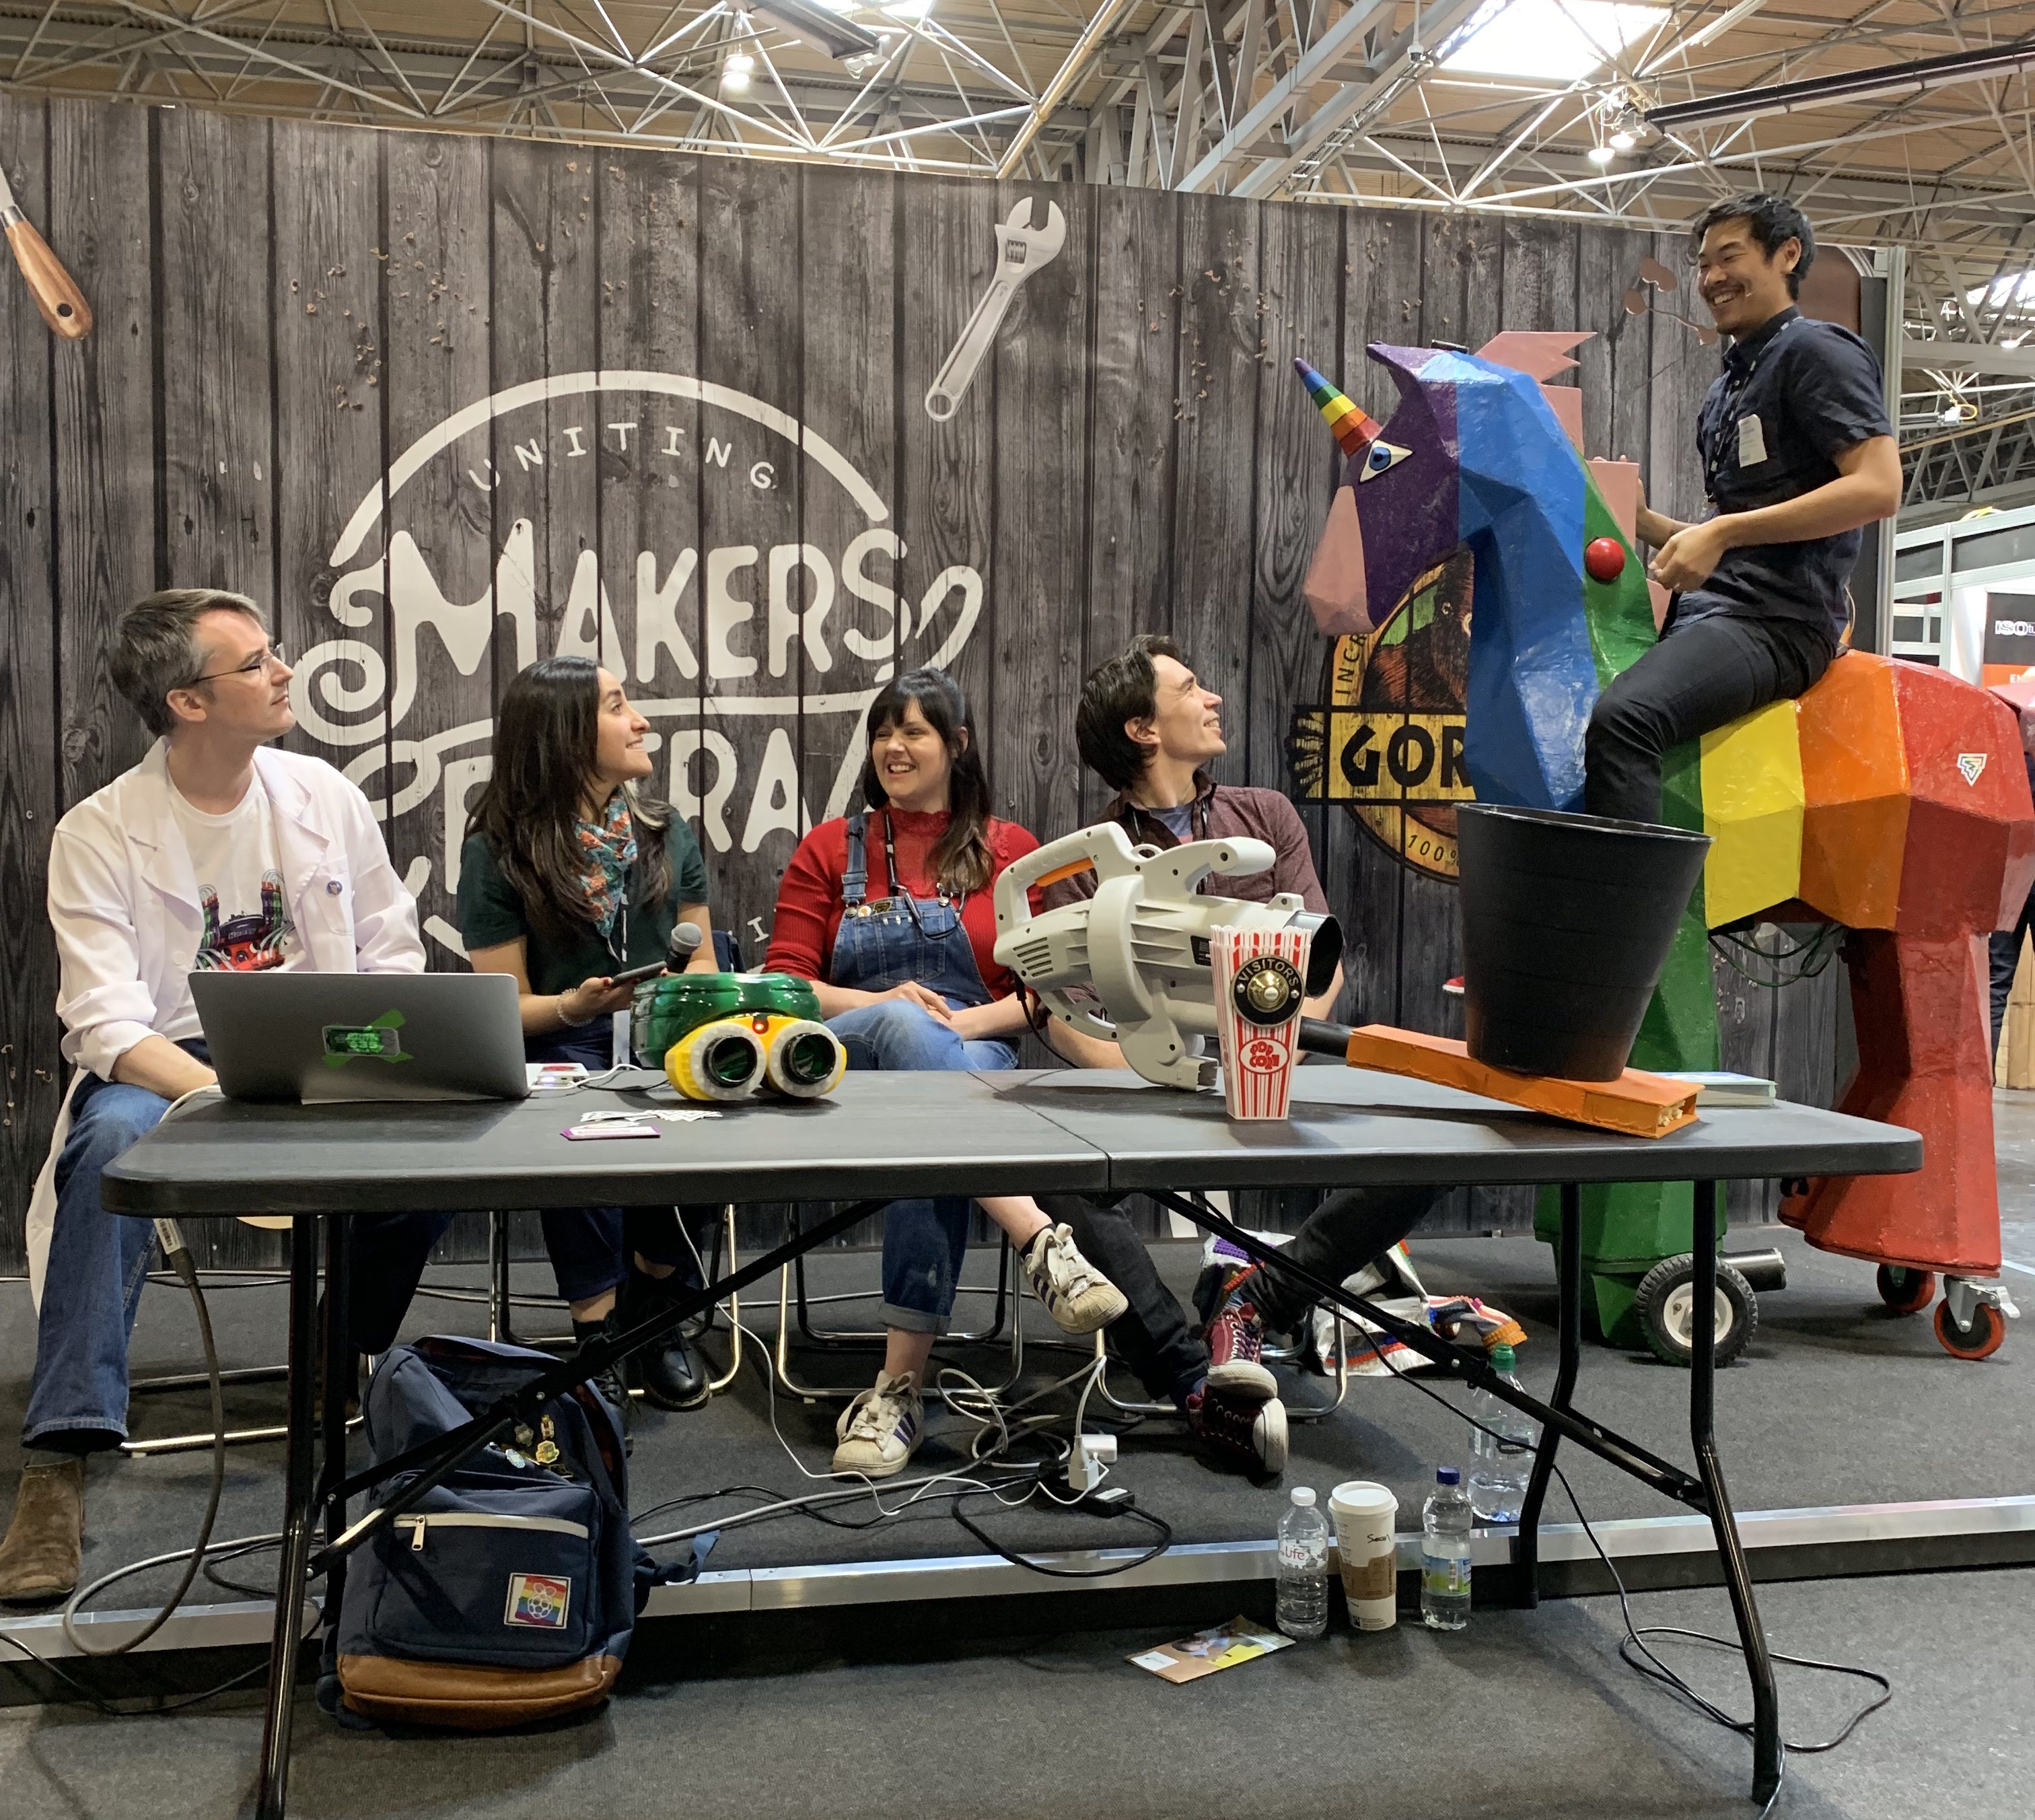
The world’s first Raspberry Pi-powered Twitter-activated jelly bean-pooping unicorn
Reading Time: 3 minutesWhen eight-year-old Tru challenged the Kids Invent Stuff team to build a sparkly, pooping, rainbow unicorn electric vehicle, they did exactly that. And when Kids Invent Stuff, also known as Ruth and Shawn, got in contact with Estefannie Explains it All, their unicorn ended up getting an IoT upgrade…because obviously. You tweet and…
-

IoT community sprinkler system using Raspberry Pi | The MagPi issue 83
Reading Time: 4 minutesSaving water, several thousand lawns at a time: The MagPi magazine takes a look at the award-winning IoT sprinkler system of Coolest Projects USA participant Adarsh Ambati. At any Coolest Projects event, you’re bound to see incredible things built by young makers. At Coolest Projects USA, we had the chance to talk…
-

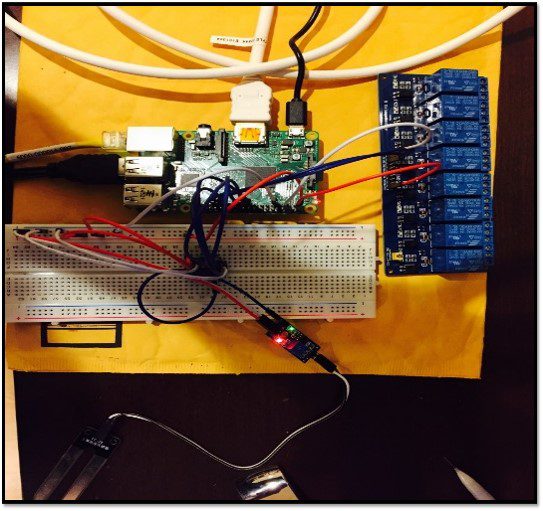
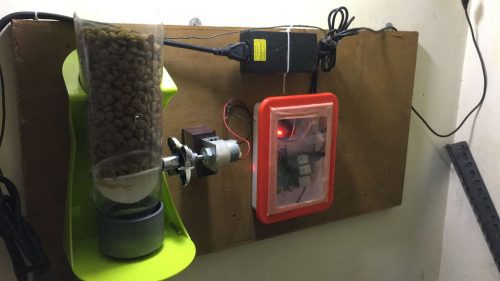
Project Floofball and more: Pi pet stuff
Reading Time: 2 minutesIt’s a public holiday here today (yes, again). So, while we indulge in the traditional pastime of barbecuing stuff (ourselves, mainly), here’s a little trove of Pi projects that cater for our various furry friends. Project Floofball Nicole Horward created Project Floofball for her hamster, Harold. It’s an IoT hamster wheel that…
-

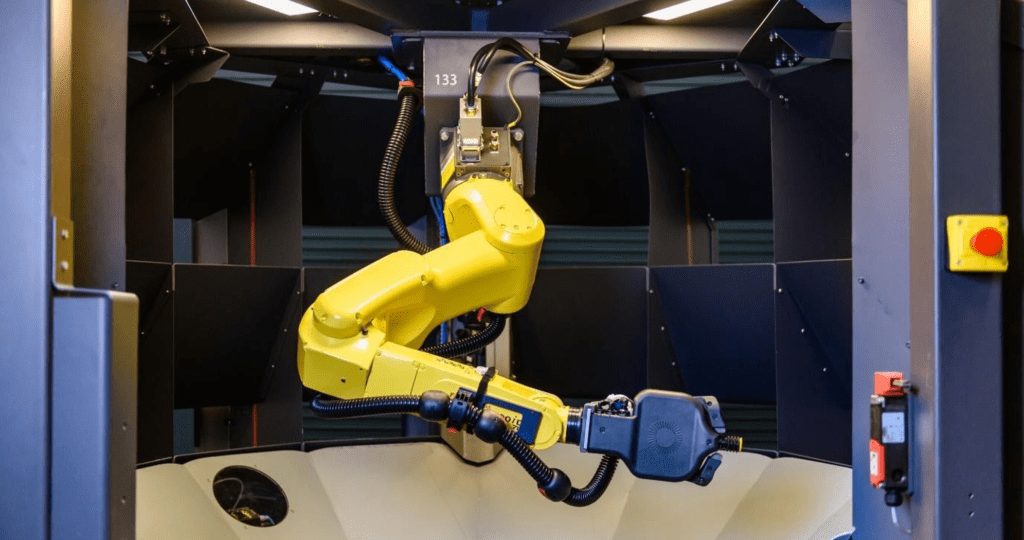
Arduino and Distrelec launch a new automation & robotics contest!
Reading Time: 2 minutesArduino and Distrelec launch a new automation & robotics contest! Arduino Team — April 23rd, 2018 How can you help advance Industry 4.0 using the Arduino ecosystem? From robots and predictive maintenance to remote control and data acquisition, we’ve teamed up Distrelec to launch a new Automation & Robotics Contest challenging our community to create innovative solutions…