Schlagwort: face recognition

  • Add face recognition with Raspberry Pi | Hackspace 38

    Add face recognition with Raspberry Pi | Hackspace 38

    Reading Time: 4 minutes

    It’s hard to comprehend how far machine learning has come in the past few years. You can now use a sub-£50 computer to reliably recognise someone’s face with surprising accuracy.

    Although this kind of computing power is normally out of reach of microcontrollers, adding a Raspberry Pi computer to your project with the new High Quality Camera opens up a range of possibilities. From simple alerting applications (‘Mum’s arrived home!’), to dynamically adjusting settings based on the person using the project, there’s a lot of fun to be had.

    Here’s a beginner’s guide to getting face recognition up and running.

    Face recognition using machine learning is hard work, so the latest, greatest Raspberry Pi 4 is a must

    1. Prepare your Raspberry Pi
    For face recognition to work well, we’re going to need some horsepower, so we recommend a minimum of Raspberry Pi 3B+, ideally a Raspberry Pi 4. The extra memory will make all the difference. To keep as much resource as possible available for our project, we’ve gone for a Raspberry Pi OS Lite installation with no desktop.

    Make sure you’re on the network, have set a new password, enabled SSH if you need to, and updated everything with sudo apt -y update && sudo apt -y full-upgrade. Finally, go into settings by running sudo raspi-config and enable the camera in ‘Interfacing Options’.

    2. Attach the camera
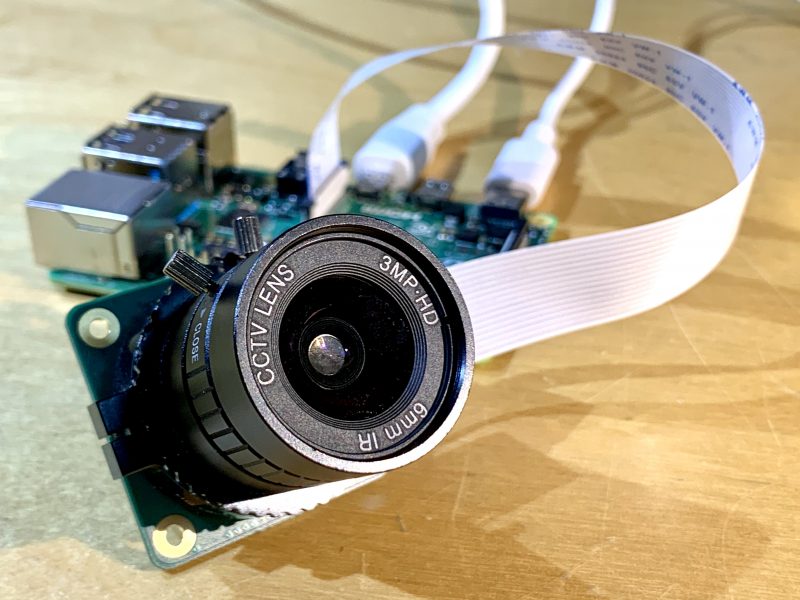
    This project will work well with the original Raspberry Pi Camera, but the new official HQ Camera will give you much better results. Be sure to connect the camera to your Raspberry Pi 4 with the power off. Connect the ribbon cable as instructed in hsmag.cc/HQCameraGetStarted. Once installed, boot up your Raspberry Pi 4 and test the camera is working. From the command line, run the following:
    raspivid -o test.h264 -t 10000
    This will record ten seconds of video to your microSD card. If you have an HDMI cable plugged in, you’ll see what the camera can see in real-time. Take some time to make sure the focus is correct before proceeding.

    3. Install dependencies
    The facial recognition library we are using is one that has been maintained for many years by Adam Geitgey. It contains many examples, including Python 3 bindings to make it really simple to build your own facial recognition applications. What is not so easy is the number of dependencies that need to be installed first. There are way too many to list here, and you probably won’t want to type them out, so head over to hsmag.cc/FacialRec so that you can cut and paste the commands. This step will take a while to complete on a Raspberry Pi 4, and significantly longer on a Model 3 or earlier.

    3. Install the libraries
    Now that we have everything in place, we can install Adam’s applications and Python bindings with a simple, single command:
    sudo pip3 install face_recognition
    Once installed, there are some examples we can download to try everything out.
    cd
    git clone --single-branch https://github.com/ageitgey/face_recognition.git
    In this repository is a range of examples showing the different ways the software can be used, including live video recognition. Feel free to explore and remix.

    5. Example images
    The examples come with a training image of Barack Obama. To run the example:
    cd ./face_recognition/examples
    python3 facerec_on_raspberry_pi.py

    On your smartphone, find an image of Obama using your favourite search engine and point it at the camera. Providing focus and light are good you will see:
    “I see someone named Barack Obama!”
    If you see a message saying it can’t recognise the face, then try a different image or try to improve the lighting if you can. Also, check the focus for the camera and make sure the distance between the image and camera is correct.

    Who are you? What even is a name? Can a computer decide your identity?

    6. Training time
    The final step is to start recognising your own faces. Create a directory and, in it, place some good-quality passport-style photos of yourself or those you want to recognise. You can then edit the facerec_on_raspberry_pi.py script to use those files instead. You’ve now got a robust prototype of face recognition. This is just the beginning. These libraries can also identify ‘generic’ faces, meaning it can detect whether a person is there or not, and identify features such as the eyes, nose, and mouth. There’s a world of possibilities available, starting with these simple scripts. Have fun!

    Issue 38 of Hackspace Magazine is out NOW

    Front cover of hack space magazine featuring a big striped popcorn bucket filled with maker tools and popcorn

    Each month, HackSpace magazine brings you the best projects, tips, tricks and tutorials from the makersphere. You can get it from the Raspberry Pi Press online store, The Raspberry Pi store in Cambridge, or your local newsagents.

    Each issue is free to download from the HackSpace magazine website.

    Website: LINK

  • Raspberry Pi won’t let your watched pot boil

    Raspberry Pi won’t let your watched pot boil

    Reading Time: 3 minutes

    One of our favourite YouTubers, Harrison McIntyre, decided to make the aphorism “a watched pot never boils” into reality. They modified a tabletop burner with a Raspberry Pi so that it will turn itself off if anyone looks at it.

    [youtube https://www.youtube.com/watch?v=F1XSx-eaCAY?feature=oembed&w=500&h=281]

    In this project, the Raspberry Pi runs facial detection using a USB camera. If the Raspberry Pi finds a face, it deactivates the burner, and vice versa.

    There’s a snag, in that the burner runs off 120 V AC and the Raspberry Pi runs off 5 V DC, so you can’t just power the burner through the Raspberry Pi. Harrison got round this problem using a relay switch, and beautifully explains how a relay manages to turn a circuit off and on without directly interfacing with the circuit at the two minute mark of this video.

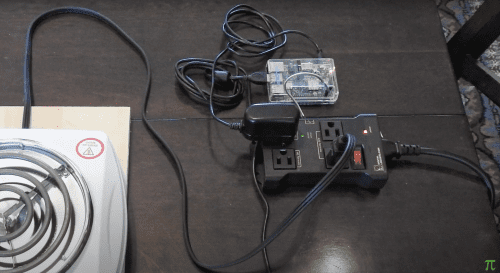
    The Raspberry Pi working through the switchable plug with the burner

    Harrison sourced a switchable plug bar which uses a relay to turn its own switches on and off. Plug the burner and the Raspberry Pi into that and, hey presto, you’ve got them working together via a relay.

    The six camera setup

    Things get jazzy at the four minute 30 second mark. At this point, Harrison decides to upgrade his single camera situation, and rig up six USB cameras to make sure that no matter where you are when you you look at the burner, the Raspberry Pi will always see your face and switch it off.

    Inside the switchable plug

    Harrison’s multiple-camera setup proved a little much for the Raspberry Pi 3B he had to hand for this project, so he goes on to explain how he got a bit of extra processing power using a different desktop and an Arduino. He recommends going for a Raspberry Pi 4 if you want to try this at home.

    Kit list:

    • Raspberry Pi 4
    • Tabletop burner
    • USB cameras or rotating camera
    • Switchable plug bar
    • All of this software
    It’s not just a saying anymore, thanks to Harrison

    And the last great thing about this project is that you could invert the process to create a safety mechanism, meaning you wouldn’t be able to wander away from your cooking and leave things to burn.

    We also endorse Harrison’s advice to try this with an electric burner and most definitely not a gas one; those things like to go boom if you don’t play with them properly.

    Website: LINK

  • This clock really, really doesn’t want to tell you the time

    This clock really, really doesn’t want to tell you the time

    Reading Time: 2 minutes

    What’s worse than a clock that doesn’t work? One that makes an “unbearably loud screeching noise” every minute of every day is a strong contender.

    That was the aural nightmare facing YouTuber Burke McCabe. But rather than just fix the problem, he decided, in true Raspberry Pi community fashion, to go one step further. Because why not?

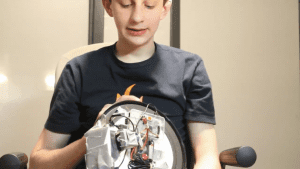
    The inventor of the clock holds it with the back facing the camera to show us how it works and is looking down at it.

    Burke showing YouTube viewers his invention

    On the back of the clock, alongside the built-in mechanism controlling the clock’s arms, Burke added a Raspberry Pi to control a motor, which he hooked up to a webcam. The webcam was programmed using open computer vision library OpenCV to detect whenever a human face comes into view. Why would a clock need to know when someone looks at it? We’ll come to that.

    First up, more on how that webcam works. OpenCV detects when a pair of eyes is in view of the webcam for three consecutive frames. You have to be really looking at it, not just passing it – that is, you have to be trying to tell the time. When this happens, the Raspberry Pi rotates the attached motor 180 degrees and back again.

    But why? Well:

    A clock that falls off the wall when you look at it

    hello #invention #robot #raspberrypi

    Burke has created a clock which, when you look at it to tell the time, falls off the wall.

    We know: you want your own. So do we. Thankfully, Burke responded to calls in the comments on his original video for a more detailed technical walkthrough, and, boy, did he deliver.

    How I made A clock that falls off the wall when you look at it

    I dunno why I sounded depressed in this video Original Video – https://www.youtube.com/watch?v=R3HUuf6LGQE&t=41s The Code – https://github.com/SmothDragon/Fa…

    In his walkthrough video, you get a good look at Burke’s entire setup, including extra batteries to make sure your Raspberry Pi gets enough juice, advice on how to get to grips with the code, and even the slots your different coloured wires need to go in. And so very, very much duct tape. Who’s going to start a GoFundMe to get Burke the glue gun sticks he so desperately needs? And hit subscribe for his YouTube channel while you’re at it!

    Website: LINK