Schlagwort: education

  • CTC 101: Giro d’Italia + CTC Faire in Barcelona

    CTC 101: Giro d’Italia + CTC Faire in Barcelona

    Reading Time: 3 minutes

    The last couple of weeks have kept the Arduino Education team extremely busy. While some of us were presenting CTC 101 to teachers all across Italy, others were in Barcelona for the CTC 101 Faire with more than 4,000 upper secondary students showcasing the projects they created as a result of the CTC 101 2017-18 academic year.

    The one thing that really amazes us at Arduino EDU is how the CTC program has scaled since its inception five years ago. Back then, we prototyped our first full-year academic program and conducted a test with 25 schools. Our first faire garnered 400 participants, about 10% the size of one of our latest events. The earliest edition of CTC ran on Arduino Uno, consisted of 20 projects, was made in black and white, and included a mascot that we commissioned to the well-known Mexican artist “Grand Chamaco.” From that experiment on, almost 18,000 students have gone through the program. CTC has been implemented by 800 schools, mainly in Spain, Sweden, Ecuador, and Mexico, while more than 1,600 teachers have had the opportunity to learn under the guidance of the Arduino EDU team both on and offline.

    In 2018, CTC 101 will expand to several countries including Italy, where my partner and Arduino co-founder Massimo Banzi together with Valentina Chinnici (Arduino EDU Product Marketing) led the EDU team through a custom-made “Giro d’Italia” visiting Turin, Bologna, Roma, Bari, and Naples to hold special events and workshops to Italian high school teachers, together with CampuStore, one of our Italian partners.

    In the words of Massimo, “The Arduino Education tour was created to confirm and strengthen Arduino’s efforts and attention towards Italian school. The hundreds of teachers who signed in to all the dates are a great encouragement for Arduino to continue the path towards research, innovation, and dissemination of the values of open source.”

    Not only did Massimo present CTC 101 to 400 teachers in person, he also hosted a webinar for over 900 educators. In case you missed it, we have posted the webinar video to the Arduino YouTube channel. (Please note that it is in Italian.)

    While Massimo was touring Italy, I travelled to Barcelona with Nerea Iriepa, CTC’s project manager, to participate in the 2018’s edition of the CTC Catalunya Faire at the renowned CosmoCaixa science museum.

    The EduCaixa Foundation has been sponsoring this project for the last four years in the regions of Catalunya, Andalucía, and Valencia, with a great degree of satisfaction from both teachers and students alike. In particular, a total of 200 schools in Catalunya (one-third of all of the public schools in the region) have been sponsored by EduCaixa, providing access to the program that has helped teachers enter the world of STEAM via Arduino Education.

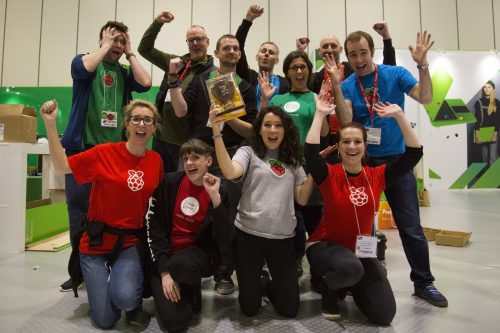
    This year’s faire brought together nearly 500 projects from 100 schools. It is worth mentioning how much effort all of the participants put in building their projects. It has been a tremendous journey for students and teachers that kicked off in September 2017 and culminated at this exhibition.

    We are truly grateful for CESIRE (big hugs to Rossana and Jordi for their work), the regional ministry of education, as well as Ultralab, our local partner, in organizing this faire.


    Website: LINK

  • New free online course about building makerspaces

    New free online course about building makerspaces

    Reading Time: 2 minutes

    Helping people to get into making is at the heart of what we do, and so we’ve created a brand-new, free online course to support educators to start their own makerspaces. If you’re interested in the maker movement, then this course is for you! Sign up now and start learning with Build a Makerspace for Young People on FutureLearn.

    Building a makerspace – free online learning

    Find out how to create and run a makerspace for young people. Look at the pedagogy and approaches behind digital making.

    Dive into the maker movement

    From planning to execution, this course will cover everything you need to know to set up and lead your very own makerspace. You’ll learn about different approaches to designing makerspace environments, understand the pedagogy that underpins the maker movement, and create your own makerspace action plan. By the end of the course, you will be well versed in makerspace culture, and you’ll have the skills and knowledge to build a successful and thriving makerspace in your community.

    Raspberry Pi Makerspace FutureLearn Online Course

    Let makerspace experts lead your journey

    This new course features five fantastic case studies about real-life makerspace educators. They’ll share their stories of starting a makerspace: what worked, what didn’t, and what’s next on their journey. Hear from Jessica Simons as she describes her experience starting the MCHS Maker Lab, connect with Patrick Ferrell as he details his teaching at the Jocelyn H. Lee Innovation Lab, and learn from Nick Provenzano as he shares his top tips on how to ensure the legacy of your makerspace. These accomplished educators will give you their practical advice and expert insights, helping you learn the best practices of starting a makerspace environment.

    Raspberry Pi Makerspace FutureLearn Online Course

    Connect with educators worldwide

    By taking this course, you’ll also be connecting with talented and like-minded educators from across the globe. This is your opportunity to develop a community of practice while learning from fellow teachers, librarians, and community leaders who are also engaged in the maker movement.

    “I like this course and how it progresses from introducing the concept of makerspaces and how they have come to education, all the way through to creating my own action plan to get started.”— Makerspace Educator in Hayward, California USA

    Sign up now

    The first run of our Build a Makerspace for Young People course starts on 12 March 2018. You can sign up and access all content for four weeks. After that period, we’ll run the course again multiple times throughout the year. Enjoy, and happy making!

    Website: LINK

  • Transition from Scratch to Python with FutureLearn

    Transition from Scratch to Python with FutureLearn

    Reading Time: 3 minutes

    With the launch of our first new free online course of 2018 — Scratch to Python: Moving from Block- to Text-based Programming — two weeks away, I thought this would be a great opportunity to introduce you to the ins and outs of the course content so you know what to expect.

    FutureLearn: Moving from Scratch to Python

    Learn how to apply the thinking and programming skills you’ve learnt in Scratch to text-based programming languages like Python.

    Take the plunge into text-based programming

    The idea for this course arose from our conversations with educators who had set up a Code Club in their schools. Most people start a club by teaching Scratch, a block-based programming language, because it allows learners to drag and drop blocks of pre-written code into a window to create a program. The blocks automatically snap together, making it easy to build fun and educational projects that don’t require much troubleshooting. You can do almost anything a beginner could wish for with Scratch, even physical computing to control LEDs, buzzers, buttons, motors, and more!

    Scratch to Python FutureLearn Raspberry Pi

    However, on our face-to-face training programme Picademy, educators told us that they were finding it hard to engage children who had outgrown Scratch and needed a new challenge. It was easy for me to imagine: a young learner, who once felt confident about programming using Scratch, is now confused by the alien, seemingly awkward interface of Python. What used to take them minutes in Scratch now takes them hours to code, and they start to lose interest — not a good result, I’m sure you’ll agree. I wanted to help educators to navigate this period in their learners’ development, and so I’ve written a course that shows you how to take the programming and thinking skills you and your learners have developed in Scratch, and apply them to Python.

    Scratch to Python FutureLearn Raspberry Pi

    Who is the course for?

    Educators from all backgrounds who are working with secondary school-aged learners. It will also be interesting to anyone who has spent time working with Scratch and wants to understand how programming concepts translate between different languages.

    “It was great fun, and I thought that the ideas and resources would be great to use with Year 7 classes.”
    Sue Grey, Classroom Teacher

    What is covered?

    After showing you the similarities and differences of Scratch and Python, and how the skills learned using one can be applied to the other, we will look at turning more complex Scratch scripts into Python programs. Through creating a Mad Libs game and developing a username generator, you will see how programs can be simplified in a text-based language. We will give you our top tips for debugging Python code, and you’ll have the chance to share your ideas for introducing more complex programs to your students.

    Scratch to Python FutureLearn Raspberry Pi

    After that, we will look at different data types in Python and write a script to calculate how old you are in dog years. Finally, you’ll dive deeper into the possibilities of Python by installing and using external Python libraries to perform some amazing tasks.

    By the end of the course, you’ll be able to:

    • Transfer programming and thinking skills from Scratch to Python
    • Use fundamental Python programming skills
    • Identify errors in your Python code based on error messages, and debug your scripts
    • Produce tools to support students’ transition from block-based to text-based programming
    • Understand the power of text-based programming and what you can create with it

    Where can I sign up?

    The free four-week course starts on 12 March 2018, and you can sign up now on FutureLearn. While you’re there, be sure to check out our other free courses, such as Prepare to Run a Code Club, Teaching Physical Computing with a Raspberry Pi and Python, and our second new course Build a Makerspace for Young People — more information on it will follow in tomorrow’s blog post.

    Website: LINK

  • Ultimaker Becomes Sponsor and Supplier for GE’s Additive Education Program

    Ultimaker Becomes Sponsor and Supplier for GE’s Additive Education Program

    Reading Time: 2 minutes

    Open source 3D printer manufacturer Ultimaker has announced that it is now a sponsor and supplier to the GE Additive Education Program (AEP). Schools can apply for subsidies from General Electric towards 3D printing.

    General Electric is helping future engineers, makers and scientists thrive with their GE Additive Education Program (AEP). The American has been gobbling up 3D printing companies over the years as it secures its future in the industry, and is now investing in people with USD $2-million set aside to subsidize desktop polymer printers in primary and second schools around the world.

    Helping out with this mission is 3D printer manufacturer, Ultimaker who just joined GE’s AEP. The company announced that it will be a sponsor and supplier.

    We are thrilled to have been asked and excited to participate in helping GE provide schools around the world with access to 3D printers,” stated John Kawola, President, Ultimaker North America.

    Schools with a strong commitment to Science, Technology, Education and Math (STEM) education teaching students in the 8 to 18 age group will receive priority in the program, which is now in its second year.

    Packages supplied by the GE AEP will include Polar Cloud-enabled polymer printers, professional training and educational modules. GE is now taking applications from schools.

    General Electric AEP Includes Ultimaker

    Essentially, the AEP hopes to nurture and develop future talent in additive manufacturing. Ultimaker adds that they share this passion and goal with GE.

    Polar 3D’s Polar Cloud platform serves as an important resource in the program, offering simplified cloud-based processing of 3D models and printer operation.

    As we enter year two of the AEP, we have seen the benefits of enabling schools with additive technologies. Students are learning at a young age to use digital tools to help boost creativity and productivity, and to prepare themselves for the quickly-changing workplace… Ultimaker has a proven track record of making 3D printing affordable and accessible across broad bands of education and professional settings, and we’re proud to have them join the effort,” stated Greg LaLonde, President, Polar 3D.

    Of course, as well as being involved with the AEP, Ultimaker has its own initiative, the Pioneer Program which launched last year. This program involves providing lesson plans, projects and content for educators who can then share ideas within the community.

    Impressively, this program now has over 100 global members and we’ve seen some of the results. For example, Ultimaker has helped one teacher inspire STEM students with bottle rockets and aided university students with printing liver models.

    Interested in finding out more? You can apply as a school to participate by visiting the GE AEP website.

    Source: PR Newswire  


    GE AEP

    Website: LINK

  • Astro Pi celebrates anniversary of ISS Columbus module

    Astro Pi celebrates anniversary of ISS Columbus module

    Reading Time: 3 minutes

    Right now, 400km above the Earth aboard the International Space Station, are two very special Raspberry Pi computers. They were launched into space on 6 December 2015 and are, most assuredly, the farthest-travelled Raspberry Pi computers in existence. Each year they run experiments that school students create in the European Astro Pi Challenge.

    Raspberry Astro Pi units on the International Space Station

    Left: Astro Pi Vis (Ed); right: Astro Pi IR (Izzy). Image credit: ESA.

    The European Columbus module

    Today marks the tenth anniversary of the launch of the European Columbus module. The Columbus module is the European Space Agency’s largest single contribution to the ISS, and it supports research in many scientific disciplines, from astrobiology and solar science to metallurgy and psychology. More than 225 experiments have been carried out inside it during the past decade. It’s also home to our Astro Pi computers.

    Here’s a video from 7 February 2008, when Space Shuttle Atlantis went skywards carrying the Columbus module in its cargo bay.

    STS-122 Launch NASA TV Coverage

    From February 7th, 2008 NASA-TV Coverage of The 121st Space Shuttle Launch Launched At:2:45:30 P.M E.T – Coverage begins exactly one hour till launch STS-122 Crew:

    Today, coincidentally, is also the deadline for the European Astro Pi Challenge: Mission Space Lab. Participating teams have until midnight tonight to submit their experiments.

    Anniversary celebrations

    At 16:30 GMT today there will be a live event on NASA TV for the Columbus module anniversary with NASA flight engineers Joe Acaba and Mark Vande Hei.

    Our Astro Pi computers will be joining in the celebrations by displaying a digital birthday candle that the crew can blow out. It works by detecting an increase in humidity when someone blows on it. The video below demonstrates the concept.

    AstroPi candle

    Uploaded by Effi Edmonton on 2018-01-17.

    Do try this at home

    The exact Astro Pi code that will run on the ISS today is available for you to download and run on your own Raspberry Pi and Sense HAT. You’ll notice that the program includes code to make it stop automatically when the date changes to 8 February. This is just to save time for the ground control team.

    If you have a Raspberry Pi and a Sense HAT, you can use the terminal commands below to download and run the code yourself:

    wget http://rpf.io/colbday -O birthday.py
    chmod +x birthday.py
    ./birthday.py

    When you see a blank blue screen with the brightness increasing, the Sense HAT is measuring the baseline humidity. It does this every 15 minutes so it can recalibrate to take account of natural changes in background humidity. A humidity increase of 2% is needed to blow out the candle, so if the background humidity changes by more than 2% in 15 minutes, it’s possible to get a false positive. Press Ctrl + C to quit.

    Please tweet pictures of your candles to @astro_pi – we might share yours! And if we’re lucky, we might catch a glimpse of the candle on the ISS during the NASA TV event at 16:30 GMT today.

    Website: LINK

  • Four days of STEAM at Bett 2018

    Four days of STEAM at Bett 2018

    Reading Time: 3 minutes

    If you’re an educator from the UK, chances are you’ve heard of Bett. For everyone else: Bett stands for British Education Technology Tradeshow. It’s the El Dorado of edtech, where every street is adorned with interactive whiteboards, VR headsets, and new technologies for the classroom. Every year since 2014, the Raspberry Pi Foundation has been going to the event hosted in the ExCeL London to chat to thousands of lovely educators about our free programmes and resources.

    Raspberry Pi Bett 2018

    On a mission

    Our setup this year consisted of four pods (imagine tables on steroids) in the STEAM village, and the mission of our highly trained team of education agents was to establish a new world record for Highest number of teachers talked to in a four-day period. I’m only half-joking.

    Bett 2018 Raspberry Pi

    Educators with a mission

    Meeting educators

    The best thing about being at Bett is meeting the educators who use our free content and training materials. It’s easy to get wrapped up in the everyday tasks of the office without stopping to ask: “Hey, have we asked our users what they want recently?” Events like Bett help us to connect with our audience, creating some lovely moments for both sides. We had plenty of Hello World authors visit us, including Gary Stager, co-author of Invent to Learn, a must-read for any computing educator. More than 700 people signed up for a digital subscription, we had numerous lovely conversations about our content and about ideas for new articles, and we met many new authors expressing an interest in writing for us in the future.

    We also talked to lots of Raspberry Pi Certified Educators who we’d trained in our free Picademy programme — new dates in Belfast and Dublin now! — and who are now doing exciting and innovative things in their local areas. For example, Chris Snowden came to tell us about the great digital making outreach work he has been doing with the Eureka! museum in Yorkshire.

    Bett 2018 Raspberry Pi

    Raspberry Pi Certified Educator Chris Snowden

    Digital making for kids

    The other best thing about being at Bett is running workshops for young learners and seeing the delight on their faces when they accomplish something they believed to be impossible only five minutes ago. On the Saturday, we ran a massive Raspberry Jam/Code Club where over 250 children, parents, and curious onlookers got stuck into some of our computing activities. We were super happy to find out that we’d won the Bett Kids’ Choice Award for Best Hands-on Experience — a fantastic end to a busy four days. With Bett over for another year, our tired and happy ‘rebel alliance’ from across the Foundation still had the energy to pose for a group photo.

    Bett 2018 Raspberry Pi

    Celebrating our ‘Best Hands-on Experience’ award

    More events

    You can find out more about starting a Code Club here, and if you’re running a Jam, why not get involved with our global Raspberry Jam Big Birthday Weekend celebrations in March?

    Raspberry Pi Big Birthday Weekend 2018. GIF with confetti and bopping JAM balloons

    We’ll be at quite a few events in 2018, including the Big Bang Fair in March — do come and say hi.

    Website: LINK

  • 2018 Picademy dates in the United States

    2018 Picademy dates in the United States

    Reading Time: 3 minutes

    Cue the lights! Cue the music! Picademy is back for another year stateside. We’re excited to bring our free computer science and digital making professional development program for educators to four new cities this summer — you can apply right now.

    We’re thrilled to kick off our 2018 season! Before we get started, let’s take a look back at our community’s accomplishments in the 2017 Picademy North America season.

    Picademy 2017 highlights

    Last year, we partnered with four awesome venues to host eight Picademy events in the United States. At every event across the country, we met incredibly talented educators passionate about bringing digital making to their learners. Whether it was at Ann Arbor District Library’s makerspace, UC Irvine’s College of Engineering, or a creative community center in Boise, Idaho, we were truly inspired by all our Picademy attendees and were thrilled to welcome them to the Raspberry Pi Certified Educator community.

    JWU Hosts Picademy

    JWU Providence’s College of Engineering & Design recently partnered with the Raspberry Pi Foundation to host Picademy, a free training session designed to give educators the tools to teach computer skills with confidence and creativity. | http://www.jwu.edu

    The 2017 Picademy cohorts were a diverse bunch with a lot of experience in their field. We welcomed more than 300 educators from 32 U.S. states and 10 countries. They were a mix of high school, middle school, and elementary classroom teachers, librarians, museum staff, university lecturers, and teacher trainers. More than half of our attendees were teaching computer science or technology already, and over 90% were specifically interested in incorporating physical computing into their work.

    Picademy has a strong and lasting impact on educators. Over 80% of graduates said they felt confident using Raspberry Pi after attending, and 88% said they were now interested in leading a digital making event in their community. To showcase two wonderful examples of this success: Chantel Mason led a Raspberry Pi workshop for families and educators in her community in St. Louis, Missouri this fall, and Dean Palmer led a digital making station at the Computer Science for Rhode Island Summit in December.

    Picademy 2018 dates

    This year, we’re partnering with four new venues to host our Picademy season.

    We’ll be at mindSpark Learning in Denver the first week in June, at Liberty Science Center in Jersey City later that month, at Georgia Tech University in Atlanta in mid-July, and finally at the Living Computer Museum in Seattle the first week in August.

    A big thank you to each of these venues for hosting us and supporting our free educator professional development program!

    Ready to join us for Picademy 2018? Learn more and apply now: rpf.io/picademy2018.

    Website: LINK

  • Astro Pi Mission Zero: your code is in space

    Astro Pi Mission Zero: your code is in space

    Reading Time: 4 minutes

    Every school year, we run the European Astro Pi challenge to find the next generation of space scientists who will program two space-hardened Raspberry Pi units, called Astro Pis, living aboard the International Space Station.

    Italian ESA Astronaut Paolo Nespoli with the Astro Pi units. Image credit ESA.

    Astro Pi Mission Zero

    The 2017–2018 challenge included the brand-new non-competitive Mission Zero, which guaranteed that participants could have their code run on the ISS for 30 seconds, provided they followed the rules. They would also get a certificate showing the exact time period during which their code ran in space.

    Astro Pi Mission Zero logo

    We asked participants to write a simple Python program to display a personalised message and the air temperature on the Astro Pi screen. No special hardware was needed, since all the code could be written in a web browser using the Sense HAT emulator developed in partnership with Trinket.

    Scott McKenzie on Twitter

    Students coding #astropi emulator to scroll a message to astronauts on @Raspberry_Pi in space this summer. Try it here: https://t.co/0KURq11X0L #Rm9Parents #CSforAll #ontariocodes

    And now it’s time…

    We received over 2500 entries for Mission Zero, and we’re excited to announce that tomorrow all entries with flight status will be run on the ISS…in SPAAACE!

    There are 1771 Python programs with flight status, which will run back-to-back on Astro Pi VIS (Ed). The whole process will take about 14 hours. This means that everyone will get a timestamp showing 1 February, so we’re going to call this day Mission Zero Day!

    Part of each team’s certificate will be a map, like the one below, showing the exact location of the ISS while the team’s code was running.

    The grey line is the ISS orbital path, the red marker shows the ISS’s location when their code was running. Produced using Google Static Maps API.

    The programs will be run in the same sequence in which we received them. For operational reasons, we can’t guarantee that they will run while the ISS flies over any particular location. However, if you have submitted an entry to Mission Zero, there is a chance that your code will run while the ISS is right overhead!

    Go out and spot the station

    Spotting the ISS is a great activity to do by yourself or with your students. The station looks like a very fast-moving star that crosses the sky in just a few minutes. If you know when and where to look, and it’s not cloudy, you literally can’t miss it.

    Source Andreas Möller, Wikimedia Commons.

    The ISS passes over most ground locations about twice a day. For it to be clearly visible though, you need darkness on the ground with sunlight on the ISS due to its altitude. There are a number of websites which can tell you when these visible passes occur, such as NASA’s Spot the Station. Each of the sites requires you to give your location so it can work out when visible passes will occur near you.

    Visible ISS pass star chart from Heavens Above, on which familiar constellations such as the Plough (see label Ursa Major) can be seen.

    A personal favourite of mine is Heavens Above. It’s slightly more fiddly to use than other sites, but it produces brilliant star charts that show you precisely where to look in the sky. This is how it works:

    1. Go to www.heavens-above.com
    2. To set your location, click on Unspecified in the top right-hand corner
    3. Enter your location (e.g. Cambridge, United Kingdom) into the text box and click Search
    4. The map should change to the correct location — scroll down and click Update
    5. You’ll be taken back to the homepage, but with your location showing at the top right
    6. Click on ISS in the Satellites section
    7. A table of dates will now show, which are the upcoming visible passes for your location
    8. Click on a row to view the star chart for that pass — the line is the path of the ISS, and the arrow shows direction of travel
    9. Be outside in cloudless weather at the start time, look towards the direction where the line begins, and hope the skies stay clear

    If you go out and do this, then tweet some pictures to @raspberry_pi, @astro_pi, and @esa. Good luck!

    More Astro Pi

    Mission Zero certificates will be arriving in participants’ inboxes shortly. We would like to thank everyone who participated in Mission Zero this school year, and we hope that next time you’ll take it one step further and try Mission Space Lab.

    Mission Zero and Mission Space Lab are two really exciting programmes that young people of all ages can take part in. If you would like to be notified when the next round of Astro Pi opens for registrations, sign up to our mailing list here.

    Website: LINK

  • Raspberry Crusoe: how a Pi got lost at sea

    Raspberry Crusoe: how a Pi got lost at sea

    Reading Time: 6 minutes

    The tale of the little HAB that could and its three-month journey from Portslade Aldridge Community Academy in the UK to the coast of Denmark.

    PACA Computing on Twitter

    Where did it land ???? #skypaca #skycademy @pacauk #RaspberryPi

    High-altitude ballooning

    Some of you may be familiar with Raspberry Pi being used as the flight computer, or tracker, of high-altitude balloon (HAB) payloads. For those who aren’t, high-altitude ballooning is a relatively simple activity (at least in principle) where a tracker is attached to a large weather balloon which is then released into the atmosphere. While the HAB ascends, the tracker takes pictures and data readings the whole time. Eventually (around 30km up) the balloon bursts, leaving the payload free to descend and be recovered. For a better explanation, I’m handing over to the students of UTC Oxfordshire:

    Pi in the Sky | UTC Oxfordshire

    On Tuesday 2nd May, students launched a Raspberry Pi computer 35,000 metres into the stratosphere as part of an Employer-Led project at UTC Oxfordshire, set by the Raspberry Pi Foundation. The project involved engineering, scientific and communication/publicity skills being developed to create the payload and code to interpret experiments set by the science team.

    Skycademy

    Over the past few years, we’ve seen schools and their students explore the possibilities that high-altitude ballooning offers, and back in 2015 and 2016 we ran Skycademy. The programme was simple enough: get a bunch of educators together in the same space, show them how to launch a balloon flight, and then send them back to their students to try and repeat what they’ve learned. Since the first Skycademy event, a number of participants have carried out launches, and we are extremely proud of each and every one of them.

    The case of the vanishing PACA HAB

    Not every launch has been a 100% success though. There are many things that can and do go wrong during HAB flights, and watching each launch from the comfort of our office can be a nerve-wracking experience. We had such an experience back in July 2017, during the launch performed by Skycademy graduate and Raspberry Pi Certified Educator Dave Hartley and his students from Portslade Aldridge Community Academy (PACA).

    Dave and his team had been working on their payload for some time, and were awaiting suitable weather conditions. Early one Wednesday in July, everything aligned: they had a narrow window of good weather and so set their launch plan in motion. Soon they had assembled the payload in the school grounds and all was ready for the launch.

    Dave Hartley on Twitter

    Launch day! @pacauk #skycademy #skypaca #raspberrypi

    Just before 11:00, they’d completed their final checks and released their payload into the atmosphere. Over the course of 64 minutes, the HAB steadily rose to an altitude of 25647m, where it captured some amazing pictures before the balloon burst and a rapid descent began.

    Soon after the payload began to descend, the team noticed something worrying: their predicted descent path took the payload dangerously far south — it was threatening to land in the sea. As the payload continued to lose altitude, their calculated results kept shifting, alternately predicting a landing on the ground or out to sea. Eventually it became clear that the payload would narrowly overshoot the land, and it finally landed about 2 km out to sea.

    Portslade Aldridge Community Academy Skycademy Raspberry Pi High Altitude Ballooning

    The path of the balloon

    It’s not uncommon for a HAB payload to get lost. There are many ways this can happen, particularly in a narrow country with a prevailing easterly wind like the UK. Payloads can get lost at sea, land somewhere inaccessible, or simply run out of power before they are located and retrieved. So normally, this would be the end of the story for the PACA students — even if the team had had a speedboat to hand, their payload was surely lost for good.

    A message from Denmark

    However, this is not the end of our story! A couple of months later, I arrived at work and saw this tweet from a colleague:

    Raspberry Pi on Twitter

    Anyone lost a Raspberry Pi HAB? Someone found this one on a beach in south western Denmark yesterday #UKHAS https://t.co/7lBzFiemgr

    Good Samaritan Henning Hansen had found a Raspberry Pi washed up on a remote beach in Denmark! While walking a stretch of coast to collect plastic debris for an environmental monitoring project, he came across something unusual near the shore at 55°04’53.0″N and 8°38’46.9″E.

    This of course piqued my interest, and we began to investigate the image he had shared on Facebook.

    Portslade Aldridge Community Academy Skycademy Raspberry Pi High Altitude Ballooning

    Inspecting the photo closely, we noticed a small asset label — the kind of label that, over a year earlier, we’d stuck to each and every bit of Skycademy field kit. We excitedly claimed the kit on behalf of Dave and his students, and contacted Henning to arrange the recovery of the payload. He told us it must have been carried ashore with the tide some time between 21 and 27 September, and probably on 21 September, since that day had the highest tide over the period. This meant the payload must have spent over two months at sea!

    From the photo we could tell that the Raspberry Pi had suffered significant corrosion, having been exposed to salt water for so long, and so we felt pessimistic about the chances that there would be any recoverable data on it. However, Henning said that he’d been able to read some files from the FAT partition of the SD card, so all hope was not lost.

    After a few weeks and a number of complications around dispatch and delivery (thank you, Henning, for your infinite patience!), Helen collected the HAB from a local Post Office.

    Portslade Aldridge Community Academy Skycademy Raspberry Pi High Altitude Ballooning

    SUCCESS!

    We set about trying to read the data from the SD card, and eventually became disheartened: despite several attempts, we were unable to read its contents.

    In a last-ditch effort, we gave the SD card to Jonathan, one of our engineers, who initially laughed at the prospect of recovering any data from it. But ten minutes later, he returned with news of success!

    Since then, we’ve been able to reunite the payload with the PACA launch team, and the students sent us the perfect message to end this story:

    Portslade Aldridge Community Academy Skycademy Raspberry Pi High Altitude Ballooning

    Website: LINK

  • Pioneer new lessons in your classroom with Google ExpeditionsPioneer new lessons in your classroom with Google ExpeditionsProduct Manager for Google Expeditions

    Pioneer new lessons in your classroom with Google ExpeditionsPioneer new lessons in your classroom with Google ExpeditionsProduct Manager for Google Expeditions

    Reading Time: < 1 minute

    Through our travels with the Google Expeditions Pioneer Program, we’ve worked alongside teachers and students to improve the overall Expeditions experience. One of the top requests we’ve heard from teachers and students is the ability to create their own Expeditions. Today, we are excited to announce a beta program that allows schools and educators to do just that. Classrooms will be able to create immersive tours of the world around them — their classrooms, their schools, their communities. We’ll provide participating schools with all the tools and hardware required to capture 360 images and curate unique Expeditions. For more information about the program, sign up here.

    Website: LINK

  • Arduino Create plans for education now available!

    Arduino Create plans for education now available!

    Reading Time: 2 minutes

    Arduino Create plans for education now available!

    Arduino TeamJanuary 24th, 2018

    Today, we’re excited to announce that Arduino Create is now available for schools with Chrome OS devices in their classrooms.

    With Arduino Create, students and teachers will be able to tinker with Arduino hardware and programming in a collaborative, always up-to-date environment. You can learn how to subscribe using this tutorial.

    Last June, we launched Arduino Create for Chrome OS; however due to limitations with Google Apps for Education (GAFE), educational institutions were unable to purchase subscriptions on the Chrome Web Store.

    The new Arduino Create subscription site allows schools to purchase and manage subscription plans for their students, starting at $0.20/student per month. All you need is a credit card and the email addresses of the students you would like to enroll. We also have a solution for students under the age of 14 who might not have full access to emails.

    The Google Admin console can be used by IT administrators to bulk install the app on a fleet of Chrome OS devices.

    Arduino Create will continue to be available for regular Chrome OS users at $0.99 per month on the Chrome Web Store. Both versions support the following boards: Uno, 101, Mega, Mega ADK, Esplora, Nano (ATmega328), Micro, Zero, MKR1000, MKR Zero, MKR Fox 1200, MKR GSM 1400, MKR WAN 1300, Pro, and Pro Mini (ATmega328).

    Visit the new Arduino Create subscription site to get started. If you have any questions or comments, write to us on this Forum page. We look forward to hearing your feedback!


    Website: LINK

  • Hello World Issue 4: Professional Development

    Hello World Issue 4: Professional Development

    Reading Time: 3 minutes

    Another new year brings with it thoughts of setting goals and targets. Thankfully, there is a new issue of Hello World packed with practical advise to set you on the road to success.

    Hello World is our magazine about computing and digital making for educators, and it’s a collaboration between the Raspberry Pi Foundation and Computing at School, which is part of the British Computing Society.

    Hello World 4 Professional Development Raspberry Pi CAS

    In issue 4, our international panel of educators and experts recommends approaches to continuing professional development in computer science education.

    Approaches to professional development, and much more

    With recommendations for more professional development in the Royal Society’s report, and government funding to support this, our cover feature explores some successful approaches. In addition, the issue is packed with other great resources, guides, features, and lesson plans to support educators.

    Highlights include:

    • The Royal Society: After the Reboot — learn about the latest report and its findings about computing education
    • The Cyber Games — a new programme looking for the next generation of security experts
    • Engaging Students with Drones
    • Digital Literacy: Lost in Translation?
    • Object-oriented Coding with Python

    Get your copy of Hello World 4

    Hello World is available as a free Creative Commons download for anyone around the world who is interested in computer science and digital making education. You can get the latest issue as a PDF file straight from the Hello World website.

    Thanks to the very generous sponsorship of BT, we are able to offer free print copies of the magazine to serving educators in the UK. It’s for teachers, Code Club volunteers, teaching assistants, teacher trainers, and others who help children and young people learn about computing and digital making. So remember to subscribe to have your free print magazine posted directly to your home — 6000 educators have already signed up to receive theirs!

    Could you write for Hello World?

    By sharing your knowledge and experience of working with young people to learn about computing, computer science, and digital making in Hello World, you will help inspire others to get involved. You will also help bring the power of digital making to more and more educators and learners.

    The computing education community is full of people who lend their experience to help colleagues. Contributing to Hello World is a great way to take an active part in this supportive community, and you’ll be adding to a body of free, open-source learning resources that are available for anyone to use, adapt, and share. It’s also a tremendous platform to broadcast your work: Hello World digital versions alone have been downloaded more than 50000 times!

    Wherever you are in the world, get in touch with us by emailing our editorial team about your article idea.

    Website: LINK

  • Create SLUG! It’s just like Snake, but with a slug

    Create SLUG! It’s just like Snake, but with a slug

    Reading Time: 3 minutes

    Recreate Snake, the favourite mobile phone game from the late nineties, using a slug*, a Raspberry Pi, a Sense HAT, and our free resource!

    Raspberry Pi Sense HAT Slug free resource

    *A virtual slug. Not a real slug. Please leave the real slugs out in nature.

    Snake SLUG!

    Move aside, Angry Birds! On your bike, Pokémon Go! When it comes to the cream of the crop of mobile phone games, Snake holds the top spot.

    Snake Nokia Game

    I could while away the hours…

    You may still have an old Nokia 3310 lost in the depths of a drawer somewhere — the drawer that won’t open all the way because something inside is jammed at an odd angle. So it will be far easier to grab your Pi and Sense HAT, or use the free Sense HAT emulator (online or on Raspbian), and code Snake SLUG yourself. In doing so, you can introduce the smaller residents of your household to the best reptile-focused game ever made…now with added mollusc.

    The resource

    To try out the game for yourself, head to our resource page, where you’ll find the online Sense HAT emulator embedded and ready to roll.

    Raspberry Pi Sense HAT Slug free resource

    It’ll look just like this, and you can use your computer’s arrow keys to direct your slug toward her tasty treats.

    From there, you’ll be taken on a step-by-step journey from zero to SLUG glory while coding your own versionof the game in Python. On the way, you’ll learn to work with two-dimensional lists and to use the Sense HAT’s pixel display and joystick input. And by completing the resource, you’ll expand your understanding of applying abstraction and decomposition to solve more complex problems, in line with our Digital Making Curriculum.

    The Sense HAT

    The Raspberry Pi Sense HAT was originally designed and made as part of the Astro Pi mission in December 2015. With an 8×8 RGB LED matrix, a joystick, and a plethora of on-board sensors including an accelerometer, gyroscope, and magnetometer, it’s a great add-on for your digital making toolkit, and excellent for projects involving data collection and evaluation.

    You can find more of our free Sense HAT tutorials here, including for making Flappy Bird Astronaut, a marble maze, and Pong.

    Website: LINK

  • Could you write for Hello World magazine?

    Could you write for Hello World magazine?

    Reading Time: 3 minutes

    Thinking about New Year’s resolutions? Ditch the gym and tone up your author muscles instead, by writing an article for Hello World magazine. We’ll help you, you’ll expand your knowledge of a topic you care about, and you’ll be contributing something of real value to the computing education community.

    Join our pool of Hello World writers in 2018

    The computing and digital making magazine for educators

    Hello World is our free computing magazine for educators, published in partnership with Computing At School and kindly supported by BT. We launched at the Bett Show in January 2017, and over the past twelve months, we’ve grown to a readership of 15000 subscribers. You can get your own free copy here.

    Our work is sustained by wonderful educational content from around the world in every issue. We’re hugely grateful to our current pool of authors – keep it up, veterans of 2017! – and we want to provide opportunities for new voices in the community to join them. You might be a classroom teacher sharing your scheme of work, a volunteer reflecting on running an after-school club, an industry professional sharing your STEM expertise, or an academic providing insights into new research – we’d love contributions from all kinds of people in all sorts of roles.

    Your article doesn’t have to be finished and complete: if you send us an outline, we will work with you to develop it into a full piece.

    Like my desk, but tidier

    Five reasons to write for Hello World

    Here are five reasons why writing for Hello World is a great way to start 2018:

    1. You’ll learn something new

    Researching an article is one of the best ways to broaden your knowledge about something that interests you.

    2. You’ll think more clearly

    Notes in hand, you sit at your desk and wonder how to craft all this information into a coherent piece of writing. It’s a situation we’re all familiar with. Writing an article makes you examine and clarify what you really think about a subject.

    Share your expertise and make more interesting projects along the way

    3. You’ll make cool projects

    Testing a project for a Hello World resource is a perfect opportunity to build something amazing that’s hitherto been locked away inside your brain.

    4. You’ll be doing something that matters

    Sharing your knowledge and experience in Hello World helps others to teach and learn computing. It helps bring the power of digital making to more and more educators and learners.

    5. You’ll share with an open and supportive community

    The computing education community is full of people who lend their experience to help colleagues. Contributing to Hello World is a great way to take an active part in this supportive community, and you’ll be adding to a body of free, open source learning resources that are available for everyone to use, adapt, and share. It’s also a tremendous platform to broadcast your work: the digital version alone of Hello World has been downloaded over 50000 times.

    Yes! What do I do next?

    Feeling inspired? Email our editorial team with your idea.

    Issue 4 of Hello World is out this month! Subscribe for free today to have it delivered to your inbox or your home.

    Website: LINK

  • Zayden’s Wish: Making the Impossible Mission Possible – in VR

    Zayden’s Wish: Making the Impossible Mission Possible – in VR

    Reading Time: 4 minutes

    **This is a guest post from the team at Trick3D

    The tarmac at Dobbins Air Force Base is clear – no jet engine roars – it’s calm enough to hear the American flag flapping in the breeze. And yet, the air’s electric with excitement. More than 50 airmen are aligned in formation. They are awaiting the arrival of a very special astronaut for a very special mission.

    Astronaut Zayden Wright was born with a rare heart condition. In his seven years of life, the young explorer endured 38 echocardiograms, six heart cauterizations and four open heart surgeries. Yet, none of these challenges have stopped his appetite for adventure. When Make-A-Wish Georgia asked Zayden Wright what he wished for in all of the world, Zayden wished to go to Saturn in a red rocket ship, so his mother, Shonda Wright, said “Let’s see what we can do!”

    From there, Zayden’s family, Make-A-Wish Georgia, immersive content studio TRICK 3D, and a squadron of local wish-granting volunteers banded together to make the seemingly impossible mission possible for the young airman. The group turned to the power of virtual reality to make the space expedition come to fruition.

    The creative vision for the virtual reality wish was set by Zayden himself. Zayden described what his space expedition would be like with his mom and, in vivid detail, he shared how his rocket ship will be red, how he’ll meet a little green alien, and how he’ll see countless stars along his journey.

    With Zayden’s creative brief in-hand, director and TRICK 3D founder, Chad Eikhoff, and his team set to work crafting the VR experience.

    “When Make-A-Wish Georgia shared the wish with me, I immediately said ‘yes! We are doing this!’ Virtual reality is a medium that’s inherently built for wishes and dreams, and this is a great example of VR making something possible that was previously unattainable,” said Eikhoff. “For us at TRICK 3D, building a world and experience for such a meaningful use at such a high level of production is 100 percent why we create, so saying ‘yes’ to Zayden was a no-brainer.”

    The ‘yes’ was easy. The task of crafting an experience that transported Zayden to the destination of his dreams was tricky – just the kind of challenge the artists of TRICK 3D love to tackle. Early on, the team turned to the HTC Vive headset, affectionately dubbed “astronaut goggles,” to achieve the most immersive virtual reality experience possible for Zayden.

    “It was imperative for this experience that we make Zayden feel as though he was really experiencing the Saturn of his dreams,” remarked TRICK 3D lead technical artist, Warren Drones. “To achieve this, our team iterated in the Vive constantly – taking the headset on and off repeatedly – checking and re-checking the experience in order to refine the virtual world we were creating in real-time. The result – Zayden’s reaction – made it all worth it and confirmed to us the power of the technology.”

    Zayden donned the HTC Vive (his astronaut goggles) and “blasted off” to Saturn on May 1st from Dobbins Air Force Base in Marietta, Ga. alongside NASA astronaut, LeRoy Chiao, to the fanfare of more than 50 airmen.

    “Zayden’s Wish” represented the first-ever VR wish granted by the Make-A-Wish Foundation and the seven-year-old’s reaction showcases the potential virtual reality has to transport kids (and adults) to places and experiences that were previously impossible or unimaginable.

    “Zayden’s wish inspires us all to imagine what’s possible – he set a high bar for using VR to instill hope and joy,” said Eikhoff. “We’re excited by the innovative pathways this wish paved that will grant future wishes not yet imagined.”

    Most recently, the Make-A-Wish Foundation honored the Georgia chapter and “Zayden’s Wish” with the Most Innovative Wish of the Year award.

    “We have seen, time and again, that when we can make seemingly impossible wishes come true for these families, they experience an improved sense of overall hope and an improved outlook,” said David Williams, president and CEO of Make-A-Wish America. “Zayden’s Wish represents a remarkable achievement in harnessing creativity and technology to make that hope happen in a whole new way.”

    To learn more about Make-A-Wish America, visit Wish.org. For more on TRICK 3D, visit TRICK3D.com.

    Website: LINK

  • The Ochre Atelier Comes To Viveport

    The Ochre Atelier Comes To Viveport

    Reading Time: 2 minutes

    The next stage of Vive’s partnership with Tate comes to life as Modigliani VR experience ‘The Ochre Atelier’ is now available to download at home

    In 1919 Amedeo Modigliani returned to Paris from the south of France. The war was over; his health had improved. His art dealer, Léopold Zborowski found a studio and living space for Modigliani and his partner, Jeanne Hébuterne, on the rue de la Grande Chaumière, near the cafés and meeting places of Montparnasse. Thanks to Vive’s VR technology, you can now be transported from the comfort of your own home to a recreation of the place where one of the greatest artists of the twentieth century lived and worked in the final months of his life.

    While the studio still exists, almost 100 years after the artist’s death, its appearance has changed significantly. There are no photographs of the studio from the 1910s.  Yet by using the actual space as a template, as well as study of first-hand accounts, historical research and new technical information about Modigliani’s paintings, the studio was reconstructed by teams at Tate and Preloaded to accurately reflect the artist’s living environment. Each object included in the experience was carefully researched, validated by art historians and authentically modelled.

    This incredible and unprecedented look into the life and work of one of the early 20th century’s most innovative artists is currently installed within Tate Modern’s exhibition Modigliani.

    Available now on Viveport, the experience has been expanded and will be more immersive than ever before by utilising the Vive controllers and Vive’s unique room-scale functionality to allow you to walk around Modigliani’s studio. You can check out the experience and how it was made by watching the video here:

    You can from today download the The Ochre Atelier on Viveport here for $2.99.

    This latest release sees Vive continue its work with the arts world, the partnership with Tate Modern being the latest project in the Vive Arts program. Vive has been previously centre stage at leading art venues and events around the world, including Tribeca Film Festival, The Venice Biennale and Somerset House.

    Stay tuned to the Vive blog for even more exciting art projects in 2018.

    Website: LINK

  • Nobel Prize and HTC Vive Partner To Debut The First VR Experience For The 2017 Nobel Prize

    Nobel Prize and HTC Vive Partner To Debut The First VR Experience For The 2017 Nobel Prize

    Reading Time: 2 minutes

    Stockholm, SwedenDecember 5, 2017 – During the Nobel Week when the Nobel Laureates come to Stockholm and Oslo, HTC VIVE™ and Nobel Media announced a partnership to create the first virtual reality experience for the Nobel Prize in Physiology or Medicine. The VR experience “The Circadian Rhythm” takes viewers on a journey into the cellular level of the human body, where they are able to learn about and interact with our biological clock to gain a greater understanding of its inner workings. This truly unique VR experience showcases the contributions of Nobel Laureates and explains how plants, animals and humans adapt their biological rhythm so that it is synchronized with the Earth’s revolutions.

    The Nobel Prize is based on recognizing great contributions to humanity, and the receivers of the Nobel Prize are among those who have advanced our knowledge of the universe and our bodies.    Nobel Media and HTC Vive are creating the virtual reality experience to visualize the 2017 Nobel Prize in Physiology or Medicine awarded to Jeffrey C. Hall, Michael Rosbash and Michael W. Young for their discoveries of molecular mechanisms controlling the circadian rhythm. The experience will be shown for the first time during the Nobel Week while the full free experience will be available globally on Viveport and at the Nobel Museum starting in 2018.

    “Together, with HTC Vive, we are creating unique VR experiences that showcase important moments and lessons that the world can benefit from,” said Mattias, Fyrenius, CEO Nobel Media.  “’The Circadian Rhythm’ is another great testament to how emerging technologies like VR can provide an unparalleled experience and moment of learning.”

    “We believe that the mysteries of our physiology and the world of physics can best be explored when you experience the breakthrough achievements of Nobel Prize Laurates in VR – imagine being in a cell and see the biological clock at work or at the beginning of time when the Big Bang happens,” said Rikard Steiber, President, Viveport.

    This initiative with Nobel Media is the latest in HTC Vive’s effort to expand the world’s understanding of the impact VR can have in educating and engaging the public on the world around us. Vive recently launched Vive Arts, an initiative set to change the way the world creates and engages with the arts. Vive’s partnership with Nobel Media further demonstrates the power VR has in shaping the way we educate and appreciate important concepts.

    Website: LINK

  • Our brand-new Christmas resources

    Our brand-new Christmas resources

    Reading Time: 3 minutes

    It’s never too early for Christmas-themed resources — especially when you want to make the most of them in your school, Code Club or CoderDojo! So here’s the ever-wonderful Laura Sach with an introduction of our newest festive projects.

    A cartoon of people singing Christmas carols - Raspberry Pi Christmas Resources

    In the immortal words of Noddy Holder: “it’s Christmaaaaaaasssss!” Well, maybe it isn’t quite Christmas yet, but since the shops have been playing Mariah Carey on a loop since the last pumpkin lantern hit the bargain bin, you’re hopefully well prepared.

    To get you in the mood with some festive fun, we’ve put together a selection of seasonal free resources for you. Each project has a difficulty level in line with our Digital Making Curriculum, so you can check which might suit you best. Why not try them out at your local Raspberry Jam, CoderDojo, or Code Club, at school, or even on a cold day at home with a big mug of hot chocolate?

    Jazzy jumpers

    A cartoon of someone remembering pairs of jumper designs - Raspberry Pi Christmas Resources

    Jazzy jumpers (Creator level): as a child in the eighties, you’d always get an embarrassing and probably badly sized jazzy jumper at Christmas from some distant relative. Thank goodness the trend has gone hipster and dreadful jumpers are now cool!

    This resource shows you how to build a memory game in Scratch where you must remember the colour and picture of a jazzy jumper before recreating it. How many jumpers can you successfully recall in a row?

    Sense HAT advent calendar

    A cartoon Sense HAT lit up in the design of a Christmas pudding - Raspberry Pi Christmas Resources

    Sense HAT advent calendar (Builder level): put the lovely lights on your Sense HAT to festive use by creating an advent calendar you can open day by day. However, there’s strictly no cheating with this calendar — we teach you how to use Python to detect the current date and prevent would-be premature peekers!

    Press the Enter key to open today’s door:

    (Note: no chocolate will be dispensed from your Raspberry Pi. Sorry about that.)

    Code a carol

    A cartoon of people singing Christmas carols - Raspberry Pi Christmas Resources

    Code a carol (Developer level): Have you ever noticed how much repetition there is in carols and other songs? This resource teaches you how to break down the Twelve days of Christmas tune into its component parts and code it up in Sonic Pi the lazy way: get the computer to do all the repetition for you!

    No musical knowledge required — just follow our lead, and you’ll have yourself a rocking doorbell tune in no time!

    Naughty and nice

    A cartoon of Santa judging people by their tweets - Raspberry Pi Christmas Resources

    Naughty and nice (Maker level): Have you been naughty or nice? Find out by using sentiment analysis on your tweets to see what sort of things you’ve been talking about throughout the year. For added fun, why not use your program on the Twitter account of your sibling/spouse/arch nemesis and report their level of naughtiness to Santa with an @ mention?

    raspberry_pi is 65.5 percent NICE, with an accuracy of 0.9046692607003891

    It’s Christmaaaaaasssss

    With the festive season just around the corner, it’s time to get started on your Christmas projects! Whether you’re planning to run your Christmas lights via a phone app, install a home assistant inside an Elf on a Shelf, or work through our Christmas resources, we would like to see what you make. So do share your festive builds with us on social media, or by posting links in the comments.

    Website: LINK

  • Decrypt messages and calculate Pi: new OctaPi projects

    Decrypt messages and calculate Pi: new OctaPi projects

    Reading Time: 3 minutes

    Back in July, we collaborated with GCHQ to bring you two fantastic free resources: the first showed you how to build an OctaPi, a Raspberry Pi cluster computer. The second showed you how to use the cluster to learn about public key cryptography. Since then, we and GCHQ have been hard at work, and now we’re presenting two more exciting projects to make with your OctaPi!

    A happy cartoon octopus holds a Raspberry Pi in each tentacle.

    Maker level

    These new free resources are at the Maker level of the Raspberry Pi Foundation Digital Making Curriculum — they are intended for learners with a fair amount of experience, introducing them to some intriguing new concepts.

    Whilst both resources make use of the OctaPi in their final steps, you can work through the majority of the projects on any computer running Python 3.

    Calculate Pi

    A cartoon octopus is struggling to work out the value of Pi

    3.14159…ummm…

    Calculating Pi teaches you two ways of calculating the value of Pi with varying accuracy. Along the way, you’ll also learn how computers store numbers with a fractional part, why your computer can limit how accurate your calculation of Pi is, and how to distribute the calculation across the OctaPi cluster.

    Brute-force Enigma

    A cartoon octopus tries to break an Enigma code

    Decrypt the message before time runs out!

    Brute-force Enigma sends you back in time to take up the position of a WWII Enigma operator. Learn how to encrypt and decrypt messages using an Enigma machine simulated entirely in Python. Then switch roles and become a Bletchley Park code breaker — except this time, you’ve got a cluster computer on your side! You will use the OctaPi to launch a brute-force crypt attack on an Enigma-encrypted message, and you’ll gain an appreciation of just how difficult this decryption task was without computers.

    Our own OctaPi

    A GIF of the OctaPi cluster computer at Pi Towers
    GCHQ has kindly sent us a fully assembled, very pretty OctaPi of our own to play with at Pi Towers — it even has eight snazzy Unicorn HATs which let you display light patterns and visualize simulations! Visitors of the Raspberry Jam at Pi Towers can have a go at running their own programs on the OctaPi, while we’ll be using it to continue to curate more free resources for you.

    Website: LINK

  • What do you want your button to do?

    What do you want your button to do?

    Reading Time: 4 minutes

    Here at Raspberry Pi, we know that getting physical with computing is often a catalyst for creativity. Building a simple circuit can open up a world of making possibilities! This ethos of tinkering and invention is also being used in the classroom to inspire a whole new generation of makers too, and here is why.

    The all-important question

    Physical computing provides a great opportunity for creative expression: the button press! By explaining how a button works, how to build one with a breadboard attached to computer, and how to program the button to work when it’s pressed, you can give learners young and old all the conceptual skills they need to build a thing that does something. But what do they want their button to do? Have you ever asked your students or children at home? I promise it will be one of the most mindblowing experiences you’ll have if you do.

    A button. A harmless, little arcade button.

    Looks harmless now, but put it into the hands of a child and see what happens!

    Amy will want her button to take a photo, Charlie will want his button to play a sound, Tumi will want her button to explode TNT in Minecraft, Jack will want their button to fire confetti out of a cannon, and James Robinson will want his to trigger silly noises (doesn’t he always?)! Idea generation is the inherent gift that every child has in abundance. As educators and parents, we’re always looking to deeply engage our young people in the subject matter we’re teaching, and they are never more engaged than when they have an idea and want to implement it. Way back in 2012, I wanted my button to print geeky sayings:

    Geek Gurl Diaries Raspberry Pi Thermal Printer Project Sneak Peek!

    A sneak peek at the finished Geek Gurl Diaries ‘Box of Geek’. I’ve been busy making this for a few weeks with some help from friends. Tutorial to make your own box coming soon, so keep checking the Geek Gurl Diaries Twitter, facebook page and channel.

    What are the challenges for this approach in education?

    Allowing this kind of free-form creativity and tinkering in the classroom obviously has its challenges for teachers, especially those confined to rigid lesson structures, timings, and small classrooms. The most common worry I hear from teachers is “what if they ask a question I can’t answer?” Encouraging this sort of creative thinking makes that almost an inevitability. How can you facilitate roughly 30 different projects simultaneously? The answer is by using those other computational and transferable thinking skills:

    • Problem-solving
    • Iteration
    • Collaboration
    • Evaluation

    Clearly specifying a problem, surveying the tools available to solve it (including online references and external advice), and then applying them to solve the problem is a hugely important skill, and this is a great opportunity to teach it.

    A girl plays a button reaction game at a Raspberry Pi event

    Press ALL the buttons!

    Hands-off guidance

    When we train teachers at Picademy, we group attendees around themes that have come out of the idea generation session. Together they collaborate on an achievable shared goal. One will often sketch something on a whiteboard, decomposing the problem into smaller parts; then the group will divide up the tasks. Each will look online or in books for tutorials to help them with their step. I’ve seen this behaviour in student groups too, and it’s very easy to facilitate. You don’t need to be the resident expert on every project that students want to work on.

    The key is knowing where to guide students to find the answers they need. Curating online videos, blogs, tutorials, and articles in advance gives you the freedom and confidence to concentrate on what matters: the learning. We have a number of physical computing projects that use buttons, linked to our curriculum for learners to combine inputs and outputs to solve a problem. The WhooPi cushion and GPIO music box are two of my favourites.

    A Raspberry Pi and button attached to a computer display

    Outside of formal education, events such as Raspberry Jams, CoderDojos, CAS Hubs, and hackathons are ideal venues for seeking and receiving support and advice.

    Cross-curricular participation

    The rise of the global maker movement, I think, is in response to abstract concepts and disciplines. Children are taught lots of concepts in isolation that aren’t always relevant to their lives or immediate environment. Digital making provides a unique and exciting way of bridging different subject areas, allowing for cross-curricular participation. I’m not suggesting that educators should throw away all their schemes of work and leave the full direction of the computing curriculum to students. However, there’s huge value in exposing learners to the possibilities for creativity in computing. Creative freedom and expression guide learning, better preparing young people for the workplace of tomorrow.

    So…what do you want your button to do?

    Hello World

    Learn more about today’s subject, and read further articles regarding computer science in education, in Hello World magazine issue 1.

    Read Hello World issue 1 for more…

    UK-based educators can subscribe to Hello World to receive a hard copy delivered for free to their doorstep, while the PDF is available for free to everyone via the Hello World website.

    Website: LINK

  • Winners of “HP Mars Home Planet” Conceptual Design Phase Announced

    Winners of “HP Mars Home Planet” Conceptual Design Phase Announced

    Reading Time: 4 minutes

    Life on Mars is one step closer to ‘virtual’ reality as nine winners have been announced at Autodesk University Las Vegas 2017, for the first phase of HP Mars Home Planet – a global project pairing co-creation on the Launch Forth platform with virtual reality (VR) to simulate a utopian civilization of one million people on Mars.

    From buildings, vehicles, farms and clothing, this co-creation project of professional architects, engineers, designers and artists from around the world explores how one million humans could thrive on the Red Planet given its climate and atmospheric challenges.

    HP Mars Home Planet runs on Launch Forth, a product design platform powered by a robust co-creation community of 120,000 designers, engineers and solvers. This community-powered platform allows people everywhere to collaborate on ideas, solve problems and create solutions for challenges, both big and small, using open innovation to accelerate the product development process.

    HP Mars Home Planet launched as a three-phase, yearlong project in August when HP Inc., NVIDIA®  and Launch Forth teamed up with Autodesk, Epic Unreal EngineFusion, HTC Vive, Microsoft and Technicolor.

    In the first phase of Mars Home Planet, participants submitted conceptual designs for the buildings, vehicles, smart cities, and transportation systems that will support one million humans in an area of Mars called ‘Mars Valley’. The challenge was so popular, it broke Launch Forth’s record of 34,000 participants and close to 500 entries in around two months.

    The winners, who, will be awarded $38,080 in total prizes, were determined by public voting and an illustrious panel of judges, including:

    • Dr. Robert Zubrin, President of Mars Society
    • Daniel Libeskind, Architect
    • Dr. Sanjay Vijendran, Mars Mission, European Space Agency
    • Andrew Anagnost, CEO of Autodesk
    • Chris deFaria, President of DreamWorks Animation Group
    • Ryan Church, Concept Artist and former Star Wars Art Director
    • Android Jones, Conceptual Artist
    • Stacy Wolf, VP of Industrial Design, HP
    • Jay Rogers, CEO of Local Motors

    The winners are:

    Infrastructure 1: Kenny Levick (United States), Mars-Genesis & Mawrth-Integra: Interplanetary Design

    Infrastructure 2: Kadek Wicaksana (Indonesia), Mars Colony 1.0

    Transportation 1: Xabier Albizu (Spain), MARS M. U. V (Multi Utility Vehicle)

    Transportation 2: Justin Carlo Punay (Philippines), Mars General Utility Vehicle 

    Innovation of Architecture: Jesús Velazco (Venezuela), Solar Powered Colony

    Innovation in Design: Jorge Moreno Fierro (Columbia), Bio System

    Innovation in Engineering: Yih Foo Looi (Malaysia), Living Environments from Hostile Wastes

    Innovation in Engineering– Special Acknowledgement: Jose Daniel Garcia Espinel (Spain), Metropolis First City on Mars

    Innovation in Science: Lake Matthew Team (United States), Artificial Geomagnetic Field to Protect a Crewed Mars Facility from Cosmic Rays

    Phase two of HP Mars Home Planet, the 3D Modeling Competition, opens for submissions today. Participants are being asked to use Autodesk software to create 3D models of buildings, city infrastructure, vehicles, sports stadiums, city parks, schools, furniture, and anything else that might be found in a utopian Martian human civilization of one million humans. Participants will be inspired by the phase one conceptual design winners, but they are free to use their imagination and create whatever they desire. Submissions close February 25, 2018.

    With creative and technical leadership from Technicolor, co-creators will bring the winning 3D models into the Unreal Engine to create a VR simulation of what life on Mars could be like for one million people. The environment will build on Mars Valley terrain from Fusion’s “Mars 2030” game, which is based on NASA Mars research and high resolution photography.

    The entire project looks to a time in the future where there are families and communities living a utopian lifestyle on Mars. The goal of the project is to engage creative thinkers to solve some of the challenges of urbanization on the Red Planet. Ultimately, through the VR experience, people here on Earth will be able to experience what life on Mars might be like.

    For more information about the winning concepts, and to join the 3D Modeling Challenge visit http://launchforth.io/hpmars.

    Website: LINK

  • Prepare to run a Code Club on FutureLearn

    Prepare to run a Code Club on FutureLearn

    Reading Time: 2 minutes

    Prepare to run a Code Club with our newest free online course, available now on FutureLearn!

    FutureLearn: Prepare to Run a Code Club

    Ready to launch! Our free FutureLearn course ‘Prepare to Run a Code Club’ starts next week and you can sign up now: https://www.futurelearn.com/courses/code-club

    Code Club

    As of today, more than 10000 Code Clubs run in 130 countries, delivering free coding opportunities to approximately 150000 children across the globe.

    A child absorbed in a task at a Code Club

    As an organisation, Code Club provides free learning resources and training materials to supports the ever-growing and truly inspiring community of volunteers and educators who set up and run Code Clubs.

    FutureLearn

    Today we’re launching our latest free online course on FutureLearn, dedicated to training and supporting new Code Club volunteers. It will give you practical guidance on all things Code Club, as well as a taste of beginner programming!

    Split over three weeks and running for 3–4 hours in total, the course provides hands-on advice and tips on everything you need to know to run a successful, fun, and educational club.

    “Week 1 kicks off with advice on how to prepare to start a Code Club, for example which hardware and software are needed. Week 2 focusses on how to deliver Code Club sessions, with practical tips on helping young people learn and an easy taster coding project to try out. In the final week, the course looks at interesting ideas to enrich and extend club sessions.”
    — Sarah Sherman-Chase, Code Club Participation Manager

    The course is available wherever you live, and it is completely free — sign up now!

    If you’re already a volunteer, the course will be a great refresher, and a chance to share your insights with newcomers. Moreover, it is also useful for parents and guardians who wish to learn more about Code Club.

    Your next step

    Interested in learning more? You can start the course today by visiting FutureLearn. And to find out more about Code Clubs in your country, visit Code Club UK or Code Club International.

    Code Club partners from across the globe gathered together for a group photo at the International Meetup

    We love hearing your Code Club stories! If you’re a volunteer, are in the process of setting up a club, or are inspired to learn more, share your story in the comments below or via social media, making sure to tag @CodeClub and @CodeClubWorld.

    You might also be interested in our other free courses on the FutureLearn platform, including Teaching Physical Computing with Raspberry Pi and Python and Teaching Programming in Primary Schools.

    Website: LINK