Schlagwort: Doctor Who

  • Take the trip of a lifetime in Maze Theory’s Viveport adventure Doctor Who: The Edge of Time

    Take the trip of a lifetime in Maze Theory’s Viveport adventure Doctor Who: The Edge of Time

    Reading Time: 6 minutes

    VR has the awesome power to make players feel super-heroic like never before. With Doctor Who: The Edge of Time, arriving to Viveport and Viveport Infinity tomorrow, developer Maze Theory had the herculean task of bringing one of the most iconic heroes in sci-fi history to life in VR, placing a Sonic Screwdriver in their hands and tasking them with protecting the universe. We had a chat with them to find out what went into making this thrilling VR adventure.

    Interview by Nathan Allen Ortega, Viveport Staff

    [youtube https://www.youtube.com/watch?v=OwjiiXyBaKA?feature=oembed&wmode=opaque&w=730&h=411]

    Tell us a bit about yourself and the crew at Maze Theory

    Marcus Moresby: I’m the Creative Director here at Maze Theory. We’re a digital entertainment studio focusing on ‘Evolutionary storytelling’ – which is our way of describing narrative adventure experiences, told through new technologies and techniques. Our experience and passions come from the areas of games, immersive theatre, film, TV and narrative drama. We bring interactive elements in to create a new form of participatory entertainment.

    How did the concept of Doctor Who: The Edge Of Time come about?

    The BBC came in to experience one of our other projects The Vanishing Act and they really liked our attention to detail, production quality and approach to immersive storytelling in VR. From there we started talking about Doctor Who and how well the show translated into the medium of VR.

    At it’s best, VR is like a teleportation device allowing players to travel to distant worlds, far-away places and go on incredible adventures in space and time. It was obvious to us straight away in that meeting that Doctor Who would translate into a perfect VR title.

    By chance, The Doctor Who Experience, a live attraction in Cardiff that documented the show’s 55 year history and exhibited many of its props, sets and characters was about to close. We got talking about photogrammetry and next thing you know we were down in Cardiff creating a digital record of the whole experience. It’s all on a hard-drive in our office.

    [youtube https://www.youtube.com/watch?v=Jtgumb-HreA?feature=oembed&wmode=opaque&w=730&h=411]

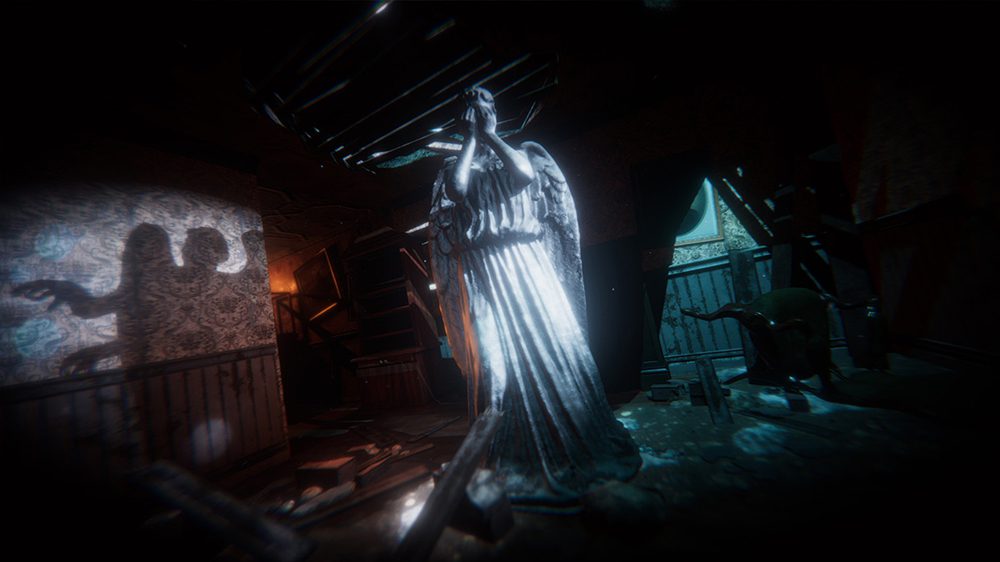
    With access to a wealth of incredible data we couldn’t help ourselves to make a weeping angels demo in VR and things just from snowballed from there.

    What have been your biggest inspirations on the design concepts in The Edge Of Time?

    We’ve focused on giving people the chance to inhabit and exist in the world of Doctor Who and the show. One of our main pillars in the production was to make you feel like you’re stepping into your own episode of the show. That’s why it was important to include the title sequence, which while breathtaking in VR, isn’t a traditional gameplay mechanic.

    We’ve also tried our best to give fans experiences they’d want to have in the world of Doctor Who. Allowing them to pilot the Tardis, come face to face with the Daleks, to solve puzzles and games with the Doctor’s trusty Sonic Screwdriver.

    At the same time, it was important not to alienate non Doctor Who fans. Both ourselves and the  BBC want to encourage new audiences to enjoy this universe. At it’s core, it’s a time-travel adventure in VR spread throughout the universe. There’s a combination of sci-fi, horror, adventure and action, all mixed up.

    What kind of research did you do to prepare for the task of bringing the world of the popular series to VR?

    With a show spanning as many series as Doctor Who we knew we’d have to be thorough with our research. Initially I spent a few weeks completely absorbing myself into it and focused on 70 episodes from the 37 series. Anything that I thought would work particularly well as an interaction, story line or environment was noted down. Then I scoured the various fan sites and forums to view their opinions on favourite episodes, monsters and what they would love to see or experience in a Doctor Who game.

    How challenging was it to figure out which Doctor Who creatures, worlds and iconic elements from the series to incorporate into the game?

    The BBC have been amazing to work with and initially we gave them a wish-list of all the monsters and places we wanted to include. This led to various discussions regarding the direction and roadmap of the new series and where this experience would fit into the universe. They’ve all been selected because of how powerful they’d be in VR. Standing next to a Dalek in VR with the legendary screaming voice really is intimidating. The Angels were a perfect fit too and VR is probably the only medium you could truly experience them.

    Tell us a bit about your collaboration with the BBC and the creative team on the Doctor Who series throughout the process of crafting your immersive VR experience

    What’s been wonderful is we got to co-write the game with Gavin Collinson, who’s worked on the show since the David Tennant days. It’s meant we’ve managed to get the story right from the perspective of a VR player and they’ve got it all working with the shows’s cannon. It’s really been a collaborative process with the team at the BBC and why we hope the end story works so well.

    Were there any story moments, puzzle concepts or other cool ideas that you had that you wanted to incorporate into the game but had to leave it on the cutting room floor?

    With a show so vast there’s a ton of material and related gameplay ideas we had to hold back. What a lot of people don’t realize about Maze Theory is we’re a very small team. Only 6 core people worked on the game, but we’ve all tried to hit a close to AAA aesthetic and game. It’s about a 3 hour experience, so not easy to make with such a small team.

    Consequently there were a tonne of ideas that haven’t made the cut. On the plus side, there’s lots of good starting points for a sequel.

    What was it like working with Jodie Whittaker?

    Jodie’s great and a complete natural with her take on the Doctor. We managed to squeeze in some time with her in between shoot days on set in Cardiff and because she’s fully in character we got through a tonne of lines and dialogue in half the time you’d normally expect.

    What do you feel are the key things about Doctor Who that make it such a global, decades spanning phenomenon?

    Time travel, adventures and science fiction, good drama, strong concepts and story writing – what’s not to like? What we love more is how this personality and character naturally translates to VR.

    How long have you and the team been working on The Edge Of Time?

    It’s been just under a year since we started main production on the game. It’s been a pretty mammoth task for everyone involved but as we get to the end of the project everyone is really proud of the title and what we’ve achieved.

    What’s on the horizon for Maze Theory?

    We’re thrilled to be working on Peaky Blinders and have just commenced production. It focuses heavily on human interaction and how you can make a character feel alive inside a virtual world. Everyone’s very excited about the idea of traveling back to the 1930’s and the narrative adventure you get with a gangster title like that.

    We’re also working on a couple of own concepts internally. It’s important for us that we aren’t just known for big IP projects and we imagine our third title will be something unexpected which learns from our previous R&D.

    That’s exciting to hear! Thanks so much for taking the time to chat with us.

    Doctor Who: The Edge of Time lands on planet Viveport tomorrow – as well as Viveport Infinity.

    Not a member? Start a 14 day trial and prepare to go all *wibbly wobbly timey wimey*, along with hundreds of awesome VR apps and games without limits.

    Website: LINK
  • Make your own custom LEDs using hot glue!

    Make your own custom LEDs using hot glue!

    Reading Time: 4 minutes

    Tired of using the same old plastic LEDs in your projects? It’s time to grab a hot glue gun and some confectionary moulds to create your own custom LEDs!

    make your own custom LEDs for Raspberry Pi

    Blinky LEDs!

    Lighting up an LED is the standard first step into the world of digital making with a Raspberry Pi. For example, at our two-day Picademy training events, budding Raspberry Pi Certified Educators are shown the ropes of classroom digital making by learning how to connect an LED to a Pi and use code to make it blink.

    Anastasia Hanneken on Twitter

    Blinking LED Light @Raspberry_Pi #picademy! https://t.co/zhTODYsBxp

    And while LEDs come in various sizes, they’re all pretty much the same shape: small, coloured domes of plastic with pointy legs that always manage to draw blood when I grab them from the depths of my maker drawer.

    So why not do away with the boring and make some new LEDs based on your favourite characters and shapes?

    Making custom LEDs with a whole lotta hot glue

    The process of creating your own custom LEDs is pretty simple, but it’s not without its risk — namely, burnt fingertips and sizzled LEDs! So be careful when making these, and supervise young children throughout the process.

    The moulds

    I used flexible ice cube trays, but you could also use chocolate moulds. As long as the mould is flexible, this should work — I haven’t tried hard plastic moulds, so I can’t make any promises for those. Also be sure to test whether your mould will withstand the heat of the hot glue!

    Check your LEDs

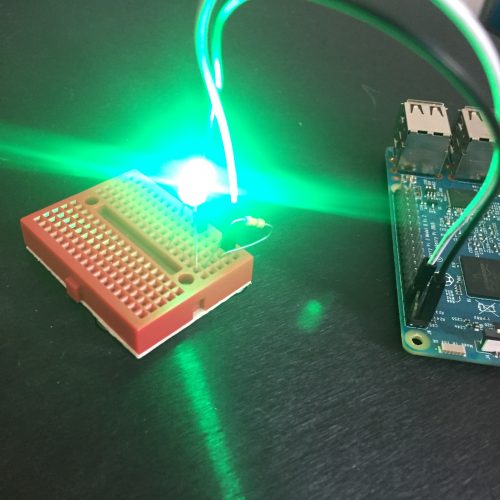
    Before you submerge your LEDs in hot glue, check to make sure they work. The easiest way to do this is to set up a testing station using a Pi, a breadboard, some jumper wires, and a resistor. To save having to write code, I used the 3V3 pin and a ground pin.

    make your own custom LEDs for Raspberry Pi

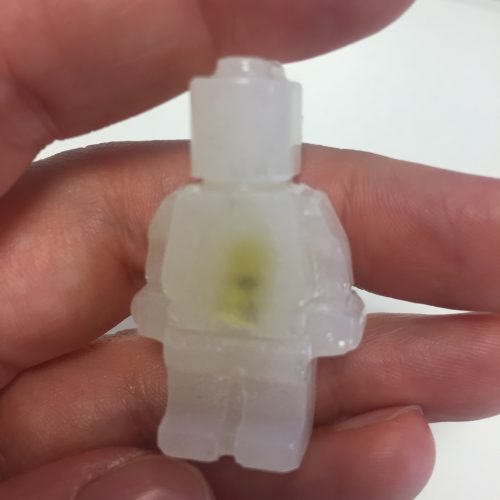
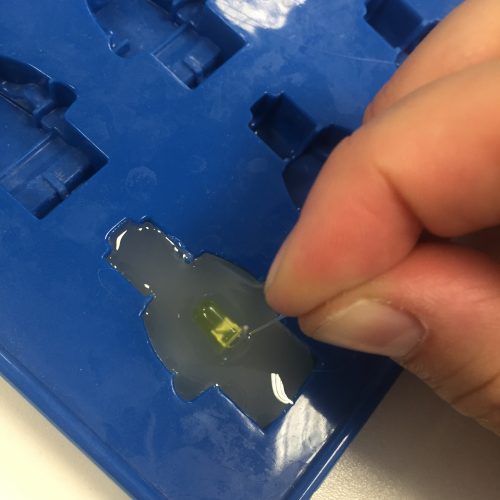
    Remember, the shorter of the two legs connects to the ground pin, while the longer goes to 3V3. If you mix this up, you may end up with a fried LED like this poor LEGO man.

    make your own custom LEDs for Raspberry Pi

    Everything isn’t awesome.

    Once you’ve confirmed that your LED works, bend its legs to make it easier to insert it into the glue.

    Glue

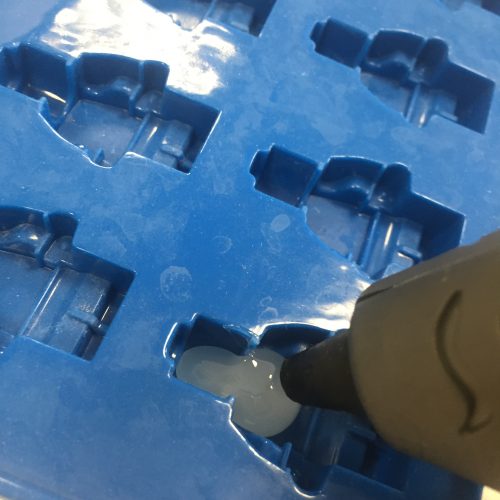
    Next, grab a hot glue gun and fill a mould. The glue will take a while to cool, so you have some time to make sure that all nooks and crannies are filled before you insert an LED.

    make your own custom LEDs for Raspberry Pi

    Tip: test a corner of your mould with the tip of your glue gun to check how heat-resistant it is. One of my moulds didn’t enjoy heat and began to bubble.

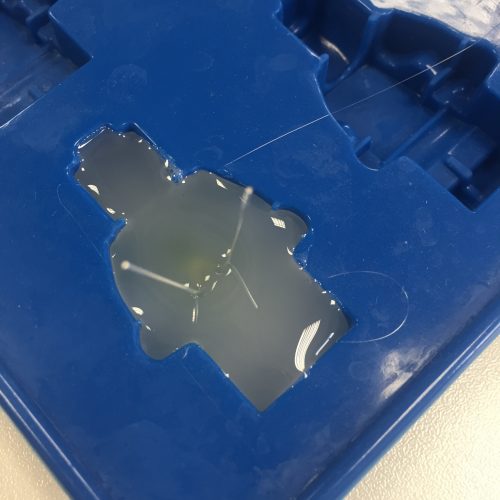
    Once your mould is properly filled, push an LED into the glue, holding on to the legs to keep your fingertips safe. Have a wiggle around to find the bottom and sides of your mould and ensure that your LED is in the centre.

    make your own custom LEDs for Raspberry Pi

    Pick a colour best suited to your mould. You could try using multiple LEDs on larger moulds to introduce more colours!

    You may notice that the LED tries to sink a little and the legs begin to drop. Keep an eye out and adjust them if you need to. They’ll stop moving once the glue begins to set.

    make your own custom LEDs for Raspberry Pi

    These took about ten minutes to cool down.

    Be patient

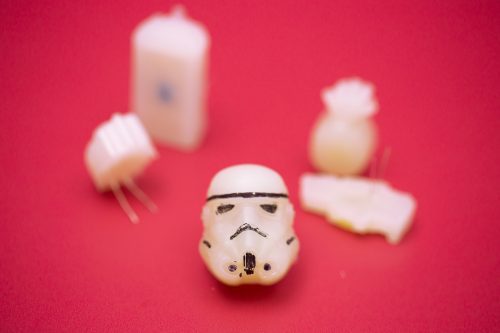
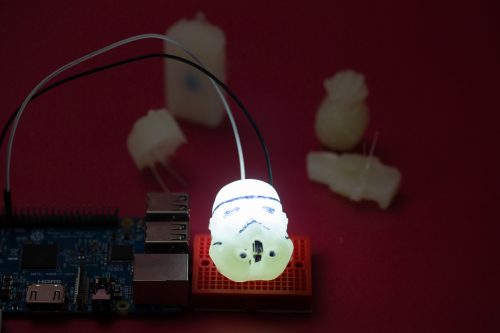
    Don’t rush. The hot glue will take time to cool down, especially if you’re using a larger mould like the one for this Stormtrooper helmet.

    Custom hot glue LED

    Here I used a gumdrop LED, which is larger than your standard maker kit LED.

    You’ll know that the glue has set when the shape pulls away easily from the mould. It should just pop out when its ready.

    make your own custom LEDs for Raspberry Pi

    Pop!

    Light it up

    Test your new custom LED one more time on your testing rig to ensure you haven’t damaged the connections.

    make your own custom LEDs for Raspberry Pi

    As with all LEDs, they look better in the dark (and terrible when you try to take a photo of them), so try testing them in a dim room or at night. You could also use a box to create a small testing lab if you’re planning to make a lot of these.

    Now it’s your turn

    What custom LED would you want to make? How would you use it in your next project? And what other fun hacks have you used to augment tech for your builds?

    Website: LINK

  • A working original Doctor Who K-9 prop

    A working original Doctor Who K-9 prop

    Reading Time: 3 minutes

    When Abertay University purchased some unwanted Doctor Who props from the BBC in 2011, they could never have known that their future computer science student Gary Taylor would transform a water-damaged robot corpse into a working K-9, the cutest (and snarkiest) of all the Doctor’s companions.

    K-9 Doctor Who Raspberry Pi Prop

    image c/o The Courier

    K-9

    If you’re unfamiliar with Doctor Who, you may not be aware of the Doctor’s robotic-canine best friend, K-9. I won’t wax lyrical about the long and winding history of this iconic science fiction character (though I could), but those of you who want to learn more can watch the video below.

    History of K9 – History of Doctor Who

    Hello and welcome to the Whoniverse and to another instalment of the History of Doctor Who series, this time I’m not looking at a universe conquering species but a tin dog. Yes the Doctor’s past travelling companion K9. There have been many versions of K9 and he has appeared alongside numerous Doctor’s and other companions.

    Tl;dw: K-9 is basically a really clever, robotic dog invented in the year 5000.

    Resurrecting a robotic dog

    For his final-year dissertation, computer science student Gary Taylor decided to bring K-9 back to life, having discovered the prop damaged by a water leak in the university hackspace.

    “I love robotics, I love programming, I love dogs, and I love Doctor Who.” Don’t we all, Gary. Don’t we all.
    Image c/o The Courier

    For his dissertation, titled Creating an Autonomous Robot Utilizing Raspberry Pi, Arduino, and Ultrasound Sensors for Mapping a Room, Gary used modern-day technology to rebuild K-9’s original and often unreliable radio-controlled electronics from the 1970s.

    However, Gary’s K-9 is more than a simple remote-controlled robot. As the dissertation title states, the robot uses ultrasound sensors for room mapping, and this function is controlled by both an Arduino and Raspberry Pi.

    A block diagram taken from Gary’s dissertation

    An Arduino Mega 2560 controls the wheels and three ultrasound sensors located at the bottom of K-9’s body. It passes the sensor data to the onboard Raspberry Pi 3, and the Pi plots obstacles and walls to create a map of K-9’s surroundings.

    The three ultrasonic sensors can be seen along the bottom of K-9’s body

    The Raspberry Pi also connects to a smartphone via Bluetooth, where Gary runs a custome app to remotely control K-9 and view the map it creates.

    More information? Affirmative!

    The team at the Electronic Engineering Journal has written up a very thorough explanation of Gary’s dissertation. Those interested in the full details of the robot won’t be disappointed!

    For a video of Gary and K-9 that refuses to embed itself in this blog post, head over to The Courier’s website.

    And for more Doctor Who–related Raspberry Pi builds, check out Jeremy Lee’s remake of Captain Jack’s Vortex Manipulator, a synthesised rendition of the classic theme using a Raspberry Pi Zero, and a collection of builds and props in this Doctor Who roundup, including a sonic screwdriver, a Dalek, and a TARDIS in near-space.

    Oh, and another thing…

    BBC released some cool behind-the-scenes images and photos from season ten of Doctor Who, including this production art for Nardole’s tracking device:

    The Pi Towers staff may have let out a little squee of delight when we noticed the Raspberry Pi included within.

    Website: LINK