Schlagwort: bare conductive

  • Raspberry Pi capacitive-touch musical Christmas tree

    Raspberry Pi capacitive-touch musical Christmas tree

    Reading Time: 2 minutes

    What, your Christmas tree ISN’T touch-enabled?

    Capacitive Touch Christmas Tree How To | Raspberry Pi | Bare Conductive Pi Cap

    Turn your Christmas tree into a capacitive touch-interactive musical instrument using a Raspberry Pi and a Bare Conductive Pi Cap. You’ll be rocking around the Christmas tree in no time! /* Bare Conductive */ Pi Cap: https://www.bareconductive.com/shop/pi-cap/ Touch Board: https://www.bareconductive.com/shop/touch-board/ Code: https://github.com/BareConductive/picap-touch-mp3-py #RasberryPi #BareConductive #Christmas

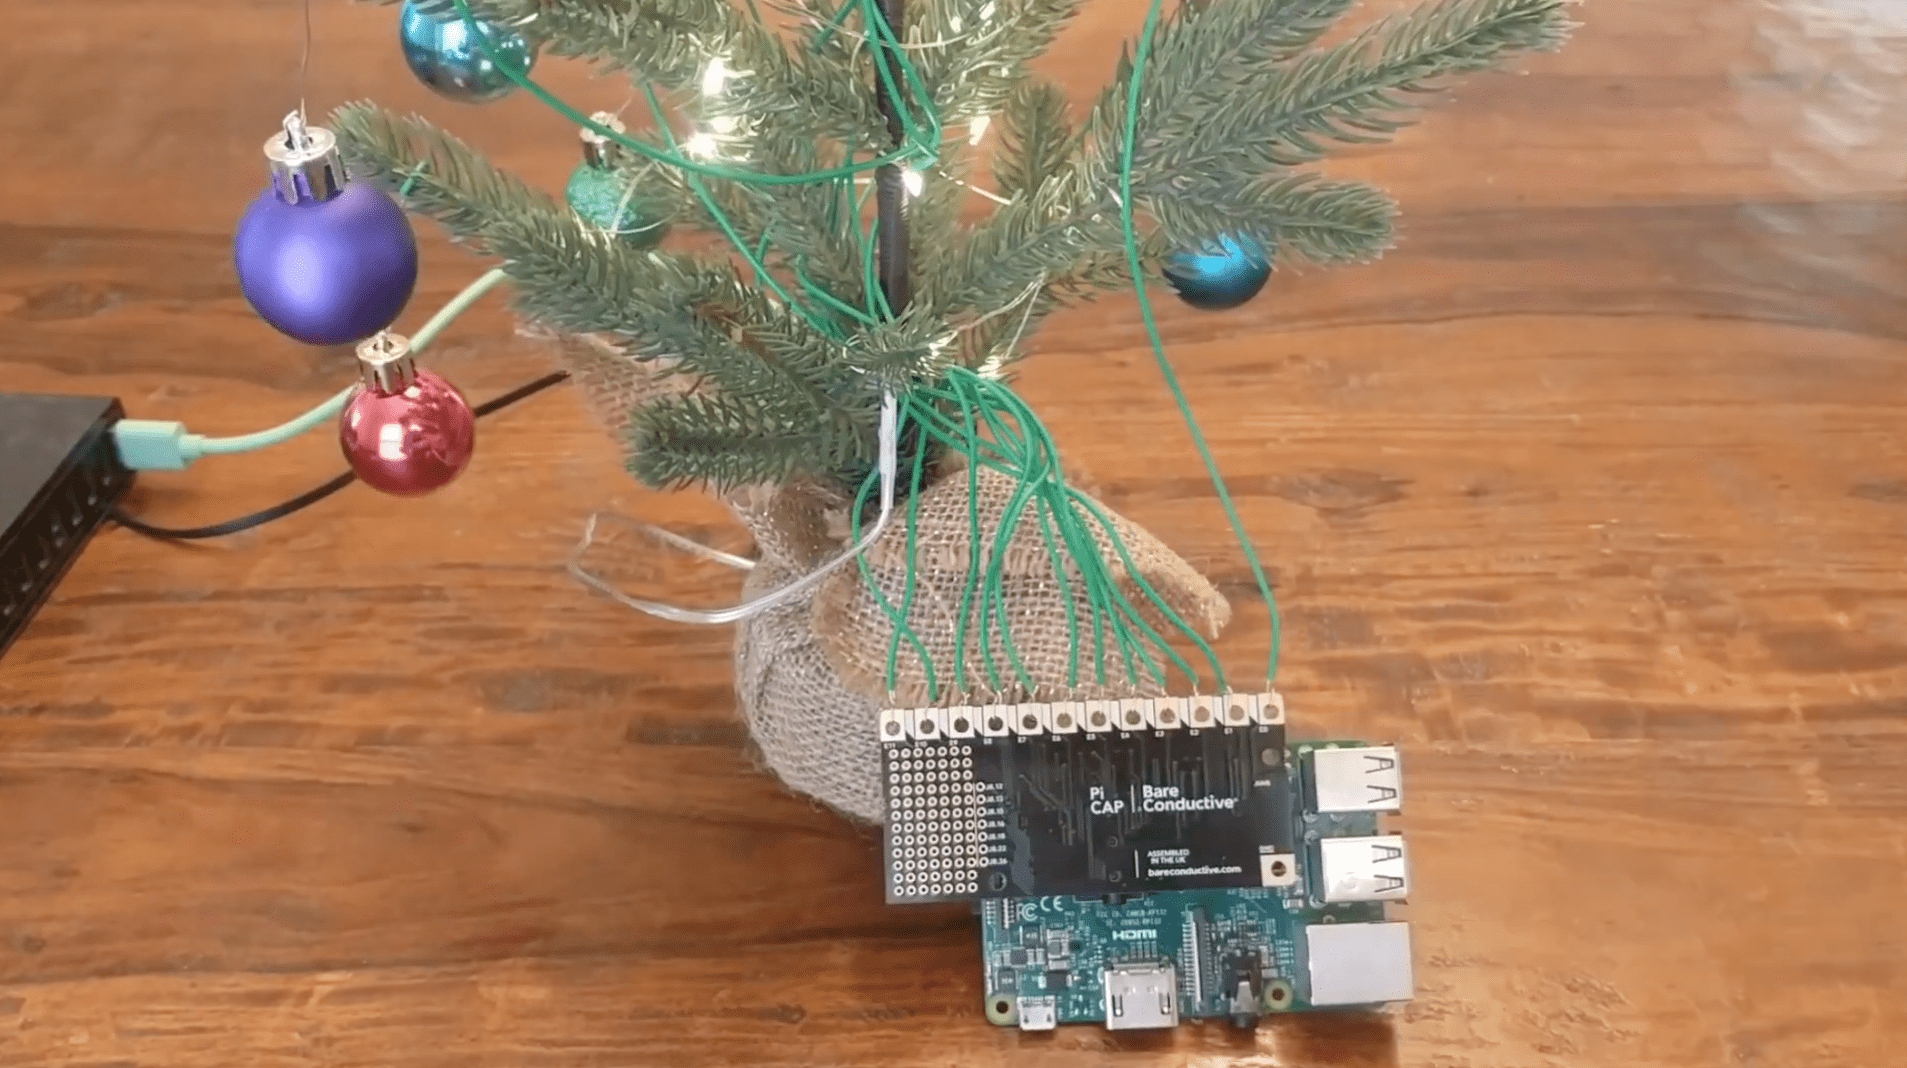
    Using the Bare Conductive Pi Cap, Davy Wybiral hooked up his fairy lights and baubles to a Raspberry Pi. The result? Musical baubles that allow the user to play their favourite festive classics at the touch of a finger. These baubles are fantastic, and it’s easy to make your own. Just watch the video for Davy’s how-to.

    The code for Bare Conductive’s Pi Cap polyphonic touch MP3 utility can be found in this GitHub repo, and you can pick up a Pi Cap on the Bare Conductive website. Then all you need to do is hook up your favourite tree decorations to the Pi Cap via insulated wires, and you’re good to go. It’s OK if your decorations aren’t conductive: you’ll actually be touching the wires and not the ornaments themselves.

    And don’t worry about touching the wires, it’s perfectly safe. But just in this instance. Please don’t make a habit of touching wires.

    Make sure to subscribe to Davy on YouTube (we did) and give him a like for the baubles video. Also, leave a comment to tell him how great it is, because nice comments are lovely, and we should all be leaving as many of them as we can on the videos for our favourite creators.

    Website: LINK

  • Beautiful and inspiring plinky-plonky conductivity

    Beautiful and inspiring plinky-plonky conductivity

    Reading Time: 2 minutes

    Recently shared by Bare Conductive, Hwan Yun‘s interactive installation, Intuition, uses a Raspberry Pi and Bare Conductive tech to transport you to the calm wonder of Icelandic nature.

    Intuition (2017)

    Interactive sound installation electric paint on paper Listhús Gallery

    Incorporation Bare Conductive

    Bare Conductive’s water-based Electric Paint allows users to incorporate safe conductivity into their projects. With the use of a Raspberry Pi 3 and the brand’s Touch Board and Pi Cap, this conductivity can be upgraded to take distance, as well as touch, into consideration.

    bare conductive Hwan Yun Raspberry Pi

    Intuition

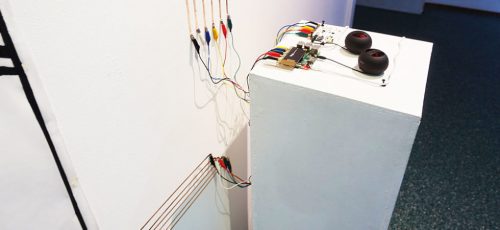
    For his installation, Hwan created several patterns on paper using Electric Paint, with six patterns connected to the Touch Board and a further six to the Pi Cap.

    This irregularity allows users to experiment, further exploring the sounds of nature that inspired the installation.

    bare conductive Hwan Yun Raspberry Pi

    The sounds themselves are less actual recordings and more a tribute to the way in which Hwan believes the picturesque beauty of the island communicates within itself.

    Getting done with #interactive #soundinstallation for #contemporaryart #exhibition. Using #bareconductive

    7 Likes, 1 Comments – HWANYUN (@_hwanyun_) on Instagram: “Getting done with #interactive #soundinstallation for #contemporaryart #exhibition. Using…”

    Follow Hwan

    If you’d like to see more installations from Hwan Yun, including behind-the-scenes posts from the creation of Intuition, be sure to follow him on Instagram. You can also learn more about his past and future projects on his website.

    Bare Conductive

    Bare Conductive products are available through many of our Approved Resellers, as well as the Bare Conductive website. As mentioned, their Conductive paint is not only water-based but also non-toxic, making it an ideal addition to any maker cupboard. For more inspiration when using Bare Conductive products, check out their Make page.

    Low-tech cardboard robot buggy

    And for more Bare Conductive products and Raspberry Pi makery, check out this low-tech Raspberry Pi robot by Clément Didier, previously covered on our blog.

    Website: LINK

  • Low-tech Raspberry Pi robot

    Low-tech Raspberry Pi robot

    Reading Time: 2 minutes

    Robot-builder extraordinaire Clément Didier is ushering in the era of our cybernetic overlords. Future generations will remember him as the creator of robots constructed from cardboard and conductive paint which are so easy to replicate that a robot could do it. Welcome to the singularity.

    Bare Conductive on Twitter

    This cool robot was made with the #PiCap, conductive paint and @Raspberry_Pi by @clementdidier. Full tutorial: https://t.co/AcQVTS4vr2 https://t.co/D04U5UGR0P

    Simple interface

    To assemble the robot, Clément made use of a Pi Cap board, a motor driver, and most importantly, a tube of Bare Conductive Electric Paint. He painted the control interface onto the cardboard surface of the robot, allowing a human, replicant, or superior robot to direct its movements simply by touching the paint.

    Clever design

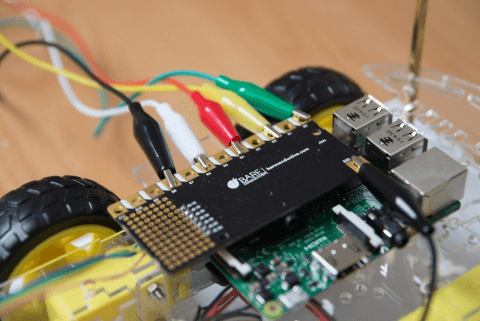
    The Raspberry Pi 3, the motor control board, and the painted input buttons interface via the GPIO breakout pins on the Pi Cap. Crocodile clips connect the Pi Cap to the cardboard-and-paint control surface, while jumper wires connect it to the motor control board.

    Raspberry Pi and bare conductive Pi Cap

    Sing with me: ‘The Raspberry Pi’s connected to the Pi Cap, and the Pi Cap’s connected to the inputs, and…’

    Two battery packs provide power to the Raspberry Pi, and to the four independently driven motors. Software, written in Python, allows the robot to respond to inputs from the conductive paint. The motors drive wheels attached to a plastic chassis, moving and turning the robot at the touch of a square of black paint.

    Artistic circuit

    Clément used masking tape and a paintbrush to create the control buttons. For a human, this is obviously a fiddly process which relies on the blocking properties of the masking tape and a steady hand. For a robot, however, the process would be a simple, freehand one, resulting in neatly painted circuits on every single one of countless robotic minions. Cybernetic domination is at (metallic) hand.

    The control surface of the robot, painted with bare conductive paint

    One fiddly job for a human, one easy task for robotkind

    The instructions and code for Clément’s build can be found here.

    Low-tech solutions

    Here at Pi Towers, we love seeing the high-tech Raspberry Pi integrated so successfully with low-tech components. In addition to conductive paint, we’ve seen cardboard laptops, toilet roll robots, fruit drum kits, chocolate box robots, and hamster-wheel-triggered cameras. Have you integrated low-tech elements into your projects (and potentially accelerated the robot apocalypse in the process)? Tell us about it in the comments!

    Website: LINK