This children’s console looks like something straight out of a superhero’s lair
Arduino Team — January 26th, 2021
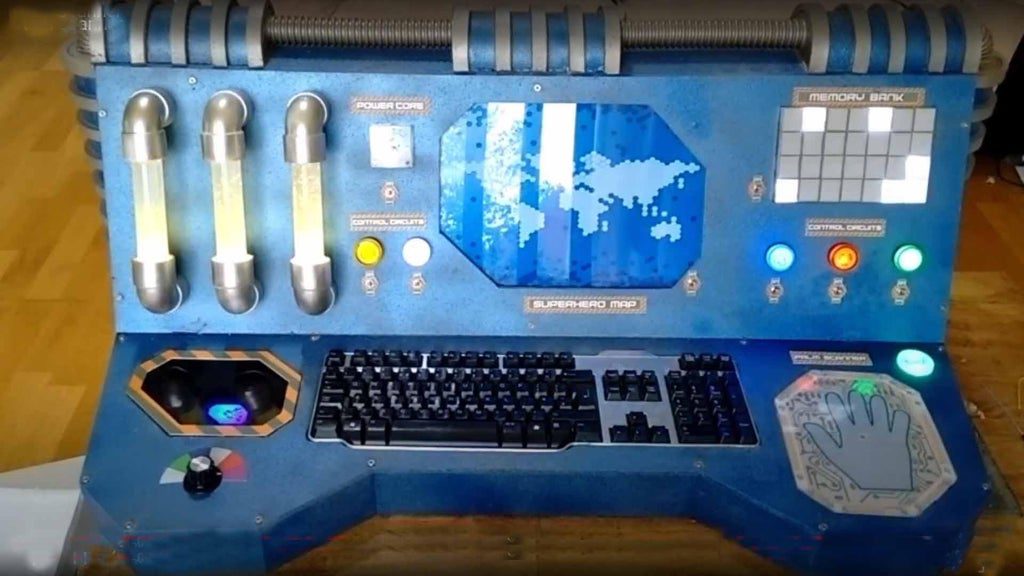
Kids have wonderful imaginations, and to help students at a primary school have a super time, creator “palladin” was asked to construct a console for them to use.
The device features a variety of lights and sci-fi additions, including glowing “reactor” tubes that diffuse light using hair gel and a “memory bank” that emits flashing patterns for a 1950s supercomputer look.
An emergency tracking map blinks randomly via an Arduino Nano, with a possible 18 LED hot spots available per the board’s I/O pins. A palm scanner, described separately here, activates rows of LEDs in sequence using another Arduino. The scanning process is triggered by a light-dependent resistor and voltage divider setup – denying access to any potential bad guys!
This pen plotter draws detailed maps the size of walls
Arduino Team — January 26th, 2021
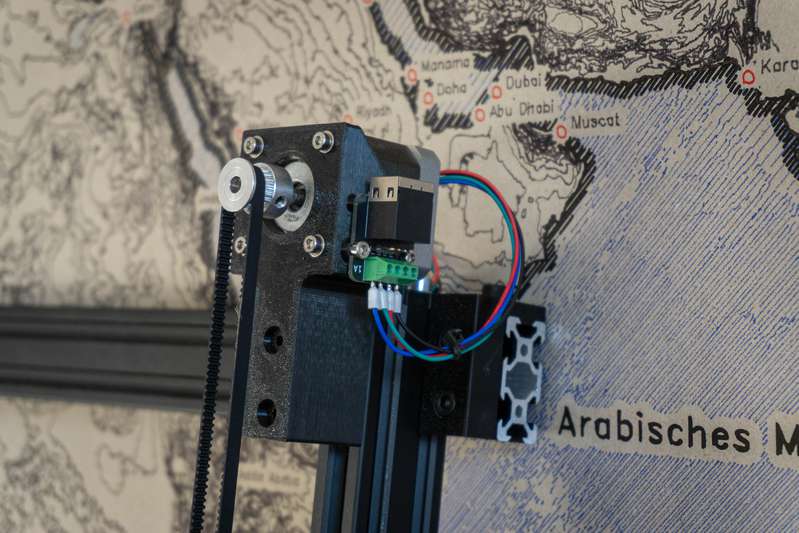
Christopher Getschmann wanted a wall-sized map of the world. He soon realized, however, that it’s tough to actually buy such a map that’s both beautiful and detailed enough to satisfy his cartographic tastes. While many would simply move on to the next “thing,” Getschmann instead took things into his own hands, and built a pen plotter specifically to draw a massive 2×3 meter map for his wall.
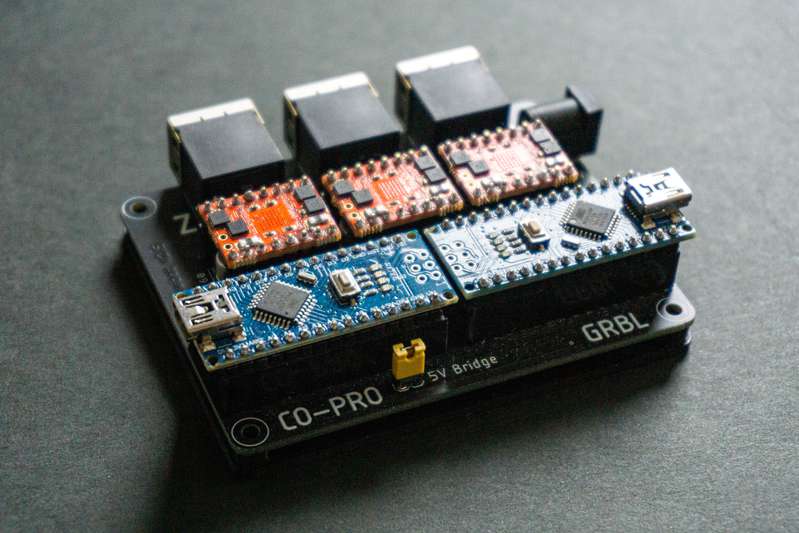
Getschmann’s CoreXY-configured device is controlled by a dual Arduino Nano setup, with one powering TMC5160 stepper drivers and the other monitoring for stalls. Data from OpenStreetMap is used to produce map sections, which are plotted in SVG format onto eight smaller cardboard sheets, and then combined as tiles into the mega world map.
Access control unit designed with a Raspberry Pi CM4 and an Arduino Micro
Arduino Team — January 25th, 2021
Whether granting access to public transit or restricting unauthorized personnel in buildings, NFC card readers can be extremely useful. Although most might not consider how they work – and simply happy getting through a turnstile – there’s lot going on behind the scenes.
In his video, Daniel Raines shows off a pair of prototype access control units (ACUs) that he’s constructed. The two networked devices are each based on a Raspberry Pi Compute Module 4 along with an Arduino Micro that controls six relays to allow or deny entry, provide feedback, fire, and lock up.
More details on the project can be found in Raines’ clip below.
2002 Audi TT dashboard gets a digital speedometer upgrade with a custom CAN bus shield
Arduino Team — January 25th, 2021
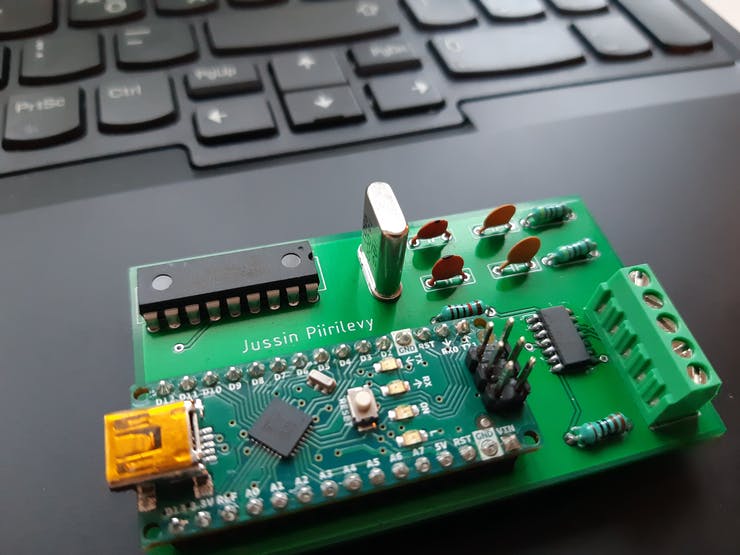
While it’s hard to beat analog instruments for instantaneous automotive feedback, Finnish electrical engineering student Jussi Ristiniemi also wanted a digital speed readout on his 2002 Audi TT.
His particular model normally uses the car’s controller area network (CAN) to transmit the radio station or CD track to the uppermost section of the digital display. For this speedometer mod, audio data was replaced with “KM/H” readings, supplied by the vehicle’s CAN bus system via an Arduino Nano and custom interface shield.
Speeds can now be nicely shown in the center of the instrument cluster, letting the driver know exactly how fast they’re traveling. As it’s winter in Finland, and the TT is only driven during the summer, actual speed display has yet to be tested. However, with access to the car’s full CAN bus, any necessary tweaks should be trivial.
Turn your staircase into a flaircase with this LED system
Arduino Team — January 22nd, 2021
If you live in a house with stairs and have to traipse up and down at night, it’s best to have some sort of light that guides you. Although a cell phone can work just fine, or you could likely activate bright overhead lighting, creator MagicManu devised an automatic and progressive solution to illuminate his path instead.
MagicManu’s system knows when someone is there using PIR sensors arranged at both ends, and only activates if it’s dark enough thanks to a photoresistor. The entire setup is controlled by an Arduino Nano, while two potentiometers adjust light sensitivity and duration of ignition.
As MagicManu walks up, a rainbow pattern emanates from the bottom to the top via addressable WS2812B LEDs, or vice versa if he’s descending.
Does this sound like a project you’d want to install in your home? Code and additional details are available in MagicManu’s write-up.
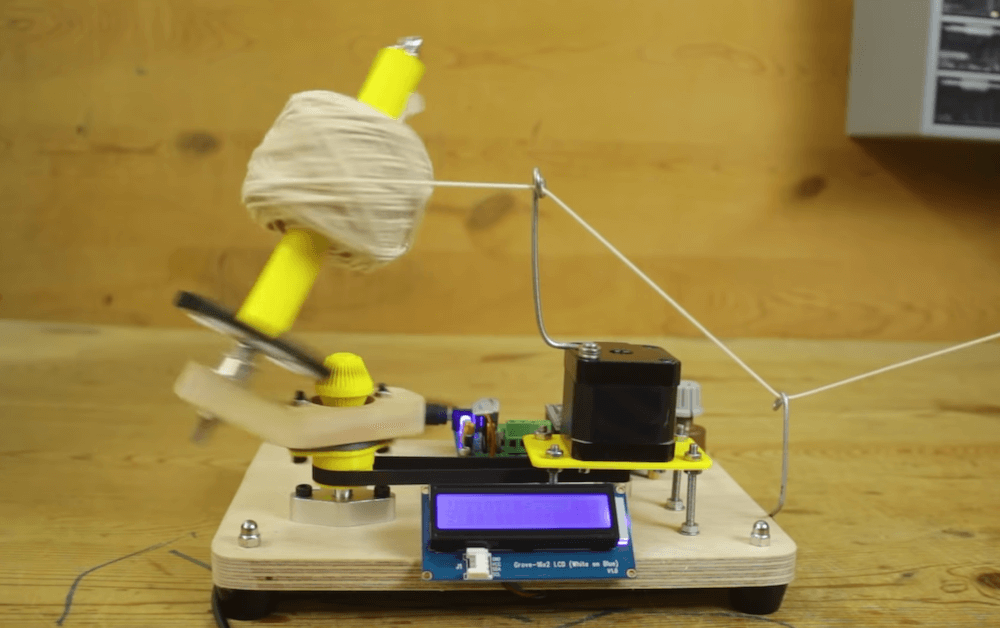
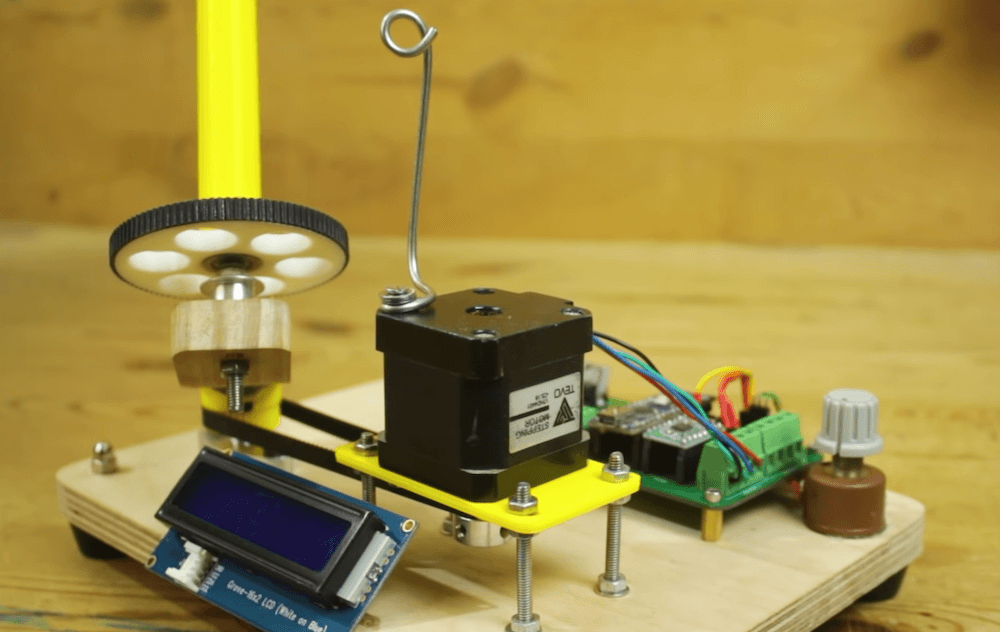
If you’ve ever wanted to wind balls of yarn, then look no further than this automated machine from Mr Innovative. The YouTuber’s DIY device is powered by an Arduino Nano and an A4988 stepper driver, spinning up a round conglomeration of yarn via a NEMA17 motor and a timing belt.
The ball is wound on an offset spindle, which is mechanically controlled to pitch back and forth and spin itself as the overall assembly rotates, producing an interesting geometric pattern.
User interface consists of a potentiometer and 16×2 I2C LCD display, allowing Mr Innovative to set the winding speed as a percentage. As seen in the video below, it’s able to “spool up” at an impressive rate, potentially creating lots and lots of balls o’ yarn as needed!
‘Raspberry and chips,’ not something you’d like to eat but in the world of silicon it’s actually a great combination. Eben Upton recently shared with us Raspberry Pi’s exciting vision for a revolutionary product that they were working on: a microcontroller, the RP2040, based on Raspberry Pi silicon.
The news was both disruptive and exciting at the same time. At Arduino, we love to put our hands on innovative technologies, micros, sensors and all the building blocks that allow us to fulfill our mission of making technology simple to use for everyone. The curiosity was growing and a few weeks later we were already tinkering with the initial development tools. The processor is a very intriguing beast — it’s a dual-core Cortex-M0+ microcontroller with fairly sophisticated architecture.
Since we have been experimenting quite a bit with multi-core processors with our Pro product, the “Portenta,” we decided to build an Arduino board based on this new silicon.
We started from the Nano format with its own tiny footprint, leveraging on some of the existing key features of other Nanos like the versatile u-blox NINA WiFi and Bluetooth module. The goal being to enable people to develop connected products leveraging our hardware powered by Raspberry silicon, a solid radio module with exceptional performance, and the Arduino Create IoT Cloud.
The new board will come packed with some high-quality MEMS sensors from STM (namely a 9-axis IMU and a microphone), a very efficient power section, and a bunch of other innovations that you can already spot from the design.
Whereas the majority of microcontrollers use embedded flash, the new RP2040 chip uses external flash. To provide plenty of space for all your code and storage we’ve included 16MB flash memory — this is also particularly useful to allow OTA (over-the-air) updates.
But there’s more! We are going to port the Arduino core to this new architecture in order to enable everyone to use the RP2040 chip with the Arduino ecosystem (IDE, command line tool, and thousands of libraries). Although the RP2040 chip is fresh from the plant, our team is already working on the porting effort… stay tuned.
While we consider what other products to develop to leverage the RP2040 architecture, we’d love to hear what you’d like us to build with this exciting new processor.
Join us in welcoming the new Raspberry Pi RP2040 and the newborn Arduino Nano RP2040 Connect, which will be available for pre-order in the next few weeks!
– Massimo Banzi (co-founder & chairman) and Fabio Violante (CEO)
James Bruton demonstrates the Coanda effect with an Arduino-controlled rig
Arduino Team — January 20th, 2021
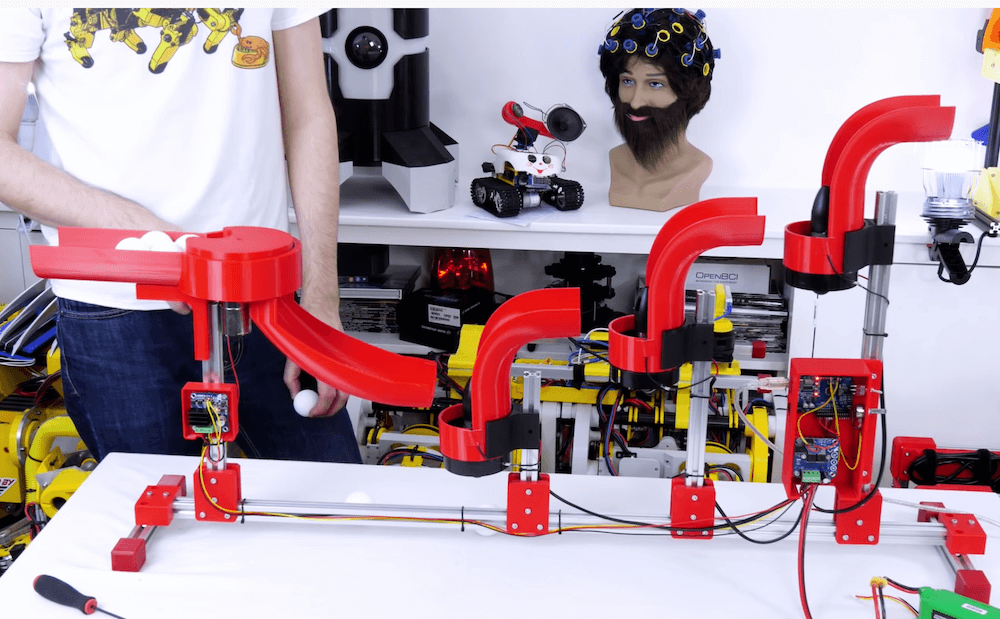
The Coanda effect, as you may or may not know, is what causes flowing air to follow a convex surface. In his latest video, James Bruton shows how the concept can used as a sort of inverted ping pong ball waterfall or staircase.
His 3D-printed rig pushes balls up from one fan stage to another, employing curved ducts to guide the lightweight orbs on their journey.
The fan speeds are regulated with an Arduino Uno and motor driver, and the Arduino also dictates how fast a feeder mechanism inputs balls via a second driver module. While the setup doesn’t work every time, it’s still an interesting demonstration of this natural phenomenon, and could likely be perfected with a bit more tinkering.
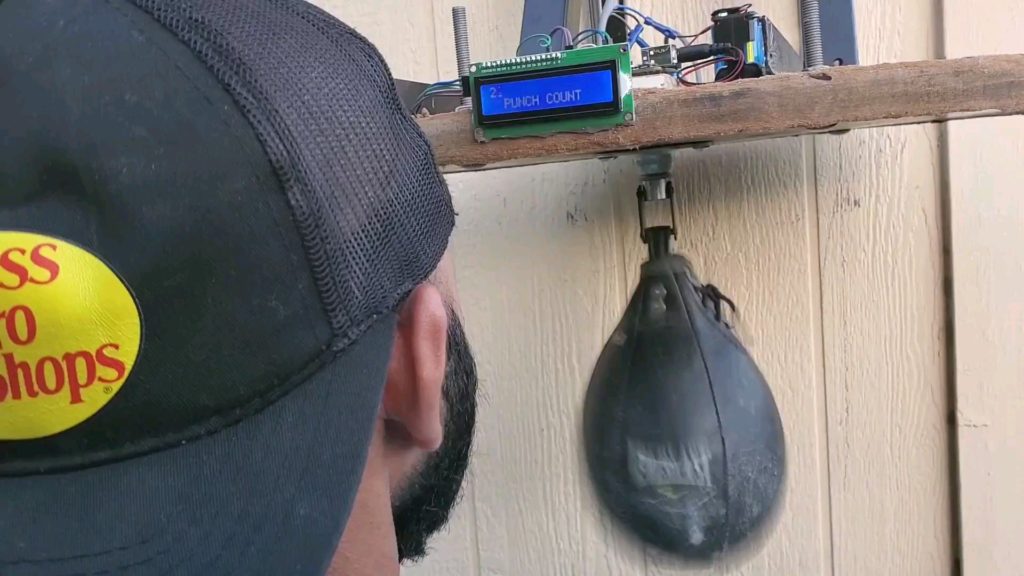
As shown in the video below, the first step was to get it physically set up, modding an old metal bed frame into a support structure. He also added a recessed NPN capacitive sensor to pick up when the bag hits the back of the platform.
The sensor sends “hit” signals to an Arduino Uno via a PC817 optocoupler. The board then counts punches and displays the number of hits on an LCD screen mounted just above eye level.
Whether it’s competing with friends or simply improving your boxing skills, DuctTapeMechanic’s system looks like a fun one to build yourself!
3D-printed mobile robot platform based on the Arduino Due
Arduino Team — January 19th, 2021
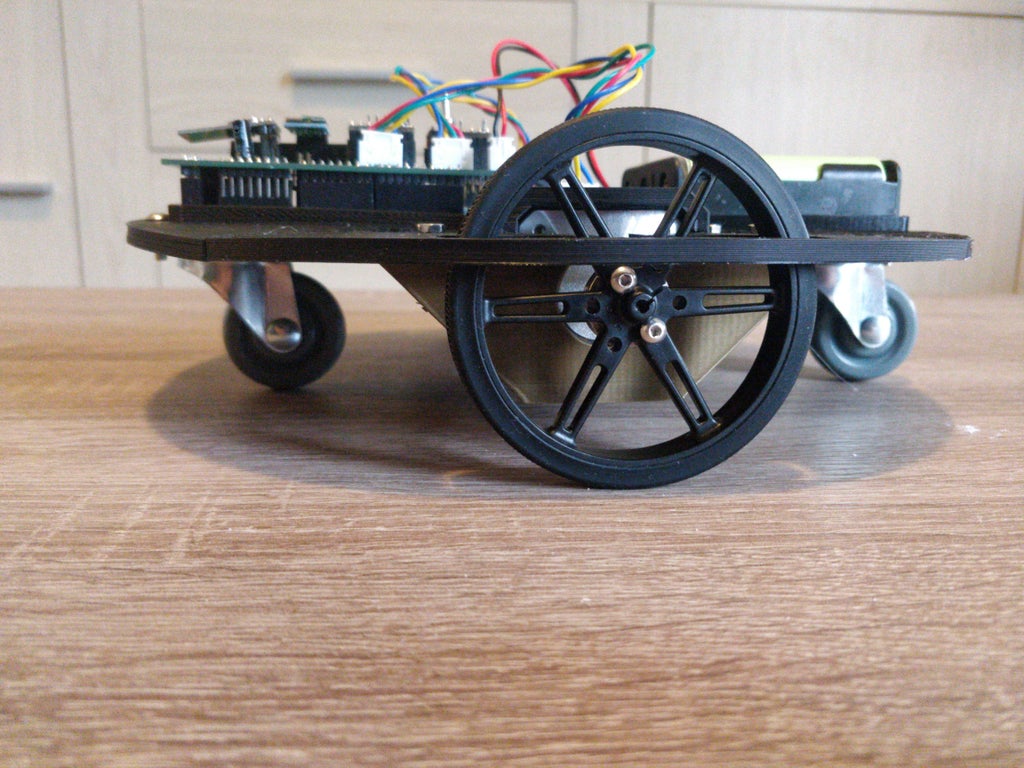
Although an Arduino can be a great way to provide computing power for a mobile robot platform, you’ll need a variety of other electronics and mechanical components to get it going. In his write-up, computer science student Niels Post outlines how he constructed a robot that travels via two stepper motors, along with casters to keep it upright. The round chassis is 3D-printed and runs on three rechargeable 18650 batteries.
The platform is based on an Arduino Due, with stepper drivers and a custom PCB to take care of the wiring. The robot has no sensors or navigation aids onboard, but instead relies on an nRF24L01+ module to communicate with a Raspberry Pi that hosts the web interface for control and livestream viewing. This setup employs a webcam to sense and direct the robot through its environment using printed markers.
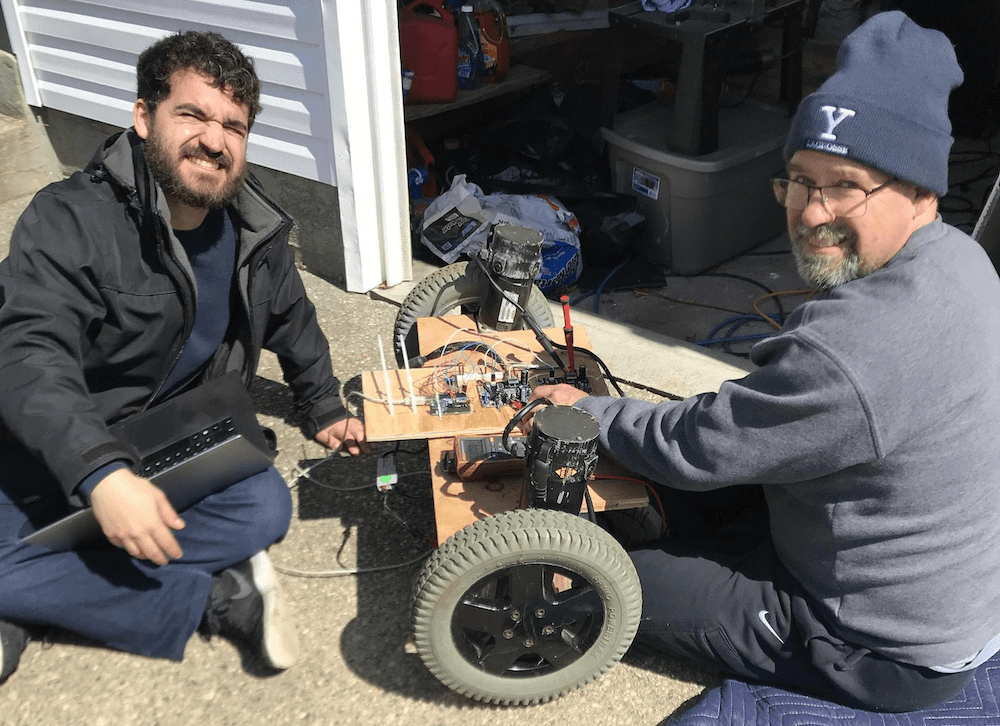
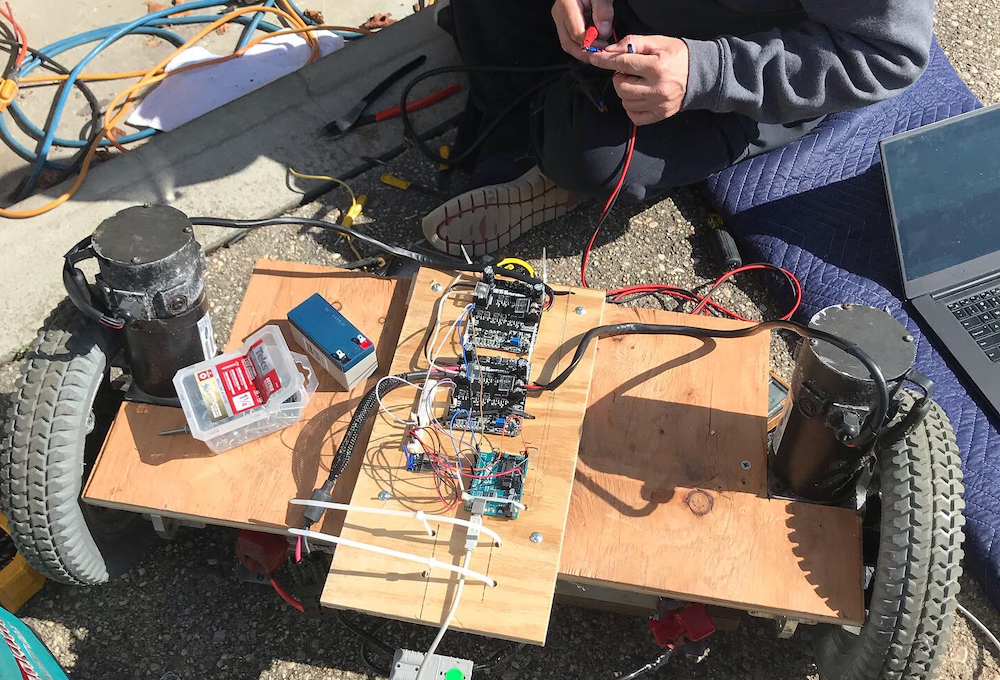
The DIY transporter is controlled by an Arduino Uno, along with a pair of motor drivers that handle the device’s high current needs. An MPU-6050 allows it to react as the rider leans forward and backwards, moving with the help of a PID loop. Steering is accomplished via a potentiometer, linked to a bent-pipe control stick using a bottle cap and glue.
Impressively, the only things purchased for the build were the motor controllers, as the rest of it was hacked together with available parts. As seen in the video below, it looks like a fun conveyance, though they were certainly wise to wear helmets while testing!
Old keyboard turned into a new children’s learning toy
Arduino Team — January 18th, 2021
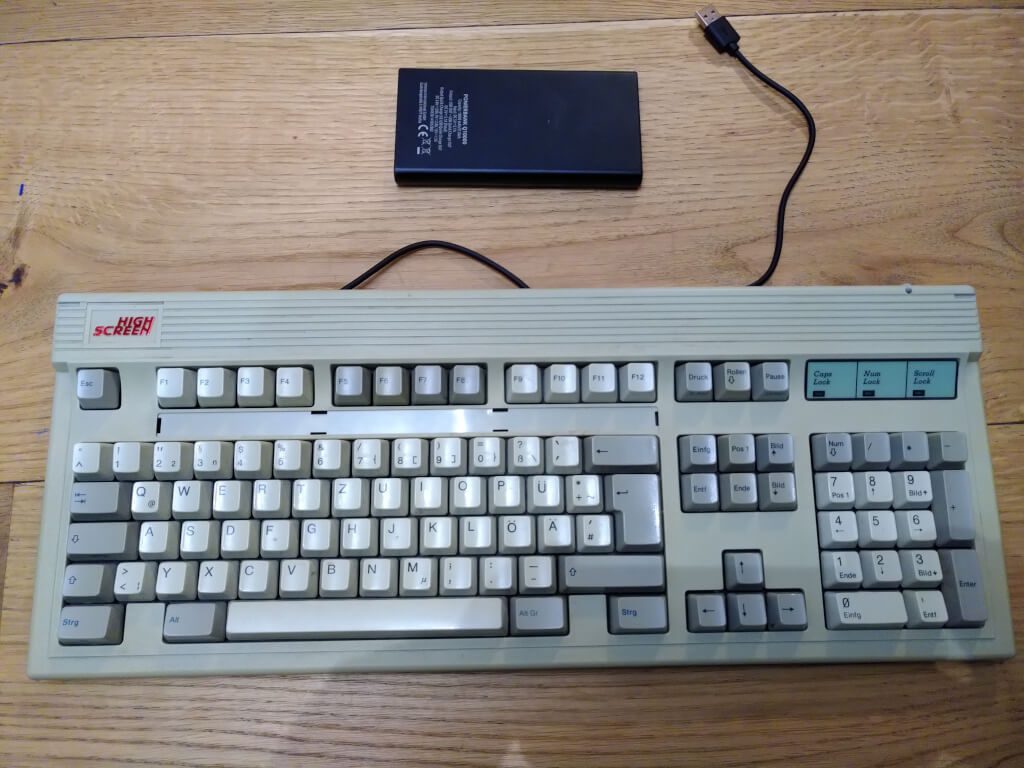
Peter Turczak’s toddler son loves “technical stuff,” especially things like keyboards and computers that adults use. After discussing this with other likeminded technical parents, the idea of giving new life to an old (PS/2 or AT) keyboard as a teaching tool was hatched.
The hacker thus added an Arduino Nano, a speaker, and an SD card reader for WAV files, allowing the device to say letters in various voices based on the keys pressed. It is also capable of playing tunes, and presumably other sounds, that one could imagine to facilitate retro learning and fun.
All the electronics fit within the keyboard’s shell, which has ample space inside, and even features a built-in speaker grill for audio output. More details on the project can be found in Turczak’s blog post.
This article was written by Per Tillisch, Tooling Team SW Engineer at Arduino.
The Arduino team created a tool to check Arduino projects for common problems. Arduino Lint runs over 175 checks on your sketches, libraries, and boards platforms which cover specification compliance, Library Manager submission requirements, and best practices.
Arduino Lint is an easy to use, yet powerful, command line tool. Its focus is on the structure, metadata, and configuration of Arduino projects, rather than the code.
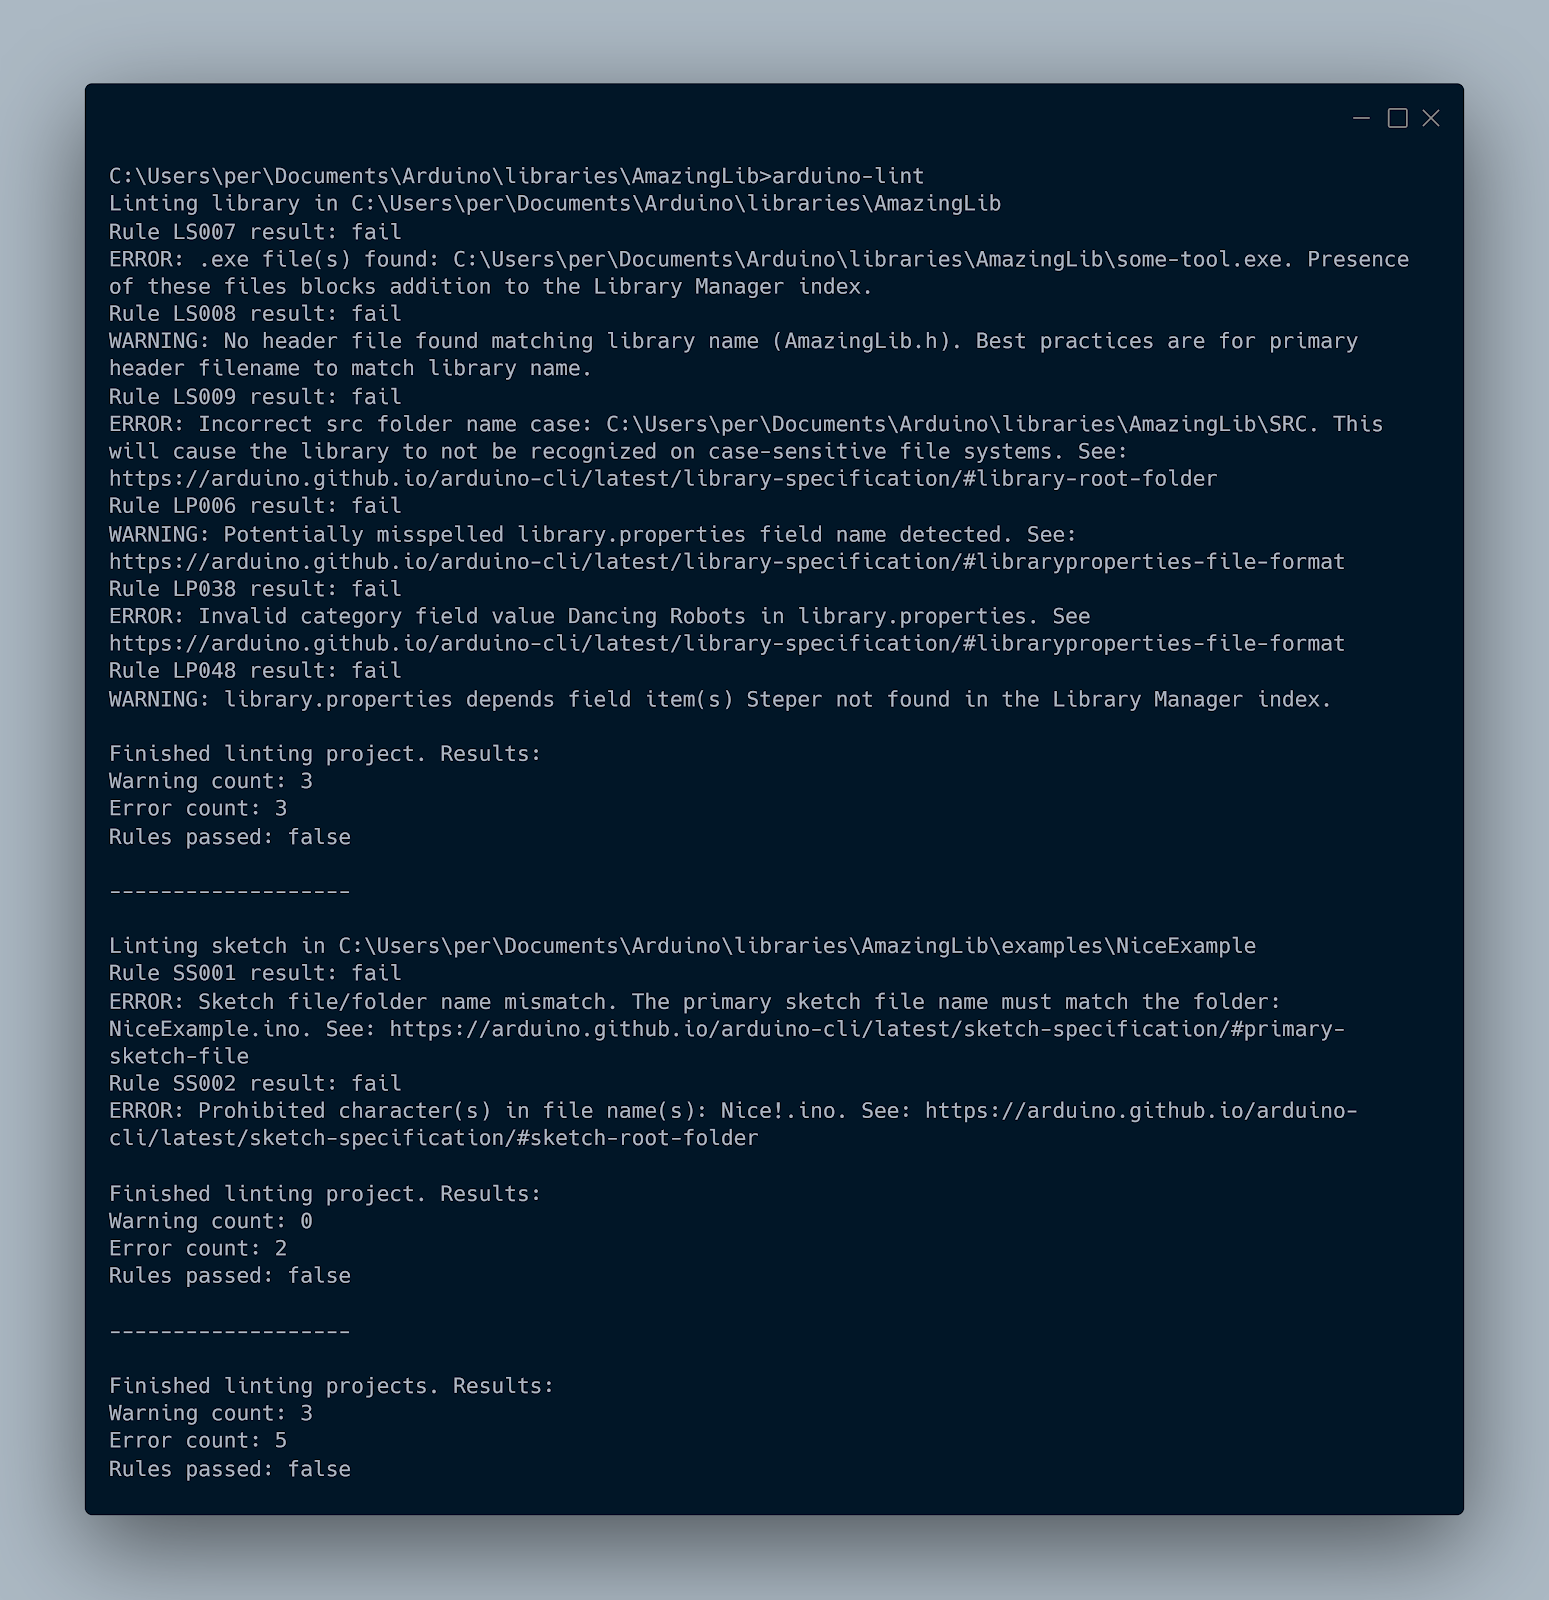
Now you only need to open a terminal at your project folder and run the command: arduino-lint
This will automatically detect the project type and check it against the relevant rules.
The default configuration of Arduino Lint provides for the most common use cases, while offering the option to change settings via command line flags.
Compliance setting
The --compliance flag allows you to configure the strictness of the applied rules. The three compliance level values accepted by this flag are:
permissive– failure will occur only when severe rule violations are found. Although a project that passes at the permissive setting will work with the current Arduino development software versions, it may not be fully specification-compliant, risking incompatibility or a poor experience for the users.
specification – the default setting, enforces compliance with the official Arduino project specifications (sketch, library, platform).
strict – enforces best practices, above and beyond the minimum requirements for specification compliance. Use this setting to ensure the best experience for the users of the project.
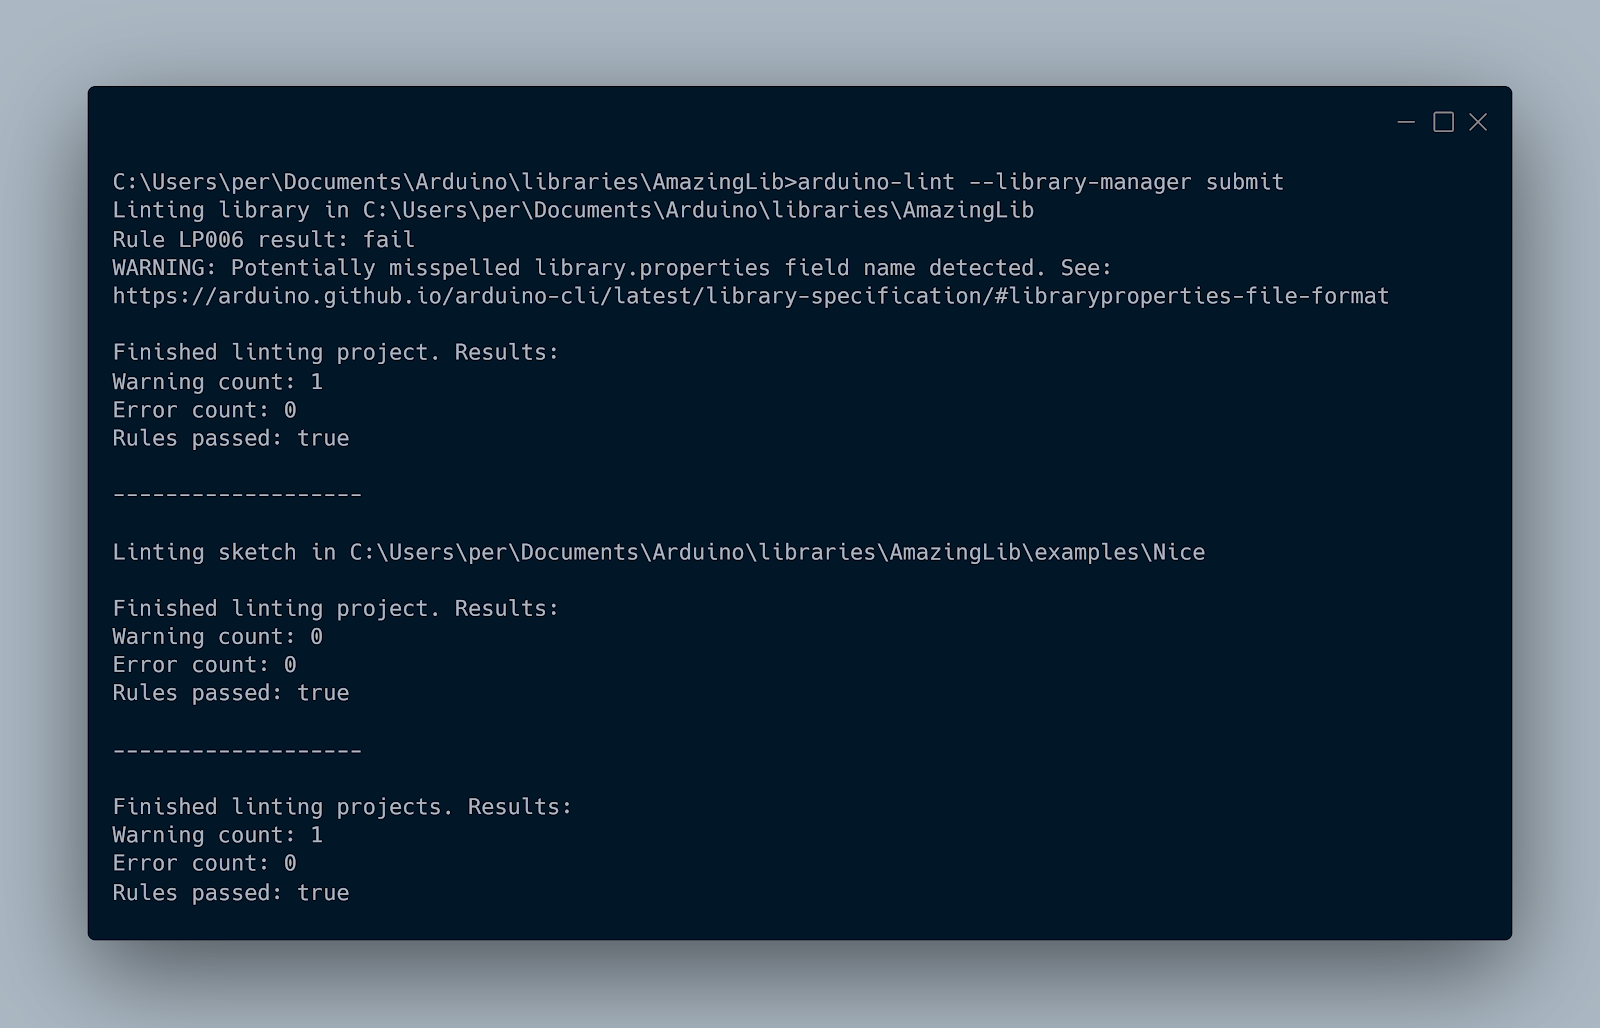
Library Manager setting
Arduino Library Manager is the best way to provide installation and updates of Arduino libraries. In order to be accepted for inclusion in Library Manager, a library is required to meet some requirements.
Arduino Lint provides checks for these requirements as well, controlled by the --library-manager flag.
The Library Manager submission-specific rules are enabled via --library-manager submit.
Even if your library isn’t yet ready to be added to Library Manager, it’s a good idea to use this setting to ensure no incompatibilities are introduced.
Once your library is in the Library Manager index, each release is automatically picked up and made available to the Arduino community. Releases are also subject to special rules. The command arduino-lint --library-manager update will tell you whether your library is compliant with these rules.
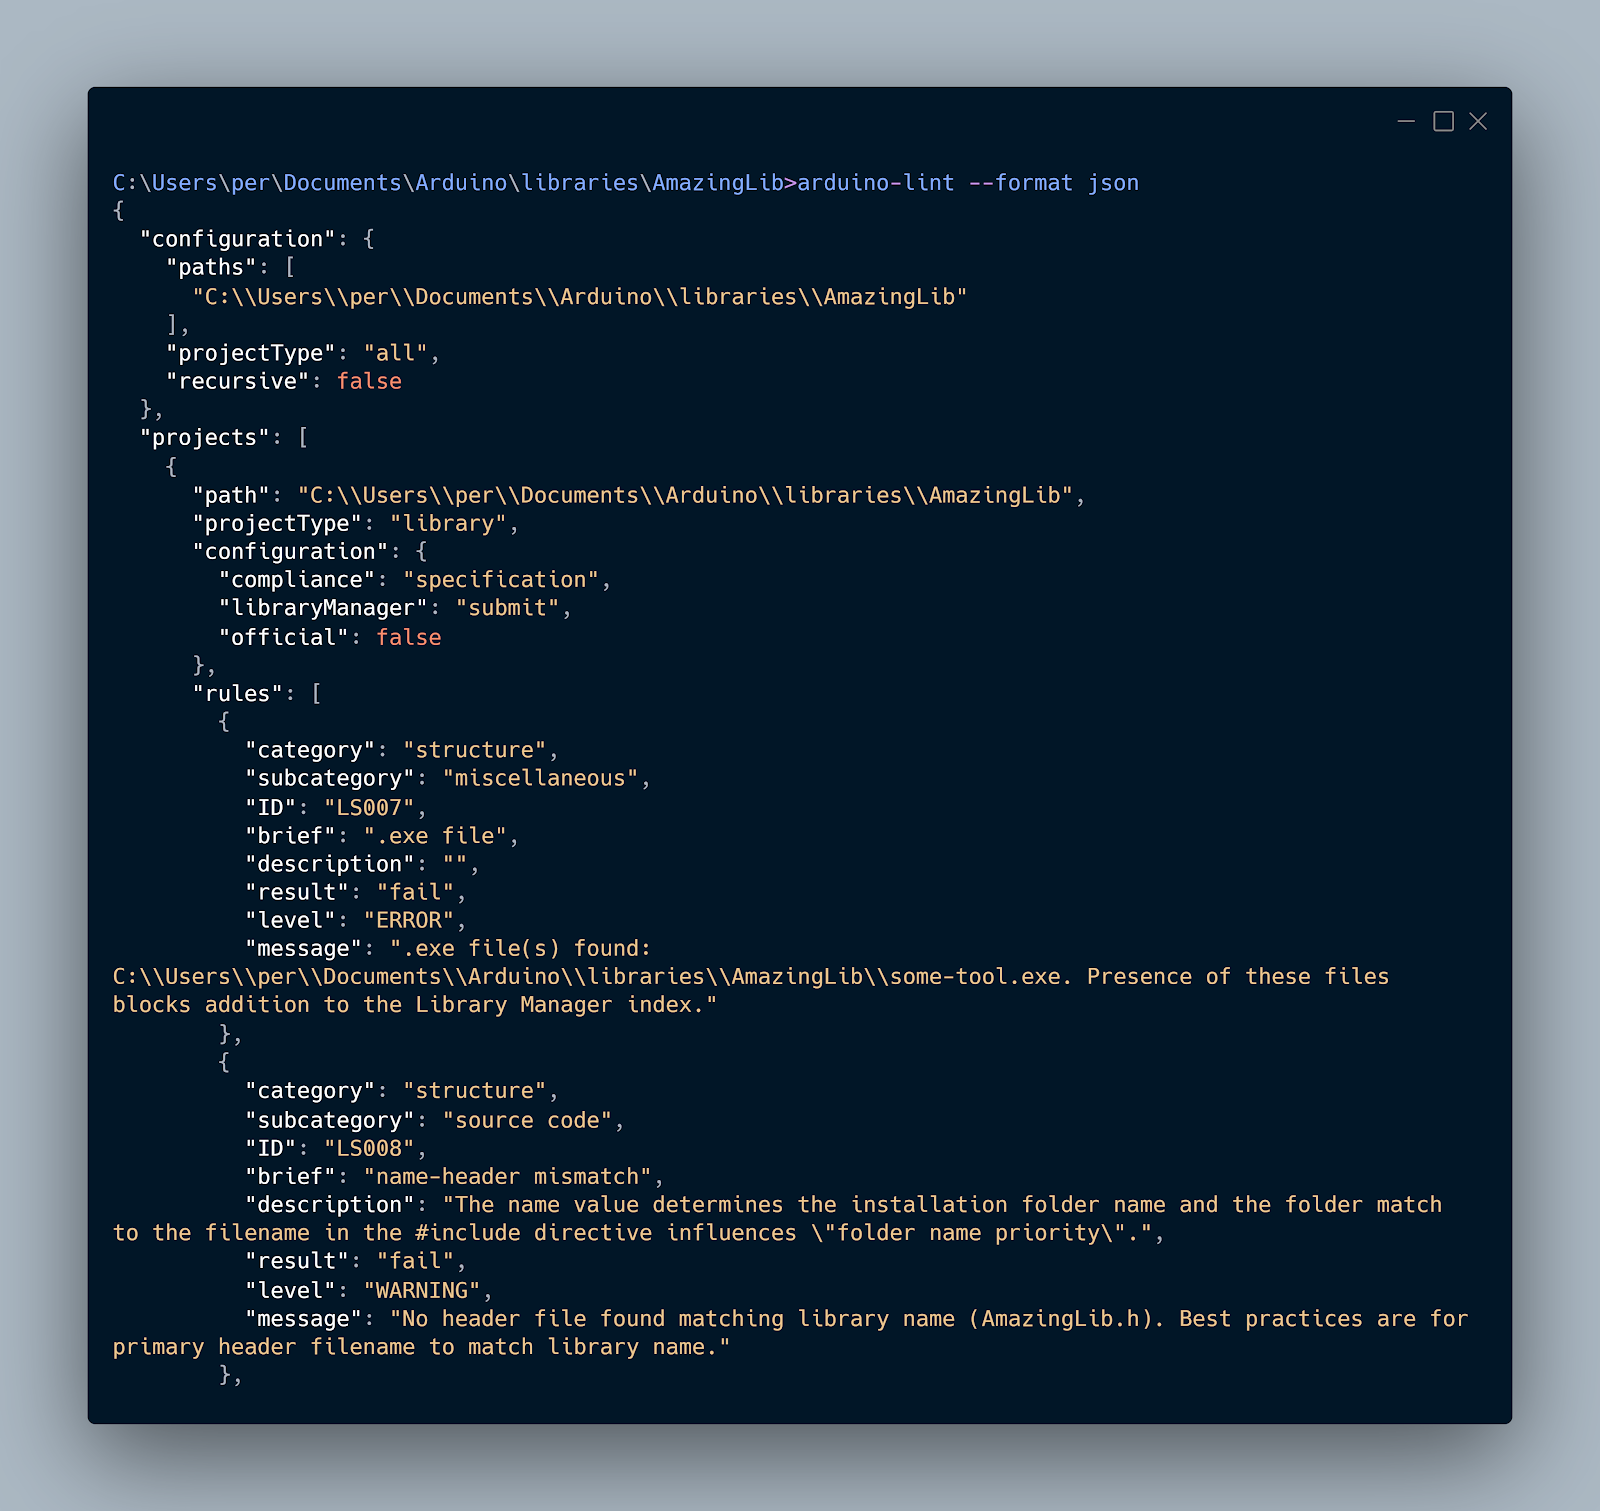
Integration
The --format flag configures the format of arduino-lint‘s output. The default --format text setting provides human readable output. For automation or integration with other tools, the machine readable output provided by --format json may be more convenient. This setting exposes every detail of the rules that were applied.
The --report-file flag causes arduino-lint to write the JSON output to the specified file.
Arduino Lint would be a great addition to your continuous integration system. Running the tool after each change to the project can allow you to identify any problems that were introduced.
Arduino-powered puzzle boxes help pop the question
Arduino Team — January 12th, 2021
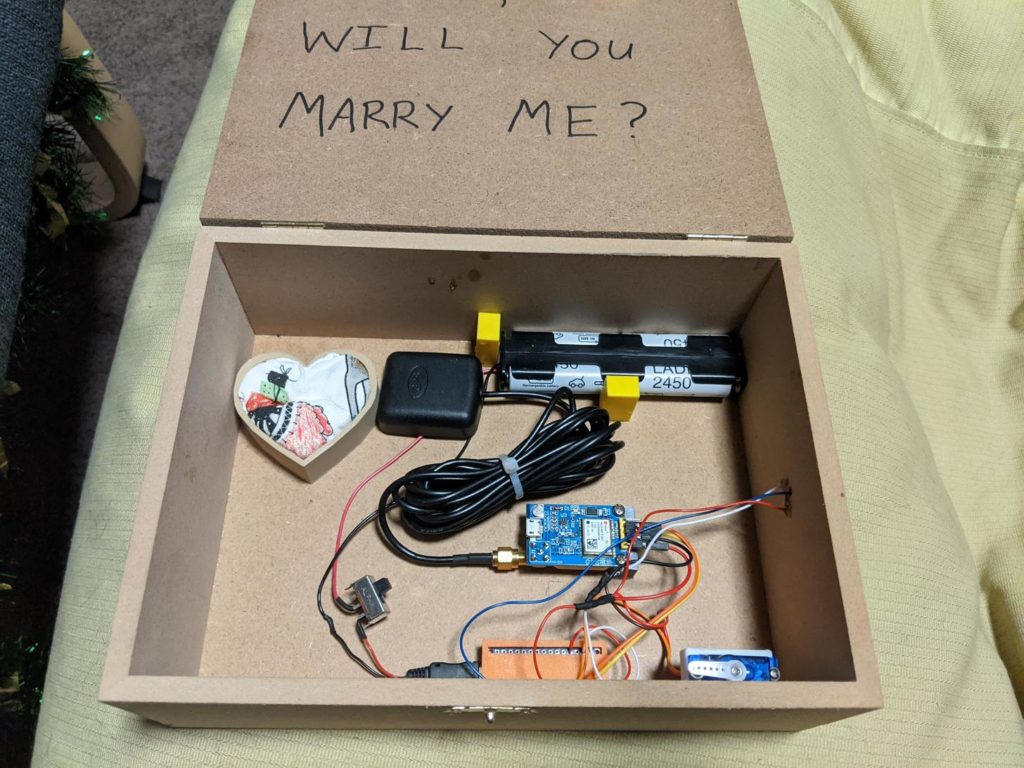
As a unique way to “pop the question” to their girlfriend, Redditor lmjd14 created a scavenger hunt for the proposal using a sequence of Arduino-based puzzle boxes.
The first box opens when one inputs a series of codes on a keypad, which relate to important relationship dates, while the second responds to holding down the correct buttons. The third involves a set of colored coins, and the fourth is activated with some RFID-enabled statues from the other boxes.
The final box was unlocked with lmjd14’s now-fiance’s thumbprint, using a GPS module that allows it to be opened only in the right location. As she said yes, it’s a hack that they will both certainly cherish, and something that will be a great story to tell others in the future!
As we all know, when aliens descend from outer space, they often beam bovine up for testing and observation. While you might not have the privilege of seeing this process in action, “OneldMONstr” has created the next best thing: a miniature model of a cow being beamed up, complete with smoke and lighting effects.
The device features an Arduino Nano for control along with WS2812B LEDs. The lucky and/or unfortunate cow is spun using a small DC motor via an L293D driver, and a coil produces smoke with haze fluid.” (Though OneldMONstr notes the next version will implement an ultrasonic hazer.) A DFPlayer Mini MP3 module is embedded in the base for sound, while a half dozen LEDs illuminate from the bottom. More details on the project can be found here.
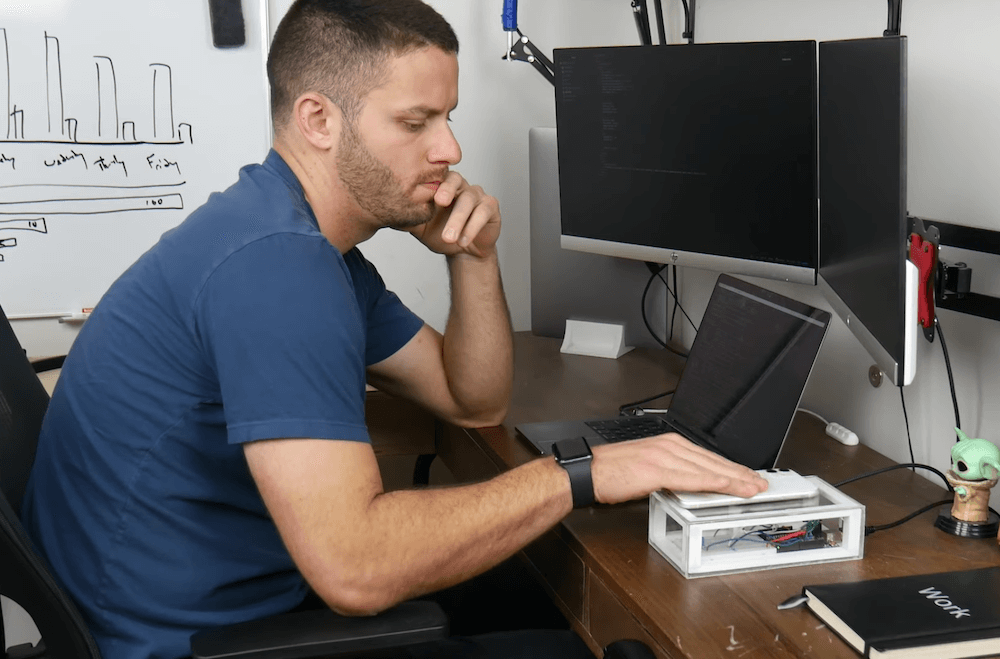
How many times a day do you grab your phone for trivial purposes, such as scrolling through social media? Nick O’Hara found that his number was around 100 times during the workday, which sounds like a lot, but is likely pretty typical. To combat these micro-distractions, he built an Arduino-based device that senses when a phone is placed on top of it using a microswitch.
When the phone is lifted, it connects to the network via a WiFi module, and donates money to charity. What O’Hara discovered was that his usage went down significantly when he automatically donated $1 per pickup, settling on about 10 checks, or $10 each day. As he increased donation/pickup level, his daily usage still came out to about $10, which would seem to be an interesting psychological experiment.
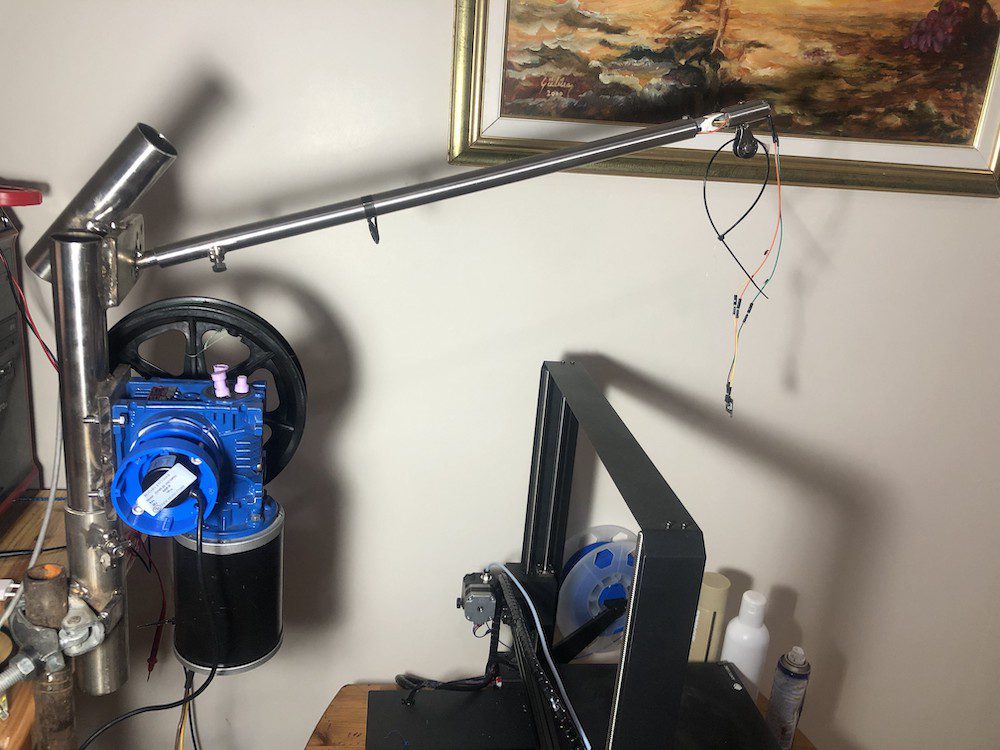
As reported by Hackaday, fishing is generally considered to be a fun and relaxing activity, but it isn’t accessible for those without a certain amount of strength and dexterity. To help more people to be able to enjoy this sport, Ozgur Ozcan has been working on what he calls the “FISHBOT.”
This auto-fishing device is controlled by an Arduino Mega, along with an IBT_2 PWM driver to actuate a 400 watt DC motor for reeling duties. An HM-10 Bluetooth module enables smartphone connectivity, opening up the possibility for fingertip activation, or even via the internal gyroscope.
The setup also features a load cell, which could be used to release the line when it’s in danger of being snapped, or to weigh the fish automatically when landed.
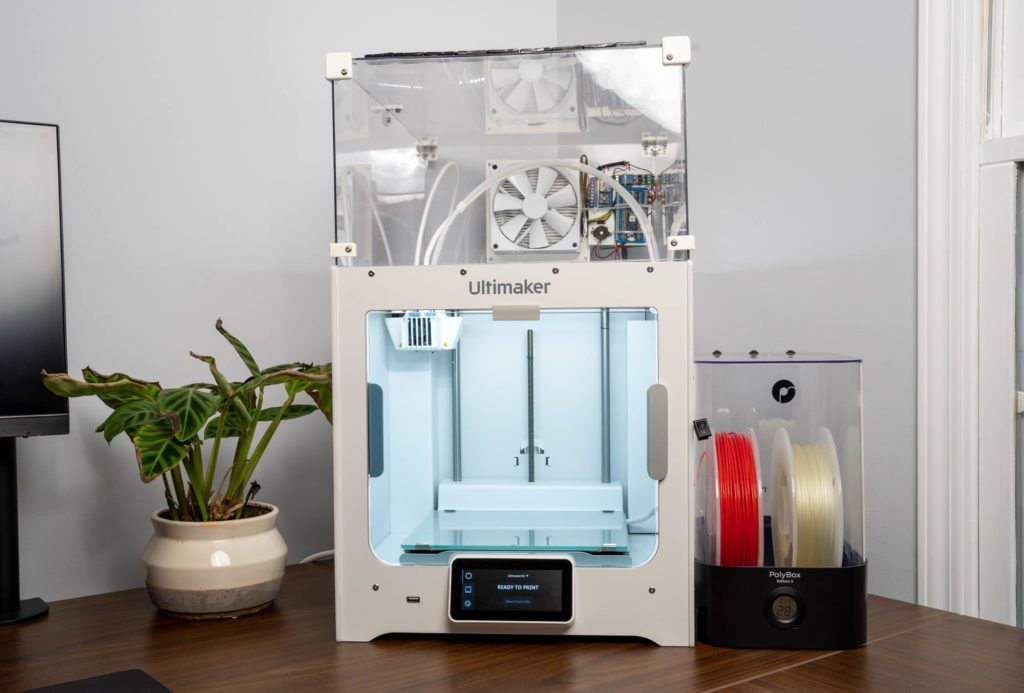
Create a Nano 33 IoT-based filtration and flame detection system for your 3D printer
Arduino Team — January 8th, 2021
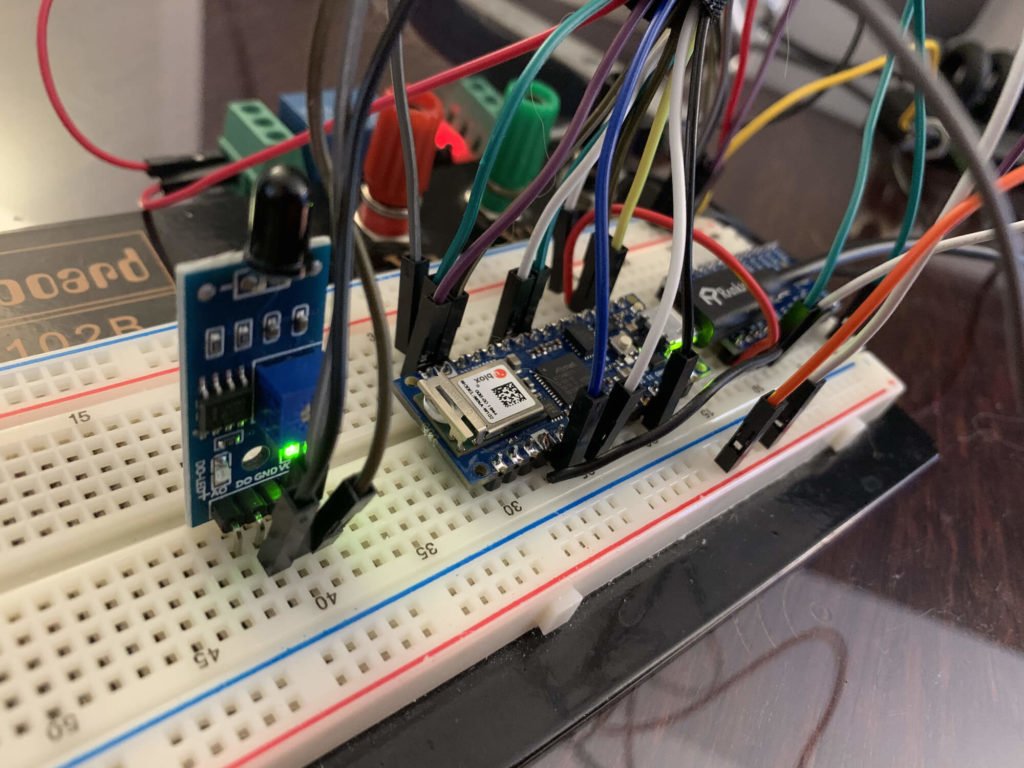
After welcoming a new child into the world, Mike Buss decided that his 3D printer needed a few safety enhancements. To address this issue, he added a clear chamber on top of his Ultimaker S3 with a fan and filter to remove volatile organic chemicals (VOCs), controlled by an Arduino Nano 33 IoT.
The Nano 33 IoT interfaces with the printer over WiFi to automatically detect when it’s in use, and switches the fan on via a relay. Speed can be modified through PWM.
Sensors are implemented to measure temperature, humidity, and VOC levels. This data is wirelessly sent to a server running on a network-attached storage device. A flame sensor is also placed above the Ultimaker, which allows it to sound an audible alarm and cut off power if burning is detected.
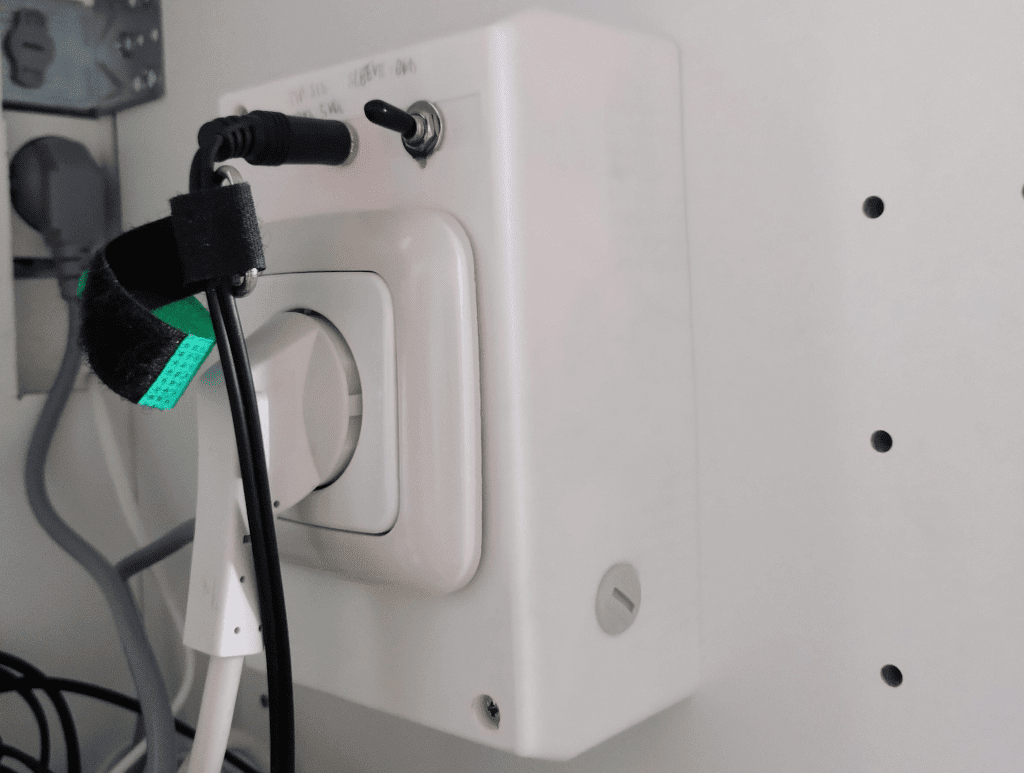
This system turns on your range hood automatically
Arduino Team — January 6th, 2021
As noted in Peter Turczak’s project write-up, having a kitchen hood only works when it’s turned on. To avoid having his apartment constantly smell like “appetizers,” the hacker hooked up an Arduino-based system to trigger it automatically.
The setup senses power input to the stove using a current transformer, processing this input with an Arduino Nano. The Nano subsequently switches on the fume extraction hood via a transistor and relay setup, pumping cooking fumes out to the environment.
Everything is mounted inside of a circuit breaker box, along with a manual override switch that enables the fan, even when the stove isn’t active.
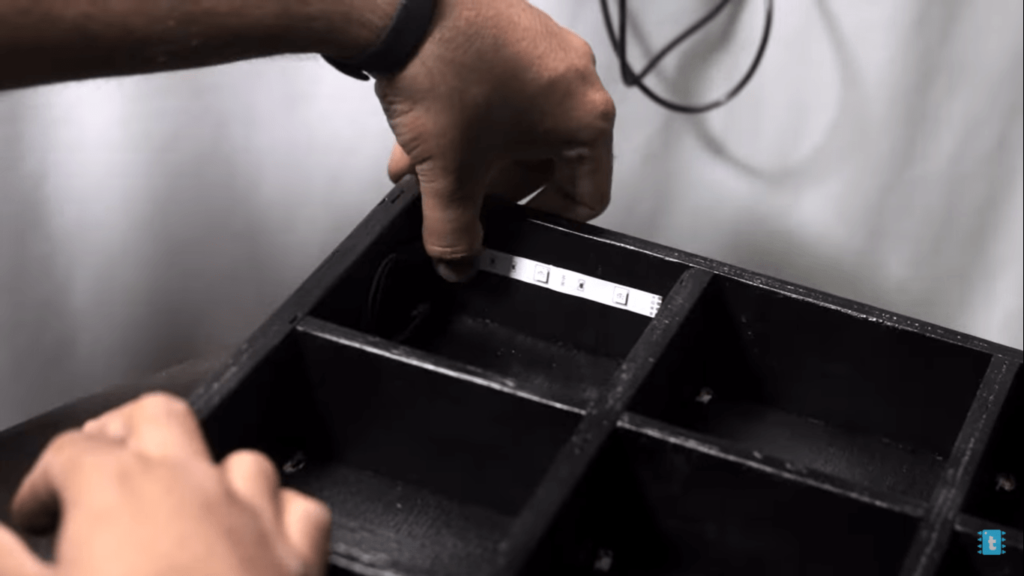
This sensor-based tic-tac-toe game looks like some touchless fun!
Arduino Team — January 6th, 2021
Tic-tac-toe is normally played with a pen and paper, or perhaps with a physical marker, but maker “techiesms” has put a new spin on this classic pastime.
His build, as seen here, takes the form of a wooden box that mounts onto the wall with nine square sections arranged in a grid pattern. Players take turns, activating a square by moving their hand near an IR proximity sensor inside each one.
The squares then light up green or red depending on the player, and when a line is made, the system beeps and blinks on and off to signify a winner. Everything is controlled via an Arduino Mega, along with a custom PCB for wiring.
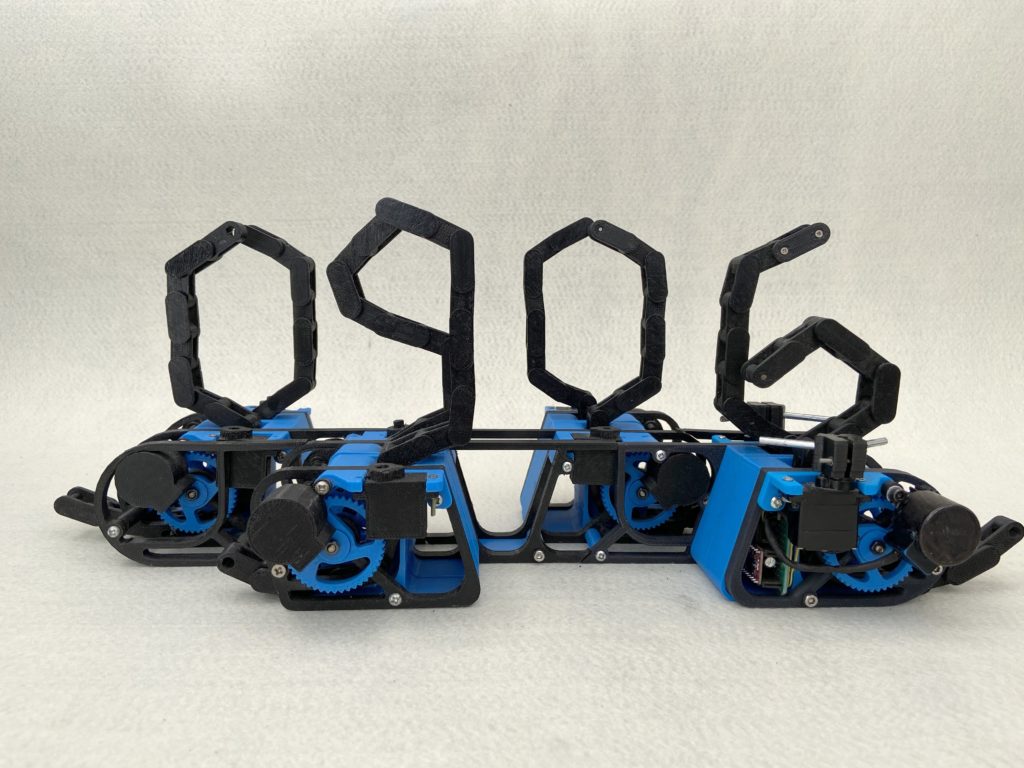
Get the time from GETULA, a modular chain link clock
Arduino Team — January 5th, 2021
After observing a bicycle chain lying on the street in a random pattern, Ekaggrat Singh Kalsi was inspired to make a morphing clock that bends chains to tell time. The clock, known as “GETULA,” consists of four independent modules that work together to reveal the hour and minutes.
Each GETULA module uses two stepper motors to advance a couple of custom 3D-printed chains out of the device’s structure. As they are pushed forward, a pair of servos manipulate the links left and right, incrementally creating numbers when fully formed.
Control is accomplished via an Arduino, along with some A4988 stepper drivers. As of now, only one number is animated, but the other three digits can still be positioned to simulate how the full four-digit device will look.
You can see a nice demo of GETULA the first video below as well as a clip of it changing from the year 2020 to 2021 in the second.
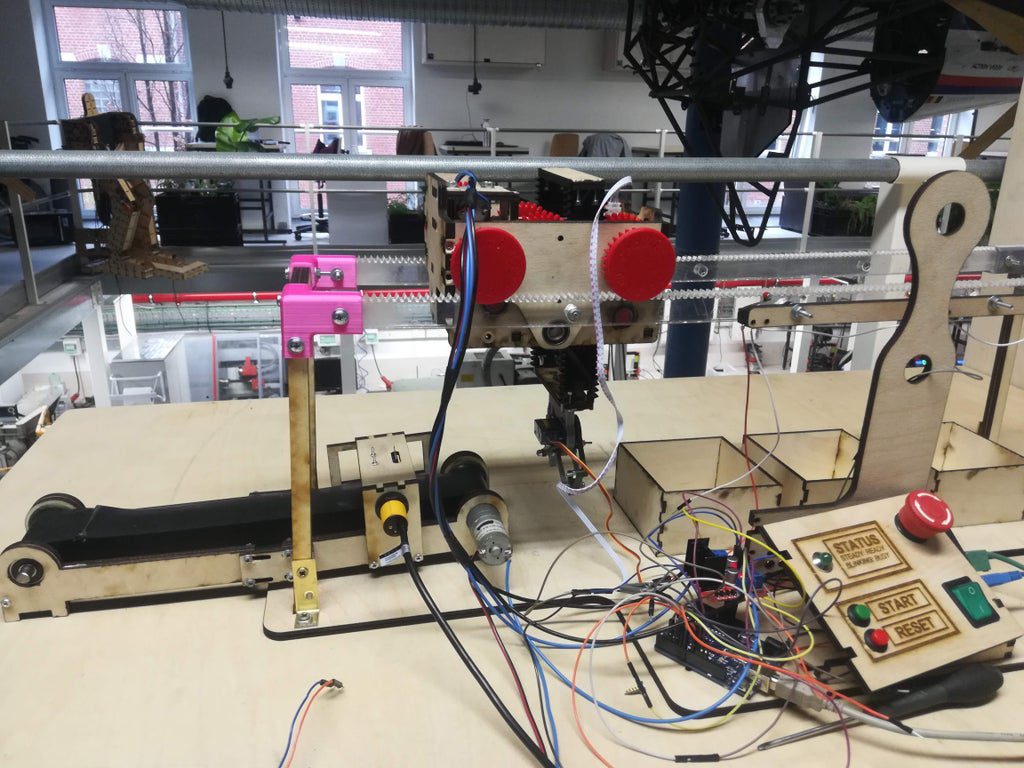
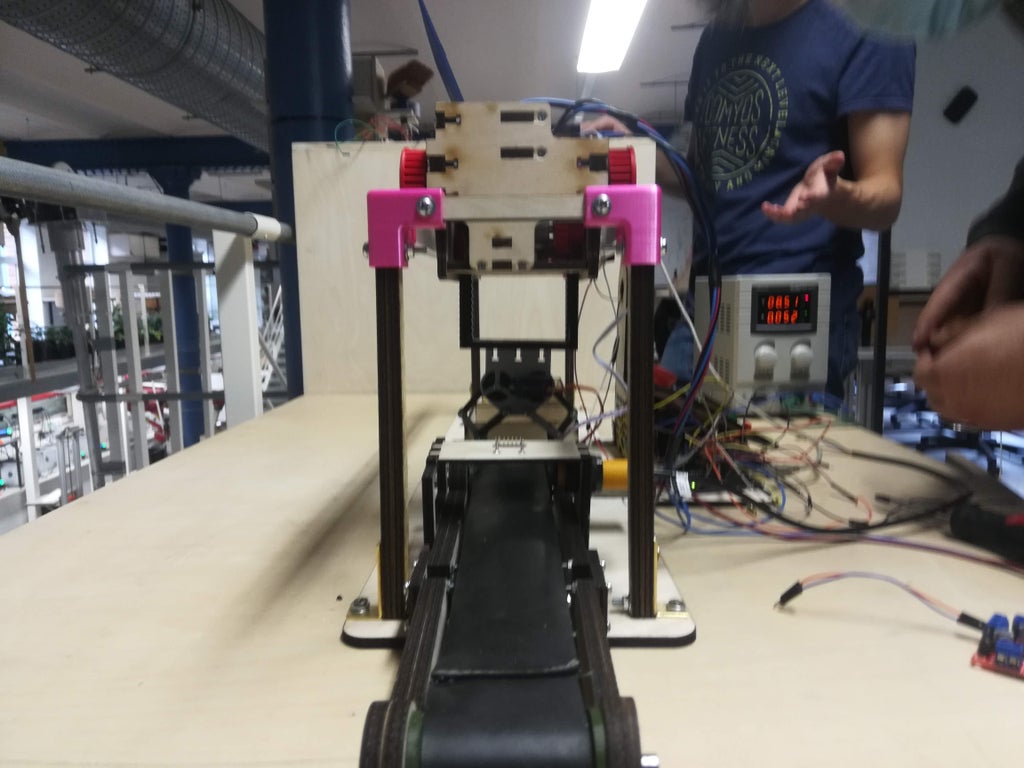
If you don’t enjoy sorting LEGO, you will be pleased to know that students at Bruface – or the Brussels Faculty of Engineering in Belgium – are working on an automated machine to do it for you!
The team’s prototype device detects brick colors on a conveyor belt and picks them up via a gantry-style gripper assembly. It then places each piece in an individual bin by color using a TCS34725 sensor, saving a step if you’d like to keep that castle wall consistent.
As of now the Arduino-powered apparatus consists of several elements — including feeding system, carrier, gripper, and control panel — that work well individually, but haven’t been fully integrated as a whole. The project will hopefully be completed this January, which should be impressive based on the current clips.
Um dir ein optimales Erlebnis zu bieten, verwenden wir Technologien wie Cookies, um Geräteinformationen zu speichern und/oder darauf zuzugreifen. Wenn du diesen Technologien zustimmst, können wir Daten wie das Surfverhalten oder eindeutige IDs auf dieser Website verarbeiten. Wenn du deine Einwillligung nicht erteilst oder zurückziehst, können bestimmte Merkmale und Funktionen beeinträchtigt werden.
Funktional
Immer aktiv
Die technische Speicherung oder der Zugang ist unbedingt erforderlich für den rechtmäßigen Zweck, die Nutzung eines bestimmten Dienstes zu ermöglichen, der vom Teilnehmer oder Nutzer ausdrücklich gewünscht wird, oder für den alleinigen Zweck, die Übertragung einer Nachricht über ein elektronisches Kommunikationsnetz durchzuführen.
Vorlieben
Die technische Speicherung oder der Zugriff ist für den rechtmäßigen Zweck der Speicherung von Präferenzen erforderlich, die nicht vom Abonnenten oder Benutzer angefordert wurden.
Statistiken
Die technische Speicherung oder der Zugriff, der ausschließlich zu statistischen Zwecken erfolgt.Die technische Speicherung oder der Zugriff, der ausschließlich zu anonymen statistischen Zwecken verwendet wird. Ohne eine Vorladung, die freiwillige Zustimmung deines Internetdienstanbieters oder zusätzliche Aufzeichnungen von Dritten können die zu diesem Zweck gespeicherten oder abgerufenen Informationen allein in der Regel nicht dazu verwendet werden, dich zu identifizieren.
Marketing
Die technische Speicherung oder der Zugriff ist erforderlich, um Nutzerprofile zu erstellen, um Werbung zu versenden oder um den Nutzer auf einer Website oder über mehrere Websites hinweg zu ähnlichen Marketingzwecken zu verfolgen.