Arduino support for the Raspberry Pi RP2040 chip is available now using the official Arduino Mbed Core. This is obviously very important, and exciting, for the upcoming Arduino Nano RP2040 Connect. But it goes beyond the Arduino device to also bring support to other boards built around the RP2040 chip.
Arduino Core and Mbed OS
Arduino is no stranger to Mbed OS. It’s a hugely important platform and operating system in the IoT space. This is due toits support for Cortex-M microcontrollers and its real-time operating system capabilities. So a lot of work was done when Mbed OS was adopted for the Nano 33 BLE and Nano 33 BLE Sense devices. Since all Mbed infrastructure and drivers were in place, we could easily support all new Arduino boards with minimal effort. Including new ones like the Portenta H7 and Nano RP2040 Connect.
This makes the Arduino Core plug-and-play, and an easy choice for getting your devices up and running quickly. We provide two cores; one for our Nano RP2040 Connect board, and one for other RP2040-based boards, including the Raspberry Pi Pico. As the core is based on Mbed OS you can choose between using the Arduino’s API or Mbed’s.
If you’d like to support any other RP2040 board with its custom features you can do so. It requires very little effort by cloning and tweaking the Arduino Mbed Core.
Ready for the Nano RP2040 Connect
All Arduino APIs are standardized, which means they can be used on all boards. If you have a sketch for your Nano 33 BLE, you can now upload it to a Nano RP2040 Connect and run it without making any changes.
In effect this means you can create sketches for the new Arduino board, even if you don’t have your hands on it yet. It also makes project upgrades very easy. Nor does the Arduino Core require a custom bootloader for RP2040 devices, as it uses the ROM-based bootloader from Raspberry Pi.
Allen Pan’s Arduino-controlled microwave only works while gaming
Arduino Team — April 26th, 2021
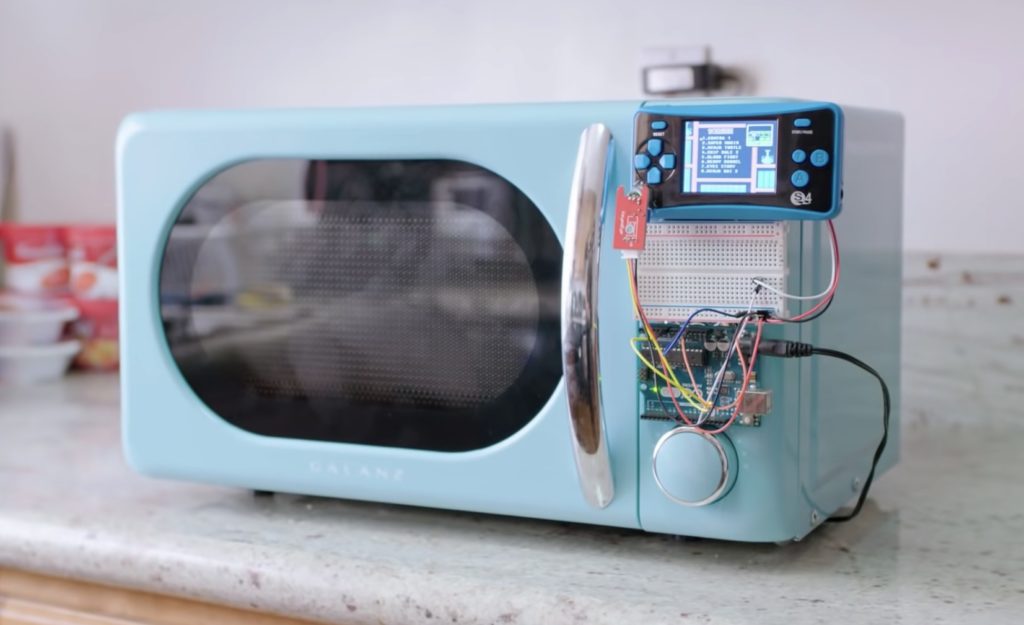
Microwave ovens have been the peak of convenient cooking since the 1960s, and nobody appreciates that convenience more than gamers. Normally you would microwave some pizza rolls between Call of Duty death matches, but Allen Pan decided to make gaming a more integral part of the cooking process for his most recent project.
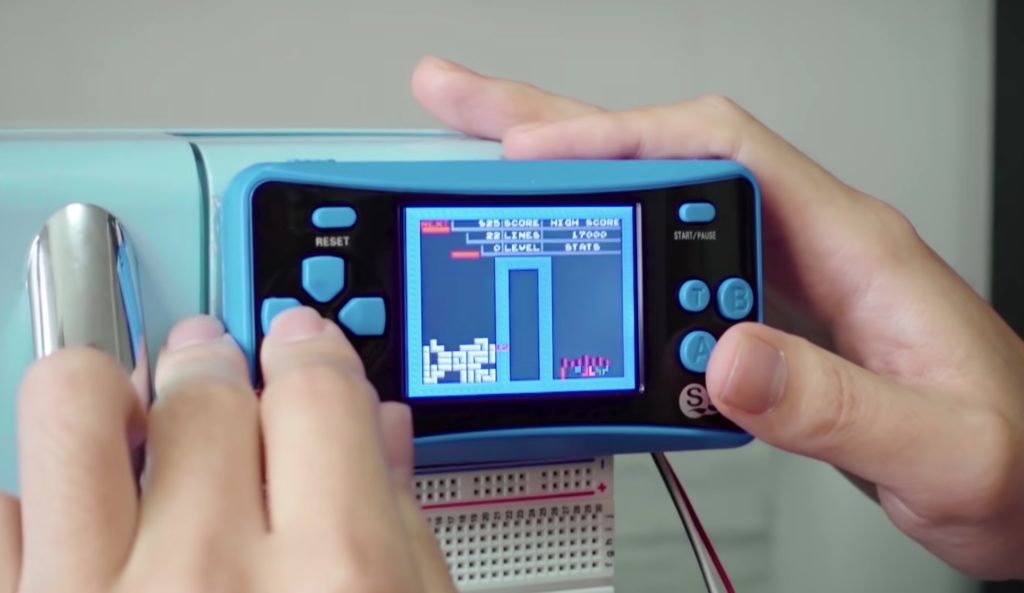
This is a microwave oven that will only cook food while an attached game console is in use. That console is a generic all-in-one handheld with many built-in games, most of which are knock-offs or in the public domain. If a Hot Pocket requires three minutes of microwave cooking, then Pan has to play one of those games for a full three minutes or risk biting into an icy center.
Pan used an Arduino Uno board to monitor a microphone placed in front of the console’s speaker. The console only outputs audio while a game is in play, so this was a reliable way to determine if the user is actively playing or if they have walked away.
If the Arduino detects sound, then it will turn on a relay in the microwave oven. Pan hardwired the microwave oven so that any time it receives power, the microwave emitter will run. All Pan needs to do is pop some food in the microwave and start playing a game. So long as his thumbs don’t get tired, he can heat up whatever treat he craves.
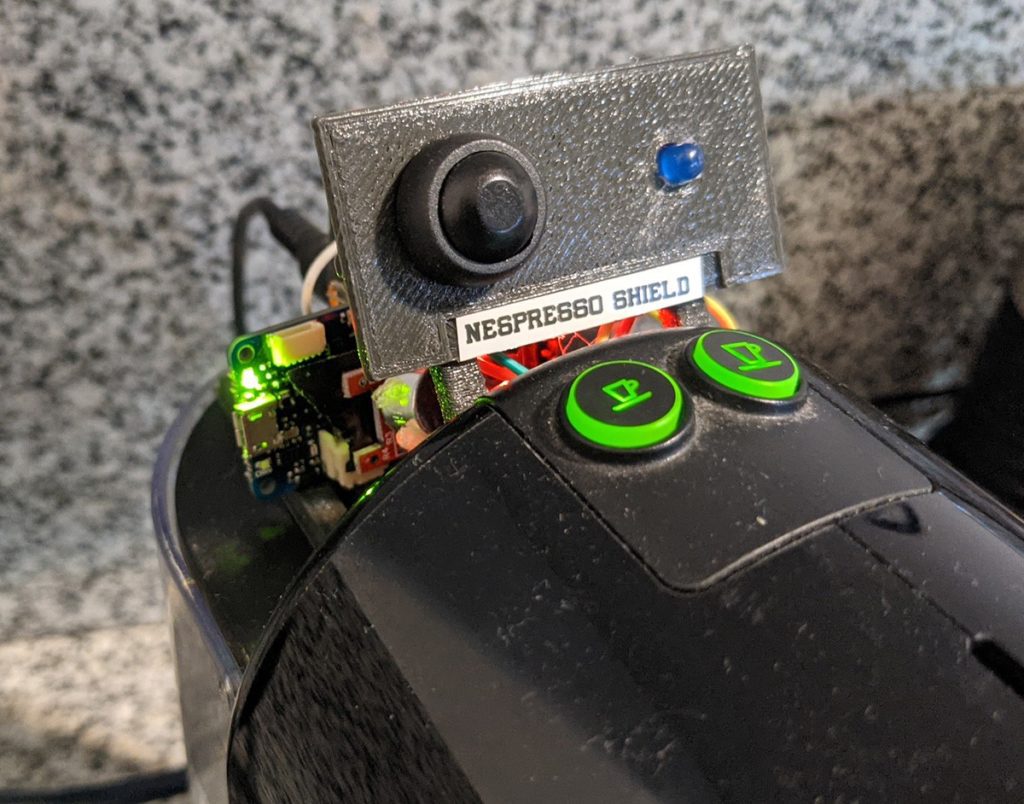
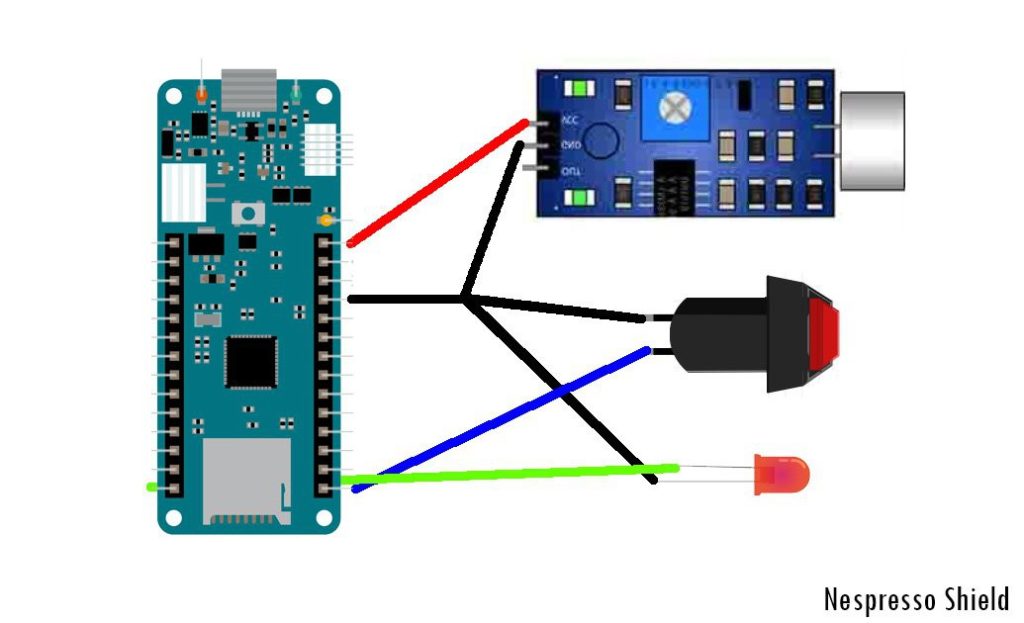
How much coffee do you consume in a day? No idea? Then the Nespresso Shield by Steadman Thompson may be just what you need!
The device employs an Arduino MKR Zero, and a microphone unit to sense when a Nespresso machine gets louder than a certain threshold. When this level is met, it knows that a drink is being prepared and records this on the board’s built-in SD card reader. Info is coordinated with RTC values, allowing the card to be pulled in order to produce nice graphs in Excel or LibreCalc.
It also keeps track of water levels, based on how many cups have been poured, with a reset button and LED as the user interface. The unit simply sits on top of the machine, so there’s no modification needed whatsoever.
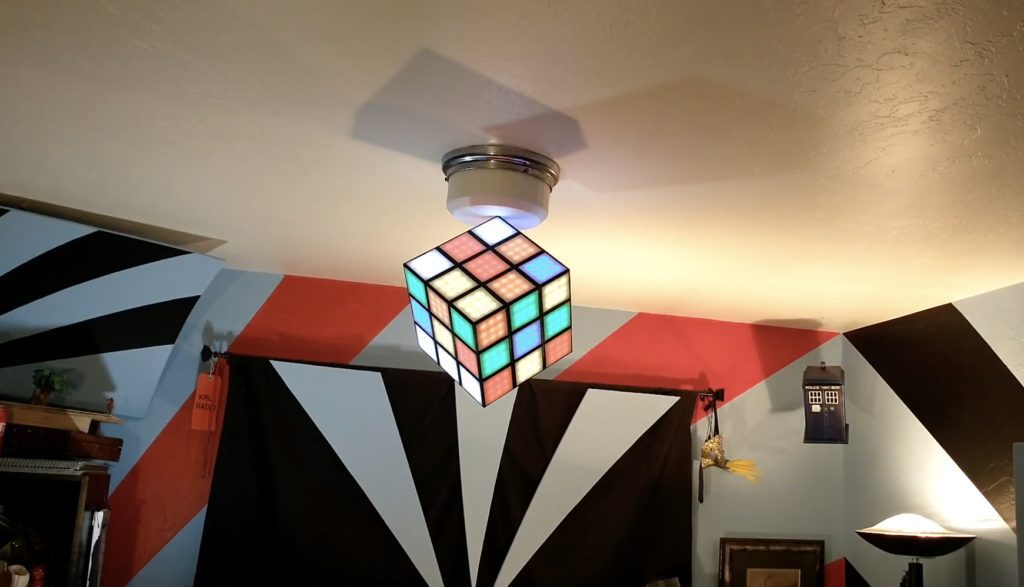
Rubik’s cubes have been mystifying and frustrating people for more than 40 years now. According to Forbes, 450 million Rubik’s cubes had been sold by 2020. But based on our very scientific estimates, only a small fraction of those have been solved. To avoid that difficulty, Stuart Gorman gave his Rubik’s cube chandelier the ability to unscramble itself.
This large 3D-printed chandelier looks exactly like the iconic cube, except that each section is lit by LEDs instead of covered with a sticker. Those are WS2812B individually-addressable RGB LEDs controlled by an Arduino Mega board. People usually choose the Mega when they need a lot of I/O pins, but in this case Gorman picked the Mega because it has lots of RAM to work with. That RAM is necessary for handling the complexity of the Arduino code that the lamp is running.
The lamp has a few different LED effects modes, which are selectable through a smartphone app that connects to the Arduino via a Bluetooth module. Static colors can be set to each face or it can flash random colors. But the exciting modes replicate traditional Rubik’s cube play. The first starts with a solved cube and then endlessly rotates random faces, like most people do when they attempt to solve a Rubik’s cube. The second mode will actually solve the cube, which it does by playing the first mode in reverse. This chandelier looks fantastic and is a lot of fun to watch in action.
This DIY Bluetooth speaker’s magical ferrofluid display reacts to the music
Arduino Team — April 23rd, 2021
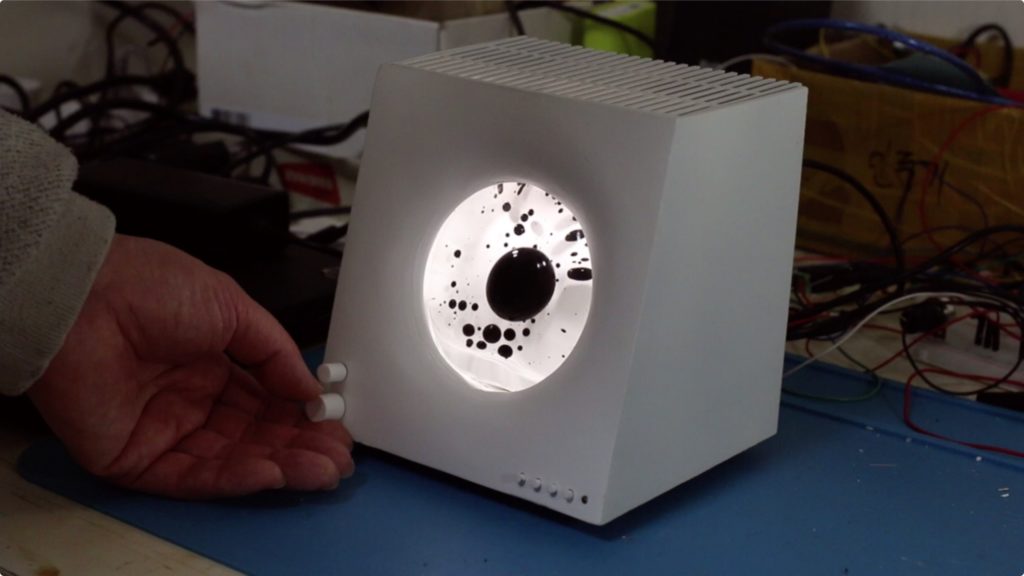
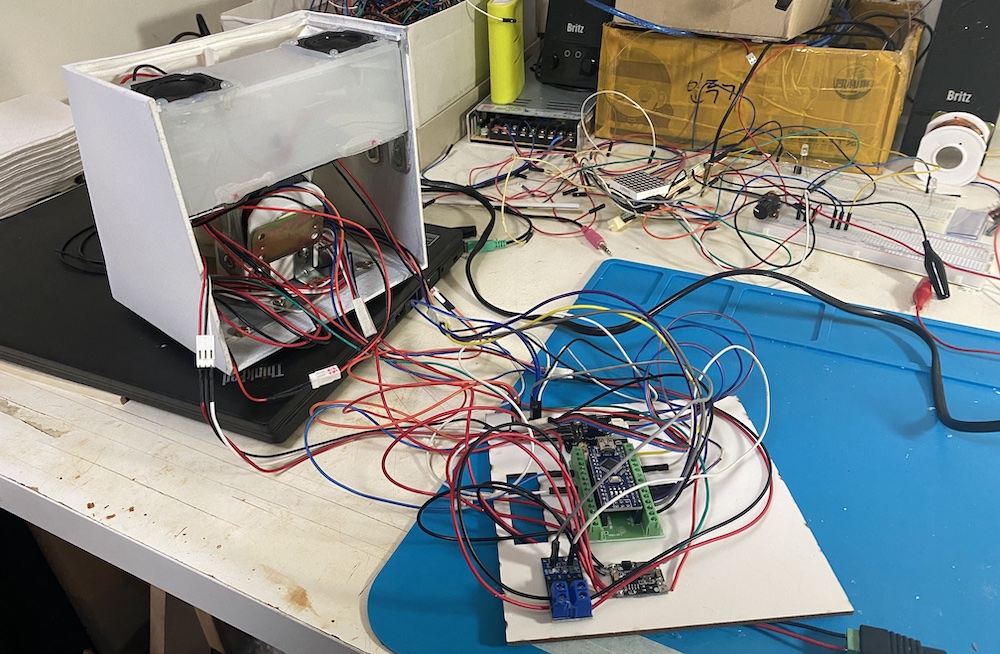
Ferrofluid is a special kind of liquid full of ferromagnetic particles, so it reacts to magnetic fields. Dakd Jung built a beautiful Bluetooth speaker that features a ferrofluid display driven by an Arduino.
This Bluetooth speaker has a gorgeous minimalistic 3D-printed enclosure that would look great on any bookshelf. But it is the ferrofluid display that makes the speaker special. A glob of ferrofluid floats inside of a glass reservoir mounted front-and-center on the speaker. That ferrofluid moves to the music playing through the speaker, providing a mesmerizing visualization. There is even a dial that lets the user adjust which part of the sound frequency that the ferrofluid responds to.
The ferrofluid is able to react to the tunes thanks to an electromagnet placed behind the glass reservoir. An Arduino Nano board controls the power going to that electromagnet proportionally to the volume in a specific frequency range of the music playing. An MSGEQ7 graphic equalizer module isolates the desired frequency range. The Arduino monitors the voltage output from that module and uses it to control the voltage going to the electromagnet.
The result is that the ferrofluid jiggles and bounces along to the intensity of the music. If the user tunes the dial to low frequences, then the ferrofluid will react to the bass. If set to high frequencies, the ferrofluid will respond to treble. It is entrancing to watch and a very creative use of ferrofluid.
The Arduino Pro lineup continues to grow with the introduction of the new Arduino Edge Control. This is a remote monitoring and control solution optimized for outdoor environments. Easy deployment makes it suitable for smart agriculture, precision farming, and other intelligent control applications in remote locations.
Featuring built-in Bluetooth, Arduino MKR boards can expand connectivity with 2G/3G/CatM1/NB-IoT modems, LoRa®, Sigfox and WiFi. With solar power capabilities you can place it anywhere while leveraging AI on the edge. Once installed in the field, it can then be managed remotely using Arduino IoT Cloud (or other services).
Real-time monitoring with Edge Control sensors
You can also connect sensors, provide real-time monitoring, and drive actuators — commonly used in agriculture — thereby reducing production-related risks.
Particularly aimed at smart agriculture, the sensors can collect real-time data. Weather conditions, soil quality, crop growth and any other data you need. Once sent to Arduino IoT Cloud, the data value chain becomes valuable analytics that support business processes at various levels. For example, crop yield, equipment efficiency, staff performance and so forth. The Edge Control can improve crop quality, reduce effort and minimize error by automating processes like irrigation, fertilization or pest control.
Remote access and maintenance
With its robust design, the Edge Control is a fitting solution for applications in any outdoor setting. For example, using it on construction sites or in real estate to automate access control. Similarly, swimming pool maintenance and cleaning companies could monitor and control the condition of pool water from remote locations. As usual, we expect the Arduino community to come up with countless ingenious ways to implement this new technology.
To learn more about how you can use the Edge Control, check out how to get started.
The Edge Control is now available for €169/US$199 on the Arduino Store.
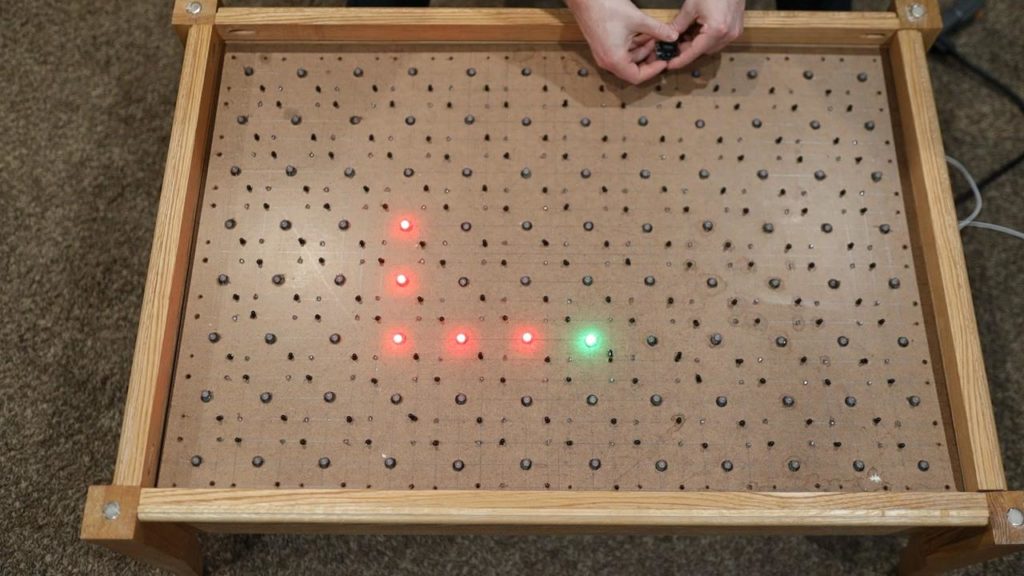
Snake is a classic game — more a genre of games — that dates all the way back to 1976 with the release of the Blockade arcade game. Many consoles and devices have received variations of Snake, putting it in the same league as Tetris and block breakers. Now Ty and Gig Builds have used an Arduino to construct a giant coffee table version of the game.
One of the reasons that so many variations of Snake exist is because it runs well on very low-resolution screens. That also made it perfect for this project, since an LED matrix makes for a great low-res display. Ty and Gig originally built that matrix for an interactive coffee table project and they were able to repurpose it for this game.
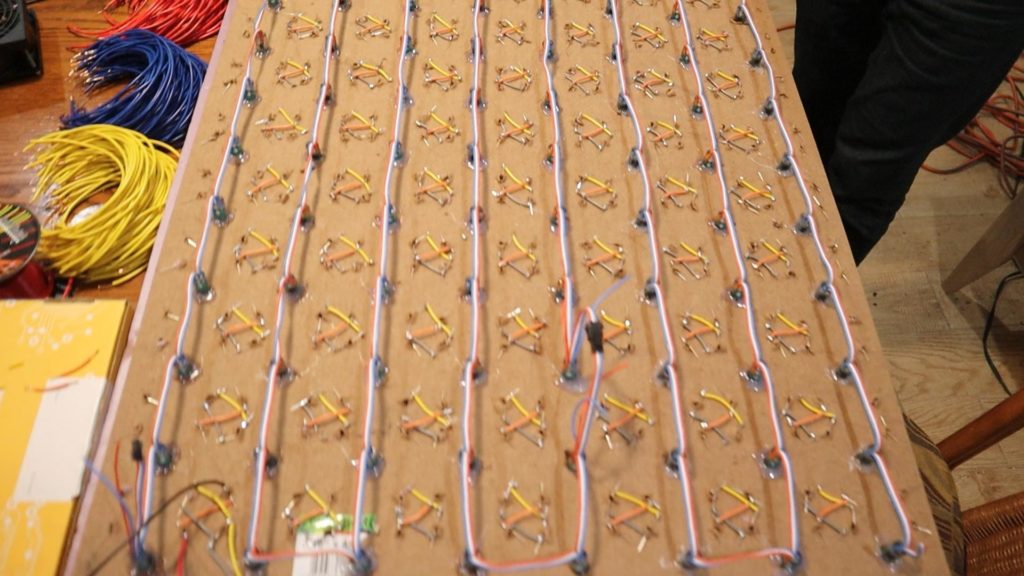
WS2811 individually-addressable RGB LEDs form that matrix. They shine through holes drilled into a sheet of plywood mounted underneath the coffee table glass. An Arduino Mega controls those LEDs, but any Arduino board would work for the job. The only other hardware components are a 5V power supply and an analog joystick module.
The joystick is comprised of two potentiometers, so the Arduino simply checks those to determine which direction to move. Programming was a small challenge, because the 1D array of LEDs had to be translated to the 2D display. With that figured out, programming the game was straightforward. Players direct the LED snake to collect as many apples as possible without colliding with itself, like they have done for the past four decades.
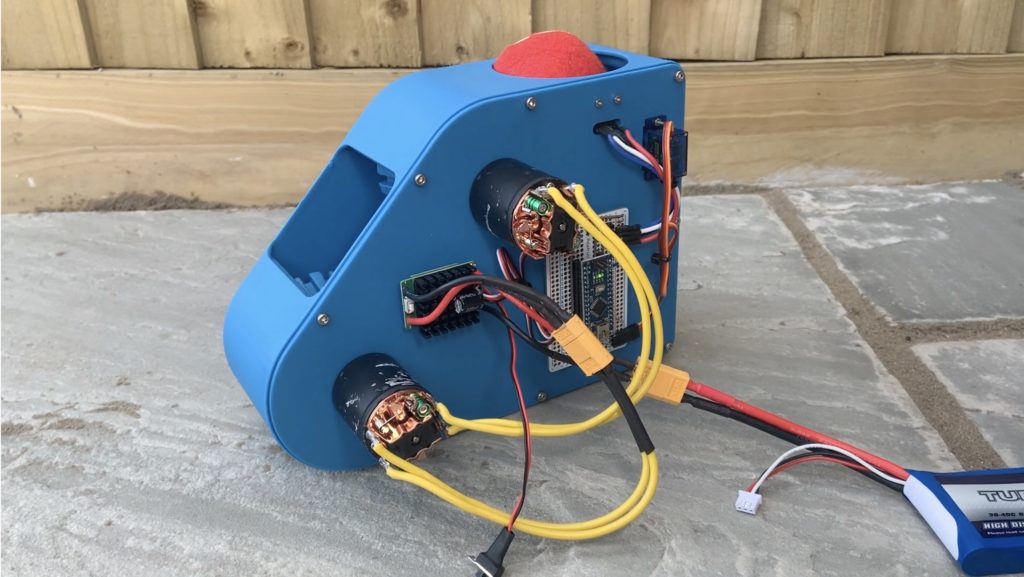
Many dog breeds require a lot of exercise and mental stimulation to be healthy and happy, but not many of us want to spend our time endlessly throwing a tennis ball. That’s why Connor Benson used an Arduino Nano to build an automatic ball launcher that is capable of keeping his pup entertained all day long.
In this case, the Nano is being employed to sense when a ball has been dropped into the ball launcher, spin up the launcher’s motors, and then release the ball down into the spinning wheels. The board requires very little power, so this machine can run on a battery pack for a relatively long time.
The frame and mechanical components are 3D-printed in a nice bright blue color. An Adafruit proximity sensor is implemented to detect when a ball is in the machine and then releases the ball with a hobby servo motor. The 3D-printed wheels that grip the ball and fling it out are spun using powerful brushless DC motors. The Nano drives those via electronic speed controllers (ESCs).
Now Benson can play fetch with his dog for hours at a time without tiring out his arm and the dog certainly seems happy with the project.
Your favorite device has just run out of juice, so you quickly take off the cover and reach into that old stash of alkaline batteries you have lying around. After trying countless combinations, you still cannot be sure they’re working properly, as each one has been slightly used. If only there were a way to know.
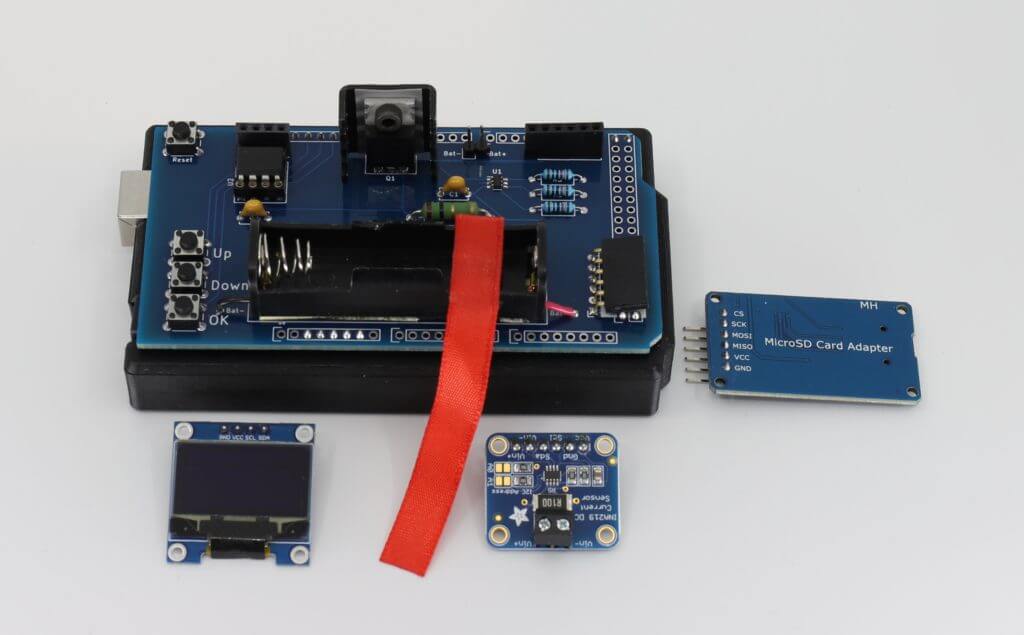
In comes a maker named Moragor with his take on a battery analyzer. The one he built doesn’t just measure the voltage for a certain type of battery. Instead, users can select from three different types (alkaline, NiMh, or Li-on), along with the current from a sleek OLED display. Then, values get read, shown, and also logged to an SD card for more advanced analysis. The entire device is based on a custom PCB that acts as a shield for an Arduino Mega.
Moragor might have gone a bit overboard, however, as he eventually got around to testing 25 different types of alkaline batteries! After measuring four batteries from each brand with discharge rates of 100mA and then 500mA, he was able to create this neat little chart that shows the energy loss from high current consumption. As seen below, there were a couple of standouts that lost nearly 60% of their energy at 500mA vs 100mA.
You can check out Moragor‘s write-up for more information on exactly what components were used and how it was made, plus all the detailed battery analysis one could hope for.
There’s a brand new device-to-device communication feature available now in the Arduino IoT Cloud. It’s something we’ve been working on for a long time. So we’re excited to see how it’ll add a whole new connected dimension to your Arduino projects.
What is “device-to-device” communication?
Internally we’ve been looking at this feature as “device-to-device” communication. It will allow your Arduino devices to send wireless messages to each other, without writing a single line of code or spending time with radio modules and network protocols.
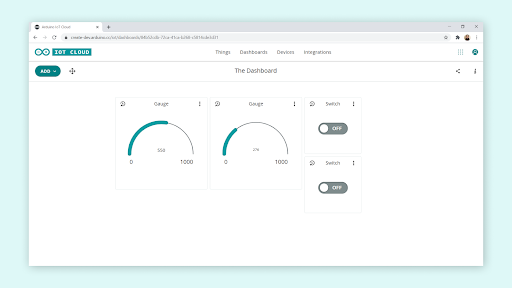
Using this feature you can link variables of the same data type between two or more cloud-enabled devices. For example, one button could set three smart bulbs to the same color. Or you could turn on a heater when temperature sensors in your room or outside in your weather station drop below a certain level. Being able to sync variables gives you an intelligent way to control multiple devices very easily.
Whether you use an Oplà IoT Kit, a MKR WiFi 1010, a Nano 33 IoT or an (upcoming!) Nano RP2040 Connect, you can configure everything from the web interface. After configuration, any changes you make to variables on one device will be reflected promptly on the other(s). This creates a seamless, powerful and secure two-way communication with almost no effort on your part, and no code required. The Arduino IoT Cloud handles authentication, security, network disruptions and any other tricky parts.
What does this mean for your projects and devices?
It means there are lots of options with thing-to-thing communication (also known as variable synchronization):
Collect sensor readings from remote devices.
Actuate devices remotely. For instance, pressing a button on one Arduino turns on an LED or motor on another.
Create a distributed algorithm where multiple devices collaborate with each other.
Are you thinking about home automation? Interactive installations? Monitoring and controlling machines from a wireless panel? This powerful new feature makes all those things easy to achieve for makers of all abilities.
Combined with IoT Cloud’s dashboards this delivers a powerful new way to build incredible automations with minimal (if any) changes. Furthermore, it gives you smartphone control of your connected boards via the existing Arduino IoT Remote iOS and Android apps.
If you want to be one of the first to try it out, grab an Arduino IoT Cloud subscription. After that, just make sure you’re signed up to the Arduino newsletter to hear about other new features.
In many respects we think of artificial intelligence as being all encompassing. One AI will do any task we ask of it. But in reality, even when AI reaches the advanced levels we envision, it won’t automatically be able to do everything. The Fraunhofer Institute for Microelectronic Circuits and Systems has been giving this a lot of thought.
AI gesture training
Okay, so you’ve got an AI. Now you need it to learn the tasks you want it to perform. Even today this isn’t an uncommon exercise. But the challenge that Fraunhofer IMS set itself was training an AI without any additional computers.
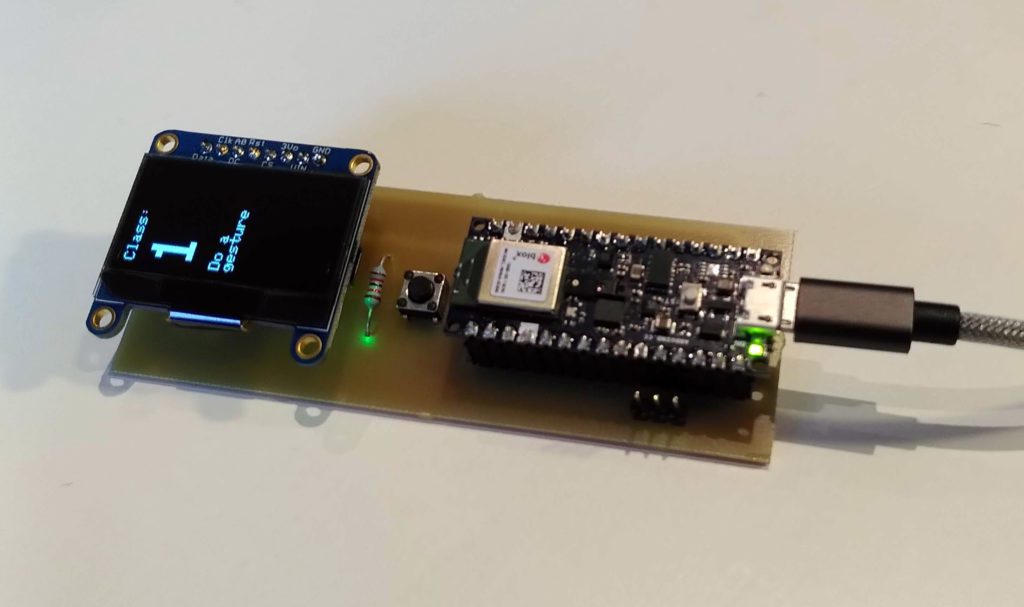
As a test case, an Arduino Nano 33 BLE Sense was employed to build a demonstration device. Using only the onboard 9-axis motion sensor, the team built an untethered gesture recognition controller. When a button is pressed, the user draws a number in the air, and corresponding commands are wirelessly sent to peripherals. In this case, a robotic arm.
At first glance this might not seem overly advanced. But consider that it’s running entirely from the device, with just a small amount of memory and an Arduino Nano. Fraunhofer IMS calls this “embedded intelligence,” as it’s not the robot arms that’s clever, but the controller itself.
This is achieved when training the device using a “feature extraction” algorithm. When the gesture is executed, the artificial neural network (ANN) is able to pick out only the relevant information. This allows for impressive data reduction and a very efficient, compact AI.
Obviously this is just an example use case. It’s easy to see the massive potential that this kind of compact, learning AI could have. Whether it’s in edge control, industrial applications, wearables or maker projects. If you can train a device to do the job you want, it can offer amazing embedded intelligence with very few resources.
Prolific project maker and Arduino lover Alain Mauer has made a rather splendid tea maker project with a steampunk twist. Despite Mauer being based in Luxemburg, we’d have to say this feels like a very British Arduino application.
Crumpets or Battenburg, anyone?
Putting the “Tea” in “Steampunk”
The Tea Timer is a classic Arduino project. A simple idea with a simple execution, beautifully presented.
Mauer’s put together a timer that submerges a teabag for a preset period. We all have our preferences for the strength of tea, and everyone knows an entire day can be ruined if the teabag’s left in for too long (right?). So a five-stage timer lets you determine just how strong your tea will be.
Once the timer’s run down, an Arduino Nano fires up the servo, which turns the gears and lifts the bag out so you don’t forget. Adjusted correctly, this also means you can consistently make the perfect cup of brown joy.
And just like the perfect cuppa, presentation is everything. Mauer didn’t need to add the gears, wooden housing or the brass finish. But the steampunk aesthetic really completes the project, and makes it into a work of art as well as an essential kitchen appliance. Now we just need to hook it up to a home automation system.
Mauer has provided all the CAD parts on his GitHub along with the Arduino code, so it’s easy to replicate.
Tea is a subject of great significance to the British. It can cause arguments, hysteria and family feuds that last for generations. All in a very civilized manner, of course. No Brit would be uncouth enough to have cross words in public about the proper way to drink tea. But we do reserve the right to tut and roll our eyes behind closed doors afterwards, should someone get it wrong.
Check out the steampunk Tea Timer and automatic teabag remover on Mauer’s blog. And let’s leave the last word on the vital importance of a cup o’ brown joy to the immortal Professor Elemental.
It was a long Monday with the Arduino forum closed for maintenance, wasn’t it? Many people had to hold back their Arduino-related questions for an entire day… panic! But before getting mad at us, read on and you’ll understand it was for an extremely good cause. 😉
We migrated the forum to a new, modern, platform which provides adramatically improved user experience. Try it now at forum.arduino.cc! It’s fast, clean, practical, and mobile-friendly. The new interface helps focus on contents, share knowledge and generate quality interactions between people.
New Forum Features
No more pages to browse manually.
Long conversations are loaded dynamically while scrolling.
Notifications are shown when someone mentions you or replies to your posts.
Links are expanded with previews.
Long conversations are automatically summarized.
Trust levels and other tools help fight spamming and encourage good behaviors.
And there’s a lot more!
The new forum is built on Discourse, which is the leading forum platform and is 100% open source. This makes the Arduino forum into one of the largest Discourse forums in the world, with over one million users and more than five million posts. We partnered with the Discourse team to perform this long and complex migration. It was great to collaborate with people who believe in quality, human-centric software and open source as much as we do.
A big thank you also goes out to all the volunteer moderators who help newcomers and keep things in order. They do an incredible job.
Spending time in the forum, reading conversations and answering questions is a great learning opportunity. Join the Arduino community now!
Forum Notes
User images (avatars) won’t be visible for a few hours because they’re being imported. There’s also some minor formatting in posts that hasn’t been applied yet, like emoticons and underlined text. There’s a job running in the background job which is working on things. Everything will appear automatically as soon as the process is complete. But we wanted to reopen the forum as soon as possible.
These are the most important things you need to know if you’re used to the old forum:
It automatically saves drafts while you’re typing.
The “Add Karma” button is not there any more because we now have message likes. If you want to show your appreciation, click the “Like” icon under a post.
The “Flag” button replaces the “Report to moderator” link.
You can configure your notification preferences on a per-category or per-topic basis by clicking the bell icon at the top-right.
There’s no “Print” button any more. A printer-friendly rendering is created when you print from your browser.
You can now bookmark your favorite posts. Click the avatar in the top right to access your bookmarks, notifications, mentions and history.
Should you notice issues with the new forum, let us know.
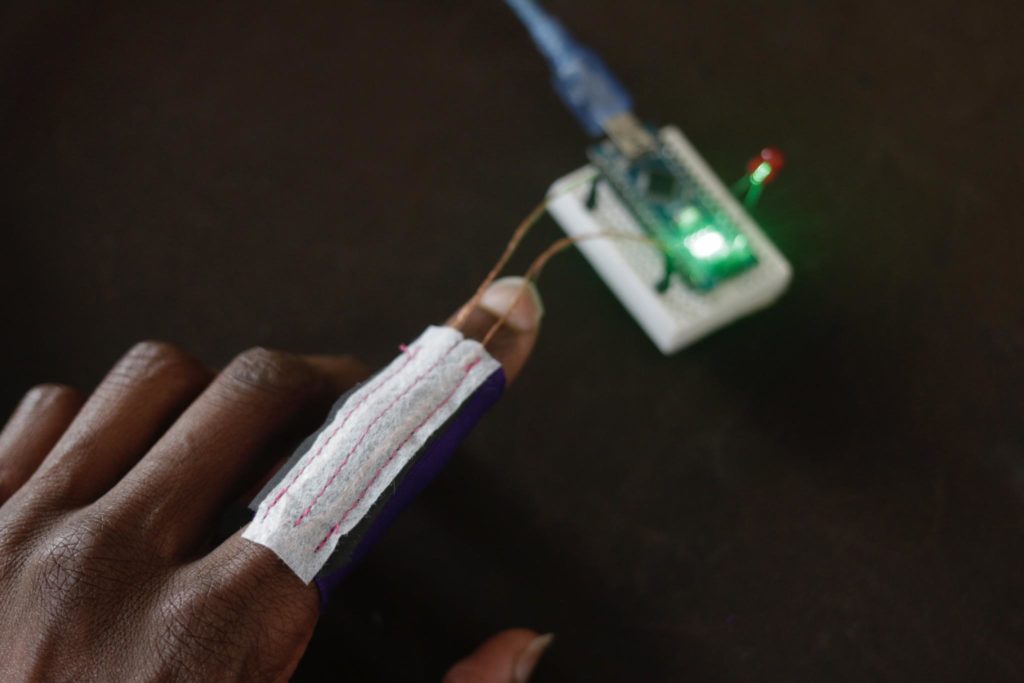
You can turn on an LED with a button or switch, but what about by bending your finger? Willpower Studios’ textile flex sensor, dubbed Finger Bend, presents a method for such an interface.
Inside the custom sleeve is a piece of piezoresistive stretch fabric, which is attached by copper threads to an Arduino Nano’s analog input pin. When a finger is curled, the light is then switched on and off again when straightened.
While an LED is interesting, this concept could be taken much further, perhaps using multiple digits for more intricate control. Details and code for the project is available in Willpower Studios’ write-up.
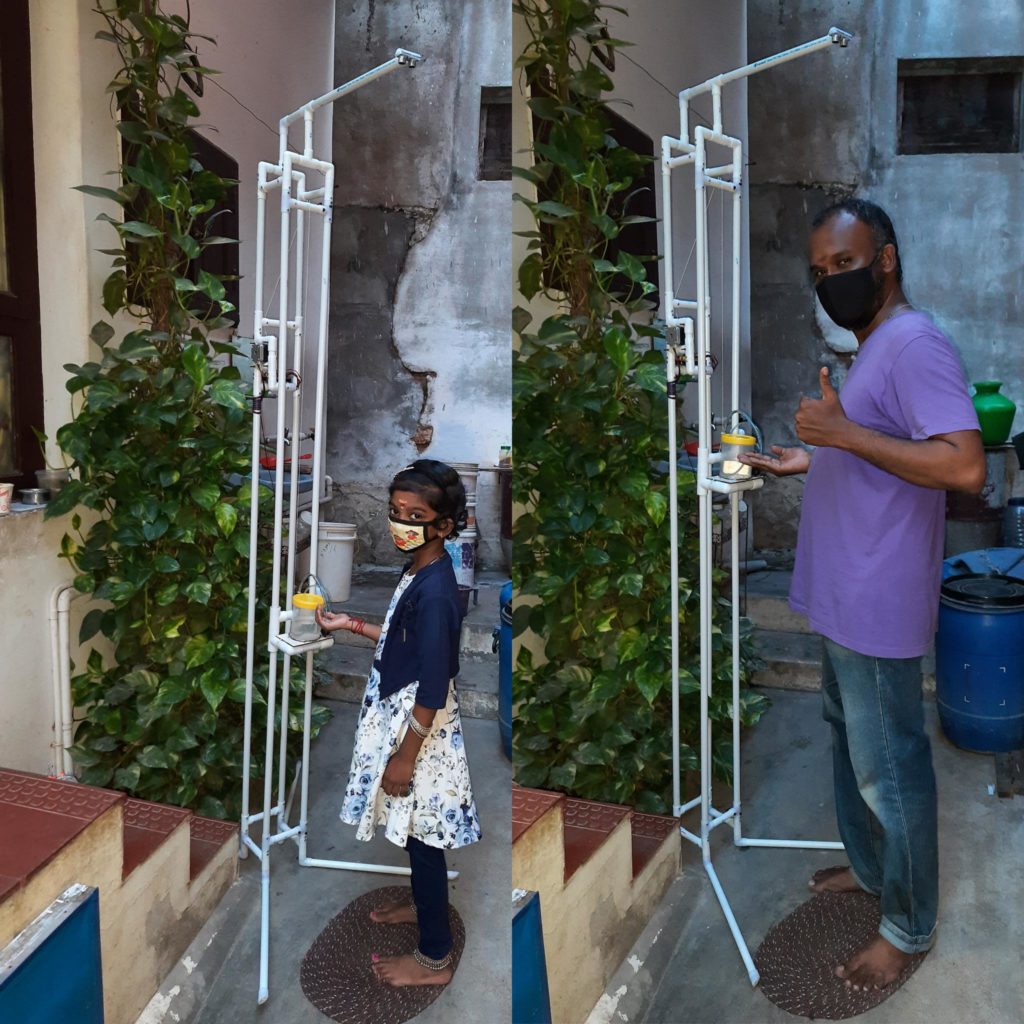
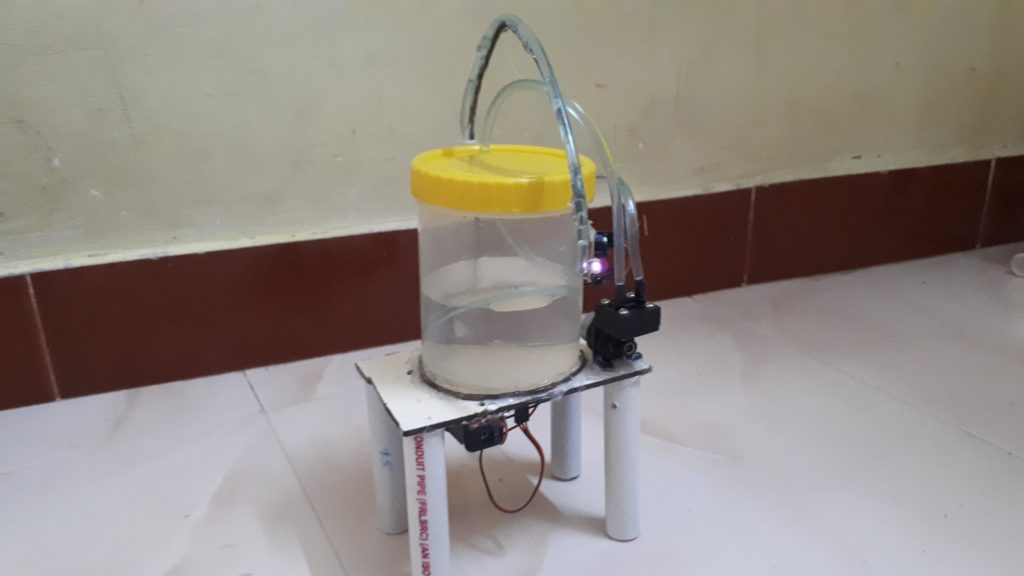
You’ve probably seen hand sanitizer stations popping up all over the place. While this seems to be a good thing, if you’re not exactly average height-wise, it’s likely they weren’t exactly designed for you. As a way to help both tall and short, and especially kids whose height varies considerably, Jegatheesan Soundarapandian has come up with an auto-adjustable stand.
The device, which is made from PVC pipe, measures your size using an ultrasonic sensor. A platform is then pulled into position via a stepper motor and string, under the control of an Arduino Uno and CNC shield. This presents you with hand sanitizer (or whatever else is needed) at a level customized just for you.
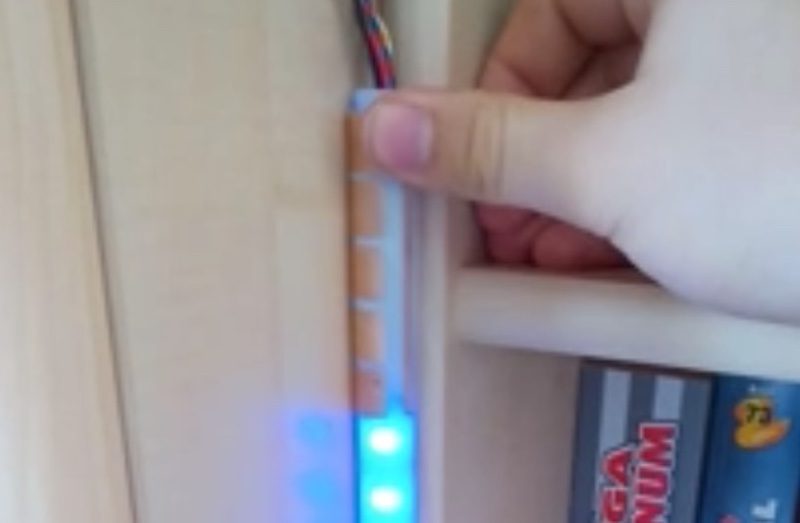
As spotted on Reddit, the Light Based Optical Productivity Enhancement System (LOPES) is an Arduino Nano Every-powered device that lights up depending on the tasks that you have left to complete. The Nano takes input from five copper touch sensor plates on the top, which enable you to add or remove jobs of different priorities.
Display is via addressable LEDs diffused by a tube, and importance is ranked as either green, yellow or red. As of now, it simply shows how much you have to do without specifics, however, its creator plans to eventually make an app to allow for further interface with a phone.
April 12th: Scheduled maintenance planned for the Arduino website
Arduino Team — April 9th, 2021
Don’t worry if you’re unable to access certain areas of the Arduino website next Monday (April 12th). We’re carrying out some scheduled maintenance to bring you a few exciting new features.
Primarily we’re updating the forum platform. This is a project we’ve been planning for a while, especially since the forums are getting so busy. The current system has served us well over the years, but it’s time for an upgrade.
Areas Affected by Scheduled Maintenance
The Arduino Forum will be offline for the entire day as it’s migrated to the new platform.
In order to take the community to the next level, we’re moving over to Discourse. This will give you a vastly improved user experience, a better interface and a lot more options for editing and formatting your posts. It was a pretty easy choice for Arduino, since Discourse is very well established, robust, and it’s also open source. As you know, this is a philosophy that’s at the core of everything Arduino, so it was important for us to choose a forum platform that has similar values.
Once we’ve moved everything over to Discourse and your new forum is up and running, we’ll give you lots more info on all the great new features and functions. Until then, please bear with us as the changes and upgrades are carried out.
This article was written by Per Tillisch from the Arduino Tooling Team.
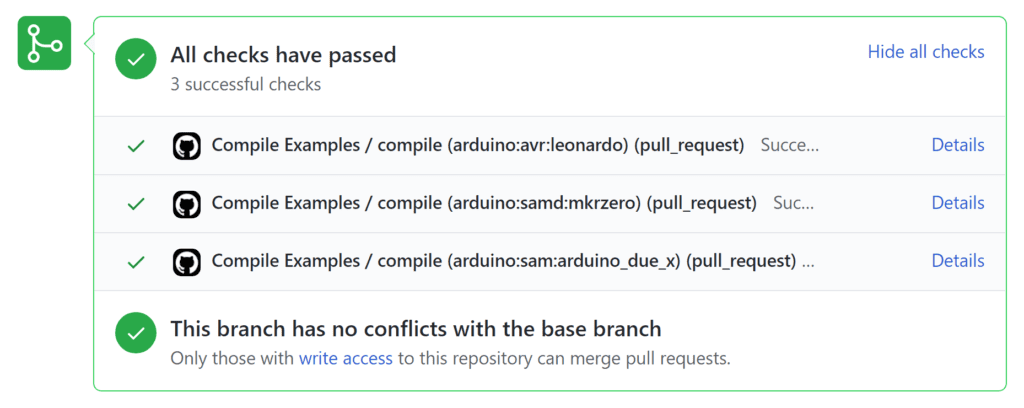
The Arduino team created some tools that make it easy to automate a check for whether your Arduino sketches compile. Used with GitHub Actions, the tools allow anyone to set up a simple “smoke test” on every commit and pull request made to a GitHub repository, with reports on the impacts of those changes.
These free, open source actions are now listed on the GitHub Marketplace.
Why do a compile test?
Although passing a “Does it compile?” check is not definitive proof of a working project, failure to compile is a sure sign of a non-working project! For this reason, it can provide a useful “smoke test”.
Even if you have more formal tests in place, a compilation check remains a valuable supplement, since it is able to catch incompatibilities with the Arduino build system that other tests will miss.
The biggest advantage of this approach is that, unlike other testing methods, it takes very little effort to set up and maintain. All that’s needed is to define a few basic parameters of the compilations, such as which Arduino boards to compile for and which library dependencies of the sketch need to be installed. After that, everything is automatic!
GitHub Actions
GitHub Actions is the preferred automation service for continuous integration in the Arduino firmware repositories. Let’s take a look at its fundamental concepts.
Workflows define the procedure that should run when a specific event occurs in the repository. For example, you might have a workflow that runs every time someone submits a pull request to your repository. Using GitHub Actions is only a matter of adding a workflow configuration file to your repository.
Actions are programs that do specific tasks. These programs are packaged in a manner that makes them easy to reuse in any GitHub Actions workflow. By using combinations of the many actions provided by the open source community, you can easily do complex things with simple, easy to maintain workflows.
Actions for Arduino projects
Several GitHub Actions actions are available for use with Arduino projects. One of these is arduino/compile-sketches. As you might have guessed from the name, this is a tool for compiling Arduino sketches.
A complete workflow to compile the sketches in a repository can be as minimal as this:
On every commit and pull request, this workflow searches the subfolders of the repository recursively for sketches and compiles them for the Arduino Uno. If compilation of any of the sketches has an error, the commit status will be set to failure.
Next, let’s take a look at a workflow that shows some of the other features of the arduino/compile-sketches action:
This is a workflow used to test the sketches that accompany a machine learning tutorial. There are a few differences from the previous workflow:
The tutorial’s sketches were written for the Arduino Nano 33 BLE board, so instead of compiling for the action’s default Arduino Uno board as in the previous workflow, the workflow was configured to compile for the Nano 33 BLE by specifying that board’s fully qualified board name (FQBN) identifier (arduino:mbed:nano33ble) via the action’s fqbn input.
These sketches require some libraries to be installed. The names of the libraries are specified via the action’s libraries input. This causes them to be installed from the Arduino Library Manager.
Just because we are compiling sketches, that doesn’t mean this action can only be used to test sketches. Compiling a sketch is also testing whether the libraries and boards platform used by that sketch will compile. Continuous integration in library and platform repositories is especially important to avoid breaking components other people rely upon. These projects often have multiple sketches that need to be compiled for multiple boards, making automation of the task even more beneficial. If you’re a library or platform developer, we strongly recommend spending a little time to set up a workflow.
This is the workflow used to test the ArduinoBLE library:
This library supports multiple architectures, so the compilations must be done for several boards. This is done by creating a job matrix. A copy of the compile-examples job runs for each of the boards listed under the jobs.compile-examples.strategy.matrix.fqbn[] key, avoiding the need to define a separate job for each board in the workflow.
Don’t let its ease of use for basic applications fool you into thinking it’s not suitable for advanced use cases. arduino/compile-sketches is a powerful general purpose tool for compiling Arduino sketches. The configuration options provide a lot of flexibility that will make it useful no matter what your requirements are. See the documentation for details: https://github.com/arduino/compile-sketches#readme
The arduino/compile-sketches action can be configured to report the change in memory usage and compiler warnings resulting from commits and pull requests. These will be displayed in the build log:
A companion action, arduino/report-size-deltas, comments on pull requests with a report of the resulting change in memory usage of the sketches that were compiled by the arduino/compile-sketches action:
The workflow for arduino/report-size-deltas is very simple, and doesn’t require any modifications to be used in your repository:
Give it a try!
Continuous integration can reduce the tedious task of manual testing. You probably wouldn’t enjoy compiling multiple sketches for multiple boards for every commit and every pull request, but these new actions are happy to do it for you.
These actions are especially useful for pull request triage. They provide an initial “smoke test” of the pull request without any effort from the repository maintainer. If the workflow job for the pull request fails or reports an undue increase in memory usage, the contributor of the pull request will often work to resolve the issues revealed by the CI system on their own initiative, reducing some of the effort required to review contributions.
We use these actions in the Arduino firmware repositories and are sure you’ll also find them useful for your projects.
Support and feedback
You can discuss or get assistance with setting up continuous integration for your Arduino projects on the Arduino Forum.
Feedback is welcome! Please submit feature requests or bug reports to the issue trackers:
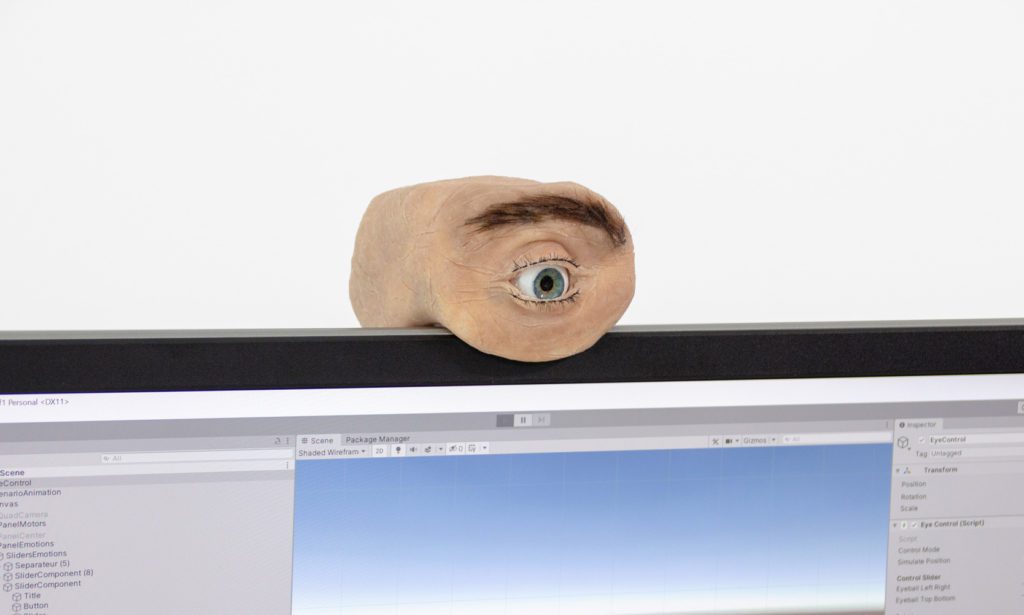
How much of what you did today has been monitored and recorded? If you don’t know, or haven’t considered it, then this anthropomorphic webcam by researchers at Saarland University in Germany might just start up that mental conversation. That’s because their Eyecam is always watching.
The device looks like an incredibly realistic eyeball, complete with surrounding flesh, eyelids, and an eyebrow. Inside is a series of six servo motors that allow it to gaze around the room and emote, under the control of an Arduino Nano. The Eyecam also includes a tiny HD camera, which is fed into a Raspberry Pi Zero to be recognized by a computer as a plug-and-play webcam.
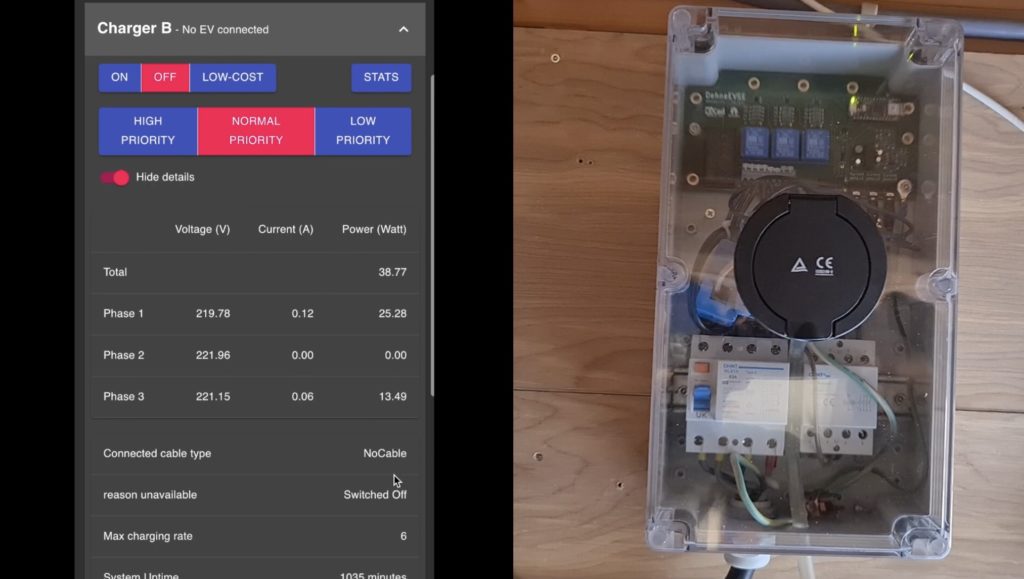
Sebastian Dehne decided to build a custom electric vehicle (EV) charging station for his Nissan Leaf from scratch, as what he calls “a real full stack project.” He notes that creating your own gives you total control over the system, and it’s both fun and cheaper than purchasing a ready-made device.
The aptly named DehneEVSE is based on an Arduino Nano 33 IoT for control and current/voltage sensing, and connects via WiFi to a server that handles charging logic. UI consists of a web app that uses WebSockets to listen for real-time updates and display power consumption for all three phases. Aside from the stats, the app enables Dehne to turn charging on/off or to a low-cost setting, which regulates charge depending on the price of energy at a particular time.
A short demo of the DehneEVSE can be seen in the video below, while more details on the station including links to the files and code are available in Dehne’s blog post.
With over 170 creative projects sent in from around the world, choosing just 10 winners for the Arduino Day Community Challenge was almost impossible.
Hopefully you were with us on Arduino Day, and saw the winning projects being unveiled during the live stream. But we also wanted to send out another big congratulations to the inventive Arduino lovers who won.
So let’s take another look at the 10 projects that won a big box of Arduino goodies for their creative contraptions.
Fingerprint Door-Lock
Anvesh Pathak
Using an Arduino Uno with a fingerprint sensor module, Anvesh created a smart, keyless door lock. A great project that has very clear, and desirable, applications. It doesn’t necessarily have to be for an external door either. This would work just as well on a cupboard, garage or even a locked box.
Anvesh went a step further in creating a great demo by incorporating a servo motor into his model house.
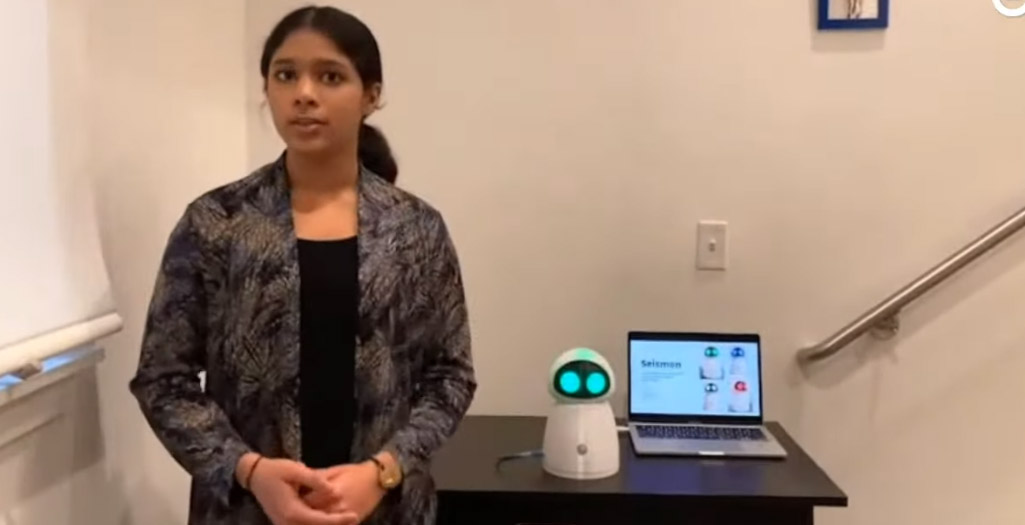
Project Seismon
Swara Kadam
It’s always exciting to see an Arduino project that can have a very real impact on the world around us. Swara’s device is designed to help schools detect and respond to earthquakes, warnings and preparatory drills.
Packed up inside a superb robotic design, it’s easy to imagine seeing Seismon on the store shelves one day.
Smart Pull-Up Bar
Nikolas Babetas
Sometimes the most inspiring thing about an Arduino project is when you see the ingenious, yet simple solutions people come up with. For example, the way Nikolas solved the detection method for beginning his workout.
A laser light mounted on the pull-up bar is broken when he grips it, kicking the Tic-Tac Motivational Distribution System into action. And yes, that’s Ah-Ha’s Take On Me bleeping away in the background.
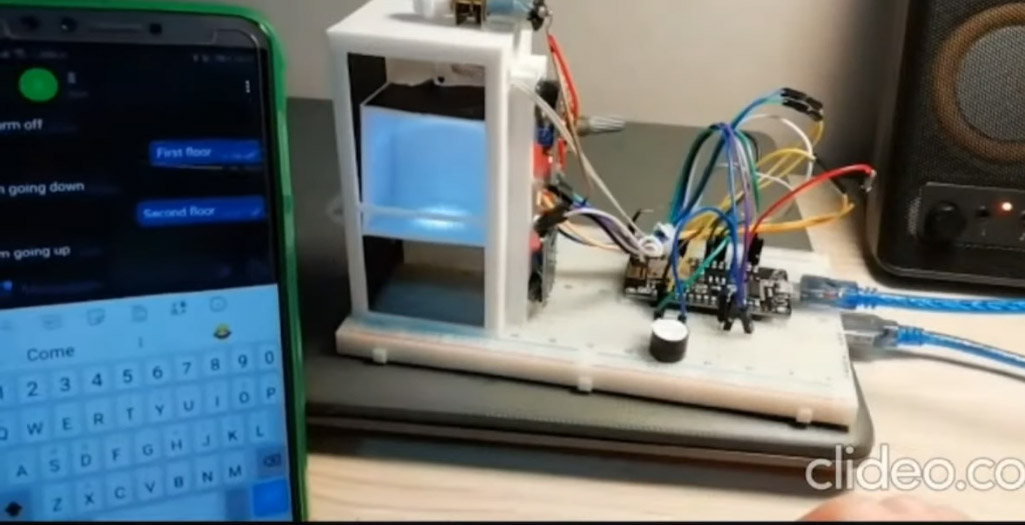
Elevator Project
Federico Magnelli
Federico chose an elevator to demonstrate his project, but what’s especially creative is that it has unlimited applications. He’s put together a system that lets him send remote commands via Telegram to an Arduino.
His example project shows how text messages can be used to remotely control lights, motors, audio and more. Anything you connect to a board, really.
Fidget Muse
Indigo Knecht
A great multifunction device inspired by the fidget cube, Indigo’s project is as educational as it is creative.
It’s all about inputs and outputs. This is a great example that anyone could use to easily learn about the multiple outputs that are possible from all kinds of Arduino Nano controls.
Orguino
Johan Halmen
An Arduino MKR1010 along with 61 servos have been used to renovate and automate an organ that was built in 1902. And if that’s not impressive enough, wait until you hear Johan’s song (and the new Arduino anthem), “The Arduino Nerd”.
Sing along, nerds!
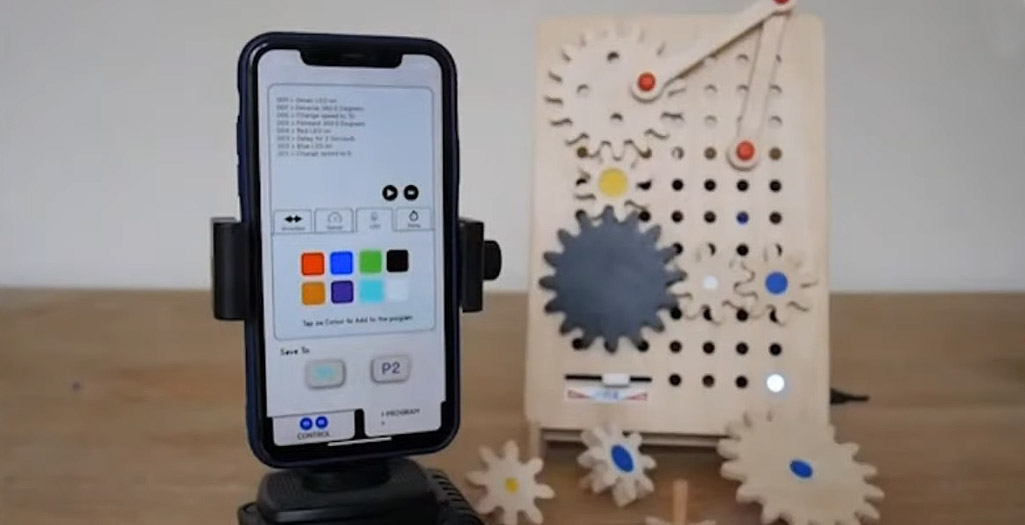
Gear Machine Project
James Clarke
Some of the most impressive Arduino projects out there are the ones that teach you about more than just electronics. James’s modular Gear Machine is powered by an Arduino Micro, and gives you a great way to learn about the mechanics of gears, as well as how to drive them.
IoT High Tech Mini Greenhouse
Maciej Gala
We love to see practical projects that also look amazing. The lighting system that Maciej has built into his IoT greenhouse is both effective and attractive. It’s also easy to see how the features of his project could easily be scaled up to any size of gardening application.
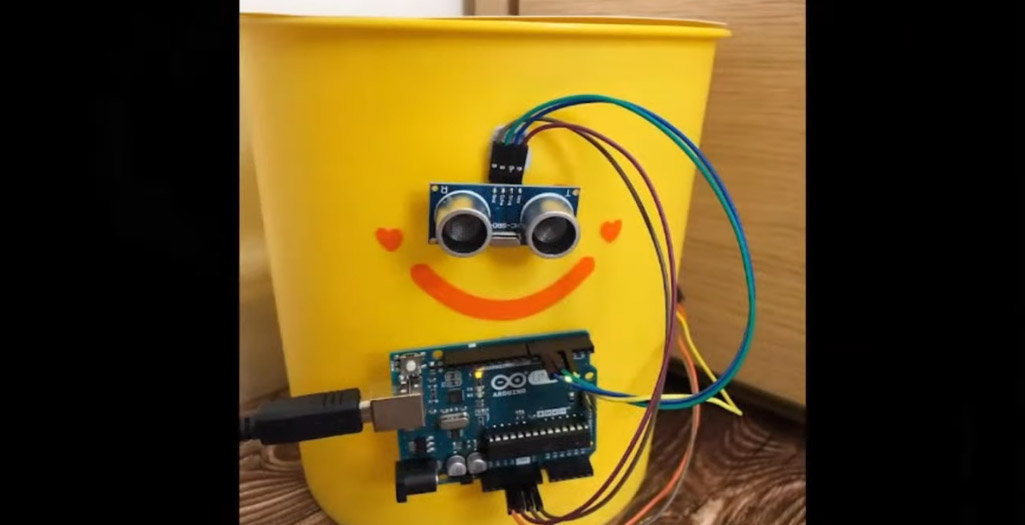
Smart Trash Can
Carmen Cheung
As simple as Carmen’s Smart Trash Can is, it’s still one of the best examples of a creative, innovative, problem solving project we’ve seen. Especially with things the way they’ve been during 2020 and 2021, a remote, contactless trash can lid is just a brilliant, practical idea.
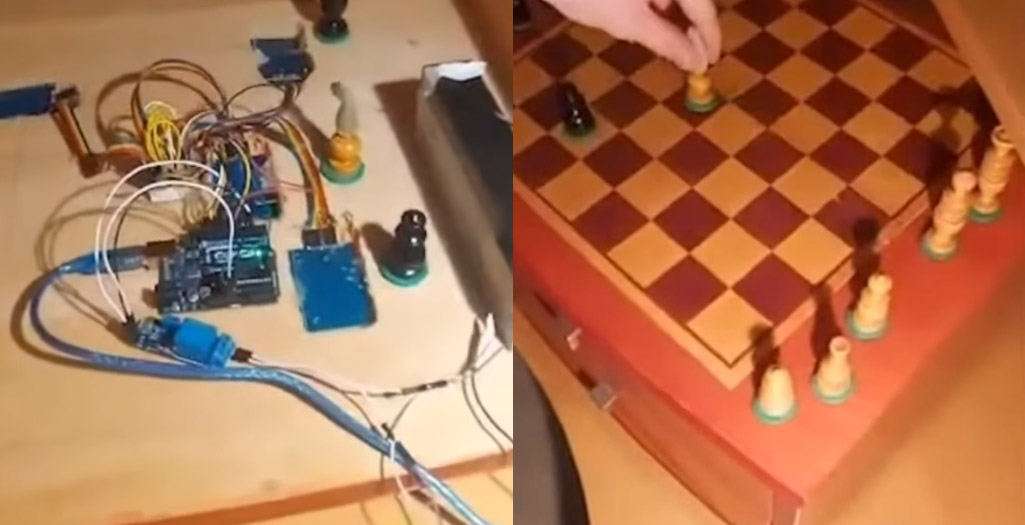
Chess Board Puzzle
Anastasis Malakozis
This is an inspired way to keep your valuables safe. Anastasis has rigged up an ingenious door lock that wouldn’t look out of place in the Wayne mansion as a sneaky way to get into the Bat Cave. Put the chess pieces in just the right place, and the lock opens.
Congratulations again to all the Arduino Day Community Challenge winners, and thanks to every who sent us their projects. You can find a lot more Arduino projects over on the Project Hub, and don’t forget to check out the rest of the Arduino Day live stream if you missed it on the day.
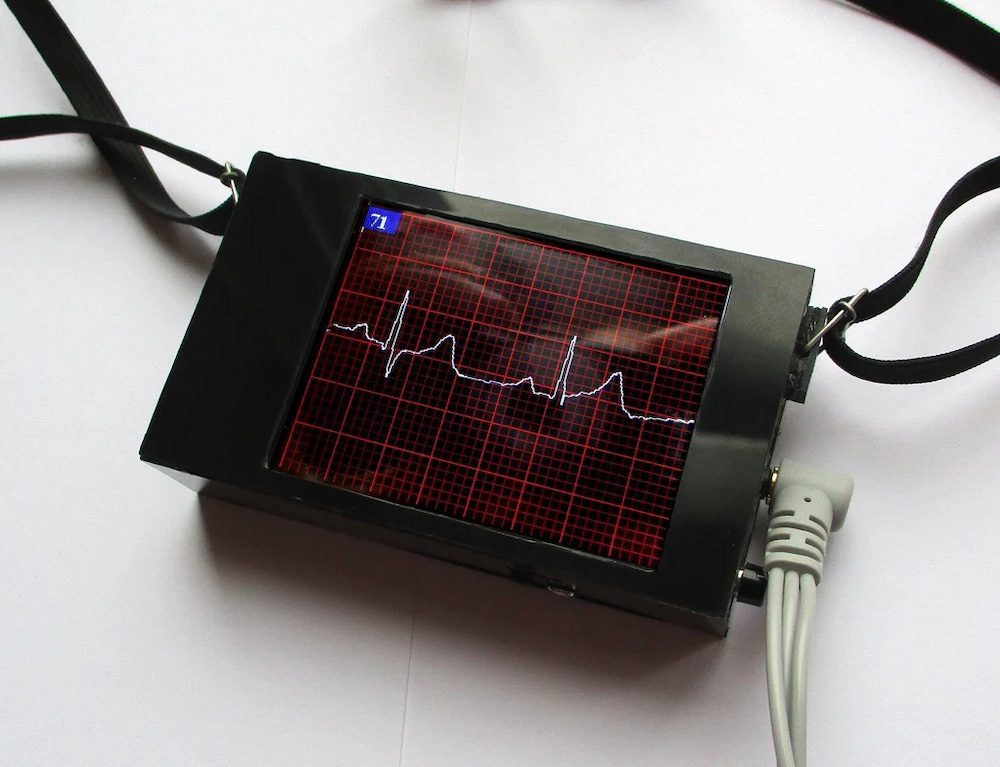
As Peter Balch explains, COVID-19 can sometimes give rise to cardiac complications. So, while not presented as an actual piece of medical equipment, he decided to construct an ECG (electrocardiogram) unit using an Arduino Nano for control along with an integrated 320×240 SPI display.
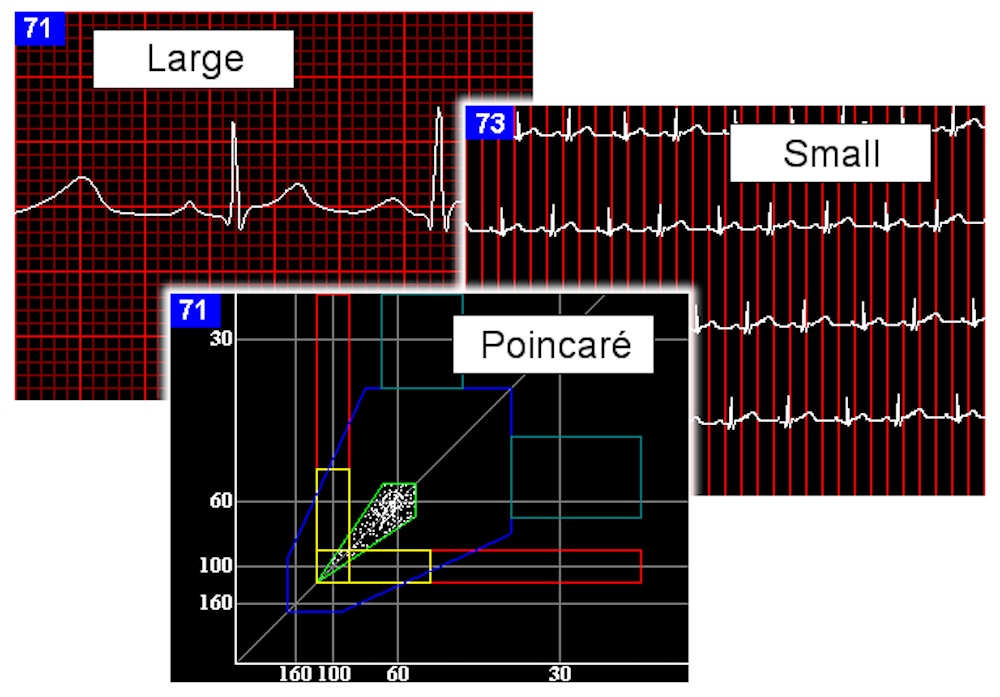
His battery-operated device features an AD8232 heart rate monitor module to acquire data from the human subject. This is connected to its wearer via electrode pads, or to a fake pulse generated by the Arduino for testing. The system allows you to view one or two heartbeats on its screen in a large format as well as many heartbeats in a smaller setup. A Poincaré display mode is also available, which plots the time between heartbeats.
Um dir ein optimales Erlebnis zu bieten, verwenden wir Technologien wie Cookies, um Geräteinformationen zu speichern und/oder darauf zuzugreifen. Wenn du diesen Technologien zustimmst, können wir Daten wie das Surfverhalten oder eindeutige IDs auf dieser Website verarbeiten. Wenn du deine Einwillligung nicht erteilst oder zurückziehst, können bestimmte Merkmale und Funktionen beeinträchtigt werden.
Funktional
Immer aktiv
Die technische Speicherung oder der Zugang ist unbedingt erforderlich für den rechtmäßigen Zweck, die Nutzung eines bestimmten Dienstes zu ermöglichen, der vom Teilnehmer oder Nutzer ausdrücklich gewünscht wird, oder für den alleinigen Zweck, die Übertragung einer Nachricht über ein elektronisches Kommunikationsnetz durchzuführen.
Vorlieben
Die technische Speicherung oder der Zugriff ist für den rechtmäßigen Zweck der Speicherung von Präferenzen erforderlich, die nicht vom Abonnenten oder Benutzer angefordert wurden.
Statistiken
Die technische Speicherung oder der Zugriff, der ausschließlich zu statistischen Zwecken erfolgt.Die technische Speicherung oder der Zugriff, der ausschließlich zu anonymen statistischen Zwecken verwendet wird. Ohne eine Vorladung, die freiwillige Zustimmung deines Internetdienstanbieters oder zusätzliche Aufzeichnungen von Dritten können die zu diesem Zweck gespeicherten oder abgerufenen Informationen allein in der Regel nicht dazu verwendet werden, dich zu identifizieren.
Marketing
Die technische Speicherung oder der Zugriff ist erforderlich, um Nutzerprofile zu erstellen, um Werbung zu versenden oder um den Nutzer auf einer Website oder über mehrere Websites hinweg zu ähnlichen Marketingzwecken zu verfolgen.