Being able to design your own custom smart home device is a great way to both have fun experimenting with various hardware/software and to escape the walled IoT device ecosystems that so many users find themselves trapped within. One maker who goes by mrdesha came up with a smart heater solution that utilizes the new Arduino Oplà IoT Kit to provide voice functionality to their room heater.
In terms of hardware, mrdesha’s project is quite simple as it just needs a few parts to function. The main component is the MKR IoT Carrier board from the Oplà Kit, along with the MKR WiFi 1010 that fits into it. Because the Oplà has two relays onboard, a pair of buttons on the heater’s remote were connected to the common (COM) and normally closed (NC) terminals, allowing for a single GPIO pin to digitally “press” each button.
Over in the Arduino Cloud, three variables were created that control various aspects of the heater, including on/off, set high-power mode, and set low-power mode. These variables are also all compatible with the Alexa integration, meaning that a user can simply tell their smart home speaker to adjust the heater automatically.
Your brand-new issue of the free Hello World magazine for computing educators focuses on all things health and well-being, featuring useful tools for educators, great ideas for schools, and inspiring projects, ideas, and resources from teachers around the world!
One such project was created by the students of James Abela, Head of Computing at Garden International School in Kuala Lumpur, Raspberry Pi Certified Educator, founder of the South East Asian Computer Science Teachers Association, and author of The Gamified Classroom:
Protecting children from breathing hazardous air
In 2018, Indonesia burned approximately 529,000 hectares of land. That’s an area more than three times the size of Greater London, or almost the size of Brunei. With so much forest being burned, the whole region felt the effects of the pollution. Schools frequently had to ban outdoor play and PE lessons, and on some days schools were closed completely. Many schools in the region had an on-site CO2 detector to know when pollution was bad, but by the time the message could get out, children had already been breathing in the polluted air for several minutes.
The air pollution from a forest fire gets dispersed by winds and can spread way beyond the area of the fire.
My Year 12 students (aged 16–17) followed the news and weather forecasts intently, and we all started to see how the winds from Singapore and Sumatra were sending pollution to us in Kuala Lumpur. We also realised that if we had measurements from around the city, we might have some visibility as to when pollution was likely to affect our school.
Making room for student-led projects
I’ve always encouraged my students to do their own projects, because it gives programming tasks meaning and creates something that they can be genuinely proud of. The other benefit is that it is something to talk about in university essays and interviews, especially as they often need to do extensive research to solve the problems central to their projects.
This project was […] a genuine passion project in every sense of the word.
James Abela
This project was much more than this: it was a genuine passion project in every sense of the word. Three of my students approached me with the idea of tracking CO2 to give schools a better idea of when there was pollution and which way it was going. They had had some experience of using Raspberry Pi computers, and knew that it was possible to use them to make weather stations, and that the latest versions had wireless LAN capability that they could use. I agreed to support them during allocated programming time, and to help them reach out to other schools.
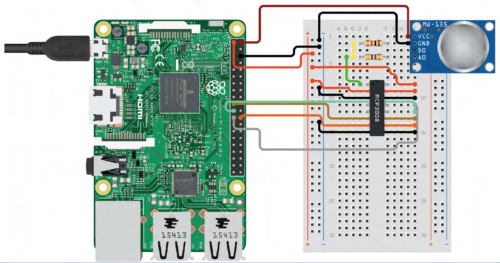
Circuit design of the CO2 sensor using just Raspberry Pi, designed on circuito.io
I was able to offer students support with this project because I flip quite a lot of the theory in my class. Flipped learning is a teaching approach in which some direct instruction, for example reading articles or watching specific videos, is done at home. This enables more class time to be used to answer questions, work through higher-order tasks, or do group work, and it creates more supervised coding time.
I was able to offer students support with this project because I flip quite a lot of the theory in my class.
James Abela
I initially started doing this because when I set coding challenges for homework, I often had students who confessed they spent all night trying to solve it, only for me to glance at the code and notice a missing colon or indentation issue. I began flipping the less difficult theory for students to do as homework, to create more programming time in class where we could resolve issues more quickly. This then evolved into a system where students could work much more at their own pace and eventually led to a point at which older students could, in effect, learn through their own projects, such as the pollution monitor.
Building the pollution monitor
The students started by looking at existing weather station projects — for example, there is an excellent tutorial on the Raspberry Pi Foundation’s projects site. Students discovered that wind data is relatively easy to get over a larger area, but the key component would be something to measure CO2. […]
Check out issue 17 of Hello World to read the rest of James’s article and find out all the details about the hardware and software his students used for this passion project. He says:
This project really helped these students to decide whether they enjoyed the hardware side of computing, and solving real-world issues really encouraged them to see computing as a practical subject. This is a message that has really resonated with other students, and we’ve since doubled the number of students taking A level computer science.
James Abela
Download the new Hello World for free!
Issue 17 of Hello World is bursting with inspiring ideas for teaching your learners about computing in the context of health and well-being. And you’ll find lots more great content in its 100 pages!
James’s article is also a wonderful example of an educator empowering their students to build a tech project they care about. You’ll discover more insights and practical tips on making computing relevant to all your learners in the following articles of the new Hello World issue:
Inspiring Young People With Contexts They Care About
Computing for all: Designing a Culturally Relevant Curriculum
Going Back to Basics: Part 2 — a follow-on from issue 16 about how to take beginner digital makers through their first physical computing projects
Download the new issue of Hello World for free today:
We’ve also just released the first-ever special edition of Hello World — The Big Book of Pedagogy — which focuses on approaches to teaching computing in the classroom. Download it for free today.
And wherever you are in the world, don’t forget to listen to the Hello World podcast, where each episode we dive into a new topic from the magazine with some of the computing educators who’ve written for us.
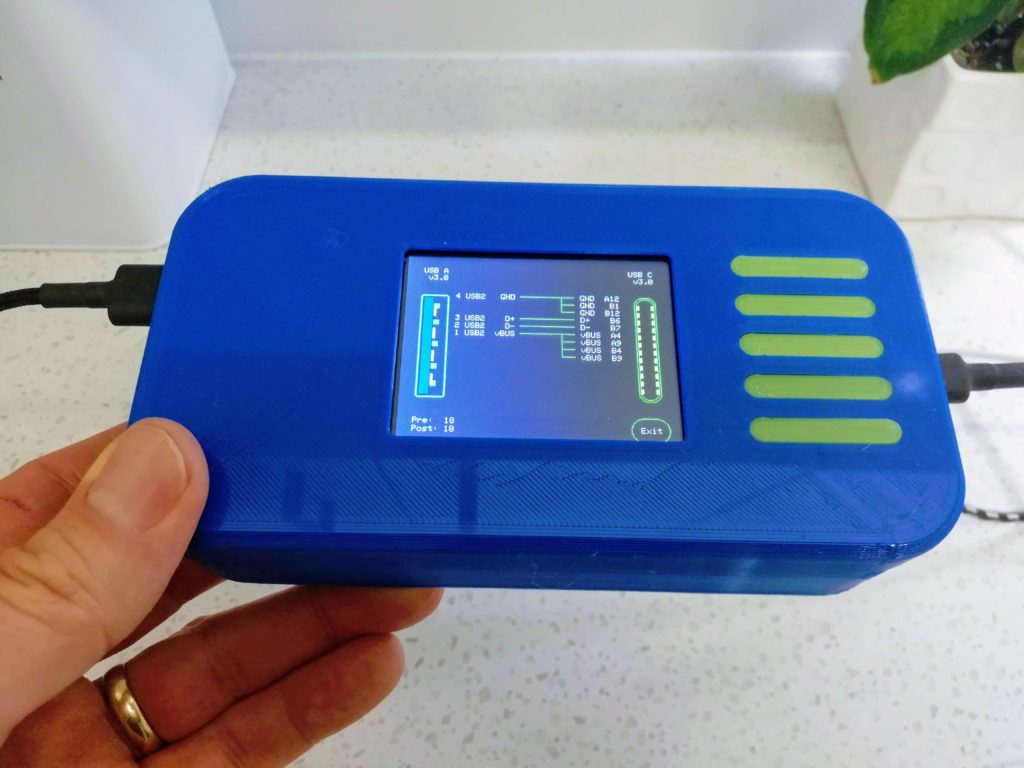
Cables come in a wide variety of styles and attempting to diagnose a potential fault in one of their tiny wires can be tricky, especially without access to fancy test equipment. To combat this problem, TechKiwiGadgets created a small device called the Touch Screen Cable Tracer, which has several varieties of connectors on both ends that allow for a USB and RJ45 cable to be plugged in and subsequently tested.
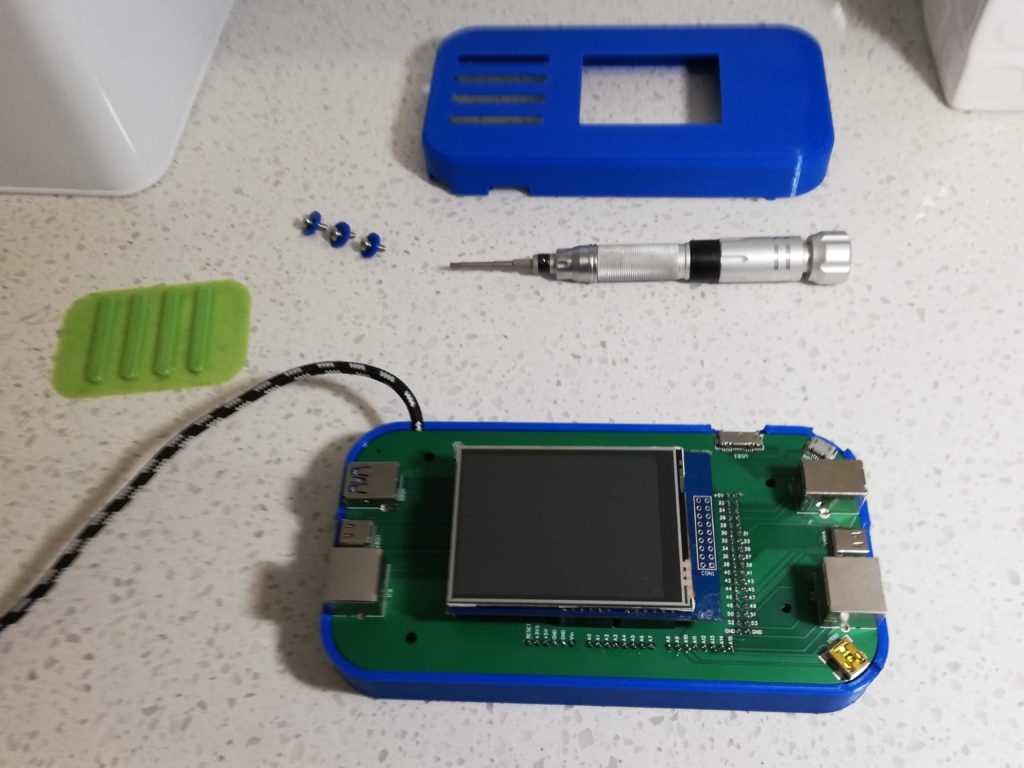
The board selected for this project was an Arduino Mega due to its large amount of RAM and GPIO pins. Placed on top of this was an ILI9325 2.8” TFT screen, which shows the menu for the cable tracing device and the current state of the attached cable. TechKiwiGadgets also designed, fabricated, and assembled a custom cable tracer shield that snaps onto the Arduino and exposes a mirrored set of connectors on either end.
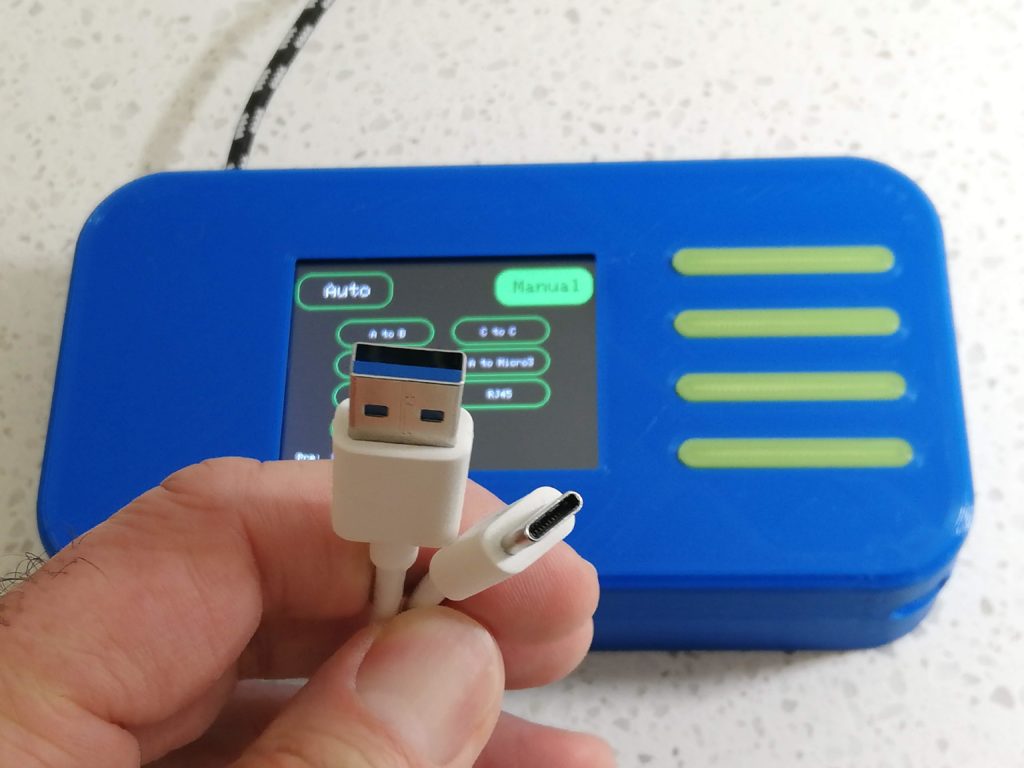
After putting the Touch Screen Cable Tracer together and placing it into a custom enclosure, it was time to test it out. There are two modes (auto and manual) that can be used to select the type of cable being used. Once the cable has been detected, the Mega attempts to pass current through the wires and read it on the other end. If a fault has occurred, it shows up on the screen as a missing conductor.
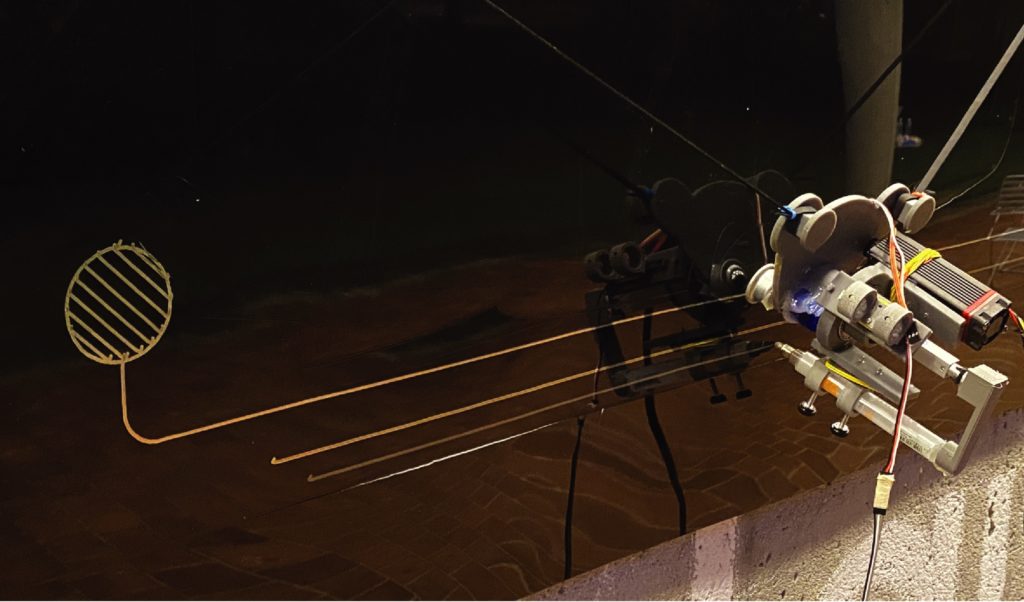
When we think of circuits, we tend to picture wires or PCB traces. But a circuit is anything that conducts electricity between components. Today we have more options than ever before thanks to material like conductive ink and thread. Utilizing conductive ink on a large scale, Duco is an open source wall-climbing robot that brings interactivity to vertical everyday surfaces.
Duco’s inspiration came from Sandy Noble’s fantastic Polargraph, which was a hanging pen plotter robot that could draw large images. But those images didn’t serve any purpose beyond visual appeal. Duco takes the Polargraph idea into a whole new direction. By swapping between special pens, Duco can draw conductive, dielectric, cleaning, or decorative lines on walls. Those combine to create multilayer functional circuits.
An Arduino Uno board controls Duco through a motor shield. It has two stepper motors, a servo motor, a linear actuator, and a UV light. It is capable of switching between two different pens — normally the conductive and dielectric ink. The UV light cures the ink after Duco applies it to a wall. Most of Duco’s frame parts were 3D-printed.
In one demonstration, Duco drew a working piano circuit onto a wall. Once the components, including control boards and speakers, were added to the circuit, people could play the piano by touching the conductive pads. In another demonstration, Duco turned a wall into a large capacitive touch sensor grid similar to a massive track pad. Duco’s creators even experimented with a laser module add-on, which let the robot cut the circuit “substrate” material.
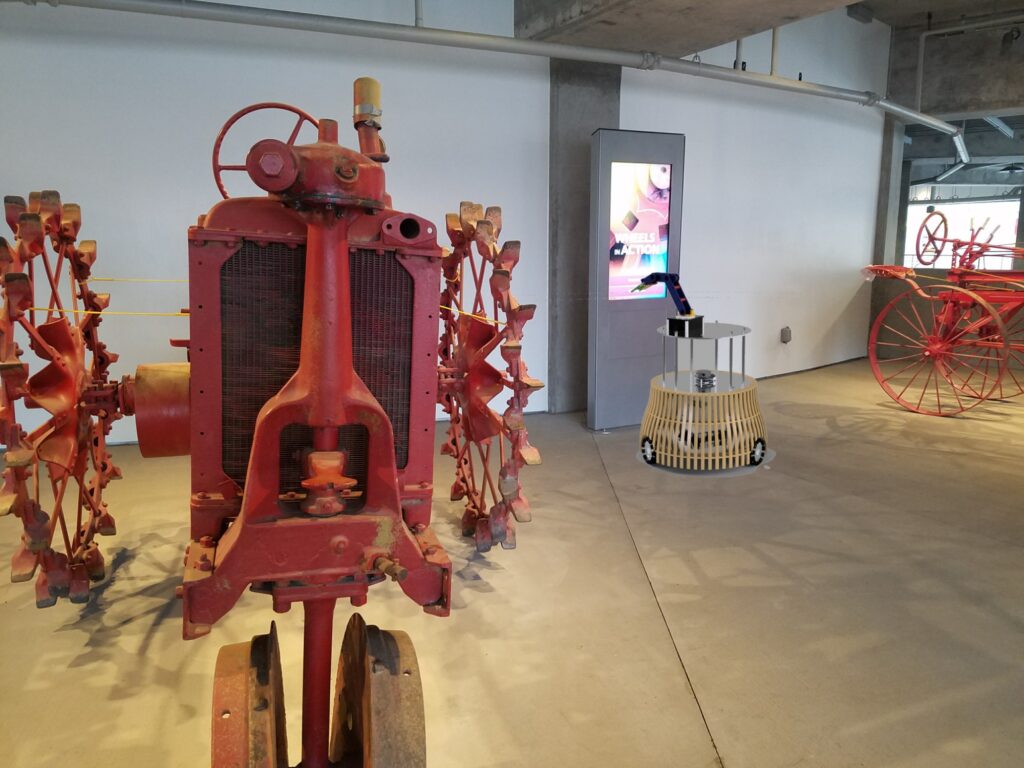
Museums allow people to explore topics in history, science, and much more through the use of exhibits that are often comprised of screens or some other interactive medium. Staff are given the role of visiting each one periodically and checking to see if they still work correctly as well as guide visitors around the area, thus taking them away from other tasks. To solve this problem, a pair from EDM Studio in Vancouver (Will Donaldson and Darran Edmundson) wanted to build an autonomous telepresence robot, called “OMNi,” which could do both on its own.
The system they came up with relies on a set of three omni wheels placed in a triangle formation around a circular base plate for creating precise movements. Positional feedback is gathered by measuring the motors’ RPM with a closed-loop PID controller/Arduino Nano combination and sending that information via I2C to a central Raspberry Pi 4. There is also a small LIDAR module on the robot that gathers point-cloud data and constructs a digital map for autonomous navigation and positioning.
The robot was designed with modularity and expandability in mind, which is why the top plate has an ample number of holes drilled into it for attaching certain accessories. One of these is a robotic gripper that utilizes servo motors to grab objects or touch a screen.
To read more about how OMNi was constructed and used in a museum setting, you can read the Donaldson and Edmundson’s writeup here on Hackaday.io.
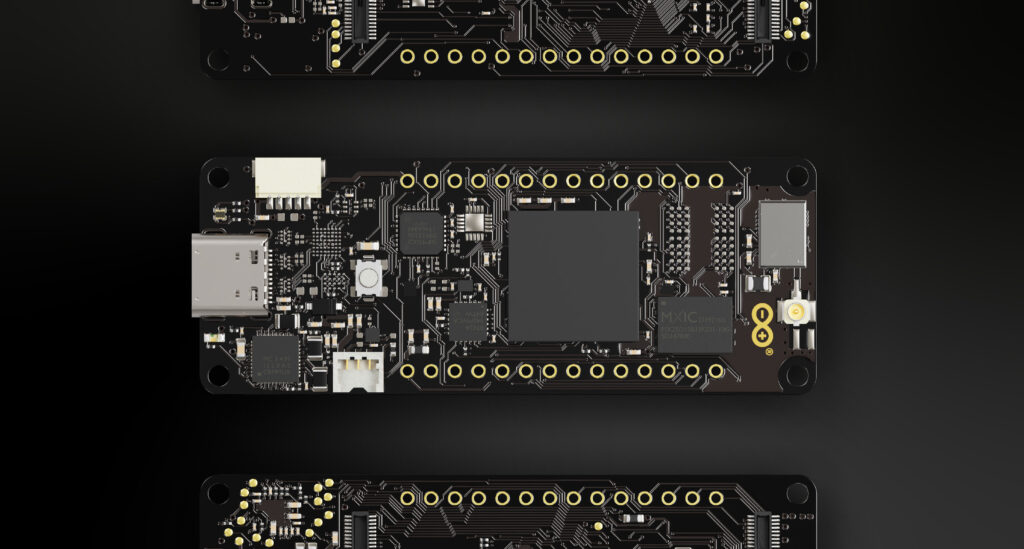
We launched the powerful Portenta H7 last year. The more targeted Portenta H7 Lite just a few weeks ago. And we’re back (already!), with another new product that fills the gap between the previous two versions.
It’s known as Portenta H7 Lite Connected, but we like to call it “the best of both worlds.”
The Portenta H7 Lite Connected is powerful, with integrated wireless connectivity, yet remains cost-optimized. You could think of it as the H7 with only one secure element and no high-resolution video interface. Or if you prefer, the H7 Lite with the ability to connect.
Adding this third iteration to the Portenta family and Arduino Pro ecosystem is our way of saying we want to be at our your side. No matter what smart project you are working on. You can always count on Arduino’s reliability, versatility, and ease of implementation; picking the product that best suits your needs.
Portenta H7 Lite (left), H7 (center) and H7 Lite Connected (right)
Here’s where the Portenta H7 Lite Connected fits into the Arduino ecosystem.
If you need excellent computational power to deploy AI on the edge.
You’re building a solution that will interact with other robotics systems, and therefore does not require a high-resolution video interface.
Prototyping an idea that you know will need to connect to WiFi but is still not at the stage where you want to invest in a fully-fledged Portenta H7.
Get the exact features you need with three options to choose from in the Portenta H7 family. And remember, the 80-pin high-density connectors at the bottom of every Portenta mean you can simply upgrade to a different version at any time.
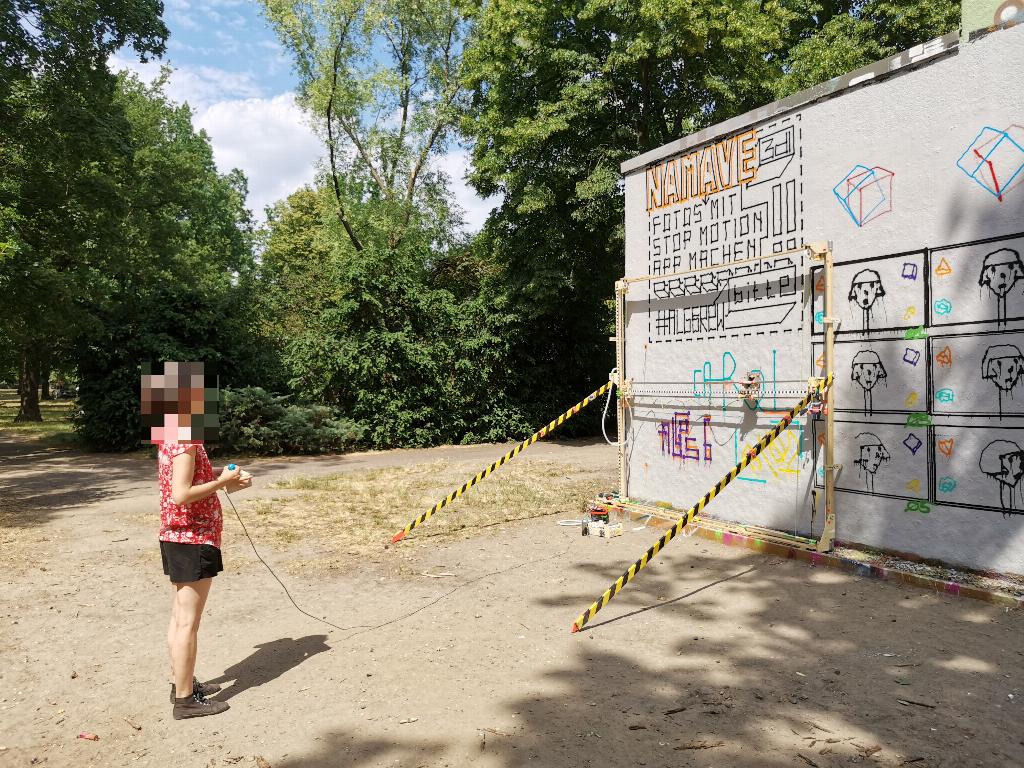
After visiting the large graffiti walls near his workshop in Berlin, Niklas Roy wanted to get involved by constructing a machine that can do the painting for him. In its most basic form, the system — which Roy calls the Graffomat — consists of two axes that work together to paint either vector or raster images.
The vertical Y axis is driven via a cordless drill, which spins a metal rod to raise or lower the spray can gantry. To the side is a second drill that spins a pulley to move the gantry left or right. The current position of the spray can is tracked by using phototransistors that detect alternating black and white patterns on a tape.
An Arduino Nano was selected as the brains of the operation, and it works by reading in data packets that contain positions or commands. If a movement is needed, the Nano outputs PWM pulses to either the X or Y axis H-bridge motor driver and rotates the drill until the target coordinate is reached. There is also a way to control the machine over the Internet in real-time using a Node.js web server to receive commands and forward them to the Graffomat.
After the system had been built, Roy wanted to begin painting. His first test was a simple “Hello World” vector art graphic, but he then shifted his efforts to a much more complicated picture that emulates an inkjet printer by spraying four matrices of CYMK dots across the wall to produce an image.
You might have noticed that the shopping experience on the Arduino Store has changed a little. We wanted to let you know what we’ve been working on to supercharge the store.
Arduino Store — A New Experience
On the surface of the Arduino Store, you’ll notice a slightly different layout. There are some new features, and it’s all much smoother. It’s even running around 30% faster. But in the background this has been quite a monumental task.
We’ve been researching for some time to figure out the best way to bring you a frictionless, enjoyable experience when you visit the official Arduino store. As you can imagine there are a lot of options out there when it comes to e-commerce platforms.
Let’s take a look at a few of the new features you’ll be seeing when you visit.
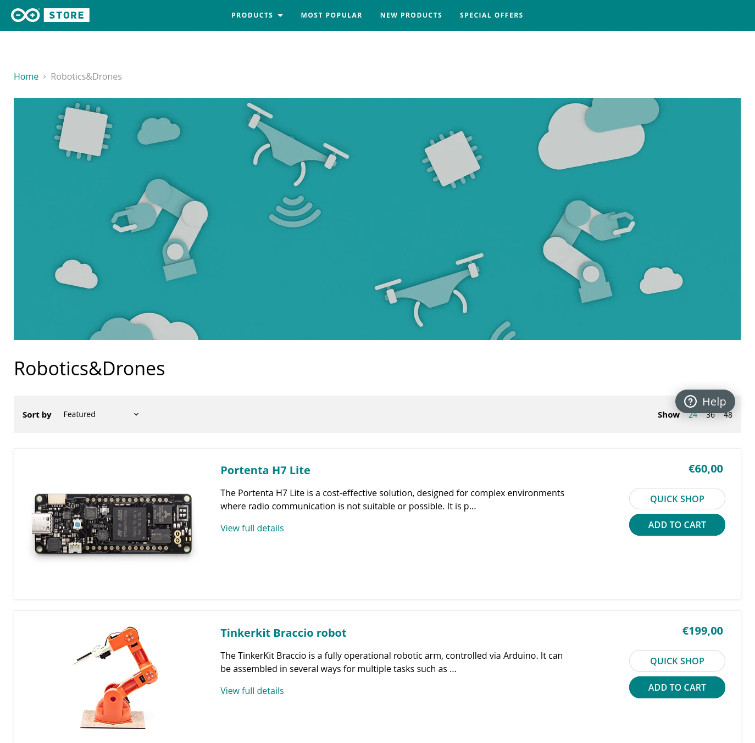
A New Way to Find Everything
The navigation has been simplified quite a lot. We shop online too, and know how important it is to be able to find the products you want quickly and easily. So the new store navigation makes it easy to hone in straight away on the products you’re looking for.
But we’ve also worked on different ways to help provide inspiration. After all, you might come to the store wanting to get started on your home automation system. In that situation, you don’t have a particular board in mind. Just an application.
So you can now browse through the store by feature. Whether it’s home automation, IoT or robotics, you can filter the Arduino devices that meet your needs.
The same goes for types of devices. Open up a page that just shows you sensors, shields or servos. Or maybe you’re working in educational technology, and want to see what’s available for university students, or high schools.
Extra Payment Methods
You can use any credit or debit card very easily now, or go with a PayPal option if you prefer. As we continue to work on the store in the background, more payment options will come online. But for now, you’re safe and secure with lots of easy options available.
Once your order’s in, you’ve got lots of great tracking options too. You can get updates via SMS text messages now. Or if you prefer, log into your Arduino Store account with the official Shopify app. Your notifications and order statuses are always right there, that way, at a moment’s notice.
On top of all the other improvements, our advanced customer care is still firmly in place. So any comments, questions or issues can be resolved quickly and easily, just as you (quite rightly) expect.
If you’ve not visited already, go check out the new Arduino Store and let us know your thoughts!
And don’t miss out. For this week only you’ve got a 10% discount on your next order (one use per customer, ends on 10th October) if you use this code during checkout: BRANDNEW-10
Remember to ping us on social media to let us know what you bought, and what you’re going to build with it!
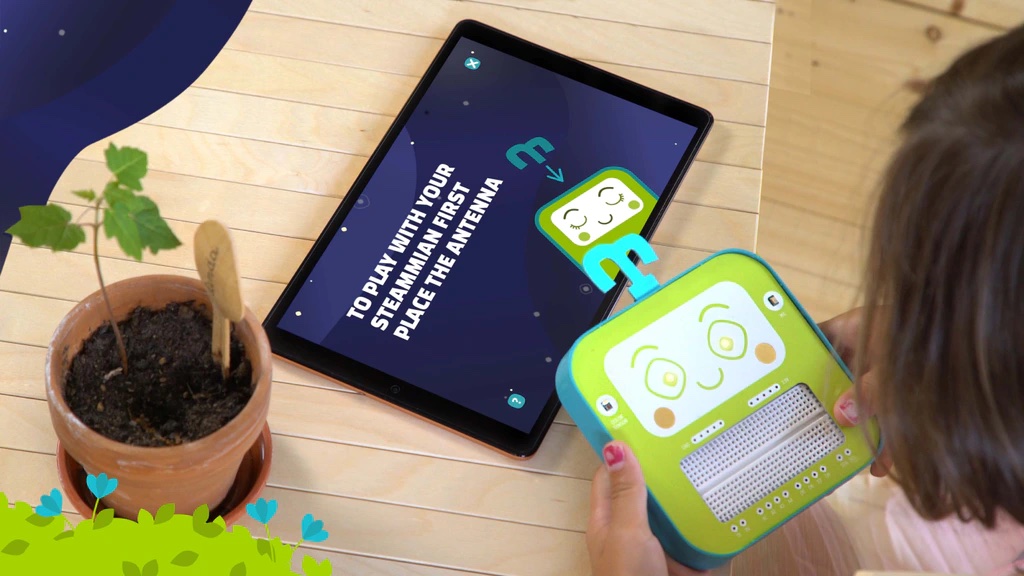
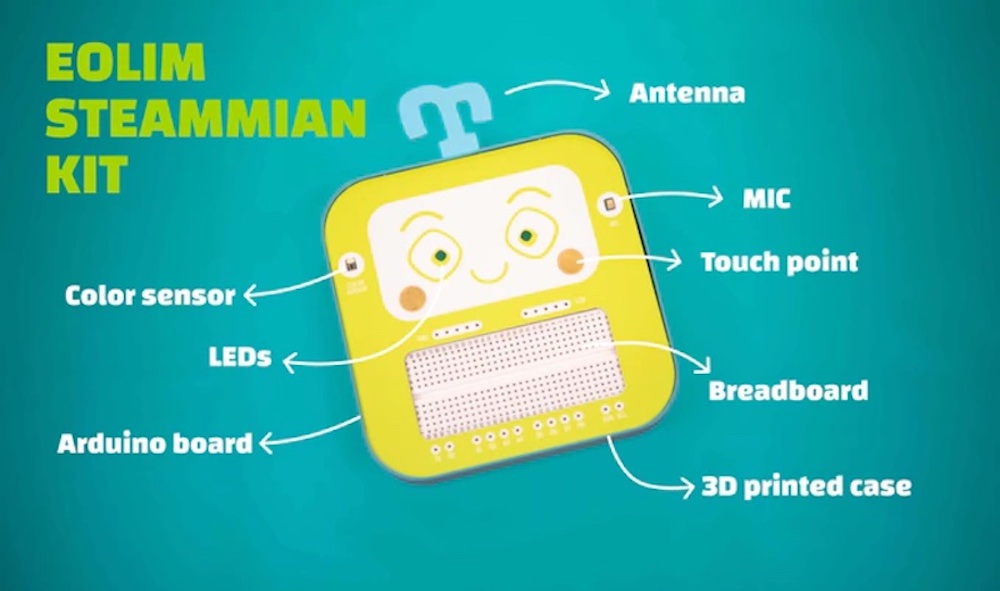
Teaching children concepts in science, technology, engineering, and mathematics is extremely important as the world is becoming even more dependent on people with those skills. To help achieve this goal, Leyla Tawfik, Serena Cangiano and the Ethafa team came up with a series of interactive learning solutions that they call “STEAMMIANS.” Each one targets a particular subset within the field of electronics and their first, “Eolim,” is focused on guiding kids ages 9-11 on how to use certain kinds of sensors to perform various actions.
Eolim consists of a large PCB that acts as a shield for the Arduino Nano 33 IoT, as it’s equipped with a microphone, a color sensor, two LEDs, and a pair of touch points on its surface. The 3D-printed case allows the shield and Nano 33 IoT to slot in alongside a breadboard for connecting other components to one of several exposed GPIO pins.
Because of the focus on experiential learning, the accompanying app enables users to go on certain “adventures” where they are instructed to follow directions to create a circuit. Programming can be done through either a block-style interface (akin to Scratch) or via the Arduino IDE for more advanced users. Finally, data can be read from the device and displayed within the app.
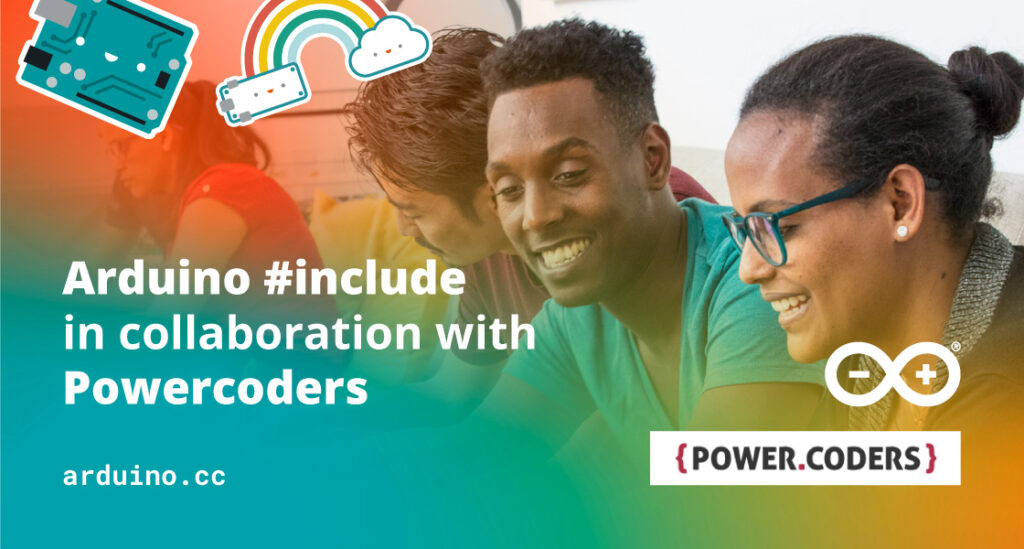
The Arduino #include program was first announced as part of 2021’s Arduino Day. Since then we’ve been working with Powercoders, which runs a bootcamp to promote equality in the IT industry.
Powercoders Internship
Powercoders is a non-profit coding academy for refugees. It offers a 3-month bootcamp followed by a 6 to 12 month internship.
It’s all about promoting equal opportunities for diverse talents across the IT industry. The goal is permanent placement of newly trained refugees in IT companies and their various internal departments.
It’s an outstanding program that’s broken up into five steps.
Basic Training: After a rigorous selection, a class of 15 to 20 students are trained for the first seven weeks in basic IT skills (HTML/CSS/JavaScript).
Career Day: In week six, the students’ CVs are sent out. They join the Career Day in week seven for interview sessions. During week eight, personal job interviews then take place.
Industry Focus Training: Weeks nine to 13 see students being prepared for their internships by improving specific technical skills to meet their companies’ requirements.
Internship: Ideally, an internship starts after the training and lasts for 12 months (with a minimum of six).
Follow-up: When selecting an intern it’s important to consider their career path. For example, as a junior position, a trainee program or an apprenticeship.
Given that Arduino shares so many of the Powercoders’ values, especially as part of the #include program, this was a great fit.
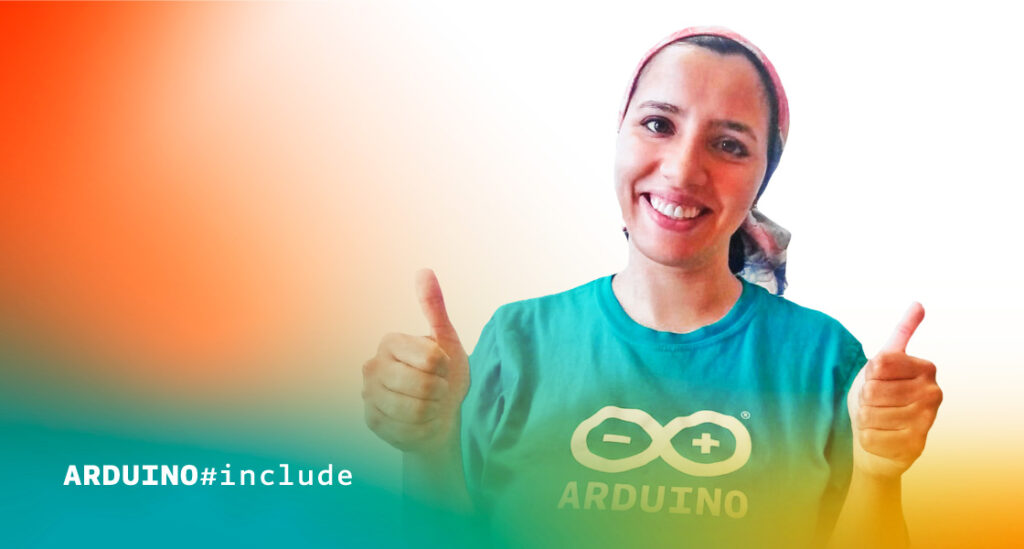
After several interviews with various candidates, we were thrilled to have met Souad Allahham and brought her into the Arduino web team.
Arduino Internship
Souad is a Syrian refugee now living in Italy. She’s acquired a wide range of digital skills not only through the Powercoders program, but is also self-taught. Her passion for the world of data makes her a perfect addition to Data Management and Analysis activities. Arduino’s currently implementing a lot of new tools and investigation strategies in this area.
“It’s been around three months that I’ve been with Arduino,” says Souad. “I admire the work environment here so much. Everyone is so kind, open and friendly. My tutor is so organized, an excellent communicator and very supportive. He provides me with all the instruction and information I need.
“My team leader is so professional and knowledgeable. I’m learning a lot about analytical tools and methods from him using real datasets,” she continues. “And my teammate shares his Arduino experience with me in a very clear and transparent way. With encouragement and support from Stefano, we published my first report about the Arduino Forum, which shows daily KPI metrics. I’m so glad to have this experience. Thank you Arduino for this golden opportunity!”
Souad’s not the only one who’s delighted that she’s been able to join the team. Stefano Visconti, who heads up the Web and Cloud teams, summed up the whole of Arduino’s appreciation for the great work she’s been doing.
“Souad is an exceptional learner,” he says.”She was able to become a valuable contributor to our team in a short time. Always positive and easy to work with!”
We hope this is only the beginning of a long journey working together. Welcome to Arduino, Souad!
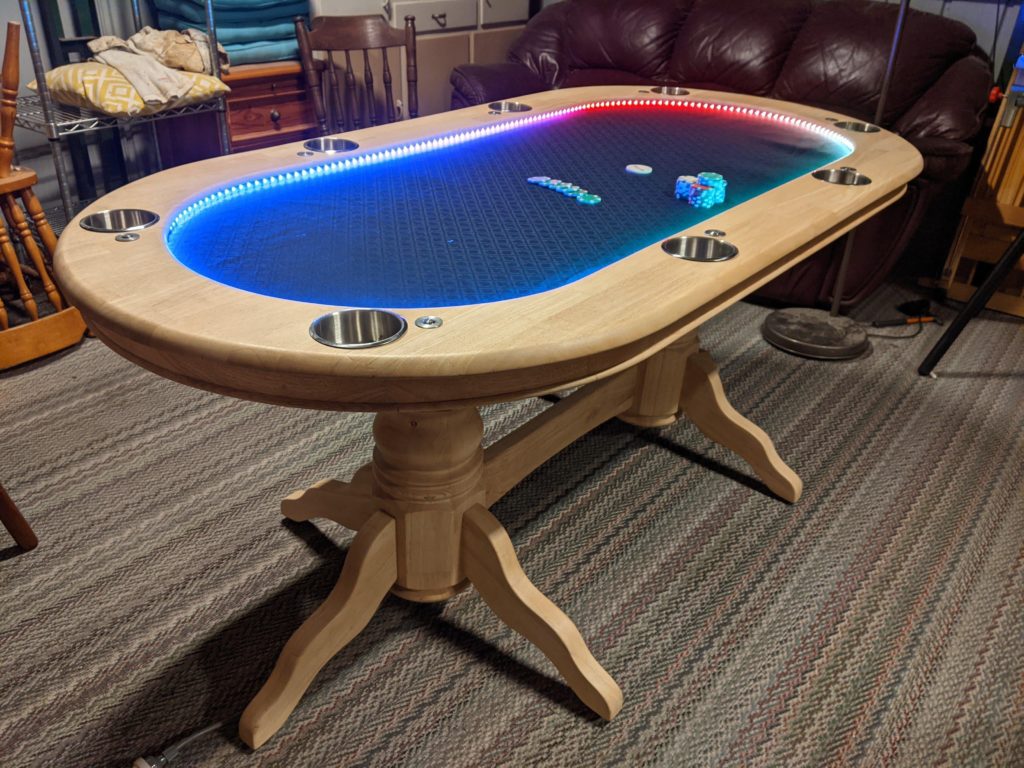
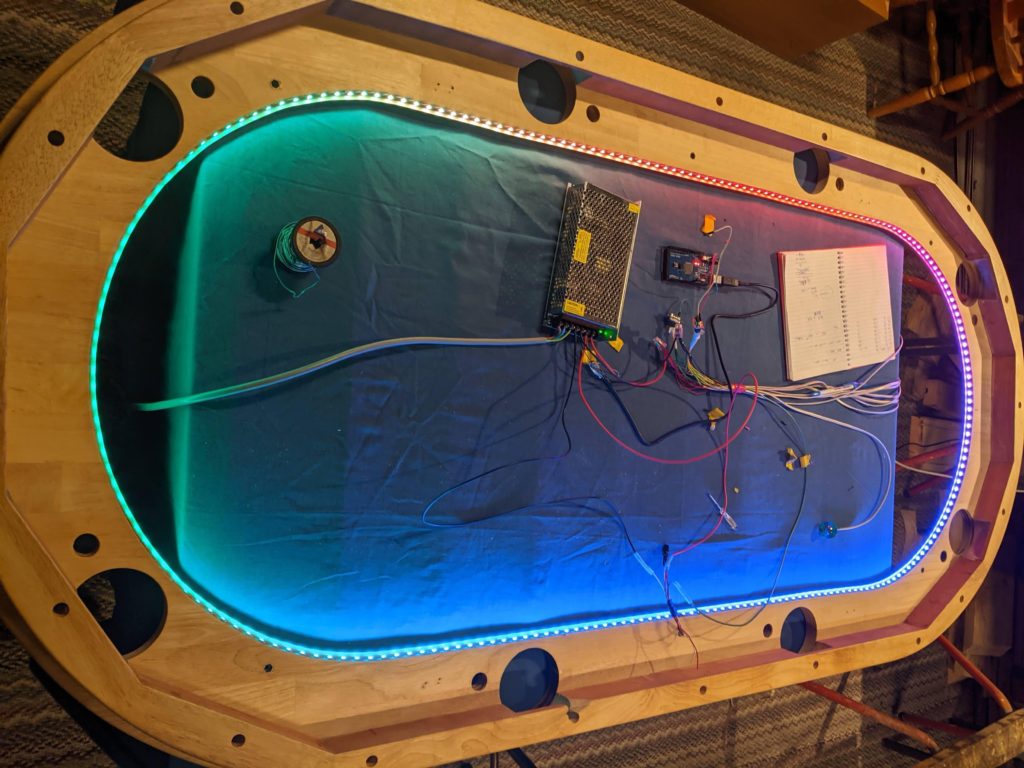
Poker is a fun game to play with a group of friends or as part of a league, and manually having to keep track of turns by passing a dealer chip around can get tiresome… quickly. Redditor tatey13 had the idea to build a custom poker table with some extra features that makes playing easier and more fun.
The table started off as an old dining room table, which was promptly sanded and had a large oval cut from its center to make room for the lighting and a soft play surface. Additionally, eight spaces were created around the table at even intervals that each have a metal container and a light-up pushbutton for getting user inputs. A long LED strip was also glued to the inner edge of the table to provide information about the current turn and timing.
In order to control everything, an Arduino Mega was selected due to its large amount of flash storage and GPIO pins. It begins by waiting for players to join, and after 20 seconds have elapsed from the first button press, the game starts. The dealer is chosen randomly, and the two spots to their immediate left are designated as the small and large blinds. If a player is taking too long, another player and the dealer can start a timer to move things along. Once everyone except a single player is remaining, the game is over, and the winner is shown with green LEDs.
You can see the table in action by watching tatey13’s video below!
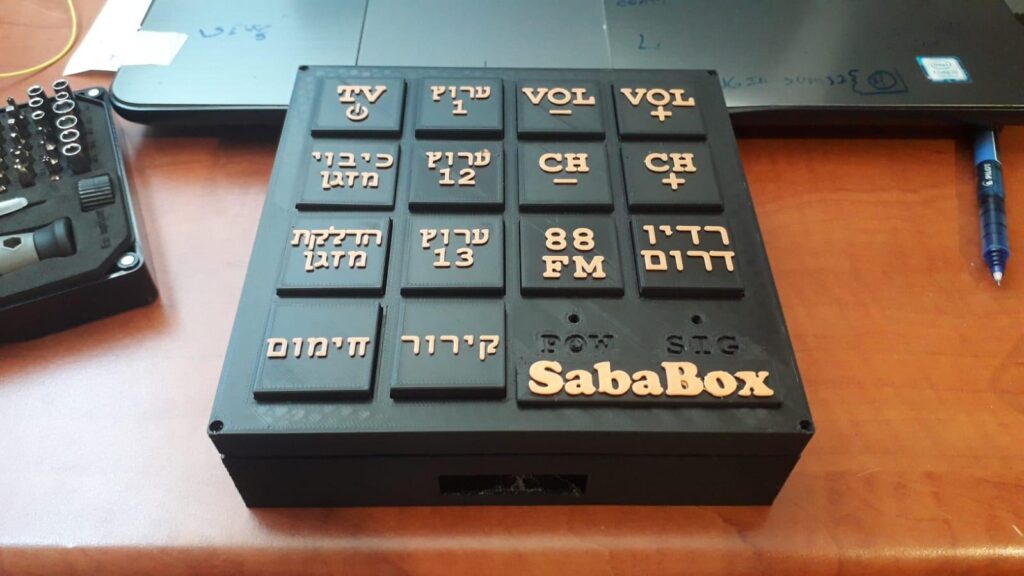
Modern television remote controls have a massive number of buttons compared to their more primitive predecessors, and because of this, seniors can struggle with knowing which button to press and when as well as having difficulties seeing the small text. This problem inspired Instructables user omerrv to create a device that he calls the Sababox, which contains just a few large, easily-pressable buttons for simple use.
The Sababox is equipped with an Arduino Nano at its core, which is connected to a grid of 14 momentary pushbutton switches. A separate circuit was also made from a Nano and IR receiver module that can read incoming infrared pulses from a remote and record them for later use. For instance, a volume up command contains a series of values which are then placed into the code for the Sababox’s Nano. When a user goes to press the larger “VOL +” button, that same command is relayed to the target device. One other nice feature of the Sababox is that it can be used to control more than one device, and omerrv currently has TV, radio, and air conditioner commands for his.
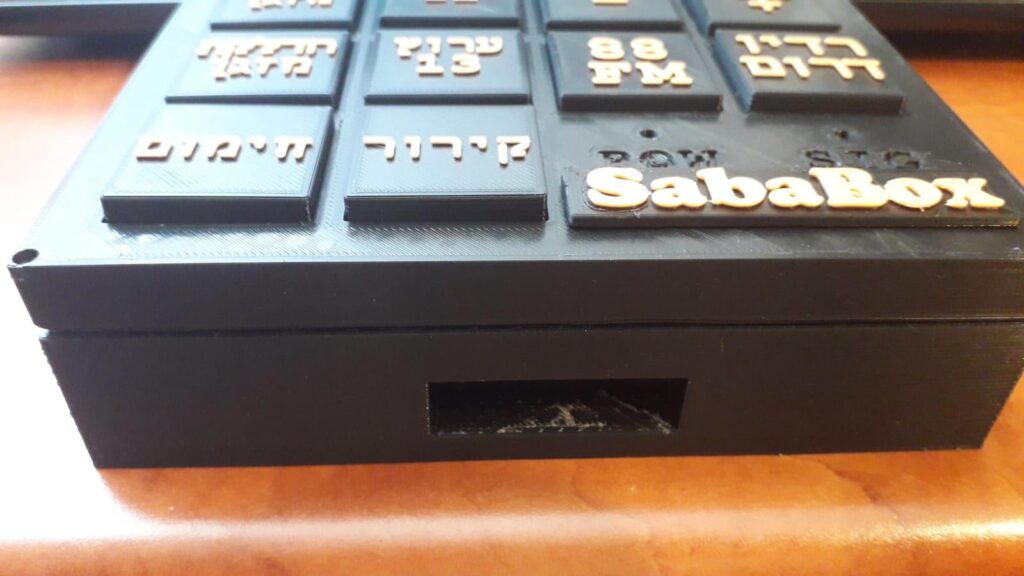
After the electronic circuit and programming had been completed, the whole assembly was placed into a large 3D-printed enclosure along with the necessary buttons and labels.
After the electronic circuit and programming had been completed, the whole assembly was placed into a large 3D-printed enclosure along with the necessary buttons and labels. To read more about how the Sababox was built, you can view its write-up here on Instructables.
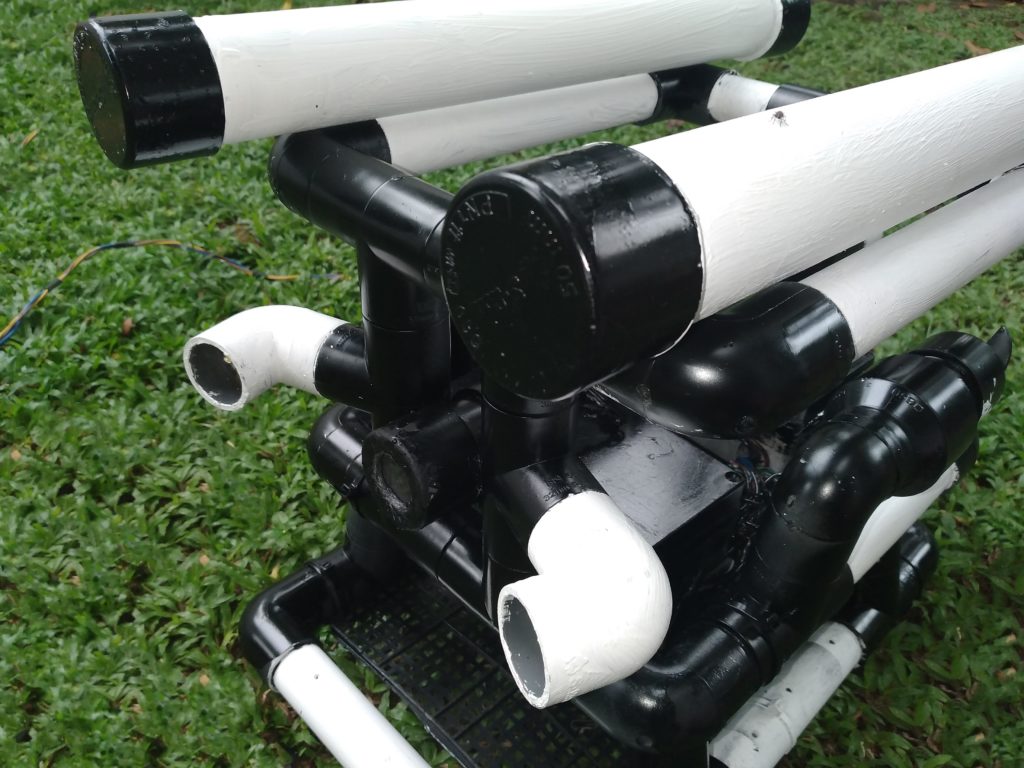
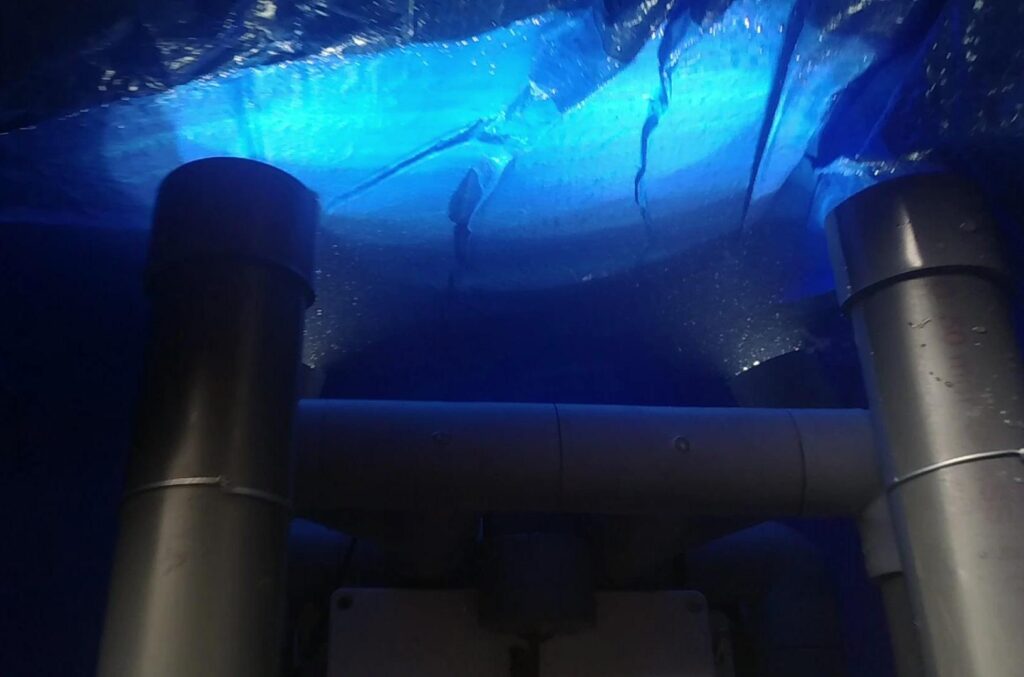
Exploring the vast underwater world is exciting, and personal breathing devices such as SCUBA allow for people to descend far further than usual. However, robots can be even better since they can operate much longer and more efficiently than a person. And because these underwater remotely operated vehicles (ROVs) can be so expensive, Ranuga Amargasinghe wanted to construct his own DIY version that costs less.
The chassis of the ROV was fashioned from a series of 50mm PVC tubes that vary in size from 70mm all the way up to 450mm in length. A rectangular base acts as a skid and helps prevent rough landings from injuring the robot. Above that is a small box which houses a 12V lead-acid battery, along with the electronics. Commands are sent from the surface control box via UART to the Arduino Nano within the ROV, which in turn activates a bank of relay modules that turns on both the vertical and horizontal thrusters for planar movements.
Back on the surface, Amargasinghe built a small controller that has four buttons for adjusting the thrust vector of the robot by checking if certain combinations are pressed. There is also a central rocker switch for telling the robot to shutdown immediately if the user needs it to. Once the camera and a couple of white LEDs were attached to the front of the ROV, it was tested in a small pool of water and balanced based on the results of those tests.
AugLimb is the extra arm you didn’t know you needed
Arduino Team — September 24th, 2021
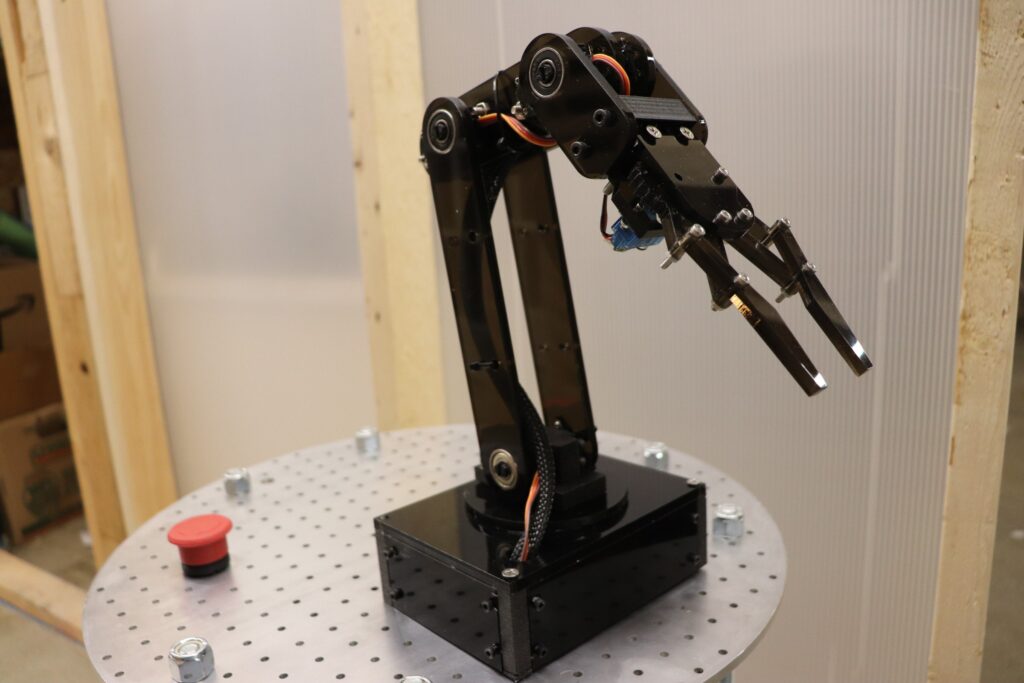
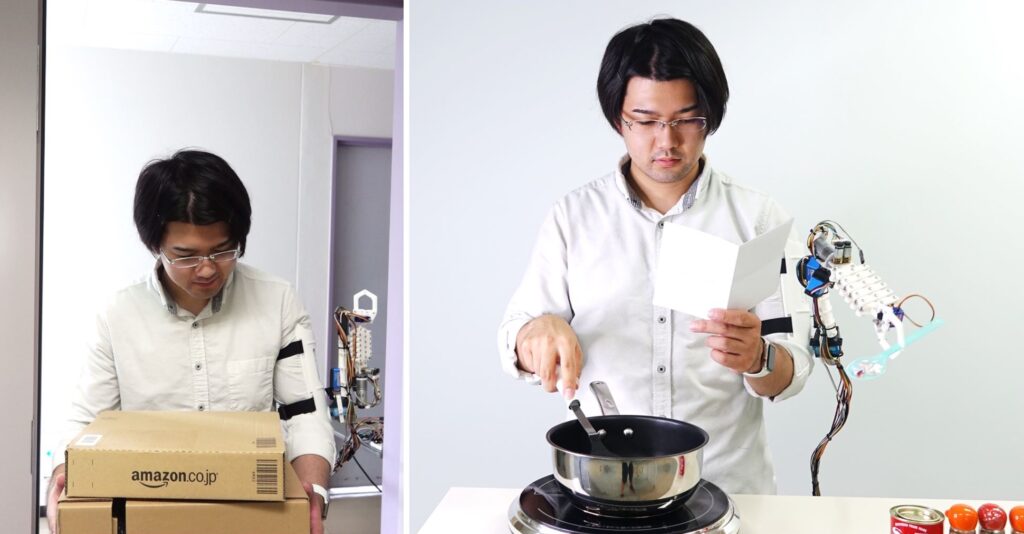
As a maker, you probably have a third hand for your soldering station. They come in handy when you need to hold a component, PCB, solder, and soldering iron all at the same time. But an extra hand would be useful for a wide range of other everyday activities. That’s why this team of researchers created a compact robotic third arm called AugLimb.
While robotic augmentations aren’t a new idea, they aren’t often as usable as AugLimb. This robotic arm is lightweight and compact, making it comfortable to wear. It can’t lift much weight, but it is very dexterous thanks to seven degrees of freedom and an extendable gripper. It attaches to the wearer’s bicep and folds up when not in use. When it is time for action, AugLimb unfolds and reaches further than the user’s own arm.
An Arduino Mega board drives AugLimb’s various motors. Those include two shoulder servos, an elbow servo, two wrist servos, a scissor extension motor, and two gripper servos. The scissor extension increases reach by up to 250mm. At this time, a second human operator has to control AugLimb’s movement. But the team hopes to introduce control schemes that let the user operate the robotic limb on their own.
AugLimb is a prototype, but Haoran Xie, a member of the team behind the project, said “We believe that AugLimb will be as popular as smart watches in the near future, as anyone from an elder to a child can comfortably wear it for the whole day.”
Arduino Education is delighted to announce its very first Inspiration Lab, in partnership with Technobel in Belgium.
What is an Arduino Education Inspiration Lab?
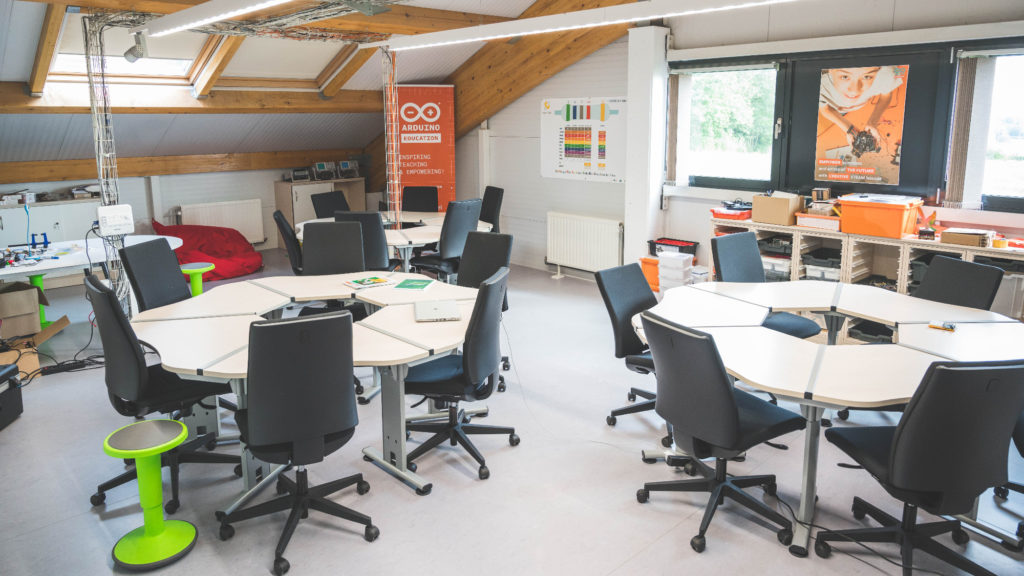
Inspiration Labs are an exciting new concept designed for students and educators to get hands-on experience. with the joy of making new discoveries. They’ll explore, design and learn electronics, coding, and programming with real-world connections. It’s all about enhancing future skills, having fun, and the joy of making new discoveries.
Technobel is a training and vocational center in Ciney, Belgium. Together we’ve created a dedicated space for teachers and students to learn with the full range of Arduino Education products in an engaging, exciting environment.
What can you do at the Inspiration Lab?
There’s something for everyone at the Inspiration Lab.
A dedicated space within Technobel, accessible to the public.
Teacher training with workshops on Arduino Education solutions; on demand, and on- or off-site.
Teacher coaching on how to create new lessons, with an emphasis on community sharing.
Specialized courses for 15 to 18-year-old students with official Arduino certification.
What Can You Learn at the Inspiration Lab?
As well as exploring, designing, discovering and learning electronics, coding and programming, the Inspiration Lab offers the following.
Promote a culture of technological innovation and development.
Create an advanced technology facility that supports product innovation and design.
Provide mentorship and certification programs for teachers and students.
Help develop design-focused thinking, product design and innovation skills through technical support and training.
Incubate product ideas to help realize them as real-world commercial products.
Prepare students to participate and compete in Arduino Technology challenges and competitions across the globe.
Nicla is Arduino Pro’s new family of modular, intelligent products that are easy to use, versatile and accessible – whether you are an advanced user working on industrial applications or a budding maker looking to prototype your first intelligent solution. No wonder it’s named after the Greek word for “victory of the people!”
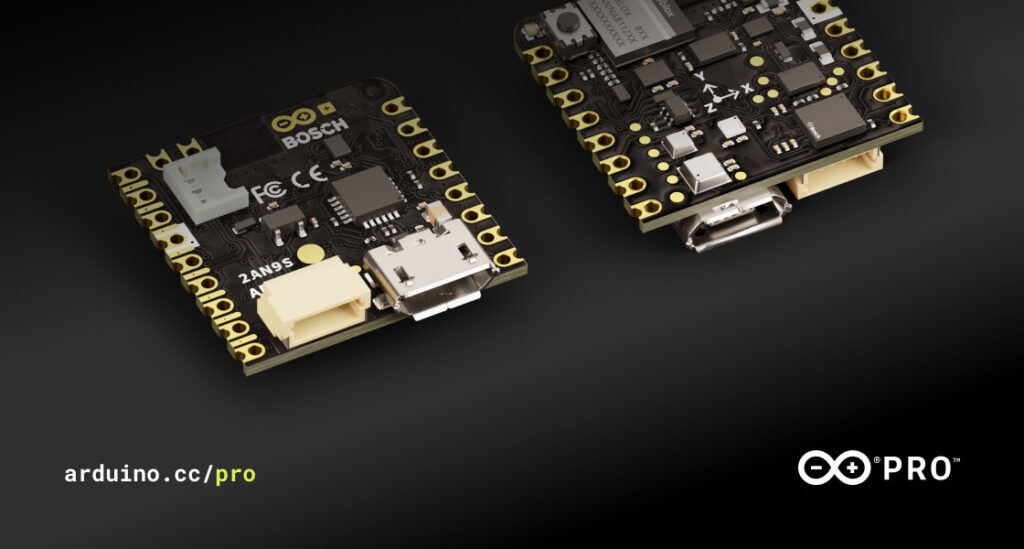
To herald the range, we have just released the Nicla Sense ME: a tiny but mighty board, co-developed with Bosch Sensortec to enable sensing and intelligence on the edge. With low-power sensors, a high-performance processor and small footprint, it offers a winning combination that can answer our community’s and clients’ needs and open up to opportunities for infinite new solutions.
What makes the Nicla Sense ME so special? Let’s dive into some details.
Sense motion and the environment
At the Sense ME’s heart, you’ll find Bosch Sensortec’s BHI260AP AI sensor system with integrated motion sensor, BMM150 magnetometer, BPM390 pressure sensor, and the unique BME688 4-in-1 gas sensor with AI and integrated high-linearity, and high-accuracy pressure, humidity and temperature sensors.
In short: it’s everything you need to monitor and interact with any type of motion and environment – hence, the “M” and “E” in the name.
Double the innovation
The Sense ME is the first product in Arduino Pro’s Nicla line, as well as the first product to introduce Bosch Sensortec’s new sensors on the market. So if you like innovation, you’ll love this little board.
Low power, high performance
The Sense ME’s Cortex-M4 nRF52832 CPU is capable of hosting intelligence on the edge, bringing AI and machine learning anywhere you need it – even off the grid, because it can be powered by battery as a completely standalone solution.
Made to fit in
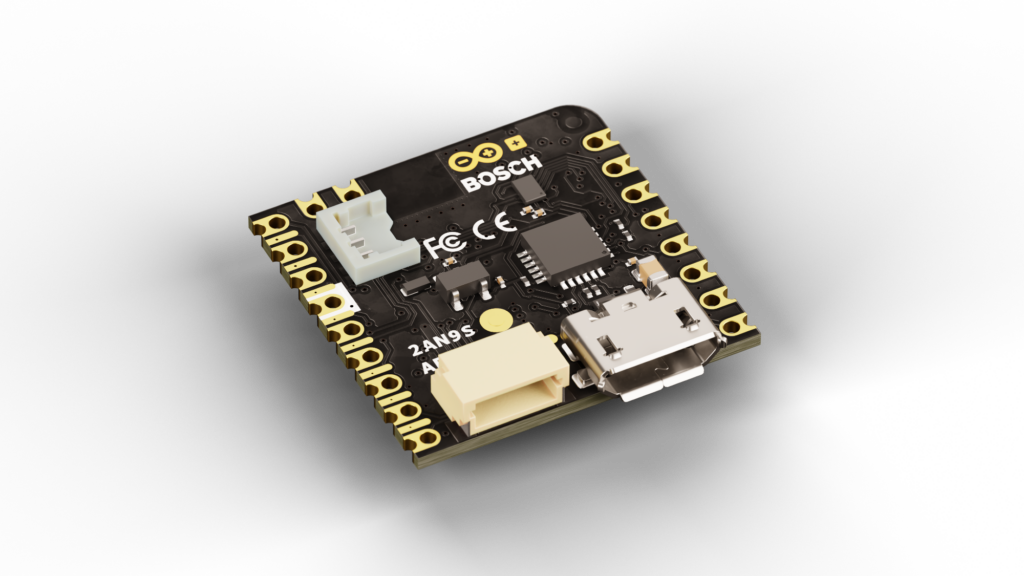
The Nicla Sense ME is a mere 22.86×22.86 mm packed with features. The whole Nicla family is based on our smallest form factor to date, yet is compatible with both MKR and Portenta products – effectively leveraging the combined power of Arduino’s ecosystem.
Ready now, ready for the future
Versatile, easy to configure, quick to set up: you can integrate the Nicla Sense ME in the solution you are designing or the one you already have in place. And because it’s designed with Bosch Sensortec’s industrial-grade, state-of-the-art components, it’s ready to explore any application in the emerging IIoT, AI and ML fields.
Small, smart, and ready to deploy constant data monitoring and AI capabilities anywhere, for anyone.
Here are just a few examples of the applications we can already envision the Nicla Sense ME will enable.
Monitor environmental parameters, from humidity and CO2 in your home to toxic substances released by industrial processes such as dry washing. Monitor air quality and safeguard people’s health.
Capture the information embedded in motion: from person-down systems and avalanche warnings that save lives, to fitness apps that check your posture to make sure your exercise routine gives you results as soon as possible.
Let the different sensors in the Nicla ME bring together a variety of data for complex solutions: stabilize robots and rovers, ensure safety working with cobots, make your home more comfortable with automation, accelerate physical rehabilitation and much, much more.
What will you create, develop and deploy with the new Nicla Sense ME?
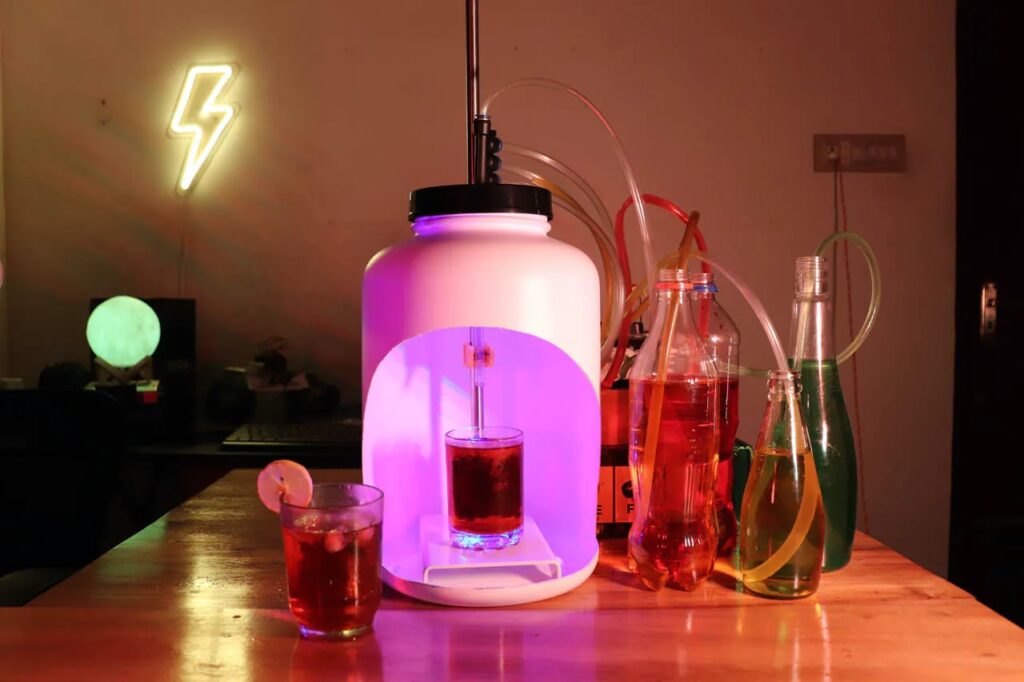
Mixing up perfect, custom cocktails often requires months or even years of training, in addition to having to know a plethora of recipes. But Jithin Sanal wanted to pour his favorite drinks without spending the extra time and effort, so he concocted a robotic cocktail mixer to perform this task for him. It operates by using a series of ingredient reservoirs, pumps, an Arduino Nano RP2040 Connect, and a few relays to dispense a precise quantity of the desired ingredient into a container. Sanal also designed and fabricated his own PCB to connect each component together in a circuit.
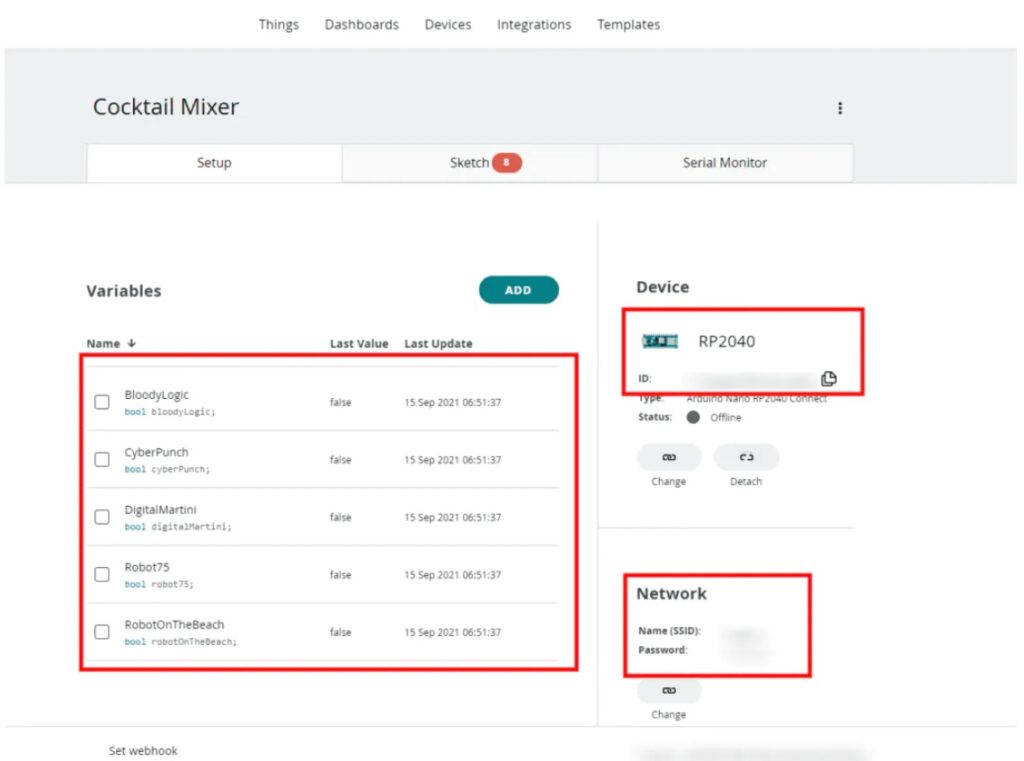
Rather than having a bunch of physical buttons on the front of the robotic cocktail mixer, Sanal instead opted to use the Arduino Cloud with five virtual ones that each correspond to a single drink. When a button is pressed, a function is executed on the Nano RP2040 Connect that activates the correct pumps in the specified order for a certain duration. By utilizing this method, users can be confident their drink is perfectly made every single time. More drinks can be added to the system simply by adding another button within the Cloud and creating the associated function in the RP2040’s code.
To see how Sanal brought this project to life in greater detail, you can view his write-up here or watch his video below.
Keeping things creative: Real-world learning from a remote perspective
Arduino Team — September 22nd, 2021
Teaching students complex concepts from a remote distance is something that many educators have had to get to grips with over the last 18 months. Especially where engineering is concerned. Keeping things hands-on and with a strong connection to real-world scenarios is vitally important for students to progress.
We recently discovered this MathWorks mechatronics article by Mojtaba Azadi at the San Francisco State University. Azadi was able to create several different types of drawing robots using the Arduino Education Engineering Kit. Aiming to foster independent confidence and strengthen the skills and abilities of students, this project is perfect for those teaching outside of the classroom setting or when running courses online.
How to teach mechatronics remotely
In Azadi’s project design, the robot itself uses core components from the Arduino Engineering Kit, including DC motors, pulleys, servos and a USB camera. The robot uses the motors attached to the pulleys to move itself across a whiteboard. Over several weeks during the course, students can develop a program where the robot can replicate an image placed in front of the USB camera.
Throughout the project, students utilize essential skills such as planning on a tight schedule, monitoring progress using a Gantt chart, and gaining confidence in their ability to communicate. All while maintaining a hands-on, real-world connection.
Learning from home with Arduino Education
There are three Arduino Education kits that support remote learning as well as in-class teaching; the Engineering Kit, the Explore IoT Kit for high school students, and the Student Kit, which is aimed at middle school students.
These kits, like all Arduino Education kits, also offer a wealth of online learning materials that assist both educators and students in the creation and approach of many different projects. There are also countless forums and resources that are readily available for members of the Arduino community.
The added benefits of all Arduino Education kits are their versatility and the fact that each one can lend itself to many different experiments that grow in scale and complexity as students learn.
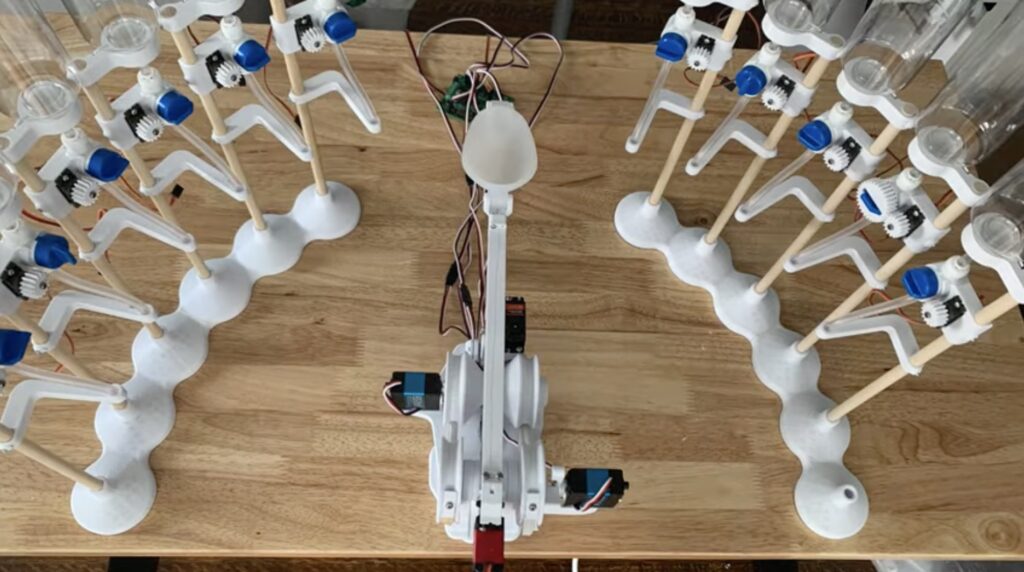
Jackson Pollock was famous for his unique style of splattering large blobs of paint across a canvas, and it was this technique that JBV Creative was trying to imitate. But rather than working by hand to painstakingly dip a brush into paint and then flinging it many times over, he wanted to build a robot that could do this task for him while still creating art.
The main part of the Flingbot, the name JBV gave to his system, is comprised of a catapult arm that is capable of both rotating and adjusting how far it can throw paint. A servo motor at the back pulls an elastic band a certain amount based on the desired distance, and a second one releases a pin to perform the launching action. As another parameter for generating abstract art, the silicone scoop itself can bend to change its shape. Every servo motor is connected to a single SSC-32U servo controller board that receives commands from an Arduino Uno.
Paint gets dispensed from one of the 12 total reservoirs that each has a gravity-feeder out its base with a servo motor that controls how much paint is deposited into the scoop. Once all of the paint has been collected for a launch, the Uno adjusts the angle and tension of the arm and finally releases the paint.
To see how JBV Creative constructed this robot and a glimpse of the wildly unpredictable artwork it produced, check out his video below as well as his project write-up here.
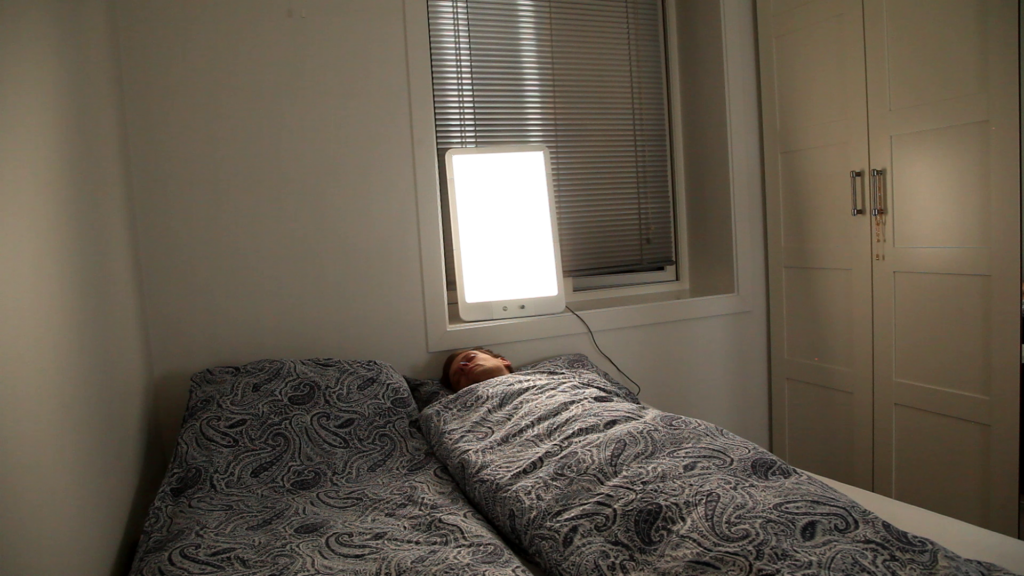
Almost no one enjoys being suddenly awakened by a loud alarm clock as the sudden rush of panic can contribute to grogginess and stress. To alleviate this problem, Simen Sørensen of the Applied Procrastination YouTube channel decided to create a lamp that simulates a sunrise to give him a calmer, more natural wake-up experience. His design utilizes an old LCD panel that has had its internals replaced by a string of LED lights to provide a pleasant and diffused glow when activated, which he calls the “Zom-B-Gone!”
The hardware for this project is based around an Arduino Nano, which continually reads the current time from an onboard DS3231 RTC module and sends out a PWM signal on one of its GPIO pins when the target wake-up time has been reached. This signal is further amplified via a ULN2803 transistor array to a voltage that the LEDs can be driven by.
With the hardware completed, Sørensen 3D-printed a whole host of parts that clip onto the sides of the LCD screen to form a nice, smooth surface. He also added a small foot on the bottom that acts as a stand. After some brief testing, Sørensen found that he enjoyed being partially awakened by the device as he felt less like a zombie throughout the day.
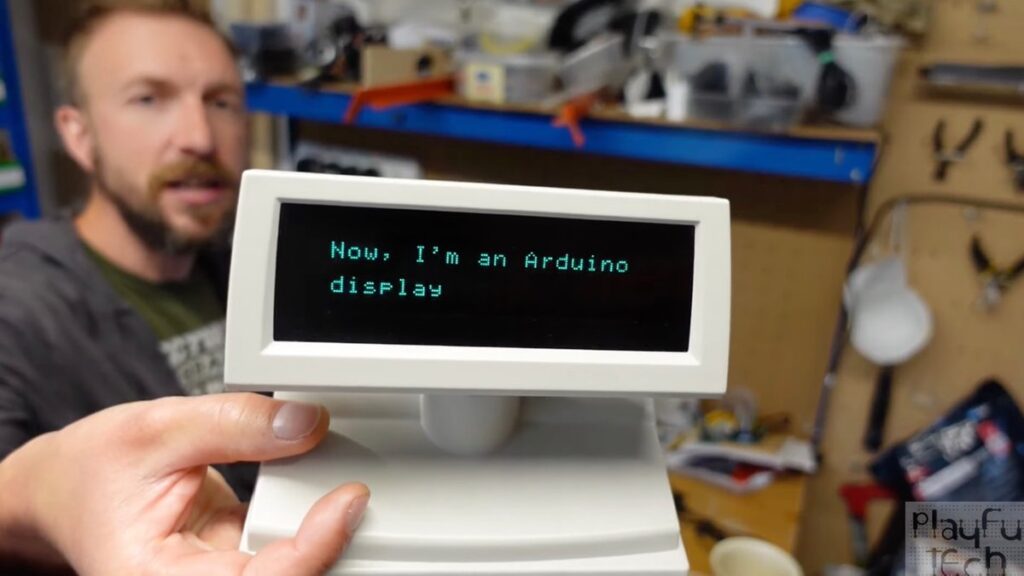
For many makers, it’s always fun to take some piece of old technology and give it a new lease on life, especially when the item in question was destined for the landfill. This is what prompted Alastair Aitchison — better known on YouTube as Playful Technology — to grab a deprecated vacuum fluorescent display (VFD) module from an Epson point-of-sale device and interface it with an Arduino Nano as a real-time display.
VFDs can be thought of as character LCDs, but rather than having many dot-matrix units that use the alignments of suspended crystals to block light, tiny phosphor crystals light up when a current is applied. The module isn’t driven directly by the Arduino Nano since it requires a far higher voltage so a special display controller chip is integrated, which receives commands/data over an RS-232 port and manipulates the onscreen graphics accordingly. This meant a MAX232 had to be used to convert the Nano’s 5V TTL voltage into the -15V to 15 range.
The programming for the Epson VFD unit was quite straightforward due to Epson’s great documentation, so knowing what data to send and when was a breeze. The code starts by initializing the display module and gives some example text. It finally enters a loop that reads data from the serial port and sends it over UART to be shown. To see all of this in action, you can view Aitchison’s video below.
Um dir ein optimales Erlebnis zu bieten, verwenden wir Technologien wie Cookies, um Geräteinformationen zu speichern und/oder darauf zuzugreifen. Wenn du diesen Technologien zustimmst, können wir Daten wie das Surfverhalten oder eindeutige IDs auf dieser Website verarbeiten. Wenn du deine Einwillligung nicht erteilst oder zurückziehst, können bestimmte Merkmale und Funktionen beeinträchtigt werden.
Funktional
Immer aktiv
Die technische Speicherung oder der Zugang ist unbedingt erforderlich für den rechtmäßigen Zweck, die Nutzung eines bestimmten Dienstes zu ermöglichen, der vom Teilnehmer oder Nutzer ausdrücklich gewünscht wird, oder für den alleinigen Zweck, die Übertragung einer Nachricht über ein elektronisches Kommunikationsnetz durchzuführen.
Vorlieben
Die technische Speicherung oder der Zugriff ist für den rechtmäßigen Zweck der Speicherung von Präferenzen erforderlich, die nicht vom Abonnenten oder Benutzer angefordert wurden.
Statistiken
Die technische Speicherung oder der Zugriff, der ausschließlich zu statistischen Zwecken erfolgt.Die technische Speicherung oder der Zugriff, der ausschließlich zu anonymen statistischen Zwecken verwendet wird. Ohne eine Vorladung, die freiwillige Zustimmung deines Internetdienstanbieters oder zusätzliche Aufzeichnungen von Dritten können die zu diesem Zweck gespeicherten oder abgerufenen Informationen allein in der Regel nicht dazu verwendet werden, dich zu identifizieren.
Marketing
Die technische Speicherung oder der Zugriff ist erforderlich, um Nutzerprofile zu erstellen, um Werbung zu versenden oder um den Nutzer auf einer Website oder über mehrere Websites hinweg zu ähnlichen Marketingzwecken zu verfolgen.