Schlagwort: arduino

  • How to make energy saving really work

    How to make energy saving really work

    Reading Time: 4 minutes

    Conserving energy is something every animal does, and we humans are no exception.

    Especially when energy costs are high — something many of us have been uncomfortably aware of in recent years — figuring out ways to live life without burning through excess fuel (and polluting the environment) is a serious priority.

    Technology has promised many solutions here, with all kinds of energy-saving products on the market claiming to cut energy bills in half while saving the planet. But how many of these gadgets actually work? And could it be better to make your own?

    In this article, we’ll look at some of the most common energy-saving devices and some examples of homemade alternatives from Arduino users.

    Why is energy saving important?

    There are several good reasons to focus on saving energy, both for your own benefit and to help others. These include:

    • It saves money. Energy costs are still high around the world, and being careful about managing your energy usage can have a significant impact on your energy bill.
    • It helps save the planet. The burning of fossil fuels contributes to climate change, and wasting less energy means your personal impact on this will be lower.
    • It’s healthier. Carbon emissions and other fuels can pollute the environment and negatively impact our collective health. According to one report, cutting energy consumption by 15% for one year could save six lives and save up to 20 billion US dollars in health costs.

    What are energy-saving devices?

    Energy-saving devices are products designed to help you cut down on your energy usage, and they can approach this task from many different angles. Here are a few of the most common examples:

    • LED light bulbs that use significantly less electricity than their traditional incandescent counterparts.
    • Smart energy meters that keep track of your usage, suggest adjustments when energy is being wasted, and help you make more efficient and informed choices.
    • Energy-efficient appliances like washing machines and AC units, designed to use minimal energy with no waste.

    Do energy-saving devices really work?

    So, do these devices really work, or is it just hype and marketing?

    The (perhaps unsatisfying) answer is… sometimes. Some energy-saving devices like LED bulbs and highly rated efficient appliances can have a tremendous impact on your usage and save you noticeable amounts of money.

    Others — especially more complicated-sounding devices that don’t come with official accreditation — may end up being a waste of money.

    The third category here is devices that can work as long as you use them correctly. This applies to tools like smart meters, which can help you make extremely useful changes to your energy usage as long as you pay attention to them and act on the insights they provide. 

    3 ways to save energy with Arduino

    You don’t have to buy your energy-saving devices from the store, of course. With some basic coding knowledge and a few simple components, you can put together your very own projects at home. Many Arduino users have done exactly that, with impressive results.

    Let’s check some out!
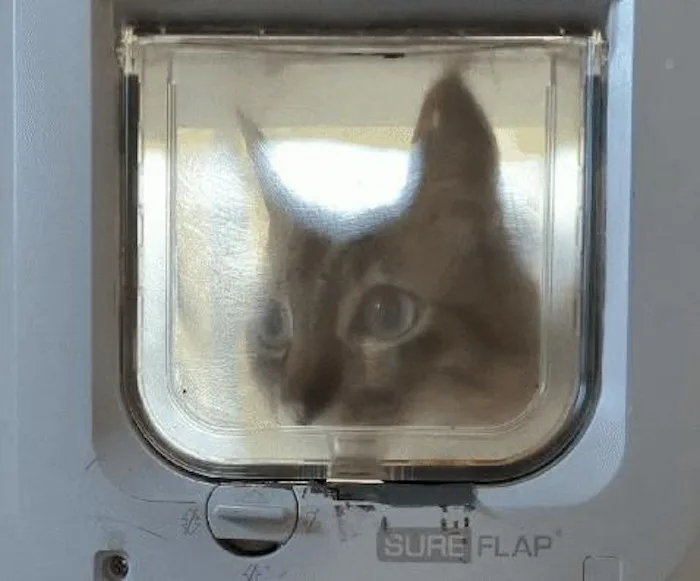
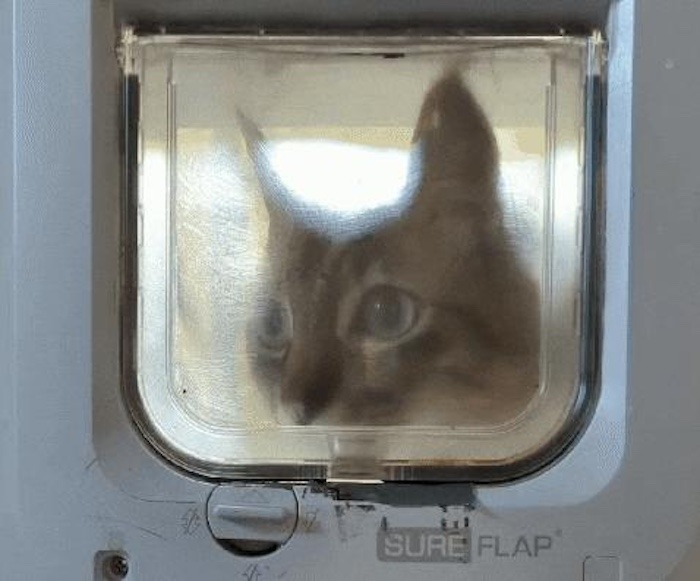
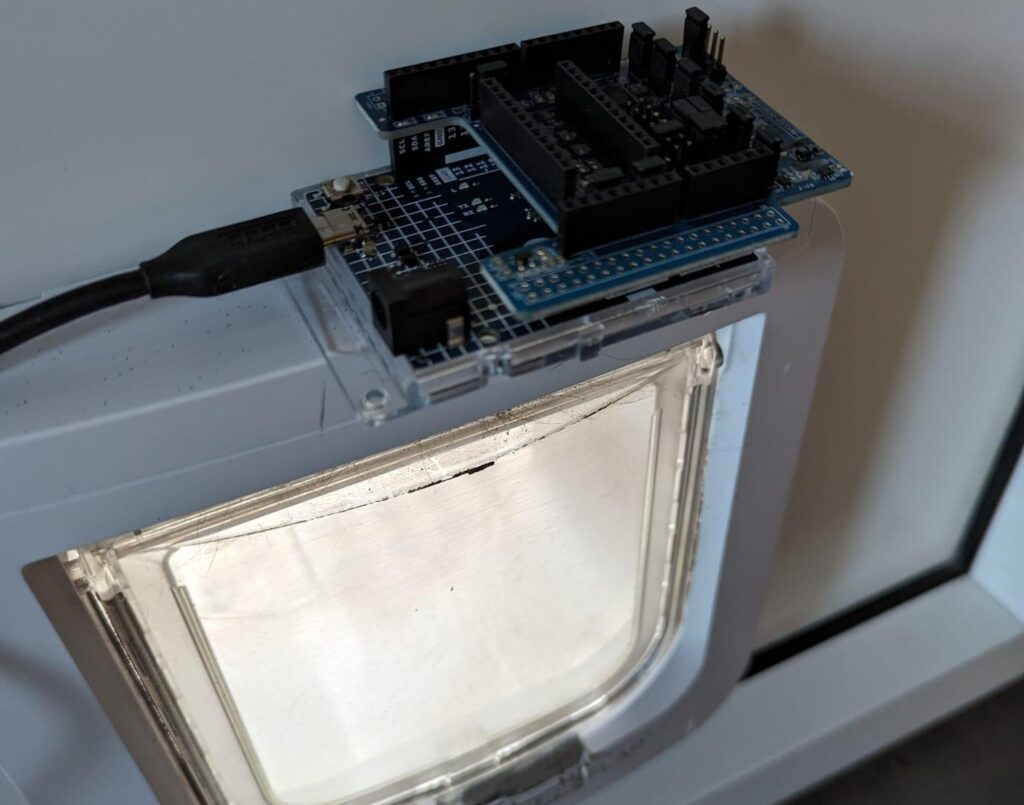
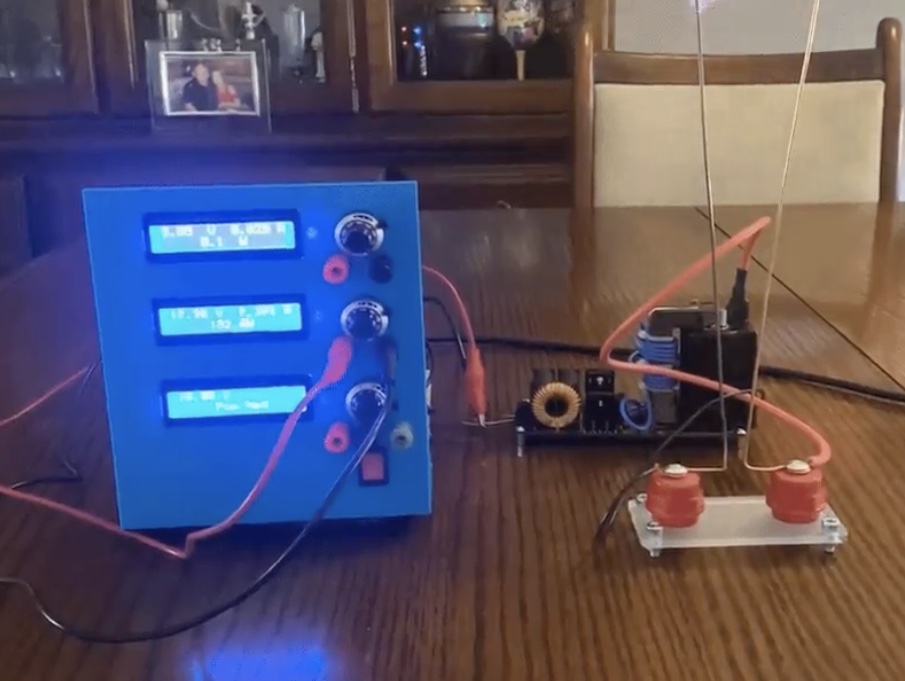
    Smart energy meters

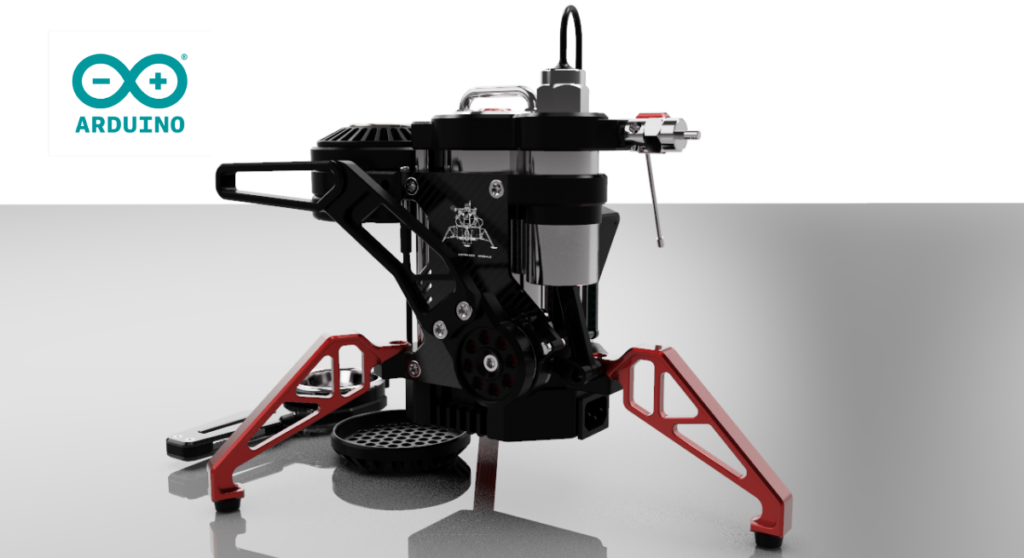
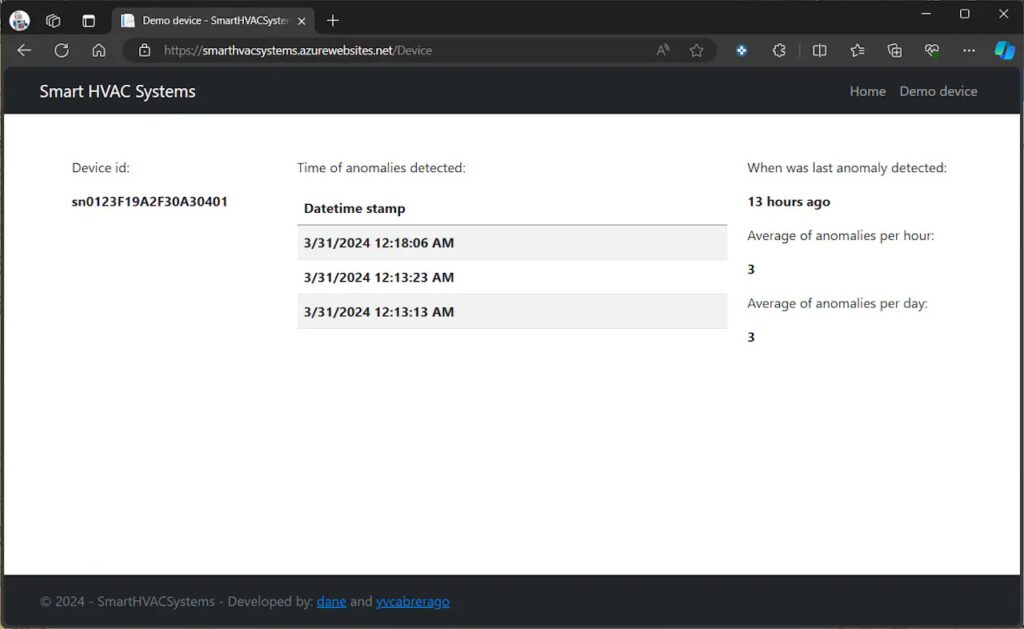
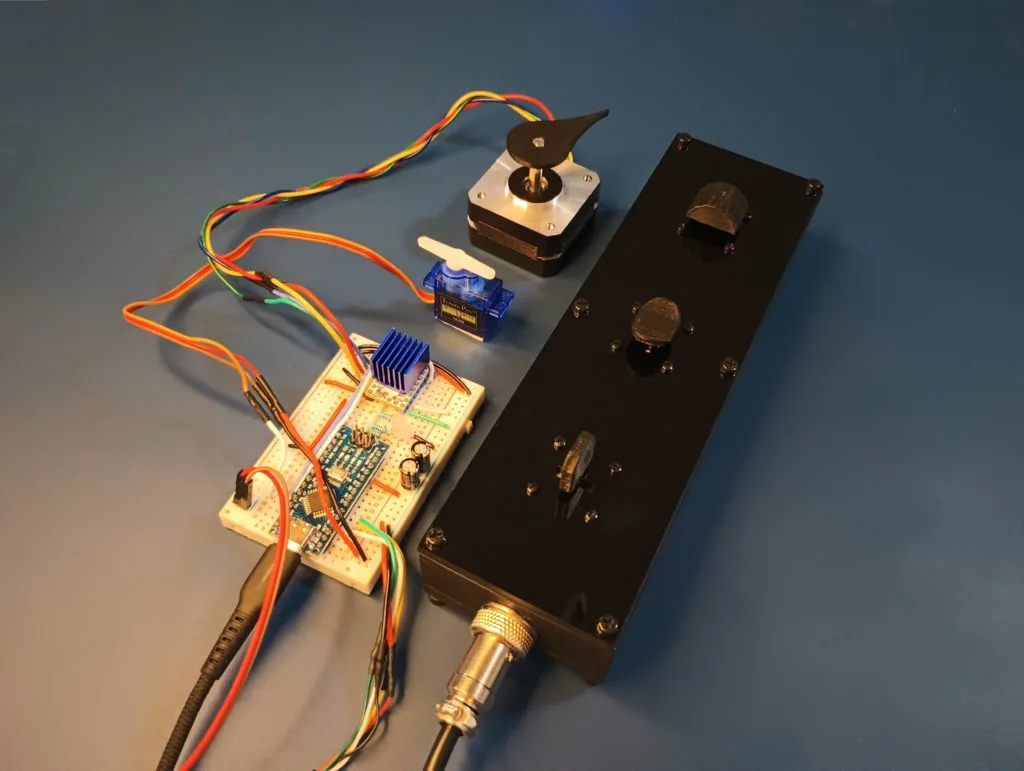
    One Redditor and Arduino user decided to develop their own version of a smart meter to help monitor energy usage and save costs.

    The device monitors amp, watt, and unit energy and allows you to view this data from your Android phone. Even more impressively, you can also turn devices on or off from your phone, managing your home’s energy usage from wherever you are. On top of that, if your devices consume more than 500W, the tool will turn them off automatically.

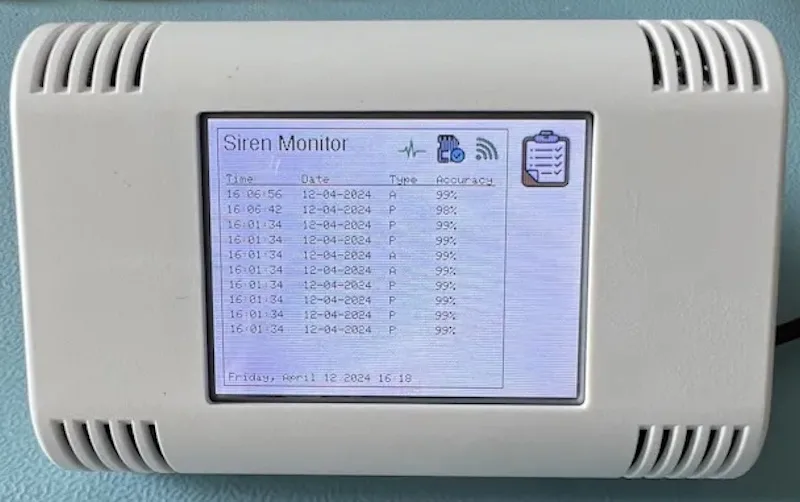
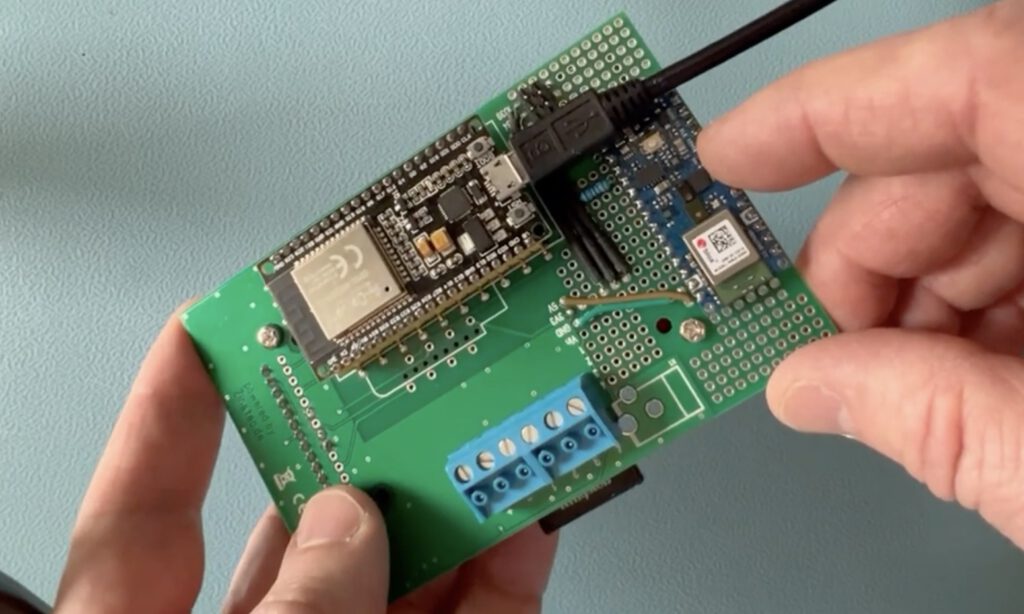
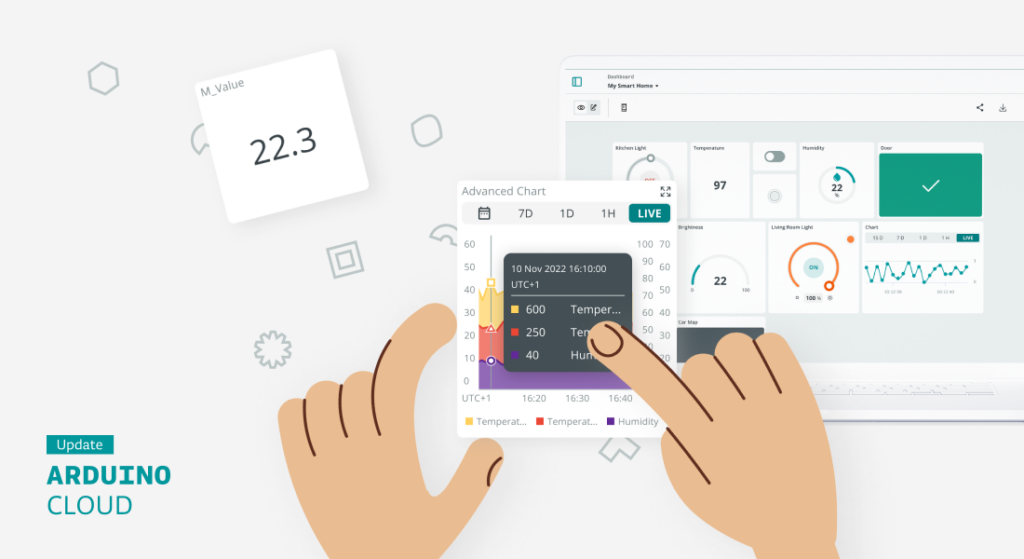
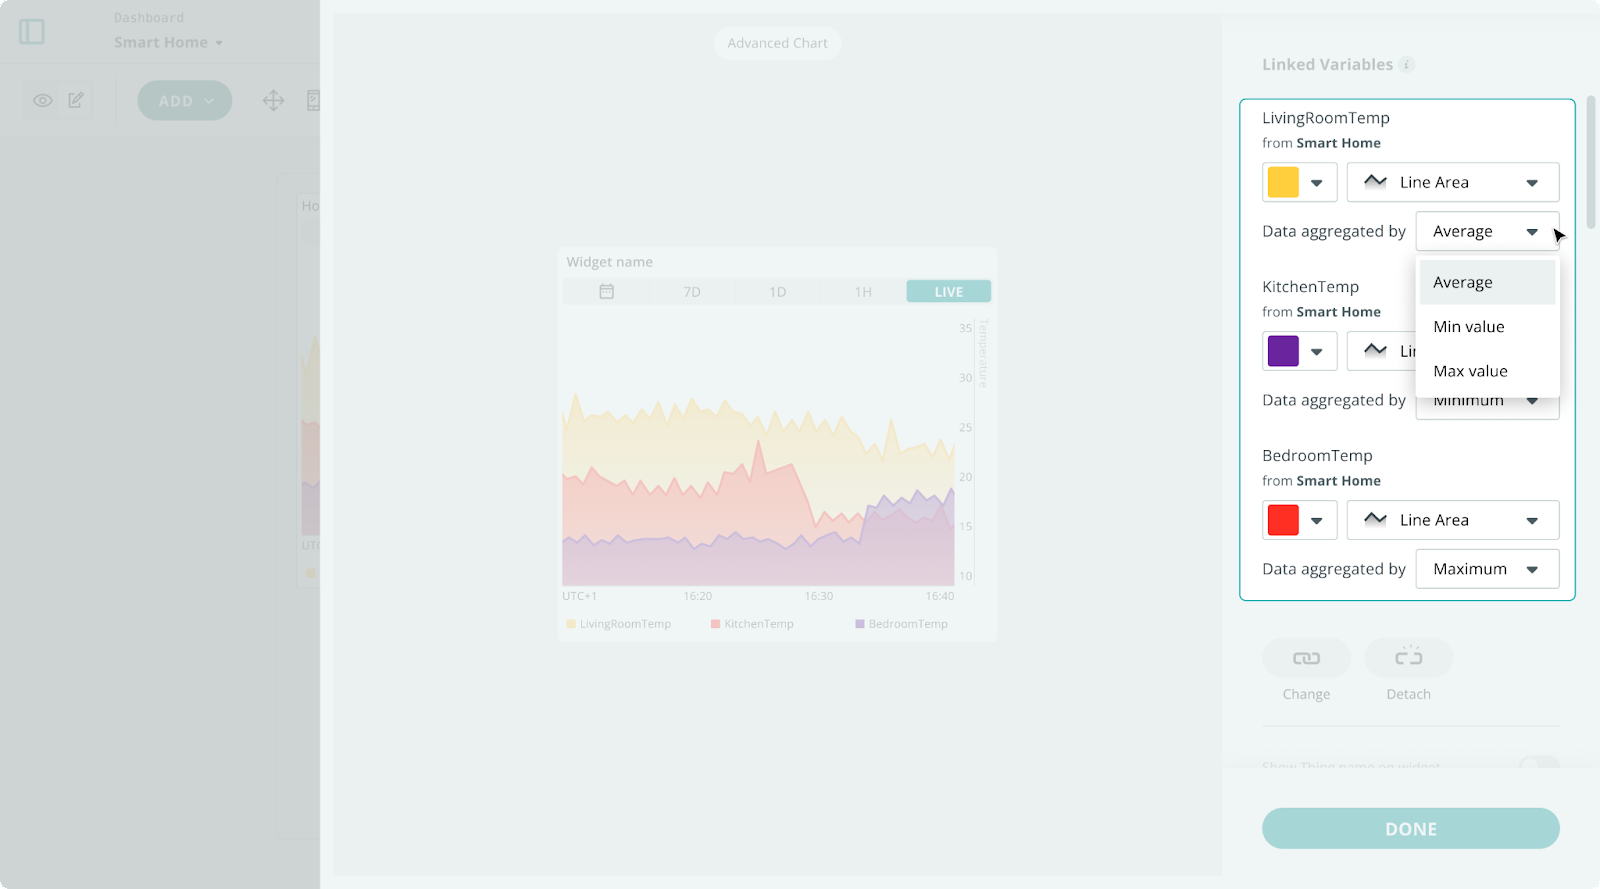
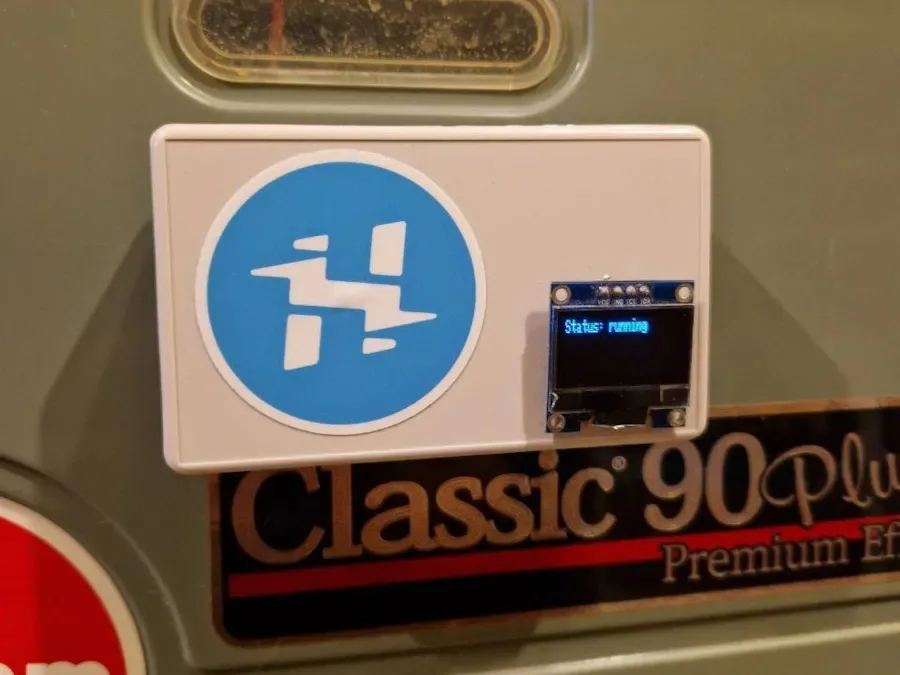
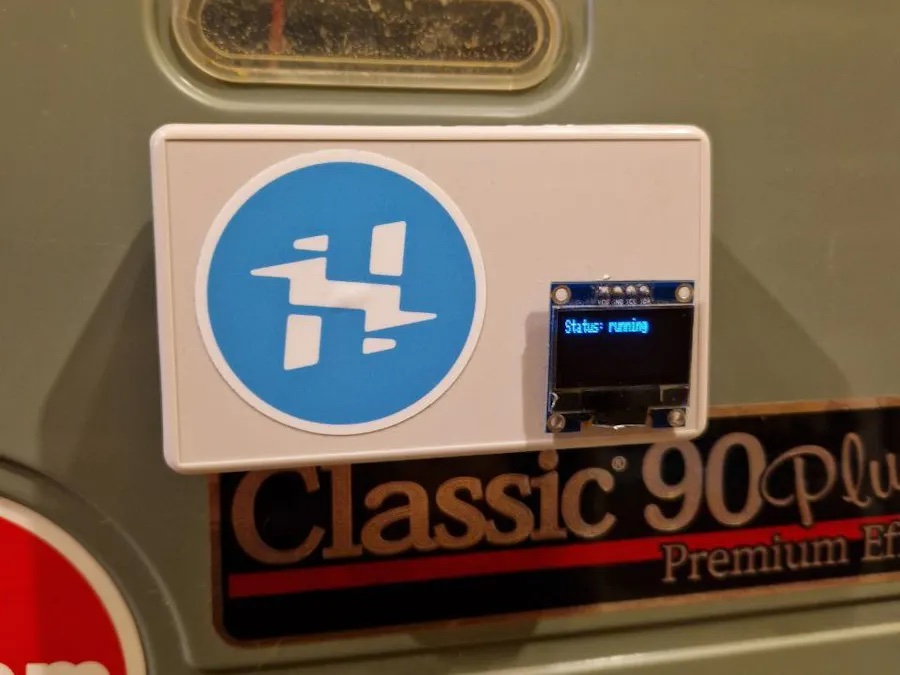
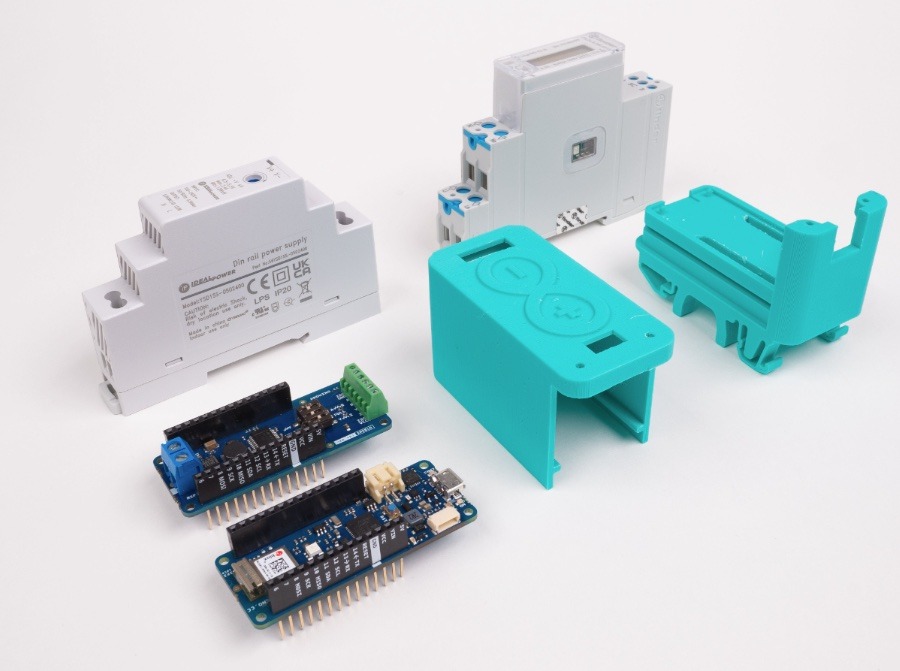
    This Arduino IoT-based energy meter is another great example of how to carefully track your energy usage through the Arduino Cloud.

    Glasses that save power

    If your eyes are closed, do you even need the lights to be on?

    That’s the idea behind a pair of glasses that automatically turn off the lights in your home whenever you close your eyes, helping you save on your electricity bill. 

    To add some extra spice, you can even add a TENS unit to make the glasses physically shock you into keeping your eyes closed longer. Evil, perhaps. Hilarious — definitely. Check out the video here.

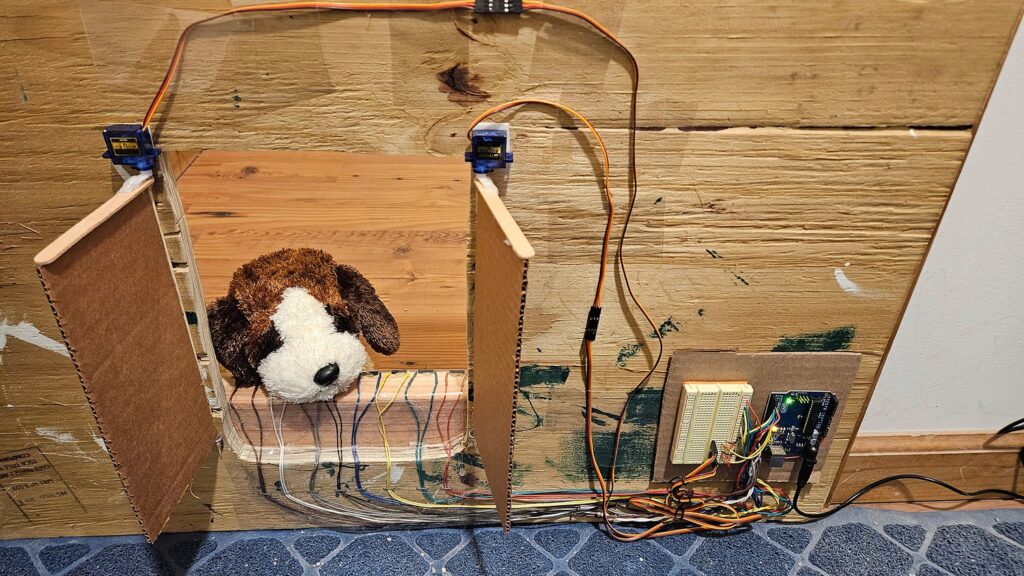
    Snap circuits – energy saving

    The best way to build lifelong good habits around energy saving is to start young. 

    EDUcentrum’s snap circuits project is designed to introduce kids to the world of circuitry and electronic prototyping, while also teaching them about energy saving.

    The project teaches kids how to assemble their own snap circuits while learning about key topics like home automation and energy saving.

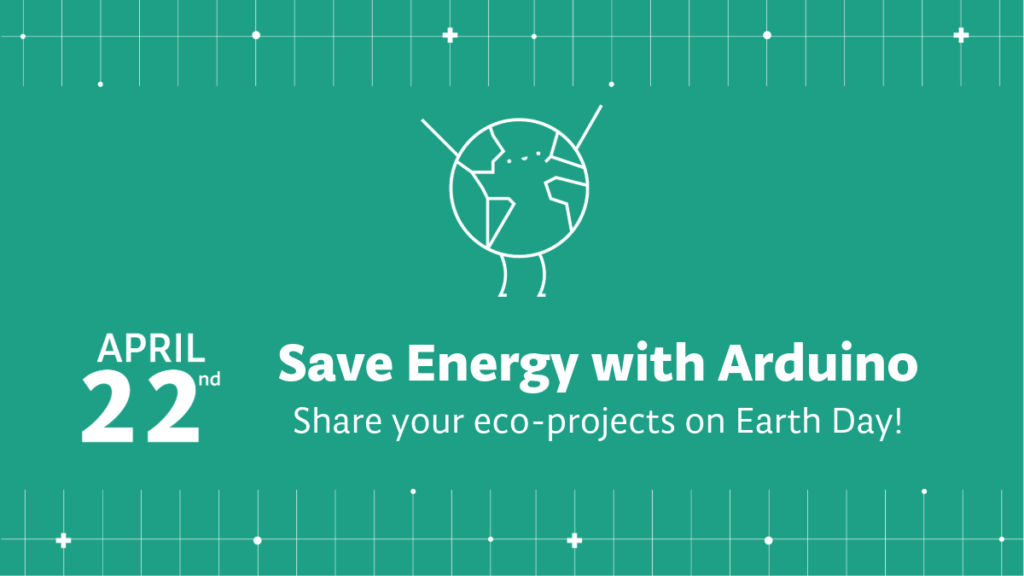
    Share your own Earth Day projects!

    Have you made any energy-saving devices or projects of your own? If so, we’d love to hear about them. Share the details in the comments below!

    Psst! For a limited time, we’re offering a special opportunity to create your own sustainable smart project with the Arduino Cloud, an all-in-one IoT solution to visualize your sensor data with stunning dashboards. Follow these three steps to give it a try:

    1. Visit Arduino Cloud plans and choose the Monthly Maker plan.

    2. Enter code EARTHDAY during checkout, valid between April 19th and April 30th, 2024.

    3. Unlock access to all advanced features, including over-the-air updates, unlimited shareable dashboards, data retention, real-time alerts and much more. 

    Whether you’re passionate about conservation or simply curious about the possibilities, now is your chance to join the community and make a difference. This offer is exclusively for new users not currently on any paid plan. You will have the flexibility to cancel at any time.

    Don’t miss out — embrace innovation while honoring our planet.

    The post How to make energy saving really work appeared first on Arduino Blog.

    Website: LINK

  • AI-powered pet flap tracks where your furry friend is

    AI-powered pet flap tracks where your furry friend is

    Reading Time: 2 minutes

    For those who own a pet with the freedom to move between the house and the yard, keeping tabs on where they are can be a challenge, especially if there’s a pet flap involved. Instructables member “madmcu” wanted to know where their cat was whilst away from the house on vacation, so they came up with an AI-driven solution that could log entrances and exits automatically.

    Because a closing flap will induce vibrations, madmcu started the project by adding a three-axis accelerometer just above the pet door’s hinge. The IMU was then connected to an Arduino UNO R4 WiFi in order to collect many data samples of a pet going through the flap. Every loop of the data collection program caused the three axes to be printed out over USB serial and sent to STMicroelectronics’s NanoEdge AI Studio application. It was in this app that madmcu set up and trained a classification model on the dataset using the two labels of either “inside” or “outside.”

    Once exported, the model was deployed back onto the UNO R4 WiFi along with an updated sketch that continuously classifies new accelerometer readings and prints the result if there is any. At the end of their project write-up, madmcu provides a couple ideas for adding alerts and even a dashboard thanks to the UNO R4’s built-in Wi-Fi capabilities.

    The post AI-powered pet flap tracks where your furry friend is appeared first on Arduino Blog.

    Website: LINK

  • This DIY pet door helps keep a dog out of the cat’s litter box

    This DIY pet door helps keep a dog out of the cat’s litter box

    Reading Time: 2 minutes

    Science Buddies had a problem: their tiny little pug loves eating their cat’s poop. Because the pug is smaller than the cat, they couldn’t simply put the litter box behind a tiny cat door. So they came up with a more sophisticated solution: a motorized door triggered by a magnetic collar.

    Riley the pug’s responses to poop access prevention are awfully pugnacious, but she is also pretty skittish. Science Buddies surmised that a cardboard door would be enough to stop her. But that would also stop Trouble the cat, so the door needed to remain open for Trouble and only close when Riley tried to enter the area with the litter box. After experimenting with a few different solutions, Science Buddies landed on servo-actuated cardboard doors that close in the presence of a strong magnetic field.

    That magnetic field comes from a permanent magnet dangling from Riley’s collar. An Arduino UNO Rev3 board detects that magnet using several Reed switches arranged along the bottom edge of the door frame. When the magnet causes the Reed switches to close, the Arduino knows that Riley is trying to get to the cat poop. In then closes two cardboard doors using small hobby servo motors.

    It took some tinkering to position the Reed switches in a way that they’d trigger consistently, but Science Buddies found a reliable setup in the end. Now whenever Riley attempts to get to the litter box, the cardboard doors slam in her adorable pug snoot and she abandons her quest.

    [youtube https://www.youtube.com/watch?v=Djzx54j-2ZU?feature=oembed&w=500&h=281]

    The post This DIY pet door helps keep a dog out of the cat’s litter box appeared first on Arduino Blog.

    Website: LINK

  • The best maker software by experience level

    The best maker software by experience level

    Reading Time: 6 minutes

    Today’s makers have access to the most advanced materials, resources, and support in history, and it’s improving all the time. The downside is that finding the right software can sometimes feel confusing and overwhelming. There are seemingly endless options, all with different attributes and advantages.

    In this article, we’re here to help make things easier. We’ll walk you through the best software for makers at each experience level — beginner, intermediate, and expert — and help you identify the right software for your needs.

    The best maker software for each experience level

    Beginner-level software

    If you’re new to the world of making, you’ll likely have some specific needs and requirements that won’t apply to more experienced folks.

    For example, you’ll want software that’s forgiving and beginner-friendly, that comes with more opportunities to learn the basics, and is easy enough that you won’t be discouraged from making.

    With that in mind, here are our top picks for the best beginner-level maker software.

    Arduino IDE

    Arduino is one of the most well-established and well-known platforms for makers of all levels. Arduino’s microcontrollers allow you to program projects with your own custom code, creating gadgets that work exactly the way you want them to.

    If you’re new to the game, you’ll want to start with a microcontroller that’s suitable for beginners. The Arduino IDE is perfect for this: it’s free, user-friendly, and leverages a simplified version of the C/C++ programming languages so you can learn the basics in a fun and rewarding way.

    TinkerCAD

    Since it first came onto the scene in 2011, TinkerCAD has been a great choice for beginners looking to get started with making their own projects.

    As a CAD (computer-aided design) software, TinkerCAD is a fantastic tool for designers and can be used to create models for 3D printing. 

    Due to its beginner-friendly nature, TinkerCAD is often used in schools to help learners get to grips with basic coding and design, building their own elementary tech projects. It’s also completely free of charge.

    The advantage of using TinkerCAD is that it also contains a simple circuit designer and visual code tool useful to generate the code for Arduino boards.

    Intermediate-level software 

    Once you’ve learned the basics of making, you’ll likely be craving some more challenging and stimulating projects.

    Taking your coding skills to the next level requires more sophisticated software, allowing you to be more adventurous and ambitious with your plans. The good news is that there is plenty of software out there for intermediate makers. Let’s take a look at some examples.

    Python

    Python is one of the most well-known programming languages out there, and it’s compatible with most maker-friendly platforms and microcontrollers.

    Python works well with Arduino hardware, and is especially well-suited for projects that use sensors and other components. You don’t need to be a coding wizard to start using Python in this way, but you will need some familiarity and experience.

    Check out this project — a Nicla Vision-based fire detector built by Arduino user Shakhizat Nurgaliyev using Python. Shakhizat created an entirely generated dataset and then trained a model on that data to detect fires.

    MicroPython

    MicroPython is an experimental, lean, and lightweight implementation of the programming language Python, and it’s designed specifically to be used with microcontrollers.

    This makes it ideal for use with Arduino projects, and it works especially well with those that use sensors and similar components. MicroPython does require a base of coding knowledge to use, but you don’t need to be an expert.

    Visual Studio Code

    Visual Studio Code, often abbreviated as VS Code, is an open-source editor created by Microsoft that is compatible with Windows, Linux, and macOS. 

    It offers a range of features such as debugging support, syntax highlighting, smart code completion, snippets, code refactoring, and integrated Git functionality. Visual Studio Code can be used to develop code for Arduino boards, and, by using the available extensions, you can upload code directly to the Arduino boards.

    Node-RED

    Node-RED is built to bring hardware devices, software, and online services together, creating ever more interesting and advanced projects.

    It works especially well with IoT projects — and is a great choice if you want to integrate platforms like Arduino with other devices to build your own custom designs for use in your home.

    Node-RED’s browser-based editor and built-in library make it a powerful tool for those with some coding experience to make new projects.

    Arduino’s Portenta X8 can host a Node-RED instance running it on a container, making it easy to connect and integrate several different services, either locally or online with Arduino Cloud or third-party software. 

    In this project, David Beamonte used Node-RED and Arduino Cloud, to integrate a TP-Link smart Wi-Fi plug with other projects. This way, they were able to link multiple smart home devices together and control them from one central hub.

    Expert-level software

    Are you a true veteran of making and coding? Fluent in more programming languages than you can remember, with a host of impressive projects under your belt and a slot at next year’s Maker Faire?

    If so, you have the skills to achieve some truly exciting things. Let’s take a look at the software available for expert-level makers.

    MATLAB

    MATLAB is an advanced piece of software that works well with Arduino hardware and similar products. 

    It’s especially useful when building projects that require data analysis and complex, large-scale computations. Proficiency in MATLAB can lead to some truly impressive creations, but it takes a solid amount of experience and skill to realize those results.

    Arduino users MadhuGovindarajan and ssalunkhe used MATLAB to build their very own lane-following rover. The project used the rover from Arduino’s Engineering Kit, combined with an algorithm that allows the rover to stay within a designated lane while driving.

    The Arduino Engineering kit contains three different projects that involve physical hardware and MATLAB/Simulink to create amazing results. 

    C/C++ IDEs

    The programming languages C and C++ have been around for decades, underpinning the worlds of computer science and software engineering.

    If you have a solid base of coding ability, you can use C/C++ development environments to program Arduino boards and create ever more advanced and impressive projects.

    Other resources

    GitHub

    Do you want to share your code with your mates, or with the world? 

    If so, GitHub is the perfect place to do it. It’s an open-source community with multiple contributors and lots of integrations with developer-oriented software. 

    Inside, you’ll find more than 300 million projects, known as repos. Makers use the platform to share their work, but it can also be useful to take a look and draw inspiration from the trending repositories.

    AI/ML

    AI is making headlines all over the world, but it extends far beyond ChatGPT.

    Makers today have access to a wealth of fantastic tools to speed up work, correct errors, and document your shiny new code. Check out GitHub copilot and OpenAI Codex to get started.

    Using software with Arduino

    By combining the right software tools with Arduino’s products, you have the perfect recipe for your next awesome project.

    If you want to gain inspiration, or share your own work with our community, check out the Arduino Project Hub where you can search for projects and filter by type and difficulty level.

    The post The best maker software by experience level appeared first on Arduino Blog.

    Website: LINK

  • Machine learning makes fabric buttons practical

    Machine learning makes fabric buttons practical

    Reading Time: 2 minutes

    The entire tech industry is desperate for a practical wearable HMI (Human Machine Interface) right now. The most newsworthy devices at CES this year were the Rabbit R1 and the Humane AI Pin, both of which are attempts to streamline wearable interfaces with and for AI. Both have numerous drawbacks, as do most other approaches. What the world really needs is an affordable, practical, and unobtrusive solution, and North Carolina State University researchers may have found the answer in machine learning-optimized fabric buttons.

    It is, of course, possible to adhere a conventional button to fabric. But by making the button itself from fabric, these researchers have improved comfort, lowered costs, and introduced a lot more flexibility — both literally and metaphorically. These are triboelectric touch sensors, which detect the amount of force exerted on them by measuring the energy between two layers of opposite charges.

    But there is a problem with this approach: the measured values vary dramatically based on usage, environmental conditions, manufacturing tolerances, and physical wear. The fabric button on one shirt sleeve may present completely different readings than another. If this were a simple binary button, it wouldn’t be as challenging of an issue. But the whole point of this sensor type is to provide a one-dimensional scale corresponding to the pressure exerted, so consistency is important.

    Because achieving physical consistency isn’t practical, the team turned to machine learning. A TensorFlow Lite for Microcontrollers machine learning model, running on an Arduino Nano ESP32 board, interprets the readings from the sensors. It is then able to differentiate between several interactions: single clicks, double clicks, triple clicks, single slides, double slides, and long presses.

    Even if the exact readings change between sensors (or the same sensor over time), the patterns are still recognizable to the machine learning model. This would make it practical to integrate fabric buttons into inexpensive garments and users could interact with their devices through those interfaces.

    The researchers demonstrated the concept with mobile apps and even a game. More details can be found in their paper here.

    Image credit: Y. Chen et al.

    The post Machine learning makes fabric buttons practical appeared first on Arduino Blog.

    Website: LINK

  • This beastly DIY bench power supply will satisfy any requirement

    This beastly DIY bench power supply will satisfy any requirement

    Reading Time: 2 minutes

    Every maker should have a bench power supply in their possession, ready to provide whatever voltage a project or particular component requires. But not all bench power supplies are created equal. Some only have a single output, some have a limited voltage range, and some can’t handle much current. In an attempt to eliminate such concerns forever, Doug Domke built “the Beast.”

    This is a beefy bench power supply that can easily handle any project an electronics tinkerer is likely to tackle. It has three outputs that can all operate at the same time. Two of them can be set anywhere from 2V to 30V and can supply up to 10A each, at 30V. However, the supply transformer is only rated for 240 watts. If both are pulling the full current, then setting them above 24V would exceed the rating. But that isn’t a situation many people will find themselves in. The third output comes from a 20W supply that can provide 3V to 30V (positive or negative).

    The user sets each output’s voltage with a simple potentiometer, but an Arduino Nano monitors the voltage and current of each using the analog input pins. The maximum 30V is far too high for the Arduino to work with directly, so it takes measurements through voltage dividers. With voltage and current readings, the Arduino can then calculate wattage. It displays the information for each output on a dedicated 16×2 character LCD screen, connected via I2C. 

    If you’re in need of a robust bench power supply, the Beast may just fit the bill.

    The post This beastly DIY bench power supply will satisfy any requirement appeared first on Arduino Blog.

    Website: LINK

  • Classify nearby annoyances with this sound monitoring device

    Classify nearby annoyances with this sound monitoring device

    Reading Time: 2 minutes

    Soon after a police station opened near his house, Christopher Cooper noticed a substantial increase in the amount of emergency vehicle traffic and their associated noises even though local officials had promised that it would not be disruptive. But rather than write down every occurrence to track the volume of disturbances, he came up with a connected audio-classifying device that can automatically note the time and type of sound for later analysis.

    Categorizing each sound was done by leveraging Edge Impulse and an Arduino Nano 33 BLE Sense. After training a model and deploying it within a sketch, the Nano will continually listen for new noises through its onboard microphone, run an inference, and then output the label and confidence over UART serial. Reading this stream of data is an ESP32 Dev Kit, which displays every entry in a list on a useful GUI. The screen allows users to select rows, view more detailed information, and even modify the category if needed.

    Going beyond the hardware aspect, Cooper’s project also includes a web server running on the ESP32 that can show the logs within a browser, and users can even connect an SD card to have automated file entries created. For more information about this project, you can read Cooper’s write-up here on Hackster.io.

    [youtube https://www.youtube.com/watch?v=UYE-HdRBQnE?feature=oembed&w=500&h=281]

    The post Classify nearby annoyances with this sound monitoring device appeared first on Arduino Blog.

    Website: LINK

  • LanderShot is an out-of-this-world espresso machine

    LanderShot is an out-of-this-world espresso machine

    Reading Time: 2 minutes

    If you think coffee people are opinionated, then you’ve never met an espresso person. There is a lot of art and science that goes into making the perfect little cup of espresso and a good barista will control every factor, from temperature to pressure to pour rate. It isn’t rocket science, but it isn’t far off. So the LanderShot Lunar Espresso Module, a CNC-machined high-tech espresso machine, has a fitting theme.

    This is, at its core, a premium espresso machine that merges designer aesthetics with cutting-edge electronics. The founder of LanderShot, Ted Ciamillo, lives in the state of Washington, but is of Italian descent. He wanted to honor his Italian heritage — and the origin of espresso — so he turned to Arduino.

    Temperature control is crucial when making espresso; heat the water too much and you’ll burn the coffee, but you’ll lose the flavor and strength if you heat it too little. For that reason, the Lunar Espresso Module utilizes PID (proportional-interval-derivative) control for the 1000-watt heater. That ensures that water comes up to temperature quickly without overshooting the target, helping it go from 20 °C to 100 °C in just 180 seconds. A pneumatic lever lets the user increase the pressure to the desired level, with each stroke adding one bar.

    An Arduino Nano Every board controls the heat, monitors temperature and pressure, and displays the results on a small screen offset to the side. “The Nano Every is excellent at performing the several jobs in the machine. We chose it for its low-profile architecture, easy access to the pinouts, robustness and accessible price point. And, of course, we are pleased that the brains of our machine were designed in Italy,” Ciamillo says.

    He adds that the greatest technical challenge was fitting all of the electronic components into the compact machine. While that may be true, we think that he’s selling himself short on the design and CNC work. The milled parts are stunning to look at, and we can only imagine that they’re even more pleasing to touch while pulling a shot.Ready to take your daily coffee to new heights? A limited number of LanderShot Lunar Espresso Module machines are available for pre-order and should ship out in June.

    The post LanderShot is an out-of-this-world espresso machine appeared first on Arduino Blog.

    Website: LINK

  • 4 new IoT monitoring dashboard updates on Arduino Cloud

    4 new IoT monitoring dashboard updates on Arduino Cloud

    Reading Time: 4 minutes

    Arduino Cloud recently received a major upgrade renewing the user interface and the Arduino Cloud editor. And as we promised it was just the beginning. This article dives into some of the new IoT monitoring dashboard features that may seem small, but pack a big punch for your connected projects.

    1. Duplicate IoT Dashboards

    Dashboards are the heart of the Arduino Cloud, allowing you to effortlessly monitor and control your devices. That’s why improving their functionality is crucial.

    Even though creating an IoT dashboard is an easy task with the intuitive drag-and-drop interface, it can become a bit tedious when you have to replicate many of them and apply minor adjustments. 

    Now it is possible to duplicate your IoT dashboards with just one click. Just click on the three dots (?) of the dashboard that you want to clone and select “Duplicate.” This creates a copy that you can customize to meet your specific needs.

    2. Customize your IoT Value Widget

    Customizing widgets has been a common request from our user community, and we’ve recently addressed this with the introduction of decimal settings in the “Value” widget. This much-awaited feature allows users to configure the number of decimal digits displayed in the widget when dealing with floating-point variable types.

    When selecting a floating-point variable type, users can specify the decimal precision shown in the widget and choose whether to truncate or round the value. Importantly, this setting only affects the visualization, not the actual variable value.

    3. Enjoy the new data aggregation method in Advanced Chart widget

    Advanced chart widgets are one of the most popular widgets for data analysis as they help you improve your data analysis. The widget now includes support for configuring the data aggregation method.

    But what does it mean?

    The chart widgets come with a smart implicit feature known as data aggregation. To prevent the chart from becoming too messy with an excess of data points, there is a fixed limit of data points per chart:

    • If the number of data points to show is lower than the maximum number of data points, there is no aggregation.
    • If the number of data points to show is bigger than the maximum number of data points, data is aggregated.

    Before this update, there was only an implicit aggregation method, which was the average.

    With this new Advanced Chart widget feature, you can now choose the aggregation method that suits your needs. Options include average, max value, and min value:

    • Average: Calculates the average of the data for each aggregation period.
    • Max value: Uses the maximum value within the aggregation period.
    • Min value: Uses the minimum value within the aggregation period.

    This enhancement is a direct result of the feedback from our community. It’s a feature that has long been requested by users, and we’re happy to finally deliver it.

    Check out this article if you want to learn more about Advanced Chart widgets. 

    4. Deploy ready-to-use dashboards and firmware for your ESP32 devices

    Templates are one of the most popular features of the Arduino Cloud. You can select a ready-to-use solution and deploy it with one click. You get the software and an IoT monitoring dashboard. If you need to do modifications for your IoT project, you can just edit the code and dashboard and off you go! It’s a fun and easy way to get started.

    The exciting thing is that two new dashboard templates for ESP32 boards are now available, complementing the offering for Arduino boards:

    With the SparkFun Weather Station kit template, you can program the SparkFun Weather Station kit firmware and get a ready-to-use dashboard that shows information about wind, rain, and sunlight.

    Check out the full list of templates to see the ones that fit you more.

    Bonus: IoT widget preview

    As a bonus, we’re also introducing a handy new feature – now when you add a widget to a dashboard, you’ll see a preview and description of the widget. This makes it even easier to choose the right widget for your dashboard and streamline your project setup process.

    Get started with Arduino Cloud

    The Arduino Cloud is free to use. Create your Arduino Cloud account today and explore how you can bring your projects to the next level. If you need enhanced functionality, you can check the premium features and redeem a code for a free 30-day trial. 

    [youtube https://www.youtube.com/watch?v=p9t8DYOubjg?list=PLT6rF_I5kknObk6lnQMpk5NIUB_vEHcNW&w=500&h=281]

    Want to learn more about Arduino Cloud IoT monitoring dashboards? 

    The post 4 new IoT monitoring dashboard updates on Arduino Cloud appeared first on Arduino Blog.

    Website: LINK

  • The new Arduino Pro 4G Module and Portenta Mid Carrier expand our ecosystem, and your options!

    The new Arduino Pro 4G Module and Portenta Mid Carrier expand our ecosystem, and your options!

    Reading Time: 2 minutes

    Our team at Embedded World (April 9th-11th in Nuremberg) has announced not one, but two groundbreaking additions to the Arduino Pro range that are ready to elevate your prototyping and connectivity experiences. Say hello to the Arduino Portenta Mid Carrier and the Arduino Pro 4G Module!

    Portenta Mid Carrier: maximizing prototyping potential

    This ultimate companion to the Portenta boards family is your gateway to seamless prototyping and expanded connectivity, designed to grant you zero hassles and maximum efficiency.

    From CAN lines to Ethernet, microSD, USB, camera interfaces, and more, it allows you to effortlessly tap into high-density signals through dedicated headers. Plus, debug pins and the RTC battery backup will simplify your development journey even more.

    Compatible with Portenta C33, Portenta H7, and Portenta X8, it adapts to your evolving development needs with ease. Whether you’re delving into machine vision prototyping or testing cellular connectivity, this is the carrier for you. 

    Find out more from the dedicated page, or head straight to the store.

    Arduino Pro 4G Module: revolutionizing connectivity

    Are you ready to revolutionize your connectivity game? Engineered to seamlessly integrate with the Portenta family, the Arduino Pro 4G Module comes with a plethora of benefits, ensuring your projects thrive with lightning-fast data throughput and high bandwidths, powered by a robust Cat.4 modem from Quectel. 

    Enjoy secure data transfer, long-range global coverage even in the most isolated locations, and cost-efficient flexibility – all in the widely adopted Mini PCIe form factor: from remote maintenance to building safety inspection, the possibilities are endless. 

    The full details are available on our website, but you can also jump right to purchase from the Arduino Store!

    Embark on your journey of innovation with Arduino’s expanding ecosystem

    Our end-to-end ecosystem of hardware, software, and cloud solutions keeps expanding to meet your needs. The Portenta Mid Carrier and Arduino Pro 4G Module are only the latest additions that promise to unlock new realms of creativity and innovation for seasoned developers and passionate hobbyists alike.

    So, what are you waiting for? Dive into a world of seamless prototyping and unparalleled connectivity today, with the Portenta Mid Carrier and Arduino Pro 4G Module.

    The post The new Arduino Pro 4G Module and Portenta Mid Carrier expand our ecosystem, and your options! appeared first on Arduino Blog.

    Website: LINK

  • Arduino featured in the 2024 State of the Edge AI Report

    Arduino featured in the 2024 State of the Edge AI Report

    Reading Time: 3 minutes

    The 2024 State of Edge AI Report is out, and we’re proud to be in it — for the second year in a row!

    “Edge AI is a crucial technology in this world of finite resources. It allows us to monitor and optimize consumption in real time: so the use of electricity or water, for example, can be optimized not just for today, but for the future. Manufacturing, agriculture and logistics can minimize their impact, with huge potential for cost savings as well as lowering our carbon footprint,” explains Fabio Violante, CEO of Arduino.

    Edge AI has witnessed a remarkable surge in recent years, driven among other factors by the urgent need for efficient resource management and sustainability. Indeed, this technology leverages real-time data analytics and predictive modeling to enable proactive decision-making in a wide variety of sectors. 

    The 2024 “State of Edge AI” Report, curated by Wevolver, contains a plethora of examples and insights relevant to applications ranging from healthcare to automotive. 

    For example, edge AI solutions facilitate precision farming practices by analyzing soil moisture levels, weather patterns, and crop health data to optimize irrigation and fertilization, thereby maximizing yields while minimizing environmental impact.

    In logistics and transportation networks, deploying AI-powered edge devices in vehicles and infrastructure makes real-time monitoring of traffic conditions and route optimization feasible. This not only improves operational efficiency but also enhances safety by mitigating the risks of accidents and breakdowns. Edge AI also facilitates the development of smart cities by enabling intelligent management of utilities, transportation systems, and public services through seamless integration with IoT devices and sensors deployed across urban environments. This empowers municipalities to optimize resource allocation, reduce congestion, and enhance the overall quality of life for residents.

    In addition to optimizing resource and energy use to reduce financial and environmental impacts, edge AI-powered systems can lead to significant cost savings by foreseeing equipment failures. Predictive maintenance was indeed the focus of our contribution to this year’s report, showcasing products like Opta, Nicla Sense ME and Portenta Machine Control and success stories (like AROL’s and Engapplic’s) that bring the benefits of edge AI into the realm of present, tangible opportunities for enterprises in any industry and at any stage of their development. 

    Curious to find out more? Just download the 108-page report for free at this link

    “Simplicity is the key to success. In the tech world, a solution is only as successful as it is widely accepted, adopted and applied — and not everyone can be an expert. You don’t have to know how electricity works to turn on the lights, how an engine is built to drive a car, or how large language models were developed to write a ChatGPT prompt: that plays a huge part in the popularity of these tools,” Violante adds. “That’s why, at Arduino, we make it our mission to democratize technologies like edge AI — providing simple interfaces, off-the-shelf hardware, readily available software libraries, free tools, shared knowledge, and everything else we can think of. We believe edge AI today can become an accessible, even easy-to-use option, and that more and more people across all industries, in companies of all sizes, will be able to leverage this innovation to solve problems, create value, and grow.”

    The post Arduino featured in the 2024 State of the Edge AI Report appeared first on Arduino Blog.

    Website: LINK

  • A shift register is all you need to build an Arduino Nano-based retro computer

    A shift register is all you need to build an Arduino Nano-based retro computer

    Reading Time: 2 minutes

    If you’ve ever tried to produce an analog video signal with an Arduino, then you know that it isn’t easy. That’s a bit counterintuitive if you think of analog video as “old” and assume that generating an analog video signal would be trivial with our powerful modern hardware. But there are many ways in which analog signals are tricky and that’s especially true if you want something like VGA output, which requires very precise timing. That’s why it is so impressive that Slu4 was able to build this retro computer with just an Arduino Nano and a shift register.

    This was no simple feat and it really showcases Slu4’s programming prowess. His creation can output 320×200 resolution VGA video while reading PS/2 keyboard inputs, with enough processing power leftover to handle basic video game logic and graphics. He demonstrates that with a Tetris­-like games that runs very smoothly. And Slu4 says that it is even possible to add 16 colors per row, though he doesn’t show that in action.

    Slu4 first achieved a similar result a few years ago, but that required several IC (Integrated Circuit) chips. This version only needs one: a standard 74HC166 shift register. That helped him overcome some of the challenges related to VGA timing, which the Nano’s ATmega328 microcontroller can just barely keep up with. This did necessitate some low-level programming to maximize efficiency, but Slu4 was able to pull it off. Even more impressive, he was able to read PS/2 keyboard input at the same time so the player can control the game. 

    [youtube https://www.youtube.com/watch?v=LnYdvNNgLPM?feature=oembed&w=500&h=281]

    The post A shift register is all you need to build an Arduino Nano-based retro computer appeared first on Arduino Blog.

    Website: LINK

  • Detecting HVAC failures early with an Arduino Nicla Sense ME and edge ML

    Detecting HVAC failures early with an Arduino Nicla Sense ME and edge ML

    Reading Time: 2 minutes

    Having constant, reliable access to a working HVAC system is vital for our way of living, as they provide a steady supply of fresh, conditioned air. In an effort to decrease downtime and maintenance costs from failures, Yunior González and Danelis Guillan have developed a prototype device that aims to leverage edge machine learning to predict issues before they occur.

    The duo went with a Nicla Sense ME due to its onboard accelerometer, and after collecting many readings from each of the three axes at a 10Hz sampling rate, they imported the data into Edge Impulse to create the model. This time, rather than using a classifier, they utilized a K-means clustering algorithm — which is great at detecting anomalous readings, such as a motor spinning erratically, compared to a steady baseline.

    Once the Nicla Sense ME had detected an anomaly, it needed a way to send this data somewhere else and generate an alert. González and Guillan’s setup accomplishes the goal by connecting a Microchip AVR-IoT Cellular Mini board to the Sense ME along with a screen, and upon receiving a digital signal from the Sense ME, the AVR-IoT Cellular Mini logs a failure in an Azure Cosmos DB instance where it can be viewed later on a web app.

    To read more about this preventative maintenance project, you can read the pair’s write-up here on Hackster.io.

    [youtube https://www.youtube.com/watch?v=R_FClm1Hk_s?feature=oembed&w=500&h=281]

    The post Detecting HVAC failures early with an Arduino Nicla Sense ME and edge ML appeared first on Arduino Blog.

    Website: LINK

  • This robot dominates dart games

    This robot dominates dart games

    Reading Time: 2 minutes

    You’ll find dartboards in just about every dive bar in the world, like cheaper and pokier alternatives to pool. But that doesn’t mean that darts is a casual game to everyone. It takes a lot of skill to play on a competitive level and many of us struggle to perform well. Niklas Bommersbach decided that years of practice was too much of a commitment, so he built this robot that can dominate dart games.

    This robot can, essentially, throw a dart perfectly every time to hit the desired target on the board. If you’re unfamiliar with the game, you might think that a bullseye is always best. But that isn’t true — especially for certain rulesets. To play strategically, Bommersbach needed his robot to nail the desired space on the board on-demand. 

    His first step was to make throws repeatable and predictable. His robot has a balanced arm that spins up to a precise rotational speed. At the set angle, it releases the dart. By monitoring many throws with computer vision, Bommersbach was able to dial in the speed and angle variables until the result became very predictable. An Arduino UNO Rev3 board controls the arm speed and calculates the release. But Bommersbach struggled to get the timing of the release exactly right, as the Arduino was running its code sequentially and so there was a small variance — just enough to throw off the throw.

    His solution was to add a second Arduino, which has the sole responsibility of releasing the dart using a stepper-actuated mechanism. That allowed for very precise timing and repeatable throws. The timing influences the dart’s vertical position on the board, while a linear motion system controls its horizontal position.

    [youtube https://www.youtube.com/watch?v=AJhCRuvOhkM?feature=oembed&w=500&h=281]

    In test matches, Bommersbach’s robot was able to trounce human opponents with ease.

    The post This robot dominates dart games appeared first on Arduino Blog.

    Website: LINK

  • Introducing the new Arduino PLC Starter Kit: Plug into the future of industrial automation

    Introducing the new Arduino PLC Starter Kit: Plug into the future of industrial automation

    Reading Time: 4 minutes

    In a world where industrial automation is rapidly advancing, education often struggles to keep pace. 

    This disconnect leaves a big gap in practical, industry-relevant skills among graduates. 

    Addressing this critical need, we’re excited to introduce the Arduino PLC Starter Kit. Powered by the robust Arduino Opta mini PLC and backed by the intuitive Arduino PLC IDE, this kit is set to revolutionize programmable logic control education.

    Continue reading to find out more about the PLC Starter Kit.

    What is the Arduino PLC Starter Kit?

    Before we delve into the details of this exciting new offering, let’s explain exactly what a PLC is. A Programmable Logic Controller (PLC) is a type of industrial computer that’s used to automate, control and coordinate a wide range of manufacturing processes and machinery. 

    The Arduino PLC Starter Kit isn’t just another educational tool; it’s a comprehensive solution designed to bridge the gap between theoretical knowledge and practical application in industrial automation — a powerful simulation tool specifically created for vocational and university students considering a career in manufacturing.

    Here’s what this groundbreaking kit offers:

    • 20 hours of in-depth lessons — Explore the world of programmable logic control with the ‘Explore PLC’ course. The course has been created by educators and covers all the essential contents including the history of programmable logic controllers, Modbus RS-485 communications, and how PLCs integrate with industrial simulated systems. 
    • Arduino Opta WiFi — Built with industrial IoT capabilities, our versatile and easy-to-use micro PLC offers real-time control, monitoring, and predictive maintenance for a variety of applications. Based on the existing  Arduino Opta WiFi, it includes the STM32H747XI dual-core Arm® Cortex®-M7 +M4 MCU, making it exceptionally reliable and robust for your classroom.
    • Digital input and output simulators – The kit’s custom-designed hardware helps bring learning to life by allowing users to replicate real-world situations. The input simulator (DIN Simul8) includes 8 switches and power control, while the output simulator (DIN Celsius) features a resistor array and a temperature sensor.
    • Arduino PLC IDE — Our popular programming tool, Arduino PLC IDE, makes programming simple. Choose from any of the five programming languages defined by the IEC 61131-3 standard (Ladder, Functional Block Diagram, Structured Text, Sequential Function Chart, or Instruction List) to quickly code a range of PLC applications
    • Arduino IDE 2 — Another benefit of the kit is that it can be programmed using our powerful IDE 2. A step up from the classic Arduino IDE, the Arduino IDE 2 offers increased performance, an improved user interface and other new features, such as autocompletion and a built-in debugger.

    And let’s not forget that all the kit’s hardware is fully compatible with the Arduino Cloud.

    Get industry-ready with real-life simulations

    Thanks to their exceptional flexibility, programmable logic controllers are being used more and more frequently in a wide range of industries. From production plants, assembly lines and packaging machines to heating control systems, traffic lights and elevators, PLC applications are vast and varied.

    To help students prepare for the demands of these competitive industries and the challenges they face, we believe they need access to high-quality PLC simulation tools. After all, there’s a big difference between reading about programming in a textbook and actually doing it. As Benjamin Franklin once famously said, “Tell me and I forget, teach me and I may remember, involve me and I learn”. And that’s where the PLC Starter Kit comes into play.

    Boasting industrial IoT capabilities, the kit’s Opta WiFi mini PLC — together with the input and output simulators – allows students to design and implement programs that simulate real-life industrial automation projects.

    Take a manufacturing production line, for instance. To prevent overheating and a potential fire, the equipment’s PLC might be programmed to shut down when the input sensor detects a high temperature. With the PLC Starter Kit, students can simulate a similar scenario and gain practical knowledge about how inputs and outputs interface with a PLC.

    It’s a great way to promote a deeper understanding of industrial automation and system behavior, while giving students the hands-on experience and critical thinking skills they’ll need to tackle real-world challenges in their professional careers.

    Try the Arduino PLC Starter Kit today

    With its powerful industrial IoT capabilities, easy programming software and wealth of online content, the PLC Starter Kit is the perfect introduction to automated programming for students and educators. 

    Interested in using the PLC Starter Kit in your education setting? Order the PLC Starter Kit here or get in touch through your local distributor and discover how it can transform your learning environment.

    The post Introducing the new Arduino PLC Starter Kit: Plug into the future of industrial automation appeared first on Arduino Blog.

    Website: LINK

  • A three-year journey to build a reaction wheel

    A three-year journey to build a reaction wheel

    Reading Time: 2 minutes

    How do unstable things stay upright? True passive balancing is very difficult and isn’t dynamic, so it doesn’t help when there is movement. Active balancing is all about inertia and this is how a tightrope walker can traverse a chasm by making small adjustments with a long pole. This is the same principle behind “self-balancing robots” that utilize reaction wheels. But the control scheme necessary to get that right is very difficult to perfect, as demonstrated by Nikodem Bartnik’s project that was three years in the making.

    Physically, this is about as simple as a self-balancing robot can be. It stands on a single foot designed to be unstable in one horizontal axis, but stable in the other. It is long, front-to-back, so the robot can’t tip forward or backward. But the bottom of the foot has a curve to it, so it can’t stand upright without tipping to one side or the other. A reaction wheel with bolts for weights is responsible for preventing that tipping.

    This is supposed to work by spinning in order to “push” against nothing (thanks to inertia), which generates torque to stop the tip. But Bartnik discovered that it was a massive challenge to tune that spin.

    An Arduino Nano board controls a small brushless DC motor that spins the reaction wheel. A gyroscope sensor lets the Arduino monitor tilt and power comes from a hobby LiPo battery. The Arduino utilizes PID (proportional-integral-derivative) algorithms to try an apply just enough spin to counteract tipping, but not so much that it overcorrects.

    That’s where Bartnik ran into trouble, because PID tuning is hard. Each variable has to be at the exact value — relative to the others — for PID to work as intended. After countless hours of struggling, Bartnik added a Bluetooth module to the Arduino to change those values wirelessly without flashing new code every time. That sped up the process dramatically, allowing Bartnik to find a set of values that works pretty well to keep the robot upright.

    [youtube https://www.youtube.com/watch?v=MHxw4yaNKVw?start=179&feature=oembed&w=500&h=281]

    The post A three-year journey to build a reaction wheel appeared first on Arduino Blog.

    Website: LINK

  • This small scorekeeping air hockey game brings the arcade classic to your tabletop

    This small scorekeeping air hockey game brings the arcade classic to your tabletop

    Reading Time: 2 minutes

    Go to any arcade and the air hockey table will probably be one of the most popular games they have. Everyone loves air hockey, but a lot of people don’t want to go to an arcade just to play. If you fall into that category, then you can follow LloydB’s Instructables guide to make your own scorekeeping air hockey table.

    The key to air hockey is right there in the name: air. All of those little holes in the table’s surface allow air flow. That creates an air cushion for the puck and paddles to float on, reducing friction and enabling knuckle-shattering gameplay. For that to work, the table needs something pushing at least as much air as escapes through the holes. This table isn’t very big, so it doesn’t need a high volume of air. Three 12V PC fans are enough. They push air into a chamber beneath the hole-filled top board. Power for the fans comes from a battery holder with 8 AA batteries.

    Those batteries also power the Arduino UNO Rev3 that handles the scorekeeping, which is the other important part of air hockey. Each goal chute has a laser break-beam sensor to detect when the puck comes shooting in. The Arduino then updates the scores shown on a 16×2 LCD screen. The Arduino will also emit a tone through a buzzer. That increases in pitch with each point, so players get audible cues as the game progresses. 

    [youtube https://www.youtube.com/watch?v=nVPHKXhAPF4?feature=oembed&w=500&h=281]

    The post This small scorekeeping air hockey game brings the arcade classic to your tabletop appeared first on Arduino Blog.

    Website: LINK

  • Don’t ignore single-axis joysticks

    Don’t ignore single-axis joysticks

    Reading Time: 2 minutes

    When you hear the word “joystick,” you probably think of the standard dual-axis joysticks that we see on video game controllers. As the name implies, those move and provide signals for two axes (X and Y). But there is no reason that a joystick needs two axes and, in fact, that may not be desirable. To demonstrate the practicality of single-axis joysticks, Austin Allen built this simple controller suitable for several different applications.

    Allen’s device controls three different things with its three single-axis joysticks: an RGB LED, a servo motor, and a stepper motor. Each of those is an example of a single-axis at work. That axis maps to color (red and green) and brightness for the LED, horn position for the servo, and rotation direction/speed for the stepper motor. There are, of course, several other viable use cases for single-axis joysticks.

    To showcase this, Allen’s unit provides signals to an Arduino Nano board, which then controls the LED and motors. It controls the LED and servo motor directly, but goes through a TMC2208 driver to handle the stepper motor. The signals from the joysticks are easy to read, because they’re just potentiometers. Each joystick accepts positive and negative power, then outputs a voltage between those two based on its position. With a standard analogRead() function, the Arduino can check the voltage and determine the joystick position.

    You may not have any use for this specific controller, but it does do a good job of illustrating potential applications for single-axis joysticks and you should consider them for future projects.

    [youtube https://www.youtube.com/watch?v=LC1AI6w4J7Y?feature=oembed&w=500&h=281]

    The post Don’t ignore single-axis joysticks appeared first on Arduino Blog.

    Website: LINK

  • Ceiling fan becomes a “spaceship” SCARA robot arm

    Ceiling fan becomes a “spaceship” SCARA robot arm

    Reading Time: 2 minutes

    We all know how annoying a ceiling fan can be when it isn’t balanced well and that annoyance perfectly demonstrates the necessity of a good, sturdy bearing. A ceiling fan’s bearing needs to allow for smooth rotational motion with as little friction as possible, while completely constraining movement in every other axis. Those properties make a ceiling base a surprisingly good starting point for a SCARA, as demonstrated in tuenhidiy’s recent Instructables write-up.

    In their tutorial, tuenhidiy refers to this as a “Spaceship Scara Arm.” It isn’t exactly clear why they chose the “spaceship” terminology, but it is similar to a conventional SCARA (Selective Compliance Assembly Robot Arm) — just one with only two degrees of freedom (DOF).

    The entire point of a SCARA is that it is fully constrained, except for rotation around the Z axis at each joint. After their ceiling fan broke, tuenhidiy noticed that the fan’s base with its beefy bearing would be perfect for this application. They took that, added a couple of stepper motors and belts, some aluminum extrusion, and a couple more bearings to create this simple SCARA.

    An Arduino UNO Rev3 board controls those motors through a CNC Shield V3. Grbl firmware makes it easy to control the positions of the motors using just about any software a user could possibly want. Some simple calculations regarding the arm’s geometry and gear ratios should let appropriate software determine exactly where it is in space. For a demonstration, tuenhidiy added a DC solenoid for its magnetic capabilities. But anyone replicating this project can add their own end effector to suit their needs.

    [youtube https://www.youtube.com/watch?v=F3zL910CVBw?feature=oembed&w=500&h=281]

    The post Ceiling fan becomes a “spaceship” SCARA robot arm appeared first on Arduino Blog.

    Website: LINK

  • A delightful Chandrayaan-3 rocket launch model

    A delightful Chandrayaan-3 rocket launch model

    Reading Time: 2 minutes

    It may not get as much attention as NASA, Roscosmos, or even CNSA (China National Space Administration), but India’s space program has achieved some impressive goals. Just last year, in August of 2023, ISRO (Indian Space Research Organisation) completed their first soft landing on a celestial object with the Chandrayaan-3’s moon landing. That understandably inspired pride among Indians and the YouTube channel Science 4 U celebrated by building this model of the Chandrayaan-3 launch.

    This project can be completed with some everyday materials and a few inexpensive components. When ready, it counts down from 10. At zero, the rocket climbs the launch pad’s structure. That rocket is a small model that makers can fabricate on any 3D printer. The launch pad and structure is mostly foam packing material.

    The electronics consist of a low-speed geared DC motor, a relay module, an OLED screen, a battery holder, and an Arduino UNO Rev3 board. The Arduino starts by displaying the numerical countdown on the OLED screen. After the countdown completes, the Arduino switches on the relay. That completes the motor circuit, allowing current to flow from the AA batteries to the motor. The running motor winds in a string that pulls the rocket up the structure.

    There doesn’t seem to be any switch or sensor to turn off the motor, so the user will have to program a timer to switch the relay. There also isn’t any hardware to reverse the motor polarity, so the user has to lower the rocket manually after a launch. But this is an inexpensive and fun project that should be perfect for students in India who are excited by Chandrayaan-3.

    [youtube https://www.youtube.com/watch?v=oftwbO1LwpA?feature=oembed&w=500&h=281]

    The post A delightful Chandrayaan-3 rocket launch model appeared first on Arduino Blog.

    Website: LINK

  • Can I build my own robot with Arduino?

    Can I build my own robot with Arduino?

    Reading Time: 5 minutes

    When you think of automation, what’s the first image that comes to mind?

    For many of us, it’s a robot. From the blocky, square-headed characters of sci-fi comic fame to household more complex creations like the Replicants of Blade Runner — robots have captured our collective imagination for a long time.

    It’s no surprise, then, that lots of Arduino users eventually set out to build a robot of their own.

    In this article, we’ll look at how to build your own robot with Arduino and share some project examples from other makers.

    What exactly is a robot?

    The term “robot” can cover a lot of potential meanings, so let’s agree on a definition.

    Here’s what the Oxford Dictionary says:

    “(especially in science fiction) a machine resembling a human being and able to replicate certain human movements and functions automatically.”

    It’s a good start, but do all robots resemble humans? Here’s Oxford’s second definition:

    “a machine capable of carrying out a complex series of actions automatically, especially one programmable by a computer.”

    This seems more accurate since it encompasses things like construction robots, robotic pets, and robotic vehicles.

    Humans have been attempting to build robots for centuries, although most of our success has taken place within the last few decades. Today, thanks to advancements in hardware and automation technology, almost anyone can build their own robots at home.

    What do you need to build a robot?

    Building your own robot might seem like an unimaginably complex task. After all, aren’t robots the stuff of sci-fi movies and leaked military prototypes?

    The good news is that building a robot doesn’t have to be a monumental undertaking, and can in fact be done with some fairly simple and easily obtained components.

    Here’s what you’ll need:

    • Some simple components like wheels, sensors, and switches (this will vary greatly depending on the type of robot you’re planning to build)
    • Some basic coding and automation skills (you don’t need to be a coding wizard)
    • A microcontroller like the Arduino UNO R4, for example.

    This is, of course, just a starting point. You can build a fairly simple robot, or you can ramp up the complexity and sophistication as much as you like — the sky really is the limit here. For beginners, though, you can find everything you need at the hardware store.

    Explore Arduino robots

    With Arduino’s products and other components, it’s possible to build your own robots more easily than ever before.

    We need to look no further than the Arduino Project Hub to find a ton of inspiring ideas. Let’s explore a few.

    Line-following robot

    Robots don’t have to be ultra-complex humanoid feats of engineering.

    In fact, if you’re just getting started with robotics, it helps to keep things simple. Check out this great example — it’s a simple, car-shaped robot designed to follow a colored line on the floor.

    The robot constantly monitors data from its infrared sensors in real time and adjusts movement based on feedback, ensuring it never strays from the line.

    If this kind of project interests you, you’ll love the upcoming Arduino Alvik, which will have a line-follower functionality. Alvik’s user-friendly interface makes MicroPython coding and robotics project development easier than ever, making learning and creating a breeze. 

    Alvik is also equipped with a range of sensors including a ToF distance sensor, line follower array, color sensor, and more. It’s especially impressive when it comes to swiftly detecting and navigating obstacles and colors.

    Join the waiting list here to be first in line for updates about Arduino Alvik.

    A piano-playing robot

    Did you think playing music was a uniquely human trait?

    Well… think again — this musically-inclined robot is capable of controlling piano keys automatically. The device was able to play piano keys 1,875 times in the space of a minute, beating the human world record by a significant margin.

    The project used a range of tools including solenoids and a custom-designed Java software interface.

    A chess-playing robot arm

    Robots have been giving us humans a run for our money in the world of chess for quite some time.

    For a new spin on the machines vs. humans saga, take a look at this robotic arm capable of physically moving the chess pieces.

    The arm was created using a 3D printer and works by using a visual recognition system to watch the opponent’s move and then formulate a response. 

    One of the most interesting things about this robot is the code used for move recognition. Because the robot uses visual recognition to follow the human’s moves, there’s no need for additional complex hardware like reed switches to be built into the chessboard, unlike other chess-playing robots.

    Stay tuned for Robotics Week!

    If you have a passion for building robots or just want to learn more about this topic, you’ll love Robotics Week, which takes place this year from April 6th-13th.

    It’s a full week of events — many of which are virtual — all centered around robotics and STEM.

    And if that’s not enough for you, this year’s Control Automation Day will focus on the theme of robotics: register today to see Arduino’s session on March 26th, “Arduino Pro Opens the Door to Robot Control for Agriculture, Biotech, and Manufacturing,” showcasing a success story based on the Portenta Machine Control by “Robotics for the Real World” provider R2 labs.

    In the meantime, visit our Project Hub for more inspiration — where you can search by category and difficulty level. And don’t forget to share your own projects with our community!

    The post Can I build my own robot with Arduino? appeared first on Arduino Blog.

    Website: LINK

  • An easy way to add a gear indicator for your stick shift

    An easy way to add a gear indicator for your stick shift

    Reading Time: 2 minutes

    The objective benefits may be almost nonexistent today, but there is still something satisfying about rowing through the gears in a car with a manual transmission. If that car was made in the past couple of decades, there is a good chance that it has an indicator on the dash to tell you what gear you’re in. But older cars usually don’t have an indicator, which is why you might want to follow Vaclav Krejci’s guide to add one.

    The great thing about this project is that it is easy to perform — even for beginners. Gearheads that don’t typically touch electronics can complete this build with some patience. Once done, it will display the current gear and a visual diagram on a small OLED screen, which the user can then mount anywhere in their car. 

    This works using an arrangement of four Hall effect sensors that detect the strength of the magnetic field coming from a permanent magnet attached to the gear shift lever. The principle is similar to triangulation, because the values detected by the four sensors can be used to calculate the position of the magnet. That isn’t very precise, but it doesn’t need to be for an application like this.

    The four Hall effect sensors mount onto a custom PCB. That connects to an Arduino UNO Rev3, which the user can tuck away inside of a center console. The Arduino performs the calculations, then updates the OLED screen with the results. Krejci even demonstrates how the user can simulate the entire circuit using WOKWI, which is very useful for ironing out kinks before building a hardware prototype. 

    [youtube https://www.youtube.com/watch?v=QixtxaAda18?feature=oembed&w=500&h=281]

    The post An easy way to add a gear indicator for your stick shift appeared first on Arduino Blog.

    Website: LINK