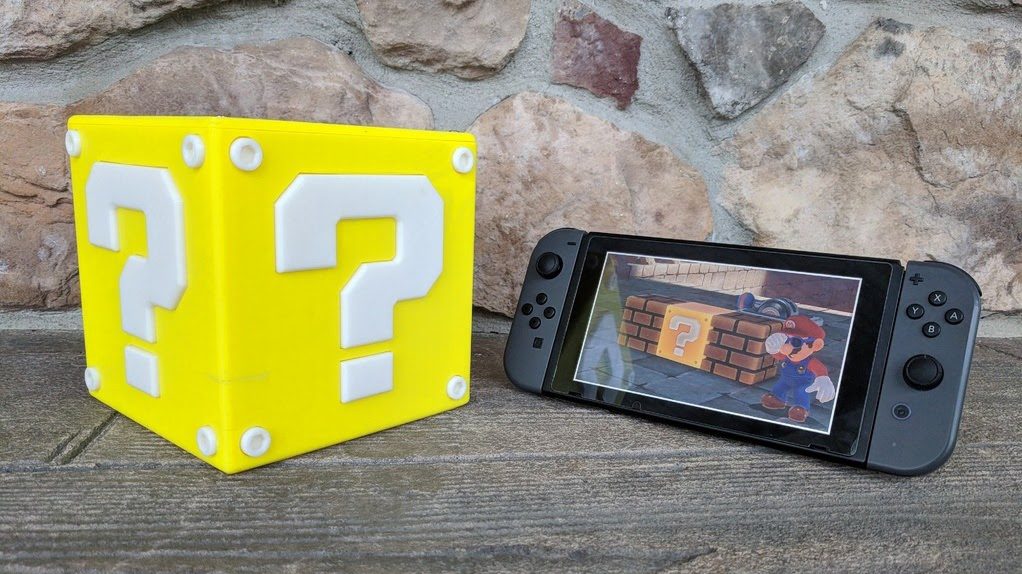
For this week’s Project of the Week, 3D print and Arduino your way to this coin-spitting Question Block from universe of Nintendo favorite, Mario.
Loose change, shrapnel… whatever you call it, the blight of small denomination coins deserves better than sitting in a jar on the shelf at home. Which is perhaps the thought that crossed maker Jonathan Whalen’s mind when he created a fully functioning Question Block from the Mario universe.
Putting his spare change to use in some video game themed frivolity, he fashioned a Question Block from the Nintendo’s Mario video game series using a 3D printer, Arduino and a bunch of other small electronics parts.
The result is pretty spectacular. We’re just holding out for the mushroom-ejecting remix.
Find out how to build your own after the jump.
Super Mario Question Block: What do You Need?
In order to create your own Super Mario Question Block, you’ll first need to download and print the required STL files. Handily Whalen has published them on the usual file repositories — you can get them from Thingiverse here.
Naturally you’ll need to print the main sections of the box in that signature yellow color too, which means an appropriately hued filament. That, and white for the question mark symbols themselves.
It’s also worth keeping in mind that the box will only shoot $1 coins. Whalen provides an STL to print your own correctly sized coins, which would naturally look best printed in gold filament.
Here’s the full bill of other materials you’ll need:
Super Mario Question Block: Putting it all Together
To create this coin-shooting Question Block, Whalen (a.k.a. Jonnywayway) 3D prints the outer shell, glue-on question marks and structure of the internal coin-firing mechanism. Printed at 20% infill with no supports, Whalen describes it as a long print, so leave yourself adequate time if you’re planning to whip this up to a deadline.
The mechanism to spit the coins out of the box is ingenious for its simplicity. A sliding carriage slots into a guiding rail printed in place on the “roof” part of the box. Held in place with a rubber band, this carriage is free to slide deeper into the box, bringing a coin with it, before firing back into place under the elastic tension from the band.
With the band and carriage in place, Whalen fixes the Arduino Nano, vibration sensor and slide switch in place (also on the roof of the box) with screws, before turning his attention to the stepper motor.
Inserted into one of the printed pieces for the mechanism, the motor mounts to the guiding rail. With a printed cog attached to its driveshaft, the stepper draws the carriage down, releasing it to spring back into place and launching a coin in the process.
Wiring these electrical components up, then its just a case of closing the box and gluing the decorative elements on the outside.
It’s worth noting this’ll be a tough project for absolute beginners. Whaley linking to the Arduino code but does not going as far as to explain how to set it all up. The same goes for hooking up power inside the Question Block. Though we imagine carefully watching his build video should give some clues.
You can find all the elements of Whaley’s build on his Thingiverse page for the project. Happy making!
Website: LINK
Schreibe einen Kommentar
Du musst angemeldet sein, um einen Kommentar abzugeben.