
A sixth joint rotates the end of the head, to which you can attach various accessories using tiny LEGO connectors inserted into its grid of holes and those on the accessory, making them easy to fit and remove.
A similar LEGO connection system is used on the bottom of the robot to attach a base. Several options are available; we were supplied with the G-Base 2.0 (£58), which attaches the arm securely to the edge of a desk (so long as it’s not too thick).
Robot connections
With the robot arm secured to a desk, it’s time to power it up. A DC supply connects to a barrel jack on the base with a red power switch next to it. Raspberry Pi 4’s USB and Ethernet ports are exposed, along with its GPIO pins via a breakout header just above. On the opposite side of the base are a micro-HDMI port, headphone jack, USB-C port, and microSD card slot.
The inserted microSD card is pre-installed with a special version of Ubuntu MATE featuring a built-in development environment for MyCobot and several apps and tools. An extensive Python library enables you to quickly start positioning the arm by setting one or more joint angles or co‑ordinates – you can also read the current values. So you can manually move the arm into different positions and read the values to help you program it to shift between positions.

Another coding option is the myBlockly app in which you drag and drop Scratch-style blocks, including dedicated ones for MyCobot to set joint angles/co-ordinates and light up the RGB LED matrix on the head. Make sure you set the Baud value in the init block to 1000000, however, otherwise it won’t move. The arm also works with the commonly used ROS (Robot Operating System) 1 and 2.
The MyCobot written documentation could be clearer and better organised, but several videos help you to get to grips with it.
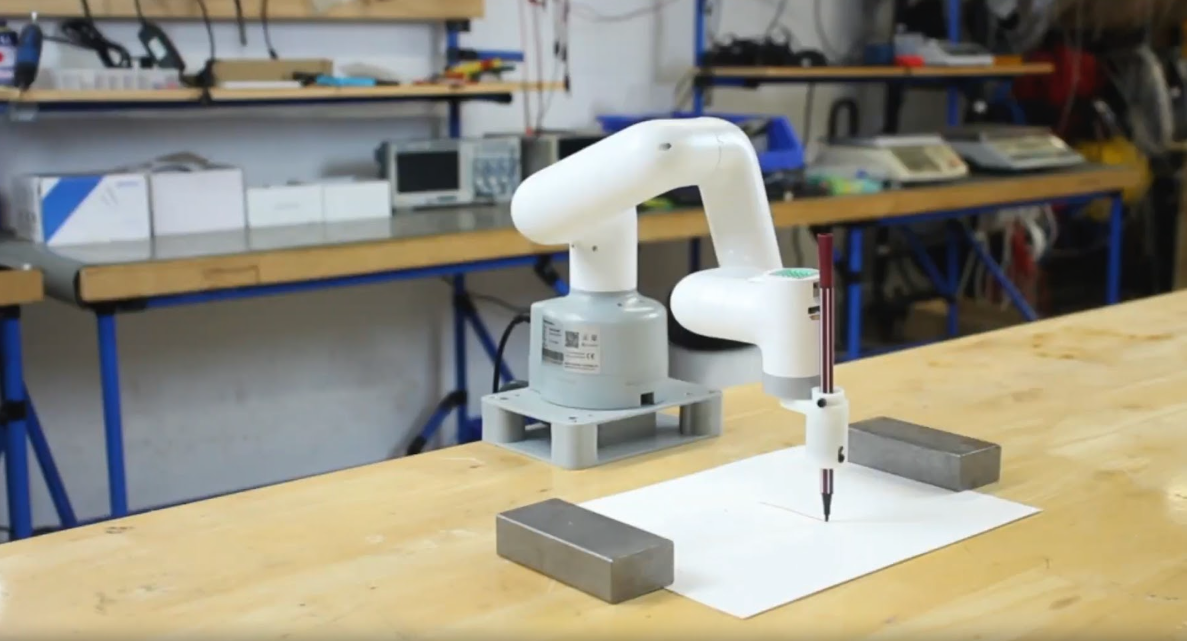
Attaching accessories
Our MyCobot arm was supplied with a couple of optional accessories: an adaptive gripper (£106) and a pen holder (£58). The gripper has a connector that plugs into a servo port on the head. It worked well and we soon had it picking up and dropping items on the desk with good repeated positioning precision.
The head also features a Grove connector, USB-C, and mini GPIO breakout, so there are plenty of connection options. You could even add a camera to give the arm computer vision.
While considerably more expensive than other Raspberry Pi robot arms we’ve tested, even without the addition of accessories, the MyCobot 280 is more robust and stylish. It has more powerful servos, while the joints have bearings for smoother movement and improved precision.
Verdict
9/10
It’s not cheap, but it does include a Raspberry Pi 4 and is a robust and stylish robotic arm with smooth and accurate movement.
Specs
Features: 6DOF, 330° rotation range, 280 mm radius, up to 250 g payload, LEGO interfaces on base and head, Raspberry Pi 4
Connections: 2 × USB 3.0, 2 × USB 2.0, Ethernet, micro-HDMI, GPIO breakout headers, USB-C, headphone jack, Grove and servo connectors