Kategorie: Mobile

  • Is your house secure? 4 common threats and how home automation can keep you safe

    Is your house secure? 4 common threats and how home automation can keep you safe

    Reading Time: 7 minutes

    If there’s one place in the world you want to feel safe, it’s inside your home.

    And yet, the unfortunate reality is that our homes can sometimes be a source of danger. From burglaries to fires, it’s important to take precautions to make sure your house remains a sanctuary and not a deathtrap.

    Home automation can be a huge help here. Today’s homeowners (and renters) have a ton of tools at their disposal to stay safe from a range of hazards and risks. Some of these tools you can even build yourself, with minimal cost and effort.

    In this article, we’ll look at some of the main dangers people face at home, and how automation can minimize the risk.

    5 common home security threats

    What are the biggest dangers facing us at home? Apart from dropped Lego pieces and precariously-stacked crockery, here are some of the main dangers facing our homes and why they’re so serious.

    Burglaries

    Home burglaries are actually decreasing in frequency as time goes on, but they’re still a threat.

    In the U.S., for example, over one million burglaries take place every year, and property crimes are the most common type of crime. Burglars use a range of techniques and methods to gain entry and steal your hard-earned possessions, and often leave behind a legacy of trauma and shock — even when you weren’t at home.

    Fires

    A house fire is a nightmare scenario, but this is also a very real concern.

    Research shows that 24.2% of all fires worldwide occur in residential buildings. Some of the main causes include:

    Even when you manage to escape a house fire, the damage can still be enormous. On top of the financial cost, you have to deal with the loss of items that can never really be replaced. The best option when it comes to house fires is to do whatever it takes to prevent them.

    Environmental dangers

    Extreme weather events are on the rise around the world, and this is a problem for the safety of your home.

    Hurricanes, earthquakes, floods, and wildfires can be devastating, and wherever you are in the world there’s almost certainly some kind of environmental risk facing your home. Repairing a damaged home can become extremely costly, and can cause massive disruptions to your life.

    Cybersecurity threats

    One of the biggest downsides to an increasingly tech-savvy world is the rise in cyber crime, which is much more widespread than it was in past decades.

    The days of clumsy spam emails being the biggest threat to ordinary people are long gone — cyber attacks are now incredibly sophisticated and constantly evolving.

    With the rise in smart home devices, typically as part of the Internet of Things, cyber criminals now have a new avenue to exploit. Many home automation systems aren’t properly protected, in fact one study found that many had major design flaws putting them at risk of cyber attacks like data leaks and break-ins.

    Home automation as a solution

    Although home automation can be a target for attackers, it can also function as a highly effective defence against many of the threats to your home.

    The home automation market is growing fast, and is predicted to reach $163 billion by 2025. As this technology becomes more advanced, more possibilities for protecting your home keep emerging. 

    Let’s take a look at some of the ways you can harness the power of home automation to keep your home safe from multiple dangers.

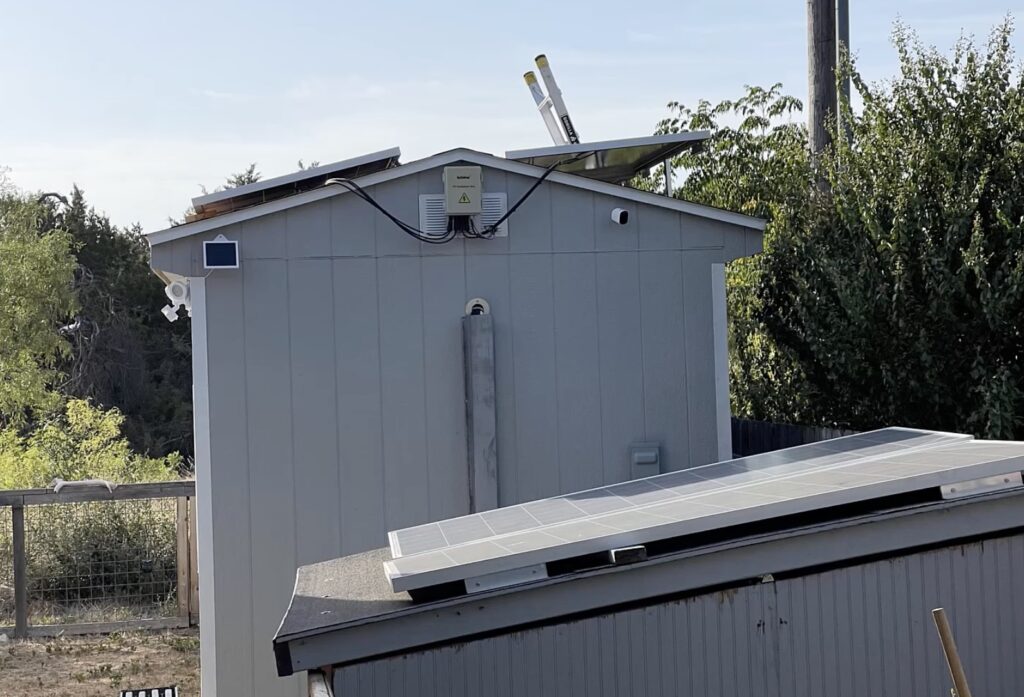
    Enhanced security features

    The best place to start with smart home security is with the basics — the locks, keys, and alarms we’ve been using to keep our houses safe since time immemorial.

    With home automation, you can take these security features to the next level, adding a new layer of safety and convenience to your home, such as:

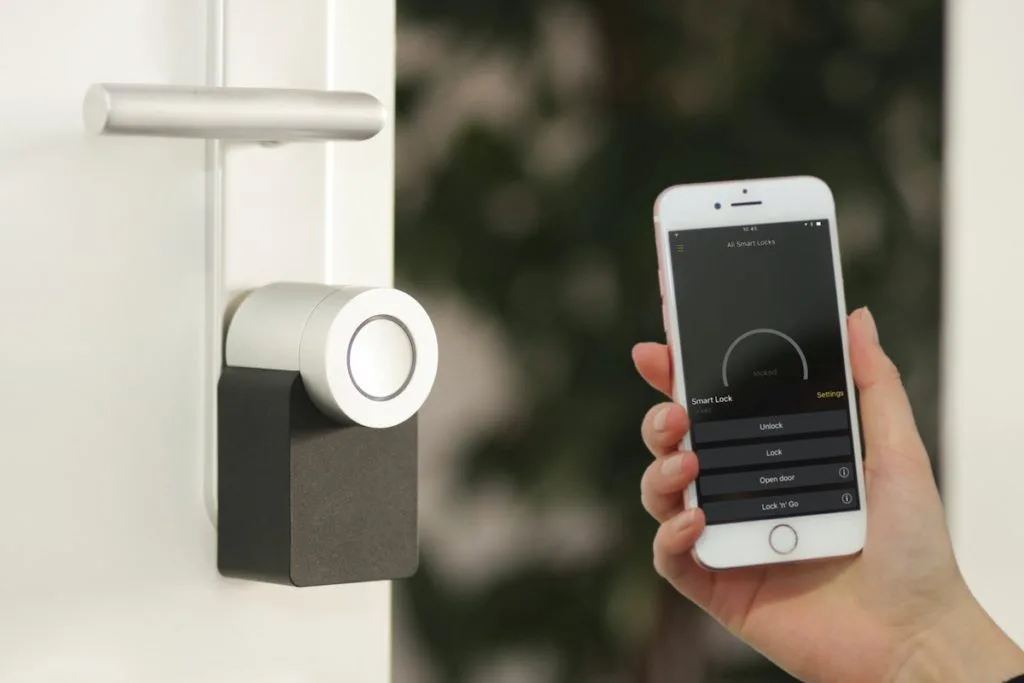
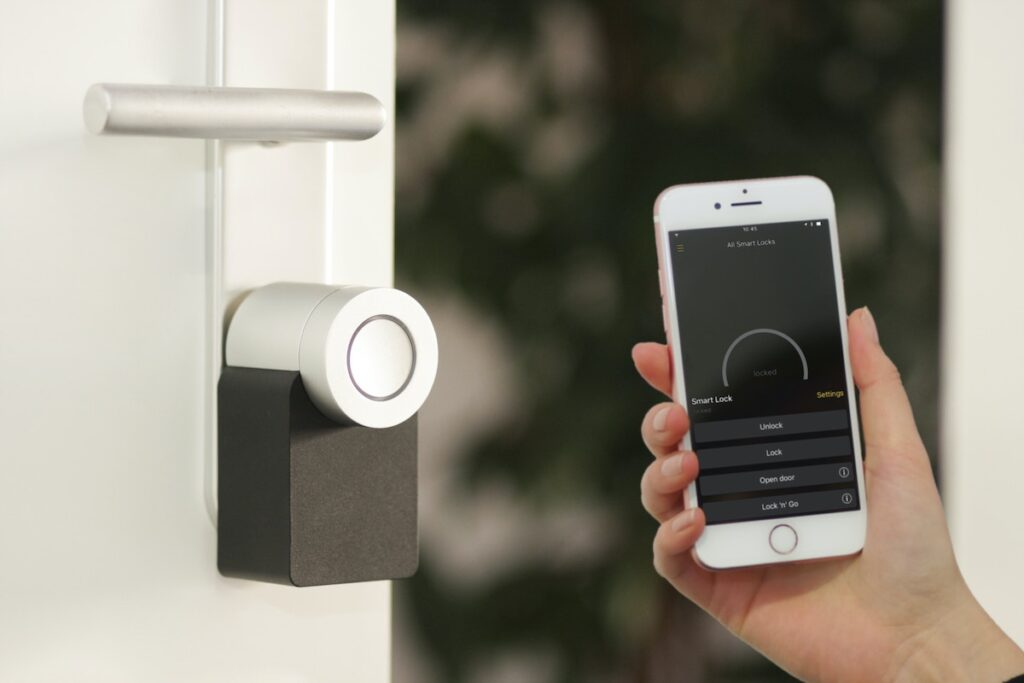
    • Smart locks and keyless entry systems, for instance based on biometric data like your fingerprints, eliminate the need for keys (which are easily lost), and make it much harder for an unwanted visitor to gain entry to your home.
    • Surveillance cameras and video doorbells allow you to see who’s at the door without going to check, even when you’re not at home. Research suggests that homes with security cameras are 300% safer from burglaries than those without.
    • Motion sensors and alarms. While they might not be cutting-edge smart home tech, these time-tested devices have been in use for decades and are still very much around because they work so well.

    Fire and environmental safety

    House fires and environmental disasters are often treated as freak accidents — something we have no control over and that we should simply hope never happens to us.

    However, we’re not powerless here, and home automation can actually offer some solid defences against the raging elements. Some examples include:

    • Smart smoke detectors. Like traditional smoke detectors, these pick up on unusual smoke in your home and issue an alert. But these smarter models can also send warnings to your smartphone, wherever you are. They can detect the difference between, for example, carbon monoxide and smoke, and some can tell you where the smoke is coming from.
    • Flood sensors and leak detectors can help you locate and identify water leakages while they’re still small and fixable, before they turn into destructive and expensive problems.
    • An uninterrupted power supply (UPS) can ensure the lights and power stay on even when the main grid has been disabled by a storm or other natural disaster, so you can keep your essential functions running.

    Cybersecurity measures

    While home automation tech is becoming more advanced all the time, there are also vulnerabilities here though, and some cyber criminals target IoT and smart home devices.

    To keep your smart home as secure as possible, it pays to take security seriously here. Let’s take a look at some basic steps everyone can take to keep their devices safe from cyber attacks.

    • Make sure your WiFi network is secure, with a strong password and encryption. Try to find a router with a security protocol of WPA2 or ideally WPA3.
    • Regularly update the firmware that runs on your smart home devices — this will ensure they’re protected against any new threats and have the most up-to-date security features installed.
    • Replace any outdated technology including routers.
    • Change your passwords frequently, and don’t use common or easily guessed passwords.

    DIY vs. professional installation

    When it comes to smart home security, it’s common to wonder if you should pay for a professional to take care of your needs, or do it yourself.

    Security is, of course, a serious matter. It’s not an area you want to leave to chance, or risk leaving your home with safety flaws because you did something wrong. 

    If you’re a beginner to building and maintaining your own home automation devices, it’s best to leave the important security jobs to a trusted professional. And even if you have some experience with these jobs, it might still be a good idea to use a specialist for the really important stuff — things like alarm systems and smart locks.

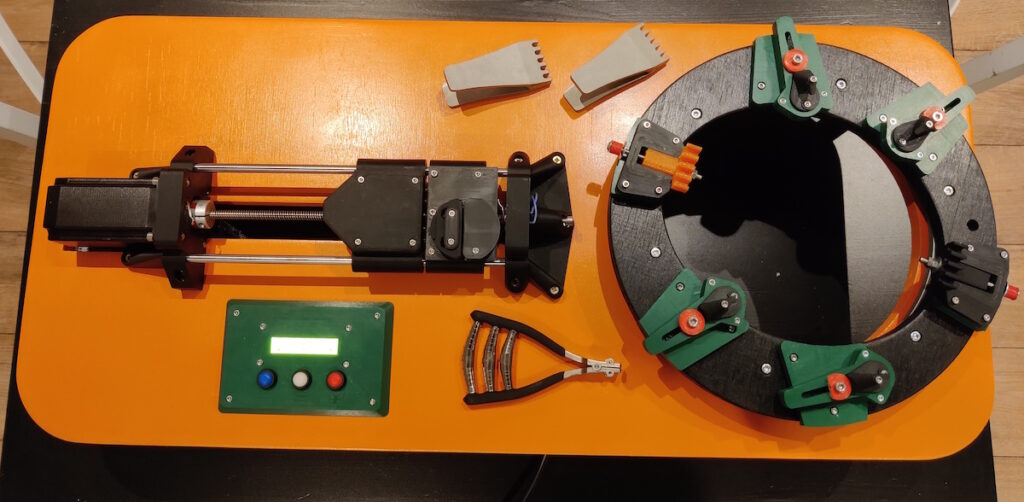
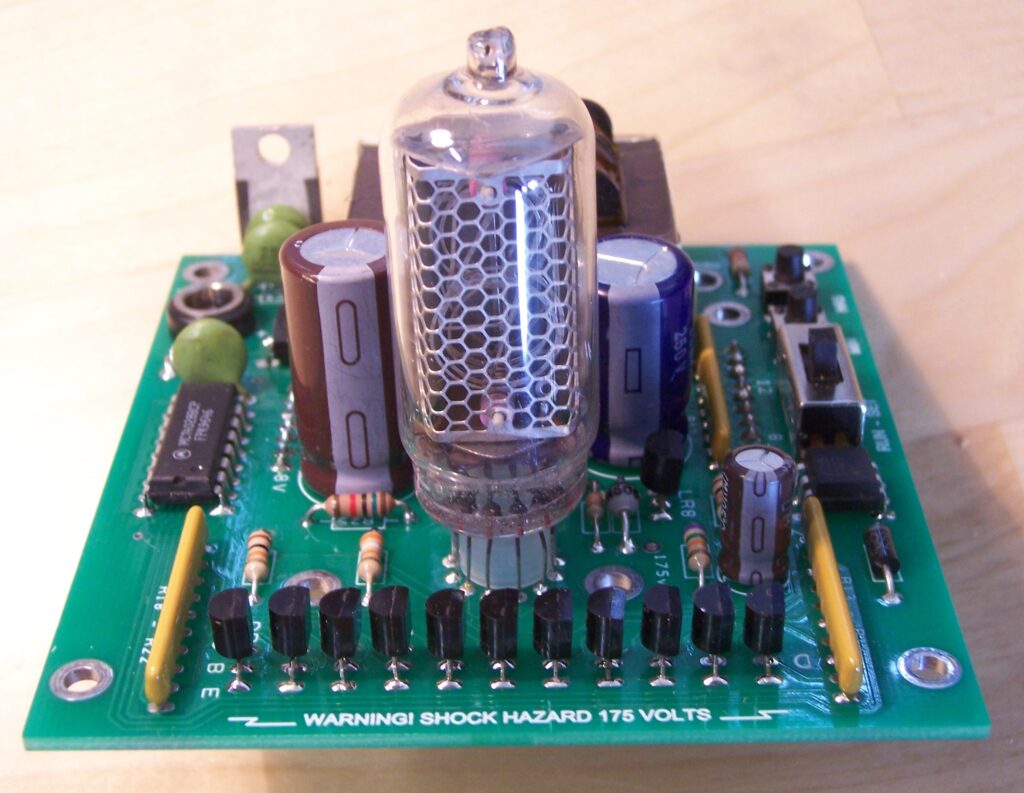
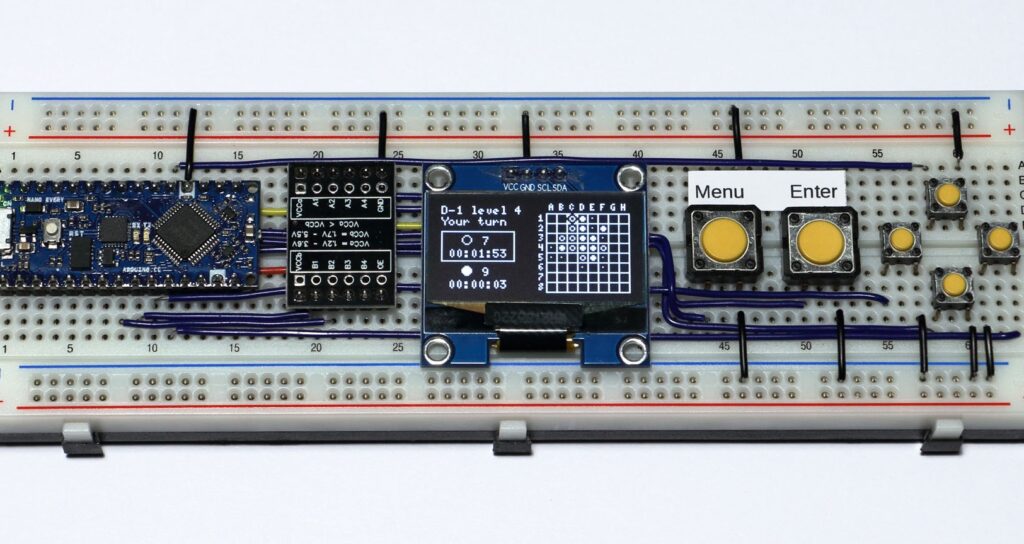
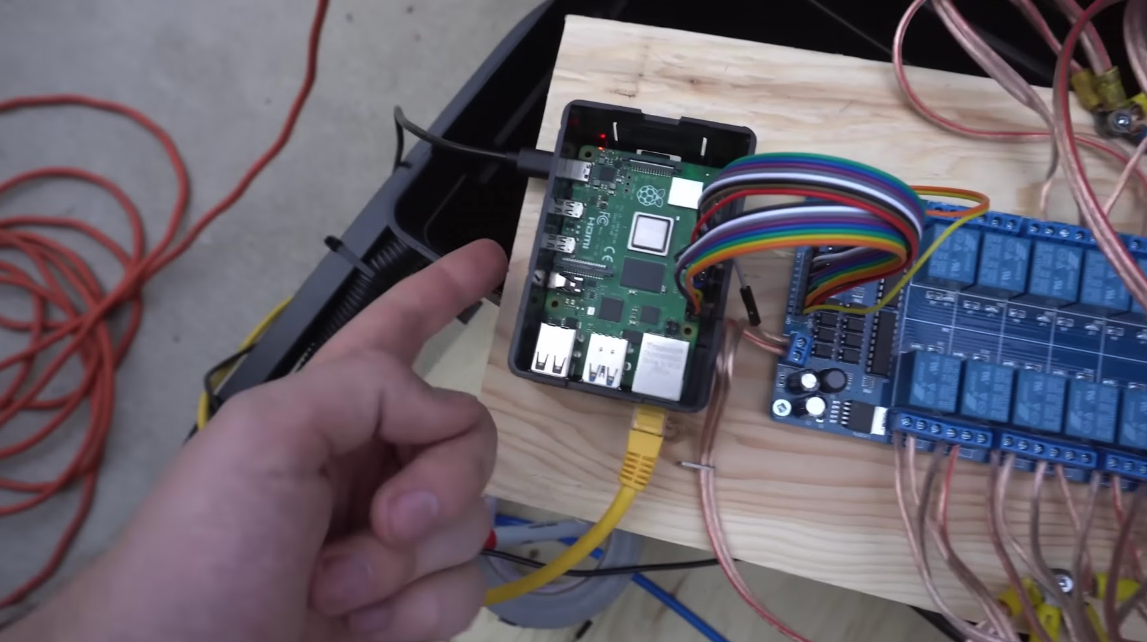
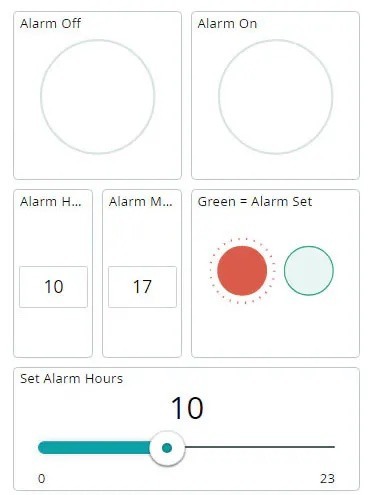
    However, it’s possible to take the DIY approach to many smart home safety devices, with only a handful of easy-to-acquire components and some basic coding and design knowledge. The Arduino Project Hub has plenty of examples here. Let’s take a look at just a few.

    RFID card door lock

    Arduino user mehmetefepekerr created this project — a radio frequency identification (RFID) card designed to add an extra layer of security to their home. The card enables you to unlock your door by tapping the card on your way in. RFID key cards are typically safer than magnetic cards since they’re more resistant to the elements, and unlike traditional locks they can’t be picked by thieves.

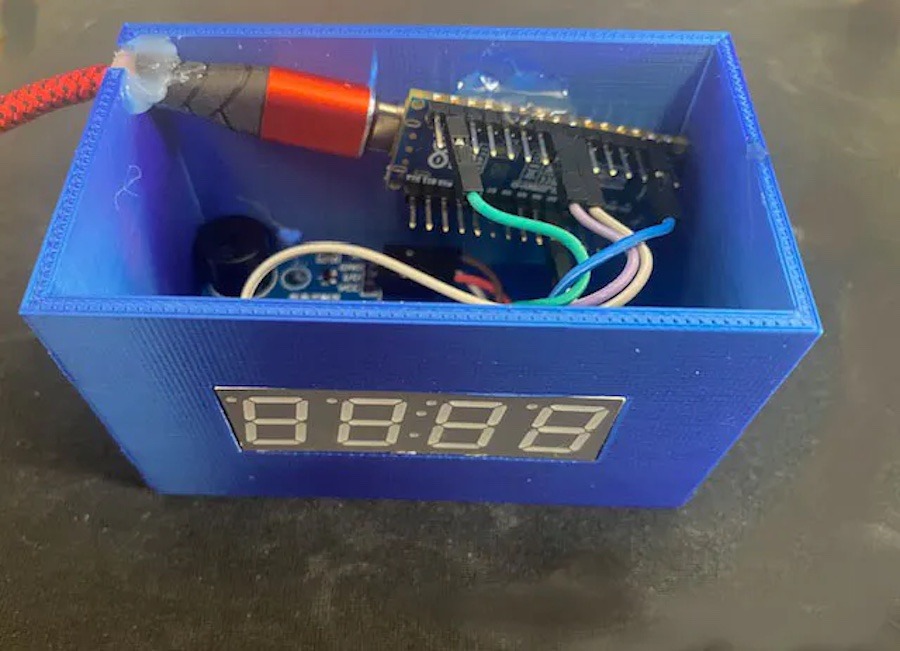
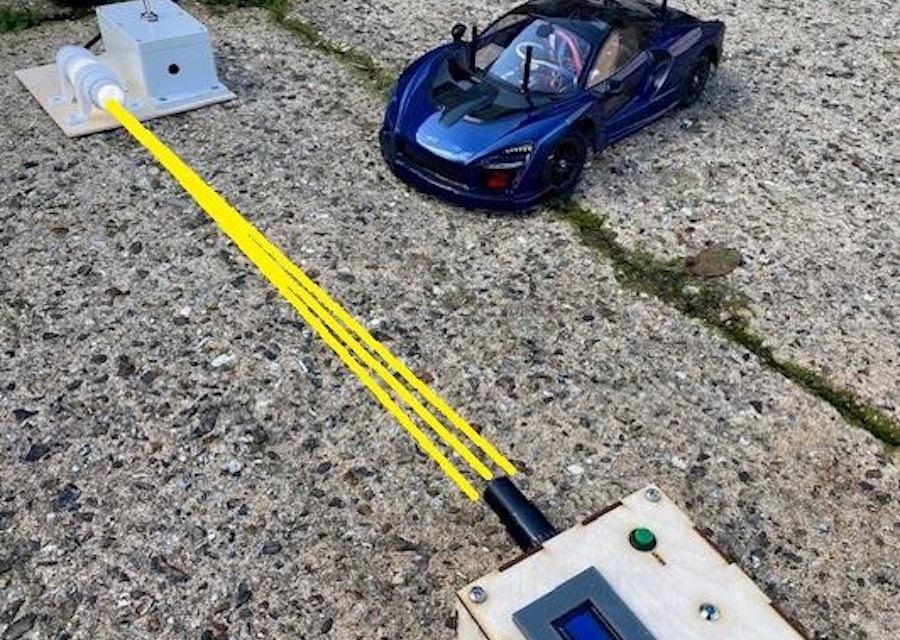
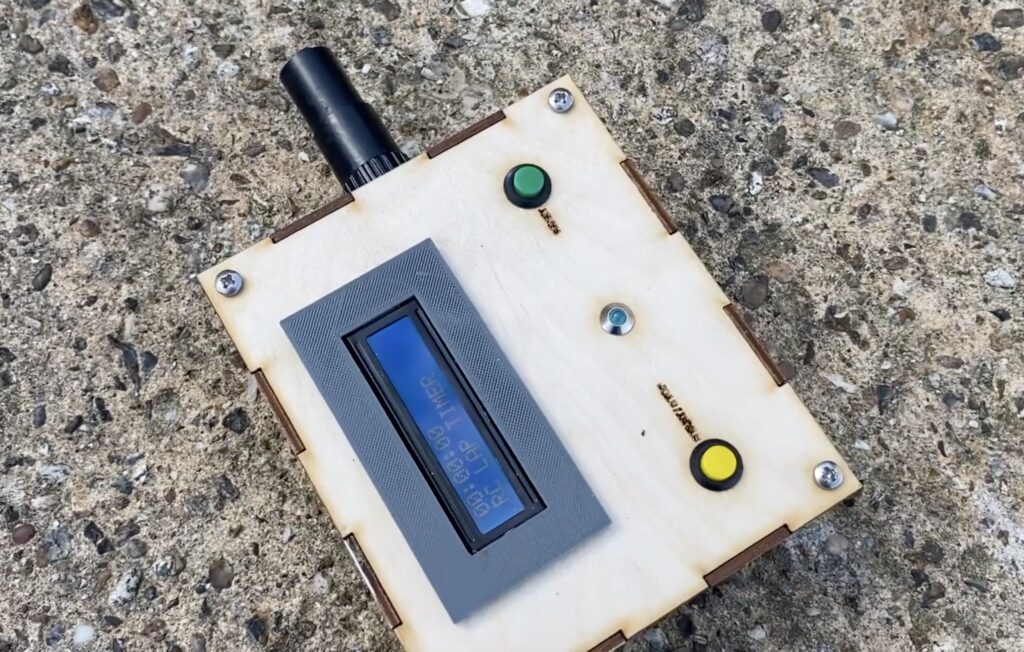
    Ultrasonic security system

    This system by theridgeguy is meant to keep your home safe by detecting the presence of intruders and sounding an alarm.It employs an ultrasonic distance sensor to detect how far someone is from the doorway, and then uses flashing lights and noises to deter them from getting any closer. Trusted guests and family members can enter a four-digit code to disarm the alarm.

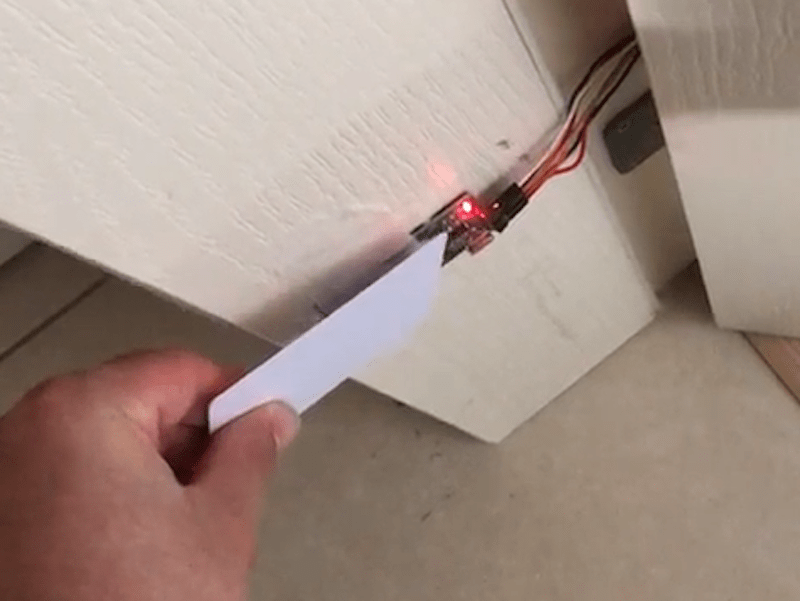
    Smoke detector using gas sensor

    When it comes to preventing house fires, time is always of the essence. This smoke detector, developed by srajandikshit147, picks up on any unexpected smoke in the environment and then warns the user by sounding a buzzer and flashing a red LED if the smoke density is higher than the safe limit.

    These ideas are just the tip of the iceberg when it comes to using Arduino to make your own smart home devices, including ones that protect you from various risks and dangers in your home.

    By tapping into the power of home automation, you can build your own devices to do all kinds of things. You don’t need to be a coding mastermind or have access to expensive gear — pretty much anyone can get started with their own basic projects today.

    Get in touch with us to learn more about what’s possible with home automation and get started on your own journey.

    The post Is your house secure? 4 common threats and how home automation can keep you safe appeared first on Arduino Blog.

    Website: LINK

  • The KhordUino is a DIY badminton racquet stringing machine

    The KhordUino is a DIY badminton racquet stringing machine

    Reading Time: 2 minutes

    Tennis and badminton racquets look pretty simple; just string woven around a hoop like a basket, right? But those strings are under massive tension, which is necessary to get good rebound on the ball or shuttlecock. Maintaining string tension while weaving the string usually requires a big and expensive machine. But the DIY KhordUino is both compact and affordable, making it realistic for hobbyists and even small businesses to string badminton racquets on a budget.

    The KhordUino is a designed specifically for stringing badminton racquets, though the process seems fairly similar for tennis racquets. Antoine Colin took care to make the machine as flat as possible for easy storage and it uses mostly 3D-printed parts, keeping the cost down. That is possible because Colin put the tensioning mechanism inline with the clamps that hold the hoop in place. This directs all the stress along the long axis of the machine, which is a compression force that the 3D-printed frame and clamps can handle.

    An Arduino Nano board tensions the string using a stepper motor that drives a lead screw. That provides a lot of torque to get very tight strings. To keep it from breaking strings or the machine itself, the Arduino monitors a load cell from a luggage scale through an HX711 amplifier. The user can set the tension to apply, then press a button to start the mechanism. It will pull the string taught, then the user can clamp it in place, loop it around, and repeat.

    [youtube https://www.youtube.com/watch?v=_KywN38xlIk?feature=oembed&w=500&h=375]

    If you want to string your own badminton racquets, then the KhordUino would be very helpful.

    The post The KhordUino is a DIY badminton racquet stringing machine appeared first on Arduino Blog.

    Website: LINK

  • A gorgeous escape room puzzle with an Alien theme

    A gorgeous escape room puzzle with an Alien theme

    Reading Time: 2 minutes

    Alien is an icon of the sci-fi horror genre and it owes its status to the legendary design work of H. R. Giger. He was responsible for the very original xenomorph and much of the set design throughout franchise. Alien and its sequels have a distinct visual aesthetic that inspired Redditor Wired_Workshop to build this escape room puzzle.

    Wired_Workshop attended the Maker Alliance Summer Camp event in Kentucky and was tasked with contributing a puzzle to that event’s ’80s-themed escape room. Being a massive Alien fan, Wired_Workshop chose to borrow the design aesthetic and some of the effects from that franchise. The puzzle itself takes sequences from the films and even has a Predator Easter egg, since both franchises exist within the same cinematic universe.

    This project required several different fabrication techniques, including 3D printing, CNC routing, and welding. An Arduino Mega 2560 board controls LEDs and monitors user input through a keypad, a huge switch lever, and glowing canisters that the player must lift. There’s also a fog machine to produce a smoke effect, driven by an Arduino Nano. Because this is a puzzle, the player has to complete those in the right order by following the available clues. And because this is just one part of an escape room, solving this puzzle provides a clue for the next puzzle developed by another attendee.

    Be sure to watch Wired_Workshop’s full video on this project to learn about all the details and to see the various Alien references. Eagle-eyed viewers should be able to spot some homages to specific scenes and props from the films.

    [youtube https://www.youtube.com/watch?v=lu4frV1Wf_0?feature=oembed&w=500&h=281]

    The post A gorgeous escape room puzzle with an Alien theme appeared first on Arduino Blog.

    Website: LINK

  • Old meets new with these three Project Hub entries from August

    Old meets new with these three Project Hub entries from August

    Reading Time: 3 minutes

    Everything old is new again! Arduino users always amaze us with how they put a fresh spin on the most common objects around us: a clock, a board game, a computer… anything can inspire the exciting new entries they share on Project Hub. These are the three builds we selected from August’s uploads to highlight our community’s advanced skills, resourcefulness, and creativity.

    3. Have the time of your life with this advanced Nixie tube clock

    As the saying goes, “With great power comes great responsibility.” if you have the electronics knowledge to work in total safety, assembling this fun retro clock is a great opportunity to show off your skills and ingenuity at the same time. Using an Arduino UNO and a Nixie tube – which, unlike an LED, operates at high voltage and therefore must be handled with care – you can read the time off a unique display, even from across the room. Combine multiple tubes to showcase different information!

    2. Learn to play a classic game in a modern way

    To make or not to make was never the question! We have no doubt you can follow this tutorial to create your own digital version of the traditional Othello game: learn to play, practice, and win – even with minimal hardware. In fact, you can get away with only the Arduino Nano Every board, the Arduino IDE, and a cable to connect the two.

    1. Build a computer so portable it fits into your pocket 

    It’s the stuff of vintage spy movies, but blends into today’s reality – where custom technology can truly be at your fingertips at all times thanks to new, accessible components. Based on two 2023 releases from Arduino – the Nano ESP32 and UNO R4 – yokonav’s debut contribution to Project Hub demonstrates how to stack hardware to form a small, functional computer that runs on Linux.

    For your chance to be selected for a $100, $300 or even $500 gift card to spend on the Arduino Store, submit your best project on Project Hub! We will be awarding three new entries every month, as detailed in the complete terms and conditions. Good luck! 

    The post Old meets new with these three Project Hub entries from August appeared first on Arduino Blog.

    Website: LINK

  • Inventor HAT Mini review

    Inventor HAT Mini review

    Reading Time: 2 minutes

    Four extra GPIO channels, each with a three-pin header, are ADC capable, so can be used as analogue inputs for sensors etc. Best of all, the board’s Nuvoton microcontroller handles all I/O, so the board only uses a handful of GPIO pins on Raspberry Pi – and it has a pass-through header so you could stack another board on top by using a stacking header.

    Light and sound

    Each set of header pins even has its own RGB NeoPixel, while the motor ports have direction LEDs. There’s also a user button and other connections include a single Qwiic/STEMMA QT for breakouts, external power and UART serial headers (both unpopulated), and an audio port (two-pin Picoblade) to connect a mini speaker.

    Pimoroni’s comprehensive Python library makes programming the board easy, and a bunch of code examples help you get started. We can see this board being used with a Raspberry Pi Zero for fun mini robots, but it’s versatile enough for many other electronics projects.

    Verdict

    9/10

    Packing an impressive array of features into a small footprint, this versatile board is ideal for mini robots and a lot more.

    Specs

    Inputs/Outputs: 4 × GPIO/ADC headers, 4 × servo headers, 2 × JST-SH  (6-pin) motor ports, 2 × regular motor outputs, 1 × Qwiic/STEMMA QT port, audio output, external power input, UART header

    Features: Nuvoton microcontroller, 8 × WS2812B RGB LEDs, User button, DRV8833 dual H-bridge motor driver, motor direction LEDs, pass-through header

    Dimensions: 65 × 30.5 × 15.5 mm

  • Join us at Maker Faire Rome, and make our day!

    Join us at Maker Faire Rome, and make our day!

    Reading Time: 2 minutes

    With some 100,000 attendees a year, Maker Faire Rome has been Europe’s biggest maker event since 2013. At Arduino, we are proud to have been part of it since its first edition, and to have grown with it – and with the maker community – year after year. In fact, we have grown so much that for the 11th edition we needed more space! 

    In addition to being Gold Sponsor of the event, Arduino will have an entire pavilion this year: more room to display our user-friendly and flexible solutions, inspire visitors with demos at all levels, and more importantly showcase outstanding projects created by our community.

    No matter where you are on your maker journey, you’ll find something interesting and fun for you at the Arduino Village:

    • See the most recent additions to our ecosystem – like the UNO R4, GIGA Display Shield, and Opta.
    • Get to know our full offering, with highlights from Arduino Pro, Arduino Education, and Arduino Cloud.
    • Enjoy interactive applications that put Arduino into action: try our RC car, play a memory game, create your own cocktail recipe at a smart bar, and more!
    • Meet our experts and ask them anything. 

    Tickets to the Maker Faire Rome are available on the website. Need an extra reason to join us? Keep your eye out for Arduino staff around the venue, handing out a special discount for our online store!

    Come visit us in the Arduino Village, right at the heart of the event in Fiera di Roma, October 20th-22nd. Meeting you will make our day!

    The post Join us at Maker Faire Rome, and make our day! appeared first on Arduino Blog.

    Website: LINK

  • Giant Dot Matrix Printer

    Giant Dot Matrix Printer

    Reading Time: 3 minutes

    An impermanent print

    Armed with, amongst other things, some solenoid valves, wood to attach the valves to his truck, a good length of hosing, speaker wire, hose splitters, and a bilge pump, Ryder set to work.

    “The ‘printer’ runs off 12 V direct from the car’s cigarette lighter,” he explains. “There’s a Raspberry Pi 4 that runs a web server that accepts input text, an input speed and font and, from that, turns the text into a picture and iterates over it left-to-right to create a bit of a map. From that map, it then determines which solenoid valve (1–12) to open or close, at a particular time.”

    Raspberry Pi’s GPIO pins are used to open and close valves via a relay board to manage the higher voltage. It also controls a windshield washer pump that turns on just before printing and just after completion to pressurise the lines. The water is then pumped out of a large bucket, into the lines, and out through the solenoid valves onto the road.

    Writing the required Python code himself, Ryder didn’t find it the most challenging part of the build. “Code is my talent; that part comes easy to me. Wiring, debugging wiring, and everything electrical on the other hand, I struggle with and it takes me a while.”

    The solenoid valves are situated about 1.5 ft above the ground on a trailer hitch, but this height will vary depending on the vehicle. In terms of the amount of water utilised, Ryder says it’s “surprisingly efficient. I can usually write messages for about 10–15 minutes before it runs out.”

    Interestingly, he claims that you can drive any speed, “as long as it’s a constant speed, and you input it into the web server before you drive. We tested it up to about 20 km/h, and I’m hoping to get the speed way up in version two.”

    Truckloads of inspiration

    Ryder describes this make as being of “moderate difficulty”, but would encourage anyone to have a go, “maybe trying a project with one pump and one solenoid (like a sprinkler).”

    Looking to make new versions of the printer, he has ordered a considerably more powerful pump in the hope it will improve the aesthetic of the printing. “I’m even looking at doing colour in some way that I’ve yet to figure out – I don’t want to have to clean up a mess or leave anything behind.”

    While feedback from the maker community has been wholeheartedly positive, some locals were a little bemused. “My neighbours have seen me doing a lot weirder projects, so they’re used to it, but I did get some weird looks from people on the street, as the machine itself – with its wires, hoses, and dripping water – looks a bit strange.”

    Ryder confirms that we can expect more offbeat Raspberry Pi-linked projects from him, but “I’m keeping them secret until I actually build them.” Watch this space…

  • The Treat Trough of Terror spits out Halloween candy

    The Treat Trough of Terror spits out Halloween candy

    Reading Time: 2 minutes

    We’re only a few short weeks away from Halloween and that means we’re starting to see the creative projects that makers come up with to celebrate the holiday. Movement, lights, and sound effects are the name of the game when it comes to Halloween decor and the Treat Trough of Terror is the perfect example.

    Gord Payne’s Treat Trough of Terror is a fun and unique way to doll out candy to the kids on Halloween while practicing social distancing. Payne can stand on his front stoop and when a trick-or-treater comes along, he can drop candy down the chute to their eager little hands. To turn that into a fun experience, the chute passes through a decorative jack o’ lantern. As the candy slides down the chute, the whole thing lights up and places spooky sound effects.

    The chute itself is just PVC pipe cut in half lengthwise and resting on a patio chair. The lights are WS2812B LEDs driven by an Arduino Nano board. The Arduino also controls the sound effects played by a small MP3 player module, with audio output going to a pair of powered speakers. An ultrasonic sensor detects the candy as it slides past on the chute, which tells the Arduino to activate the light and sound effects.

    [youtube https://www.youtube.com/watch?v=gUjkn2-ibGI?feature=oembed&w=500&h=281]

    If you want to hand out candy while maintaining at least six feet of distance, this is the perfect project to work on over the next few weeks.

    The post The Treat Trough of Terror spits out Halloween candy appeared first on Arduino Blog.

    Website: LINK

  • A simple single-axis sun tracker to maximize solar output

    A simple single-axis sun tracker to maximize solar output

    Reading Time: 2 minutes

    Solar power is awesome, but it takes a long to recoup the investment on hardware. The more output you can squeeze from a solar panel, the faster you’ll cross that line into actual monetary savings on energy. You can achieve decent output through most of the day with smart placement, but a sun tracker like this single-axis design from Shawn Murphy will dramatically increase your output.

    This is a single-axis sun tracker and so it doesn’t increase output quite as much as a tracker that moves on two axes. But if one orients that axis properly, this will still be a significant improvement over a static solar panel.

    Murphy has two 300 watt solar panels mounted on the roof of a shed that they use as an art studio. That roof has a slight downward slope, so the panels only receive full sunlight when the sun is low in the sky. To account for that, a pair of powerful linear actuators lift up the entire roof of the shed to keep the solar panels perpendicular to the sun’s rays as much as possible. Gas struts help to lighten the load on the actuators.

    An Arduino Nano RP2040 Connect board controls the linear actuator motors through a Drok DC motor controller. The Arduino looks at a pair of LDRs (light dependent resistors) and calculates the differential between them to determine if the panels should tilt further. Murphy connected the Nano to the Arduino Cloud to log the readings, which lets him check to see the movement throughout the day.

    [youtube https://www.youtube.com/watch?v=lgmIF0OEbS0?feature=oembed&w=500&h=281]

    You might not have a shed with a roof like Murphy’s, but you can still repurpose this project for your own solar panels.

    The post A simple single-axis sun tracker to maximize solar output appeared first on Arduino Blog.

    Website: LINK

  • Android 14 business features for your distributed teamsAndroid 14 business features for your distributed teamsProduct Manager

    Android 14 business features for your distributed teamsAndroid 14 business features for your distributed teamsProduct Manager

    Reading Time: 2 minutes

    Advanced security and compliance features

    At Android, we’re committed to building the most secure mobile platform for businesses. So we’re introducing new security and compliance features in Android 14 to provide even stronger protection for your work devices.

    • Six-digit PIN unlock: We’ve increased the default lock screen PIN number from four digits to six. Adding just two digits to unlock the device increases the number of possible PIN combinations from 10,000 to 1 million — reducing the risk of break-ins.
    • Credential manager controls: New credential manager controls for Work Profile and fully managed devices allow IT admins to only enable credential managers they trust. With more control over their data, organizations can better protect sensitive business credentials.
    • 2G connectivity controls: IT admins can now configure mobile connectivity according to their risk model, allowing them to protect their managed devices from 2G traffic interception, person-in-the-middle attacks and other 2G network vulnerabilities. For example, IT admins can temporarily turn off 2G radio when employees are traveling to specific high-risk locations, or turn off 2G by default.
    • Ultra-wide band (UWB) logs: We’ve introduced new policy logs and admin controls for managed UWB to meet this year’s National Information Assurance Partnership (NIAP) standards.

    For more information on Android’s ongoing security and compliance efforts, check out the latest version of the Android Security Paper. You’ll find a detailed overview of Android’s security and management APIs, including our multi-layered approach to security, the types of Zero Trust signals available, Google Play Protect’s malware defense and Android’s security certifications.

    Website: LINK

  • Android 14: More customization, control and accessibility featuresAndroid 14: More customization, control and accessibility featuresVP of Engineering, Android

    Android 14: More customization, control and accessibility featuresAndroid 14: More customization, control and accessibility featuresVP of Engineering, Android

    Reading Time: 3 minutes

    Whether it’s the color of your phone, your choice of phone case, the hardware of your device or the choices you’ve made to customize its software, your devices are an extension of your personality. Android has always helped you express yourself in both practical and artistic ways–from the wallpaper, style and color palette theme to buttons and backgrounds. Now, we’re introducing more ways to tailor your phone to your personal preferences.

    Android 14’s updated customization picker makes it easier to switch between wallpapers and update what you want to see at a glance. You can now set custom lock screen shortcuts, like QR reader or the Google Home app, so you have quick, one-tap access to your most used controls directly from your Android lock screen.

    Choose from a set of new, curated lock screen templates for fonts, widgets, colors and formats that best match your style. These options also use AI to adjust your screen based on your situation. For example, if the weather is suddenly taking a turn for the worse, your lock screen weather widget will become more prominent.

    Android 14 also lets you show off your most creative and artistic self — no art skills required. Coming first to Pixel 8/8 Pro, generative AI wallpapers use AI-generated text-to-image diffusion models to help you create wallpapers that match your vision. You can choose from pre-set suggestions to create never-before-seen wallpapers in just a few taps.

    If you prefer a less colorful phone aesthetic that is easy on the eyes, Android 14 includes a monochromatic theme that makes minimal colors look sleek and beautiful across your entire device.

    Android is also helping to improve your photo and camera quality. Building on Android 13’s support for high dynamic range (HDR) video, Android 14 supports HDR images with Ultra HDR. Ultra HDR helps your photos look their best by bringing out vibrant colors, brighter highlights and darker shadows. Plus, thanks to the great HDR screens available on many of today’s phones, Ultra HDR takes and displays high-definition photos without altering the original quality of the image.

    More control over your health, security and data

    Apps help people track their fitness, health and wellness levels. But the data that’s collected is often isolated within each particular app, limiting your visibility and control over your data. Health Connect is now built into your Android 14 settings as a central way to store all your data in one place and stay in control of your privacy. And your data is securely encrypted on your phone, which ensures Google or anyone else can’t see or use it for any other purpose. Just connect and sync your favorite health and fitness apps — like Oura, Peloton and Whoop — to get started.

    You’ll also have more visibility into how your data is being used by apps that request access to your data. With new data sharing updates on Android 14, when you’re asked to grant apps permission to information like your location you’ll be notified when an app is sharing location data with third parties and can make a more informed decision on whether or not to grant access.

    Website: LINK

  • Jet-powered Star Wars speeder bike built from repurposed hoverboard

    Jet-powered Star Wars speeder bike built from repurposed hoverboard

    Reading Time: 2 minutes

    Developing your skill set is all about pushing the boundaries of your current knowledge and experience, but that inevitably leads to occasional failure. When that happens, you need to know how to pivot and complete the project. A great example of that is James Bruton’s Star Wars speeder bike built from a repurposed hoverboard.

    Bruton started this project with the idea of taking the electronics and motors from a hoverboard and reconfiguring them to create a self-balancing bike. His intention was to control the movement by shifting his weight and by tilting the back half of the bike relative to the front half, so the hoverboard electronics would act just like they normally would. But that proved to be very difficult to ride, so Bruton had to pivot to a new control method that would give him better maneuverability.

    To save the project, Bruton turned to an Arduino UNO Rev3. It monitors the rotation angle and tilt angle of the handlebars using potentiometers, then uses servo motors to tilt the hoverboard controller boards accordingly. As far as the hoverboard electronics know, this is just the movement of the rider shifting their weight or moving their feet. This causes the bike to roll side-to-side or rotate in place through input through the handlebars.

    The bike rides on omni wheels, so Bruton also needed a way to move forwards. He chose to use hobby jet thrusters that are also under the control of the Arduino, with a throttle turning a third potentiometer. Those thrusters don’t have quite enough force for the job, so Bruton needs a push to get started. But they do let him continue on once he’s moving.

    [youtube https://www.youtube.com/watch?v=j9tN51fh_vE?feature=oembed&w=500&h=281]

    The post Jet-powered Star Wars speeder bike built from repurposed hoverboard appeared first on Arduino Blog.

    Website: LINK

  • Raspberry Pi 5

    Raspberry Pi 5

    Reading Time: 2 minutes

    Power of potential

    A lot of people here at Raspberry Pi are very excited for the addition of PCI Express. NVME storage is one thing, a very cool thing that will make for some very low-profile home file servers, but we’re looking forward to seeing what people connect to it over time. How soon until someone has an RTX 4090 hooked up to it? Then we’ll truly be playing with power.

    While I’ll definitely be using it myself for retro game stuff, desktop computing, and media server stuff (the new VideoCore is very nice!), what I’m most excited for is to see what folks in the community come up with. Alasdair Allan, Head of Documentation here at Raspberry Pi, has already mentioned wanting to do more machine learning tests on it using the extra oomph the chipset provides. What else will you all come up with? As always, flood The MagPi social media accounts with what you do make so that I can see.

    Out soon

    I have to remind myself that, although everyone knows about it, it’s not out just yet! For the next issue, we’re already working on cool stuff you can do with Raspberry Pi 5, so you will be well fed with inspiration and tutorials to get you started. In the meantime, what do you want to make with Raspberry Pi 5? We’re all ears/eyes. Drop us a social media message or an email – we’re on Mastodon, Threads, Facebook, etc.

  • No need for buttons with this Arduino Cloud alarm clock

    No need for buttons with this Arduino Cloud alarm clock

    Reading Time: 2 minutes

    When Arduino first hit the maker scene, the world of embedded electronics was largely unconnected and offline. But as the IoT, home automation, and smart technology advanced, Arduino kept up. Today, there are a variety of Arduino development boards that offer built-in networking capability and you can use the Arduino Cloud to take advantage of them. To demonstrate that, Doug Domke built this button-free alarm clock.

    User interface design is a complex field that has to balance usability, simplicity, and practicality. Take a look at the radio alarm clocks of the 1990s to see how bad user interfaces can make device interaction frustrating. Domke’s alarm clock goes in the complete opposite direction and omits buttons altogether. It lets the user “set it and forget it” through a simple Arduino Cloud dashboard. The time automatically updates based on the configured time zone and daylight savings settings.

    This requires very little hardware. Power comes in through USB to an Arduino Nano ESP32 board, with a connected piezo buzzer module and four-digit seven-segment display. Those fit inside a basic 3D-printed enclosure. All the magic happens through the Arduino Cloud and Domke explains how to set up an Arduino Cloud account, create a dashboard, and connect the Nano ESP32 to that dashboard.

    If you want a dedicated alarm clock, this is a quick and easy project that will help you get acquainted with the Arduino Cloud for future IoT projects.

    The post No need for buttons with this Arduino Cloud alarm clock appeared first on Arduino Blog.

    Website: LINK

  • Tiny DIY Roomba cleans desks and countertops

    Tiny DIY Roomba cleans desks and countertops

    Reading Time: 2 minutes

    The future we were promised was supposed to include robot maids and flying cars. The future we got has Roomba vacuums and Southwest Airlines. But at least those Roomba vacuum robots work pretty well for keeping floors slightly cleaner. Sadly, they leave elevated surfaces untouched and dust-ridden. To address that limitation, Jared Dilley built this tiny DIY Roomba to clean his desk.

    Dilley is a dog owner and so his desk ends up with quite a bit of dust and loose hair, even though his dog is large and doesn’t sit on the desk — a mystery all pet owners will find relatable. Fortunately, Dilley is an engineer and had already created a small Arduino-controlled tank robot a while back. That operated a bit like a Roomba and would drive around until its ultrasonic sensor detected an obstacle, at which point it would turn. Dilley just needed to repurpose that robot into small mean cleaning machine.

    The 3D-printed robot operates under the control of an Arduino UNO Rev3 through a motor driver shield. Originally, it only had the ultrasonic sensor, which was enough to detect obstacles in front of the robot. But because its new job is to patrol desks and countertops, Dilley had to add “cliff” sensors to keep it from falling off. He chose to put an infrared sensor at each of the front two corners. The Arduino will register the lack of a reflection when one of those sensors goes past an edge, and will then change course. A Swiffer-like attachment on the back of the robot wipes up dust and dog hair.

    [youtube https://www.youtube.com/watch?v=fM7q85V_2Z0?feature=oembed&w=500&h=281]

    The post Tiny DIY Roomba cleans desks and countertops appeared first on Arduino Blog.

    Website: LINK

  • Bristol Braille Canute 360

    Bristol Braille Canute 360

    Reading Time: 3 minutes

    Keeping it local

    Founder and MD of Bristol Braille Technology Ed Rogers has been working on “refreshable Braille technology” since 2008 and co-invented the Canute multiline Braille display. He is also a co-founder and trustee of the Braillists Foundation, a community of more than 1500 people who help each other with projects to promote Braille use. Ed drew on this community’s expertise when designing the Canute 360 to ensure it would meet their needs and expectations. Having closely followed Raspberry Pi’s success for many years, he was convinced from the outset that it would be the ideal component for the embryonic Braille reader. “We didn’t want to distract ourselves by reinventing the wheel, or having to support our own OS,” so the dedicated OS and thriving Raspberry Pi community were vital factors.

    Bristol Braille started with a standalone, “functional” book-reading prototype, says Ed, and the 14 major revisions over an eight-year development cycle each involved Raspberry Pi and Python. The folks at Raspberry Pi loved the concept, and Ed says individuals “bent over backwards” in a bid to ensure Canute made it to market. This is refreshing for a small company working in a supply chain that likes scale. While some components for the Canute are made in places such as China and India, the circuit boards are made by Philtronics in Wales, and the final build is done in-house in Bristol and Exeter. “By taking advantage of the proximity, we are able to be much more hands-on,” says Ed.

    Ed describes Raspberry Pi Zero as Canute’s ‘brains’. It runs Raspberry Pi OS, along with the Braille custom user interface. The interface was Bristol Braille’s biggest design hurdle, especially since the final product needed to be relatively affordable. Although it has a £2000 price tag, many are destined for libraries and educational institutes and, thus, will have multiple users.

    Raspberry Pi Zero is connected to media ports on the main circuit board, and is able to read the BRF (Braille Ready Files), interpret them as Braille, and send them to an Atmel chip on the main board to convert into dot patterns. Each Braille cell is made up of six dots which can either be up or down. There is virtually no margin for error, and a stuck dot can change the entire meaning of a word.

    Incredible touch

    Bristol Braille’s Canute 360 has been enthusiastically embraced by the Braillist community, with several hundred already sold. This summer, the team embarked on a roadshow demonstrating the 360 and its successor, the Canute Console. This is based around Raspberry Pi 400, meaning greater processing power as well as an integrated keyboard. A hardware add-on that includes a Canute 360, it adds a BRLTTY screen-reader. Ed says the Console enables them to do “far more exciting things with tactile graphics, using Raspberry Pi 400 to interpret sports matches as tactile animated pitches [and] to draw maps of cities in a top-down GTA 2 fashion.”

    This recently launched model has a technical graphics focus, and is aimed at computer science students and those familiar with using Linux or willing to learn it. Every pre-existing multi-line Linux terminal application shows up in digital Braille for the first time. The new device has generated much excitement, with the first pre-orders currently being delivered. Watch the demo video showing a football match replay.

  • Celebrating a few resourceful Project Hub uploads from July

    Celebrating a few resourceful Project Hub uploads from July

    Reading Time: 3 minutes

    Makers always find a good reason to make: to learn or to enjoy, to share or to find a solution, they can play around all day, and work around anything. Proud of our community’s resourcefulness, this month we celebrate three projects uploaded to Project Hub in July that embed IoT, robotics, and home automation into approachable and fun tutorials. It just takes equal parts passion, creativity, and willingness to try something new…

    3. Go the extra mile with 3D printing

    Adding custom enclosures can make your project look neater, protect its inner workings, and allow you to hone your designs for functionality and fun! It’s the finishing touch that makes any project really stand out – including this one, for an Arduino Nano Every tank that can be controlled remotely via Bluetooth®. You can find all the instructions you need in its Project Hub write-up: add a handful of components, and go call that friend who has a 3D printer!

    2. Hot glue your first robotic arm

    This Arduino UNO Rev3 project gives anyone approaching robotics a leg up – in building their first robotic arm! Using ready available and inexpensive materials like cardboard, you can follow the tutorial and replicate the simple Arduino and Python code to program the arm: it will record and replay positions, which you can easily control from a graphical interface. 

    1. Go nuts taking good care of your backyard squirrels! 

    Why just casually feed the little creatures, when you can construct a system that also automatically reports back on their activity? Peter Stuhr’s first tutorial on Project Hub combines a solar-powered MKR WiFi 1010 with Google Sheets, using the simple IFTTT web hook: every time the feeder is opened, the board wakes up for 10 minutes and fills out a few rows in the spreadsheet. His solution could be adapted to monitor many other events in the garden, but we love that he has invested his skills and resourcefulness to ensure hungry squirrels always have enough food. 

    For your chance to be selected for a $100, $300 or even $500 gift card to spend on the Arduino Store, submit your best project on the Project Hub! We will be awarding three new entries every month, as detailed in the complete terms and conditions. Good luck!

    The post Celebrating a few resourceful Project Hub uploads from July appeared first on Arduino Blog.

    Website: LINK

  • Can you smell what the Rockobot is cooking?

    Can you smell what the Rockobot is cooking?

    Reading Time: 2 minutes

    Modern engineering is increasingly cross-disciplinary, so today’s students often take courses that would have seemed to be “outside their field” a couple of decades ago. Pelochus and their classmates at the University of Granada are studying computer engineering, but had a class that challenged them to build battlebots in order to get some hands-on learning with microcontrollers and embedded systems. To dominate the competition, they used an Arduino to create the Rockobot.

    This is a play on a meme that was popular in the 3D printing community recently. For laughs, people would slap a bust of Dwayne “The Rock” Johnson — wrestler and actor extraordinaire — onto just about anything that could be 3D-printed. Pelochus and their team figured that such adornment would increase their chances of success in a battle, and we can smell what they’re cooking.

    Below the studly noggin, the Rockobot is a pretty standard tank-style battlebot. It has bent sheet metal plows in the front and back, which are the primary offense and defense. An Arduino Nano board controls the motors that drive the tank treads through a custom PCB populated with L289N H-bridge drivers. Power comes from a 1550mAh 14.8V battery through a step-down converter. Ultrasonic sensors on the front and back, along with infrared sensors on the sides, help the Rockobot navigate autonomously while avoiding collisions.

    The spirit of Mr. Johnson must have been inhabiting the Rockobot, because it blew through the competition and took the top position in the class tournament.

    The post Can you smell what the Rockobot is cooking? appeared first on Arduino Blog.

    Website: LINK

  • A simple non-contact lap timer for RC car racing

    A simple non-contact lap timer for RC car racing

    Reading Time: 2 minutes

    Remote control cars have been popular toys for children and adults alike for decades now. And while there is plenty of fun to be had cruising around, a little bit of healthy competition can add another layer of enjoyment. To race or practice racing, you’ll want some way to time your laps. If you don’t have anyone to operate a stopwatch for you, then you should check out Tom Goff’s tutorial on how to create a non-contact lap timer.

    Goff built this specifically for his son to time laps when racing his RC car. It is a simple, affordable, and portable device that is easy to take to any paved area and set up. It acts as both the start and finish line, so it triggers the timer the first time the RC car passes through and stops the timer the second time.

    It recognizes the passing RC car using a DIY break beam sensor. Instead of using an off-the-shelf infrared module, Goff made his own sensor. One side has a very bright LED with the beam kept tight by PVC pipe and a convex lens. The other side has an Arduino Nano board that detects that beam using a light-dependent resistor (LDR). The Arduino utilizes the millis() function to count the elapsed time between beam breaks, then displays the results on an LCD screen. An 18650 lithium battery cell and charge controller in each unit provide power.

    [youtube https://www.youtube.com/watch?v=bwxbSRWqfBA?feature=oembed&w=500&h=281]

    The post A simple non-contact lap timer for RC car racing appeared first on Arduino Blog.

    Website: LINK

  • The new Arduino GIGA Display Shield: Nice touch!

    The new Arduino GIGA Display Shield: Nice touch!

    Reading Time: 2 minutes
    Arduino Giga Display Shield

    A few months ago, we promised you that the GIGA R1 WiFi would allow you to “think bigger and be more creative than ever”.

    Now, we are happy to announce you can step up your game even further, with the introduction of the Arduino GIGA Display Shield — an innovative touchscreen solution enabling all makers to effortlessly deploy fast and highly responsive graphic interfaces to their GIGA R1 WiFi projects.

    Featuring a 3.97” 480×800 RGB touchscreen, an MP34DT06JTR digital microphone, a Bosch BMI270 six-axis IMU, an Arducam® 20-pin camera connector, and an RGB LED, the GIGA Display Shield is perfect for easily creating handheld devices or dashboards you can control with a touch.

    It basically adds intuitive interfaces, high-level user experiences, and cutting-edge technology to your strengths in this game we call making.

    [youtube https://www.youtube.com/watch?v=6W75woSe_40?feature=oembed&w=500&h=281]

    With the GIGA Display Shield, you can quickly add a cool UI to your hardware projects without extra wiring, have graphics adjust automatically according to device orientation or audio commands, or leverage computer vision as your solution’s input. If that’s not enough, GIGA R1 WiFi’s new set of top-facing connectors leave the top header available for expansion, attaching other shields to boost your possibilities even more.

    Ready, player one? Find out more about how the GIGA Display Shield can give you a boost. We think you’ll have a lot of fun with this…

    The post The new Arduino GIGA Display Shield: Nice touch! appeared first on Arduino Blog.

    Website: LINK

  • Win a brand new Raspberry Pi 5!

    Win a brand new Raspberry Pi 5!

    Reading Time: < 1 minute

    Subscribe

  • Raspberry Pi 5 in The MagPi magazine issue 134

    Raspberry Pi 5 in The MagPi magazine issue 134

    Reading Time: 4 minutes

    Up to three times faster, absolutely packed with new features, and available to The MagPi subscribers first

    Introducing… Raspberry Pi 5

    The incredible new computer from Raspberry Pi is a giant leap forward in features and performance. Now running a 2.4GHz ARM CPU inside a brand new BCM2712 Broadcom chip, Raspberry Pi is up to three times faster than Raspberry Pi 4. And a new Raspberry Pi RP1 chip takes over most of the I/O, freeing up space for a raft of new features: a power button, Dual DSI/CSI sockets, a Raspberry Pi connector for PCIe (along with an upcoming HAT to offer super-fast M.2 drive storage), a real-time clock with a battery connector and a custom power management chip. All this alongside amazing new accessories including a redesigned Raspberry Pi Case with fan, an Active Cooler attachment, and PoE and M.2 accessories coming soon. 

    There’s a lot to learn about this exciting new computer, and you’ll find out all about it in this month’s edition of The MagPi.

    We've reserved Raspberry Pi 5 boards
for The MagPi subscribers

    Raspberry Pi 5 Priority Boarding

    We’ve reserved Raspberry Pi 5 boards for subscribers to The MagPi magazine and HackSpace to pre-order. If you’ve got a print subscription to one of our magazines, you’ll be able to buy your Raspberry Pi 5 first. See Priority Boarding for more information.

    Building new hardware, new silicon, and new docs for Raspberry Pi 5

    Engineering and documentation interviews

    Rob sat down with James Adams, CTO (Hardware) and Alasdair Allan (Head of Documentation) for an exclusive interview on the new hardware. They cover in-depth the new RP1 chip, and why it’s such an important feature in Raspberry Pi 5 and with the new Raspberry Pi connector for PCIe and M.2 implementations. The new power chip is explained in depth. Our feature digs deep into the Raspberry Pi 5 hardware and explains why it’s designed just the way it is.

    Raspberry Pi braille readers bring literacy to non- and partially sighted readers.

    Bristol Braille Canute 360

    We’re incredibly proud of the variety of projects the Raspberry Pi community comes up with. Bristol Braille, developed the Canute 360, is the world’s first multi-line Braille reader and is powered by Raspberry Pi Zero. This innovative device generates entire paragraphs of copy, and converts a Terminal window into Braille for non- and partially-sighted people. It provides a significant advance over traditional Braille devices.

    Keeping a watch on things in style

    Zelda Guardian Security Camera

    Naomi has recreated a model of a Guardian from The Legend of Zelda to monitor her dog. This working model has a rotating head and uses a Raspberry Pi Camera instead of firing a laser. The result is a fantastic camera project that’s lovingly recreated and painted to look just like the real thing.  

    Control a model railway

    Control a model railway

    Stewart Watkiss has spent the last few issues of The MagPi explaining electronics and circuit control. Now it’s time to put it to use by controlling a model railway. This tutorial features servo motors and Raspberry Pi along with an L289N H-bridge driver on a motor control board. This enables Raspberry Pi to power and control the train directly on the track. 

    Trick or Treat with Raspberry Pi

    Trick or Treat

    It’s nearly time for Halloween and Rob has created this fangtastic feature packed with ghoulish projects. It’s got everything from haunted mirrors to talking doorbells and an automated candy dispenser. 

    Learn robotics with Raspberry Pi

    Learn robotics with Raspberry Pi

    If you’ve ever fancied making a robot, either the wheeled variety or one with arms and legs, then our Learn Robotics spread has all the resources you need. Discover some of the best makers around, along with easy-to-use kits and tutorials, books and websites