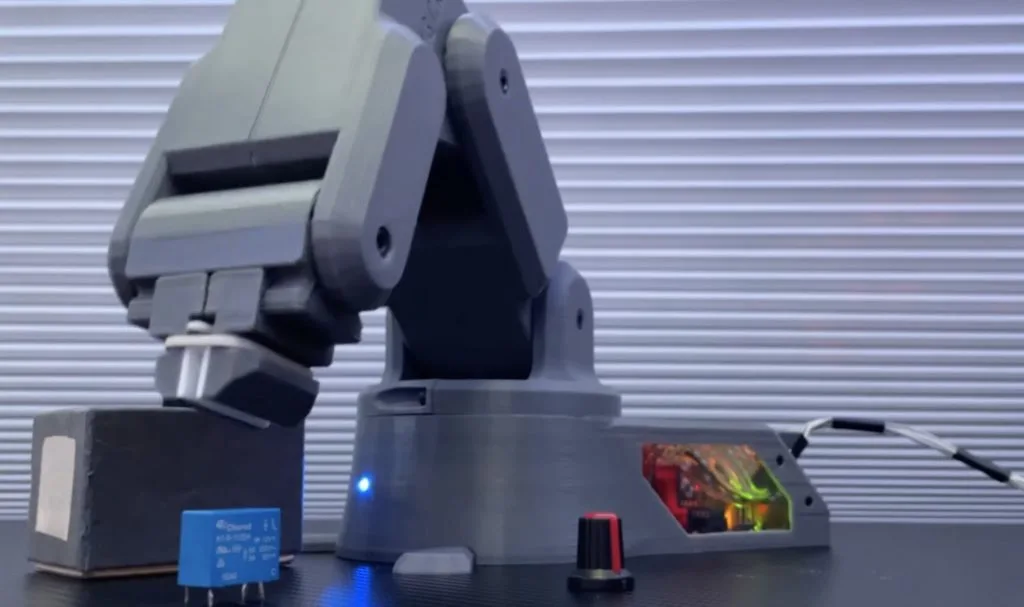
Getting started in the world of robotics can be a very challenging task, even for more experienced hobbyists, due to how difficult it can be to achieve smooth and precise motion through programming. Frustrated by the lack of accessible options, the YouTuber known as “Build Some Stuff” decided to not only design his own, but to do it using as few prefabricated parts as possible and while keeping the total cost under $60.
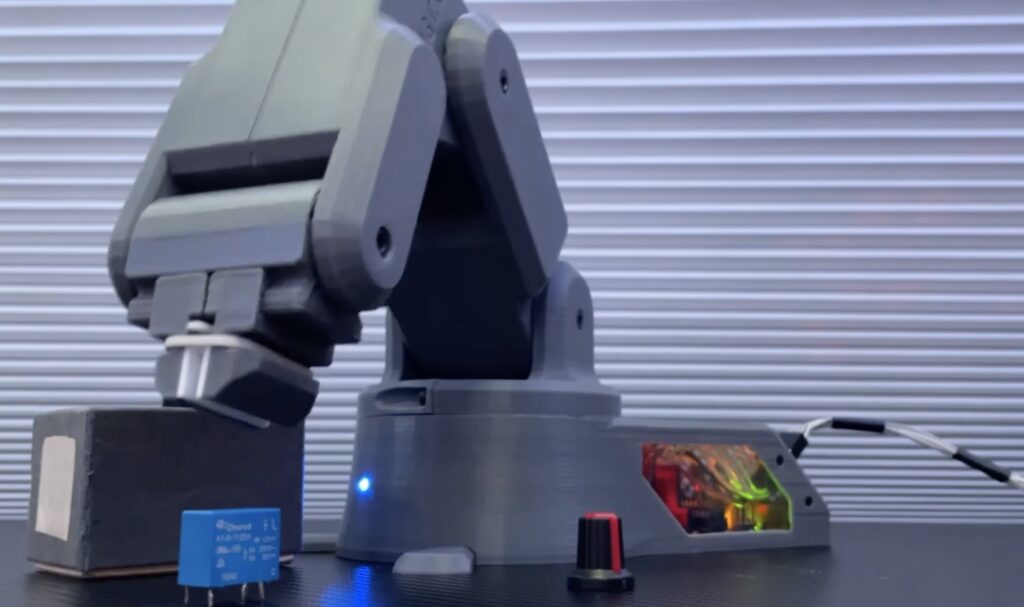
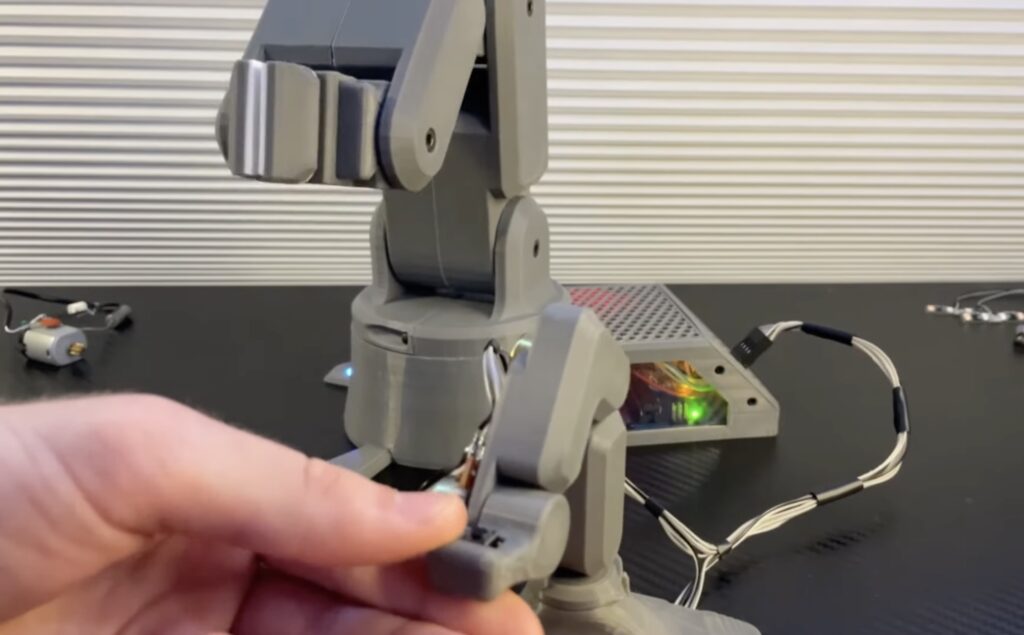
The premise of the arm project was to utilize a total of five servo motors for manipulating each degree of freedom, as well as an Arduino Leonardo and a PCA9685 driver for controlling them. Once the components had been selected, Build Some Stuff then moved onto the next step of creating 3D models of each of the robot arm’s joints in Fusion 360 before 3D printing them. He also made a scaled-down version of the larger arm assembly and replaced the servo motors with potentiometers, therefore allowing him to translate the model’s position into degrees for the motors.
Although simple, the code running on the Leonardo was still responsive enough to move the servos in nearly perfect synchronization compared to the model. To see more about how Build Some Stuff was able to make this robotic system from scratch and some of the problems he ran into, watch the video below!
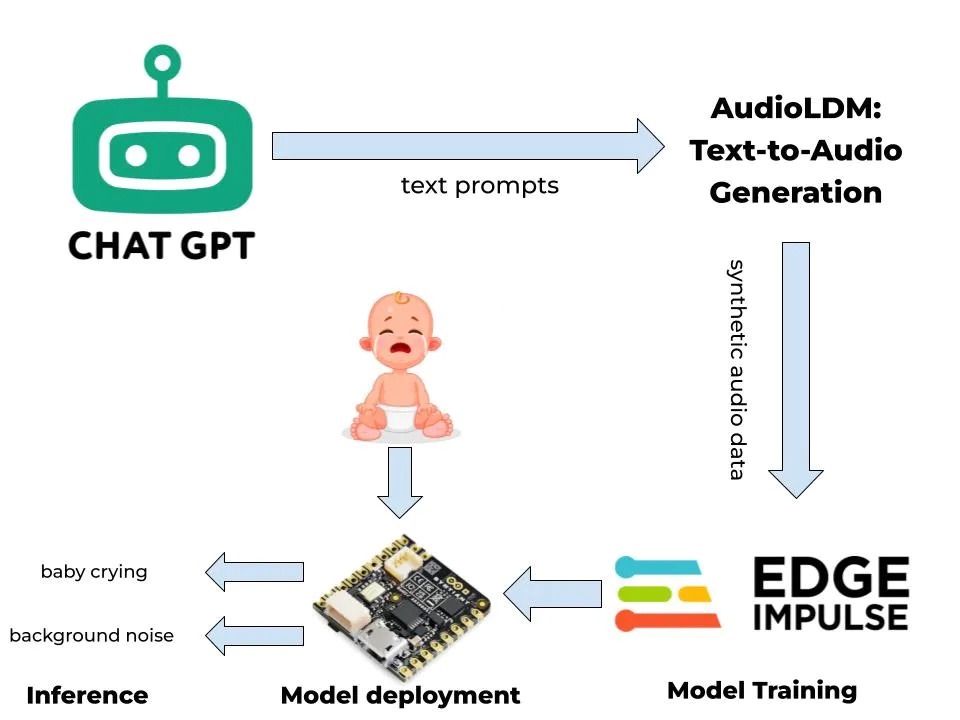
When a baby cries, it is almost always due to something that is wrong, which could include, among other things, hunger, thirst, stomach pain, or too much noise. In his project, Nurgaliyev Shakhizat demonstrated how he was able to leverage ML tools to build a cry-detection system without the need for collecting real-world data himself.
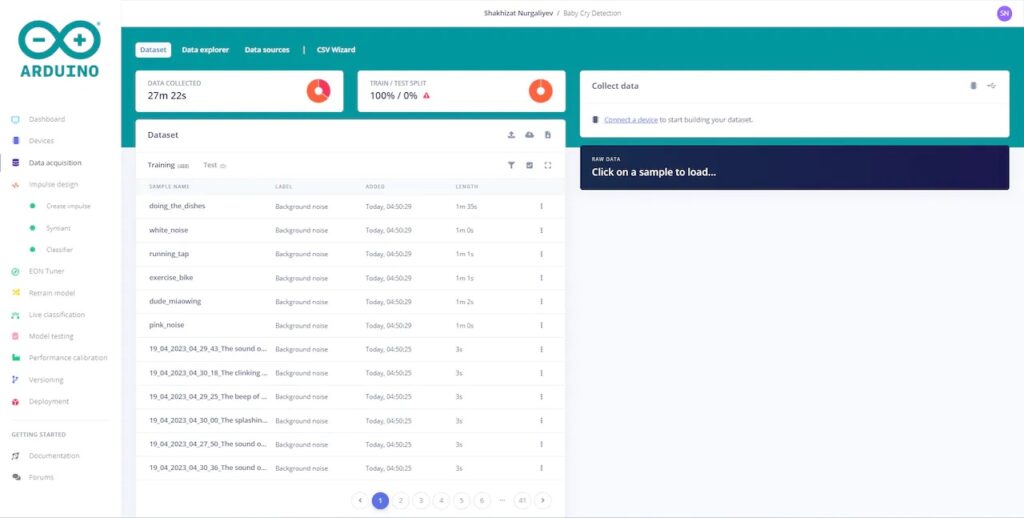
The process is as follows: ChatGPT generates a series of text prompts that all involve a crying baby in some manner. These prompts are then passed to AudioLDM which creates sounds according to the prompts. Finally, Shakhizat used the Arduino Cloud’s Machine Learning Tools integration, powered by Edge Impulse, to train a tinyML model for deployment onto an Arduino Nicla Voice board. To create the sounds themselves, Shakhizat configured a virtual Python environment with the audioldm package installed. His script takes the list of prompts, executes them within an AudioLDM CLI command, and saves the generated sound data as a WAV file.
Once this process was done, he configured a project in the Edge Impulse Studio which trains a classifier model. The result after training completed was a model that could accurately distinguish between background noise and a crying baby 90% of the time, and deploying it onto the Arduino Nicla Voice showed the effectiveness of how synthetic datasets and embedded models can be used in the real world.
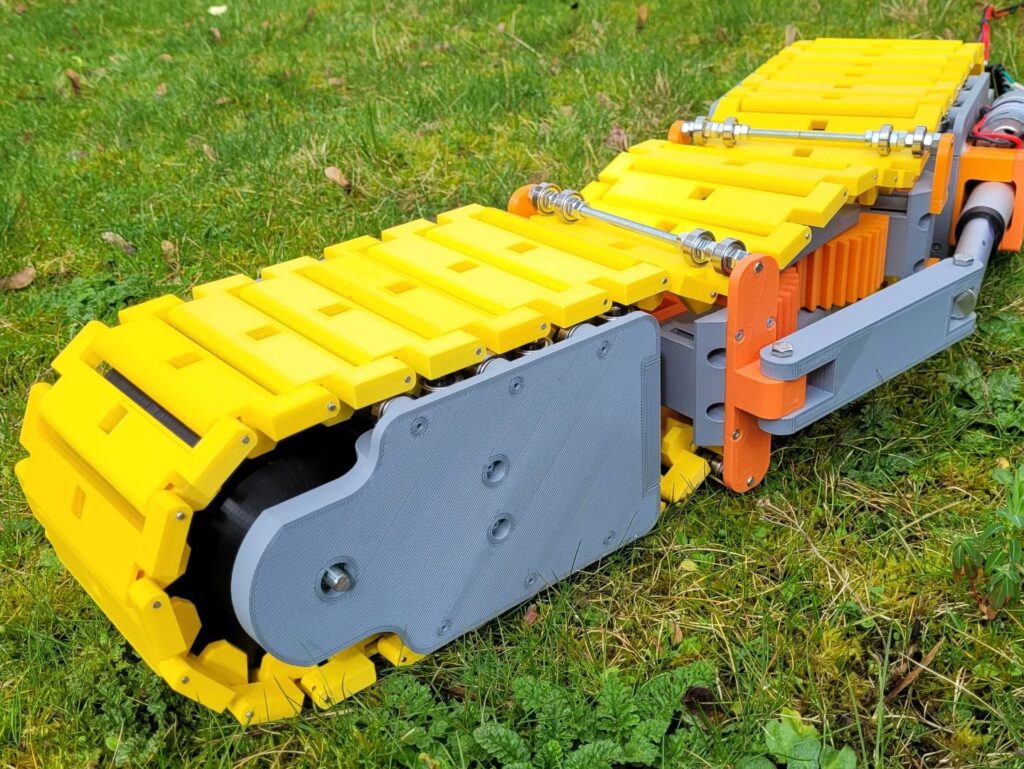
James Bruton has become something of a YouTube sensation by experimenting with unusual drive mechanisms for his robots. While he does do other things, most of his projects seem to focus on designing, building, and evaluating drive types that are far outside of the norm. His newest project is no different. It is a single-track tank vehicle that steers itself by bending its entire body.
Bruton got this idea after looking at the way conveyor belts work. Those belts, which tend to be a series of interconnected segments, are obviously flexible along their length, which is necessary for them to bend and loop back around. But they are also slightly flexible in the direction perpendicular to that, which is necessary for the conveyor belt to make a turn. Bruton figured that if he could make a tank track bend in a similar way, he could make the vehicle turn without the need for a second track.
To test this idea, Burton 3D-printed almost the entirety of the vehicle. That includes the track itself, which is made of several rigid segments that link together. There is just enough movement in the connections to allow a segment to sit at an angle relative to its neighbors. Conventional motors in front and back units spin the track, and an Arduino Mega 2560 board controls them. Between the two units is a joint that pivots horizontally. A linear actuator arm controls the angle between the front and back units, forcing the track to bend.
While the turning radius is massive, this vehicle can maneuver. It isn’t very good at clearing obstacles, but that is more due to Bruton’s design than the drive and steering system. That could be improved with additional design iterations, but this vehicle already proves that the concept works.
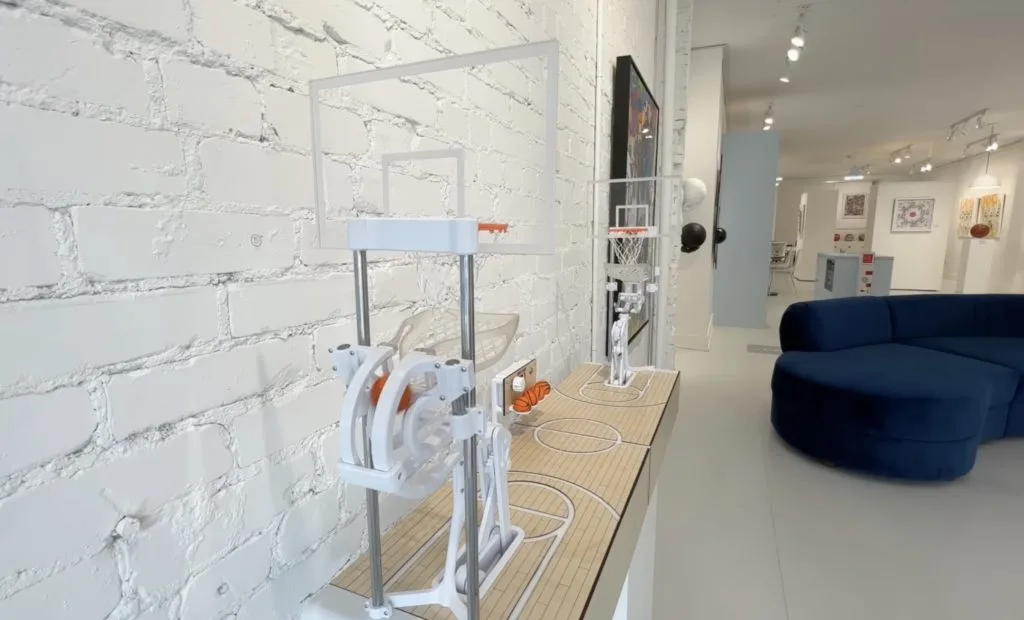
If you aren’t part of that world, you may be making the mistake of thinking that art galleries are full of boring paintings for stuffy socialites. In reality, there are all kinds of different art galleries and some of them have some pretty interesting pieces. Kinetic art is always the most exciting, as demonstrated by JBV Creative’s “Super Splash Bros” basketball sculpture built for display in a local gallery.
There weren’t any rigid constraints for this project, which let JBV Creative express his individuality. He experimented with a few different concepts and had some fun along the way, but ultimately settled on a miniature full court with two robots that throw tiny basketballs back and forth. One robot will throw the ball and sink a basket. The ball then rolls down a chute to land in the “hand” of the second robot, which proceeds to throw the ball back to the first robot’s side. That repeats endlessly, while a counter ticks up the number of sunk free-throws.
Most of this project was an exercise in mechanical design, with all of the parts either being 3D-printed or laser-cut. Beefy stepper motors actuate the robot arms and an Arduino Nano board controls those. The Arduino just needs to know when to do that, which is why each chute has a switch mounted below to detect the presence of a ball. Then it throws the ball and increases the count shown on a four-digit, seven-segment display.
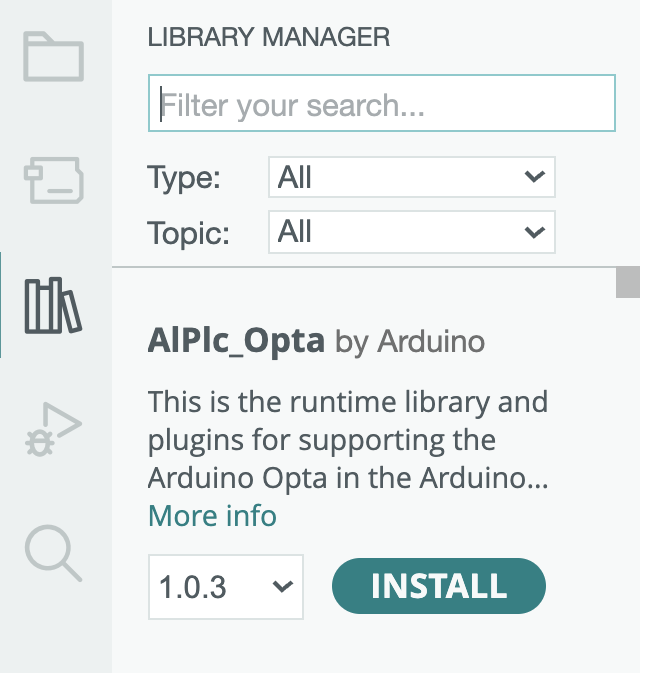
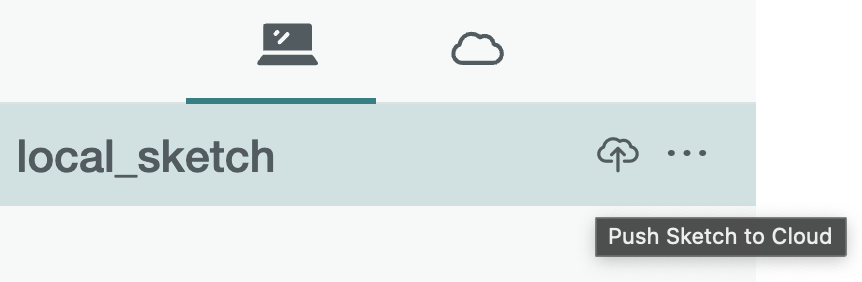
We’re happy to share that version 2.1 of the Arduino IDE is out! Among the many updates and fixes, this latest release includes two main highlights:
A full redesign of the Library Manager panel, which is now more usable and clear, along with an improved search engine.
A full redesign of the integration with Arduino Cloud that lets you backup your sketches via a single click and access them on multiple computers (as well as the browser).
The development of the Arduino IDE is made possible thanks to a passionate open source community, and to everyone supporting us with donations, purchases of original Arduino hardware, or Arduino Cloud subscriptions.
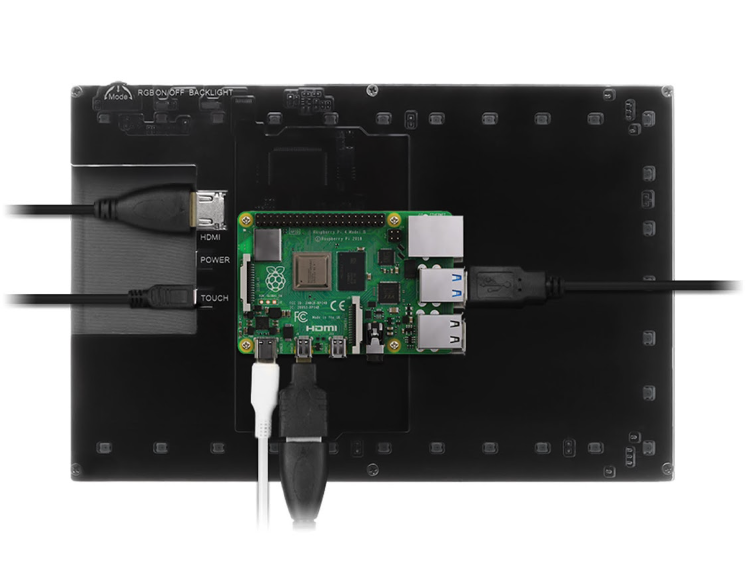
One plus point is the full-size HDMI socket, so you can easily plug in a Raspberry Pi using the supplied cable – with a micro-HDMI adapter for Raspberry Pi 4. There’s a mounting point on the rear to secure Raspberry Pi to create an all-in-one unit, complete with a two-part plastic stand.
Touch control
Two micro-USB sockets need to be connected (via supplied cables) to Raspberry Pi’s USB ports to supply power and enable touch control. An official PSU is advisable, otherwise the screen may be underpowered and keep switching off. In any case, it shows ‘No signal’ at times while Raspberry Pi OS is booting up, until the desktop appears.
We found it fiddly to tap icons and window controls, but this improved after changing the system default to ‘Larger screens’ to make them bigger. Pinch-zoom gesture control works well enough, although a bit of jiggery-pokery is needed in Raspberry Pi OS to enable right-clicking with a long press. Unless you want to attach a physical keyboard, you’ll also need to install an on-screen virtual one such as Onboard
Verdict
8/10
The RGB marquee lighting is a bit gimmicky, but the picture quality is good and touch control works well. As a bonus, the screen can also be used with many other devices.
Specs
Display: 10.1″ IPS, 1200×800 pixels, 5-point multi-touch control
Ports & cables: HDMI port, 2 × micro-USB ports, HDMI cable, micro-HDMI adapter, 2 × micro-USB to USB cables
Other: Raspberry Pi mounting point with screws, 2 × plastic stand legs
We are excited to share that 294 teams of young people participating in this year’s Astro Pi Mission Space Lab achieved Flight Status: their programs will run on the Astro Pis installed on the International Space Station (ISS) in April.
Mission Space Lab is part of the European Astro Pi Challenge, an ESA Education project run in collaboration with the Raspberry Pi Foundation. It offers young people the amazing opportunity to conduct scientific investigations in space, by writing computer programs that run on Raspberry Pi computers on board the International Space Station.
In depth
To take part in Mission Space Lab, young people form teams and choose between two themes for their experiments, investigating either ‘Life in space’ or ‘Life on Earth’. They send us their experiment ideas in Phase 1, and in Phase 2 they write Python programs to execute their experiments on the Astro Pis onboard the ISS. As we sent upgraded Astro Pis to space at the end of 2021, Mission Space Lab teams can now also choose to use a machine learning accelerator during their experiment time.
In total, 771 teams sent us ideas during Phase 1 in September 2022, so achieving Flight Status is a huge accomplishment for the successful teams. We are delighted that 391 teams submitted programs for their experiments. Teams who submitted had their programs checked for errors and their experiments tested, resulting in 294 teams being granted Flight Status. 134 of these teams included some aspects of machine learning in their experiments using the upgraded Astro Pis’ machine learning accelerator.
The 294 teams to whom we were able to award Flight Status this year represent 1245 young people. 34% of team members are female, and the average participant age is 15. The 294 successful teams hail from 21 countries; Italy has the most teams progressing to the next phase (48), closely followed by Spain (37), the UK (34), Greece (25), and the Czech Republic (25).
Life in space
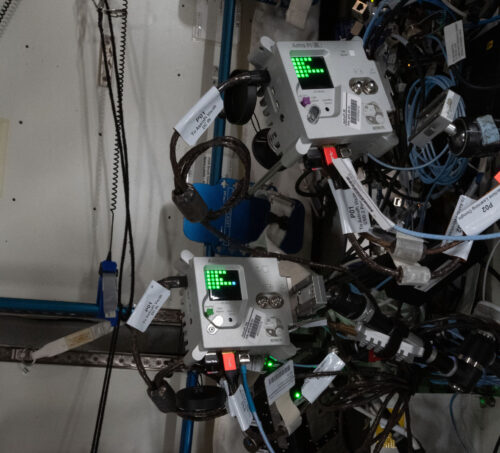
Mark II Astro Pis on the ISS
Teams can use the Astro Pis to investigate life inside ESA’s Columbus module of the ISS, by writing a program to detect things with at least one of the Astro Pi’s sensors. This can include for example the colour and intensity of light in the module, or the temperature and humidity.
81 teams that created ‘Life in space’ experiments have achieved Flight Status this year. Examples of experiments from this year are investigating how the Earth’s magnetic field is felt on the ISS, what environmental conditions the astronauts experience compared to those on Earth directly beneath the ISS as it orbits, or whether the cabin might be suitable for other lifeforms, such as plants or bacteria.
Life on Earth
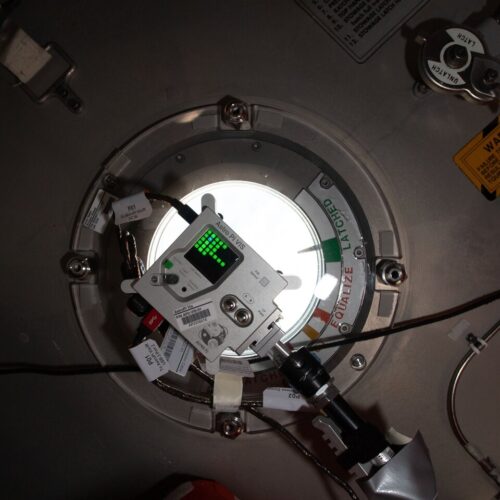
Astro Pi VIS in the window on the ISS
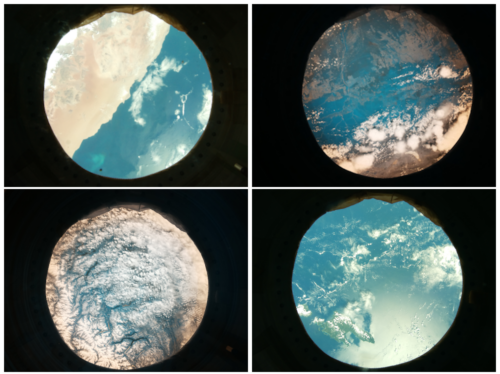
In the ‘Life on Earth’ theme, teams investigate features on the Earth’s surface using the cameras on the Astro Pis, which are positioned to view Earth from a window on the ISS.
This year the Astro Pis will be located in the Window Observational Research Facility (WORF), which is larger than the window the computers were positioned in in previous years. This means that teams running ‘Life on Earth’ experiments can capture better images. 206 teams that created experiments in the ‘Life on Earth’ theme have achieved Flight Status.
Thanks to the upgraded Astro Pi hardware, this is the second year that teams could decide whether to use visible-light or infrared (IR) photography. Teams running experiments using IR photography have chosen to examine topics such as plant health in different regions, the effects of deforestation, and desertification. Teams collecting visible light photography have chosen to design experiments analysing clouds in different regions, changes in ocean colour, the velocity of the ISS, and classification of biomes (e.g. desert, forest, grassland, wetland).
Testing, testing
Images taken by Astro Pi VIS on the ISS in Mission Space Lab 2021/22
Each of this year’s 391 submissions has been through a number of tests to ensure they follow the challenge rules, meet the ISS security requirements, and can run without errors on the Astro Pis. Once the experiments have started, we can’t rely on astronaut intervention to resolve any issues, so we have to make sure that all of the programs will run without any problems.
This means that the start of the year is a very busy time for us. We run tests on Mission Space Lab teams’ programs on a number of exact replicas of the Astro Pis, including a final test to run every experiment that has passed all tests for the full three-hour experiment duration. The 294 experiments that received Flight Status will take over 5 weeks to run.
97 programs submitted by teams during Phase 2 of Mission Space Lab this year did not pass testing and so could not be awarded Flight Status. We wish we could run every experiment that is submitted, but there is only limited time available for the Astro Pis to be positioned in the ISS window. Therefore, we have to be extremely rigorous in our selection, and many of the 97 teams were not successful because of only small issues in their programs. We recognise how much work every Mission Space Lab team does, and all teams can be very proud of designing and creating an experiment.
Even if you weren’t successful this year, we hope you enjoyed participating and will take part again in next year’s challenge.
What next?
Once all of the experiments have run, we will send the teams the data collected during their experiments. Teams will then have time to analyse their data and write a short report to share their findings. Based on these reports, we will select winners of this year’s Mission Space Lab. The winning and highly commended teams will receive a special surprise.
Congratulations to all successful teams! We are really looking forward to seeing your results.
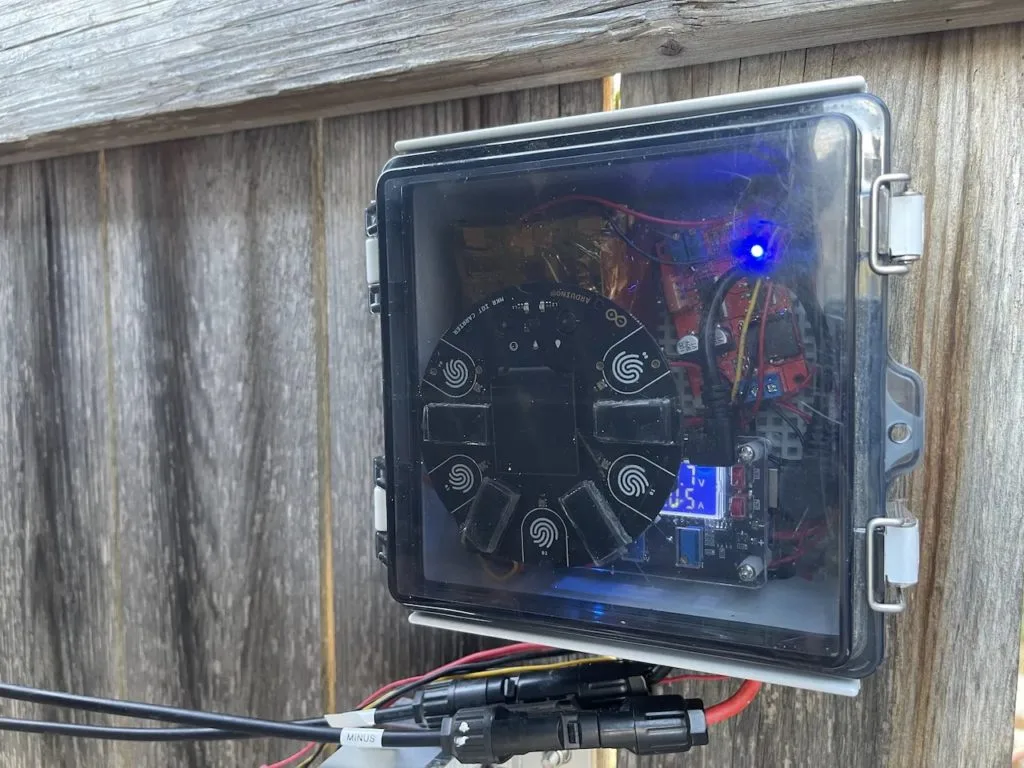
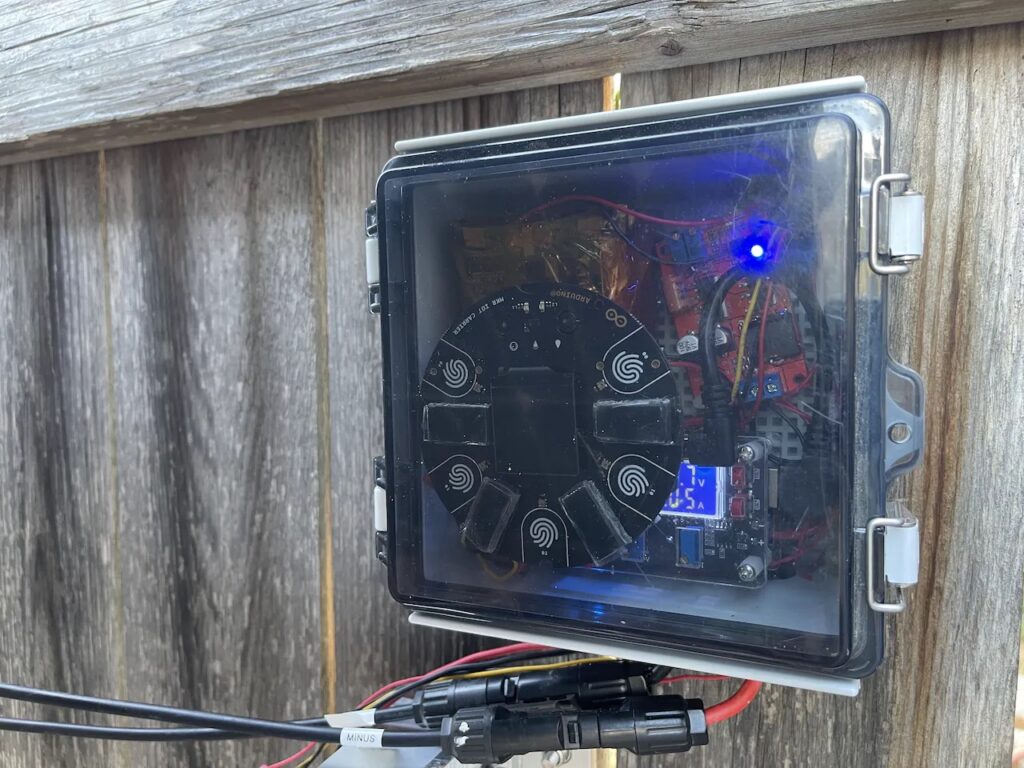
As a part of his new raised garden bed project, Shawn Murphy was looking for ways to improve his backyard even further with intelligent IoT systems. Apart from the existing 1800W solar panel array, he also wanted a device that could report current weather and soil conditions in real-time and even perform some watering tasks without the need for human intervention.
Initially, Murphy had researched constructing a pump that could take water from a pair of rain storing barrels and deliver it to the garden bed. However, this would have been costly to build and maintain, so he instead went with a gravity-fed setup. In this configuration, gravity would move water down-slope to a solenoid valve attached to the Arduino IoT Explorer Kit’s 24V relay pin. Once wired together, he added a soil moisture sensor for measuring the water content of the soil, along with a 12V battery pack and solar charge controller for off-grid power.
The resulting hardware was then loaded with a sketch that would continually read the moisture content of the soil, activate the solenoid valve if necessary, and even turn on a small fan if the enclosure were to get too hot. Best of all, the WiFi connectivity of the IoT Explorer Kit allowed Murphy to send the values remotely to an Arduino Cloud dashboard, complete with toggle switches for manually overriding the solenoid valve if necessary.
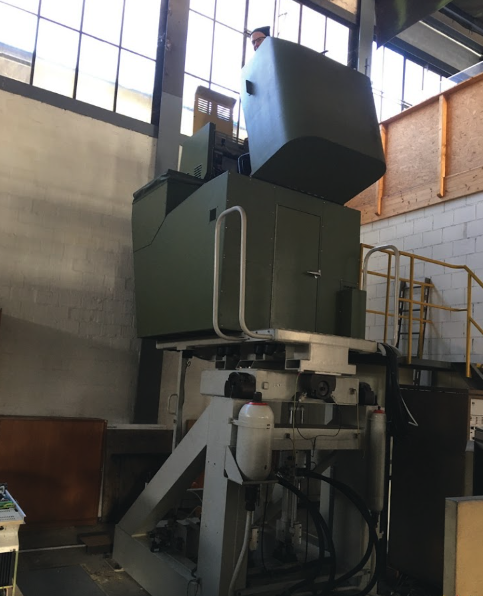
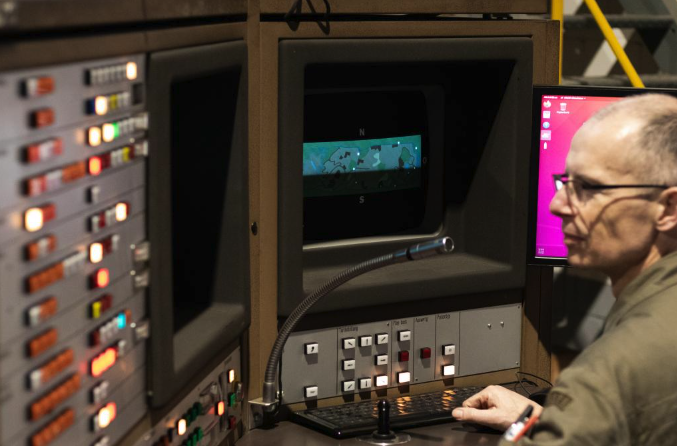
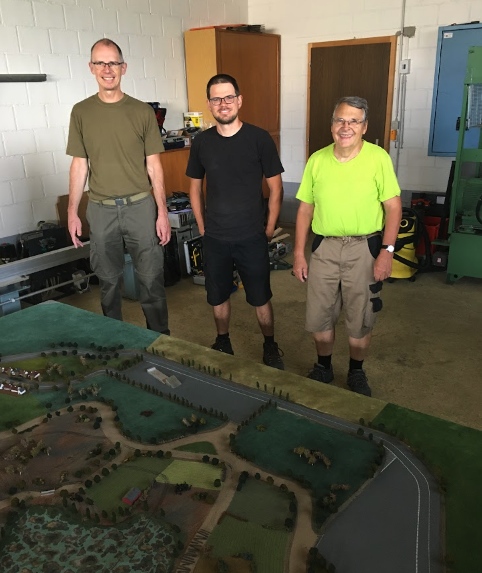
In 2004, the Military Museum saved one of the FASIP systems in Thun from being scrapped, and rebuilt it at the museum site in the village of Full. But, after several years, various defects in the antiquated computers and in other electronic components had led to its apparent end. The Full museum’s dedicated helpers, Gerold Handschin, Michael Salathé and René Demarmels, could not resign themselves to this. Instead, they began a thorough analysis of how the FASIP system worked, identified defects, and gradually replaced any components that failed. Their aim was to replace each item “as faithfully as possible.”
Sadly, the original 1970s MITRA-125 computer which controlled almost every aspect, including responding to the displacement sensors and controlling the simulator’s movements, lamp, and displays, was defective. This central control unit clearly needed to be replaced. “Fortunately, the program in operation on the MITRA-125 was available as a hard copy. So we decided to replace the old computer with a new system,” says Gerold. The only issue: it was all in French. Scanning in the several-thousand-page document and using text recognition software helped, but in some cases the type had faded so much that the characters could not be recognised. “We sometimes had to approach the correct parameter values by trial and error,” says Gerold, but new C-based simulator software for Raspberry Pi was eventually written.
Restoration challenges
The decision to use Raspberry Pi 3B+ as the new central control computer was down to its GPIO, its size, and the price. Raspberry Pi was fitted onto a new adapter board via its interface slot, replacing the interface board for the MITRA-125. The original power supply units were in poor condition and voltages were no longer stable, so modern switching power supplies were fitted. “The new adapter board contains multiplexers to connect all the signals needed for the Raspberry Pi GPIO,” explains Gerold. It was also used to adjust the 3.3 V voltage of the GPIO to the 5 V TTL logic of the existing systems.
The IO plug-in unit’s original boards, XERUDI and XUCI, were replaced by the new board and Raspberry Pi too, but it was a challenge to work out the correct timing when driving the components of the interface plug-in unit. The overhaul of the simulator was completed at the end of July 2020. Since then, it has been possible to drive the Panzer 68 simulator through the grounds at the Swiss Military Museum in Full by appointment.
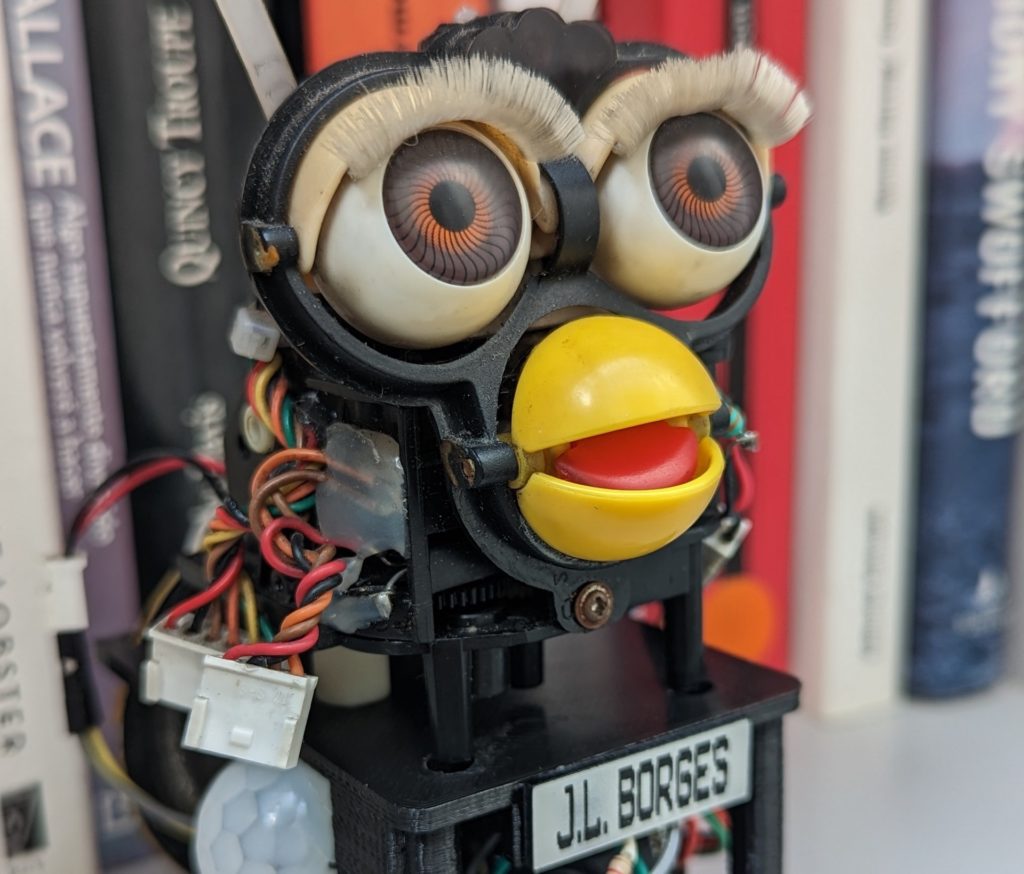
For our younger readers: the Furby is a toy released in 1998 by Tiger Electronics and that saw tremendous success in the following years. Each Furby is a little animatronic creature that resembles the Mogwai from the Gremlins films, but more colorful. When first unboxed, they speak “Furbish,” but then transition to English. While they speak, they move their ears, eyelids, and mouths. The toy has long since lost its popularity, but that didn’t stop Roni Bandini from modifying one to recite Jorge Luis Borges quotes.
While Furby toys are often described as robots, that term would be a stretch. A standard Furby only has a single DC motor to actuate all of the animatronic movement. But a clever gear mechanism controls what moves. If the motor only turns a little bit, it will just move the mouth. It can then turn further to move the ears or eyelids. Bandini discarded the original control board entirely and replaced it with his own to produce sounds, so he just needed to gain control over the DC motor.
Bandini chose to use an Arduino Nano board with an H-bridge for that job. A limit switch tells the Arduino when the motor is in the home position. Then it can rotate the motor the appropriate amount for the desired animatronic movement. Mouth movement syncs with the audio, which comes from a DFRobot DFPlayer Mini MP3 player board. Any time an audio clip is playing, the Arduino will move the Furby’s mouth. To keep it from jabbering on all the time, Bandini added a PIR (passive infrared) sensor. That tells the Arduino when someone moves nearby so it can activate a quote.
The quotes come from Jorge Luis Borges, who was an Argentinian writer of great renown. Bandini kept the Furby in its skinless state, which is a little disturbing. But at least it has deep and philosophical things to say.
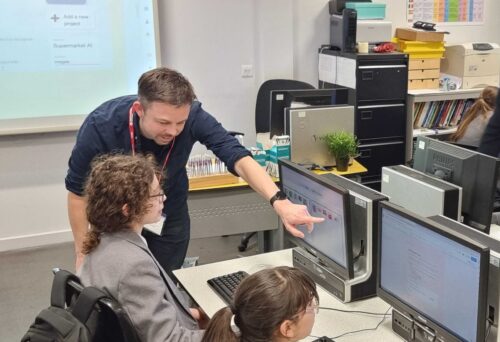
We are delighted to announce that we’ve launched Experience AI, our new learning programme to help educators to teach, inspire, and engage young people in the subject of artificial intelligence (AI) and machine learning (ML).
Experience AI is a new educational programme that offers cutting-edge secondary school resources on AI and machine learning for teachers and their students. Developed in partnership by the Raspberry Pi Foundation and DeepMind, the programme aims to support teachers in the exciting and fast-moving area of AI, and get young people passionate about the subject.
The importance of AI and machine learning education
Artificial intelligence and machine learning applications are already changing many aspects of our lives. From search engines, social media content recommenders, self-driving cars, and facial recognition software, to AI chatbots and image generation, these technologies are increasingly common in our everyday world.
Young people who understand how AI works will be better equipped to engage with the changes AI applications bring to the world, to make informed decisions about using and creating AI applications, and to choose what role AI should play in their futures. They will also gain critical thinking skills and awareness of how they might use AI to come up with new, creative solutions to problems they care about.
The AI applications people are building today are predicted to affect many career paths. In 2020, the World Economic Forum estimated that AI would replace some 85 million jobs by 2025 and create 97 million new ones. Many of these future jobs will require some knowledge of AI and ML, so it’s important that young people develop a strong understanding from an early age.
Develop a strong understanding of the concepts of AI and machine learning with your learners.
Experience AI Lessons
Something we get asked a lot is: “How do I teach AI and machine learning with my class?”. To answer this question, we have developed a set of free lessons for secondary school students (age 11 to 14) that give you everything you need including lesson plans, slide decks, worksheets, and videos.
The lessons are also for you if you’re an educator or volunteer outside of a school setting, such as in a coding club.
The six lessons
What is AI?: Learners explore the current context of artificial intelligence (AI) and how it is used in the world around them. Looking at the differences between rule-based and data-driven approaches to programming, they consider the benefits and challenges that AI could bring to society.
How computers learn: Learners focus on the role of data-driven models in AI systems. They are introduced to machine learning and find out about three common approaches to creating ML models. Finally the learners explore classification, a specific application of ML.
Bias in, bias out: Learners create their own machine learning model to classify images of apples and tomatoes. They discover that a limited dataset is likely to lead to a flawed ML model. Then they explore how bias can appear in a dataset, resulting in biased predictions produced by a ML model.
Decision trees: Learners take their first in-depth look at a specific type of machine learning model: decision trees. They see how different training datasets result in the creation of different ML models, experiencing first-hand what the term ‘data-driven’ means.
Solving problems with ML models: Learners are introduced to the AI project lifecycle and use it to create a machine learning model. They apply a human-focused approach to working on their project, train a ML model, and finally test their model to find out its accuracy.
Model cards and careers: Learners finish the AI project lifecycle by creating a model card to explain their machine learning model. To finish off the unit, they explore a range of AI-related careers, hear from people working in AI research at DeepMind, and explore how they might apply AI and ML to their interests.
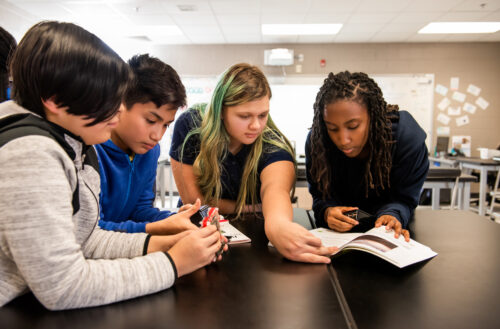
As part of this exciting first phase, we’re inviting teachers to participate in research to help us further develop the resources. All you need to do is sign up through our website, download the lessons, use them in your classroom, and give us your valuable feedback.
Ben Garside, one of our lead educators working on Experience AI, takes a group of students through one of the new lessons.
Support for teachers
We’ve designed the Experience AI lessons with teacher support in mind, and so that you can deliver them to your learners aged 11 to 14 no matter what your subject area is. Each of the lesson plans includes a section that explains new concepts, and the slide decks feature embedded videos in which DeepMind’s AI researchers describe and bring these concepts to life for your learners.
We will also be offering you a range of new teacher training opportunities later this year, including a free online CPD course — Introduction to AI and Machine Learning — and a series of AI-themed webinars.
Tell us your feedback
We will be inviting schools across the UK to test and improve the Experience AI lessons through feedback. We are really looking forward to working with you to shape the future of AI and machine learning education.
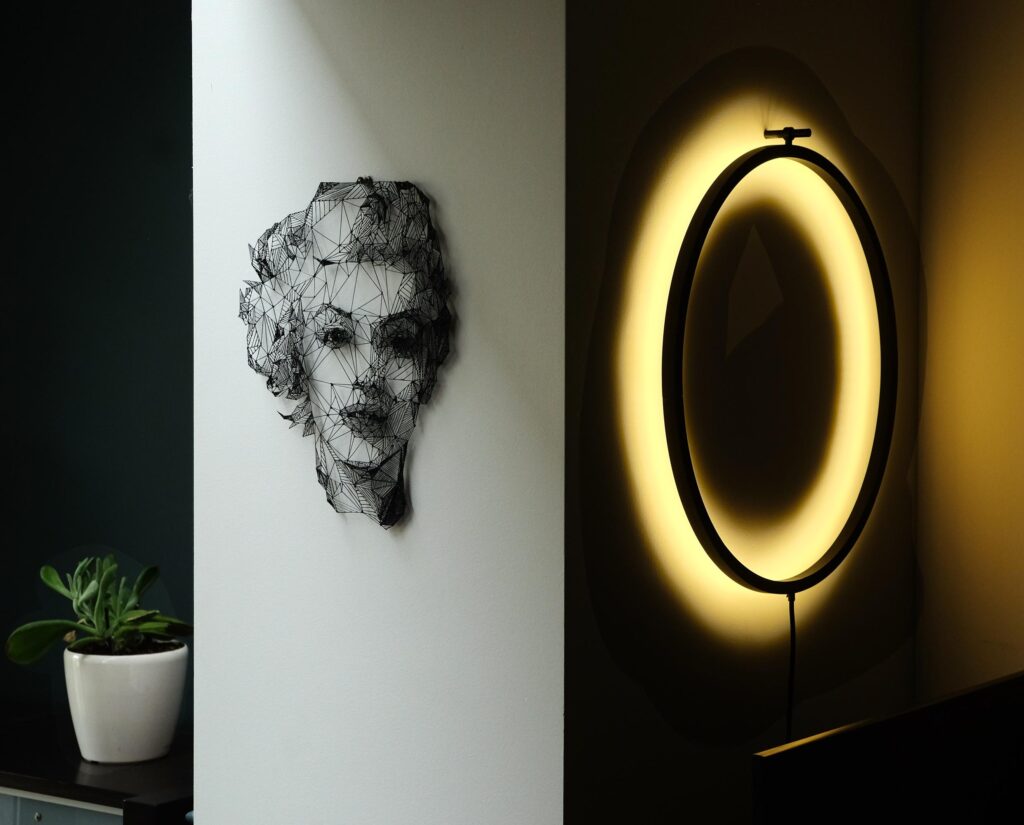
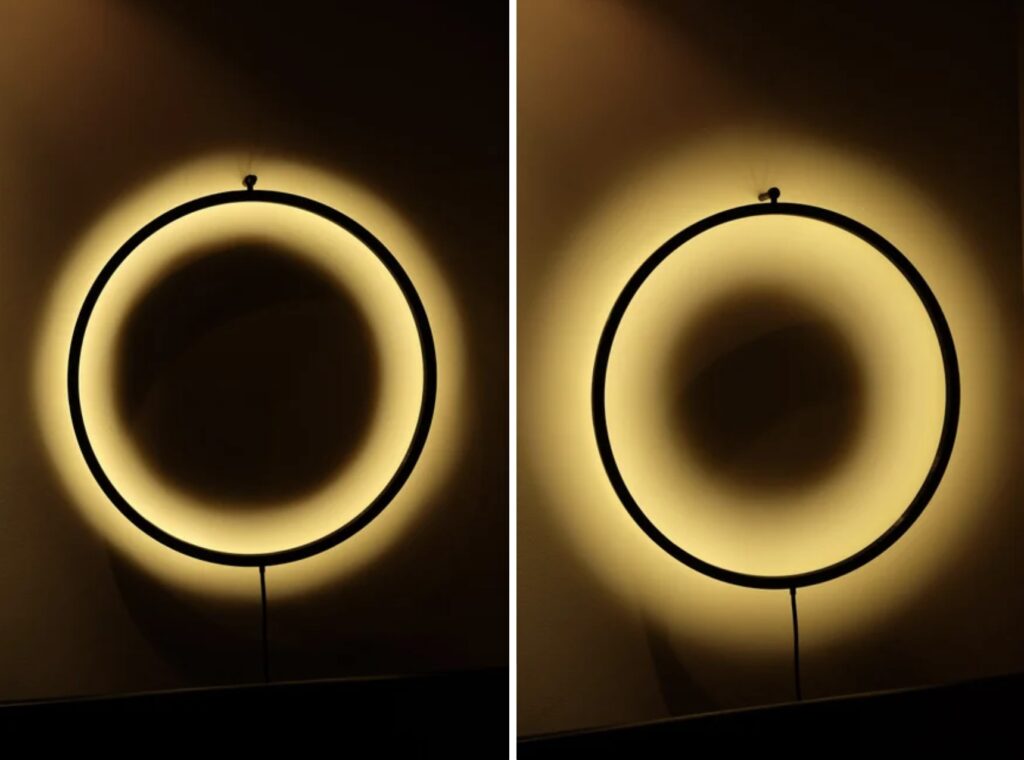
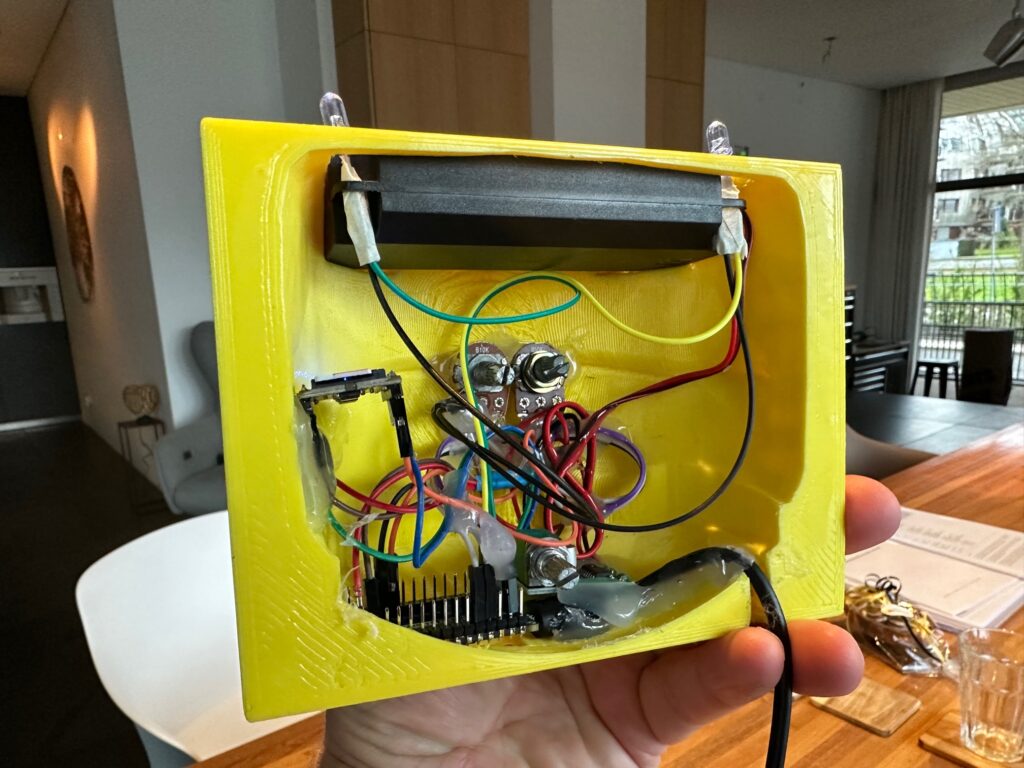
Have you ever exited a dark movie theater in the middle of the afternoon and found yourself blinded by the sudden transition to bright sunlight? Etienne Leroy faces the same problem after watching a movie on his home projector and turning on the lights. Because those lights are intense and instantly come on at full brightness, the transition can be very harsh. To increase comfort, he designed a ring-shaped lamp that lightens progressively.
ECLIPSE is a ring-shaped lamp that shines its light upon the wall onto which it is mounted. When activated, it gradually increased the brightness of the light in order to avoid a jarring transition after movie time. There are no longer any worries about hurt eyes and the lamp looks gorgeous, so it adds to the home’s decor instead of detracting from it. Best of all, ECLIPSE is easy and affordable to build if you want your own.
The lamp’s frame is printable in small sections that should fit on most consumer 3D printers. Illumination comes from a strip of “warm white” LEDs, though it would be easy to substitute another color or even RGB LEDs. An Arduino Nano controls those LEDs, increasing brightness slowly over a set period of time. It uses an infrared receiver module, so users can take advantage of the remotes they already own and have handy to turn the ECLIPSE lamp on. It will work with any infrared remote and the user only needs to decode the specific code sent by their remote when they press the desired button.
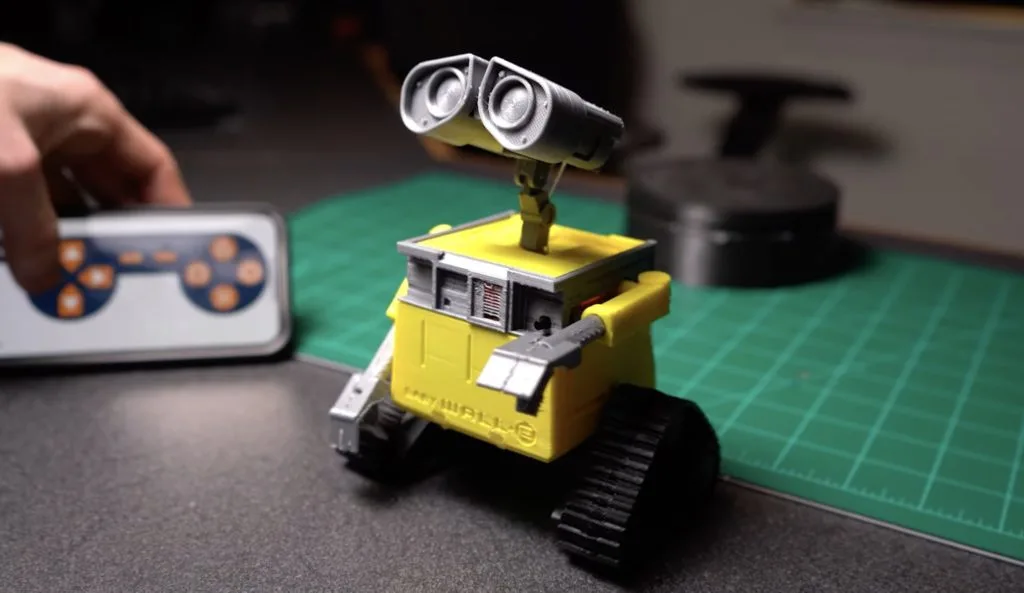
While brainstorming gift ideas, Professor Boots settled upon creating a tiny present-delivering robot that could move around on its own power. Because WALL-E’s design already has a built-in compartment and is quite memorable, it became the jumping off point for the project. The entire robot is 3D-printed from a combination of rigid PLA for the housing and flexible TPU for the tracks.
The lowest portion of the compartment houses two geared DC motors that each control a track independently. They are driven by an H-bridge chip which is, in turn, controlled by an Arduino Nano. A total of five servo motors were used to adjust the positions of the head, arms, and the front compartment. A small speaker and amplifier circuit was added so that the classic “WALL-E” sound effect could be played, and finally, an HM-10 Bluetooth® module was connected via UART for communication with a smartphone.
The mobile app, called Dabble, gives the user a virtual Bluetooth® controller and allows them to push buttons to make the robot drive, open the compartment, and even perform some predefined movement sequences, although the RC mode can be switched to autonomous via a small button at the front.
To see more about how this pint-sized WALL-E-Inspired robot was made, watch Professor Boots’ video below.
What’s the most important substance in the world? After the air we breathe, the answer is almost certainly water. We need it to live, we can’t go more than a few days without it, and it makes up about 60% of our bodies.
All this just makes it even more worrying that in many parts of the world, running out of water is a very real problem. As time goes on, the global population grows, and the effects of climate change continue, water shortages around the world will become even more of a challenge.
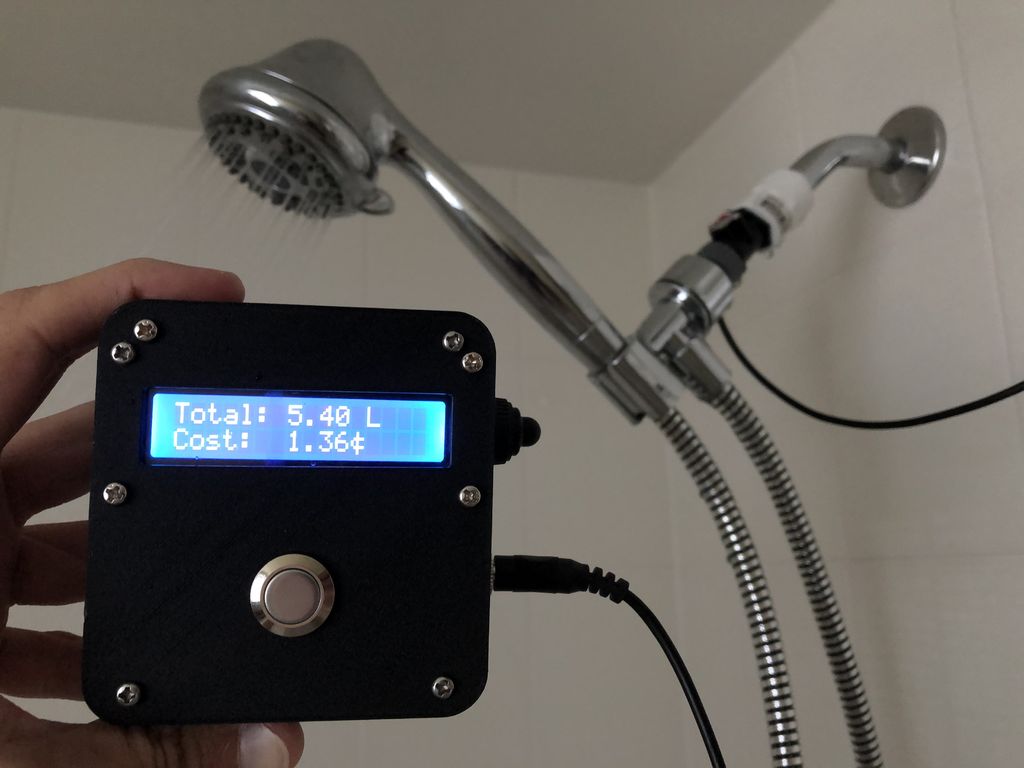
What can we do? One of the tools in our toolbox here is automation. Used right, it can help us manage our water supplies better and ensure as many people as possible have access to plentiful safe water. It’s even possible to employ automation in our own homes, using tools like Arduino and the Arduino Cloud and to better manage our water consumption, eliminate any wastage, and save on bills.
Why is water conservation so important?
Even though the planet is 70% water, less than 2% of that is freshwater, and even less is clean and drinkable.
One in six people globally has no access to clean water, which puts them at enormous risk for all kinds of waterborne diseases. And the problem is getting worse — the UN has predicted that water shortages will affect almost 20% of the human population by 2025.
As a result, it’s incredibly important to conserve the clean water we do have and ensure it stretches as far as possible. Here’s why:
Saving water ensures communities are prepared in the event of droughts and other water shortages. Managing our water usage and conserving an appropriate amount when times are good gives us a valuable buffer when times are hard.
Conserving water helps avoid the political unrest and even conflict that can arise when people have to compete for the same inadequate amount of water.
In developed countries, conserving water more efficiently helps protect against rising costs.
Transporting and cleaning water requires a lot of energy. By reducing our usage, we limit the environmental cost of all this work.
How can automation help save water?
The concept of using automation to save water is not new. In fact, there are many innovative projects already in place around the world, and as time goes on they look set to continue. Let’s take a look at some of the most interesting ways automation is being used to save our water.
Irrigation sensors
Irrigation — the process of artificially adding water to soil — is a critical part of modern-day farming. It enables us to keep crops watered on a consistent basis, ensuring large-scale farms that can feed entire populations.
However, despite its necessity, irrigation comes at a cost — it uses a huge amount of water. If we can find ways to manage our irrigation systems more efficiently, minimizing waste, we stand to save a lot of H2O.
Enter automated irrigation. This relies on using sensors in the soil to detect when water is needed and trigger irrigation systems only when the levels are low enough to warrant it. This ensures water is used only when needed, helping us conserve much more.
Manage water infrastructure more efficiently
Cities are incredibly complex beasts — huge networks of various different processes and systems to keep the lights on, the trains running… and the water flowing.
Ensuring everyone gets constant access to clean water is a monumental task, and often results in inefficiencies and wastage.
The St. George Water Services Department in Washington County, Utah, decided to introduce automation tools to manage their water systems more efficiently. They did this via a radio network that transmitted sensor data from across the entire district, giving them newfound visibility into their water systems and allowing them to minimize wastage and optimize the water cycle for more than 80,000 people in the city of St. George.
Home automation
Conserving water isn’t something you have to leave to governments and other big organizations. You can start using automation to optimize your water usage at home, saving money on energy bills and doing your bit for the environment.
One example is water sensors, which can detect the level of water in your tank and automatically alert you when they’re running low. They can also automatically turn off the water supply when it isn’t needed.
Another example is detecting leaks — you can install simple sensors that notify you when water is leaking, for example through damaged pipes. This can not only damage your home but also lead to large avoidable costs.
The Arduino Project Hub is filled with examples of home automation systems just like this one. Conserving water in your home is one of many incredibly useful ways to deploy automation, and can be done with only a few components and some basic knowledge.
Visit our Home Automation website to find out more about how Arduino works and how you can get started.
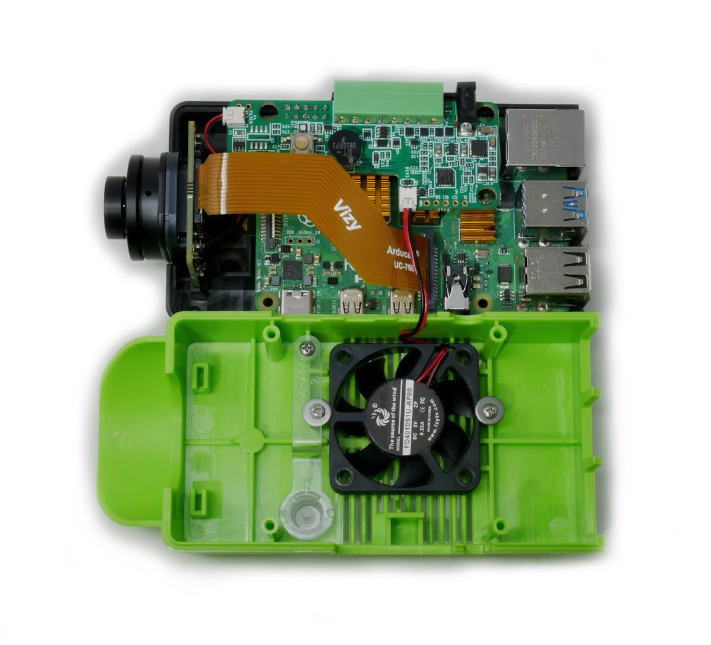
Vizy comes self-assembled (you can choose between 2GB, 4GB, and 8GB Raspberry Pi inside). A microSD card is pre-installed and all you need to do is plug it in and press the button to turn it on.
While there’s no fun in the build process, it is quick to get up and running. On first run, it uses Raspberry Pi’s Wi-Fi module to broadcast a network, which you can join from another computer. You can also connect via an Ethernet cable, which was the approach we favoured.
Once connected, you set up Vizy to automatically connect to a local wireless network so it connects whenever you boot up. Then, you can investigate the built-in software, divided into a range of apps and examples.
Built-in apps include a Bird Feeder (identifies birds), MotionScope (captures the motion of objects), and Object Detector (detects and logs classes with text alerts sent via Signal).
The examples are more simple, including OpenCV Edge Detection, Pet Companion, Pic Taker, TensorFlow Lite, and simple video capture. You can investigate the Python code for each example, to help you start to build your own apps. Detailed documentation at docs.vizycam.com includes a ‘Getting started’ guide, and information about accessories and applications, plus some simple API information. You can access the Python editor directly from the web interface, or log into the Shell and control Raspberry Pi directly.
These built-in programs ensure Vizy is a great platform for exploring machine learning possibilities. We particularly liked MotionScope, which captures the movement of an object (such as a bouncing ball) and provides detailed x, y, and z co-ordinates as graphs and a data dump. We can imagine this working incredibly well alongside calculus learning.
Meanwhile, the Object Detector and Bird Feeder can be used to analyse and respond to scenes, creating alerts for specific items. We had a lot of fun tracking a pet cat and sending alarms when she was detected on a table.
The camera is the equivalent of a Raspberry Pi High Quality Camera, although we’d be happier if it used an official camera offering. We also found the 1.5 m power lead to be a little short for some setups, mainly when we tried to move out into the garden for testing – although we note a Power over Ethernet Splitter (£15/$18) that would work well in this setting. There is also an optional outdoor enclosure with IP66 rating and a 4G LTE cellular network adapter.
Vizy provides you with a great introduction to image recognition that does a lot of the heavy lifting, allowing you to focus on practical projects. We think this would be ideal in a classroom setting.
Verdict
9/10
An interesting camera that allows you to quickly investigate image recognition projects.
Specs
Components: Raspberry Pi 4 (2, 4, or 8GB RAM), universal tripod mount, 32GB microSD, 25 W AC power supply, Vizy case (900 g; 10×15×10 cm)
Camera: 12-megapixel Sony image sensor (IMX477), wide-angle, 3.25 mm M12 lens (optional high-quality 8-50 mm C/CS zoom lens), electronically switchable IR-cut filter
I/O: Digital I/O, analogue I/O, PWM, UART serial; high-current output (up to 1000 mA per channel), optional lighting accessory
Ham radio allows for the broadcast and reception of non-commercial radio signals across vast distances with relatively inexpensive equipment. As the name implies, ham radio relies on antennas to function, and most designs can take up large amounts of space. An alternative antenna is the magnetic loop design which has a tall circle of copper tubing around the outside while each end is soldered onto a variable capacitor that is used to tune the signal.
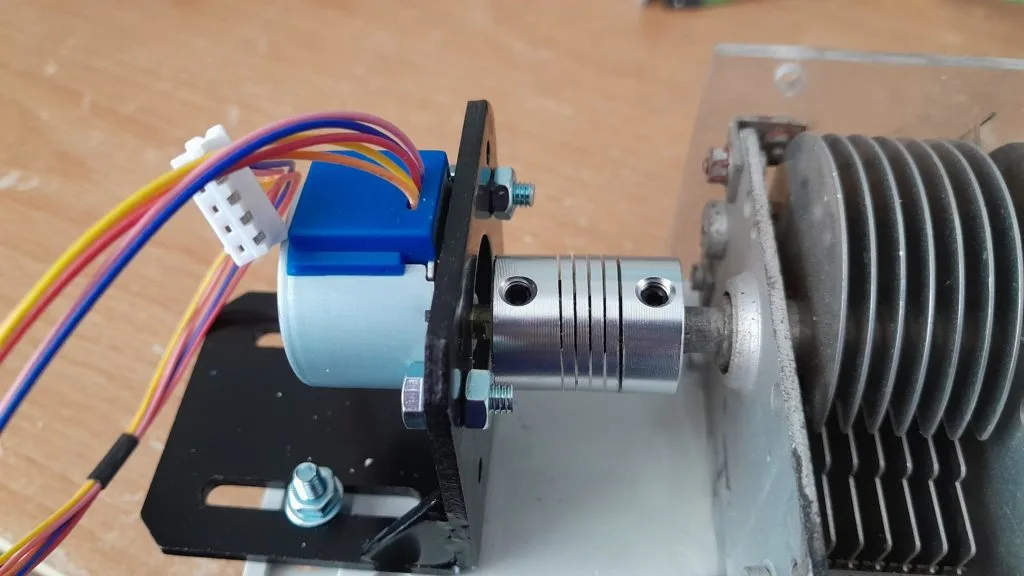
TekMakerUK was inspired by Kevin Loughin’s YouTube video on the design and decided to make his own experimental version capable of 5W transmissions, which he could tune via an Android phone. The variable capacitor is from an old valve radio and has a central shaft that rotates to adjust the distance between the dielectric plates. In order to turn the coupling, a 5V stepper motor was added to the base along with a ULN2003 stepper motor driver. The driver was then connected to an Arduino Uno, although the board was replaced by a Nano Every for soldered connections.
In terms of usage, there is a digital encoder that increments the count either up or down depending on the direction it is rotated in, and this dictates how far the stepper should move. Calibrating the “zero” or home position is done by slowly moving the stepper on initialization until it hits a limit switch. More details about TekMakerUK’s magnetic loop antenna tuner can be found here on Instructables.
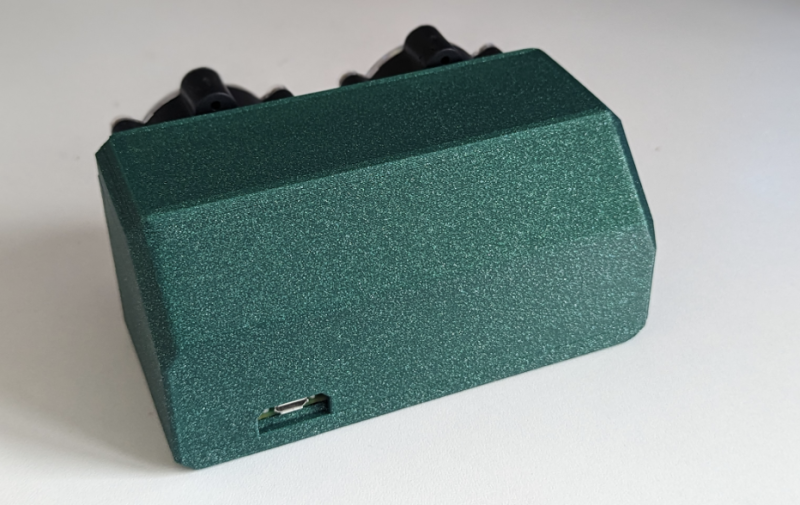
Whether it is a library, conference room, school classroom, or some other public space, we all require peace and quiet to work sometimes, but achieving it can be a challenge. After wondering if loudmouths could be automatically asked to be silent via some kind of sensor-driven system, Bas op ten Berg, the founder of BotBerg, chose to build one using just a few components.
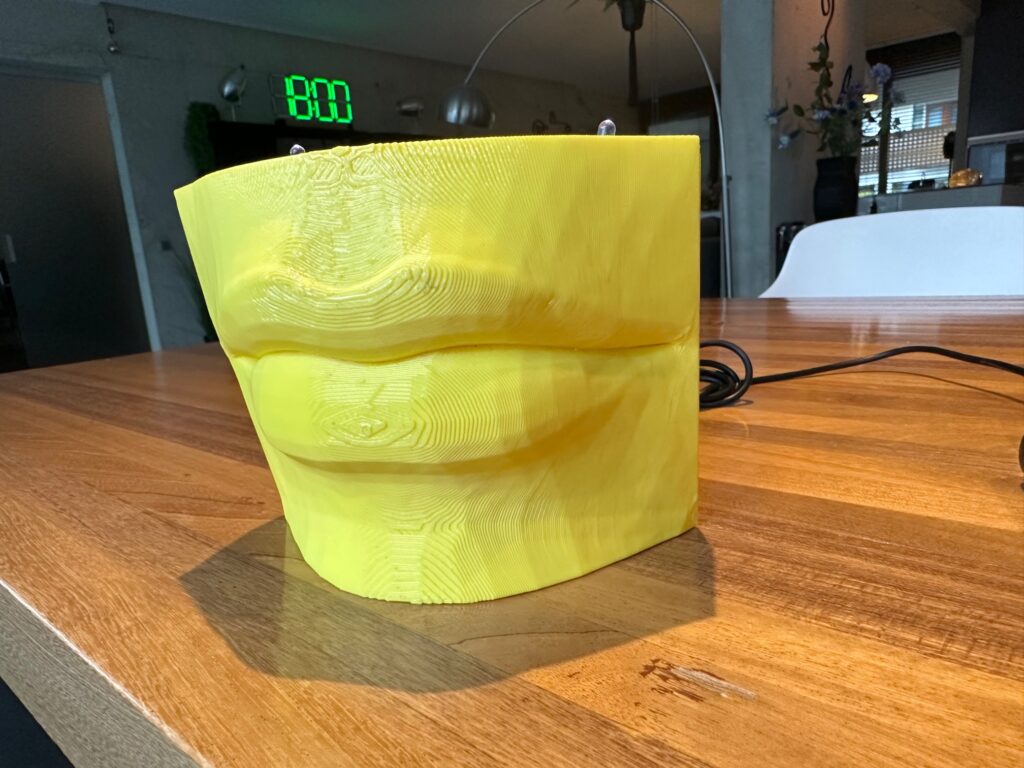
His smart shusher is based on the Arduino Nano 33 BLE Sense board and its built-in MP34DT05 MEMS microphone element. By reading in the pulse-density modulation (PDM) value from the output pin, he could easily convert it into the sound pressure, and thus the ambient noise level. Setting the noise threshold is done by carefully adjusting a connected potentiometer that gets read multiple times per second from an analog input pin. When the set threshold has been exceeded for a predetermined amount of time, a DFRobot MP3 player module is triggered and plays a sound file containing the phrase “Pssst, silence please! Silence please!” which is sure to grab anyone’s interest. All of the parts are housed within an equally attention-grabbing 3D printed lower face so that it appears to be speaking.
Beyond this local, offline functionality, op ten Berg offers other ways to expand the project, including ideas such as BLE connectivity, extra sounds/lights, or even switching on a relay. More details can be found on his website.
Rather than pay anywhere between £80 and £500 on a commercial dosing pump, however, he decided to make one himself. By using a Raspberry Pi Pico microcontroller, along with good-quality relays and pumps, he has been able to create a driver for a fraction of the cost – just £14 in total. He has also done so without compromising. “Price wasn’t a limiting factor at all because these parts are relatively cheap,” he explains.
Nothing fishy
Although he was always keen to keep costs under £30, the main requirement was to create a device that could dose a configurable amount of chemicals accurate to within 0.5 millilitres or less. He also needed each pump to separately operate a configurable number of times each day so that different liquids could be used at different quantities.
“The doser needed to be low voltage because of its proximity to water, and I wanted it to be small and neat so that it could go near a beautiful reef tank and not look out of place,” Joe continues. “I also needed it to be repairable and easy to take apart if necessary to replace the parts. This is why I chose particular peristaltic pumps. You can take out the tubing and replace it with new tubing very easily from the front.”
Peristaltic pumps are low-maintenance and easy to sterilise. They use rollers or shoes to effectively massage a fixed amount of chemical through the tube while preventing back-flow. Sourcing the pumps and the relay took Joe a few hours. He was then able to design a case using 3D modelling software, map the wiring and electronics on paper, solder a prototype, and write the software.
Good dose
“When you buy a commercial doser, you’re stuck with the company’s proprietary software which is usually awful and painful to use, or simply doesn’t work half the time,” Joe says. “This project fit my ultimate aim which is to build everything for the aquarium myself, from the LED fixtures to the doser and temperature/pH monitoring system.”
Joe wrote the program in MicroPython and, after calibrating each of the doser’s two pumps to run at the same speed, he set it to run every 15 minutes. This allowed a small amount of calcium hydroxide to flow 96 times a day from one pump, ensuring 200 ml of the chemical would be dosed on a daily basis. The other pump was set to dose other chemicals, such as amino acids and food, when needed.
It’s certainly effective. Joe says that the Pico controls the relay, turning the pumps on and off with simple code sent via one of the GPIO pins. A few functions calculate the dosage/timing and the code just loops, sleeping in-between dosing. “My next step will be to upgrade to Raspberry Pi Pico W,” he says. “I will then write some wireless LAN code to control it via my mobile phone.”
If you do any kind of video content creation and you still rely entirely on static shots, then you’re missing out on an opportunity to generate visual interest that draws viewers in. Dynamic shots can do a lot to increase the production value of your videos, but most people can’t afford to hire a camera operator. That’s why you should check out Giovanni Aggiustatutto’s camera robot.
This device attaches to a standard tripod to provide motorized panning and tilting. While those movements are not comprehensive, they do allow for a lot of flexibility for capturing dynamic video. The best part is that the setup includes a remote with a joystick to make controlling the movement a snap. The remote lets users program movements ahead of time, which the device can then execute when it is time to get the shot. There is even a timelapse mode that will move the camera slightly between still captures.
Because this pans and tilts, it needs two motors. Those are stepper motors controlled by an Arduino Nano Every board through two TMC2208 stepper motor driver modules. A joystick on the remote lets the user pan or tilt, while an LCD provides information. The remote connects to the main unit via an Ethernet cable. The enclosures and most of the mechanical parts are 3D-printable, but this project does require some hardware like pulleys, bearings, and aluminum tube.
In the 1950s, Alan Turing explored the central question of artificial intelligence (AI). He thought that the original question, “Can machines think?”, would not provide useful answers because the terms “machine” and “think” are hard to define. Instead, he proposed changing the question to something more provable: “Can a computer imitate intelligent behaviour well enough to convince someone they are talking to a human?” This is commonly referred to as the Turing test.
It’s been hard to miss the newest generation of AI chatbots that companies have released over the last year. News articles and stories about them seem to be everywhere at the moment. So you may have heard of machine learning (ML) chatbots such as ChatGPT and LaMDA. These chatbots are advanced enough to have caused renewed discussions about the Turing Test and whether the chatbots are sentient.
Chatbots are not sentient
Without any knowledge of how people create such chatbots, it’s easy to imagine how someone might develop an incorrect mental model around these chatbots being living entities. With some awareness of Sci-Fi stories, you might even start to imagine what they could look like or associate a gender with them.
The reality is that these new chatbots are applications based on a large language model (LLM) — a type of machine learning model that has been trained with huge quantities of text, written by people and taken from places such as books and the internet, e.g. social media posts. An LLM predicts the probable order of combinations of words, a bit like the autocomplete function on a smartphone. Based on these probabilities, it can produce text outputs. LLM chatbots run on servers with huge amounts of computing power that people have built in data centres around the world.
Our AI education resources for young people
AI applications are often described as “black boxes” or “closed boxes”: they may be relatively easy to use, but it’s not as easy to understand how they work. We believe that it’s fundamentally important to help everyone, especially young people, to understand the potential of AI technologies and to open these closed boxes to understand how they actually work.
As always, we want to demystify digital technology for young people, to empower them to be thoughtful creators of technology and to make informed choices about how they engage with technology — rather than just being passive consumers.
That’s the goal we have in mind as we’re working on lesson resources to help teachers and other educators introduce KS3 students (ages 11 to 14) to AI and ML. We will release these Experience AI lessons very soon.
Why we avoid describing AI as human-like
Our researchers at the Raspberry Pi Computing Education Research Centre have started investigating the topic of AI and ML, including thinking deeply about how AI and ML applications are described to educators and learners.
To support learners to form accurate mental models of AI and ML, we believe it is important to avoid using words that can lead to learners developing misconceptions around machines being human-like in their abilities. That’s why ‘anthropomorphism’ is a term that comes up regularly in our conversations about the Experience AI lessons we are developing.
To anthropomorphise: “to show or treat an animal, god, or object as if it is human in appearance, character, or behaviour”
Anthropomorphising AI in teaching materials might lead to learners believing that there is sentience or intention within AI applications. That misconception would distract learners from the fact that it is people who design AI applications and decide how they are used. It also risks reducing learners’ desire to take an active role in understanding AI applications, and in the design of future applications.
Examples of how anthropomorphism is misleading
Avoiding anthropomorphism helps young people to open the closed box of AI applications. Take the example of a smart speaker. It’s easy to describe a smart speaker’s functionality in anthropomorphic terms such as “it listens” or “it understands”. However, we think it’s more accurate and empowering to explain smart speakers as systems developed by people to process sound and carry out specific tasks. Rather than telling young people that a smart speaker “listens” and “understands”, it’s more accurate to say that the speaker receives input, processes the data, and produces an output. This language helps to distinguish how the device actually works from the illusion of a persona the speaker’s voice might conjure for learners.
Another example is the use of AI in computer vision. ML models can, for example, be trained to identify when there is a dog or a cat in an image. An accurate ML model, on the surface, displays human-like behaviour. However, the model operates very differently to how a human might identify animals in images. Where humans would point to features such as whiskers and ear shapes, ML models process pixels in images to make predictions based on probabilities.
Better ways to describe AI
The Experience AI lesson resources we are developing introduce students to AI applications and teach them about the ML models that are used to power them. We have put a lot of work into thinking about the language we use in the lessons and the impact it might have on the emerging mental models of the young people (and their teachers) who will be engaging with our resources.
It’s not easy to avoid anthropomorphism while talking about AI, especially considering the industry standard language in the area: artificial intelligence, machine learning, computer vision, to name but a few examples. At the Foundation, we are still training ourselves not to anthropomorphise AI, and we take a little bit of pleasure in picking each other up on the odd slip-up.
Here are some suggestions to help you describe AI better:
Avoid using
Instead use
Avoid using phrases such as “AI learns” or “AI/ML does”
Use phrases such as “AI applications are designed to…” or “AI developers build applications that…”
Avoid words that describe the behaviour of people (e.g. see, look, recognise, create, make)
Use system type words (e.g. detect, input, pattern match, generate, produce)
Avoid using AI/ML as a countable noun, e.g. “new artificial intelligences emerged in 2022”
Refer to ‘AI/ML’ as a scientific discipline, similarly to how you use the term “biology”
The purpose of our AI education resources
If we are correct in our approach, then whether or not the young people who engage in Experience AI grow up to become AI developers, we will have helped them to become discerning users of AI technologies and to be more likely to see such products for what they are: data-driven applications and not sentient machines.
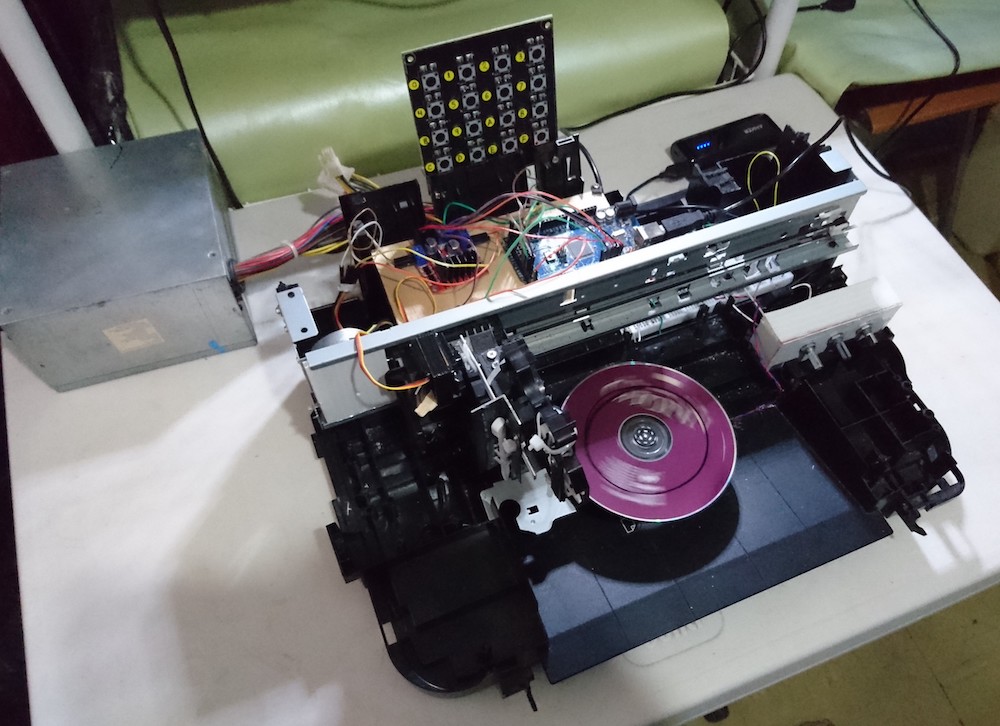
The art of making pottery has existed for tens of thousands of years, and the materials used have stayed relatively similar as nearly all items were made from clay which was left to harden either from the sun or via a kiln. But for those who wish to do only a little sculpting with little regard for the finished product, such as Guillermo Perez Guillen had the idea to employ a cornstarch-based material instead for reduced costs. Beyond merely using one’s hands to shape the “clay”, he also upgraded his 3D pottery machine project with new controls, patterns, and more.
Just like in the first version, this second iteration of the clay sculpting machine relies on an old CD-ROM drive to both spin the platter — handled by an Arduino Nano 33 BLE Sense, and move the toolhead along a single axis. But unlike the previous version, this one introduces far more automation and control. An Arduino Mega 2560 receives inputs from a 4×4 matrix keypad for homing, positioning the toolhead, or running a predefined pattern. A stepper motor, driven by an L298N, moves the gantry left and right while a servo motor can raise or lower the stylus.
With this combination of moveable axes and the ability to creates patterns automatically, this improved system is capable of producing very creative works of cornstarch-based pottery. Guillen hopes that this project could find its way into classrooms as kit for STEM education, helping students intuitively learn how to make 2D figures such as circles, squares and triangles, or even 3D figures like cylinders and cubes. More information about Guillen’s machine can be found here on Hackaday.io.
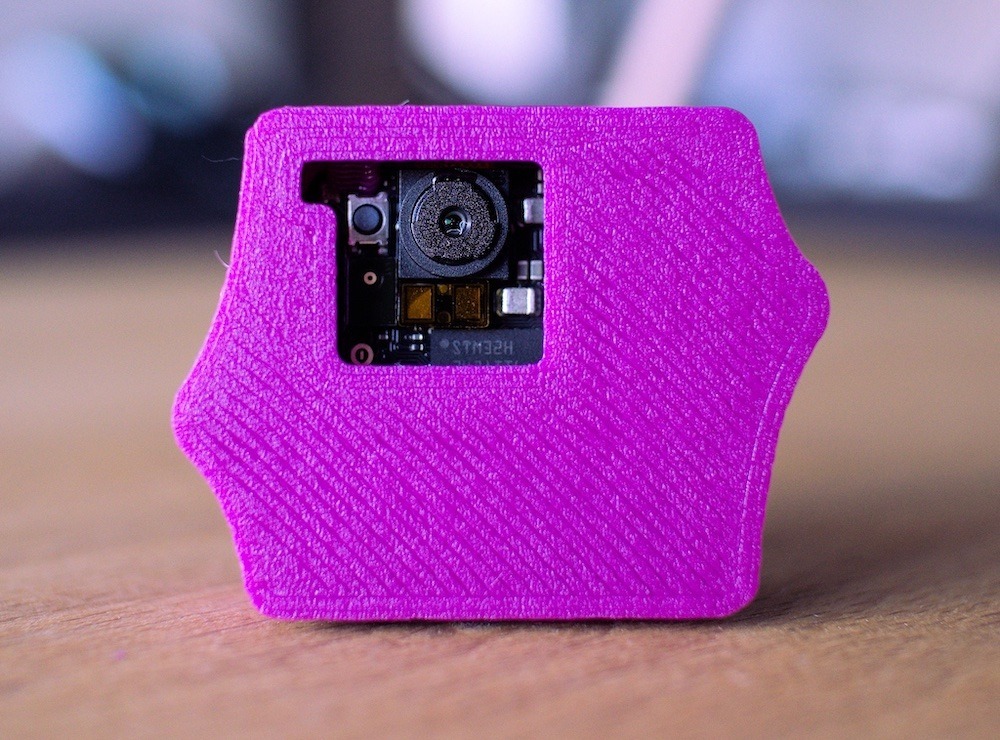
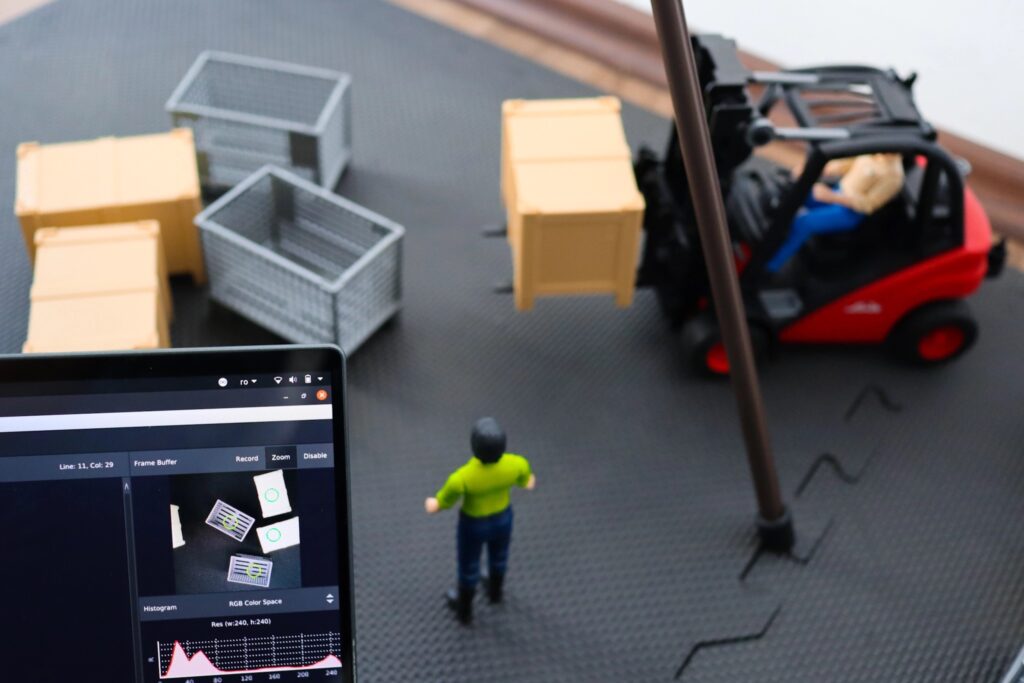
Maintaining accurate records for both the quantities and locations of inventory is vital when running any business operations efficiently and at scale. By leveraging new technologies such as AI and computer vision, items in warehouses, store shelves, and even a customer’s hand can be better managed and used to forecast changes demand. As demonstrated by the Zalmotek team, a tiny Arduino Nicla Vision board can be tasked with recognizing different types of containers and sending the resulting data to the cloud automatically.
The hardware itself was quite simple, as the Nicla Vision already contained the processor, camera, and connectivity required for the proof-of-concept. Once configured, Zalmotek used the OpenMV IDE to collect a large dataset featuring images of each type of item. Bounding boxes were then drawn using the Edge Impulse Studio, after which a FOMO-specific MobileNetV2 0.35 model was trained and could accurately determine the locations and quantities of objects in each test image.
Deploying the model was simple thanks to the OpenMV firmware export option, as it could be easily incorporated into the main Python script. In essence, the program continually gathers new images, passes them to the model, and gets the number of detected objects. Afterwards, these counts are published via the MQTT protocol to a cloud service for remote viewing.
Um dir ein optimales Erlebnis zu bieten, verwenden wir Technologien wie Cookies, um Geräteinformationen zu speichern und/oder darauf zuzugreifen. Wenn du diesen Technologien zustimmst, können wir Daten wie das Surfverhalten oder eindeutige IDs auf dieser Website verarbeiten. Wenn du deine Einwillligung nicht erteilst oder zurückziehst, können bestimmte Merkmale und Funktionen beeinträchtigt werden.
Funktional
Immer aktiv
Die technische Speicherung oder der Zugang ist unbedingt erforderlich für den rechtmäßigen Zweck, die Nutzung eines bestimmten Dienstes zu ermöglichen, der vom Teilnehmer oder Nutzer ausdrücklich gewünscht wird, oder für den alleinigen Zweck, die Übertragung einer Nachricht über ein elektronisches Kommunikationsnetz durchzuführen.
Vorlieben
Die technische Speicherung oder der Zugriff ist für den rechtmäßigen Zweck der Speicherung von Präferenzen erforderlich, die nicht vom Abonnenten oder Benutzer angefordert wurden.
Statistiken
Die technische Speicherung oder der Zugriff, der ausschließlich zu statistischen Zwecken erfolgt.Die technische Speicherung oder der Zugriff, der ausschließlich zu anonymen statistischen Zwecken verwendet wird. Ohne eine Vorladung, die freiwillige Zustimmung deines Internetdienstanbieters oder zusätzliche Aufzeichnungen von Dritten können die zu diesem Zweck gespeicherten oder abgerufenen Informationen allein in der Regel nicht dazu verwendet werden, dich zu identifizieren.
Marketing
Die technische Speicherung oder der Zugriff ist erforderlich, um Nutzerprofile zu erstellen, um Werbung zu versenden oder um den Nutzer auf einer Website oder über mehrere Websites hinweg zu ähnlichen Marketingzwecken zu verfolgen.