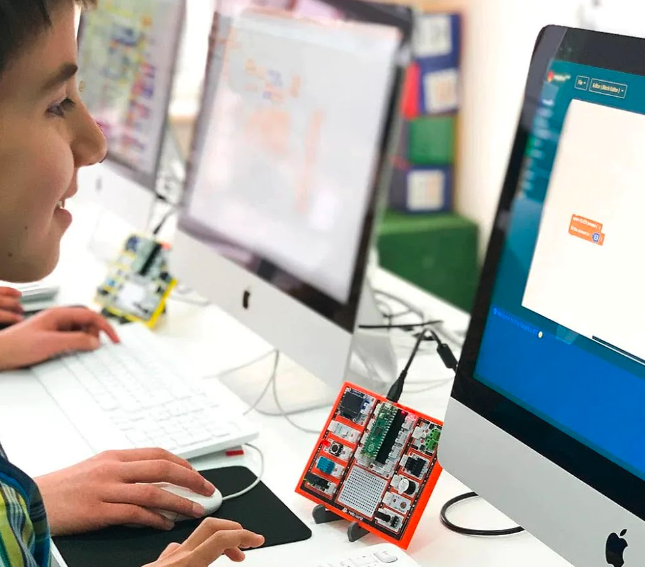
There’s also a protoboard area, rather than a breadboard (so the holes aren’t already connected in rows), although a mini breadboard is also supplied. Another nice touch is the battery connector for the supplied 2×AAA battery holder, so you can power the kit away from a computer.
Interestingly, the ten modules are already connected to Pico’s GPIO pins via a frame with solder joints. So, you can use them all straight away without having to do any wiring.
Alternatively, you can snap the modules off and wire them to Pico with Grove connectors (ten supplied). The beauty of this is that they can subsequently be reused separately for other projects, once you’ve finished going through the ones in the PicoBricks e-book.
Electronic learning
The 234-page e-book takes learners through 25 electronics projects of increasing complexity, from blinking an LED to setting up a mini smart greenhouse. Each project features an introductory explanation, wiring diagram, and step-by-step programming guide using the MicroBlocks visual programming system, akin to Scratch, which can be run on any type of connected computer – either in the browser or using an offline app. A PicoBricks library can be installed via its menus.
Alternative project code is also provided in the e-book in MicroPython and Arduino IDE (C/C++) form, albeit without any explanation as to how it works. There are also links to the code, although it sometimes differs slightly from what’s in the book.
There are some fun and interesting projects to complete with the PicoBricks Base kit, including a reaction game, magic 8-ball, music player with speed control, thermometer, alarm clock, and colour-matching game. Many of them make good use of the mini OLED. A few community-made projects are also available from the PicoBricks GitHub repo.
Missing components
Perhaps the biggest downside is that around half of the projects in the e-book require extra components – such as a 2WD robot car and smart greenhouse kit – that are only included in the more expansive IoT Expert ($69) or Zero to Hero ($99) versions of the PicoBricks kit, available direct from robotistan.com.
Alternatively, you could supplement the Base kit with standard components already in your toolbox (or buy them separately), such as servos, motors, and ultrasonic distance and PIR sensors. These can be connected with jumper wires to the full female GPIO breakout headers flanking Pico, or to the Grove connectors.
In addition, instead of using the optional Wi-Fi and Bluetooth boards (that connect to the PicoBricks IoT module), you could always replace the kit’s removable Raspberry Pi Pico with a Pico W. Either way, once you’ve learnt the basics, there’s the potential to experiment with IoT projects not fully explored in the e-book.
Verdict
8/10
While the Base kit is missing a few components for some projects, it offers a value-for-money and well-organised way for newcomers to learn about electronics and programming.
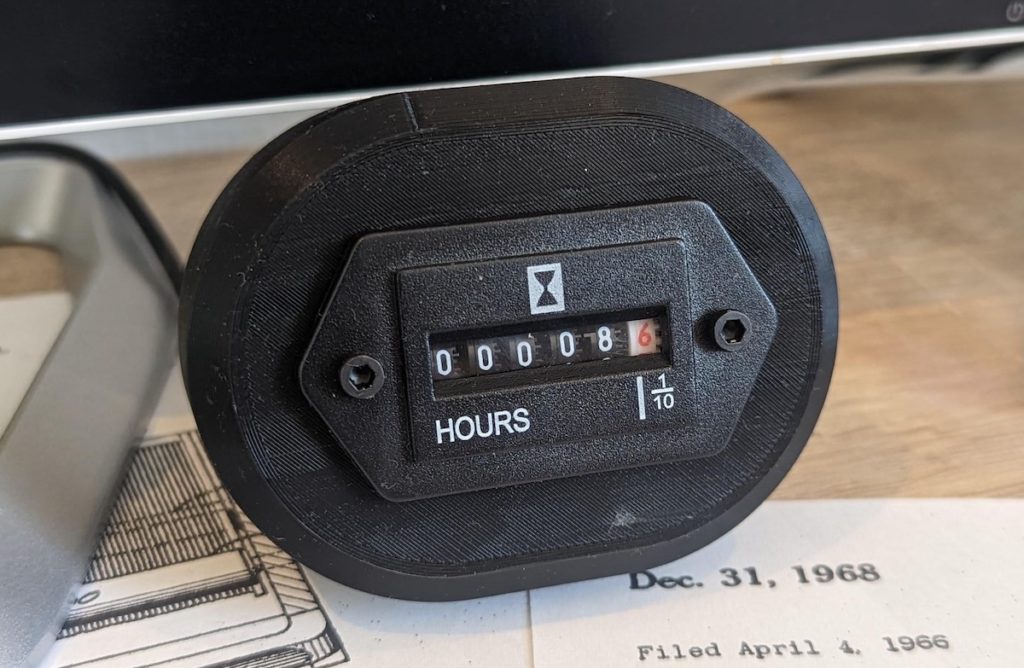
Hour meters are common for many types of machinery, because they serve a similar to purpose as your car’s odometer. When time running is a more important metric than distance, an hour meter is a good choice. And because they’re common, it is easy to find hour meters in any style you can imagine — both vintage and new. This Instructables tutorial from Gautchh will show you how to convert an hour meter into a time tracker for your work or leisure activities.
You could, of course, just use an app or a stopwatch to track your time, but this is much more appealing. The idea is simple: a specific action on your computer triggers the device and it will continue ticking up until another action triggers it to stop. Gautchh provides a Python script that triggers the meter when a specific process runs or stops. The user can choose the process, which should correspond to whatever software they want to track. For it to work properly, however, that process can’t run in the background when the user isn’t actively using the software.
On the hardware side, an Arduino Nano board will accept commands from the connected PC via the Serial connection and will control the hour meter. If you buy the same hour meter as Gautchh, you can follow their instructions and use their code. If you buy another model, you may need to perform some reverse-engineering to figure out the control signals and tweak the code. A simple 3D-printed enclosure houses the meter and the Arduino, putting them in a compact package that can sit unobtrusively on a desk.
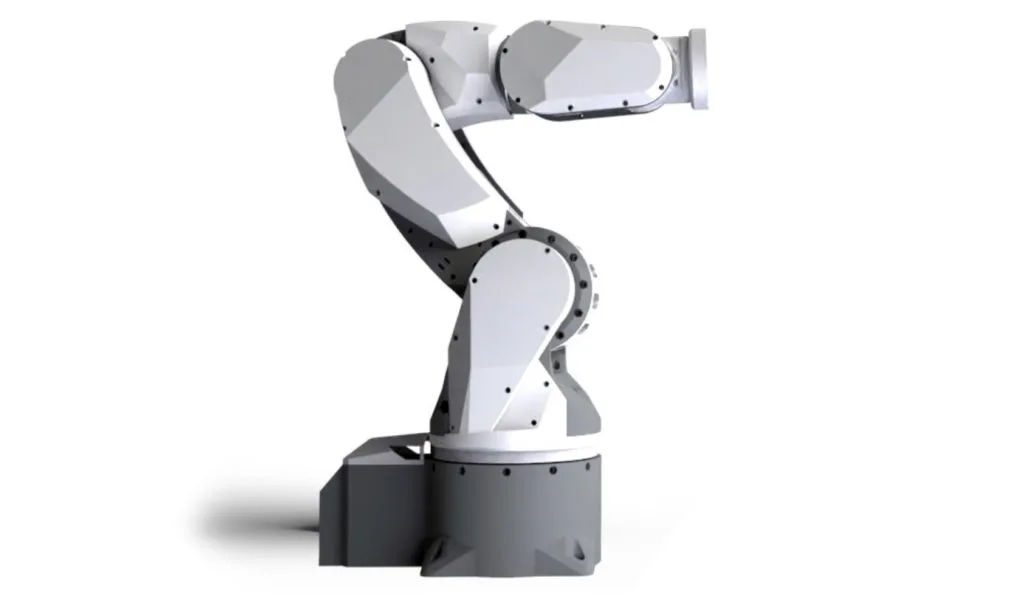
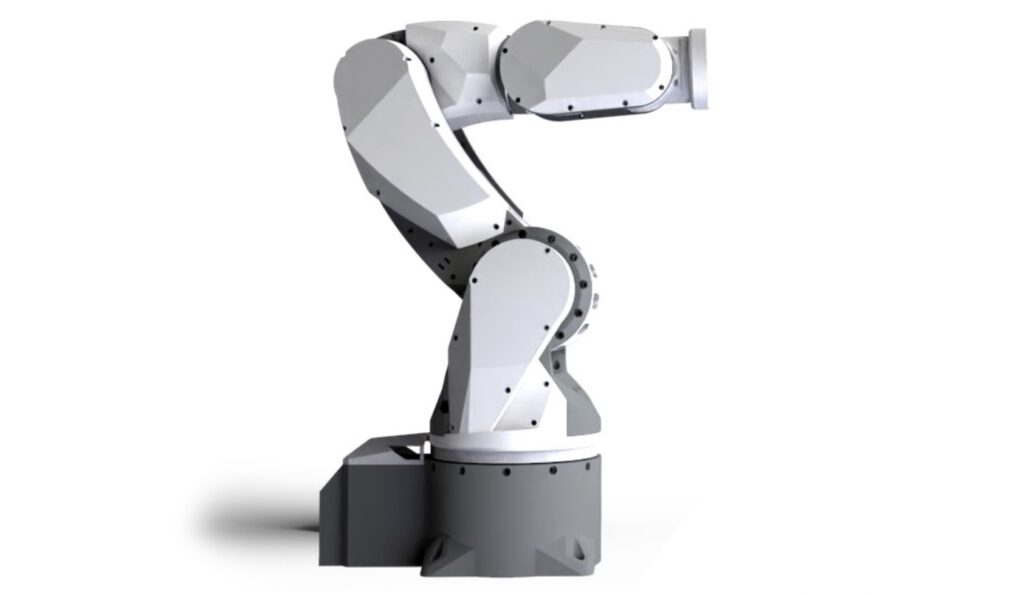
If you want a robot arm, either for some practical job or just fun, you have a lot of options. There are many consumer and industrial robot arms on the market, but the models that aren’t glorified toys tend to be pricey. You can also build your own. If you go that route, you’ll want a design that is well-engineered and well-documented. It isn’t free, but the ARCTOS robot arm is a high-quality option that meets both of those criteria.
Based on aesthetics alone, the ARCTOS robot arm looks fantastic. It resembles something you’d see in a lab in a sci-fi movie. But it also offers more than a pretty package. It has six degrees of freedom and a payload of 500 grams, making it suitable for tasks ranging from pick-and-place to packing boxes. Best of all, you can assemble it using easily sourced hardware and 3D-printed parts. Those parts are PLA and just about any modern 3D printer can handle the fabrication.
The ARCTOS design files will set you back €39.95 (about $44) and sourcing all of the parts for the build will cost around $400. Stepper motors actuate the joints, through simple belt drives and cycloidal gear boxes. An Arduino Mega 2560 controls those through a standard CNC shield. It runs open source firmware based on GRBL that will work with a variety of control software options to suit different tasks.
Personal safety is a growing concern in a variety of settings: from high-risk jobs where HSE managers must guarantee workers’ security to the increasingly common work and study choices that drive family and friends far apart, sometimes leading to more isolated lives. In all of these situations, having a system capable of sensing and automatically contacting help in case of emergency can not only give people peace of mind, but save lives.
A particularly interesting case – as the world population ages – regards the increasing number of elderly people who are still healthy enough to be independent yet must also accept the fact their bodies are becoming weaker and their bones more fragile. This specific target is more prone to falls, which can result in fractures, head injuries, and other serious accidents that can severely impact the quality of life. Detecting falls early can allow for prompt medical attention and prevent serious consequences. Additionally, detecting falls can help identify underlying health issues or environmental factors that may be contributing to accidents, allowing for appropriate interventions to be put in place to avoid future falls.
A variety of person-down systems and fall detection methods exist, ranging from threshold-based algorithms to traditional machine learning applications. The biggest challenge they all share is they suffer from high false-positive triggers. In other words, they cause unnecessary alarm and distress to both the seniors and their caregivers, resulting in unwarranted actions.
Our solution
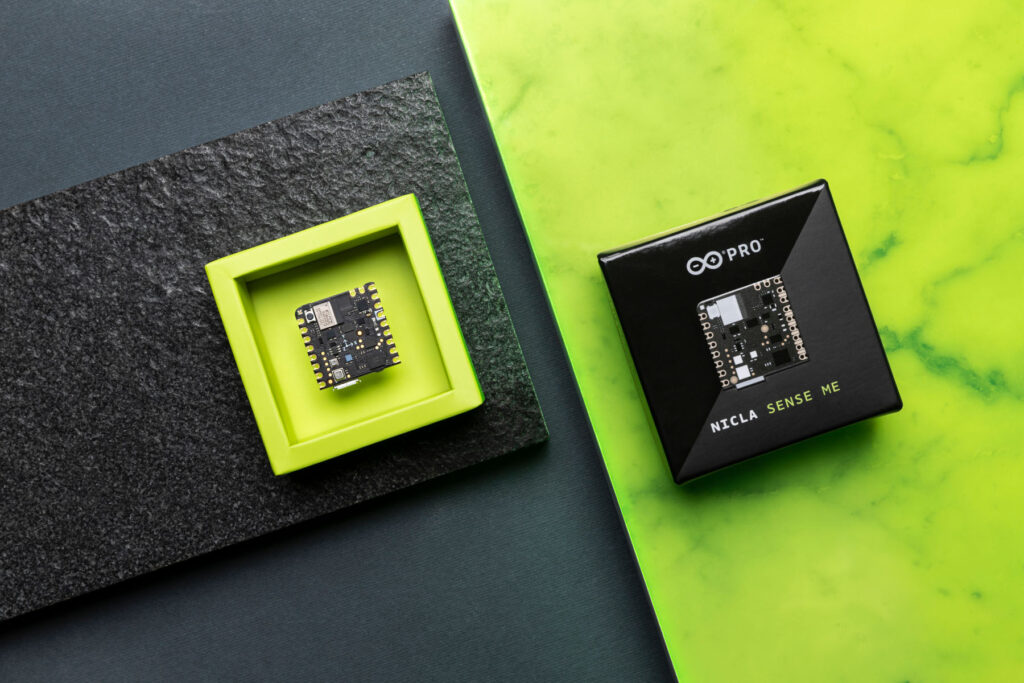
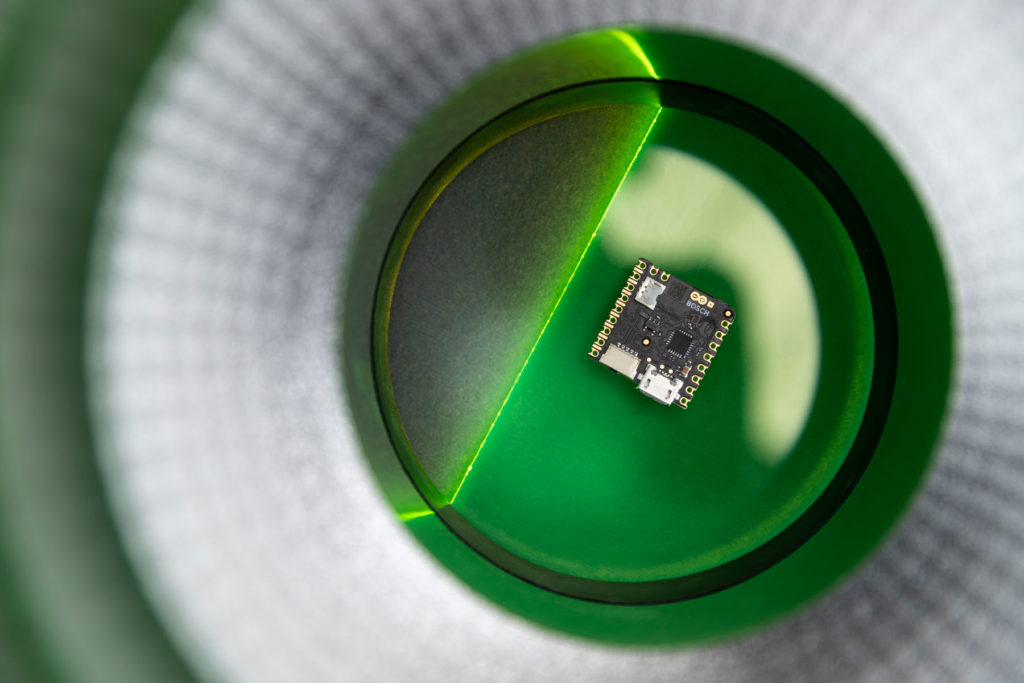
A tiny but mighty deployment device: Nicla Sense ME
For its project, Aizip selected the Nicla Sense ME: a compact module integrating multiple cutting-edge sensors from Bosch Sensortec, enabling sensor fusion applications directly at the edge. Additionally, the module houses an Arm® Cortex®-M4 microcontroller (nRF52832) leveraging Bluetooth® 4.2. Aizip’s neural network model fits right in with the remaining resources of the microcontroller, thanks to its compact footprint. The result? A small and lightweight device that can be clipped onto one’s belt and worn all day without hassle, able to monitor health parameters and immediately alert assistance in case of fall, with near-zero latency and full respect for privacy.
A more accurate fall detection algorithm
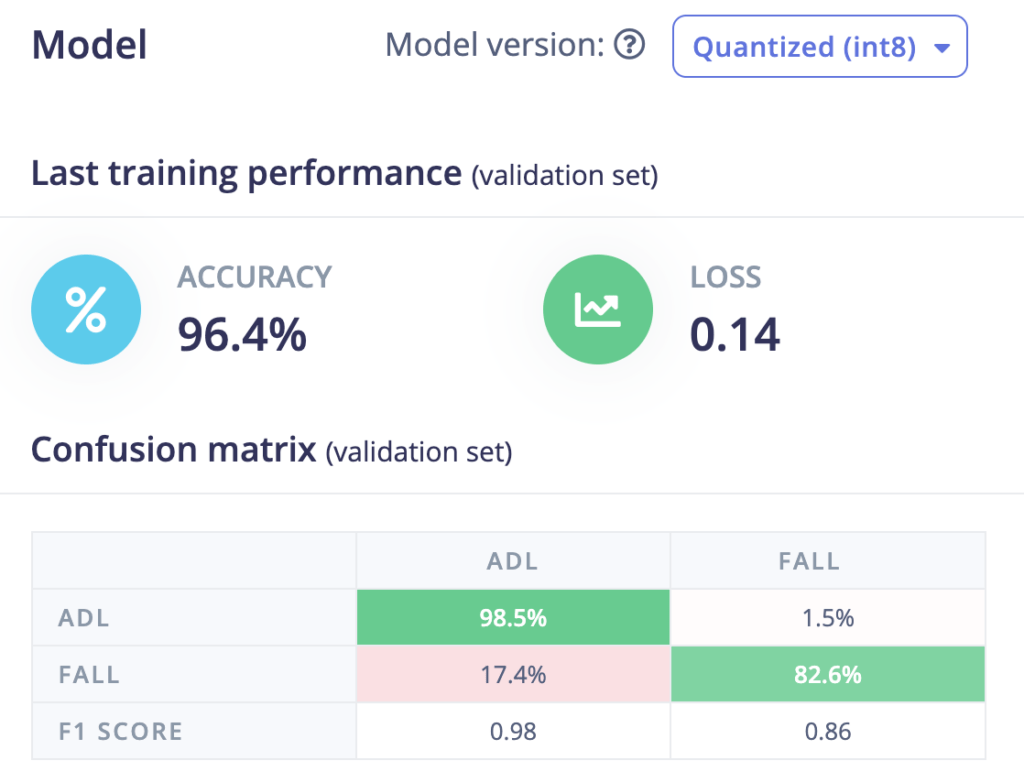
Aizip’s fall detection solution integrates a neural network algorithm with sensor fusion to greatly enhance detection accuracy, while also being lightweight enough it can run in real time on a microcontroller. The neural network within the microcontroller continuously processes sensor readings from the accelerometer (BHI260AP) and the pressure sensor (BMP390). Upon detecting a fall, the device sends an alarm via Bluetooth and activates an on-board LED. In order to minimize frequent false alarms that could significantly affect user experience, the neural network is optimized to differentiate real falls from abrupt movements such as jumping, sprinting, and quickly sitting down. The neural network-based algorithm excels at capturing subtle features in inputs, leading to a substantial reduction in false alarm rates compared to threshold-based approaches or traditional machine learning algorithms.
Typical neural networks offer superior performances but also pose additional challenges, when deploying them onto resource-constrained microcontroller devices, due to the extensive computing and memory resources required. The simultaneous need for Bluetooth connectivity and sensor fusion further compounds this issue. However, Aizip’s proprietary efficient neural network architecture makes this solution stand out because it minimizes resource requirements while maintaining high accuracy. The neural network is quantized to 8-bit and deployed onto the microcontroller using Aizip’s automated design tool. The implemented model achieves a 94% fall detection accuracy and a <0.1% false positive rate, all while utilizing less than 3KB of RAM. A perfect fit for the low-consumption Nicla Sense ME!
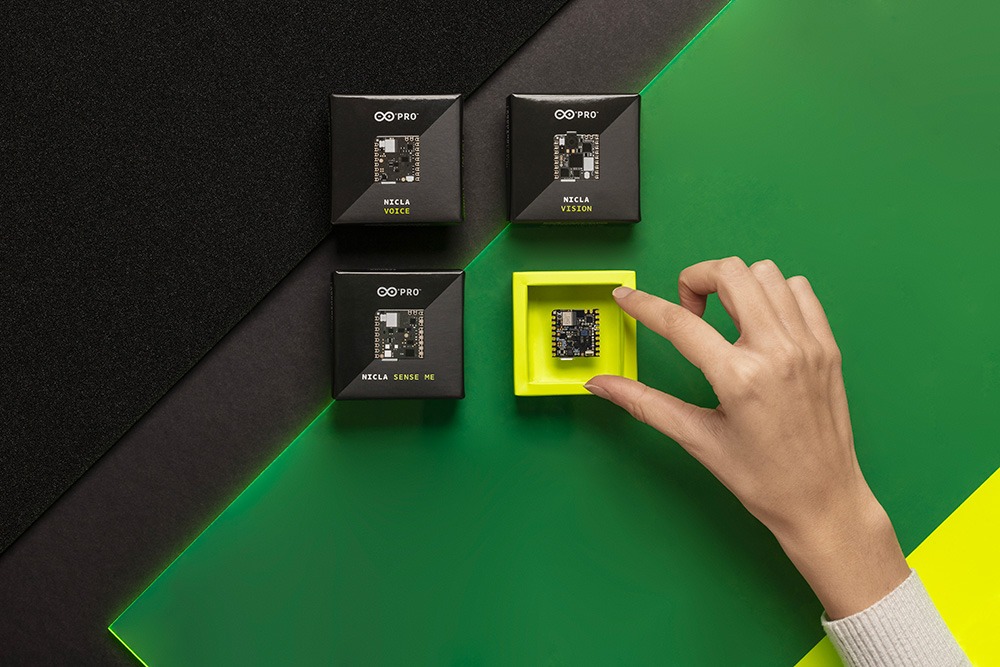
Solving it with Arduino Pro
Now let’s explore how we could put all of this together and what we would need for deployment both in terms of hardware and software stack. The Arduino Pro ecosystem is the latest generation of Arduino solutions bringing users the simplicity of integration and scalable, secure, professionally supported services.
When personal safety is a concern, smart wearables that leverage AI can help. And processing the data required to monitor health conditions and prevent falls doesn’t have to come at the expense of comfort or privacy. Thanks to extremely efficient models like Aizip’s and compact yet high-performance modules like Arduino Pro’s Nicla Sense ME, you can create a discreet and reliable solution able to immediately call for help when needed (and only when needed).
Our recently launched “Arduino Project of the Month” initiative adds a pinch of competition to our community’s passion for sharing. Out of the dozens of new entries added in February, we are now happy to announce our first top three selections, highlighting interesting projects for everyone to learn, test, and improve upon!
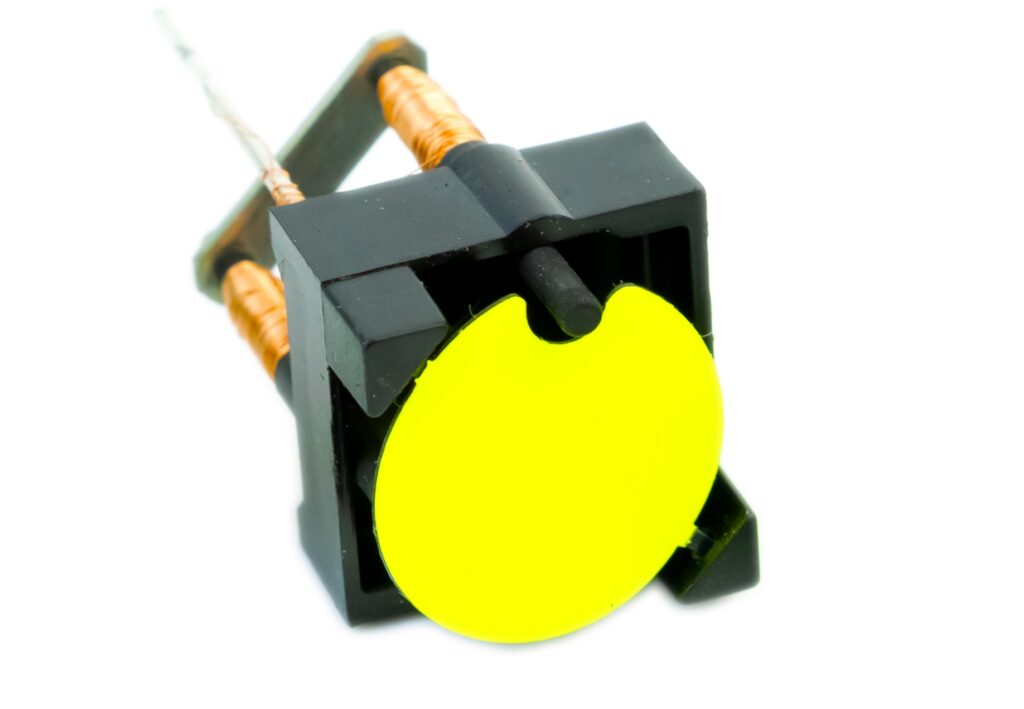
Flip-disc (or flip-dot) displays leverage electromagnetism to set the position of thousands of discs in seconds, showing dynamic text and minimalist graphics with great flexibility and a wonderful retro vibe. For this project, all you need are an Arduino Uno, the Arduino IDE 2.0, and some soldering skills to get your own flip-disc sign up and running.
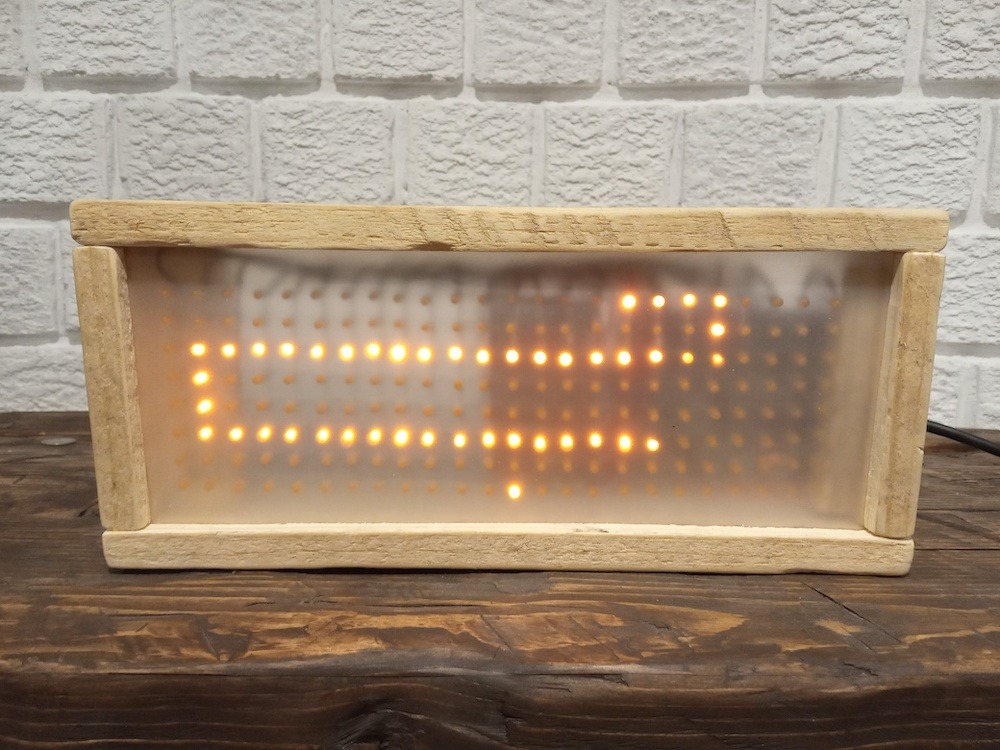
Originating in 1976, Snake is almost 50 years old but is still a lot of fun! This build brings the game back in a shiny and bright version, based on a 192-LED matrix combined with a library to control it.
Following the instructions is a great way to learn about multiplexing, shift registers, and of course, electric circuits. Not to mention, the same project can be adapted to display stationary or scrolling text: have your name in lights, thanks to Arduino Nano and the Arduino IDE.
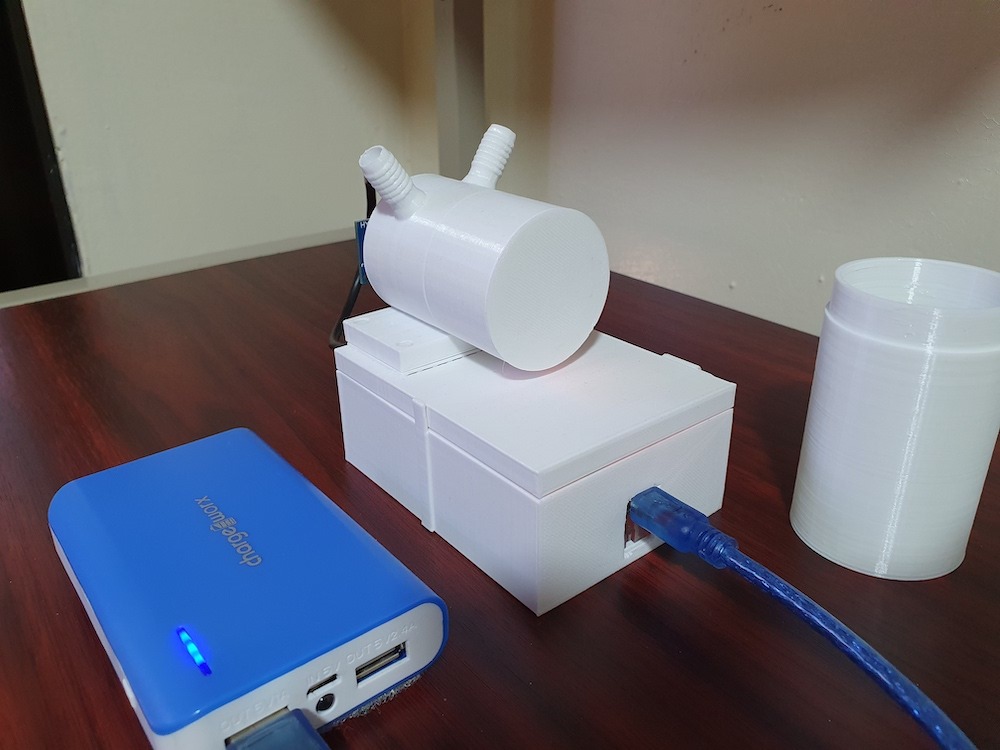
How many times have you just needed to know what gas is in the air? Okay, it may not be an everyday situation for most of us, but we thought this project really deserved gold for our February selection.
It starts like a beautiful physics lesson on sound speed in gasses, and ends with a solution that’s portable, 3D-printed, and connected to your smartphone. Upload the code to an Arduino Nano, powered by battery charger, and test it out yourself.
For your chance to be selected for a $100, $300 or even $500 gift card to spend on the Arduino Store, submit your best project on Project Hub! We will be awarding three new entries every month, as detailed in the complete terms and conditions. Good luck!
Today we share a guest blog from Chris Roffey, who manages the UK Bebras Challenge, a computational thinking challenge we run every year in partnership with the University of Oxford.
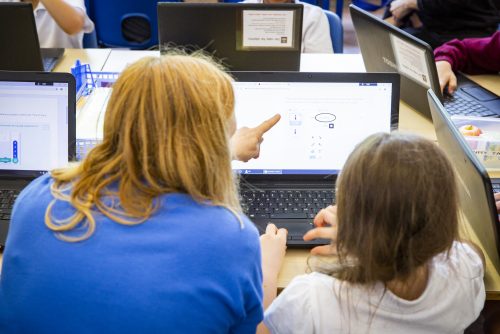
Bebras is a free annual challenge that helps schools introduce computational thinking to their learners through online, self-marking tasks. Taking part in Bebras, students solve accessible, interesting problems using their developing computational thinking skills. No programming is involved in taking part. The UK challenge is for school students aged 6 to 18 years old, with a special category for students with severe visual impairments.
Bebras means ‘beaver’
Preparing the UK Bebras Challenge for schools
While UK schools take part in Bebras throughout two weeks in November, for me the annual cycle starts much earlier. May is the time of the annual Bebras international workshop where the year’s new tasks get decided. In 2022, 60 countries were represented — some online, some in person. For nearly a week, computer scientists and computing teachers met to discuss and work on the new cycle’s task proposals submitted by participating countries a little earlier.
After the workshop, in collaboration with teams from other European countries, the UK Bebras team chose its task sets and then worked to localise, copy-edit, and test them to get them ready for schools participating in Bebras during November. From September, schools across the UK create accounts for their students, with over 360,000 students ultimately taking part in 2022. All in all, more than 3 million students from 59 countries took part in the 2022/2023 Bebras challenge cycle.
An invitation to the Oxford University Computing Challenge
In this cycle, the UK Bebras partnership between the Raspberry Pi Foundation and the University of Oxford has been extended to include the Oxford University Computing Challenge (OUCC). This is an invitation-based, online coding challenge for students aged 10 to 18, offered in the UK as well as Australia, Jamaica, and China. We invited the students with the top 10% best results in the UK Bebras challenge to take part in the OUCC — an exciting opportunity for them.
In contrast to Bebras, which doesn’t require participants to do any coding, the OUCC asks students to create code to solve computational thinking problems. This requires students to prepare and challenges them to develop their computational thinking skills further. The two younger age groups, 10- to 14-year-olds, solve problems using the Blockly programming language. The older two age groups can use one of the 11 programming languages that Bebras supports, including all the most common ones taught in UK schools.
Over 20,000 Bebras participants took up the invitation to the first round of the OUCC in the third week of January. Then in March, the top 20 participants from each of the four OUCC age groups took part in the final round. The finalists all did amazingly well. In the first round, many of them had solved all the available tasks correctly, even though the expectation is that participants only try to solve as many as they can within the round’s time limit. In the final round, a few of the finalists managed to repeat this feat with the even more advanced tasks — which is, in modern parlance, literally impossible!
Celebrating together
Many of the participants are about to take school exams, so the last stage of the annual cycle — the prize winners’ celebration day— takes place when the exam period has ended. This year we are holding this celebration on Friday 30 June at the Raspberry Pi Foundation’s headquarters in Cambridge. It will be a lovely way to finish the annual Bebras cycle and I am looking forward to it immensely.
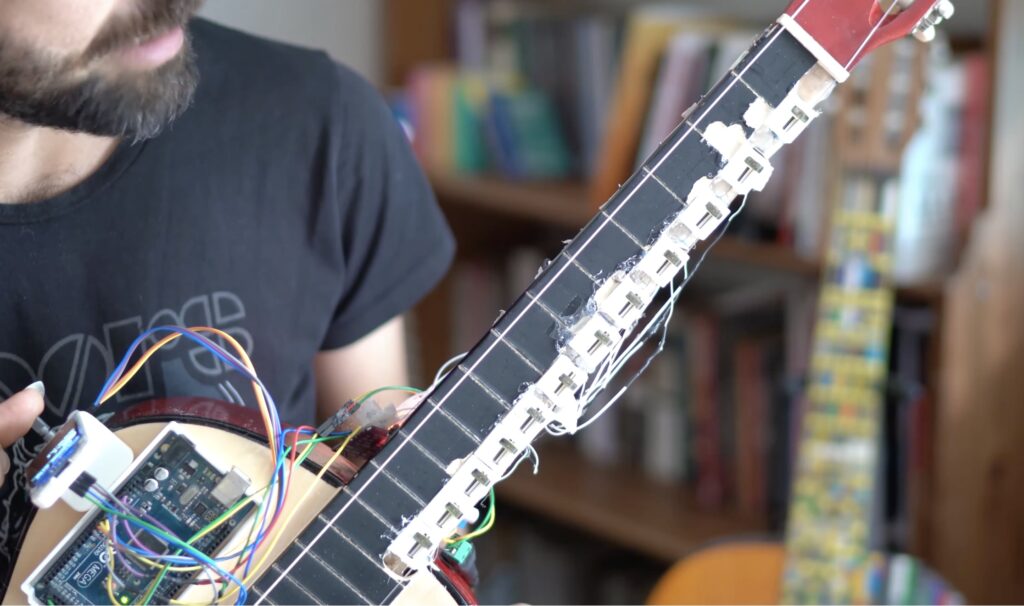
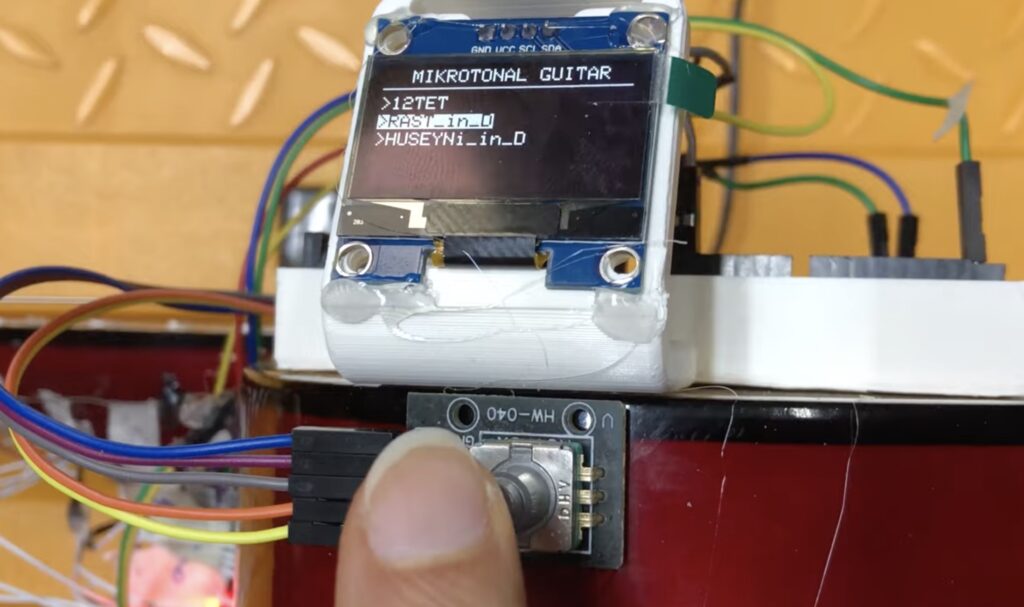
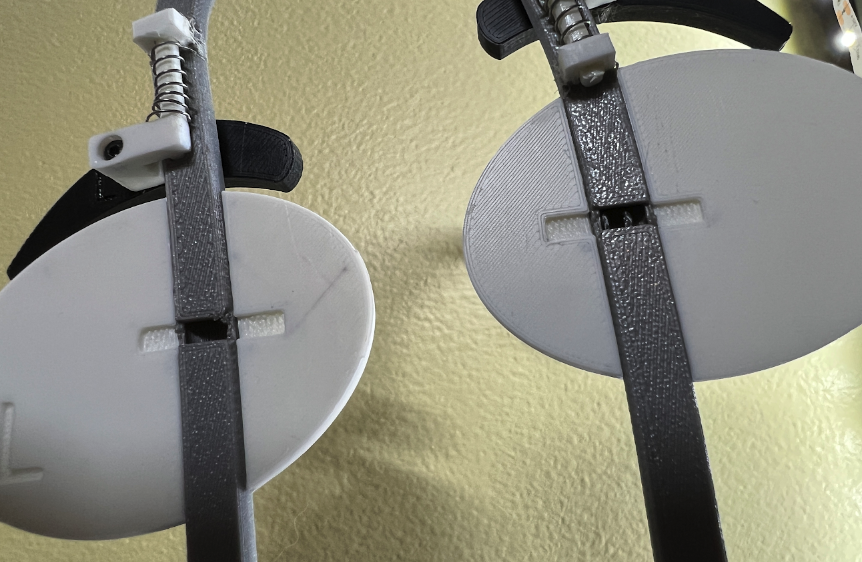
Playing the guitar is a great way to impress people at beach parties, but learning to play the guitar isn’t easy. Even grasping the basic theory is a big task and that’s before you even start to practice finger positioning and movement. That’s why Tolgahan Çogulu and Selçuk Keser built this Automatic Microtonal Guitar to make things a little easier.
This guitar isn’t fully automatic in the way the same way as a player piano. At this time, the prototype only has a single automatic string (the high E) and so it is very limited in range. And the guitarist still has to do a lot of the work. They have to pluck the string and push buttons in the correct sequence as they do. But the guitar is able to adjust the exact point that those buttons push the string down onto the fret board. Because that point alters the length of the string, the guitar can alter the note for each button the guitarist presses as they play.
The prototype works by using an Arduino Mega 2560 board to control a series of tiny servo motors attached to the guitar’s fret board with 3D-printed mounts. The servos move small sliders back and forth along the string to change the pitch. The guitarist pushes down on the sliders like buttons, forcing them to push the string against the fret board at the set point. It is useful mostly for adjusting the tuning prior to the start of a song, but future iterations may be able to alter the tuning during a song.
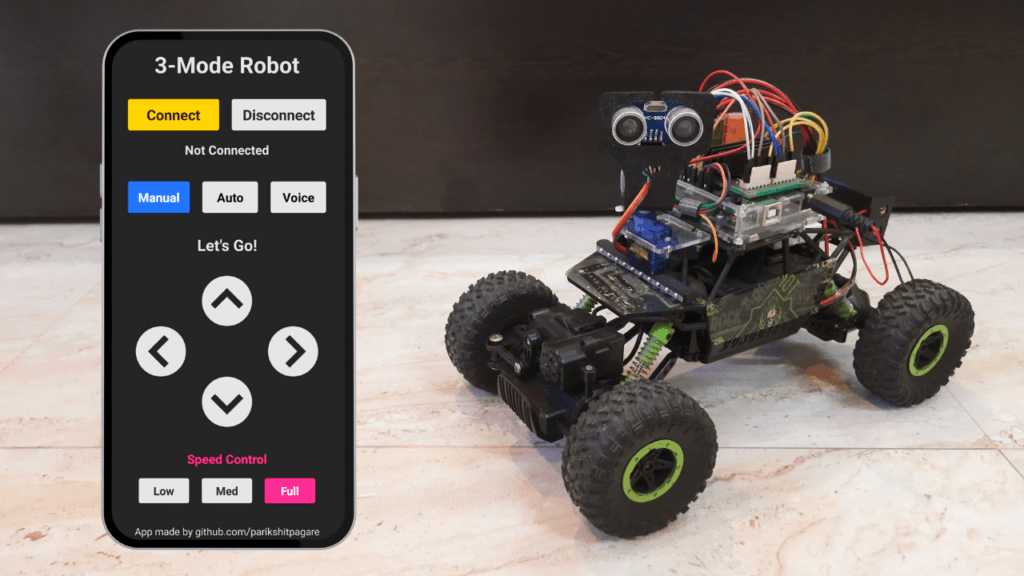
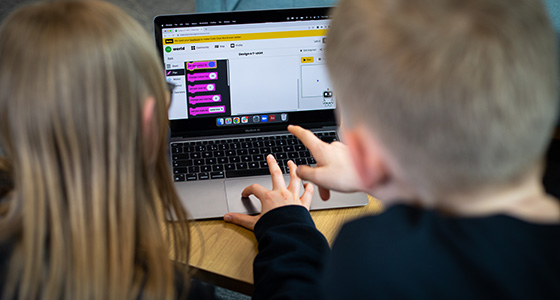
The fantastic thing about Arduino boards and maker hardware as a whole is that they make creativity accessible. Just a few decades ago, it would take serious expertise and a generous budget to build even a simple robot. But with the technology available today, Parikshit Pagare was able to create this robot car that can be controlled manually, by voice, or operate autonomously.
Pagare started with the kind of RC car that you can find at any toy store or online retailer. That provided a platform to build upon, with a frame, wheels, and motors. But the original RC control was very rudimentary, which is why he replaced all of the electronics. The upgraded vehicle has an Arduino Uno that controls the two DC motors through L298N motor drivers. An HC-05 modules allows for Bluetooth® communication with a smartphone and an ultrasonic sensor mounted on a servo arm provides some feedback.
A custom app, developed with the MIT App Inventor platform, enables the different control modes. The manual mode lets the user operate the vehicle directly, just like the original RC control. The voice mode lets the user speak commands like “move forward.” Before following such commands, the robot checks the ultrasonic sensor to ensure that there isn’t an obstacle in the way. In autonomous mode, the robot will perform its own pathfinding with the help of the ultrasonic sensor, similar to a Roomba.
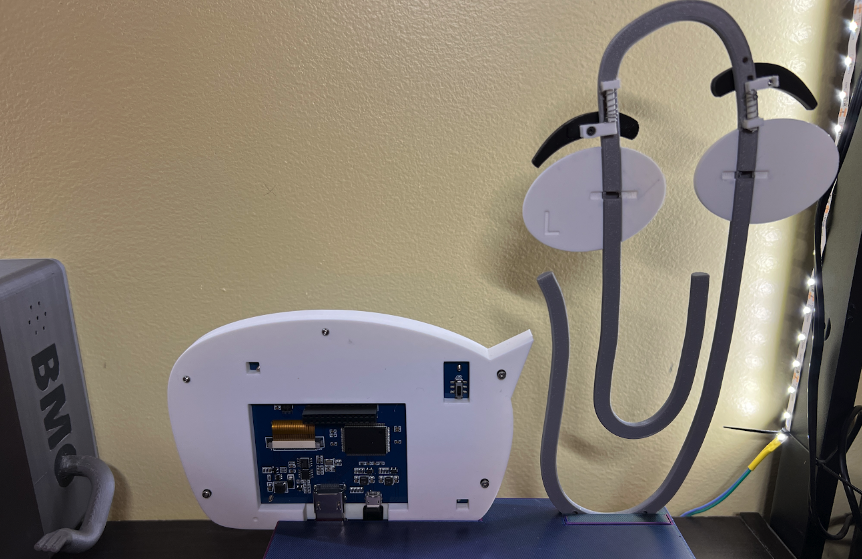
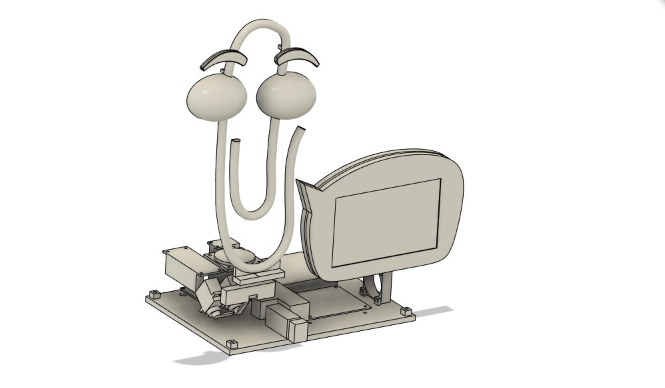
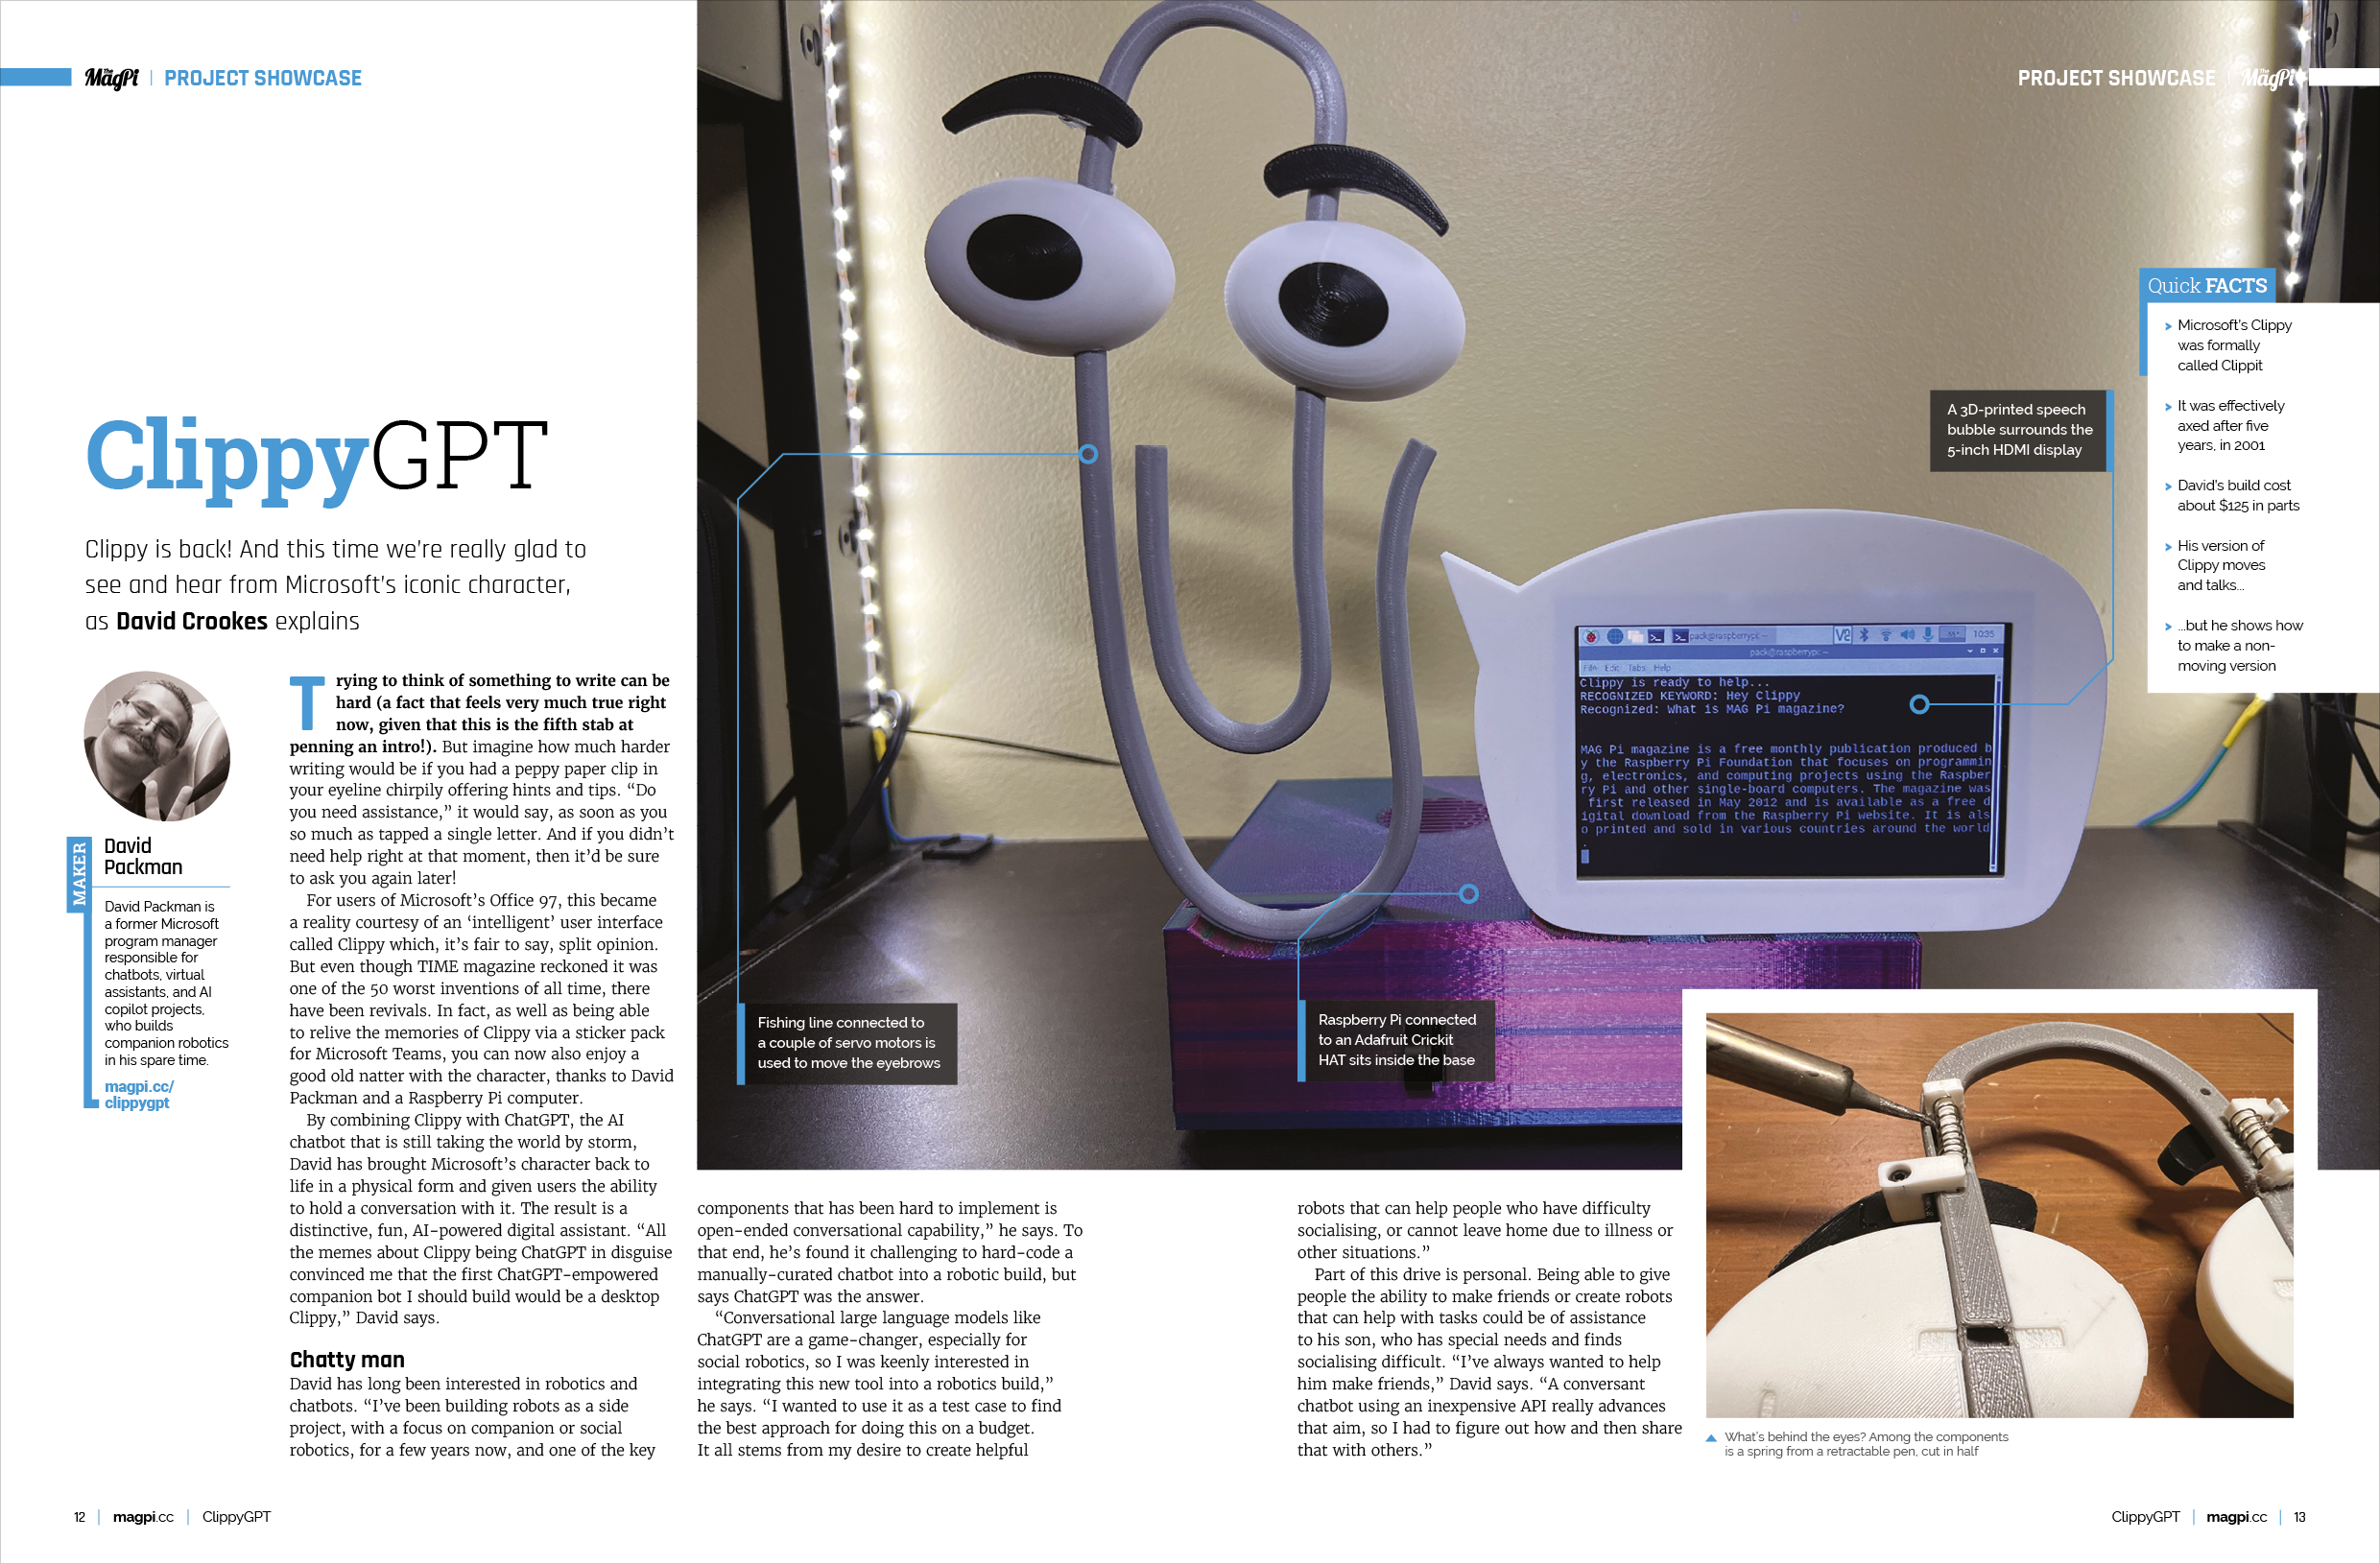
By combining Clippy with ChatGPT, the AI chatbot that is still taking the world by storm, David has brought Microsoft’s character back to life in a physical form and given users the ability to hold a conversation with it. The result is a distinctive, fun, AI-powered digital assistant. “All the memes about Clippy being ChatGPT in disguise convinced me that the first ChatGPT-empowered companion bot I should build would be a desktop Clippy,” David says.
Chatty man
David has long been interested in robotics and chatbots. “I’ve been building robots as a side project, with a focus on companion or social robotics, for a few years now, and one of the key components that has been hard to implement is open-ended conversational capability,” he says. To that end, he’s found it challenging to hard-code a manually-curated chatbot into a robotic build, but says ChatGPT was the answer.
“Conversational large language models like ChatGPT are a game-changer, especially for social robotics, so I was keenly interested in integrating this new tool into a robotics build,” he says. “I wanted to use it as a test case to find the best approach for doing this on a budget. It all stems from my desire to create helpful robots that can help people who have difficulty socialising, or cannot leave home due to illness or other situations.”
Part of this drive is personal. Being able to give people the ability to make friends or create robots that can help with tasks could be of assistance to his son, who has special needs and finds socialising difficult. “I’ve always wanted to help him make friends,” David says. “A conversant chatbot using an inexpensive API really advances that aim, so I had to figure out how and then share that with others.”
Say it again
At the robot’s heart is a Raspberry Pi 3 Model B computer which he took from an older robot build knowing that it was compatible with other components he owned. One such add-on was the Adafruit Cricket HAT that enables the creation of robot friends using Python by allowing motors, servos, or solenoids to be controlled. “There were some software library dependencies that made it easier to use Raspberry Pi OS as well,” he adds.
To handle speech, David turned to Microsoft Azure’s speech services. This allowed him to convert speech to text and vice versa, with David finding the free tier provided all the capability he needed to provide a speech interface with ChatGPT. “It also has the benefit of recognising an offline wake word,” he says. “So nothing is recorded or sent over the internet until I specifically activate it.”
David also made use of the OpenAI Python library to run the ChatGPT queries. “The OpenAI API calls are the only expense, but it’s pretty cheap for a build like this,” he says. “One day of heavy usage was only eight cents. Also, the Python SpeechRecognition library is largely broken, so it was a very appealing alternative with extra benefits.”
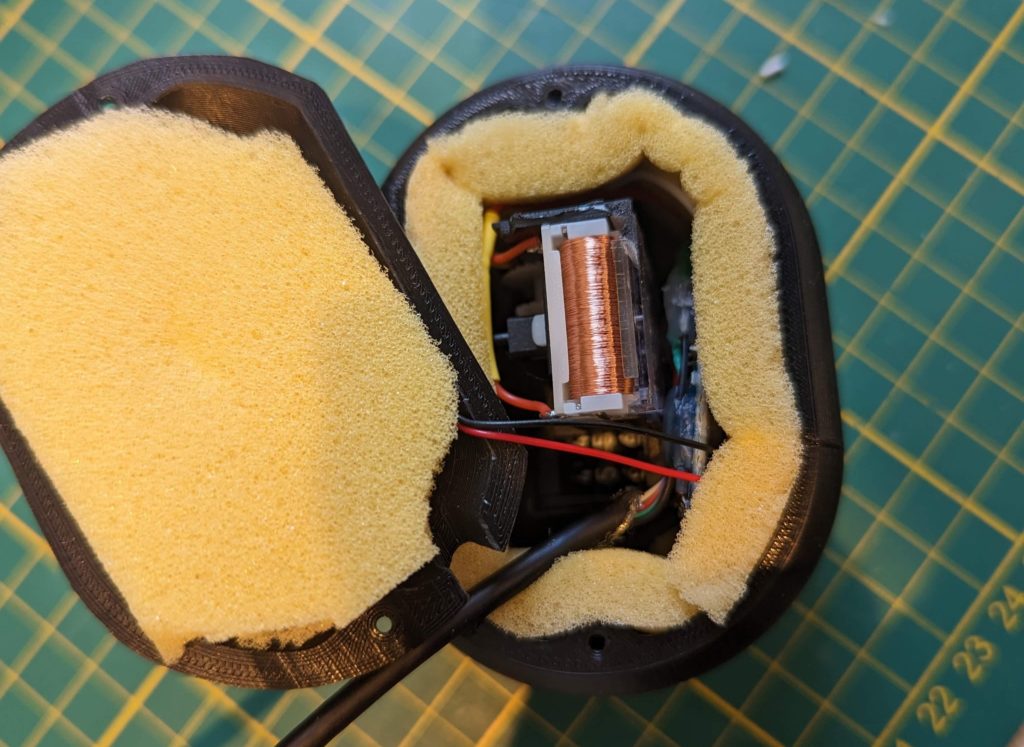
Getting animated
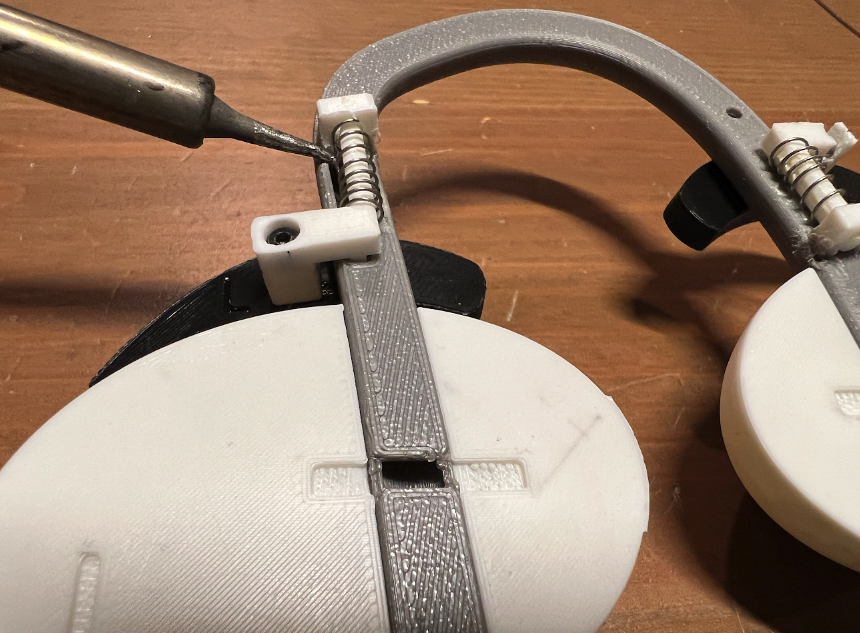
A key part of the whole build has been the animatronics. While Clippy’s speech is outputted to a speech bubble (essentially a 3D-printed case surrounding a 5-inch HDMI display, fitted with a salvaged speaker from an Amazon Echo Dot), the paper clip has wiggling eyebrows which help to bring this retro cultural icon to life.
“The animatronics are pretty simplistic, although it was a bit of a bodge to get the eyebrow mechanism to work, since the directional force has to wind through some curved passages inside Clippy,” David says. “In the end, I used a technique that we use to build 3D-printed assistive device hands, which is fishing line.
“To counter the pull of the lines, I also had to design a spring mechanism to return the movement to a start position after the servos release the tension on the lines. I couldn’t use bands since that would pull the mechanism out of the sockets in the back, so I resorted to the old standby of using compression springs from old retractable ink pens. From a coding perspective, adding movement to the conversational aspect is relatively easy.”
Looking ahead
In all, the build took David a week to complete. He was able to do this with a single Python script. “And I did it in a way that made it really easy to integrate into any project, in order to build something that was more engaging and personable than just a canned speaker with a microphone.”
David says he is now integrating the techniques into more complex robotic builds, such as a conversational companion bot based on BMO from the Cartoon Network’s Adventure Time animated television series, and a counter-top kitchen robot called Whiskrz.
“That will include some machine vision to help identify ingredients, suggesting recipes on what you show it, and do simple tasks such as mixing,” David adds. “I’ve left the build simple so that it’s easy for others to adjust, allowing them to make more cool things with it. There are lots of improvements that can be made based on what you need.”
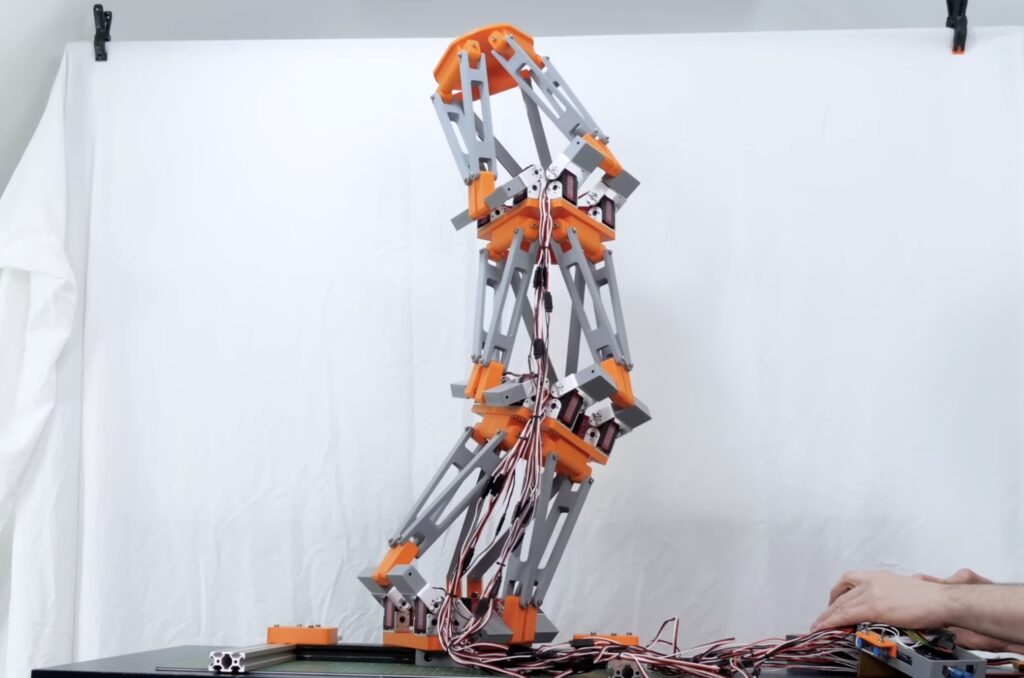
Octopus tentacles are, essentially, long continuous muscles — a bit like your tongue. That anatomy gives octopuses incredible dexterity, but it is very difficult to replicate in robots. Artificial “muscle” fiber isn’t very practical yet, which is why roboticists turn to more conventional means of actuation. Cable-driven tentacles are popular, but they require many powerful cable motors. For his newest project, James Bruton took a different approach and utilized Stewart platforms.
Stewart platforms are somewhat common in industrial settings, because they can work with hydraulic pistons that handle a lot of weight. Six linear actuators arranged between two plates let the second plate move at any angle relative to the first plate, with the exact angle depending on the current lengths of the actuators. By chaining together several Stewart platforms, Bruton created a tentacle-like structure with complete freedom in every joint.
The current prototype only has three Stewart platforms, but those are enough to demonstrate the concept. Bruton used servos instead of linear actuators to keep the costs down. An Arduino Mega 2560 board controls those: a total of 18 servo motors. The entire structure is made up of 3D-printed parts.
But expanding this design into a full Doc Ock tentacle (much less four of them) would come with challenges. As with any robot arm, the motors closer to the base experience more load as the weight and the length of the arm increase. Those would probably need to be replaced with beefier models. And with six servos for every joint, even an Arduino Mega 2560 would quickly run out of pins. That could, however, be solved by using multiple Arduino boards or an IO expander.
“May the Fourth be with you” is one of those sayings that has been ingrained into our culture thanks to the popularity of Star Wars, and few things represent its impact more than the custom props, costumes, and projects that fans from around the world have constructed. To celebrate this year’s “holiday,” here is a list of Arduino-powered builds from a makerspace in a galaxy far, far away that’ll awaken the DIY force in you!
A Virtual Platform for Blaster Props
The plasma/laser blaster is an iconic weapon in the Stars Wars universe, with nearly every character having used one at some point. To make the creation of blaster props easier, YouTuber CCHobbyFun came up with a system based on the Arduino Nano Every which allows for an ammo counter, animated scope display, and LEDs to be connected. In addition to these features, it also supports sound effects via an MP3 player and speaker combination.
Ever wanted to listen in on conversations by enemy storm troopers and battle droids? This device by The Last Outpost Workshop on YouTube now lets you by presenting users with a switch to go between storm trooper or droid mode. After making a selection, various conversations are played in a loop using an Arduino Nano and MP3 player and audio levels are displayed via an LED matrix at the top.
Apart from R2-D2 and C-3PO, no other droid is quite as recognizable as BB-8 from the sequels. However, rather than just building another BB-8 clone, Eric Ameres blended the droid with the shape of DO to create a self-balancing platform. He incorporated an Arduino Uno, a gyroscope, and some motors to drive the two hemispheres and tilt/rotate the head on top.
Two years ago, maker Manguel Ahumada set about devising a fully autonomous Baby Yoda robot inspired by the Mandalorian TV series that uses AI to follow him around. Beyond processing image data and sending commands to the motors via a Raspberry Pi, the robot also employs an Arduino Pro Micro to read incoming sensor data.
Wanting to combine all of the most notable imagery of the Star Wars universe into a single project, Kutluhan Aktar developed his own smart lamp with a twist. Each component, including the Arduino Nano 33 BLE Sense, fans, and more, were soldered to the amazingly-designed Millenium Falcon PCB and then attached to the 3D-printed base. With this, he could view environmental data in real-time thanks to a mobile app and turn the lights on or off.
One of the reasons why assembling working models of BB-8 is so difficult is due to how the droid is able to roll in any direction while still keeping its head upright. Ilge Ipek’s innovative design moves his custom Arduino Nano board and two motors inside of the main ball while using magnets at the top to maintain the head’s position in addition to providing fully wireless control over Bluetooth.
YouTuber James Bruton is famous for his robot-building abilities, and his B2EMO chassis from the Andor series takes this to the next level. Based on the Arduino Mega 2560 and an nRF24L01 radio transceiver module, his robot can drive in any direction thanks to its omnidirectional wheels while also being able to stretch and tilt in a lifelike manner.
Widely regarded as one of the most “out-there” making YouTube channels, the Hacksmith specializes in building the impossible, and their Mandalorian-themed jetpack is no exception. It was constructed from a pair of nozzles which are actuated by a solenoid valve and a gimbal mechanism- all controlled via an Arduino Mega 2560.
Everybody loves a cute companion robot that can accompany you anywhere, so better to combine that idea with than the BD-1 droid from the Star Wars: The Fallen Order video game. The robot is primarily built using a Raspberry Pi 4, although an Arduino Leonardo and a Nano Every also make appearances to do everything from speaking to moving its arms and even project images onto a wall.
We’re excited to announce the release of two new widgets to the Arduino IoT Cloud: the Value Selector and Value Dropdown Widgets.
In this blog post, we’ll be exploring the benefits of the new widgets, how to use them, and how you can take advantage of this latest feature.
The Arduino IoT Cloud dashboards
The Arduino Cloud is an all-in-one platform that streamlines the development, deployment, and management of IoT devices. The platform supports various hardware, such as Arduino boards, ESP32, and ESP8266-based boards, which makes it easy for makers, IoT enthusiasts, and professionals to build connected projects without much hassle.
What makes Arduino Cloud stand out is its user-friendly and intuitive interface. This simplifies complex tasks and ensures that even those with little coding experience can use the platform. Moreover, the platform offers a low-code approach and a comprehensive catalogue of templates and examples that enable users to get started quickly.
The IoT Cloud application of the Arduino Cloud platform allows easy management and monitoring of connected devices via customizable dashboards. This feature provides real-time data visualizations of the device’s data, making it easy for users to monitor and keep track of their devices. Plus, with the mobile app Arduino IoT Cloud Remote — available for Android and iOS — users can manage their devices remotely from anywhere.
The Arduino Cloud platform also offers a range of widgets, including switches, buttons, color selectors, status, gauges, maps, and a chart widget that allows users to plot the temporal evolution of one variable of one device. This rich palette of widgets makes it easy for users to build dashboards that suit their needs.
The new widgets
The new Value Selector and Value Dropdown Widgets simplify the task of creating a map between variable values and their real-world representations, providing users with greater flexibility and ease of use. With them, you can decouple the internal values of the variables in the sketch from the representation on the dashboard. This simplifies the code and prevents developers from updating the code if a change on the visible value is needed.
The Value Selector Widget offers a more visual way of representing values and choices, making it easier for users to understand and work with their data. This feature simplifies the code and allows for greater flexibility in representing data.
The Value Dropdown Widget is a compact and organized way of presenting a list of options to users. This feature is particularly useful when designing for smaller screens or when there are many options to choose from. Dropdown menus allow for clear categorization and organization of options, making it easier for users to find what they are looking for.
Both of these new features are incredibly convenient for predefining a list of values that the user can choose from. The meaningful names and values assigned to each option simplify the process of selecting data, making it more intuitive and accessible to users.
In summary, the Value Selector and Dropdown Widgets are powerful new features that provide users with greater flexibility, ease of use, and clarity when working with their data. We are excited to see how these new tools will enhance the user experience and improve the way users work with their data. These new widgets add up to the recently announced improvement of the percentage widget and the new advance chart widget. You can read the full story in the blog post.
Try the now widgets today
Ready to take your IoT projects to the next level? Check out the official Arduino Cloud website for more information on the Arduino IoT Cloud and all the resources available to you. You can also explore the documentation to learn more about the exciting new widgets that are available.Dive in and try out the new Arduino IoT Cloud widgets for yourself! We’d love to hear your feedback, so don’t forget to share your thoughts and experiences with us on the forum.
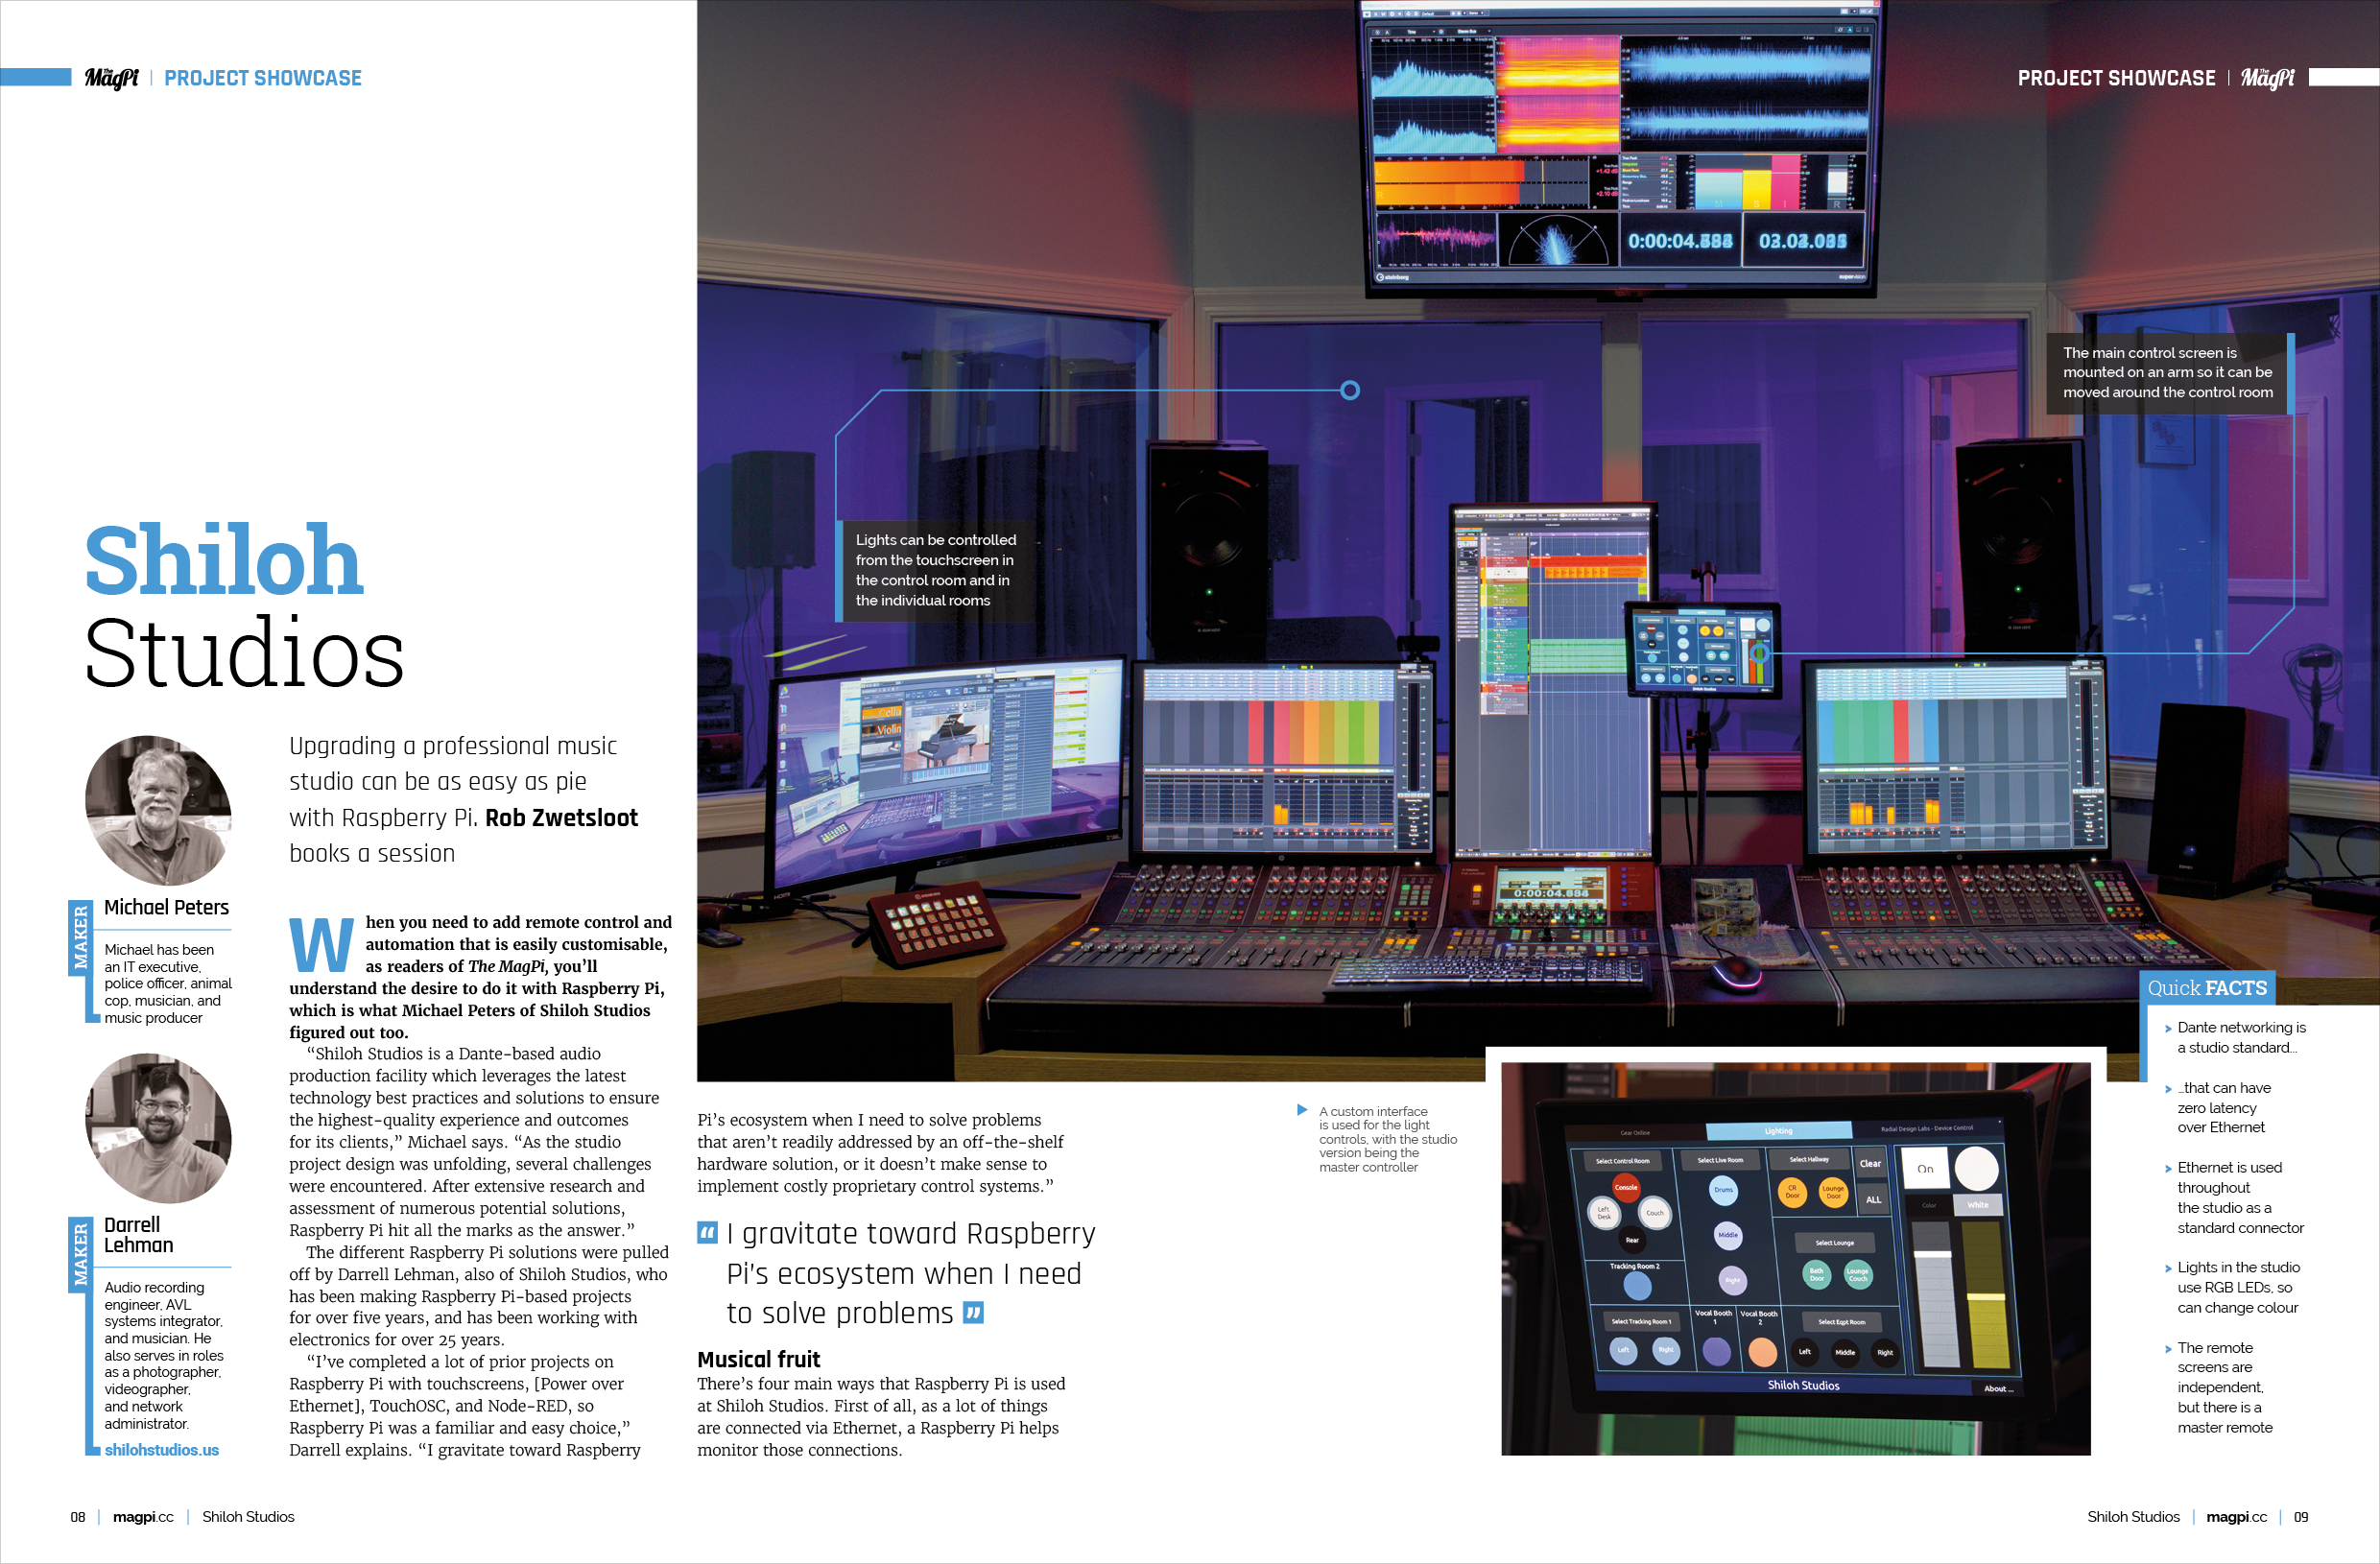
The different Raspberry Pi solutions were pulled off by Darrell Lehman, also of Shiloh Studios, who has been making Raspberry Pi-based projects for over five years, and has been working with electronics for over 25 years.
“I’ve completed a lot of prior projects on Raspberry Pi with touchscreens, [Power over Ethernet], TouchOSC, and Node-RED, so Raspberry Pi was a familiar and easy choice,” Darrell explains. “I gravitate toward Raspberry Pi’s ecosystem when I need to solve problems that aren’t readily addressed by an off-the-shelf hardware solution, or it doesn’t make sense to implement costly proprietary control systems.”
Musical fruit
There’s four main ways that Raspberry Pi is used at Shiloh Studios. First of all, as a lot of things are connected via Ethernet, a Raspberry Pi helps monitor those connections.
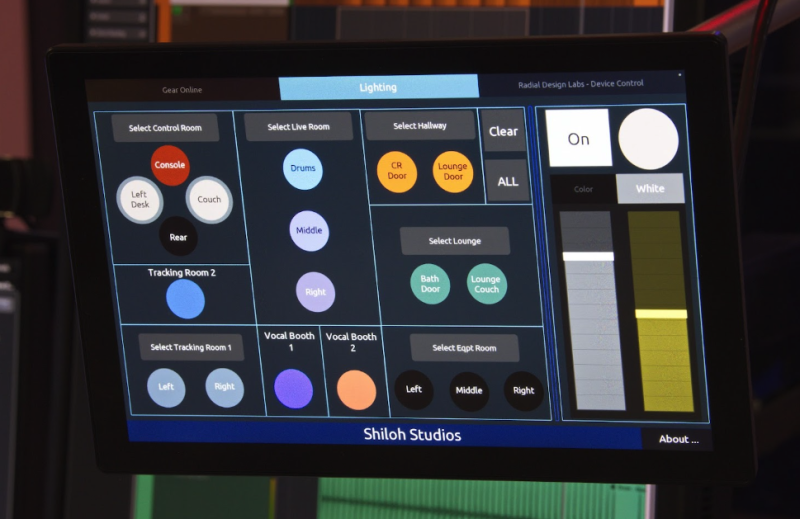
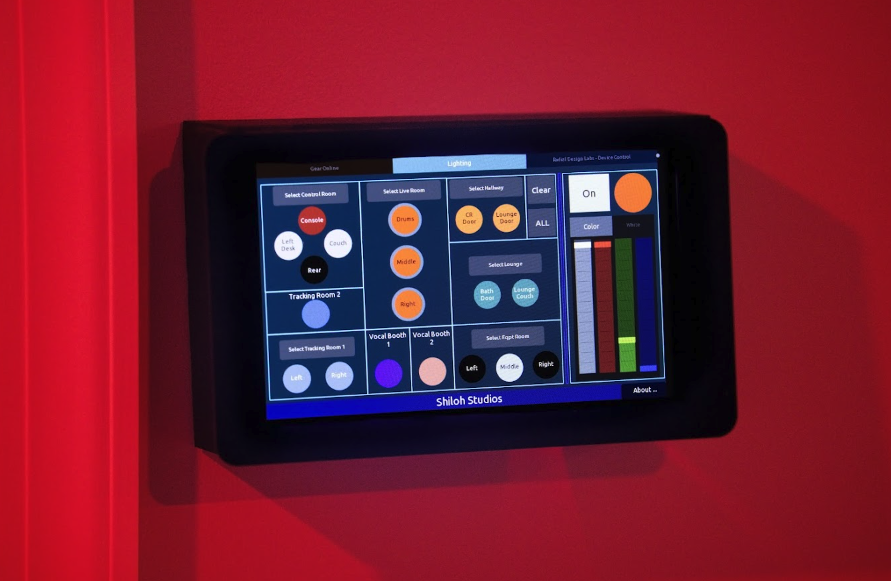
There’s also a system for full remote control over the lighting systems, with remote screens in multiple rooms. Similarly, there’s remote control of RDL devices in various studio rooms so performers can listen to audio live.
The last main way is a USB to Ethernet connected keyboard, as Michael explains: “to facilitate the composer client’s needs, a Native Instruments S88 keyboard was placed in the control room, but it also needed to be flexibly deployable to allow relocation to other studio spaces as needed. The S88 requires a USB connection to the DAW [Digital Audio Workstation] PC. Twisted pair to USB converters were not reliably sufficient to the cause. Long USB cables posed a similar liability. Raspberry Pi 4 with a PoE HAT provided the right solution by enabling a rock-solid USB to Ethernet connection.”
“I would say construction was probably the easiest part of the project because Raspberry Pi has such a great ecosystem of add-ons available online,” Darrell tells us. “And for each accessory that I needed, I had options to choose from. The most challenging part of the construction was figuring out how I wanted to build the wall brackets.”
On tour
On a digital tour of the studio, the various Raspberry Pi implementations had a great professional finish, and the UI created for the light remote looked and worked just like we’d expect from tablets with apps, or touchscreen products specifically made for that use.
Broadening participation and finding new entry points for young people to engage with computing is part of how we pursue our mission here at the Raspberry Pi Foundation. It was also the focus of our March online seminar, led by our own Dr Bobby Whyte. In this third seminar of our series on computing education for primary-aged children, Bobby presented his work on ‘designing multimodal composition activities for integrated K-5 programming and storytelling’. In this research he explored the integration of computing and literacy education, and the implications and limitations for classroom practice.
Motivated by challenges Bobby experienced first-hand as a primary school teacher, his two studies on the topic contribute to the body of research aiming to make computing less narrow and difficult. In this work, Bobby integrated programming and storytelling as a way of making the computing curriculum more applicable, relevant, and contextualised.
Critically for computing educators and researchers in the area, Bobby explored how theories related to ‘programming as writing’ translate into practice, and what the implications of designing and delivering integrated lessons in classrooms are. While the two studies described here took place in the context of UK schooling, we can learn universal lessons from this work.
What is multimodal composition?
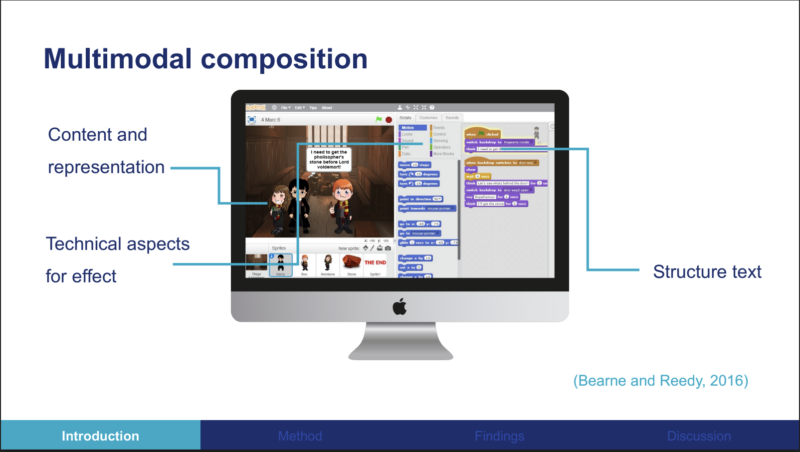
In the seminar Bobby made a distinction between applying computing to literacy (or vice versa) and true integration of programming and storytelling. To achieve true integration in the two studies he conducted, Bobby used the idea of ‘multimodal composition’ (MMC). A multimodal composition is defined as “a composition that employs a variety of modes, including sound, writing, image, and gesture/movement [… with] a communicative function”.
Storytelling comes together with programming in a multimodal composition as learners create a program to tell a story where they:
Decide on content and representation (the characters, the setting, the backdrop)
Structure text they’ve written
Use technical aspects (i.e. motion blocks, tension) to achieve effects for narrative purposes
Defining multimodal composition (MMC) for a visual programming context
Multimodality for programming and storytelling in the classroom
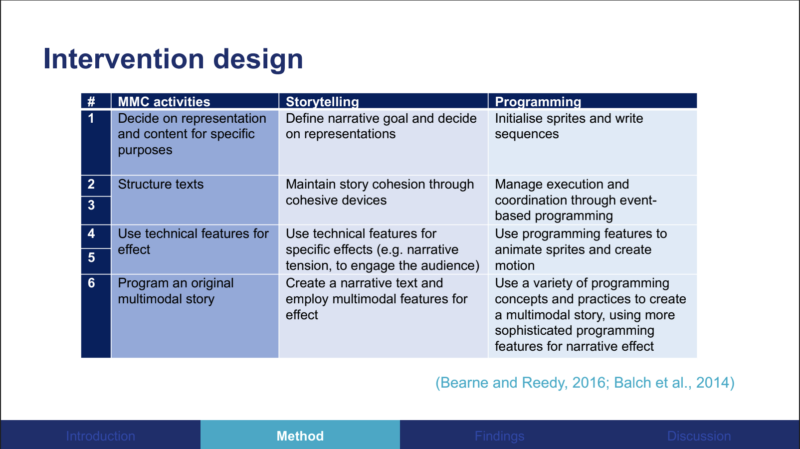
To investigate the use of MMC in the classroom, Bobby started by designing a curriculum unit of lessons. He mapped the unit’s MMC activities to specific storytelling and programming learning objectives. The MMC activities were designed using design-based research, an approach in which something is designed and tested iteratively in real-world contexts. In practice that means Bobby collaborated with teachers and students to analyse, evaluate, and adapt the unit’s activities.
Mapping of the MMC activities to storytelling and programming learning objectives
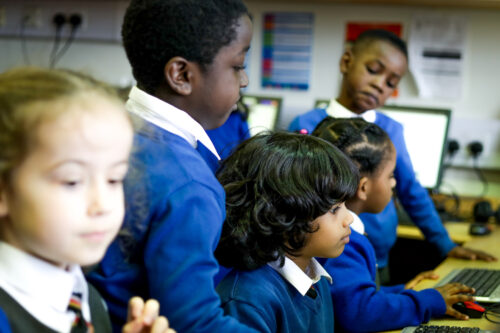
The first of two studies to explore the design and implementation of MMC activities was conducted with 10 K-5 students (age 9 to 11) and showed promising results. All students approached the composition task multimodally, using multiple representations for specific purposes. In other words, they conveyed different parts of their stories using either text, sound, or images.
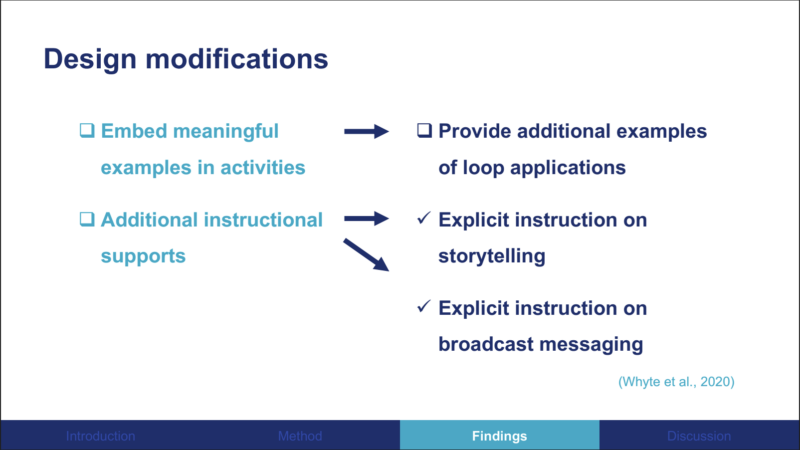
Bobby found that broadcast messages and loops were the least used blocks among the group. As a consequence, he modified the curriculum unit to include additional scaffolding and instructional support on how and why the students might embed these elements.
Bobby modified the classroom unit based on findings from his first study
In the second study, the MMC activities were evaluated in a classroom of 28 K-5 students led by one teacher over two weeks. Findings indicated that students appreciated the longer multi-session project. The teacher reported being satisfied with the project work the learners completed and the skills they practised. The teacher also further integrated and adapted the unit into their classroom practice after the research project had been completed.
How might you use these research findings?
Factors that impacted the integration of storytelling and programming included the teacher’s confidence to teach programming as well as the teacher’s ability to differentiate between students and what kind of support they needed depending on their previous programming experience.
In addition, there are considerations regarding the curriculum. The school where the second study took place considered the activities in the unit to be literacy-light, as the English literacy curriculum is ‘text-heavy’ and the addition of multimodal elements ‘wastes’ opportunities to produce stories that are more text-based.
Bobby’s research indicates that MMC provides useful opportunities for learners to simultaneously pursue storytelling and programming goals, and the curriculum unit designed in the research proved adaptable for the teacher to integrate into their classroom practice. However, Bobby cautioned that there’s a need to carefully consider both the benefits and trade-offs when designing cross-curricular integration projects in order to ensure a fair representation of both subjects.
Can you see an opportunity for integrating programming and storytelling in your classroom? Let us know your thoughts or questions in the comments below.
Join our next seminar on primary computing education
At our next seminar, we welcome Kate Farrell and Professor Judy Robertson (University of Edinburgh). This session will introduce you to how data literacy can be taught in primary and early-years education across different curricular areas. It will take place online on Tuesday 9 May at 17.00 UK time, don’t miss out and sign up now.
Yo find out more about connecting research to practice for primary computing education, you can find other our upcoming monthly seminars on primary (K–5) teaching and learning and watch the recordings of previous seminars in this series.
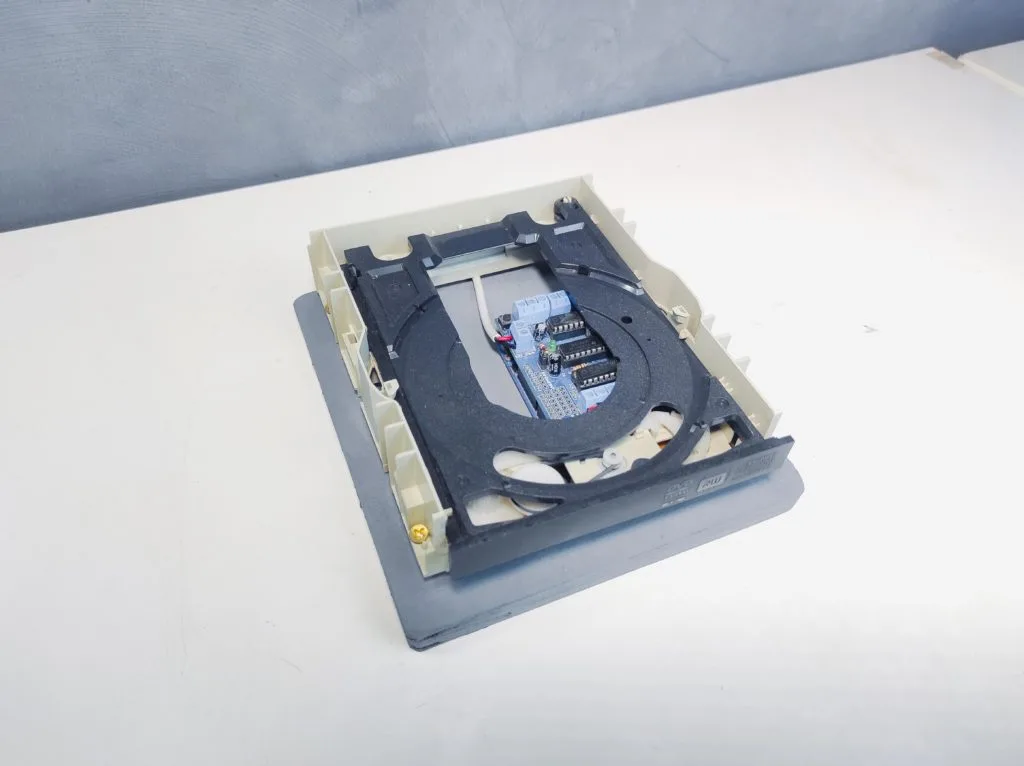
There are a few approaches to making your own PCBs at home, and perhaps one of the most interesting yet potentially tedious methods involves making a UV-resistant mask and then etching away the non-copper areas with an acid bath. This etching step requires constantly moving the acid across the board’s surfaces for up to 30 minutes at a time, which is why Earl Daniel Villanueva made a small machine to handle this automatically.
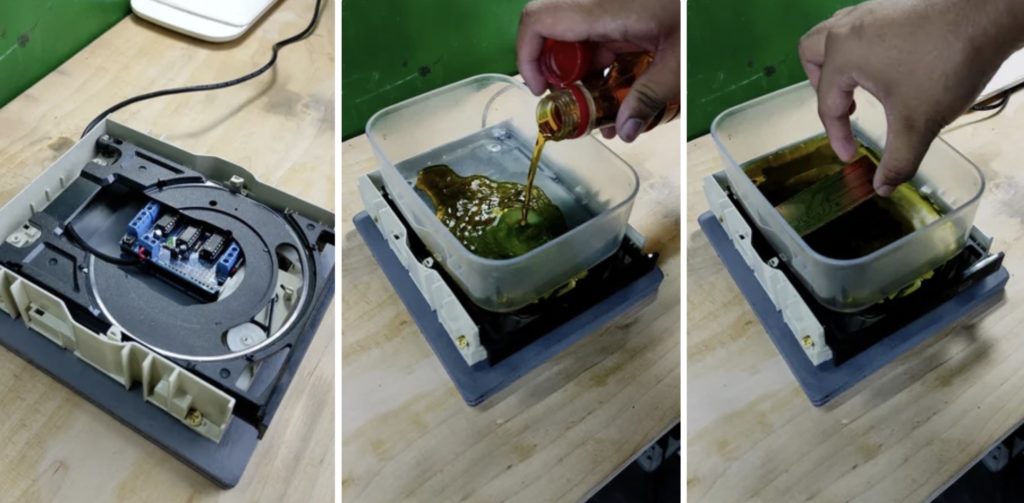
Villanueva began by gathering together an old CD-ROM drive, an Arduino Uno, an Adafruit Motor Shield, and a 5V power supply. The disc drive was chosen because it not only had an easily accessible DC motor, but also due to the disc ejection assembly being able to rapidly move in or out. After desoldering the motor from the drive’s mainboard and connecting it to the motor shield, he wrote a simple sketch for the Arduino that caused the motor to quickly oscillate between directions, thus creating the desired shaking motion.
Satisfied with the electronics, he then moved onto building a base plate from scrap wood and mounted the drive on top. Lastly, he attached a plastic container full of acid to the drive tray and watched as it continually swirled the solution across the PCB, resulting in a clean finished product.
For those aged 65 and over, falls can be one of the most serious health concerns they face either due to lower mobility or decreasing overall coordination. Recognizing this issue, Naveen Kumar set out to produce a wearable fall-detecting device that aims to increase the speed at which this occurs by utilizing a Transformer-based model rather than a more traditional recurrent neural network (RNN) model.
Because this project needed to be both fast and consume only small amounts of current, Kumar went with the new Arduino GIGA R1 WiFi due to its STM32H74XI dual-core Arm CPU, onboard WiFi/Bluetooth®, and ability to interface with a wide variety of sensors. After connecting an ADXL345 three-axis accelerometer, he realized that collecting many hours of samples by hand would be far too time consuming, so instead, he downloaded the SisFall dataset, ran a Python script to parse the sample data into an Edge Impulse-compatible format, and then uploaded the resulting JSON files into a new project. Once completed, he used the API to split each sample into four-second segments and then used the Keras block edit feature to build a reduced-sized Transformer model.
The result after training was a 202KB large model that could accurately determine if a fall occurred 96% of the time. Deployment was then as simple as using the Arduino library feature within a sketch to run an inference and display the result via an LED, though future iterations could leverage the GIGA R1 WiFi’s connectivity to send out alert notifications if an accident is detected. More information can be found here in Kumar’s write-up.
Programming is becoming an increasingly useful skill in today’s society. As we continue to rely more and more on software and digital technology, knowing how to code is also more and more valuable. That’s why many parents are looking for ways to introduce their children to programming. You might find it difficult to know where to begin, with so many different kids’ coding languages and platforms available. In this blog post, we explore how children can progress through different programming languages to realise their potential as proficient coders and creators of digital technology.
ScratchJr
Everyone needs to start somewhere, and one great option for children aged 5–7 is ScratchJr (Scratch Junior), a visual programming language with drag-and-drop blocks for creating simple programs. ScratchJr is available for free on Android and iOS mobile devices. It’s great for introducing young children to the basics of programming, and they can use it to create interactive stories and games.
Scratch
Moving on from ScratchJr, there’s its web-based sibling Scratch. Scratch offers drag-and-drop blocks for creating programs and comes with an assortment of graphics, sounds, and music for your child to bring their programs to life. This visual programming language is designed specifically for children to learn programming fundamentals. Scratch is available in multiple spoken languages and is perfect for beginners. It allows kids to create interactive stories, animations, and games with ease.
The Raspberry Pi Foundation has a wealth of free Scratch resources we have created specifically for young people who are beginners, such as the ‘Introduction to Scratch’ project path. And if your child is interested in physical computing to interact with the real world using code, they can also learn how to use electronic components, such as buzzers and LEDs, with Scratch and a Raspberry Pi computer.
MakeCode
Another fun option for children who want to explore coding and physical computing is the micro:bit. This is a small programmable device with an LED display, buttons, and sensors, and it can be used to create games, animations, interactive projects, and lots more. To control a micro:bit, a visual programming language called MakeCode can be used. The micro:bit can also be programmed using Scratch or text-based languages such as Python, offering an easy transition for children as their coding skills progress. Have a look at our free collection of micro:bit resources to learn more.
HTML
Everyone is familiar with websites, but fewer people know how they are coded. HTML is a markup language that is used to create the webpages we use every day. It’s a great language for children to learn because they can see the results of their code in real time, in their web browser. They can use HTML and CSS to create simple webpages that include links, videos, pictures, and interactive elements, all the while learning how websites are structured and designed. We have many free web design resources for your child, including a basic ‘Introduction to web development’ project path.
Python
If your child is becoming confident with Scratch and HTML, then using Python is the recommended next stage in their learning. Python is a high-level text-based programming language that is easy to read and learn. It is a popular choice for beginners as it has a simple syntax that often reads like plain English. Many free Python projects for young people are available on our website, including the ‘Introduction to Python’ path.
The Python community is also really welcoming and has produced a myriad of online tutorials and videos to help learners explore this language. Python can be used to do some very powerful things with ease, which is why it is so popular. For example, it is relatively simple to create Python programs to engage in machine learning and data analysis. If you wanted to explore large language models such as GPT, on which the ChatGPT chatbot is based, then Python would be the language of choice.
JavaScript
JavaScript is the language of the web, and if your child has become proficient in HTML, then this is the next language for them. JavaScript is used to create interactive websites and web applications. As young people become more comfortable with programming, JavaScript is a useful language to progress to, given how ubiquitous the web is today. It can be tricky to learn, but like Python, it has a vast number of libraries of functions that people have already created for it to achieve things more quickly. These libraries make JavaScript a very powerful language to use.
Try out kids’ coding languages
There are many different programming languages, and each one has its own strengths and weaknesses. Some are easy to learn and use, some are really fast, and some are very secure.
Starting with visual languages such as Scratch or MakeCode allows your child to begin to understand the basic concepts of programming without needing any developed reading and keyboard skills. Once their understanding and skills have improved, they can try out text-based languages, find the one that they are comfortable with, and then continue to learn. It’s fairly common for people who are proficient in one programming language to learn other languages quite quickly, so don’t worry about which programming language your child starts with.
Whether your child is interested in working in software development or just wants to learn a valuable — and creative — skill, helping them learn to code and try out different kids’ coding languages is a great way for you to open up new opportunities for them.
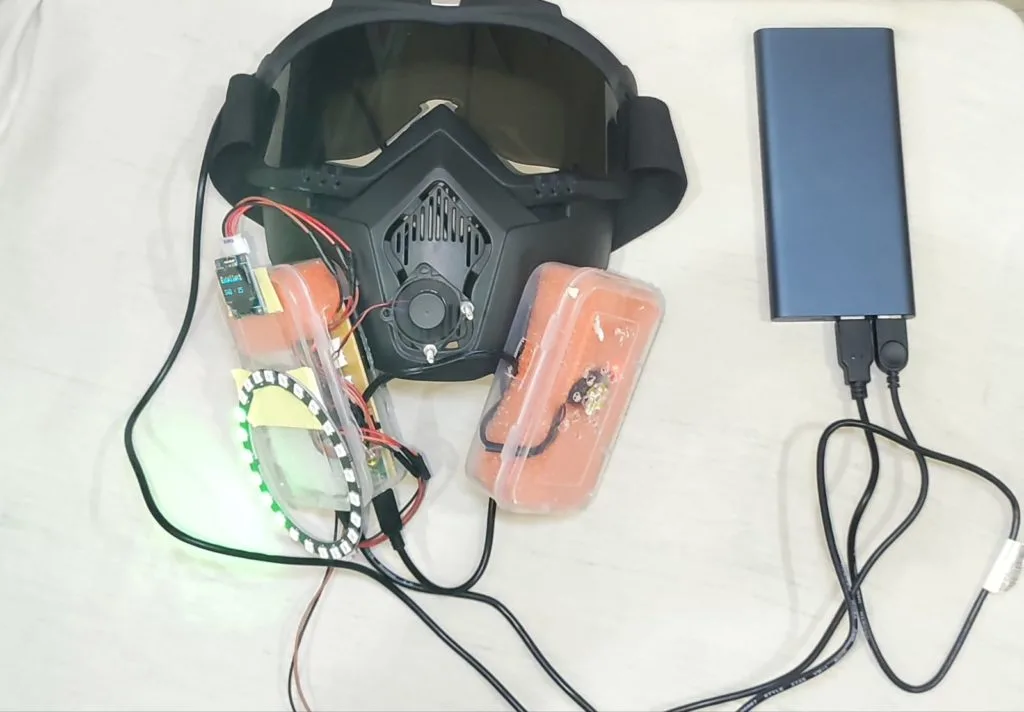
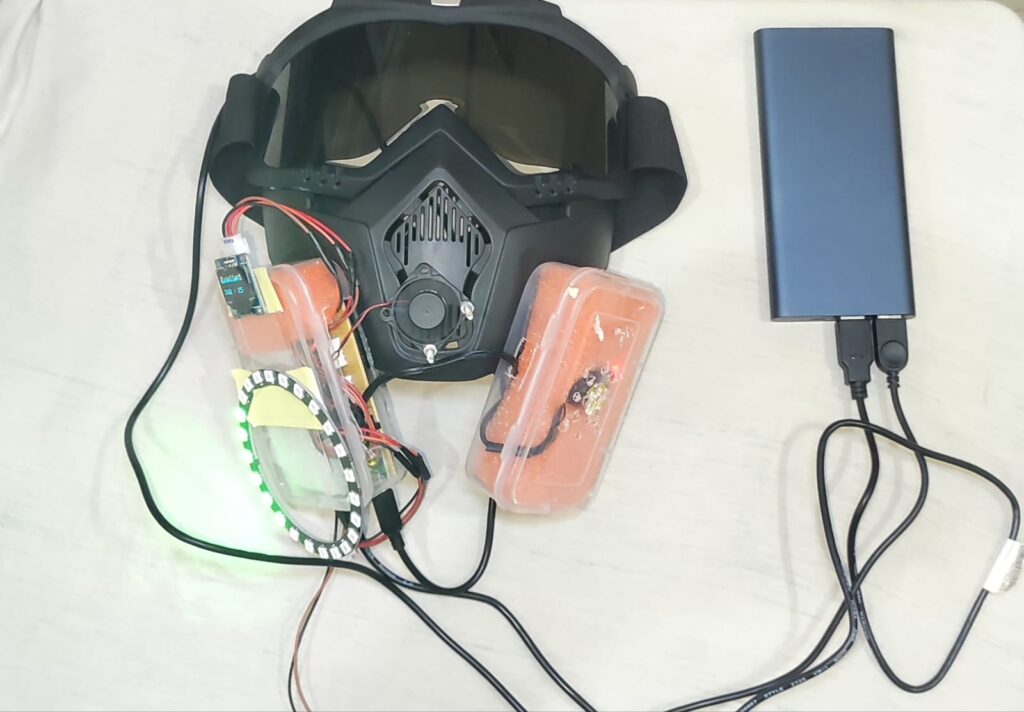
Hazardous pollution in the form of excess CO2, nitrogen dioxide, microscopic particulates, and volatile organic compounds has become a growing concern, especially in developing countries where access to cleaner technologies might not be available or widely adopted. Krazye Karthik’s Environmental Sense Mask (ES-Mask) focuses on bringing attention to these harmful compounds by displaying ambient air quality measurements in real-time.
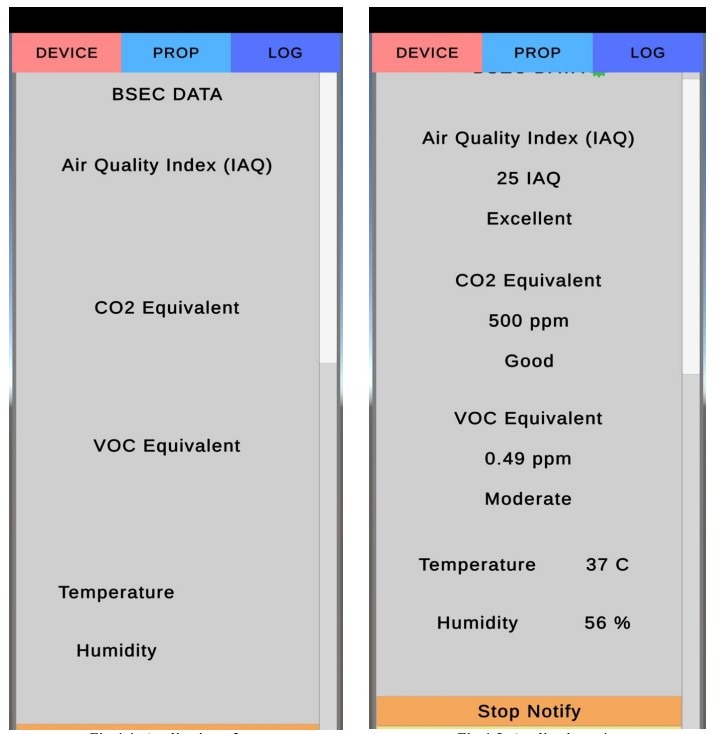
In order to get values for the air quality index (AQI), CO2, volatile organic compounds (VOCs), and temperature/humidity, Karthik selected the Nicla Sense ME due to its onboard Bosch BME688 sensor module. In addition to providing this data over Bluetooth® Low Energy, the Nicla Sense ME also sends it over I2C to a MKR WiFi 1010 which is responsible for parsing the data. Once done, a comment is generated for the current AQI ranging from “excellent” to “hazardous.” This reading is displayed on an attached OLED screen and a ring of 24 NeoPixel LEDs are illuminated according to the level of dangerous pollutants.
Beyond the microcontroller and sensor components, Karthik added a 5V fan to a mask along with a few air filters to help increase the cleanliness of the air he was breathing. Last of all, he built a mobile app that grabs the data via BLE and shows it in an organized format.
Energy crises are nothing new, but they’re always painful. Right now, the world is dealing with a serious energy crisis that has led to skyrocketing utility bills, economic uncertainty, and widespread questions about how we supply our homes with power.
One of the biggest questions being asked right now is, “how do we avoid this kind of energy crisis in the future?” What steps can we take — as individuals and societies — to mitigate energy crises and deal with them more effectively when they do come around?
Automation is one powerful tool at our disposal here. It can be used not just by governments and energy companies, but also by individual households. The good news is that tools like Arduino and the Arduino Cloud can help you build automated devices to better manage your energy usage and save money in times of crisis.
In this article, we’ll take a look at how automation can help us use our energy more efficiently, avoid major crises, and pave the way to a more sustainable and reliable energy future.
What’s going on with the current energy crisis?
The energy crisis of 2022 is the culmination of several unfortunate recent trends. As demand for energy bounced back hard after the pandemic, the world simultaneously saw a reduction in natural gas supply — largely related to the Russia-Ukraine conflict and associated disruptions. As a result, gas prices have increased significantly, and the prices of other fossil fuels like coal and oil have followed suit. This has left millions of families around the globe facing an uncertain winter and some pretty tough financial conditions.
How automation can help with an energy crisis
Smart grids
Energy grids are the source of power for most of our homes. When you switch on the lights, turn on the heat, and take a hot shower — the energy for all these tasks is drawn from the grid of power that services your region.
If we can find ways to run energy grids more efficiently and reliably, we can do more with less energy, leading to lower costs and minimal disruption even during periods of energy uncertainty.
One way to do this is through smart grids. This is when ordinary energy grids are enhanced with technology like sensors that continuously monitor performance, collecting huge amounts of data on things like energy usage and wastage while predicting issues before they even arise.
By feeding this data back to control centers, smart grids allow energy providers to run their grids much more effectively. They can anticipate and fix issues before they become serious problems, identify areas where energy is being wasted, and make plans based on concrete data.
Digitize the oil and gas industry
The oil and gas industry is enormous and like most large, established industries it can be slow to adapt and modernize in many ways.
While more agile companies have been quick to embrace digital transformation and all the advantages it brings, giant energy companies are much more slow-moving and rely on often outdated processes and technology. This results in inefficiencies, higher costs, and increased environmental damage.
But what if the oil and gas sector can harness digital tools to run more effectively? A more well-oiled fossil fuel industry could be a major factor in mitigating energy crises and moving towards a cleaner and more sustainable energy future. Here are some ways digital transformation could benefit oil and gas:
Maintain equipment and monitor conditions. With technologies like the Internet of Things, it’s possible for oil and gas companies to monitor their processes more closely in real-time. This enables them to predict issues and make repairs before any problems arise, tweak processes to optimize performance, avoid downtime and delays, and save money.
Be more sustainable and environmentally conscious. Technology can help oil and gas companies become more sustainable in many ways — from tracking waste and monitoring energy use to removing harmful compounds from their processes and even combining fossil fuels with cleaner energy sources.
Improve access to energy reserves. Digital transformation gives energy companies the tools to tap into more energy reserves than before, helping tackle shortages and supply issues around the world.
Artificial intelligence
AI has the potential to improve our lives and societies in all kinds of ways, and the way we use energy and avert future crises is just one example.
Here are just a few of the ways AI can be used to mitigate, manage, and even avert energy crises:
By monitoring energy usage, AI tools can radically reduce energy wastage. For example, by automatically reducing energy usage during non-peak hours, we can save a great deal of energy — a valuable ability when supply is tight.
Make renewable energy sources like wind power more reliable and productive by predicting failures and making data-based decisions via AI models. This will allow us to pivot away from fossil fuels and the energy crises that stem from our overreliance on this type of power.
Optimize energy usage in data centers — something which accounts for around 1% of electricity demand worldwide — enabling us to save significant amounts of power during times of crisis.
It’s not all about energy. Water supply is also a major challenge in many parts of the world, and in the future, we’re likely to face many more water crises.
AI can help here, too. Water wastage is an enormous issue around the world, especially in regions where access to clean water is already limited. AI can help tackle this by closely monitoring and analyzing water supplies and systems, quickly identifying things like leaks, blockages, and other problems that can interrupt supply and lead to wasted water.
By managing water supplies in as effective and data-driven a way as possible, and taking appropriate action in real-time to deal with issues, AI systems can preserve much more water than we currently do, helping every liter stretch further. This can help reduce the risk and severity of water crises and also help us mitigate them when they do inevitably occur.
Take control of your energy
There are many tools available to us when it comes to dealing with energy crises, and they’re not confined to governments and corporations. There’s a lot you can do with automation and technology to manage your own energy usage better — from sensors that track consumption and adjust energy expenditure in your home to more efficient appliances.
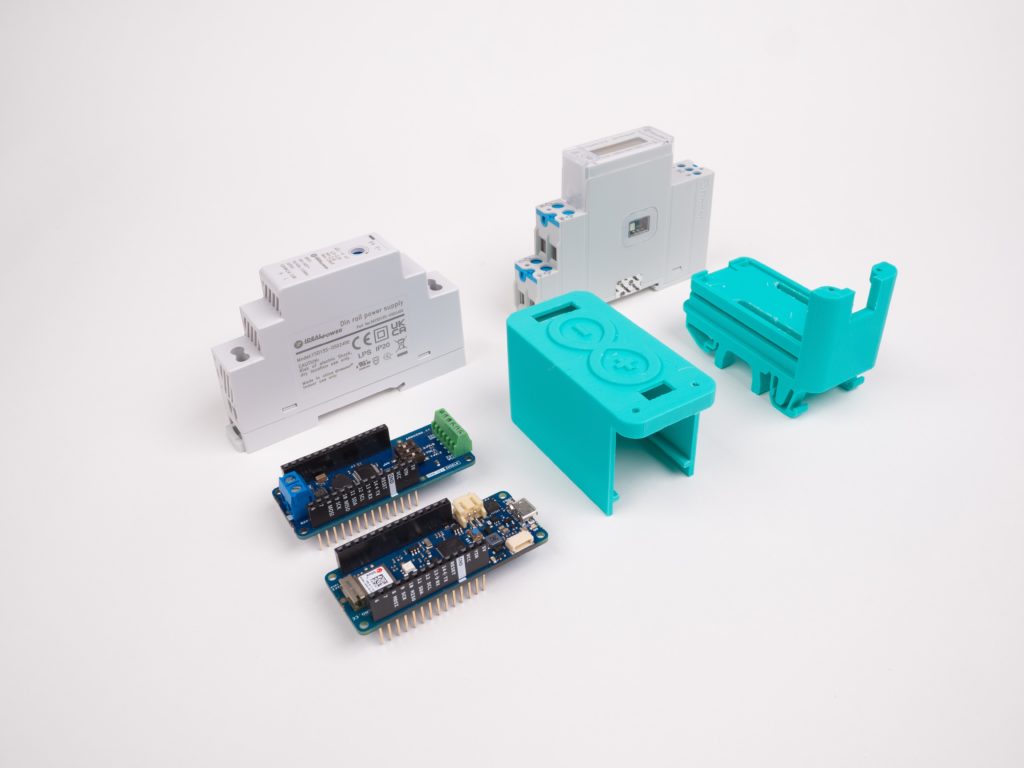
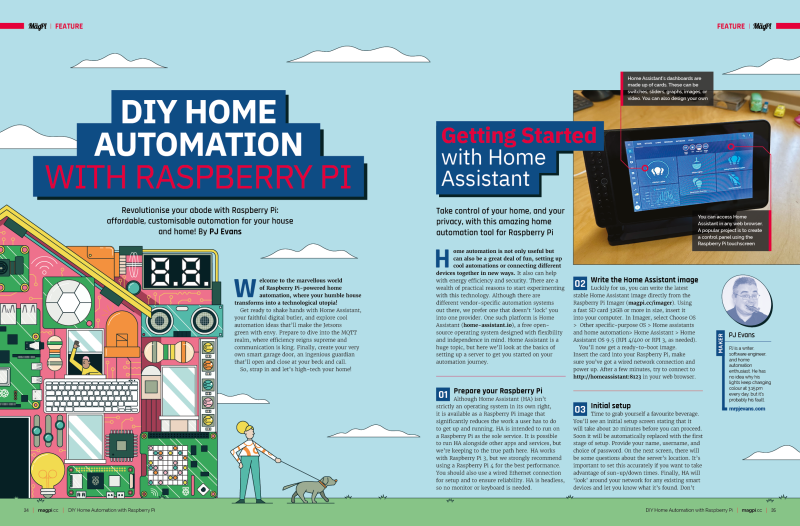
Transform Your Home with Raspberry Pi Home Automation
Revolutionise your living space with Raspberry Pi home automation! With Home Assistant, a flexible and independent open-source operating system, you can create custom automations for energy efficiency and security. The system can be set up on a Raspberry Pi 3 or 4 with a wired Ethernet connection, and once installed, it can be controlled via any web browser. Follow the simple steps to set up your server and get started on your automation journey. With Home Assistant, you’ll have a digital butler to help you connect devices and design custom dashboards for an unbeatable smart home experience.
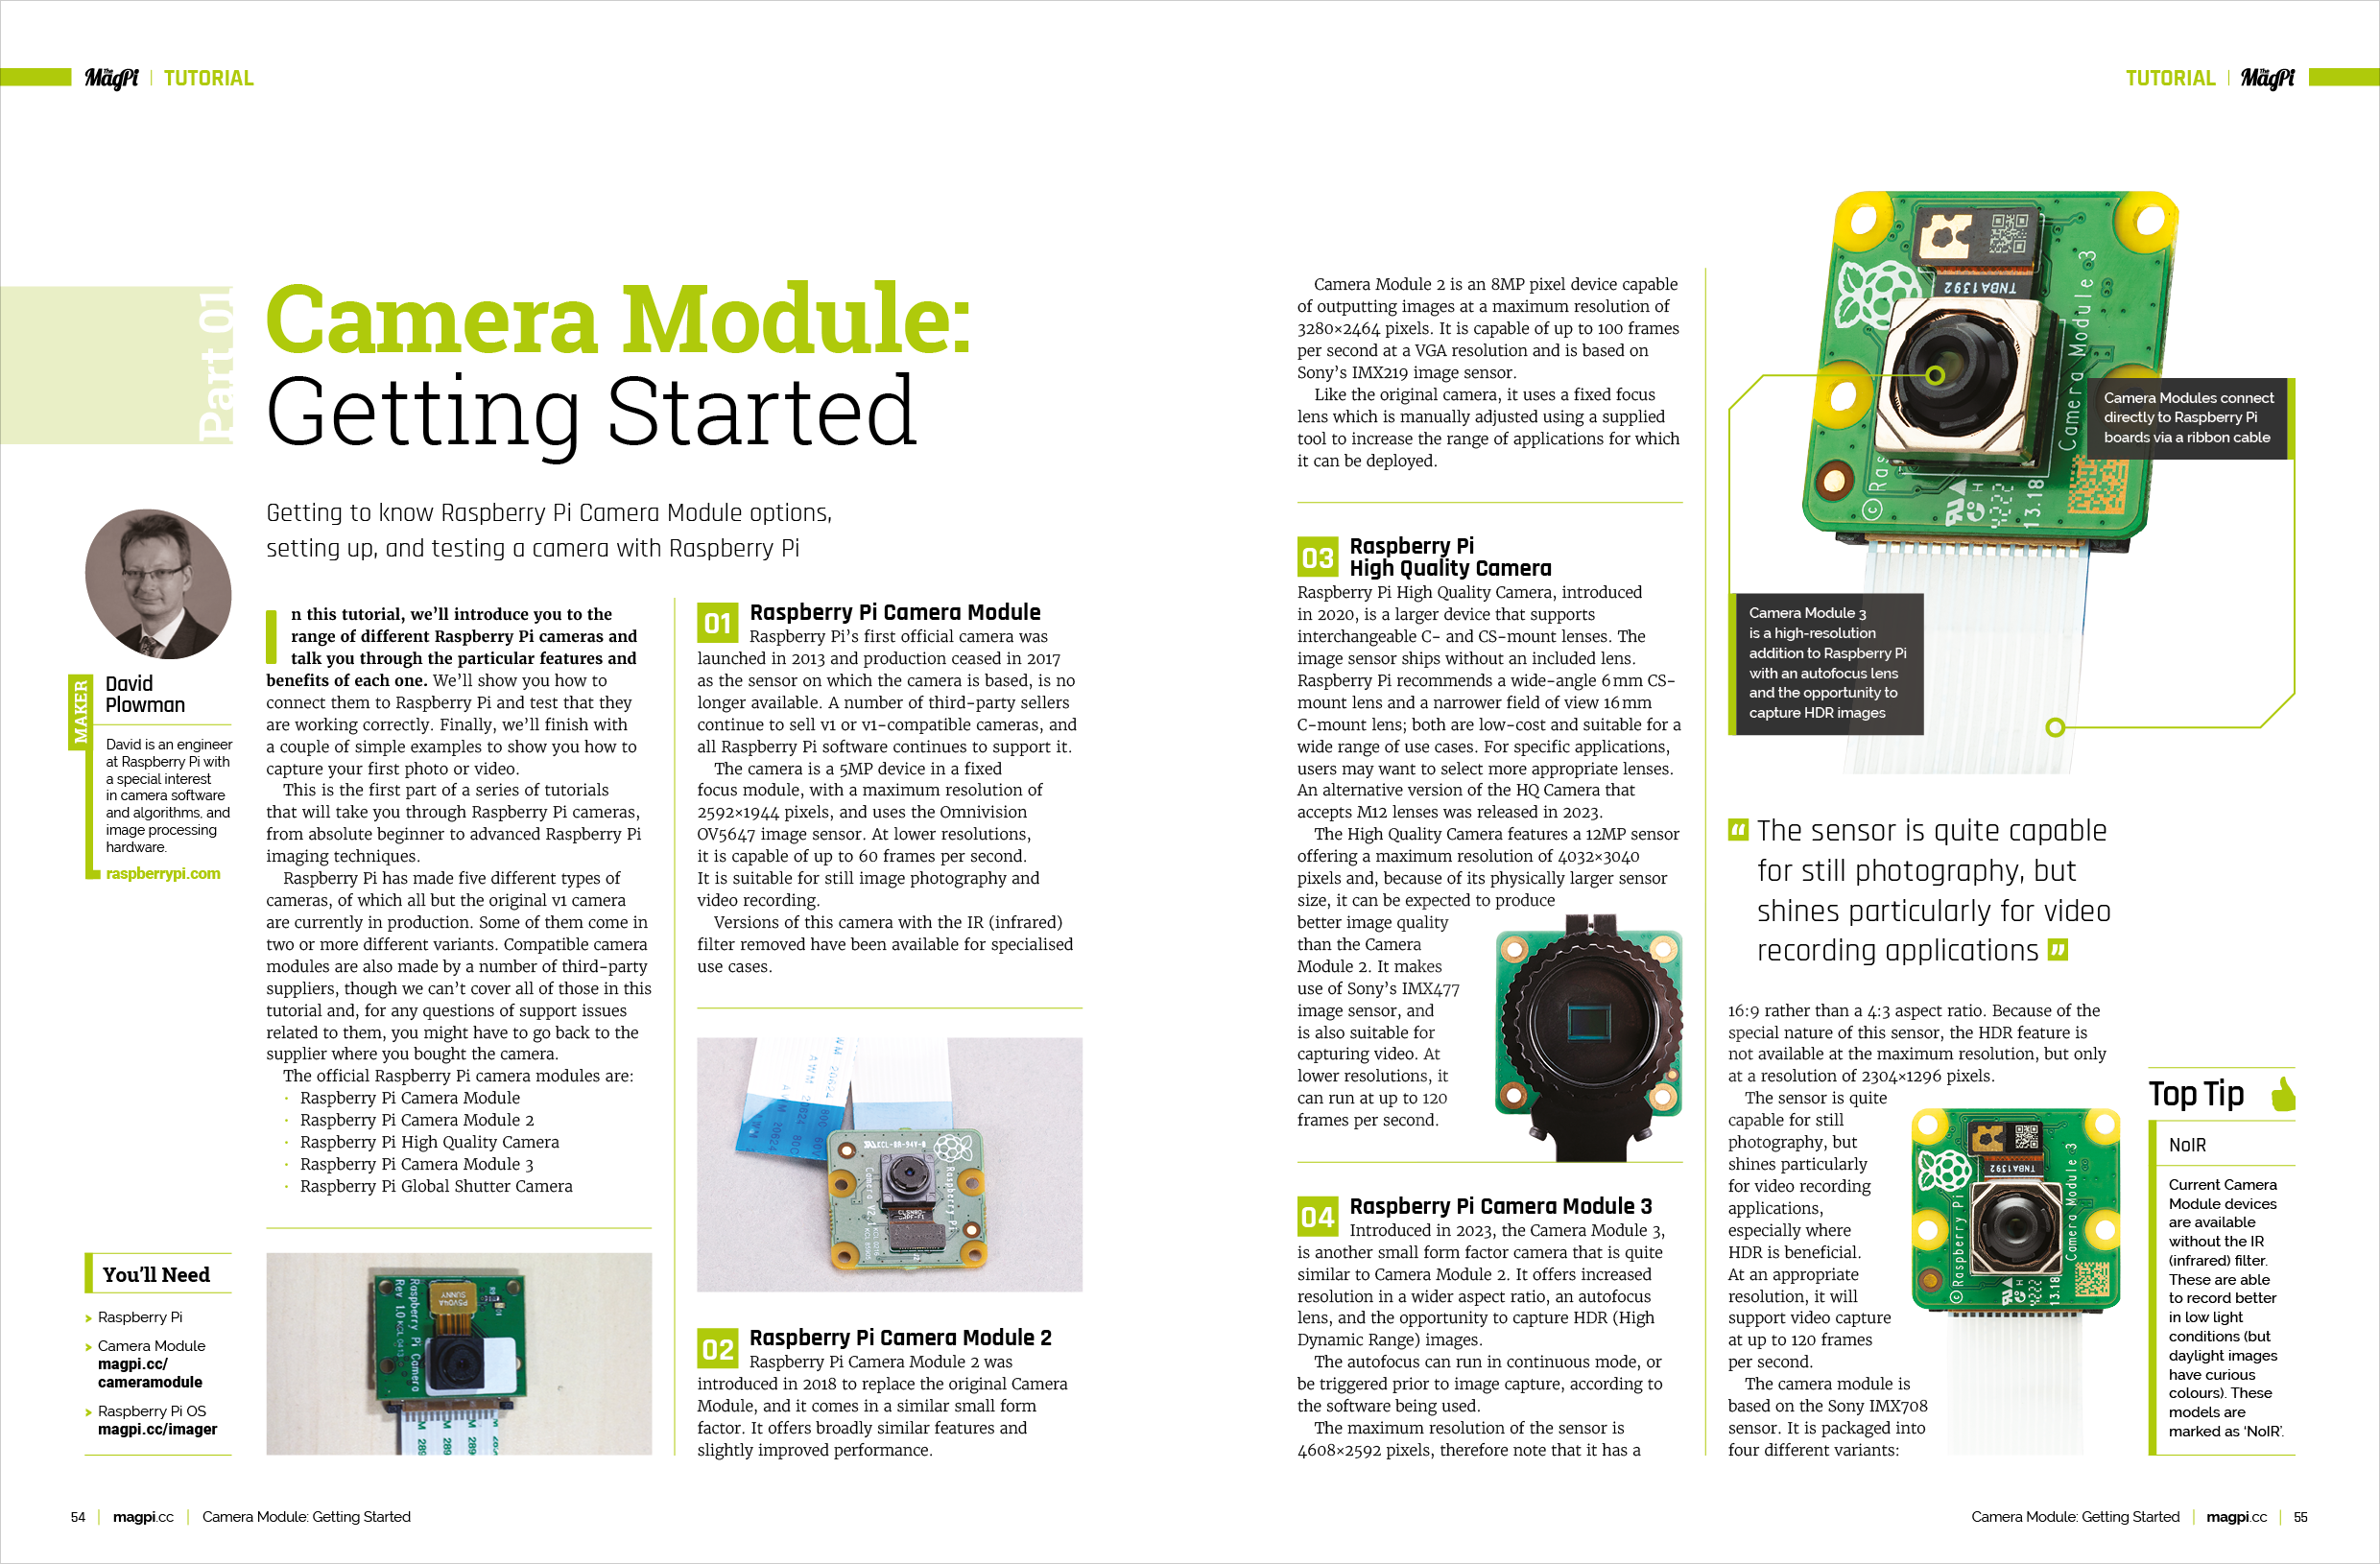
Raspberry Pi Camera Module: Getting Started
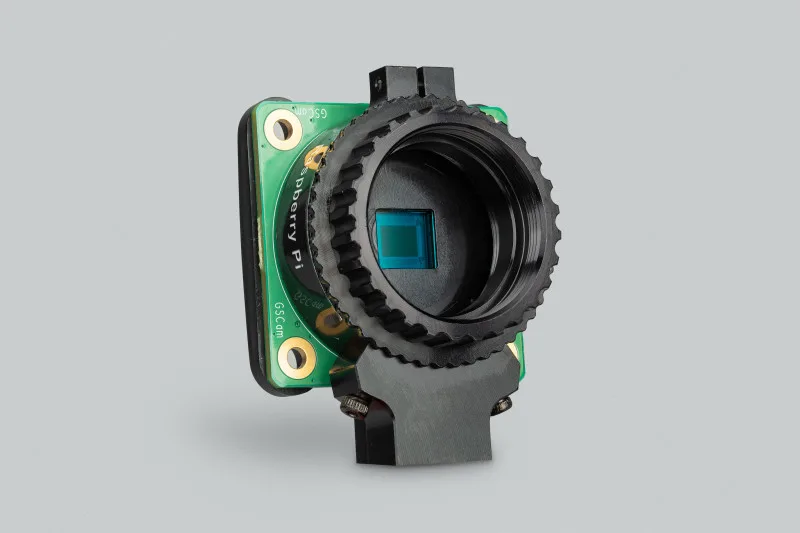
Learn about the range of Raspberry Pi cameras and their features in this tutorial by David Plowman, a Raspberry Pi engineer specializing in camera software and hardware. From the original camera to the latest Camera Module 3, discover how to set up and test each camera with Raspberry Pi. Whether you’re a beginner or an advanced user, this series of tutorials will take you through everything you need to know about Raspberry Pi cameras.
Raspberry studio sounds
Discover the potential of Raspberry Pi in a music studio! Join Michael Peters and Darrell Lehman from Shiloh Studios as they transform their professional audio production space using Raspberry Pi. From monitoring Ethernet connections to managing custom lighting, this tiny tech powerhouse brings versatility and creativity to the next level. Get inspired to remix your own studio!
ClippyGPT: A Blast from the Past
Remember Clippy, Microsoft Office’s helpful yet often irritating paperclip? Thanks to David Packman, it’s back! By combining Clippy with ChatGPT, the AI chatbot sensation, David has given the character a new lease on life. This AI-powered digital assistant offers users interactive conversations and provides assistance in a fun, engaging way.
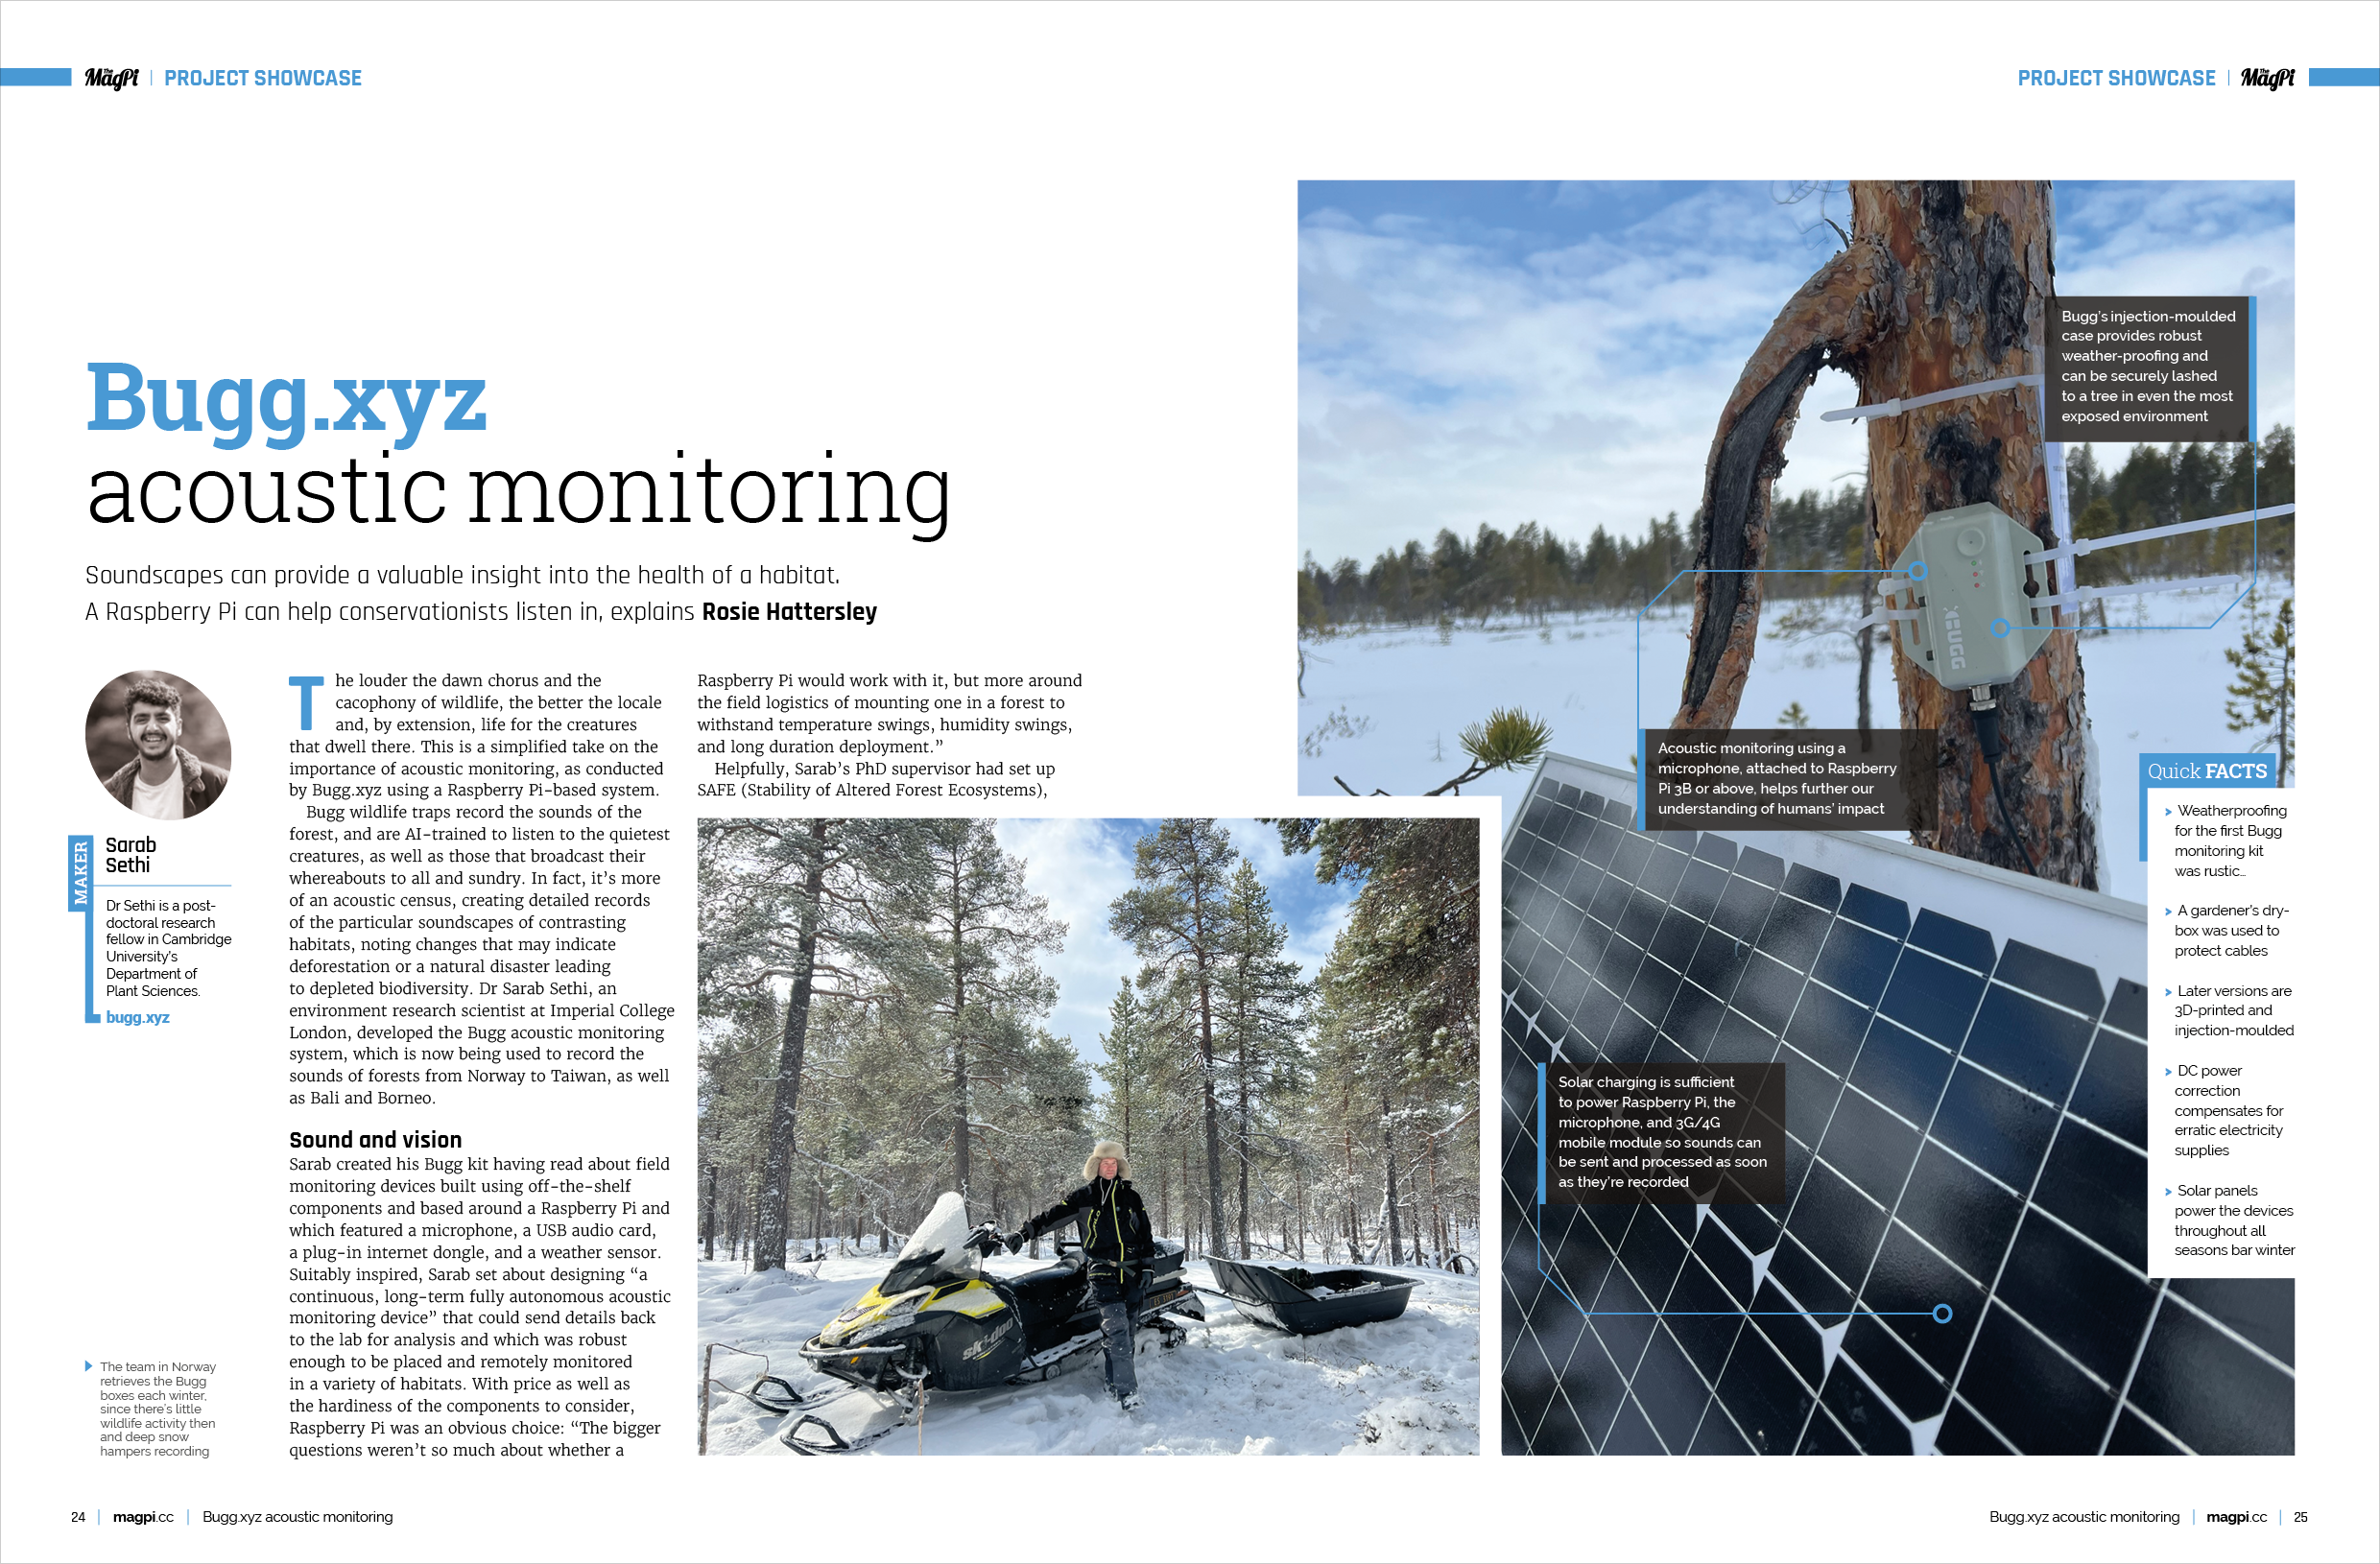
Bugg.xyz: Acoustic Ecosystem Monitoring
Unlock the secrets of nature’s sounds with Bugg.xyz, an innovative Raspberry Pi-based acoustic monitoring system. Developed by Dr. Sarab Sethi, this device records soundscapes in forests worldwide, from Norway to Taiwan, Bali, and Borneo. By tracking the unique sounds of different habitats, Bugg.xyz helps conservationists detect changes in biodiversity and identify potential threats, such as deforestation or natural disasters. Tune into the music of the wild and explore how this cutting-edge technology is shaping the future of conservation.
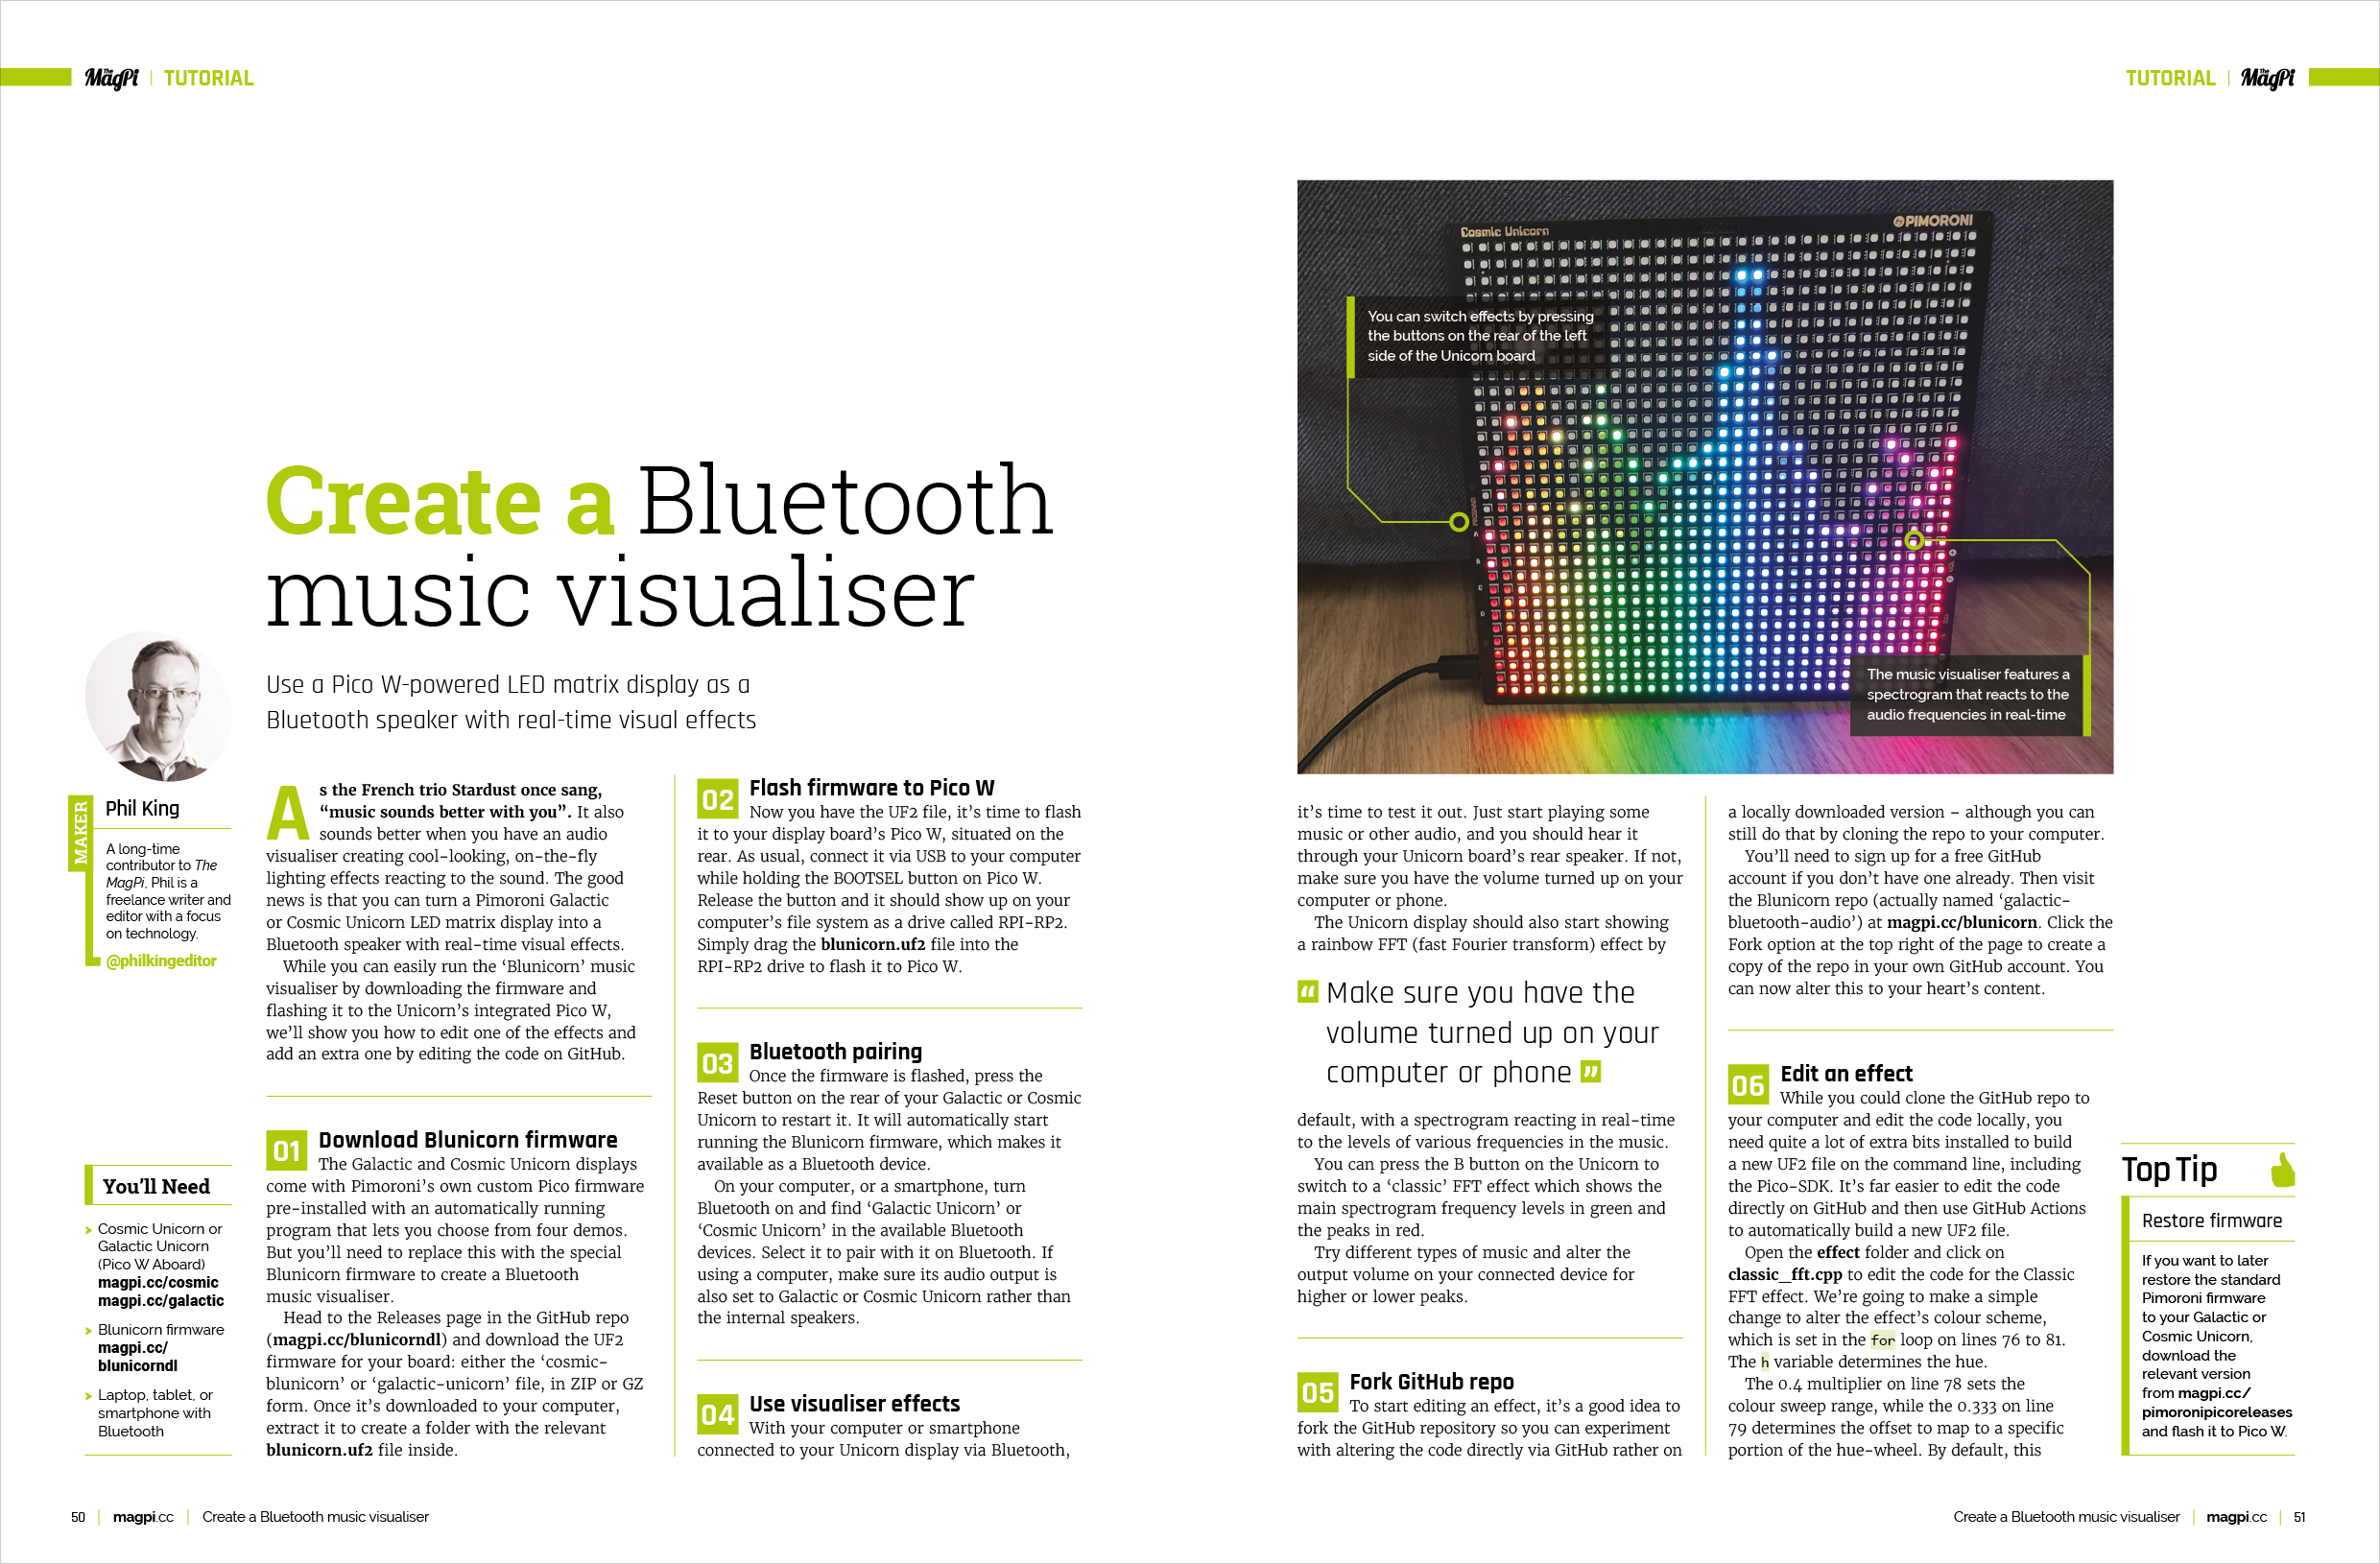
Create a Bluetooth Music Visualizer
Transform your Pimoroni Galactic or Cosmic Unicorn LED matrix display into a Bluetooth speaker with real-time visual effects using the Blunicorn firmware. The display in this build shows a rainbow effect reacting to the levels of various frequencies in the audio.
Dive into this Raspberry Pi extravaganza with DIY binary clocks, Game Boy Interceptors, tank simulators, and astrophotography. Learn to code with Python and build a machine-learning transcriber, while enjoying reviews, interviews, and all things Raspberry Pi!
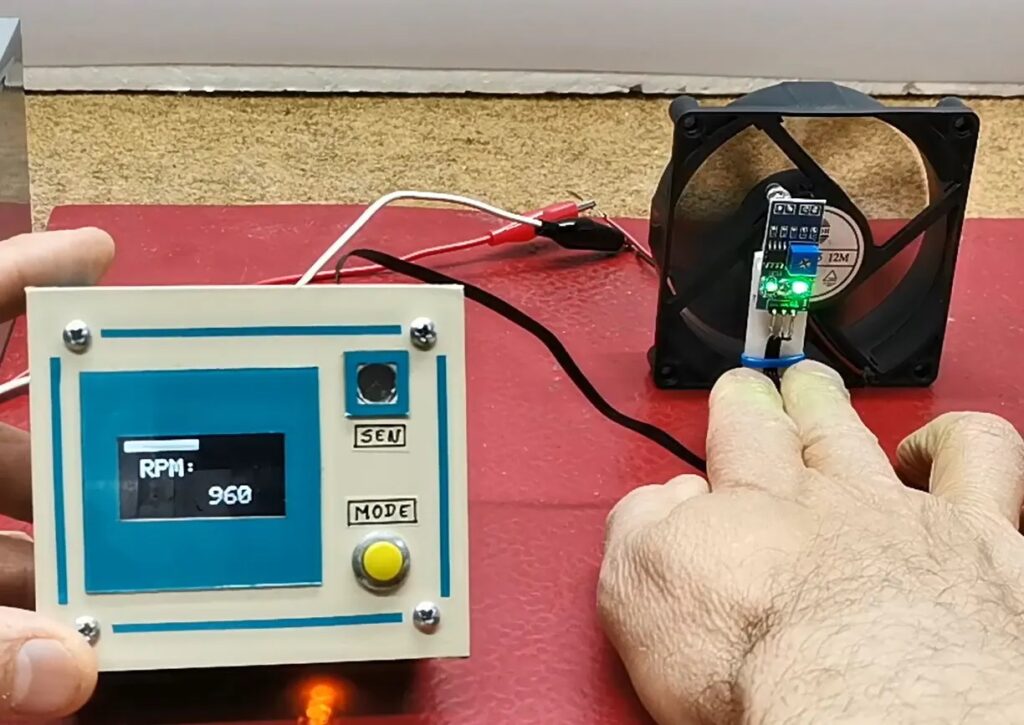
A tachometer is a device that display the speed of a rotating object. The most well-known example is the automotive tachometer, which shows a driver the RPM of the engine — information that is particularly useful when the car has a manual transmission. But there are many other uses for tachometers and this tutorial from Mirko Pavleski explains how to build a tachometer with an infrared sensor.
To calculate the rotational speed of something like a wheel, you need to monitor at least one point on that wheel and time the interval between passes by a static reference point. A common way to achieve that is with a Hall effect sensor that detects the magnetic field from a permanent magnet attached to the wheel’s rim. But Hall effect sensors are unsuitable for some applications, such as when there are strong magnetic fields nearby. Pavleski’s write-up demonstrates how to instead use an infrared sensor to detect the passing of the wheel’s spokes.
This infrared sensor module works by emitting infrared light from an LED and monitoring the reflection. When one of the wheel’s spokes passes in front of the sensor, the reflection becomes strong and easy to detect. An Arduino Nano board measures the time between those events and multiplies the result by the number of spokes to determine the total time for a complete revolution. Divide 60 by that number and you get the RPM. The Arduino continuously calculates that value and displays the number on a small OLED screen. Power comes from a 9V battery.
One of the great things about this design is that it doesn’t require contact with the measured object and since it is portable, so one can measure the RPM of anything spinning that has spokes.
Um dir ein optimales Erlebnis zu bieten, verwenden wir Technologien wie Cookies, um Geräteinformationen zu speichern und/oder darauf zuzugreifen. Wenn du diesen Technologien zustimmst, können wir Daten wie das Surfverhalten oder eindeutige IDs auf dieser Website verarbeiten. Wenn du deine Einwillligung nicht erteilst oder zurückziehst, können bestimmte Merkmale und Funktionen beeinträchtigt werden.
Funktional
Immer aktiv
Die technische Speicherung oder der Zugang ist unbedingt erforderlich für den rechtmäßigen Zweck, die Nutzung eines bestimmten Dienstes zu ermöglichen, der vom Teilnehmer oder Nutzer ausdrücklich gewünscht wird, oder für den alleinigen Zweck, die Übertragung einer Nachricht über ein elektronisches Kommunikationsnetz durchzuführen.
Vorlieben
Die technische Speicherung oder der Zugriff ist für den rechtmäßigen Zweck der Speicherung von Präferenzen erforderlich, die nicht vom Abonnenten oder Benutzer angefordert wurden.
Statistiken
Die technische Speicherung oder der Zugriff, der ausschließlich zu statistischen Zwecken erfolgt.Die technische Speicherung oder der Zugriff, der ausschließlich zu anonymen statistischen Zwecken verwendet wird. Ohne eine Vorladung, die freiwillige Zustimmung deines Internetdienstanbieters oder zusätzliche Aufzeichnungen von Dritten können die zu diesem Zweck gespeicherten oder abgerufenen Informationen allein in der Regel nicht dazu verwendet werden, dich zu identifizieren.
Marketing
Die technische Speicherung oder der Zugriff ist erforderlich, um Nutzerprofile zu erstellen, um Werbung zu versenden oder um den Nutzer auf einer Website oder über mehrere Websites hinweg zu ähnlichen Marketingzwecken zu verfolgen.