Kategorie: Linux

  • Love Machine ChatGPT compliment giver

    Love Machine ChatGPT compliment giver

    Reading Time: 4 minutes

    Despite these alarmist news items gaining media coverage every single year for more than a decade, we punters just don’t seem to wise up to such confidence tricks. Tech entrepreneurs Kakapo Labs set about a more benign riff, on the idea that Joe Public loves a bit of flattery, using clever verbal flummery generated by AI darling ChatGPT, creating a Love Machine that dishes out compliments and chocolates in equal measure. So far, the gentle love-bombing experiment doesn’t seem to have a hidden agenda.

    Sweet nothings

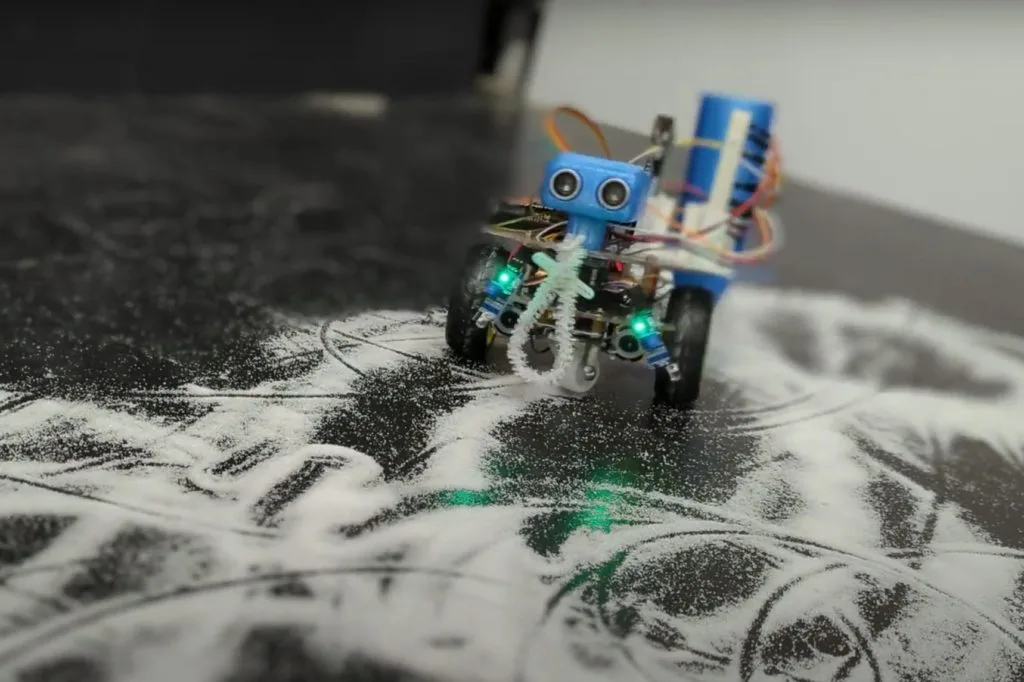
    Will and India, from London-based Kakapo Labs, have backgrounds in electronics engineering and graphic design, respectively, and are interested in “building fun, positive things that cross the boundary between the internet and real-world objects.” As with the password insecurity mentioned above, Will notes that behavioural psychology research shows that it’s pretty clear people are highly motivated by small rewards. “We were interested in what people might do to get a small reward and how much they’d enjoy it. ChatGPT was in the news a lot around the time we started this project, but mainly related to its impact on work. “We thought instead we could try to use it to make some fun” – hence the AI cutey sporting a designer fluffy red skirt and matching glowing red LED matrix heart.

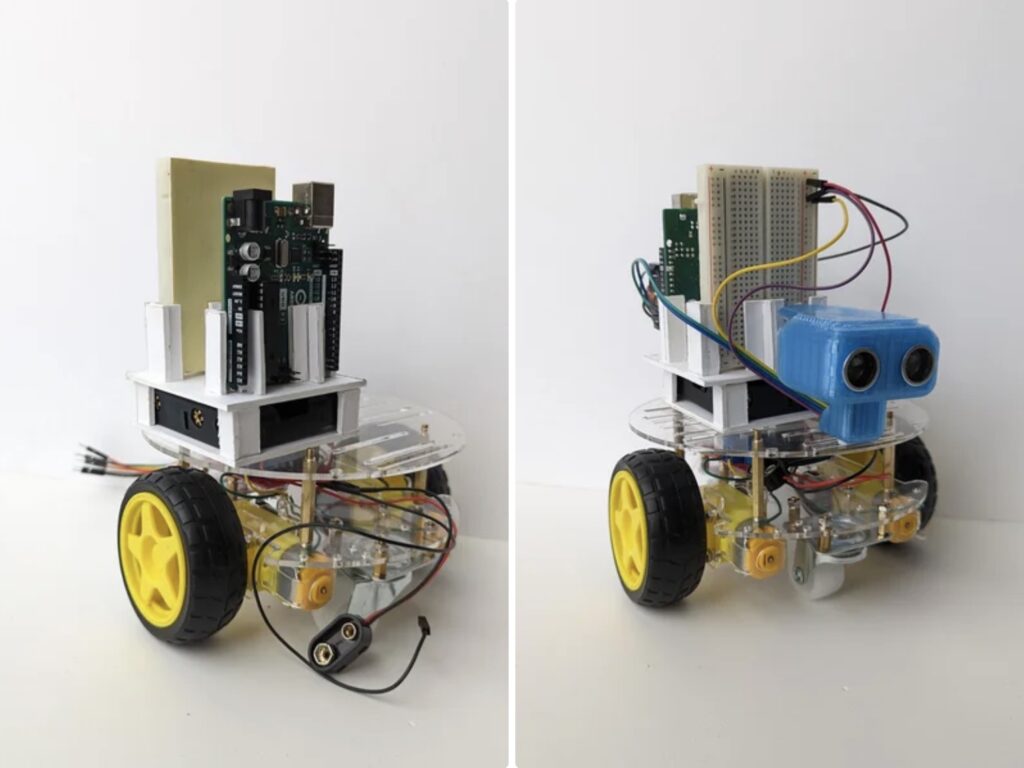
    They chose Pico W for this ChatGPT Love Machine “because it’s powerful but also simple, low-cost, and small but, at the same time, can run a full wireless stack which is easy to use.” Kakapo Labs has more than a decade’s experience of using wireless microcontrollers, and often found them complicated to use “as the trade-offs needed to squeeze an internet stack into an environment without a full operating system, and limited resources meant it always felt like a bit of an awkward fit.” However, Will says that, with MicroPython on Pico W, things work painlessly and the development time is short.

    Fiddling about

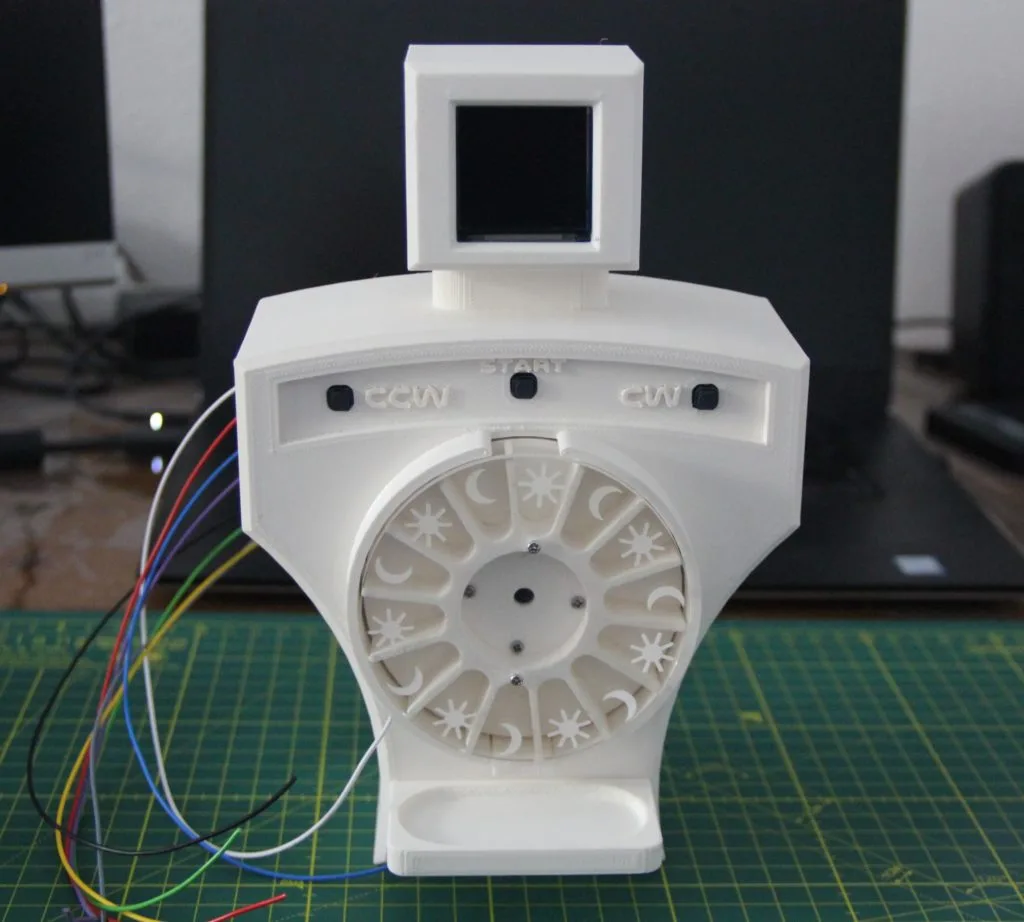
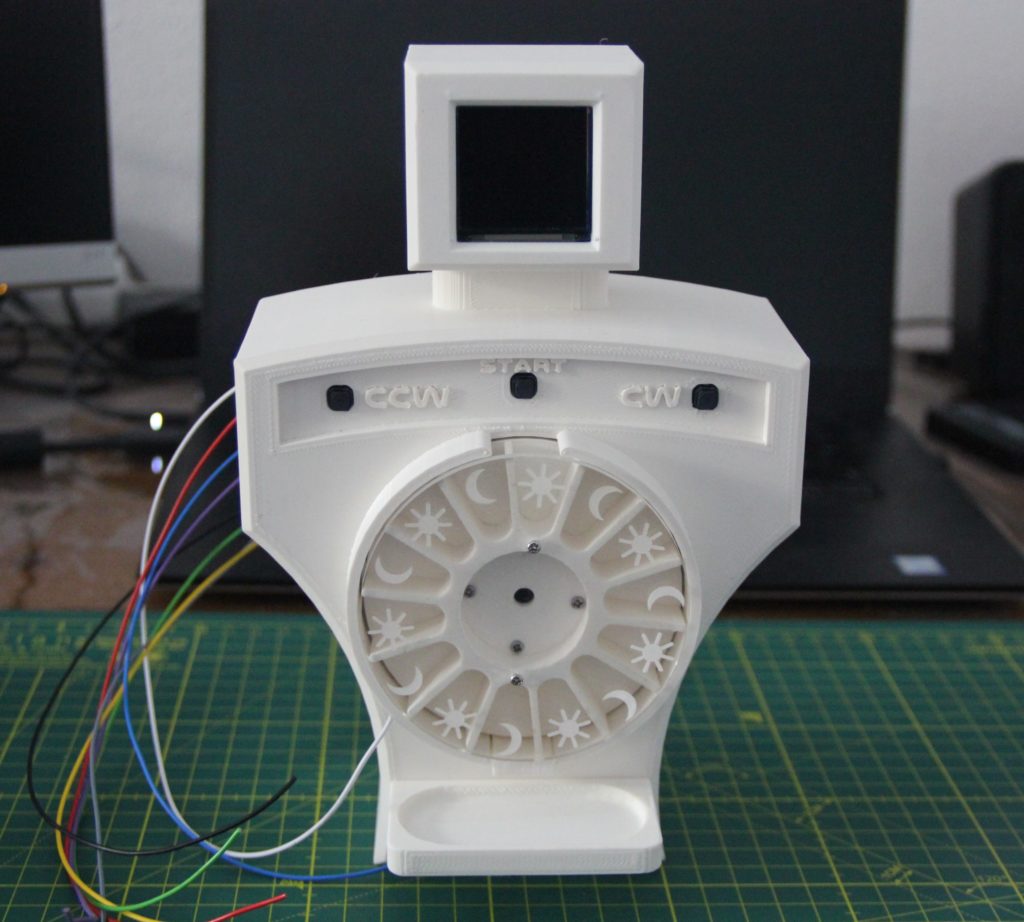
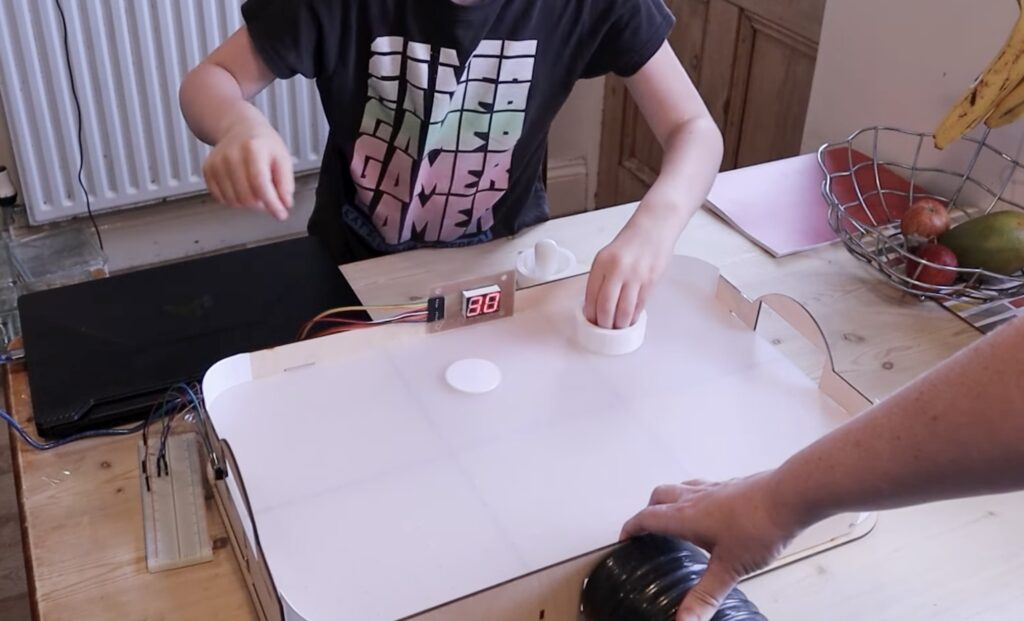
    The Love Machine was originally a gum ball dispenser that Kakapo bought online for less than £100, replacing its 20p coin-operated mechanism with one they designed in Inkscape and laser-cut themselves. This involved several stacked-up pieces sandwiched together, plus a retractable gear wheel attached to a stepper motor. With lots of fiddly parts to connect up, Will and India realised they could simplify access by removing the vending machine’s base and upending it. They boosted its power using a voltage converter but tried not to over-egg things and cause jams that could damage the mechanical cogs. A stirrer used to push gum balls towards the dispensing slot was not needed; removing this made things work more reliably. They also used brass inserts pushed into the acrylic sheet, instead of nuts, reducing “the number of hands/fingers/things to hold simultaneously and [making] assembly and disassembly quicker and easier.”

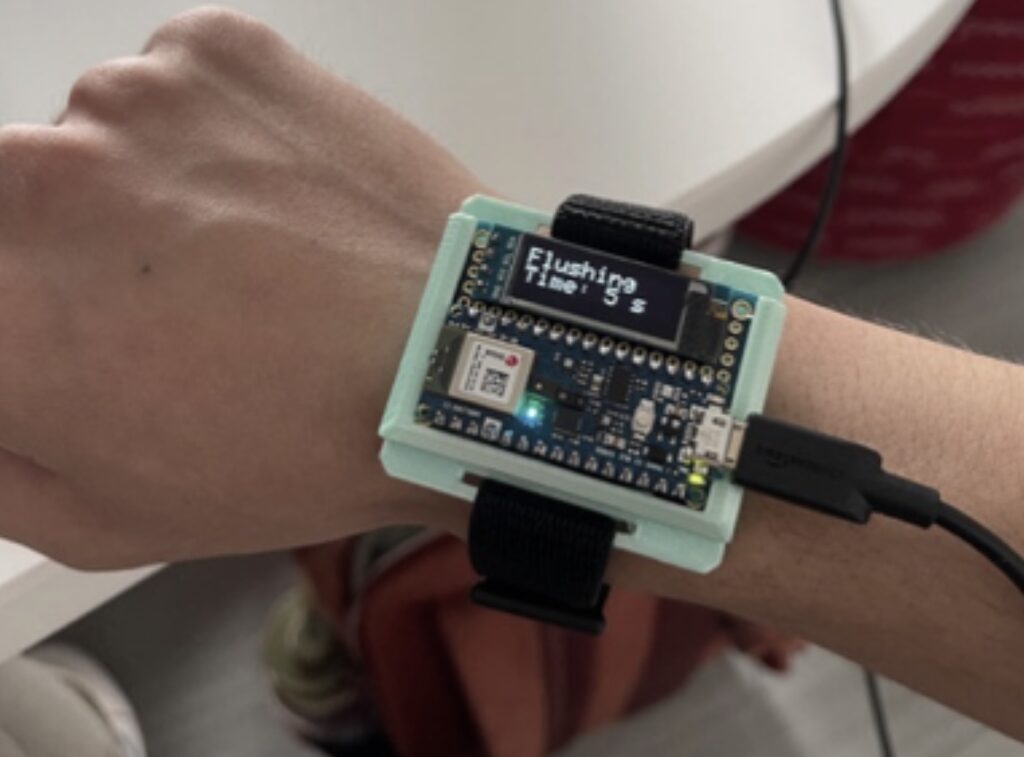
    Pimoroni’s ‘phew’ web server provides an access point to the software and allows the team to control access and connect the ChatGPT Love Machine to Wi-Fi via their phones. The Love Machine is controlled using a web socket including, on the client side, the ‘micropython_async_websocket_client’ library for which WSS (Secure WebSocket) support was so recent that its code hadn’t yet been merged into the main library. Using the AWS API gateway keeps running costs down as there’s no need to have a server instance constantly handling requests.

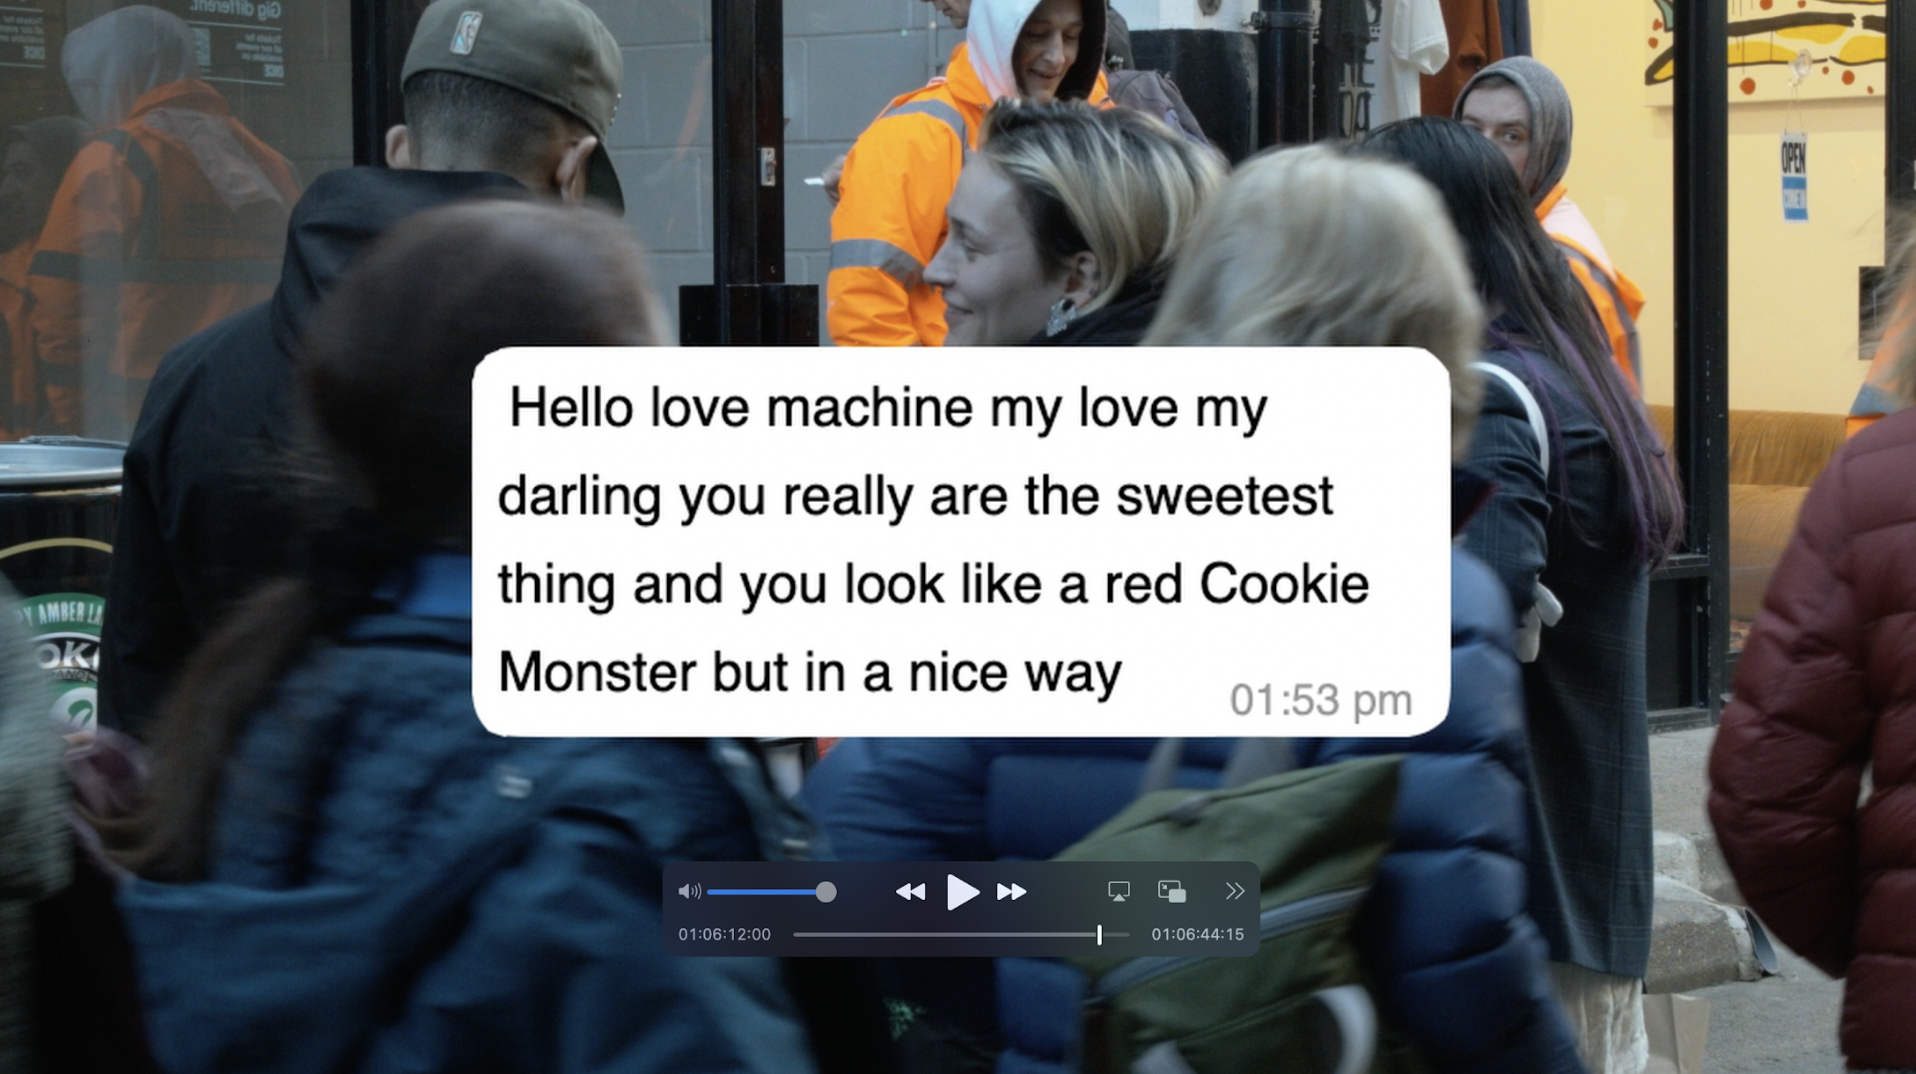
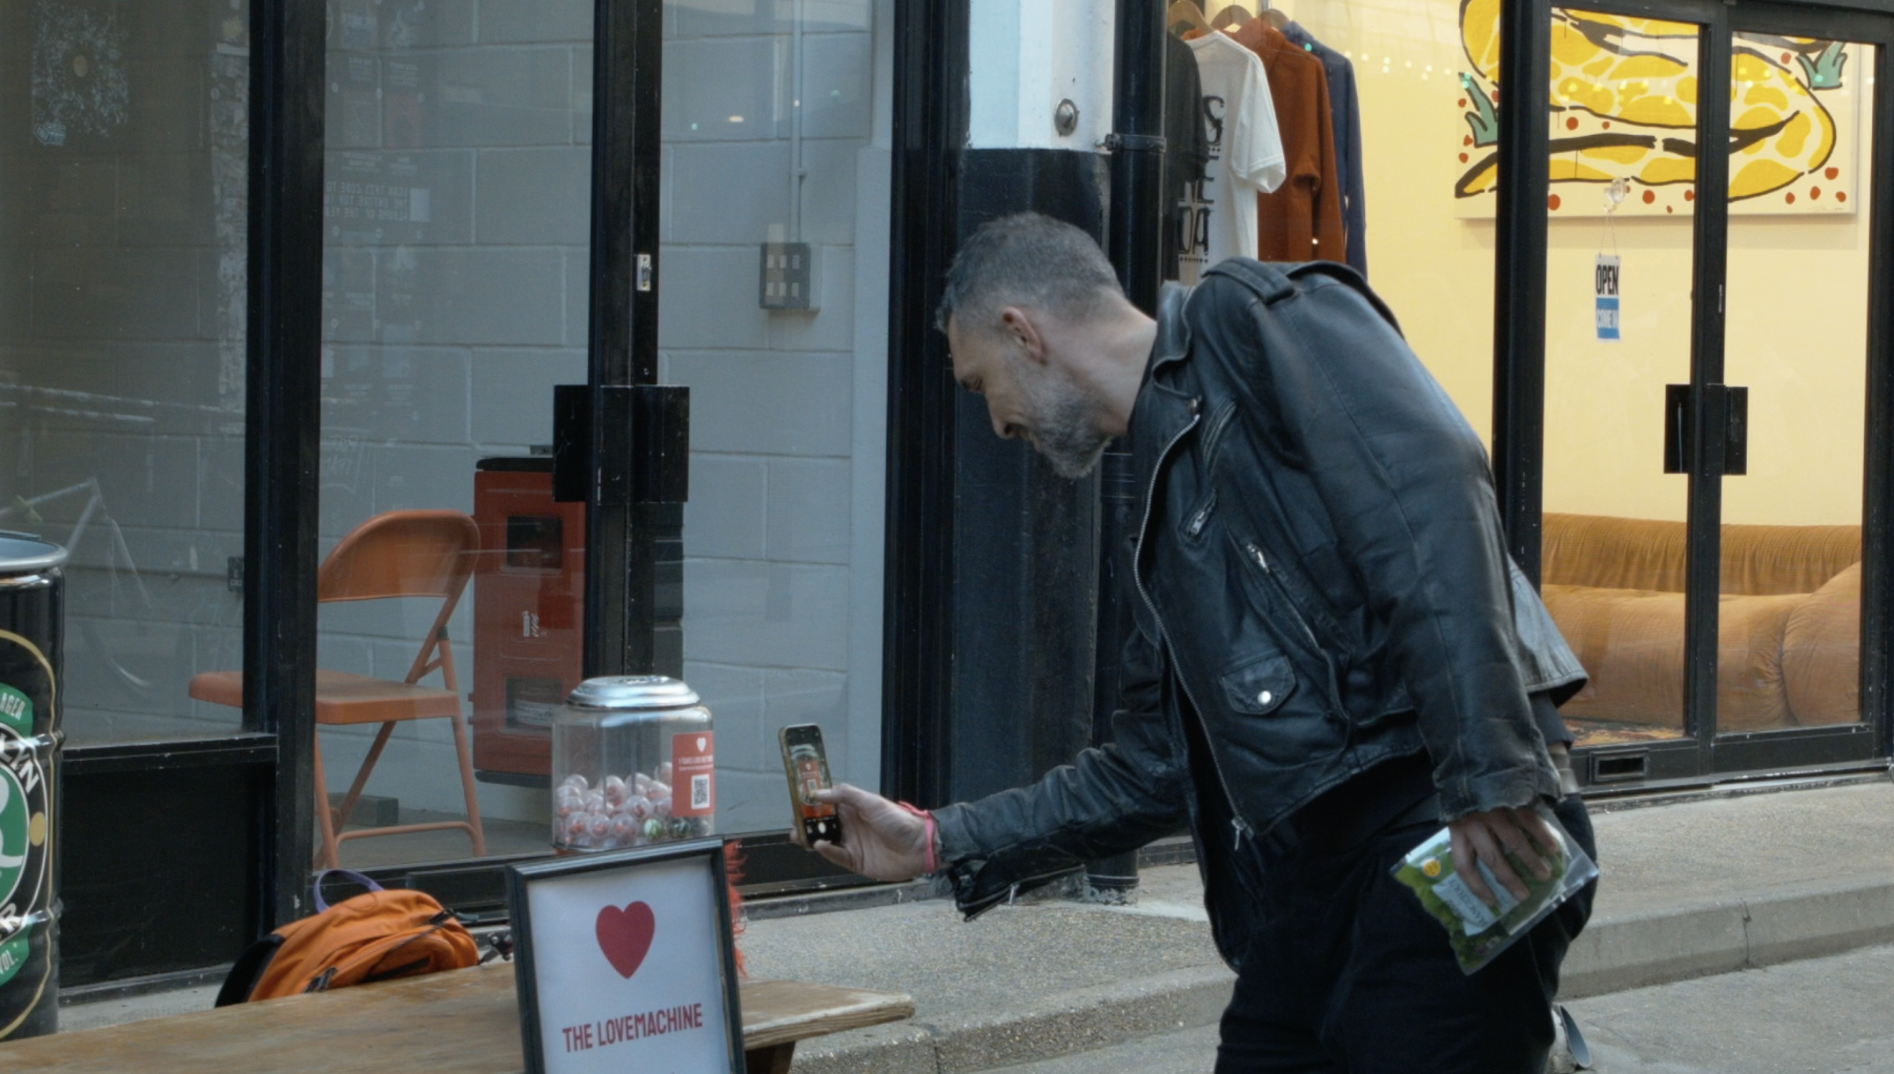
    This technology is hidden behind the Love Machine’s greeting board which tells passers-by how to interact. Users send WhatsApp messages to the compliment machine, configured using Twilio, and ChatGPT “provides the conversation and judges whether people are sending compliments,” says Will.

    With a company named after David Attenborough’s favourite breed of parrot, it was important to the Kakapo team that the build was fast to complete and fun, making it an ideal project that would catch people’s imagination and then discover that they could create similar ones.

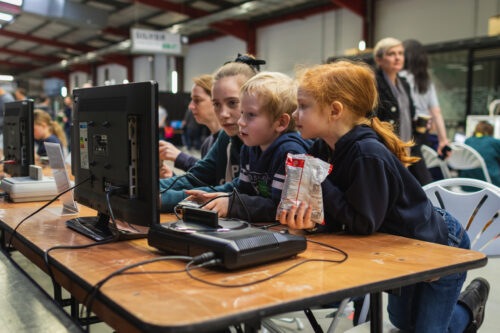
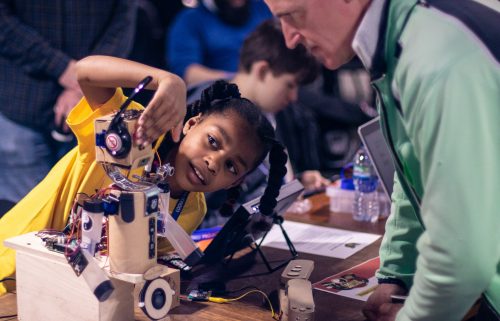
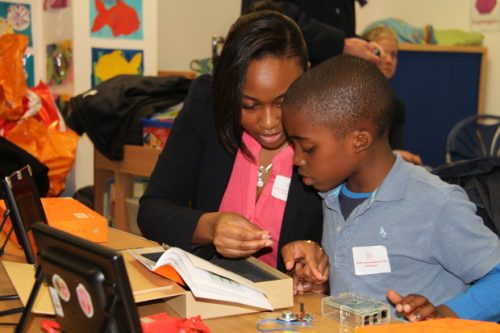
    “We think getting people to have a go with tech when they’re young is really important! Making things can be very rewarding and is the ideal career for some people. They are also diversity advocates – opening up the chance to have a go can help people who didn’t realise ‘someone like me can do this’.”

  • Introducing Code Clubs in eastern India: 32,000 more young digital makers

    Introducing Code Clubs in eastern India: 32,000 more young digital makers

    Reading Time: 5 minutes

    At the Raspberry Pi Foundation, our mission is to enable young people to realise their full potential through the power of computing and digital technologies. One way we achieve this is through supporting a global network of school-based Code Clubs for young people, in partnership with organisations that share our mission.

    For the past couple of years we have been working with Mo School Abhiyan, a citizen–government partnership that aims to help people to connect, collaborate, and contribute to revamping the government schools and government-aided schools in the Indian state of Odisha. Together with Mo School Abhiyan we have established many more Code Clubs to increase access to computer science education, which is an important priority in Odisha.

    Learners in a computing classroom.

    We evaluate all of our projects to understand their impact, and this was no exception. We found that our training improved teachers’ skills, and we learned some valuable lessons — read on to find out more.

    Background and aims of the project

    After some successful small-scale trials with 5 and then 30 schools, our main project with Mo School Abhiyan began in August 2021. In the first phase, between August 2021 and January 2022, we aimed to train 1000 teachers from 1000 schools.

    Teachers in Code Club training in Odisha, India.

    For a number of reasons, including coronavirus-related school closures, not all teachers were able to complete their training during this phase. Therefore we revised the programme, splitting the teachers in two groups depending on how far they had progressed with their initial training. We also added more teachers, so our overall aim became to support 1075 teachers to complete their training and start running clubs in 2022.

    Our training and ongoing support for the teachers

    We trained the teachers using a hybrid approach through online courses and in-person training by our team based in India. As we went along and learned more about what worked for the teachers, we adapted the training. This included making some of the content, such as the Prepare to run a Code Club online course, more suitable for an Indian context.

    Teachers in Code Club training in Odisha, India.

    As most of the teachers were not computing specialists but more often teachers of other STEM subjects, we decided to focus the training on the basics of using Scratch programming in a Code Club.

    We continue to provide support to the teachers now that they’ve completed their training. For instance, each Friday we run ‘Coding pe Charcha’ (translating to ‘Discussion on Coding’) sessions online. In these sessions, teachers come together, get answers to their questions about Scratch, take part in codealongs, and find out on how their students can take part in our global technology showcase Coolest Projects.

    Measuring the impact of the training

    To understand the impact of our partnership with Mo School Abhiyan and learn lessons we can apply in future work, we evaluated the impact of the teacher training using a mixed-methods approach. This included surveys at the start and end of the main training programme, shorter feedback forms after some elements of the training, and follow-up surveys to understand teachers’ progress with establishing clubs. We used Likert-style questions to measure impact quantitatively, and free-text questions for teachers to provide qualitative feedback.

    Teachers in Code Club training in Odisha, India.

    One key lesson early on was that the teachers were using email infrequently. We adapted by setting up Whatsapp groups to keep in touch with them and send out the evaluation surveys.

    Gathering feedback from teachers

    Supported by our team in India, teachers progressed well through the training, with nine out of every ten teachers completing each element of the training.

    Teachers’ feedback about the training was positive. The teachers who filled in the feedback survey reported increases in knowledge of coding concepts that were statistically significant. Following the training, nine out of every ten teachers agreed that they felt confident to teach children about coding. They appeared to particularly value the in-person training and the approach taken to supporting them: eight out of every ten teachers rated the trainer as “extremely engaging”.

    Teachers in Code Club training in Odisha, India.

    The teachers’ feedback helped us identify possible future improvements. Some teachers indicated they would have liked more training with opportunities to practise their skills. We also learned how important it is that we tailor Code Club to suit the equipment and internet connectivity available in schools, and that we take into account that Code Clubs need to fit with school timetables and teachers’ other commitments. This feedback will inform our ongoing work.

    The project’s impact for young people

    In our follow-up surveys, 443 teachers have confirmed they have already started running Code Club sessions, with an estimated reach to at least 32,000 young people. And this reach has the potential to be even greater, as through our partnership with Mo School Abhiyan, teachers have registered more than 950 Code Clubs to date.

    An educator helps two young people at a computer.

    Supported by the teachers we’ve trained, each of the young people attending these Code Clubs will get the opportunity to learn to code and create with technology through our digital making projects. The projects enable young people to be creative and to share their creations with each other. Our team in India has started visiting Code Clubs to better understand how the clubs are benefiting young people.

    What’s next for our work in India

    The experience we’ve gained through the partnership with Mo School Abhiyan and the findings from the evaluation are helping to inform our growing work with communities in India and around the world that lack access to computing education. 

    In India we will continue to work with state governments and agencies to build on our experience with Mo School Abhiyan. We are also exploring opportunities to develop a computing education curriculum for governments and schools in India to adopt.

    If you would like to know more about our work and impact in India, please reach out to us via india@raspberrypi.org.

    Website: LINK

  • This beautiful lamp shows the moon’s phases from your nightstand

    This beautiful lamp shows the moon’s phases from your nightstand

    Reading Time: 2 minutes

    Early astronomers used observations on the moon’s phases to deduce the spherical nature of celestial objects and eventually to develop the heliocentric model that we all know and love today. Astrologers saw deep meaning in the phases of the moon and used that to create an entire mythos. The moon and its phases are important to human history and society, so why not celebrate them with this lovely lamp that showcases them?

    At first glance, this looks like the kind of moon lamp that has been very popular in recent years. Such lamps are common 3D printing projects, because it is possible to use real topographic data to create a 3D lithophane that makes the terrain visible. A lithophane is a piece of artwork made using a thin, translucent sheet of varying thickness. When backlit, the thicker areas look darker and the thinner areas look lighter. Like the popular moon lamps, this project starts with a 3D-printed lithophane of the moon. With a light source inside, it looks like an accurate lunar model.

    But Payasa and Selina, two high school students in an engineering class, took things a step further by adding an internal rotating shade. That sits between the light source (an LED bulb) and the inner surface of the moon lithophane, creating a shadow that results in an effect similar to the moon going through its phases. An Arduino Nano board controls a small stepper motor that rotates the shade. The user can set the speed of the motor, pushing the moon through its phases as fast as they like.

    [youtube https://www.youtube.com/watch?v=Ul4Rba9aMlY?feature=oembed&w=500&h=281]

    The post This beautiful lamp shows the moon’s phases from your nightstand appeared first on Arduino Blog.

    Website: LINK

  • Reliving elementary school with a robotic recorder

    Reliving elementary school with a robotic recorder

    Reading Time: 2 minutes

    The recorder is a type of flute that is very popular in elementary schools because the instrument is so simple and inexpensive. If you were born in the last four decades and grew up in a western country, then there is a very good chance that you were required to learn how to play some basic melodies on a recorder. But like all instruments, the recorder is difficult to play well. So Luis Marx built a robotic recorder that could do the tricky parts.

    Marx still has to blow into the mouthpiece to play this robotic recorder, but it takes care of the rest. A standard recorder has eight holes: seven finger holes on top and one thumb hole on bottom. The player’s spare thumb and finger help them stabilize the instrument. This contraption uses eight solenoids to close or open the holes according a pre-programmed sequence. It doesn’t appear that Marx integrated MIDI capability, but that would make it much easier to play new songs.

    The current implementation has the sequence of notes programmed into an Arduino sketch. That sketch runs on an Arduino Nano board, which controls the solenoids through eight MOSFETs. Power comes from a 650mAh LiPo battery and everything attaches to the recorder via a 3D-printed frame. As you can hear in the video, this works quite well. Foam earplugs on the solenoid rams ensure an airtight seal on the finger holes, resulting in clean sound as long as Marx’s blowing technique is good.

    [youtube https://www.youtube.com/watch?v=-AKAh1zPo5k?feature=oembed&w=500&h=281]

    The post Reliving elementary school with a robotic recorder appeared first on Arduino Blog.

    Website: LINK

  • Upgrade your sewing machine for CNC embroidery

    Upgrade your sewing machine for CNC embroidery

    Reading Time: 2 minutes

    With a CNC (computer numerical control) embroidery machine, you can sew any custom patterns you want: text, logos, or goofy pictures. But commercial CNC embroidery equipment is expensive and consumer versions often leave a lot to be desired, which is why you might want to check out this write-up by SpaceForOne that explains how to upgrade a regular sewing machine for personalized CNC embroidery.

    For this to work, the machine needs to be able to move an embroidery hoop in two axes on a plane perpendicular to the sewing needle. To do that, SpaceForOne used hardware similar to what you’d see on a 3D printer. The structure is aluminum extrusion and the axes ride on linear rails. Stepper motors move the axes and an Arduino Uno board controls those using a GRBL-compatible CNC shield that accepts standard G-code created in whatever software the user prefers.

    You could simply start the G-code file while running the machine, but it would be really hard to avoid snags or putting lines where travel moves should be. That’s why SpaceForOne also interfaced with the sewing machine. The CNC shield controls the machine’s motor, while an optical sensor monitors the drive shaft speed and a break beam sensor detects when the needle is in the top position. Those let the Arduino control the operation of the sewing machine according to basic G-code commands.

    There are many software options, but SpaceForOne used the InkStitch plugin for Inkscape. With that, the user can easily turn text or an image into G-code.

    [youtube https://www.youtube.com/watch?v=rIG09RFPYDc?feature=oembed&w=500&h=281]

    The post Upgrade your sewing machine for CNC embroidery appeared first on Arduino Blog.

    Website: LINK

  • Meet our next 3 favorite Project Hub entries!

    Meet our next 3 favorite Project Hub entries!

    Reading Time: 3 minutes

    The “Arduino Project of the Month” competition continues to bring out the best in our community! We are happy to highlight inventive projects and creative solutions, as well as the generous users who share everything they’ve learned along the way. So let’s hear it for the three entries selected for the month of March! 

    3. Add an LCD display to your Digitech Brian May pedal

    Adding an LCD display and controller to your Brian May pedal makes it easy to select and always know what tone you are on: no more guessing, and no more DIY labels! This project leverages the Arduino Uno Rev3, Arduino IDE 1.8, and minimal additional components to make your life as a musician easier than ever. Rock on!

    2. Learn about trajectories and angles with Nerf darts

    When your son believes you can do anything… you turn to the helpful Arduino community to create, well, anything. In this case, an experimentation station based on the Arduino Nano and coded via Arduino IDE, ready to launch Nerf darts at different angles to observe their effect on trajectories. Adding a physical control panel with buttons and pressure gauge definitely won this dad extra points, and allowed him to learn “way more than we could have imagined going from idea to prototype to final build.” 

    1. Build a European roulette game

    Why gamble when you can have a cool hobby like making? Constructing a roulette with an Arduino Nano and 37 LEDs that simulates the movement of the ball seems like a lot of fun! It’s also a good way to find out more about Charlieplexing (AKA tristate multiplexing) and other interesting techniques that can be useful when working with LEDs — which is one of the reasons why this was our top pick for March. 

    For your chance to be selected for a $100, $300 or even $500 gift card to spend on the Arduino Store, submit your best project on Project Hub! We will be awarding three new entries every month, as detailed in the complete terms and conditions. Good luck! 

    The post Meet our next 3 favorite Project Hub entries! appeared first on Arduino Blog.

    Website: LINK

  • Hello World #21 out now: Focus on primary computing education

    Hello World #21 out now: Focus on primary computing education

    Reading Time: 2 minutes

    How do we best prepare young children for a world filled with digital technology? This is the question the writers in our newest issue of Hello World respond to with inspiration and ideas for computing education in primary school.

    Cover of Hello World issue 21.

    It is vital that young children gain good digital literacy skills and understanding of computing concepts, which they can then build on as they grow up. Digital technology is here to stay, and as Sethi De Clercq points out in his article, we need to prepare our youngest learners for circumstances and jobs that don’t yet exist.

    Primary computing education: Inspiration and ideas

    Issue 21 of Hello World covers a big range of topics in the theme of primary computing education, including:

    • Cross-curricular project ideas to keep young learners engaged
    • Perfecting typing skills in the primary school classroom
    • Using picture books to introduce programming concepts to children
    • Toolkits for new and experienced computing primary teachers, by Neil Rickus and Catherine Archer
    • Explorations of different approaches to improving diversity in computing and instilling a sense of belonging from the very start of a child’s educational journey, by Chris Lovell and Peter Marshman

    The issue also has useful news and updates about our work: we share insights from our primary-specialist learning managers, tell you a bit about the research presented at our ongoing primary education seminar series, and include some relevant lesson plans from The Computing Curriculum.

    A child at a laptop in a classroom in rural Kenya.

    As always, you’ll find many other articles to support and inspire you in your computing teaching in this new issue. Topics include programming with dyslexia, exploring filter bubbles with your learners to teach them about data science, and using metaphors, similes, and analogies to help your learners understand abstract concepts.

    What do you think?

    This issue of Hello World focusses on primary computing education because readers like you told us in the annual readers’ survey that they’d like more articles for primary teachers.

    We love to hear your ideas about what we can do to continue making Hello World interesting and relevant for you. So please get in touch on Twitter with your thoughts and suggestions.

    Website: LINK

  • 24850 young people’s programs ran in space for Astro Pi 2022/23

    24850 young people’s programs ran in space for Astro Pi 2022/23

    Reading Time: 4 minutes

    Over 15,000 teams of young people from across Europe had their computer programs run on board the International Space Station (ISS) this month as part of this year’s European Astro Pi Challenge.

    Logo of the European Astro Pi Challenge.

    Astro Pi is run in collaboration by us and ESA Education, and offers two ways to get involved: Mission Zero and Mission Space Lab.

    Mission Zero: Images of Earth’s fauna and flora in space 

    Mission Zero is the Astro Pi beginners’ activity. To take part, young people spend an hour writing a short Python program for the Astro Pi computers on the International Space Station (ISS). This year we invited them to create an 8×8 pixel image or animation on the theme of fauna and flora, which their program showed on an Astro Pi LED matrix display for 30 seconds.

    This year, 23,605 young people’s Mission Zero programs ran on the ISS. We need to check all the programs before we can send them to space and that means we got to see all the images and animations that the young people created. Their creativity was absolutely incredible! Here are some inspiring examples:

    Pixel images from Mission Zero participants.

    Mission Space Lab: Young people’s experiments on the ISS

    Mission Space Lab runs over eight months and empowers teams of young people to design real science experiments on the ISS, executed by Python programs they write themselves. Teams choose between two themes: ‘Life in space’ and ‘Life on Earth’.

    This year, the Mission Space Lab programs of 1245 young people in 294 teams from 21 countries passed our rigorous judging and testing process. These programs were awarded flight status and sent to the Astro Pis on board the ISS, where they captured data for the teams to analyse back down on Earth.

    Mission Space Lab teams this year decided to design experiments such as analysing cloud formations to identify where storms commonly occur, looking at ocean colour as a measure of depth, and analysing freshwater systems and the surrounding areas they supply water to.

    The Earth’s surface from the perspective of the International Space Station.
    A selection of images taken by the Astro Pis of the Earth’s surface, including mountains, deserts, Aotearoa New Zealand south island, and lakes

    Teams will be receiving their experiment data later this week, and will be analysing and interpreting it over the next few weeks. For example, the team analysing freshwater systems want to investigate how these systems may be affected by climate change. What their Mission Space Lab program has recorded while running on the Astro Pis is a unique data set that the team can compare against other scientific data.

    The challenges of running programs in space

    For the ‘Life on Earth’ category of Mission Space Lab experiments this year, the Astro Pis were positioned in a different place to previous years: in the Window Observational Research Facility (WORF). Therefore the Astro Pis could take photos with a wider view. Combined with the High Quality Camera of the upgraded Astro Pi computers we sent to the ISS in 2021, this means that the teams got amazing-quality photos of the Earth’s surface.

    The Astro Pi computers inside the International Space Station.
    The two Astro Pis positioned in an observation window on the ISS

    Once the experiments for ‘Life on Earth’ were complete, the astronauts moved the Astro Pis back to the Columbus module and replaced their SD cards, ready for capturing the data for the ‘Life in Space’ experiments.

    Running programs in an environment as unique as the ISS, where all hardware and software is put to the test, brings many complexities and challenges. Everything that happens on the ISS has to be scheduled well in advance, and astronauts have a strict itinerary to follow to keep the ISS running smoothly.

    The earth’s surface from the perspective of the International Space Station, with a large robotic arm in view.
    The Canadarm in view on the ISS, photographed by an Astro Pi computer

    As usual, this year’s experiments met with their fair share of challenges. One initial challenge the Astro Pis had this year was that the Canadarm, a robotic arm on the outside of the ISS, was in operation during some of the ‘Life on Earth’ experiments. Although it’s fascinating to see part of the ISS in-shot, it also slightly obscured some of the photos.

    Another challenge was that window shutters were scheduled to close during some of the experiments, which meant we had to switch around the schedule for Mission Space Lab programs to run so that all of the experiments aiming to capture photos could do so.

    What’s next for Astro Pi?

    Well done to all the young people who’ve taken part in the European Astro Pi Challenge this year.

    • If you’ve mentored young people in Mission Zero, then we will share their unique participation certificates with you very soon.
    • If you are taking part in Mission Space Lab, then we wish you the best of luck with your analysis and final reports. We are excited to read about your findings.

    If you’d like to hear about upcoming Astro Pi Challenges, sign up to the newsletter at astro-pi.org.

    Website: LINK

  • Electronic game of Connect Four played on an 8×8 LED matrix

    Electronic game of Connect Four played on an 8×8 LED matrix

    Reading Time: 2 minutes

    The childhood classic tabletop game of Connect Four entails dropping either a red or yellow disc into one of several columns in a grid with the hope of lining up four in a row. And even though the game has existed digitally for a while now, it is mostly played on LCD screens with fancier graphics and AIs against which the player competes. Wanting to push this paradigm further, Mirko Pavleski built a mini tabletop arcade cabinet that uses an Arduino Nano and an LED matrix instead to run the game.

    In order to display the current grid to the player(s), Pavleski purchased an 8×8 WS2812B individually addressable LED matrix that gets powered by the Arduino Nano‘s 5V regulator. Because the game can either be played against another human or an AI opponent, the cabinet contains three buttons for selecting the chip’s drop location and a buzzer to deliver audible feedback when an event occurs. The entire device was constructed from a few 5mm PVC boards lined with colored paper for an old-fashioned aesthetic.

    Watching the microcontroller AI opponent play Connect Four in real-time is quite impressive, owing to the relatively small computing resources of the Arduino Nano’s ATmega328 MCU. To see it in action, you can watch Pavleski’s video below or check out his project write-up on Hackster.io.

    [youtube https://www.youtube.com/watch?v=4c123jpPZYk?feature=oembed&w=500&h=281]

    The post Electronic game of Connect Four played on an 8×8 LED matrix appeared first on Arduino Blog.

    Website: LINK

  • This stretchable wearable sensor provides accurate knee tracking

    This stretchable wearable sensor provides accurate knee tracking

    Reading Time: 2 minutes

    Health tracking is a vital component to recovering after an injury or simply trying to improve one’s own fitness, and although accelerometer-based devices are decent at tracking general activity, they fail to accurately monitor specific areas of the body such as joint movement. This is why a team of researchers from the Singapore University of Technology and Design (SUTD) along with members of SingHealth Polyclinics designed a knitted wearable sensor for use on the knee.

    Based on conductive fabric technology, the device utilizes a stitched pattern of conductive threads that change their resistance depending on the extent to which they are stretched. Once added to the garment, the team created a small pocket for storing an Arduino Nano 33 BLE Sense board whose job it is to continuously measure the voltage in the fabric via its ADC and output the results over Bluetooth® Low Energy with a response time of a mere 90 milliseconds.

    Through their experiments of making subjects walk, jog, and climb stairs, the researchers were able to compare the electrical signals to actual joint movement in order to correlate the two and calibrate the sensor to translate voltages into degrees of motion. Because of the device having a resolution of just 0.12 degrees, it showed to be a promising candidate as both an effective activity tracker and a comfortable garment that can be worn for extended periods of time.

    [youtube https://www.youtube.com/watch?v=KPlSPtDVs2k?feature=oembed&w=500&h=281]

    More details on the knitted smart knee brace can be found here on the SUTD website and in the team’s paper.

    The post This stretchable wearable sensor provides accurate knee tracking appeared first on Arduino Blog.

    Website: LINK

  • This robot ensures power tool batteries are always topped off

    This robot ensures power tool batteries are always topped off

    Reading Time: 2 minutes

    If you’re anything like every other human being on the planet, you have several cordless power tools and their batteries are all dead. You never remember to put the batteries on their chargers until you need the tool for a job on realize that it won’t turn on. Discipline is difficult, so instead Lance of the Sparks and Code YouTube channel built a robot to charge his power tool batteries.

    This robot does still require some attention: Lance has to place a stack of batteries into the robot’s hopper to get the process started. But after that, the robot will set each battery in the charger, wait until it is full of juice, move the battery out of the way, then repeat with the next battery. The batteries all have to be identical (or at least share a charger), but it is a good idea to keep all of your cordless power tools within the same ecosystem anyway.

    For this to work, the robot needs to know the status of each battery. While the batteries have internal electronics, interfacing with those would have taken some reverse engineering skill. Instead, Lance chose a more practical solution: using a light sensor to determine when a battery’s “charged” status indicator lights up. An Arduino monitors that sensor and also controls the robot’s motors through a CNC shield. There are two motors: one to push the sled that grabs batteries from the hopper and another that lowers the charger down onto the current battery, which is necessary because the batteries vary in height.

    Now Lance has a convenient way to charge up all of his power tool batteries — if he can remember to place them in the hopper.

    [youtube https://www.youtube.com/watch?v=G3ZsTozCEVo?feature=oembed&w=500&h=281]

    The post This robot ensures power tool batteries are always topped off appeared first on Arduino Blog.

    Website: LINK

  • Analyze the ambient sound around you with this Arduino setup

    Analyze the ambient sound around you with this Arduino setup

    Reading Time: 2 minutes

    You’ve probably heard that there isn’t any sound in space. That’s because sound is vibration traveling through a medium, like air or wood, and space is a mostly empty vacuum. The frequency of the vibration in a medium is the pitch of the sound and the amplitude is the volume. If you want a way to visualize the frequencies of the sounds around you, Vaclav Krejci (upir on YouTube) designed an Arduino-based audio analyzer that you can build.

    Like the visualizer of the equalizer on an old stereo receiver, this displays the levels of several frequency bands within the audio it monitors. In this case, that audio is the sound around the device collected by an onboard microphone. It shows the levels for seven different frequencies: 63Hz, 160Hz, 400Hz, 1kHz, 2.5kHz, 6.3kHz, and 16kHz. Most devices like this use LEDs to show the levels, but this shows them on a OLED screen instead and that allows for more flexibility.

    That OLED screen connects to an Arduino Uno Rev3 board, which uses a pair of DFRobot modules to work with the audio. The first is an analog mic board that performs amplification to boost the audio signal up to something usable. The second is the AudioAnalyzer board that breaks that audio signal down into seven frequencies. Krejci’s code is straightforward and simply displays seven bar graphs corresponding to the amplitude numbers provided by the AudioAnalyzer board.

    Use this in space and it should show all zeroes. But use it here on Earth and it will help you analyze the sound around you.

    [youtube https://www.youtube.com/watch?v=dCofwhHcW7Y?feature=oembed&w=500&h=281]

    The post Analyze the ambient sound around you with this Arduino setup appeared first on Arduino Blog.

    Website: LINK

  • Brew your own beer in The MagPi magazine issue #130

    Brew your own beer in The MagPi magazine issue #130

    Reading Time: 3 minutes

    Step back in time with MCM/70

    Learning APL with an MCM/70

    We love Michael Gardi’s impressive reproduction of the classic Canadian-built MCM/70 personal computer. Crafted with meticulous detail, Michael used a Raspberry Pi 4 to emulate the MCM/70’s software and created custom keycaps for authenticity. Not just for show, Michael is using the machine to learn APL (A Programming Language) developed in the 1960s.

    Brew your own beer with a Tilt hydrometer and Raspberry Pi

    Raspberry Pi Micro Brewery

    Brewing beer, a centuries-old practice, is brought bang up-to-date with Raspberry Pi. All you need is a Wi-Fi and Bluetooth-enabled Raspberry Pi, a Tilt hydrometer for accurate measurements, a brewing bucket, and your usual brewing tools and ingredients.

    Create your own bedtime stories with ChatGPT and Stable Diffusion

    Automatically create bedtime stories with AI

    Create a magical bedtime storyteller using artificial intelligence with ChatGPT for narrative and Stable Diffusion for illustrations. Raspberry Pi writes stories while showcasing AI-generated pictures, with characters and settings decided by listeners. This project also provides insights on using ChatGPT and Stable Diffusion APIs, Python modules, and effectively storing and replaying stories.

    Learn Linux and the command line in The MagPi magazine issue #130

    Learn Linux and the command line

    Mastering Linux and its Command Line Interface (CLI) is an essential skill and Raspberry Pi is the ideal platform. In this feature, we will introduce you to the command line interface and the basic commands you need to truly take control of your computer.

    The MagPi community events calendar

    Events Calendar

    Raspberry Pi has a vibrant maker community and there are events taking place around the world. Meet fellow enthusiasts and share your knowledge, network, and inspire each other. Our Raspberry Pi Events calendar and map let you know where to go.

    The MagPi #130 out NOW!

    You can grab the brand-new issue right now from Tesco, Sainsbury’s, Asda, WHSmith, and other newsagents, including the Raspberry Pi Store in Cambridge. You can also get it via our app on Android or iOS.

    You can also subscribe to the print version of The MagPi. Not only do we deliver it globally, but people who sign up to the twelve-month print subscription get a FREE Raspberry Pi Zero Pico W!

    A free PDF of The MagPi magazine will be available in three weeks‘ time. Sign up for our newsletter to be notified when our free digital edition is available.

  • Sort up to 280 coins per minute with this 3D-printed machine

    Sort up to 280 coins per minute with this 3D-printed machine

    Reading Time: 2 minutes

    Counting one’s coins by hand can take a very long time, and for those wanting to avoid physically going to the bank or paying a fee at a commercial machine, what options remain? The YouTuber known as Fraens has created a full 3D-printed coin sorter and counter that combines technology with a clever design to accomplish this task automatically.

    The bulk of the device is comprised of the drum which has many round slots placed around its inner circumference that coins can travel within. It is set at an angle that matches the stationary underside, and this is necessary because the coins should only fall through when the drum reaches the top half of its cycle. Since each coin denomination is slightly bigger or smaller, the series of rectangular slots have varying sizes to separate the denominations, and every drop is picked up by an infrared distance sensor when it detects a change in light levels caused by the passing coin.

    A geared motor is responsible for rotating the drum, and it in turn is powered by an L298N H-bridge driver which is controlled by an Arduino Uno Rev3. The Uno also reads the states of the infrared sensors to count the quantities of each coin and displays the result using an LCD positioned at the front of the device.

    To see more about how Fraens’ coin sorter works, you can watch his video below!

    [youtube https://www.youtube.com/watch?v=sQj0ageWvSU?feature=oembed&w=500&h=281]

    The post Sort up to 280 coins per minute with this 3D-printed machine appeared first on Arduino Blog.

    Website: LINK

  • This cheap robot arm can follow recorded movements

    This cheap robot arm can follow recorded movements

    Reading Time: 2 minutes

    There are many ways to control a robot arm, with the simplest being a sequential list of rotation commands for the motors. But that method is very inefficient when the robot needs to do anything complex in the real world. A more streamlined technique lets the user move the arm as necessary, which sets a “recording” of the movements that the robot can then repeat. We tend to see that in high-end robots, but Mr Innovative built a robot arm with recording capability using very affordable materials.

    This uses an input controller that is roughly the same size and shape as the robot arm, so Mr Innovative can manipulate that controller and the arm will mimic the movements like a puppet. The robot arm will also record those movements so it can repeat them later without any direct oversight. The video shows this in action with a demonstration in which the robot picks up small cylindrical objects and places them at the top of chute, where they slide back down for the process to continue indefinitely.

    An Arduino Nano board powers the servo motors through a custom driver board to actuate the robot arm. It takes input from the controller, which has rotary potentiometers in the joints where the robot arm has servo motors. Therefore, the values from the potentiometers match the desired angles of the servo motors. The custom driver board has two buttons: one to activate the gripper and one to record to movements. When Mr Innovative holds down the second button, the Arduino will store all the movement commands so that it can repeat them.  

    [youtube https://www.youtube.com/watch?v=F5U4b3zkau8?feature=oembed&w=500&h=281]

    The post This cheap robot arm can follow recorded movements appeared first on Arduino Blog.

    Website: LINK

  • Win one of three Pico Bricks Base Kits

    Win one of three Pico Bricks Base Kits

    Reading Time: < 1 minute

    Subscribe

  • Enabling automated pipeline maintenance with edge AI

    Enabling automated pipeline maintenance with edge AI

    Reading Time: 2 minutes

    Pipelines are integral to our modern way of life, as they enable the fast transportation of water and energy between central providers and the eventual consumers of that resource. However, the presence of cracks from mechanical or corrosive stress can lead to leaks, and thus waste of product or even potentially dangerous situations. Although methods using thermal cameras or microphones exist, they’re hard to use interchangeably across different pipeline types, which is why Kutluhan Aktar instead went with a combination of mmWave radar and an ML model running on an Arduino Nicla Vision board to detect these issues before they become a real problem.

    The project was originally conceived as an arrangement of parts on a breadboard, including a Seeed Studio MR60BHA1 60GHz radar module, an ILI9341 TFT screen, an Arduino Nano for interfacing with the sensor and display, and a Nicla Vision board. From here, Kutluhan designed his own Dragonite-themed PCB, assembled the components, and began collecting training and testing data for a machine learning model by building a small PVC model, introducing various defects, and recording the differences in data from the mmWave sensor. The system is able to do this by measuring the minute variations in vibrations as liquids move around, with increased turbulence often being correlated with defects.

    After configuring a time-series impulse, a classification model was trained with the help of Edge Impulse that would use the three labels (cracked, clogged, and leakage) to see if the pipe had any damage. It was then deployed to the Nicla Vision where it achieved an accuracy of 90% on real-world data. With the aid of the screen, operators can tell the result of the classification immediately, as well as send the data to a custom web application. 

    [youtube https://www.youtube.com/watch?v=ghSaefzzEXY?feature=oembed&w=500&h=281]

    More details on the project be found here in its Edge Impulse docs page.

    The post Enabling automated pipeline maintenance with edge AI appeared first on Arduino Blog.

    Website: LINK

  • This robotic dispenser will tell you if you forget to take your pills

    This robotic dispenser will tell you if you forget to take your pills

    Reading Time: 2 minutes

    Many types of medications (such as anti-depressants like SSRIs) can have a very negative effect if they aren’t taken on a regular basis. Even taking them a few hours late can harm a person’s mood and cause physical discomfort. But remembering to take pills at the proper time can be tricky — even setting an alarm isn’t foolproof, because you can turn it off without actually taking a pill. That’s why M. Bindhammer is building a 3D-printed robotic pill dispenser that will tell people if they forget to take their medicine.

    M. Bindhammer’s design reflects his own needs: he has to take one pill in the morning and another in the evening. He suffers from bipolar disorder and missing the schedule by even a couple of hours can have consequences. To ensure that he adheres to that schedule, this robot dispenses two pills a day and will demand attention if M. Bindhammer forgets. It has 14 chambers, so M. Bindhammer can load up a full week’s worth of medication at once for convenient long-term use.

    While the project isn’t complete yet, M. Bindhammer has finished the mechanical design and worked out most of the circuitry. The 14 chambers sit around a wheel torso turned by a continuous rotation servo motor, with a second servo motor that opens a door underneath the current chamber to allow a pill to drop down. An Arduino Due board with a custom breakout shield — which also integrates a DS3231 precision RTC — controls those servos and monitors a capacitive touch sensor in the base so it knows when the user picks up a pill. The Arduino will be able to provide feedback through an OLED screen face and a speaker connected to a speech synthesis module. When the robot is done, those will let the Arduino display a warning and emit an audio reminder if M. Bindhammer doesn’t take a pill when he should.

    The post This robotic dispenser will tell you if you forget to take your pills appeared first on Arduino Blog.

    Website: LINK

  • Preparing young children for a digital world | Hello World #21

    Preparing young children for a digital world | Hello World #21

    Reading Time: 5 minutes

    How do we teach our youngest learners digital and computing skills? Hello World‘s issue 21 will focus on this question and all things primary school computing education. We’re excited to share this new issue with you on Tuesday 30 May. Today we’re giving you a taste by sharing an article from it, written by our own Sway Grantham.

    Cover of Hello World issue 21.

    How are you preparing young children for a world filled with digital technology? Technology use of our youngest learners is a hotly debated topic. From governments to parents and from learning outcomes to screen-time rules, everyone has an opinion on the ‘right’ approach. Meanwhile, many young children encounter digital technology as a part of their world at home. For example in the UK, 87 percent of 3- to 4-year-olds and 93 percent of 5- to 7-year-olds went online at home in 2023. Schools should be no different.

    A girl doing digital making on a tablet

    As educators, we have a responsibility to prepare learners for life in a digital world. We want them to understand its uses, to be aware of its risks, and to have access to the wide range of experiences unavailable without it. And we especially need to consider the children who do not encounter technology at home. Education should be a great equaliser, so we need to ensure all our youngest learners have access to the skills they need to realise their full potential.

    Exploring technology and the world

    A major aspect of early-years or kindergarten education is about learners sharing their world with each other and discovering that everyone has different experiences and does things in their own way. Using digital technology is no different.

    Allowing learners to share their experiences of using digital technology both accepts the central role of technology in our lives today and also introduces them to its broader uses in helping people to learn, talk to others, have fun, and do work. At home, many young learners may use technology to do just one of these things. Expanding their use of technology can encourage them to explore a wider range of skills and to see technology differently.

    A girl shows off a robot she has built.

    In their classroom environment, these explorations can first take place as part of the roleplay area of a classroom, where learners can use toys to show how they have seen people use technology. It may seem counterintuitive that play-based use of non-digital toys can contribute to reducing the digital divide, but if you don’t know what technology can do, how can you go about learning to use it? There is also a range of digital roleplay apps (such as the Toca Boca apps) that allow learners to recreate their experiences of real-world situations, such as visiting the hospital, a hair salon, or an office. Such apps are great tools for extending roleplay areas beyond the resources you already have.

    Another aspect of a child’s learning that technology can facilitate is their understanding of the world beyond their local community. Technology allows learners to explore the wider world and follow their interests in ways that are otherwise largely inaccessible. For example:

    • Using virtual reality apps, such as Expeditions Pro, which lets learners explore Antarctica or even the bottom of the ocean
    • Using augmented reality apps, such as Octagon Studio’s 4D+ cards, which make sea creatures and other animals pop out of learners’ screens
    • Doing a joint project with a class of children in another country, where learners blog or share ‘email’ with each other

    Each of these opportunities gives children a richer understanding of the world while they use technology in meaningful ways.

    Technology as a learning tool

    Beyond helping children to better understand our world, technology offers opportunities to be expressive and imaginative. For example, alongside your classroom art activities, how about using an app like Draw & Tell, which helps learners draw pictures and then record themselves explaining what they are drawing? Or what about using filters on photographs to create artistic portraits of themselves or their favourite toys? Digital technology should be part of the range of tools learners can access for creative play and expression, particularly where it offers opportunities that analogue tools don’t.

    Young learners at computers in a classroom.

    Using technology is also invaluable for learners who struggle with communication and language skills. When speaking is something you find challenging, it can often be intimidating to talk to others who speak much more confidently. But speaking to a tablet? A tablet only speaks as well as you do. Apps to record sounds and listen back to them are a helpful way for young children to learn about how clear their speech is and practise speech exercises. ChatterPix Kids is a great tool for this. It lets learners take a photo of an object, e.g. their favourite soft toy, and record themselves talking about it. When they play back the recording, the app makes it look like the toy is saying their words. This is a very engaging way for young learners to practise communicating.

    Technology is part of young people’s world

    No matter how we feel about the role of technology in the lives of young people, it is a part of their world. We need to ensure we are giving all learners opportunities to develop digital skills and understand the role of technology, including how people can use it for social good.

    A woman and child follow instructions to build a digital making project at South London Raspberry Jam.

    This is not just about preparing them for their computing education (although that’s definitely a bonus!) or about online safety (although this is vital — see my articles in Hello World issue 15 and issue 19 for more about the topic). It’s about their right to be active citizens in the digital world.

    So I ask again: how are you preparing young children for a digital world?

    Subscribe to the Hello World digital edition for free

    The first experiences children have with learning about computing and digital technologies are formative. That’s why primary computing education should be of interest to all educators, no matter what the age of your learners is. This issue covers for example:

    And there’s much more besides. So don’t miss out on this upcoming issue of Hello World — subscribe for free today to receive every PDF edition in your inbox on the day of publication.

    Website: LINK

  • The Whimsy Artist is a little robot that both creates and destroys art

    The Whimsy Artist is a little robot that both creates and destroys art

    Reading Time: 2 minutes

    Many people find the subjectivity of art to be frustrating, but that subjectivity is what makes art interesting. Banksy’s self-shredding art piece is a great example of this. The original painting sold at auction for $1.4 million—and then it shredded itself in front of everyone. That increased its value and the now-shredded piece, dubbed “Love Is in the Bin,” sold again at auction in 2021 for a record-breaking $23 million. In a similar vein to that infamous work, this robot destroys the artwork that it produces.

    “The Whimsy Artist” is a small robot rover, like the kind you’d get in an educational STEM kit. It is the type of robot that most people start with, because it is very simple. It only needs two DC motors to drive around and it can detect obstacles using an ultrasonic distance sensor and has two infrared sensors for line-following. An Arduino Uno Rev3 board controls the operation of the two motors according to the information it receives from the sensors.

    That decision-making is where the artistic elements come into play. When it doesn’t detect any obstacles, the robot will run in “creative” mode. It opens a chute on a dispenser to drop a trail of fine sand while it moves in a pleasant spiral pattern. But if it sees an obstacle with the ultrasonic sensor, it gets angry. In that mode, it reverses direction and uses the IR sensors to follow the line it just created while deploying a brush to destroy its own sandy artwork.

    [youtube https://www.youtube.com/watch?v=wni_M91ZCLI?start=1&feature=oembed&w=500&h=281]

    The post The Whimsy Artist is a little robot that both creates and destroys art appeared first on Arduino Blog.

    Website: LINK

  • These projects from CMU incorporate the Arduino Nano 33 BLE Sense in clever ways

    These projects from CMU incorporate the Arduino Nano 33 BLE Sense in clever ways

    Reading Time: 4 minutes

    With an array of onboard sensors, Bluetooth® Low Energy connectivity, and the ability to perform edge AI tasks thanks to its nRF52840 SoC, the Arduino Nano 33 BLE Sense is a great choice for a wide variety of embedded applications. Further demonstrating this point, a group of students from the Introduction to Embedded Deep Learning course at Carnegie Mellon University have published the culmination of their studies through 10 excellent projects that each use the Tiny Machine Learning Kit and Edge Impulse ML platform.

    Wrist-based human activity recognition

    Traditional human activity tracking has relied on the use of smartwatches and phones to recognize certain exercises based on IMU data. However, few have achieved both continuous and low-power operation, which is why Omkar Savkur, Nicholas Toldalagi, and Kevin Xie explored training an embedded model on combined accelerometer and microphone data to distinguish between handwashing, brushing one’s teeth, and idling. Their project continuously runs inferencing on incoming data and then displays the action on both a screen and via two LEDs. 

    Categorizing trash with sound

    In some circumstances, such as smart cities or home recycling, knowing what types of materials are being thrown away can provide a valuable datapoint for waste management systems. Students Jacky Wang and Gordonson Yan created their project, called SBTrashCat, to recognize trash types by the sounds they make when being thrown into a bin. Currently, the model can three different kinds, along with background noise and human voices to eliminate false positives.

    Distributed edge machine learning

    The abundance of Internet of Things (IoT) devices has meant an explosion of computational power and the amount of data needing to be processed before it can become useful. Because a single low-cost edge device does not possess enough power on its own for some tasks, Jong-Ik Park, Chad Taylor, and Anudeep Bolimera have designed a system where each device runs its own “slice” of an embedded model in order to make better use of available resources. 

    Predictive maintenance for electric motors

    Motors within an industrial setting require constant smooth and efficient operation in order to ensure consistent uptime, and recognizing when one is failing often necessitates manual inspection before a problem can be discovered. By taking advantage of deep learning techniques and an IMU/camera combination, Abhishek Basrithaya and Yuyang Xu developed a project that could accurately identify motor failure at the edge. 

    Estimating inventory in real-time with computer vision

    Warehouses greatly rely on having up-to-date information about the locations of products, inventory counts, and incoming/outgoing items. From these constraints, Netra Trivedi, Rishi Pachipulusu, and Cathy Tungyun collaborated to gather a dataset of 221 images labeled with the percentage of space remaining on the shelf. This enables the Nano 33 BLE Sense to use an attached camera to calculate empty shelf space in real-time. 

    Dog movement tracking

    Fitness trackers such as the FitBit and Apple Watch have revolutionized personal health tracking, but what about our pets? Ajith Potluri, Eion Tyacke, and Parker Crain addressed this hole in the market by building a dog collar that uses the Nano’s IMU to recognize daily activities and send the results to a smartphone via Bluetooth. This means the dog’s owner has the ability to get an overview of their pet’s day-to-day activity levels across weeks or months.

    Intelligent bird feeding system

    Owners of backyards everywhere encounter the same problem: “How do I keep the squirrels away from a birdfeeder while also allowing birds?” Eric Wu, Harry Rosmann, and Blaine Huey worked together on a Nano 33 BLE Sense-powered system that employs a camera module to identify if the animal at the feeder is a bird or a squirrel. If it is the latter, an alarm is played from a buzzer. Otherwise, the bird’s species is determined through another model and an image is saved to an SD card for future viewing. 

    Improving one’s exercise form

    Exercise, while being essential to a healthy lifestyle, must also be done correctly in order to avoid accidental injuries or chronic pain later on, and maintain proper form is an easy way to facilitate this. By using both computer vision on an NVIDIA Jetson Nano and anomaly detection via an IMU on a Nano 33 BLE Sense, Addesh Bhargava, Varun Jain, and Rohan Paranjape built a project that was more accurate than typical approaches to squatting form detection. 

    The post These projects from CMU incorporate the Arduino Nano 33 BLE Sense in clever ways appeared first on Arduino Blog.

    Website: LINK

  • DIY air hockey table uses an Arduino to keep score

    DIY air hockey table uses an Arduino to keep score

    Reading Time: 2 minutes

    Inspired by game nights with her family, Lorraine Underwood from element14 Presents wanted to build a project that would be both fun and playable many times over. Based on these parameters, she opted to design and construct her own take on an air hockey table that would be capable of keeping score automatically.

    The base of the air hockey table was made by first drawing a 2D model of the tabletop, complete with the myriad of holes for air to pass through and a zone at each end for scoring with the 3D printed puck. Below the top are four panels that comprise the four walls, with one having a slot for attaching a high-power fan. Extra rigidity was added by slotting in a grid of struts to buttress the rectangular layout and make it more impervious to accidental bumps or hits.

    In terms of scoring, a player receives a point when their puck passes below the opponent’s goal, which meant Underwood needed some way of consistently detecting when the puck crosses the line. To do this, she created a small sketch for an Arduino Uno Rev3 that checked the state of a phototransistor and incremented the score when triggered. Although this worked initially, she did acknowledge that further improvements are needed to prevent false positives.

    [youtube https://www.youtube.com/watch?v=3RbMmlKIwT0?feature=oembed&w=500&h=281]

    More information about this custom air hockey table can be found in Underwood’s write-up here.

    The post DIY air hockey table uses an Arduino to keep score appeared first on Arduino Blog.

    Website: LINK