Kategorie: Linux

  • Adafruit 1.3″ Color TFT Bonnet

    Adafruit 1.3″ Color TFT Bonnet

    Reading Time: 3 minutes

    What’s it for?

    So, if a device so reminiscent of a classic console isn’t for gaming, what is it for? The Bonnet shares a heritage with Adafruit’s Mini PiTFT. That device features the same square 33 mm display, but has just the two buttons. This Adafruit 1.3″ Color TFT Bonnet comes with the five-way joystick to enable more complex interface interactions (the fifth direction is a push inwards, incidentally).

    Like the Mini PiTFT, the Adafruit 1.3″ Color TFT Bonnet also features a Qwiic/STEMMA QT connector for I2C sensors. And this is where things become clearer. You can plug and play Adafruit’s range of STEMMA QT devices, which includes all manner of sensors: magnetometers, temperature, pressure, proximity, and so on.

    It is in this area where the Adafruit 1.3″ Color TFT Bonnet comes alive. What we have here isn’t the heart of a portable games console, but an interface for a range of sensor projects. In that spirit, it is something of a shame that the Bonnet covers the entire 40-pin GPIO header, unlike the Mini PiTFT which leaves 16 pins free. But the STEMMA QT connector provides your I/O needs.

    Kernel or Python

    Setup of the Adafruit 1.3″ Color TFT Bonnet was straightforward, although the linked instructions are for the two-button Adafruit Mini PiTFT.

    There are two approaches: use a script to install a kernel module, or use Python and the Pillow library to draw images on the display.

    Crucially, you can’t use both techniques at once. This is a shame as the kernel module is faster and, arguably, more fun. But once it’s installed, you can’t move on to using Python.

    The kernel method is also more accessible method for beginners. Run a script and you can mirror the Raspbian with Desktop interface on the tiny 1.3-inch display.

    It’s fun but wholly impractical. Not quite ready to give up our dream of a teeny console, we attempted to install PICO-8 in this mode and while it did run, the experience was (as Limor claimed) too small.

    The kernel installation script also enables you to run Raspberry Pi in a console mode. Text mode is better, if you have very good eyesight, but it’s still lacking an effective use case. According to Adafruit, the Bonnet runs at 15 fps in kernel mode, so it is better suited to simple animations and video (neither of which is fun to watch on such a small display).

    This leaves the second, more practical, option. Which is to follow the Python setup guide. This approach is (according to Adafruit) more stable and allows you to write Python code to control the display.

    You need to install the Adafruit_Blinka library that provides CircuitPython support in Python. Once up and running, you can follow the tutorials to create your own display interfaces, and there are examples on the site. From here, you will be able to create interfaces that display information, and interact with your range of I2C sensors.

    The screen is sharp, and lovely to look at, but it’s so small that it strikes us as a bit fiddly for anything complicated.

    Verdict

    7/10

    We found this a bit of a head-scratcher, and we’d be interested to hear from makers who find it fits their use case. Unless you know exactly what you’re going to make with it, we suggest going for the simpler two-button Adafruit Mini PiTFT.

  • Digital Making at Home: Making games

    Digital Making at Home: Making games

    Reading Time: 4 minutes

    When you’re part of the Raspberry Pi Foundation community, you’re a part of a global family of young creators who bring things to life with the power of digital making. We imagine that, given the current changes we’re all navigating, there are probably more of you who are interested in creating new and exciting things at home. And we want to help you! One of the best things we can do right now is to tap into what connects us as a community, and that’s digital making. So, welcome to Digital Making at Home from the Raspberry Pi Foundation!

    Welcome to Digital Making at Home from the Raspberry Pi Foundation

    Subscribe to our YouTube channel: http://rpf.io/ytsub Help us reach a wider audience by translating our video content: http://rpf.io/yttranslate Buy a Raspbe…

    What is Digital Making at Home?

    Whether you wrote your first line of code years ago or minutes ago, or you’ve yet to get started, with Digital Making at Home we’re inviting you on a digital making adventure each week.

    Digital Making at Home from the Raspberry Pi Foundation V1

    At the start of each week, we will share a theme that’s designed to jumpstart your journey of creative expression and problem solving where you create a digital making project you’re proud of. Every week, we’ll have code-along videos led by people from our team. They will walk you through projects from our free projects collection, to give you a place to start and a friendly face to accompany you!

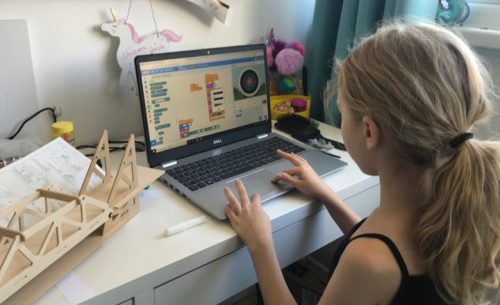
    a girl using Scratch on a laptop at home

    For those of you whose mother language isn’t English, our free project guides are available in up to 30 languages so far.

    Share your digital making project with us!

    Each week, when you’ve made something you love using digital making, you can share it with us! Just make sure you have your parent’s or guardian’s permissions first. Then share your project by filling out this form. You might find one of your projects featured in a future blog post for the whole community to see, but no matter what, we want to see what you created!

    Just because we’re all at home, that doesn’t mean we can’t create together, so let’s kick off Digital Making at Home with this week’s theme:

    This week, we’re making games

    Playing a game is a fun way to pass the time, but why not take it to the next level and make your own game? This week, we invite you to create a game that you can play with your friends and family!

    Let your imagination run free, and if you’re not sure where to start, here are three code-along videos to help you.

    Beginner level

    If you’re new to coding, we want to introduce you to Scratch, a block-based coding language that is perfect to start with.

    Try out Archery, led by Mr C and his sidekick Xavier:

    Digital Making at Home – [Archery] (beginner)

    Subscribe to our YouTube channel: http://rpf.io/ytsub Help us reach a wider audience by translating our video content: http://rpf.io/yttranslate Buy a Raspbe…

    Go to the free Archery project guide (also available in Polish).

    Intermediate level

    If you’re looking to go beyond the Scratch surface, dive a little deeper into the coding language with.

    Try out CATS!, led by Christina:

    Digital Making at Home – [Cats] (intermediate)

    Subscribe to our YouTube channel: http://rpf.io/ytsub Help us reach a wider audience by translating our video content: http://rpf.io/yttranslate Buy a Raspbe…

    Go to the free CATS! project guide (available in 30 languages).

    Advanced level

    If you’re all Scratched out, move on to Python, a text-based coding language, to take things up a notch.

    Try out Turtle Race, led by Marc:

    Digital Making at Home – [Turtle Race] (advanced)

    Subscribe to our YouTube channel: http://rpf.io/ytsub Help us reach a wider audience by translating our video content: http://rpf.io/yttranslate Buy a Raspbe…

    Go to the free Turtle Race project guide (available in 16 languages).

    More inspiration for making games

    If you’re creating a game in Scratch, check out the extra videos from Mr C in the ‘Digital Making at Home: Making games’ playlist. These will show you how to add a timer, or a score, or a game over message, or a cool starter screen to any Scratch game!

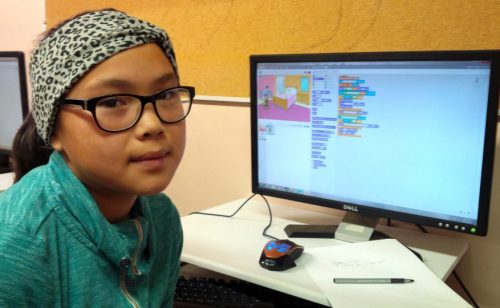
    A girl with her Scratch project

    And if you’re into Python coding and hungry for more creative inspiration, we’ve got you covered. Our own Wireframe magazine, which you can download for free, has a ton of resources about making games. The magazine’s Source Code series shows you how to recreate an aspect of a classic game with a snippet of Python code, and you can read articles from that series on the Raspberry Pi blog. And if that’s still not enough, take a look at our Code the Classics book, which you can also download for free!

    Alright friends, you’ve got all you need, so let’s get digital making!

    Share your feedback

    We’d love to know what you think of Digital Making at Home, so that we can make it better for you! Let us know your thoughts by filling in this form.

    Website: LINK

  • The Wash-A-Lot-Bot is a DIY handwashing timer

    The Wash-A-Lot-Bot is a DIY handwashing timer

    Reading Time: 2 minutes

    The Wash-A-Lot-Bot is a DIY handwashing timer

    Arduino TeamMarch 29th, 2020

    With the current coronavirus situation, we’ve been encouraged to wash our hands regularly for 20 seconds – or approximately how long it takes you to hum “Happy Birthday” from beginning to end twice. That sounds easy enough, but do you really do this every time? What you need is some sort of automatic timer, perhaps with a gauge for easy visual reference. 

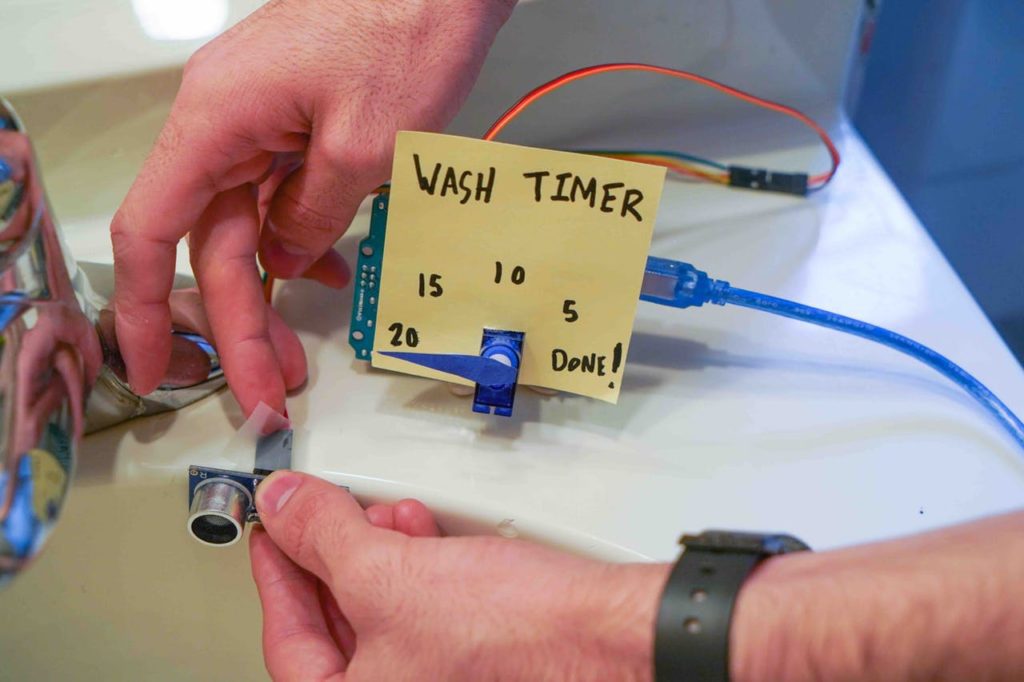
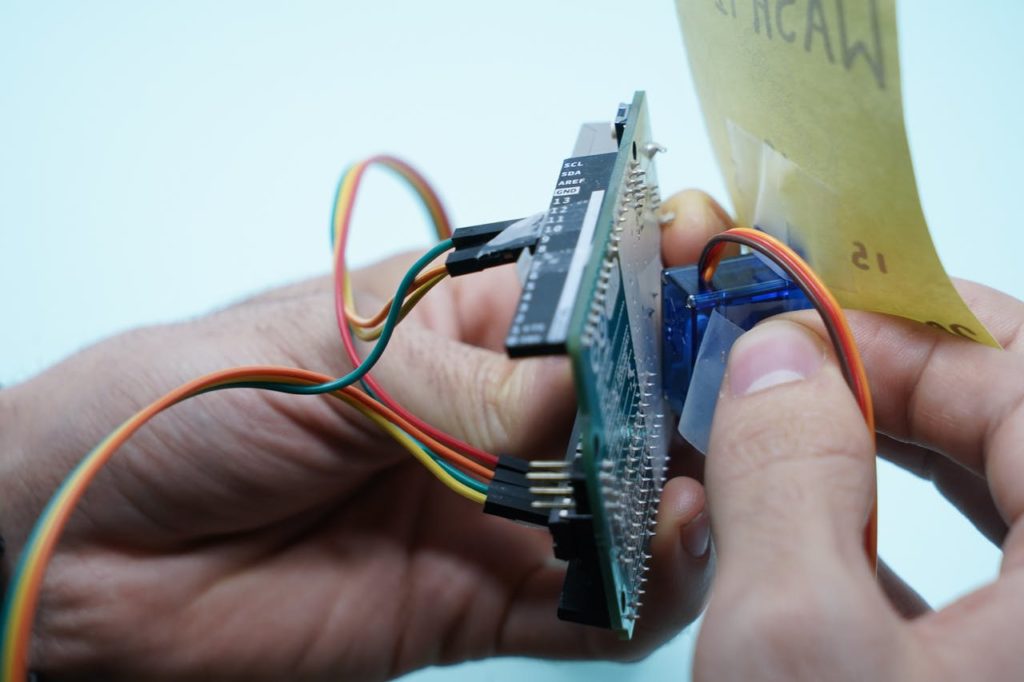
    As it just so happens, Gautam Bose and Lucas Ochoa built such a device with an Arduino Uno. The aptly named Wash-A-Lot-Bot detects a person’s hands via an ultrasonic sensor, then ticks a dial timer from 0 to 20 (or rather 20 to DONE!) using a micro servo. 

    This simple setup can be made with little more than scissors and tape, making it a great way to learn about Arduino and programming while you’re stuck indoors.

    [youtube https://www.youtube.com/watch?v=CEpfipV1_3w?feature=oembed&w=500&h=281]

    Website: LINK

  • Together, let’s make COVID-19 history – CONFERENCE ANNOUNCEMENT

    Together, let’s make COVID-19 history – CONFERENCE ANNOUNCEMENT

    Reading Time: 3 minutes

    Combating COVID-19 Conference: A Collaborative Arduino Community Initiative to take place on April 2nd at 5pm CET

    To the Arduino community:

    Humanity is facing one of the most trying events in its history and as technologists, makers and designers we are asking ourselves how can we help. 

    How can we contribute to the efforts to save lives, to help our fellow human beings?

    All of us have been thinking about this and observing what is going on in the world.

    We have seen communities, including all of you, trying to design devices that would help hospitals cope with the lack of equipment; we’ve seen people firing up their imagination and their 3D printers in an effort to build something that could save even a single human life.

    Having noticed that a large number of these efforts are using Arduino technology we reached out to a number of these communities to offer our help, donate some hardware, provide engineering support, and do whatever we can considering that we are a small company.

    One thing that was striking to us is the large amount of duplication in the work people are doing. Many people are spending valuable time trying to overcome similar challenges in their design, rather than sharing their solution to the benefit of all and moving on to the next hurdle. Also, there are different teams with different strengths and skill sets that would be better working together than apart.

    We must do better, be more effective, work together, and merge efforts to solve these problems and reach our common goal quicker and more efficiently.

    Because of all of this, we want to invite as many of these projects as possible to an online gathering, to get people talking, to offer help on how to design and make hardware, how to think about the software, and how to scale manufacturing (we would like to share our knowledge in making tens of thousands of open source boards per week). Finally and most importantly, we must take guidance from medical professionals so that they can steer requirements and validate the designs so our efforts have the most positive impact. 

    Join us online on April 2nd to understand how we can work together to do better together, and together let’s make COVID-19 history.

    — David Cuartielles and Massimo Banzi, Arduino co-founders (on behalf of Arduino)


    Combating COVID-19 Conference: A Collaborative Arduino Community Initiative will take place on April 2nd at 5pm CET.

    This is an open invitation to anyone currently using Arduino-compatible devices within a project to design and manufacture ventilators, respirators or other devices to combat COVID-19. Be you a doctor, an academic, a professional company/researcher or an innovator, you are more than welcome to join the conference. 

    The conference will be hosted in Zoom (link available soon), with the ability to interact with Arduino and other members on the conference via Discord (free download here). 

    There are different ways to participate in the conference: you can present your Arduino-based solution to tackle COVID-19, support other community projects, or provide expert advice — we are all stronger together.

    (N.B. If you want to present and share your project, please complete this form by 12:00 (noon) CET on April 2nd.)

    More information on the conference will be available soon. In the meantime, you can learn more about Arduino’s overall response to COVID-19 emergency here.

    Website: LINK

  • FluSense takes on COVID-19 with Raspberry Pi

    FluSense takes on COVID-19 with Raspberry Pi

    Reading Time: 3 minutes

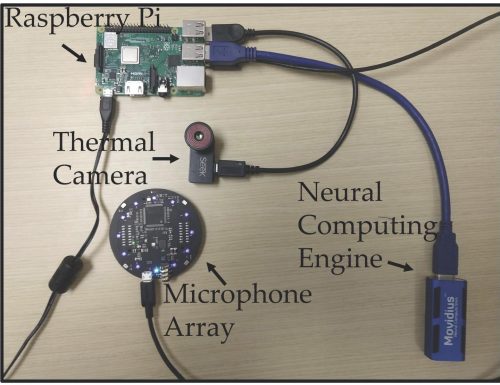
    Raspberry Pi devices are often used by scientists, especially in biology to capture and analyse data, and a particularly striking – and sobering – project has made the news this week. Researchers at UMass Amherst have created FluSense, a dictionary-sized piece of equipment comprising a cheap microphone array, a thermal sensor, an Intel Movidius 2 neural computing engine, and a Raspberry Pi. FluSense monitors crowd sounds to forecast outbreaks of viral respiratory disease like seasonal flu; naturally, the headlines about their work have focused on its potential relevance to the COVID-19 pandemic.

    A photo of Forsad Al Hossain and Tauhidur Rahman with the FluSense device alongside a logo from the Amherst University of Massachusetts

    Forsad Al Hossain and Tauhidur Rahman with the FluSense device. Image courtesy of the University of Massachusetts Amherst

    The device can distinguish coughing from other sounds. When cough data is combined with information about the size of the crowd in a location, it can provide an index predicting how many people are likely to be experiencing flu symptoms.

    It was successfully tested in in four health clinic waiting rooms, and now, PhD student Forsad Al Hossain and his adviser, assistant professor Tauhidur Rahman, plan to roll FluSense out in other large spaces to capture data on a larger scale and strengthen the device’s capabilities. Privacy concerns are mitigated by heavy encryption, and Al Hossain and Rahman explain that the emphasis is on aggregating data, not identifying sickness in any single patient.

    The researchers believe the secret to FluSense’s success lies in how much of the processing work is done locally, via the neural computing engine and Raspberry Pi: “Symptom information is sent wirelessly to the lab for collation, of course, but the heavy lifting is accomplished at the edge.”

    A bird's-eye view of the components inside the Flu Sense device

    Image courtesy of the University of Massachusetts Amherst

    FluSense offers a different set of advantages to other tools, such as the extremely popular self-reporting app developed by researchers at Kings College Hospital in London, UK, together with startup Zoe. Approaches like this rely on the public to sign up, and that’s likely to skew the data they gather, because people in some demographic groups are more likely than others to be motivated and able to participate. FluSense can be installed to capture data passively from groups across the entire population. This could be particularly helpful to underprivileged groups who are less likely to have access to healthcare.

    Makers, engineers, and scientists across the world are rising to the challenge of tackling COVID-19. One notable initiative is the Montreal General Hospital Foundation’s challenge to quickly design a low-cost, easy to use ventilator which can be built locally to serve patients, with a prize of CAD $200,000 on offer. The winning designs will be made available to download for free.

    There is, of course, loads of chatter on the Raspberry Pi forum about the role computing has in beating the virus. We particularly liked this PSA letting you know how to free up some of your unused processing power for those researching treatments.

    screenshot of the hand washer being built from a video on instagram

    Screenshot via @deeplocal on Instagram

    And to end on a cheering note, we *heart* this project from @deeplocal on Instagram. They’ve created a Raspberry Pi-powered soap dispenser which will play 20 seconds of your favourite song to keep you at the sink and make sure you’re washing your hands for long enough to properly protect yourself.

    Website: LINK

  • Customise your Raspberry Pi magic mirror with modules

    Customise your Raspberry Pi magic mirror with modules

    Reading Time: 6 minutes

    Building a magic mirror is one of the easiest, and most rewarding Raspberry Pi projects. Follow our Build a magic mirror tutorial to get your own mirror up-and-running.

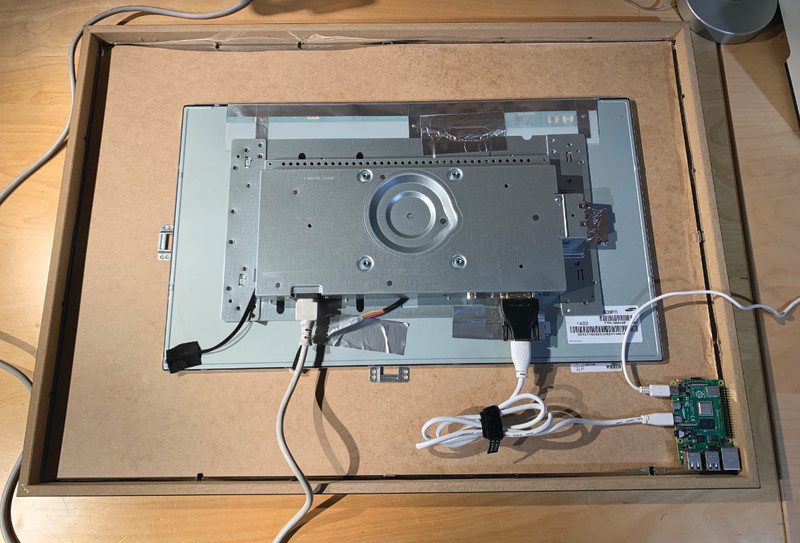
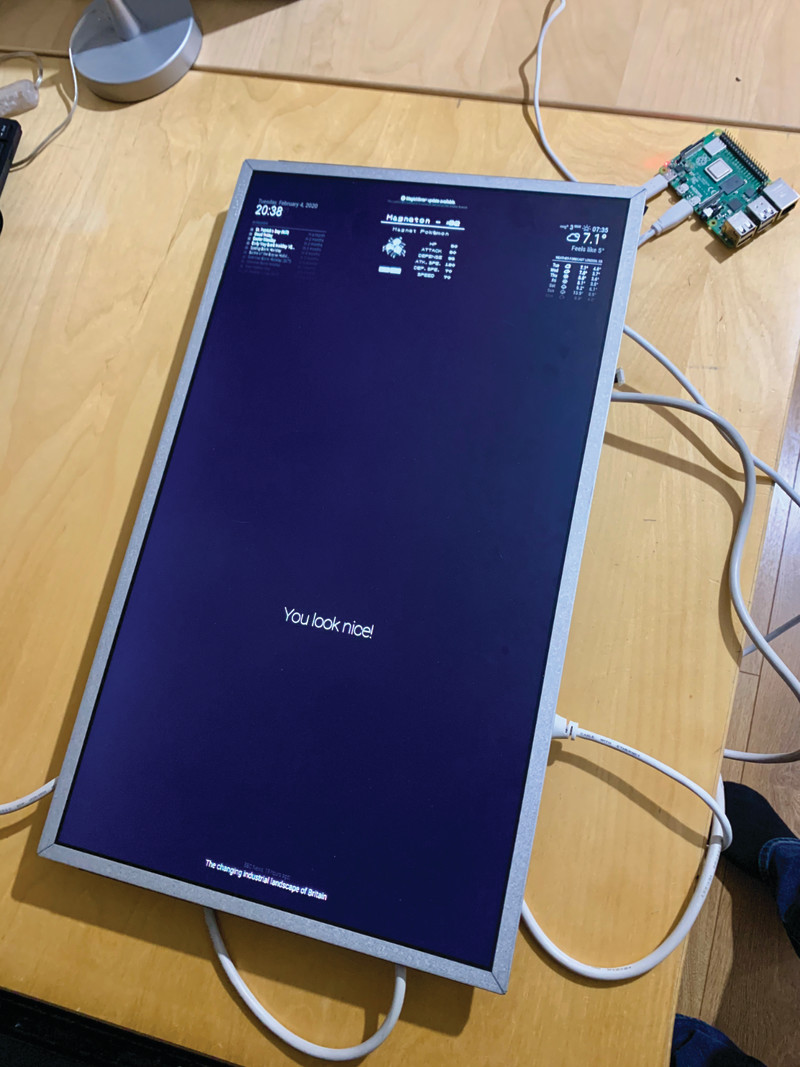
    The rear view shows the mounted monitor and Raspberry Pi computer. Removing the monitor’s bezel gets the screen as close as possible to the surface

    Orientate your magic mirror

    Can a mirror be upside-down? A magic mirror can! Most mirrors tend to be portrait, whereas screens are normally landscape. Normally we could make some changes to /boot/config.txt to easily rotate the screen, but with Raspberry Pi 4’s fancy new graphics support, this is no longer possible. To rotate your display 90º so it fits your mirror, open a Terminal and enter the following:

    /etc/xdg/lxsession/LXDE-pi/autostart

    Now add this line to the end of the file:

    @xrandr --output HDMI-1 --rotate right

    Save the file (CTRL+X) and reboot. Your display should now be portrait.

    Safety first

    Sadly, MagicMirror2 doesn’t (yet) come with an easy configuration utility. For now, you will need to do some text editing of config.js. Don’t worry: as long as you make copies of your files, it’s going to be hard to break anything. If MagicMirror2 refuses to start, just copy the file back. Here’s how it works from a Terminal:

    cd ~/MagicMirror/config
    cp config.js config.js.backup

    If anything goes wrong, just copy the config backup back and try again:

    cp config.js.backup config.js

    Each time you edit config.js, you’ll need to restart MagicMirror2 for changes to take effect. To do this at any time:

    pm2 restart MagicMirror 

    Meet the config file

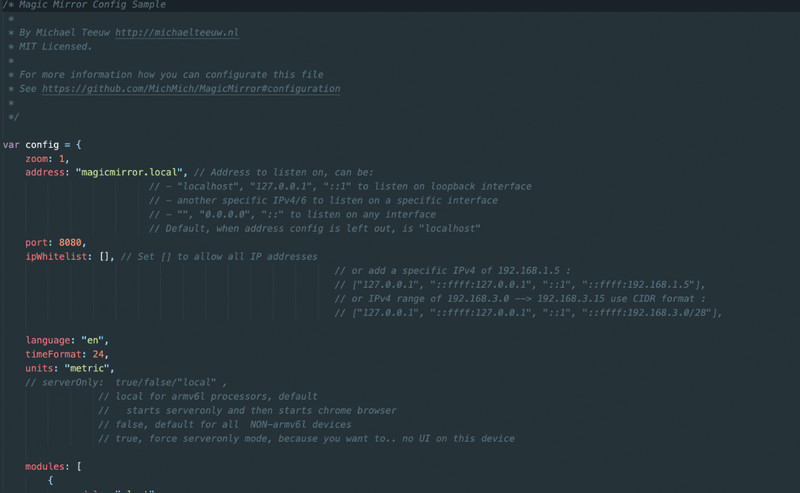
    Your config file controls some of the fundamental features of your mirror, as well as the various modules. It is formatted in a JavaScript file. This is a very well-structured language but unforgiving. A misplaced ‘{’ or ‘[’ and nothing will work (hence the previous step). The config.js.example file is a great way to explore without changing anything. You’ll see how to change the ‘zoom’ (text size), units (metric or imperial), and whether you want a 24-hour clock or not. Most importantly, the ‘modules’ section controls which modules (code that gives certain functionality) are loaded and where they’re placed.

    Here’s a section of the config file. It’s JavaScript code so may look a little different if you’re used to Python

    Tip! Learn JSON

    If you’re serious about configuring MagicMirror2, knowing the JSON data format is essential. Have a look at json.org.

    The default MagicMirror2 modules

    MagicMirror2 comes with a selection of modules pre-installed. Start by tailoring them to your specific needs. Find the ‘modules’ section in config.js. Within the two square brackets are sections contained within curly brackets: { }. Each one is a single module. Each module has different requirements but each one requires a ‘module’ line like this:

    module: "name-of-module",

    Most also require a ‘position’, which can be ‘top_bar’, ‘top_left’, ‘lower_third’, and many others. This controls where the module is displayed on the mirror. If a title is required, then ‘title’ allows you to change the text of the header. Finally ‘config’ will contain information that is specific to that module.

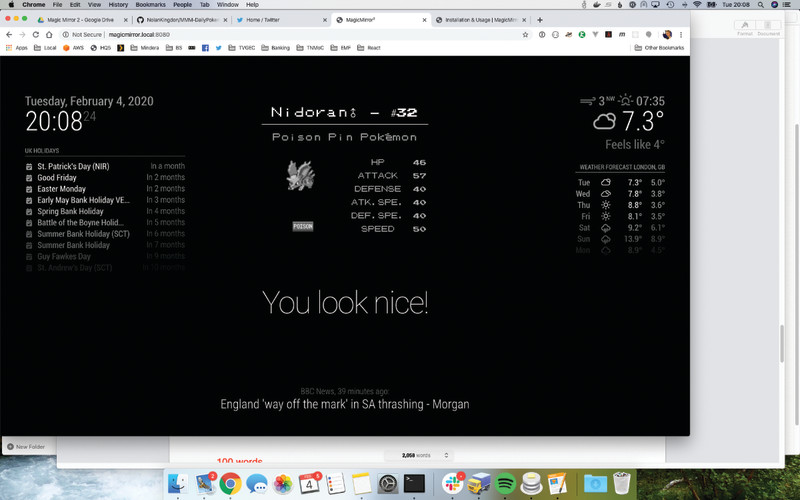
    There are many, many modules available for all kinds of uses. This one shows you a daily Pokémon!

    Whatever the weather

    Let’s use the weather module as an example. Under ‘modules’, find ‘weatherforecast’. You have the option to change the title (maybe ‘Will it rain?’) and the position of the module on the screen. In ‘config’ you have three pieces of information to complete. To get your own weather forecast, go to openweathermap.org and register for a free account. You can then create an API key (a secure way of your mirror communicating with the service), which you need to specify here in ‘appid’. Change the name of your location as you wish and finally change the location ID to the correct one listed in this file: magpi.cc/citylist. Restart MagicMirror2 and see your local weather!

    Breaking (glass) news

    The default news feed on the mirror comes from The New York Times, which may not be your cup of tea. The ‘newsfeed’ module works with any RSS feed, of which there are millions to choose from (and you can have multiple newsfeeds if you wish). Let’s change the newsfeed to the BBC. Find the module ‘newsfeed’ and you’ll see under ‘config’ the ‘feeds’. This is surrounded with square brackets [ ], which means we can have multiple entries. Change ‘New York Times’ to ‘BBC News’ and the ‘url’ to ‘http://feeds.bbci.co.uk/news/rss.xml’. Restart MagicMirror2 and now you’re getting the headlines from the UK.

    Vampire mode (no reflection)

    By now you may be finding it a little frustrating if you’ve already put up your mirror. With a bit of reconfiguration, you can access the mirror display using a web browser and work on it from your desktop. Edit config.js and have a look at the first few lines under ‘config’. These control access to the display. It’s locked down by default (which is good), but we can allow other computers access. Change these following lines as shown:

    address: "",
    ipWhitelist: []

    This allows any IP address on your network to access the server. You’ll need to restart MagicMirror2 for changes to take effect. Now you should be able to see your display at http://<your mirror’s IP address>:8080.

    It may be easier to configure your screen before mounting it in the mirror

    Client and server mode

    The reason we can so easily see the display in a web browser is that MagicMirror2 is split in to two parts: the client, the software that displays the screen; and the server, which generates the content. This clever split allows you to generate the content from a separate computer on the network, which is handy if you want to do something really intensive. It also allows you to have multiple mirrors that all show the same display, which makes rolling out changes really easy.

    To start an installation of MagicMirror2 without a display (server):

    node serveronly

    To create a client that gets its content from the server:

    node clientonly --address <ip of server> --port 8080

    Editing modules

    Let’s have a look at modifying existing modules. You’ll have seen in the centre of the screen, there are ‘compliments’ rotating every few seconds. You can change these in config.js, but let’s look in the actual code so we can get a feel of how things are arranged. In Terminal, navigate to where the default modules are installed:

    cd ~/MagicMirror/modules/default

    If you do an ls to get a directory listing, you’ll be able to tell what’s available. We’re interested in the ‘compliments’ module:

    cd compliments

    Now edit the file:

    nano compliments.js

    Look at the various text strings and change them to whatever you like. Save the file and restart MagicMirror2 to see your new messages. A sample compliments.js file can be seen here.

    More MagicMirror2 modules

    Great news: you are not restricted to the default modules. There are hundreds of community-built modules that are free to download and install. They cover all kinds of useful information, including stock prices, local transportation, prayer guides, and even how your local Minecraft server is holding up. Luckily, a directory of MagicMirror2 modules is maintained on the main site’s wiki.

    Most modules will require some configuration, so make sure you look at the README file and follow the instructions carefully. There’s no limit to how many modules you can have, bar the positions available on the screen.

    Installing modules

    Sadly, we don’t have a nice package manager for MagicMirror2, so installing modules tends to involve using Git to fetch the code. For an example, we’re going to install ‘Daily Pokemon’. From the Terminal, we’ll go to the modules directory, then get the code from GitHub.

    cd ~/MagicMirror/modules
    git clone https://github.com/NolanKingdon/MMM-DailyPokemon
    cd MMM-DailyPokemon
    npm install

    The final command gets all the libraries that the module needs to run. Once completed, edit the config file:

    nano ~/MagicMirror/config.js

    Create a new line after modules: [ and add the code from the Figure 1 listing (or use the download link for the full, edited config.js file). Make sure you end with a comma. Restart MagicMirror2 and admire your daily Pokémon.

    More MagicMirror2 modules

    As we’ve already said, there’s a dizzying array of modules to choose from, and you can even write your own. If you’re in the mood for customising, here are a few of our favourites. You can find all of them, along with installation instructions at magpi.cc/mirrormodules.

    magpi.cc/mmmstocks

    Every information screen needs a stock ticker, right?

    magpi.cc/mmmwiki

    Up your knowledge as you get ready to leave the house with these random snippets from Wikipedia.

    magpi.cc/mmmukrail

    Is your train going to be on time? If you’re in the UK, this module will let you know. Many other countries have equivalent modules too.

    Click here to download the full code.

    modules: [ { module: "MMM-DailyPokemon", position: "top_center", config: { updateInterval: 600000, minPoke: 4, maxPoke: 151, grayscale: true, showType: true, language: "en", genera: true, gbaMode: true, nameSize: 26 } },
  • Using Raspberry Pi for deeper learning in education

    Using Raspberry Pi for deeper learning in education

    Reading Time: 7 minutes

    Using deeper learning as a framework for transformative educational experiences, Brent Richardson outlines the case for a pedagogical approach that challenges students using a Raspberry Pi. From the latest issue of Hello World magazine — out today!

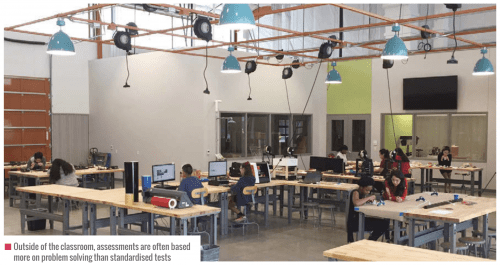
    A benefit of completing school and entering the workforce is being able to kiss standardised tests goodbye. That is, if you don’t count those occasional ‘prove you watched the webinar’ quizzes some supervisors require.

    In the real world, assessments often happen on the fly and are based on each employee’s ability to successfully complete tasks and solve problems. It is often obvious to an employer when their staff members are unprepared.

    Formal education continues to focus on accountability tools that measure base-level proficiencies instead of more complex skills like problem-solving and communication.

    One of the main reasons the U.S. education system is criticised for its reliance on standardised tests is that this method of assessing a student’s comprehension of a subject can hinder their ability to transfer knowledge from an existing situation to a new situation. The effect leaves students ill-prepared for higher education and the workforce.

    A study conducted by the National Association of Colleges and Employers found a significant gap between how students felt about their abilities and their employer’s observations. In seven out of eight categories, students rated their skills much higher than their prospective employers had.

    Some people believe that this gap continues to widen because teaching within the confines of a standardised test encourages teachers to narrow their instruction. The focus becomes preparing students with a limited scope of learning that is beneficial for testing.

    With this approach to learning, it is possible that students can excel at test-taking and still struggle with applying knowledge in new ways. Educators need to have the support to not only prepare students for tests but also to develop ways that will help their students connect to the material in a meaningful manner.

    In an effort to boost the U.S. education system’s ability to increase the knowledge and skills of students, many private corporations and nonprofits directly support public education. In 2010, the Hewlett Foundation went so far as to develop a framework called ‘deeper learning’ to help guide its education partners in preparing learners for success.

    The principles of deeper learning

    Deeper learning focuses on six key competencies:

      1. Master core academic content
      2. Think critically and solve
        complex problems
      3. Work collaboratively
      4. Communicate effectively
      5. Learn how to learn
      6. Develop academic mindsets

    This framework ensures that learners are active participants in their education. Students are immersed in a challenging curriculum that requires them to seek out and acquire new information, apply what they have learned, and build upon that to create new knowledge.

    While deeper learning experiences are important for all students, research shows that schools that engage students from low-income families and students of colour in deeper learning have stronger academic outcomes, better attendance and behaviour, and lower dropout rates. This results in higher graduation rates, and higher rates
    of college attendance and perseverance than comparison schools serving similar students. This pedagogical approach is one we strive to embed in all our work at Fab Lab Houston.

    A deeper learning timelapse project

    The importance of deeper learning was undeniable when a group of students I worked with in Houston built a solar-powered time-lapse camera. Through this collaborative project, we quickly found ourselves moving beyond classroom pedagogy to a ‘hero’s journey’ — where students’ learning paths echo a centuries-old narrative arc in which a protagonist goes on an adventure, makes new friends, encounters roadblocks, overcomes adversity, and returns home a changed person.

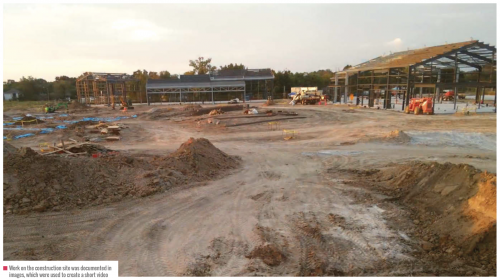
    In this spirit, we challenged the students with a simple objective: ‘Make a device to document the construction of Fab Lab Houston’. In just one sentence, participants understood enough to know where the finish line was without being told exactly how to get there. This shift in approach pushed students to ask questions as they attempted to understand constraints and potential approaches.

    Students shared ideas ranging from drone video to photography robots. Together everyone began to break down these big ideas into smaller parts and better define the project we would tackle together. To my surprise, even the students that typically refused to do most things were excited to poke holes in unrealistic ideas. It was decided, among other things, that drones would be too expensive, robots might not be waterproof, and time was always a concern.

    The decision was made to move forward with the stationary time-lapse camera, because although the students didn’t know how to accomplish all the aspects of the project, they could at least understand the project enough to break it down into doable parts and develop a ballpark budget. Students formed three teams and picked one aspect of the project to tackle. The three subgroups focused on taking photos and converting them to video, developing a remote power solution, and building weatherproof housing.

    A group of students found sample code for Raspberry Pi that could be repurposed to take photos and store them sequentially on a USB drive. After quick success, a few ambitious learners started working to automate the image post-processing into video. Eventually, after attempting multiple ways to program the computer to dynamically turn images into video, one team member discovered a new approach: since the photos were stored with a sequential numbering system, thousands of photos could be loaded into Adobe Premiere Pro straight off the USB with the ‘Automate to Sequence’ tool in Premiere.

    A great deal of time was spent measuring power consumption and calculating solar panel and battery size. Since the project would be placed on a pole in the middle of a construction site for six months, the students were challenged with making their solar-powered time-lapse camera as efficient as possible.

    Waking the device after it was put into sleep mode proved to be more difficult than anticipated, so a hardware solution was tested. The Raspberry Pi computer was programmed to boot up when receiving power, take a picture, and then shut itself down. With the Raspberry Pi safely shut down, a timer relay cut power for ten minutes before returning power and starting the cycle again.

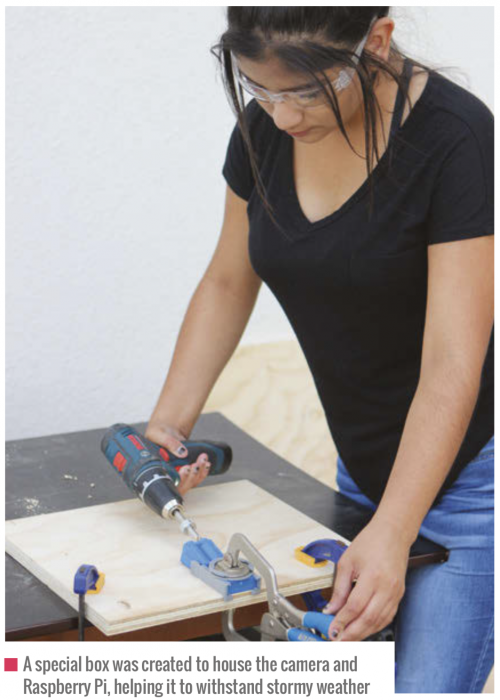
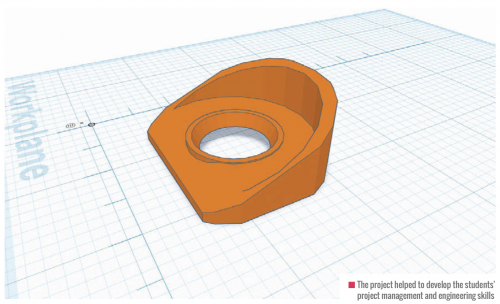
    Finally, a waterproof container had to be built to house the electronics and battery. To avoid overcomplicating the process, the group sourced a plastic weatherproof ammunition storage box to modify. Students operated a 3D printer to create custom parts for the box.

    After cutting a hole for the camera, a small piece of glass was attached to a 3D-printed hood, ensuring no water entered the box. On the rear of the box, they printed a part to hold and seal the cable from the solar panel where it entered the box. It only took a few sessions before the group produced a functioning prototype. The project was then placed outside for a day to test the capability of the device.

    The test appeared successful when the students checked the USB drive. The drive was full of high-quality images captured every ten minutes. When the drive was connected back to Raspberry Pi, a student noticed that all the parts inside the case moved. The high temperature on the day of the test had melted the glue used to attach everything. This unexpected problem challenged students to research a better alternative and reattach the pieces.

    Once the students felt confident in their device’s functionality, it was handed over to the construction crew, who installed the camera on a twenty-foot pole. The installation went smoothly and the students anxiously waited to see the results.

    Less than a week after the camera went up, Houston was hit hard with the rains brought on by hurricane Harvey. The group was nervous to see whether the project they had constructed would survive. However, when they saw that their camera had survived and was working, they felt a great sense of pride.

    They recognised that it was the collaborative effort of the group to problem-solve possible challenges that allowed their camera to not only survive but to capture a spectacular series of photos showing the impact of the hurricane in the location it was placed.

    BakerRipleyTimeLapse2

    This is “BakerRipleyTimeLapse2” by Brent Richardson on Vimeo, the home for high quality videos and the people who love them.

    A worthwhile risk

    Overcoming many hiccups throughout the project was a great illustration of how the students learned how to learn and
    to develop an academic mindset; a setback that at the beginning of the project might have seemed insurmountable was laughable in the end.

    Throughout my experience as a classroom teacher, a museum educator, and now a director of a digital makerspace, I’ve seen countless students struggle to understand the relevance of learning, and this has led me to develop a strong desire to expand the use of deeper learning.

    Sometimes it feels like a risk to facilitate learning rather than impart knowledge, but seeing a student’s development into a changed person, ready to help someone else learn, makes it worth the effort. Let’s challenge ourselves as educators to help students acquire knowledge and use it.

    Get your FREE copy of Hello World today

    Issue 12 of Hello World is available now as a FREE PDF download. UK-based educators can also subscribe to receive Hello World directly to their door in all its shiny printed goodness. Visit the Hello World website for more information.

    Website: LINK

  • Raspberry Pi problems solved in The MagPi 92

    Raspberry Pi problems solved in The MagPi 92

    Reading Time: 2 minutes

    Click here to buy The MagPi magazine issue #92

    Raspberry Pi Problems Solved

    Raspberry Pi problems solved

    Learn to diagnose and fix issues with Raspberry Pi. Get rid of glitches and odd behaviour, sort out boot problems, reconnect networking problems, and discover advanced troubleshooting tips.

    Magic Mirror facial recognition

    Facial recognition with a magic mirror

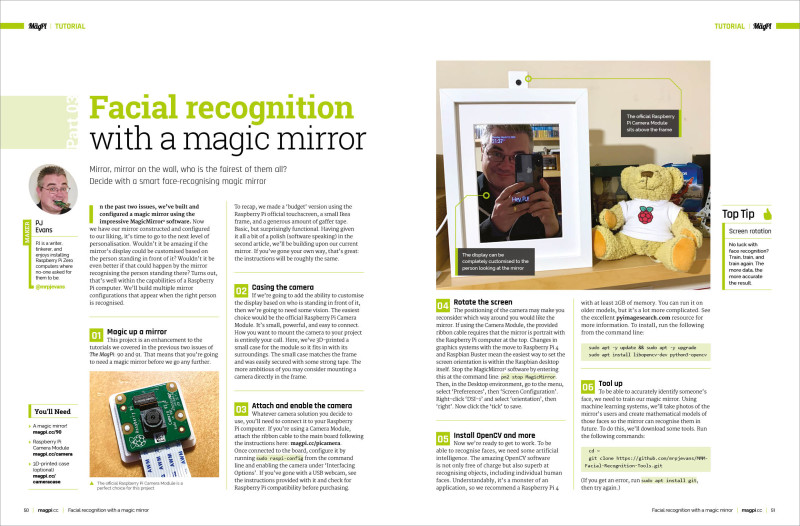
    PJ continues his incredible journey into the world of magic mirror technology. This month, he adds facial recognition to the project with OpenCV. Gaze into the glass and it gazes back, adjusting its behaviour to your lovely visage. Get personalised calendar events, notifications, and alerts.

    Track local weather & pollution

    Track local weather & pollution with Raspberry Pi

    Build a weather station in your own garden. This project is a fantastic way to explore science and meteorology from the comfort of your own garden.

    Inside our feature you’ll find a range of weather projects and builds that can track just about anything. Then we use the new Enviro board to track air quality and particulate matter.

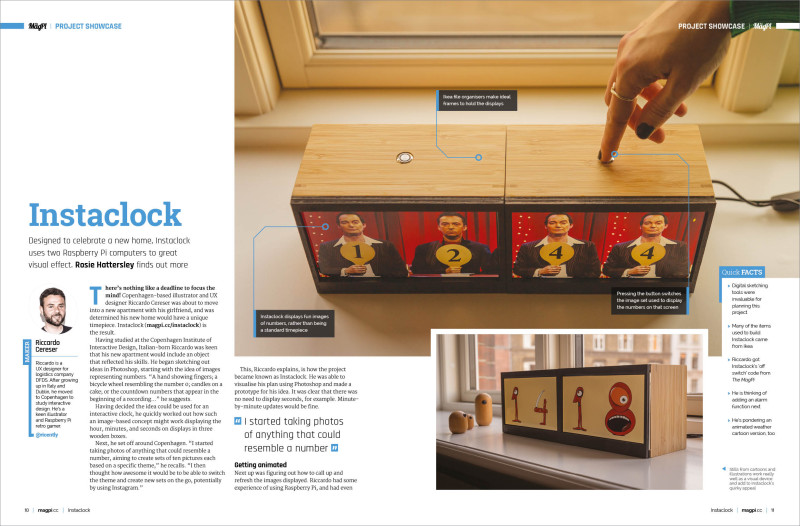
    Instaclock

    The best project showcases: like Instaclock, Chamber Sourdough Incubator, and Solar-powered Camera

    You’ll find the best Raspberry Pi projects in The MagPi, and this month we have an incredible selection for you to look at. 

    Instaclock uses twin screens to display images of four numbers taken from Instagram to show the time. You’ll also find Chamber: Sourdough Incubator – a project using Raspberry Pi to keep a sourdough starter at the right temperature – and a solar-powered camera that keeps itself running in remote locations.

  • Ashley’s top five projects for Raspberry Pi first-timers

    Ashley’s top five projects for Raspberry Pi first-timers

    Reading Time: 4 minutes

    It is time. Time to go to that little stack of gifts from well-wishers who have badged you as “techie” or noted that you “play computer games”. Armed with this information, they decided you’d like to receive one of our small and perfectly formed Raspberry Pis. You were thrilled. You could actually make a thing.

    Except you haven’t. You had to go to that job thingy, and talk to that partner thingy, and wash and feed those children thingies. Don’t worry, we’re not offended. We know that embarking on your first coding project is daunting and that the community has taken off like a rocket so there are eight bajillion ideas floating around. Good job we’re here to help, then, isn’t?

    First-timer project 01

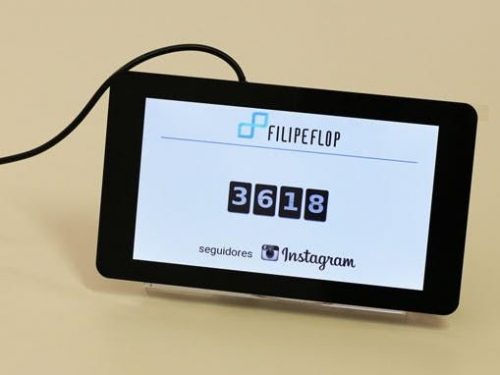
    Some of us have found ourselves spending more time with our online communities recently. Those whose digital family of choice is to be found on Reddit should see an uptick in their personal ‘Karma’ if they’re spending more time digging into “the front page of the internet”. If you’d like to see a real-world indicator of the fruits of your commenting/sharing/Let-Me-Google-That-For-You labour, a super-easy Raspberry Pi first-timer project is building a Karma counter, like this one we found on Reddit.

    Now, Squiddles1227 is one of those flash 3D printer-owning types, but you could copy the premise and build your own crafty Karma-themed housing around your counter.

    On a similar note (and featuring a comprehensive ‘How To’), GiovanniBauer on instructables.com used his Raspberry Pi to create an Instagram follower counter. Developed on Raspbian with Node.js, this project walk-through should get you started on whichever social media counter project you’d like to have a bash at.

    First-timer project 02

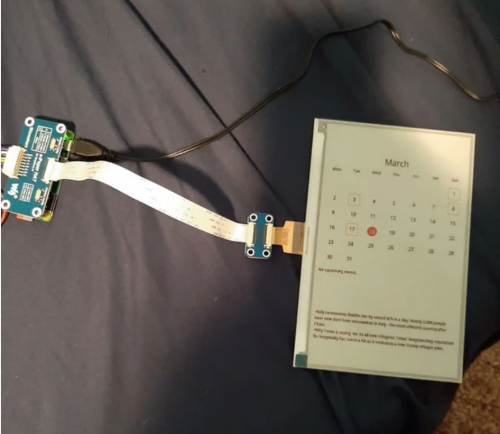
    We know this is a real-life Raspberry Pi first-timer project because the Reddit post title says so. Ninjalionman1 made an e-ink calendar using a Raspberry Pi Zero so they can see their daily appointments, weather report, and useful updates.

    We mined the original Reddit thread to find you the comment linking to all the info you need about hardware and setup. Like I said, good job we’re here.

    First-timer project 03

    Raspberry Pi 3 and 4, as well as Raspberry Pi Zero W, come with built-in Bluetooth connectivity. This means you can build something to let your lockdown-weary self take your emotional-health-preserving music/podcasts/traditional chant soundtrack with you as you migrate around your living space. “Mornings in the lounge… mid-afternoons at the kitchen table…” – we feel you.

    Circuitdigest.com posted this comprehensive walk-through to show you how a Raspberry Pi can convert an ordinary speaker with a 3.5mm jack into a wireless Bluetooth speaker.

    First-timer project 04

    PCWorld.com shared 10 Raspberry Pi projects they bet anyone can do, and we really like the look of this one. It shows you how to give a “dumb” TV extra smarts, like web browsing, which could be especially useful if screen availability is limited in a multi-user household.

    The PCWorld article recommends using a Raspberry Pi 2, 3 or 4, and points out that this is a much cheaper option than things like Chromebits and Compute Sticks.

    First-timer project 05

    Lastly, electromaker.io have hidden the coding education vegetables in the Minecraft tomato sauce using Raspberry Pi. The third post down on this thread features a video explaining how you can hack your kids’ favourite game to get them learning to code.

    The video blurb also helpfully points out that Minecraft comes pre-installed on Raspbian, making it “one of the greatest Pi projects for kids.”

    If you’re not quite ready to jump in and try any of the above, try working your way through these really simple steps to set up your Raspberry Pi and see what it can do. Then come back here and try one of these first-timer projects, share the results of your efforts, tag us, and receive a virtual round of applause!

    Website: LINK

  • Win one of ten Argon ONE cases!

    Win one of ten Argon ONE cases!

    Reading Time: < 1 minute

    Subscribe

  • SASSIE helps prevent awkward gaps in conversation

    SASSIE helps prevent awkward gaps in conversation

    Reading Time: < 1 minute

    SASSIE helps prevent awkward gaps in conversation

    Arduino TeamMarch 24th, 2020

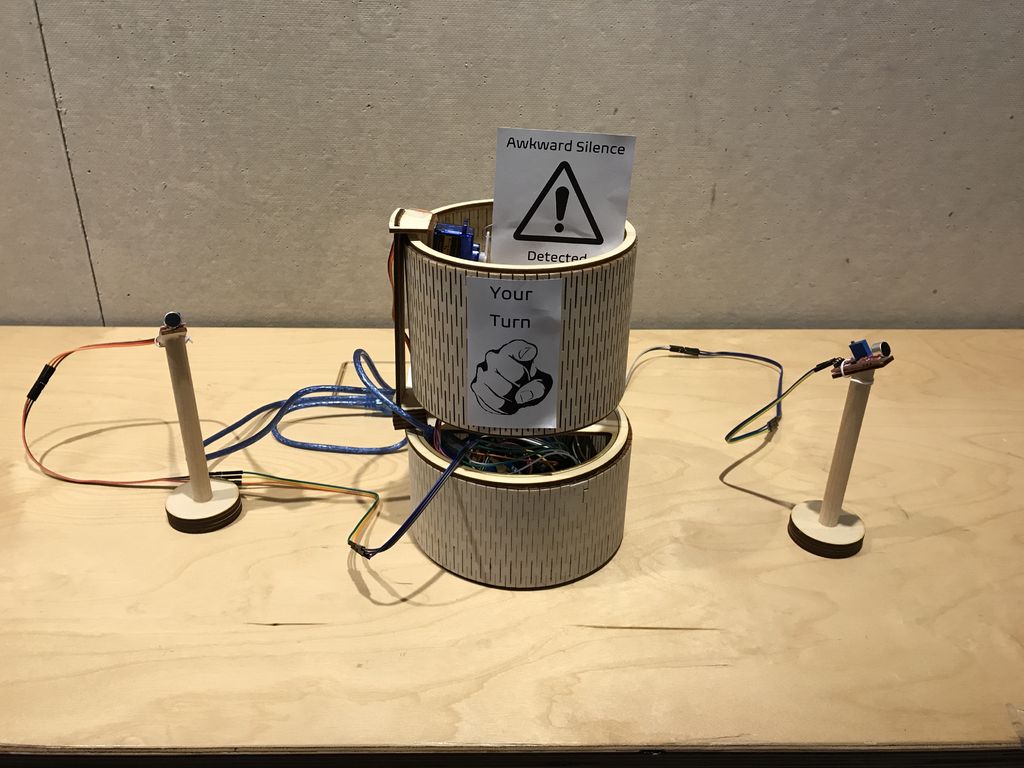
    Whether it’s with an old friend or new acquaintance, we’ve all had those awkward gaps in conversation. Do you speak next, or let the other person lead the discussion? If that’s not happening naturally, then SASSIE, or “System for Awkward Silence Solution and Interaction Enhancer,” is here to help.

    The cylindrical device detects audio feedback via a pair of microphones positioned near each person in a conversation. When a sufficient silence is detected, SASSIE pops a flag out and rotates to indicate who needs to talk. If that wasn’t enough of a hint, it also audibly tells that person to say something. 

    [youtube https://www.youtube.com/watch?v=Y9cKHJU2yeM?feature=oembed&w=500&h=281]

    SASSIE is powered by dual Arduino Uno boards, one of which takes care of the bulk of the control functions, while the other actuates the stepper to spin the top indicator.

    Website: LINK

  • 1,156 LEDs make up these dual acrylic light-up panels

    1,156 LEDs make up these dual acrylic light-up panels

    Reading Time: 2 minutes

    1,156 LEDs make up these dual acrylic light-up panels

    Arduino TeamMarch 24th, 2020

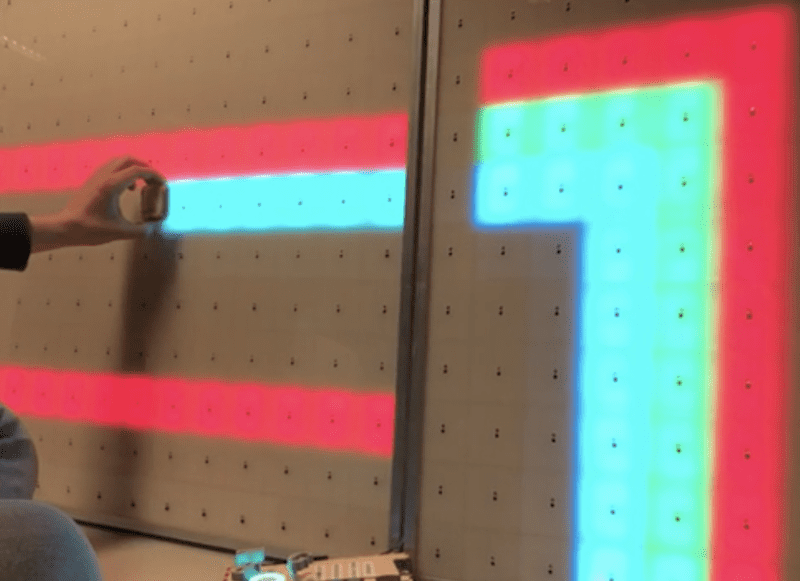
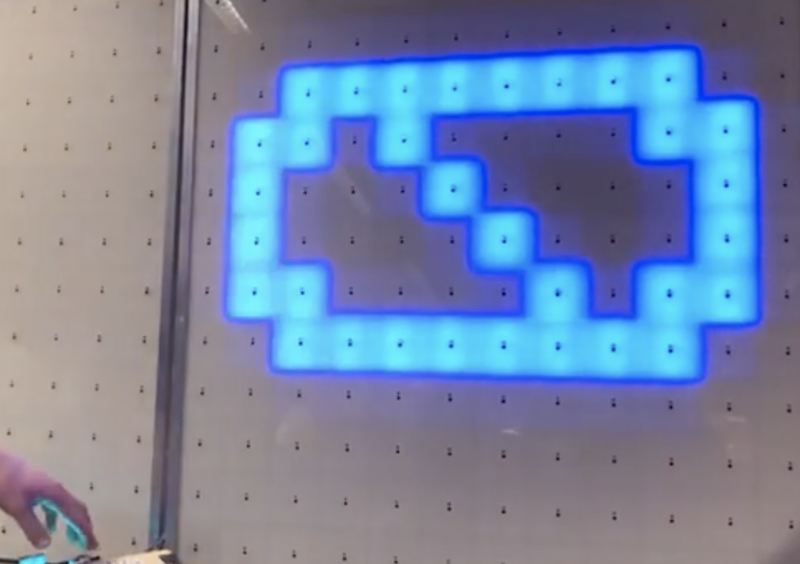
    What does one do with over 1,000 LEDs, white acrylic, and 288 IR sensors? If you’re Redditor “jordy_essen,” you create an interactive light panel.

    In one mode, the user pull a reflective tool across the sensors to draw a paths, with potentiometers implemented to select the color. It can also be set up to play a sort of whack-a-mole game, where one has to activate the sensor in the same area where it illuminates.

    For this amazing device, jordy_essen uses not one, or even two, but six Arduino Mega boards to drive the LEDs directly — in turn controlled by a webpage running on a Raspberry Pi. If that wasn’t enough hardware, an Uno is tasked with taking inputs from the color potentiometers. 

    It’s a brilliant project in any sense of the word!

    Website: LINK

  • Stay busy in your Vault with a Raspberry Pi Zero Pipboy

    Stay busy in your Vault with a Raspberry Pi Zero Pipboy

    Reading Time: 2 minutes

    While being holed up in the Vaults living off our stash of Nuke cola, we’ve come across this mammoth junk-build project, which uses Raspberry Pi Zero W to power a working Pipboy.

    Pipboy scrap build

    No Description

    UK-based JustBuilding went full Robert House and, over several months, built the device’s body by welding together scrap plastic. Raspberry Pi Zero W serves as the brain, with a display header mounted to the GPIO pins. The maker wrote a Pipboy-style user interface, including demo screens, in Python — et voilà…

    Lucky for him, semiconductors were already invented but, as JustBuilding admits, this is not what we’d call a beginner’s project. Think the Blue Peter show’s Tracey Island extravaganza, except you don’t have crafty co-presenters/builders, and you also need to make the thing do something useful (for our US readers who just got lost there, think Mr Rogers with glitter glue and outdoor adventure challenges).

    The original post on Instructables is especially dreamy, as JustBuilding has painstakingly produced a really detailed, step-by-step guide for you to follow, including in-the-making photos and links to relevant Raspberry Pi forum entries to help you out where you might get stuck along the way.

    And while Raspberry Pi can help you create your own post-apocalyptic wristwear, we’re still working on making that Stealthboy personal cloaking device a reality…

    If you’re lucky enough to have access to a 3D printer, the following is the kind of Pipboy you can knock up for yourself (though we really like JustBuilding’s arts’n’crafts upcycling style):

    3D Printed Pipboy 3000 MKIV with Raspberry Pi

    Find out how to 3D print and build your own functional Pipboy 3000 using a Raspberry Pi and Adafruit 3.5″ PiTFT. The pypboy python program for the Raspberry …

    Website: LINK

  • Arduino’s response to the Covid-19 outbreak

    Arduino’s response to the Covid-19 outbreak

    Reading Time: < 1 minute

    Arduino’s response to the Covid-19 outbreak

    Arduino TeamMarch 23rd, 2020

    For the latest update regarding Arduino’s response to the Covid-19 outbreak please click here.

    Priority Service for the Design & Production of Essential Medical and Personal Protective Equipment (PPE)

    As companies around the globe rapidly react to governments’ calls to produce critical medical equipment like ventilators and PPE, Arduino is prioritizing stock allocation for these urgent needs.

    If your company urgently requires any Arduino hardware or software to facilitate the prototyping and production of any equipment or solution to lessen the impact of Covid-19 please contact us.

    A dedicated team will work to ensure we support your needs through ensuring the fastest possible delivery (either directly or via sub-distribution) and/or expediting production as required. We will also provide increased levels of design support and help for those designing such critical equipment. 

    Website: LINK

  • Don’t forget about Steam Link on Raspberry Pi

    Don’t forget about Steam Link on Raspberry Pi

    Reading Time: 2 minutes

    Connect your gaming PC to your TV with ease, thanks to Steam Link and Raspberry Pi.

    A Steam Link to the past

    Back in 2018, we asked Simon, our Asset Management Assistant Keeper of the Swag, Organiser of the Stuff, Lord Commander of the Things to give Steam Link on Raspberry Pi a try for us, as he likes that sort of thing and was probably going to do it anyway.

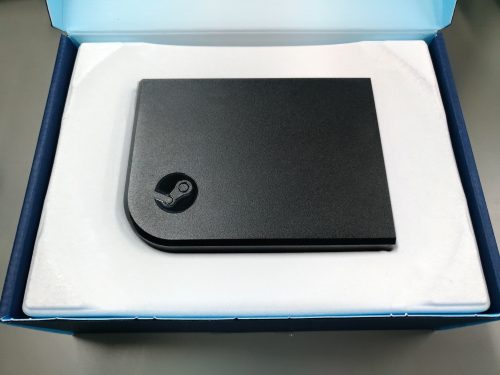
    Valve’s Steam Link, in case you don’t know, allows users of the gaming distribution platform Steam to stream video games from their PC to a display of their choice via their home network, with no need for cumbersome wires and whatnot.

    Originally produced as a stand-alone box in 2018, Valve released this tool as a free download to all Raspberry Pi users, making it accessible via a single line of code. Nice!

    The result of Simon’s experiment was positive: he reported that setting up Steam Link was easy, and the final product was a simple and affordable means of playing PC games on his TV, away from his PC in another room.

    And now…

    Well, it’s 2020 and since many of us are staying home lately, so we figured it would be nice to remind you all that this streaming service is still available.

    To set up Steam Link on your Raspberry Pi, simply enter the following into a terminal window:

    sudo apt update sudo apt install steamlink

    Website: LINK

  • Raspberry Pine

    Raspberry Pine

    Reading Time: 2 minutes

    Wood-n’t it be nice

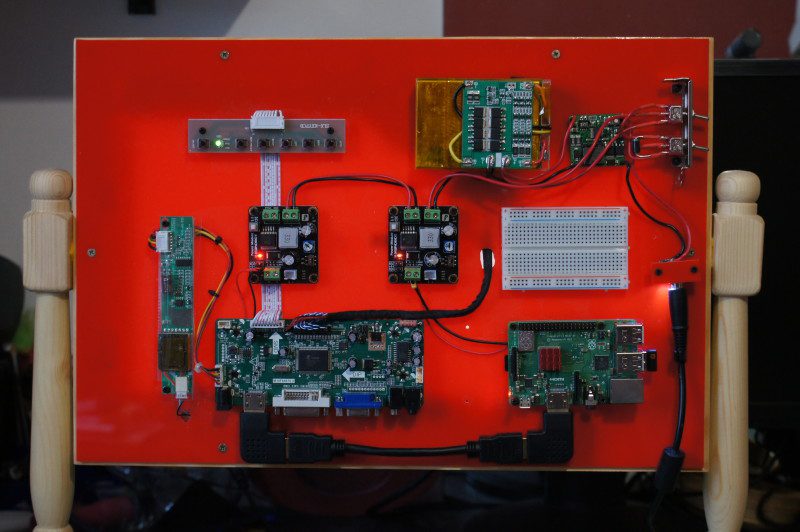
    The screen is mounted in a custom pine frame and stand. The frame is built using strips of small pine architrave backed by pine strips, offset to give a suitable rebate for the panel to fit and hiding the border. The side supports are modified pine staircase spindles. A Perspex sheet is used to mount the electronics and, when powered, the panel backlight creates a warm glow. Finally, short lengths of foam draft excluder secure the panel sandwiched in the frame.

    The LCD panel has a driver board with HDMI, DVI, and VGA inputs. This is connected to the project’s Raspberry Pi 3B+ by a short HDMI lead, with left- and right-handed adapters. This caused a headache for Neil: “I think the biggest challenge was sourcing the LCD panel driver board from a UK supplier on eBay. Unfortunately, the only documentation you get is from the tiny screen printing on the board itself.”

    The rest of the electronics supply and manage power. The main supply is the original PSU brick from the donor laptop, providing 19.5 V at 4.5 A. Two DFRobot PSU boards are used to drop the 19.5 V to 5 V for Raspberry Pi, and 12 V for the LCD driver board, enough to power the backlight.

    The rear is an exposed collection of controller board and, of course, the project’s Raspberry Pi 3B+

    There is also the option of battery power, from three Li-ion cells recovered from another laptop. A battery management system (BMS) board sits on top of it and ensures the cell charge states are balanced. Finally, a charger board provides the correct constant current and voltage charge profile.

    A tree-mendous result

    The result is a very different take on the classic desktop project: a computer that would look just as at home on the bedroom dressing table as it would in the study. Neil was certainly pleased with the results, as well as an unplanned effect: “The choice of raspberry-coloured Perspex as the support for the electronics produced a pleasant surprise. When powered on, the LCD backlight gives a raspberry glow.”

    Regarding planned further refinements, he tells us: “When the Raspberry Pi 4B+ gets the update to boot from USB, there may be a rebuild to refine the layout so the SSD doesn’t stick out the side. Currently, the donor laptop keyboard is being developed with an Arduino Due and more pine. There are thoughts of matching mouse and speakers.”

  • Tune in to the official Arduino Day 2020 livestream

    Tune in to the official Arduino Day 2020 livestream

    Reading Time: < 1 minute

    Tune in to the official Arduino Day 2020 livestream

    Arduino TeamMarch 20th, 2020

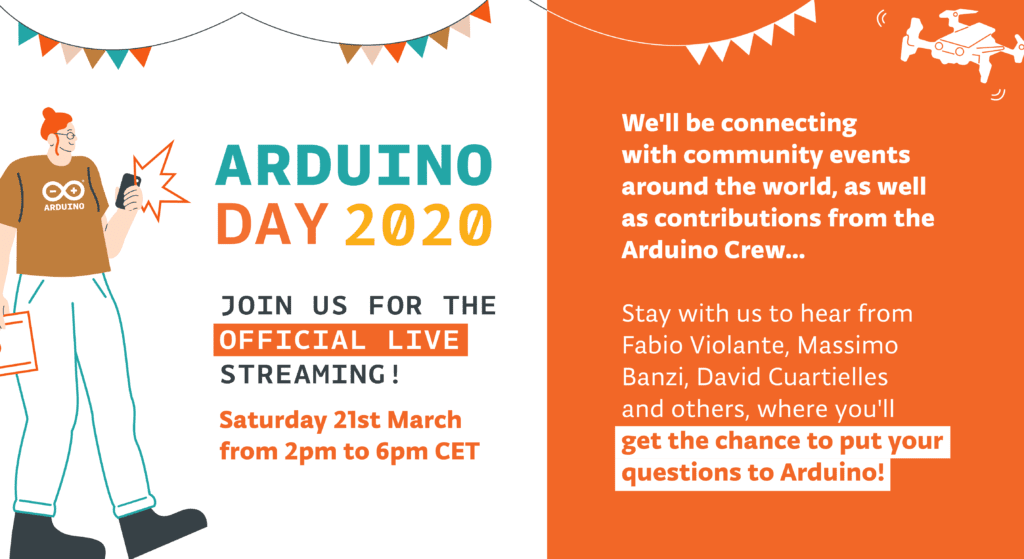
    We’re just hours away from (virtually) celebrating Arduino Day! Join us on Saturday for our official livestream, starting at 2pm CET. We’ll connect with community events from all around the world as well as hear from Arduino team members like Fabio Violante, Massimo Banzi, and David Cuartielles.

    Be sure to set a reminder and tune in!

    [youtube https://www.youtube.com/watch?v=u93BhPnooZc?feature=oembed&w=500&h=281]

    Website: LINK

  • Work remotely with Arduino Create — get a free upgrade now

    Work remotely with Arduino Create — get a free upgrade now

    Reading Time: 2 minutes

    Work remotely with Arduino Create — get a free upgrade now

    Arduino TeamMarch 20th, 2020

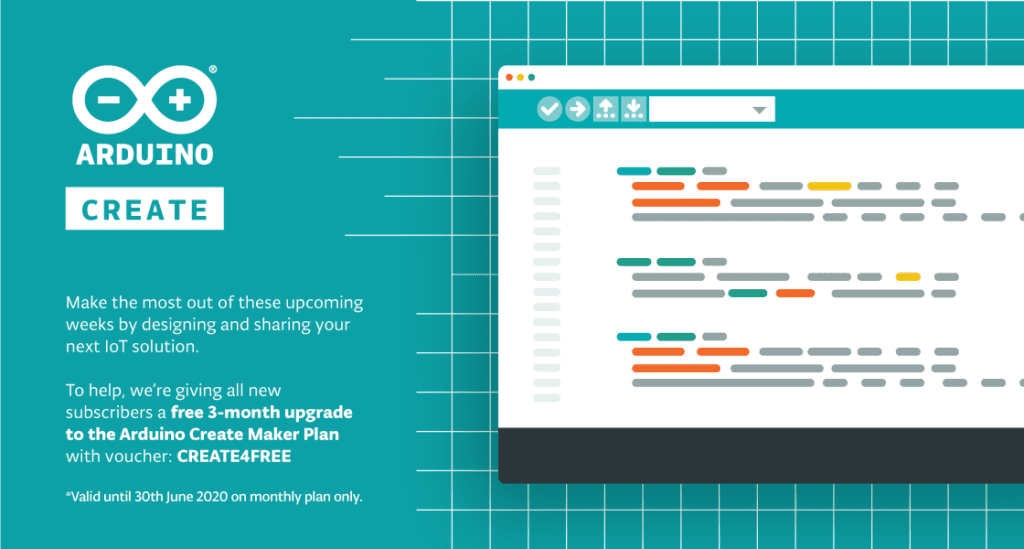
    To help individuals work remotely and share their designs with team members, we’re providing a free three-month upgrade to the Arduino Create Maker plan to all 1.4 million users of Create as well as new subscribers to the service. With Arduino Create everything is ready to go; there is no need to install libraries and you can quickly share your sketch with teammates via just a URL. 

    To gain your free three-month upgrade* all you need to do is go to Arduino Create choose the “Maker” plan with the default monthly option and enter the voucher code “CREATE4FREE” during the purchase process.

    Arduino Create enables users to write code, access content, configure boards and share projects. Features such as an always up-to-date online IDE and the ability to share builds and receive feedback from other facilities means you can work from home efficiently and effectively. If you don’t want to start a project from scratch there’s always the option to tap into the power of the community on the Arduino Project Hub by browsing projects and making them your own. 

    The Maker plan comes with the added benefits of up to 250 sketches allowed in your sketchbook along with 200MB space to store those sketches and libraries. You can manage more connected objects (five ‘things’) with up to 20 properties per ‘thing,’ enabling the development of complete IoT solutions. Automating processes remotely is further enabled by the Maker plan including access to set up and remotely control 5 of each cloud enabled Arduino board, three cloud-enabled Linux devices, and one cloud-enabled generic third-party board.

    Find out more details about Arduino Create and all the features included in the Maker plan here.

    *The free 3-month upgrade to Create Maker is applicable to the monthly plan and is limited to new subscribers only. Voucher code “CREATE4FREE” expires June 30th, 2020. 

    Please note the first monthly payment will start three months after you purchase the plan, and you are able to cancel your subscription at any time.

    Website: LINK

  • Activities you can do at home this week!

    Activities you can do at home this week!

    Reading Time: 3 minutes

    At the Raspberry Pi Foundation, our mission is to put the power of computing and digital making into the hands of people all over the world. We know that a lot of families around the globe are navigating school closures and practicing social distancing right now to keep their communities healthy and safe.

    So in today’s post, we put together a list for you with some of our free online projects and resources that digital makers of all ages and experience levels can explore at home.

    A family of digital makers (illustration)

    For most of these projects, you don’t need any new software or hardware. And many of our online resources are available in multiple languages, so young learners can use them even if their mother language isn’t English!

    Free activities for you at home

    Beginner level:

    • Rock band: This activity is a great introduction to Scratch, a block-based coding language. You’ll learn how to get started with Scratch and start your dream music group. Rock on!
    • Pixel art: This is a great activity for anyone just getting started with programming. Grab some crayons or colored pencils and create your masterpiece!
    • Web page stickers: In this activity, you’ll learn the basics of HTML and create some stickers. We can’t wait to see what you make!

    pixel art (illustration)

    Intermediate level

    • Storytime with Python (the language not the snake!): Let your imagination run wild with this activity! You will use Python to create a program that generates a random story, based on what the user types in.
    • Meme generator: In this activity you will make a meme generator with HTML, CSS, and Javascript! Using an image of your choice (bonus points if the image is of your pet), you can create your own memes.

    example of a meme

    Advanced level

    • Getting started with GUIs: In this activity, you will create two simple GUIs (graphical user interfaces) in Python. This is where you can get fancy with buttons, menus, and even a text box!
    • Pride and Prejudice for zombies: Learn how to use Python web requests and regular expressions while creating a version of Pride and Prejudice that’s more appealing to zombies.

    Not just for young learners

    • Build a web server with Flask: This is a great how-to project if you’d like to learn how to set up a web server and create a simple website using Flask, Python, and HTML/CSS. Be aware though, the guide may not always work smoothly, because of external updates.
    • Sign up for one of our free online courses. From programming to physical computing and running coding clubs, we’ve got something that will inspire you.
    • Check out The MagPi magazine! Download the free PDF of this month’s MagPi and read about the #MonthOfMaking, getting started with electronics, fancy ways to wear your Raspberry Pi, and more.

    People creating a robot (illustration)

    We are here to support you!

    Our team is working hard to bring you more online learning experiences to support you, your children, and everyone in the community at this time. You can read our CEO Philip Colligan’s message about how we are responding to the novel coronavirus.

    We want to make sure digital makers of all ages have the resources they need to explore and create with code. What do you think of these activities, and what else would you like to see? Tell us in the comments below!

    Website: LINK

  • VersaTouch brings touch localization and force sensing to everyday surfaces

    VersaTouch brings touch localization and force sensing to everyday surfaces

    Reading Time: 2 minutes

    VersaTouch brings touch localization and force sensing to everyday surfaces

    Arduino TeamMarch 19th, 2020

    Researchers from the University of Auckland in New Zealand’s are exploring a new way to construct interactive touch surfaces using finger-mounted audio transducers. 

    VersaTouch — which works on everyday surfaces — uses one or more receivers to measure sound waves emanating from the wearer’s “augmented” fingers, allowing it to calculate their positions and/or movements. The plug-and-play system can also sense force based on a changing audio signature and track individual digits by alternating each one’s sonic outputs. 

    Importantly, VersaTouch can be configured without permanent modification to the newly interactive surface. The setup includes an Arduino Due to receive signals, a Teensy 3.6 to control the transducers, and a MacBook to process the data and calculate the touch positions with a Java program.

    More information on the project can be found in the team’s research paper, and you can see it demonstrated in the video below. 

    [youtube https://www.youtube.com/watch?v=B-U2Yurobfg?feature=oembed&w=500&h=281]

    VersaTouch is a portable, plug-and-play system that uses active acoustic sensing to track fine-grained touch locations as well as touch force of multiple fingers on everyday surfaces without having to permanently instrument them or do an extensive calibration. Our system is versatile in multiple aspects. First, with simple calibration, VersaTouch can be arranged in arbitrary layouts in order to fit into crowded surfaces while retaining its accuracy. Second, various modalities of touch input, such as distance and position, can be supported depending on the number of sensors used to suit the interaction scenario. Third, VersaTouch can sense multi-finger touch, touch force, as well as identify the touch source. Last, VersaTouch is capable of providing vibrotactile feedback to fingertips through the same actuators used for touch sensing.

    Website: LINK

  • Build a physical game controller for Infinite Bunner

    Build a physical game controller for Infinite Bunner

    Reading Time: 5 minutes

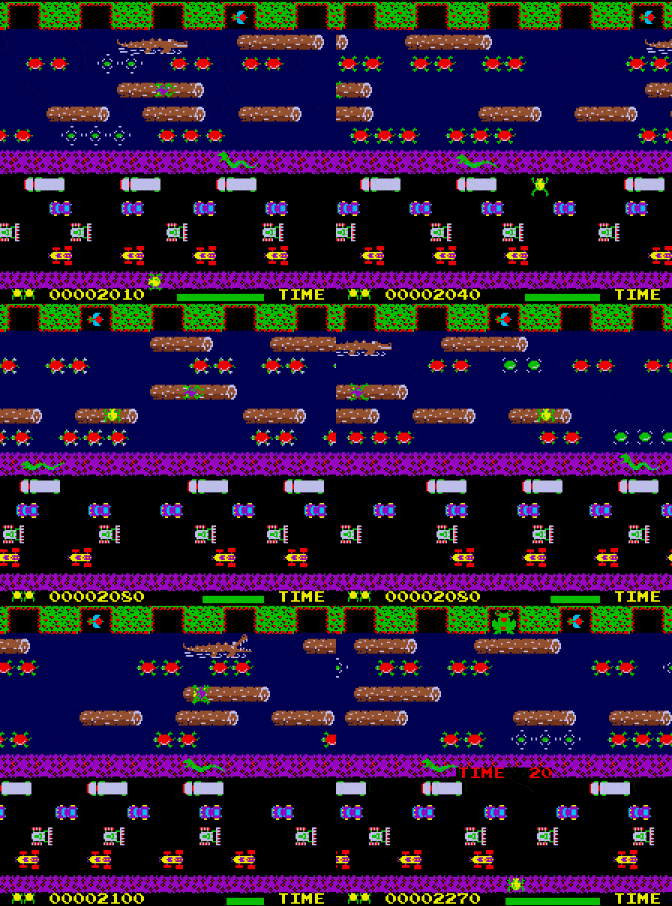
    In HackSpace magazine issue 28 we had a look at how to create an ultrasonic controller for a version of Pong called Boing!. This month, we’re going to take a step further forward through video game history and look at the game Frogger. In this classic game, you control a frog as it makes its way across logs, roads, and train tracks, avoiding falling in the water or getting hit.

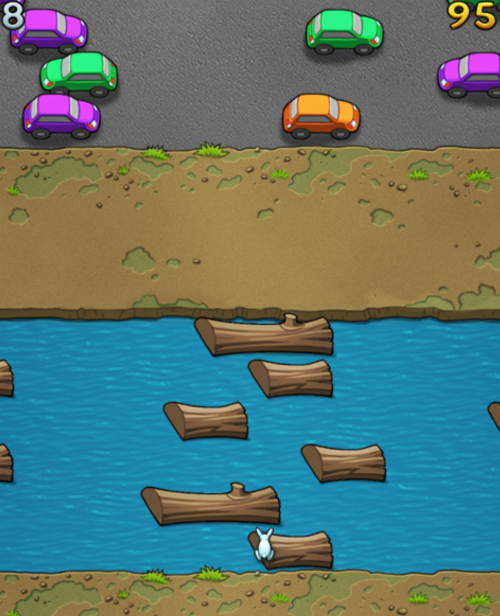
    Infinite Bunner

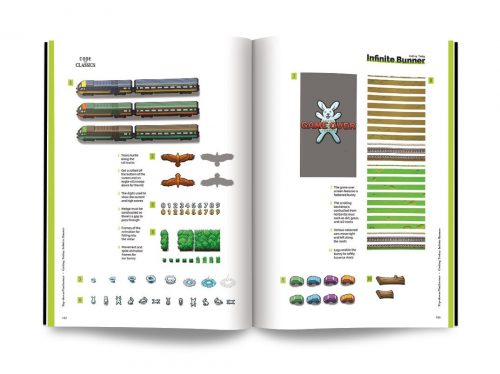
    The tribute to Frogger in the new Code the Classics Volume 1 book is called Infinite Bunner, and works in much the same way, except you control a bunny.

    Jump along the logs, dodge the traffic, avoid the trains, and keep your bunny alive for as long as possible

    All this hopping got us thinking about a controller. Our initial idea was that since the animals jump, so should the controller. An accelerometer can detect freefall, so it shouldn’t be too hard to convert that into button presses. However, it turns out that computer-controlled frogs and rabbits can jump much, much faster than humans can, and we really struggled to get a working game mechanic, so we compromised a little and worked with ‘flicks’.

    The flick controller

    The basic idea is that you tilt the controller left or right to move left or right, but you have to flick it up to register a jump (simply holding it upright won’t work).

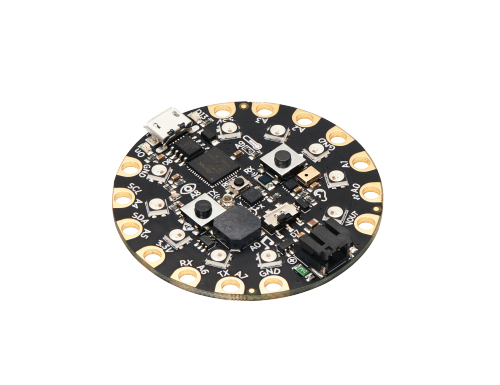
    We’ve used a Circuit Playground Bluefruit as our hardware, but it would work equally well with a Circuit Playground Express. There are two key parts to the software. The first is reading in accelerometer values and use these to know what orientation the board is in, and the second is the board mimicing a USB keyboard and sending keystrokes to any software running on it.

    Playing Infinite Bunner

    The first step is to get Infinite Bunner working on your machine.

    Get your copy of Code the Classics today

    You can download the code for all the Code the Classics Volume 1 games here. Click on Clone or Download > Download ZIP. Unzip the download somewhere.

    You’ll need Python 3 with Pygame Zero installed. The process for this differs a little between different computers, but there’s a good overview of all the different options on page 186 of Code the Classics.

    Subscribe to HackSpace magazine for twelve months and you get a Circuit Playground Express for free! Then you can make your very own Infinite Bunner controller

    Once everything’s set up, open a terminal and navigate to the directory you unzipped the code in. Then, inside that, you should find a folder called bunner-master and move into that. You can then run:

    python3 bunner.py

    Have a few goes playing the game, and you’ll find that you need the left, right, and up arrow keys to play (there is also the down arrow, but we’ve ignored this since we’ve never actually used it in gameplay – if you’re a Frogger/Bunner aficionado, you may wish to implement this as well).

    Reading the accelerometer is as easy as importing the appropriate module and running one line:

    from adafruit_circuitplayground import cpx, y, z = cp.acceleration

    Sending key presses is similarly easy. You can set up a keyboard with the following:

    from adafruit_hid.keyboard import Keyboard from adafruit_hid.keyboard_layout_us import KeyboardLayoutUS from adafruit_hid.keycode import Keycode keyboard = Keyboard(usb_hid.devices)

    Then send key presses with code such as this:

    time.keyboard.press(Keycode.LEFT_ARROW) time.sleep(0.1) keyboard.release_all()

    The only thing left is to slot in our mechanics. The X-axis on the accelerometer can determine if the controller is tilted left or right. The output is between 10 (all the way left) and -10 (all the way right). We chose to threshold it at 7 and -7 to require the user to tilt it most of the way. There’s a little bit of fuzz in the readings, especially as the user flicks the controller up, so having a high threshold helps avoid erroneous readings.

    The Y-axis is for jumping. In this case, we require a ‘flap’ where the user first lifts it up (over a threshold of 5), then back down again.

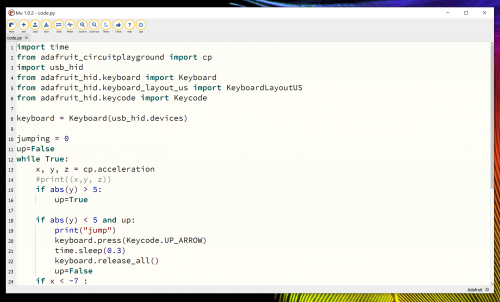
    The full code for our controller is:

    import time from adafruit_circuitplayground import cp import usb_hid from adafruit_hid.keyboard import Keyboard from adafruit_hid.keyboard_layout_us import KeyboardLayoutUS from adafruit_hid.keycode import Keycode keyboard = Keyboard(usb_hid.devices) jumping = 0 up=False while True: x, y, z = cp.acceleration if abs(y) > 5: up=True if y < 5 and up: keyboard.press(Keycode.UP_ARROW) time.sleep(0.3) keyboard.release_all() up=False if x < -7 : keyboard.press(Keycode.LEFT_ARROW) time.sleep(0.1) keyboard.release_all() if x < 7 : keyboard.press(Keycode.RIGHT_ARROW) time.sleep(0.1) keyboard.release_all() time.sleep(0.1) if jumping > 0: jumping=jumping-1

    It doesn’t take much CircuitPython to convert a microcontroller into a games controller

    The final challenge we had was that there’s a bit of wobble when moving the controller around – especially when trying to jump repeatedly and quickly. After fiddling with thresholds for a while, we found that there’s a much simpler solution: increase the weight of the controller. The easiest way to do this is to place it inside a book. If you’ve ever held a copy of Code the Classics, you’ll know that it’s a fairly weighty tome. Just place the board inside and close the book around it, and all the jitter disappears.

    That’s all there is to the controller. You can use it to play the game, just as you would any joypad. Start the game as usual, then start flapping the book around to get hopping.

    HackSpace magazine is out now

    The latest issue of HackSpace magazine is out today and can be purchased from the Raspberry Pi Press online store. You can also download a copy if you want to see what all the fuss is about.

    Code the Classics is available from Raspberry Pi Press as well, and comes with free UK shipping. And here’s a lovely video about Code the Classics artist Dan Malone and the gorgeous artwork he created for the book:

    Code the Classics: Artist Dan Malone

    No Description

    Website: LINK