Kategorie: Linux

  • Upgrading an inexpensive exercise bike with a Nano 33 BLE Sense

    Upgrading an inexpensive exercise bike with a Nano 33 BLE Sense

    Reading Time: < 1 minute

    Upgrading an inexpensive exercise bike with a Nano 33 BLE Sense

    Arduino TeamOctober 8th, 2020

    After purchasing a basic foldable exercise bike, Thomas Schucker wondered if he could get a bit more out of it, perhaps even using it with virtual riding apps like Zwift and RGT. By default, this piece of equipment is set up to output cadence info via a simple headphone jack, using a demagnetized portion of the flywheel for sensing.

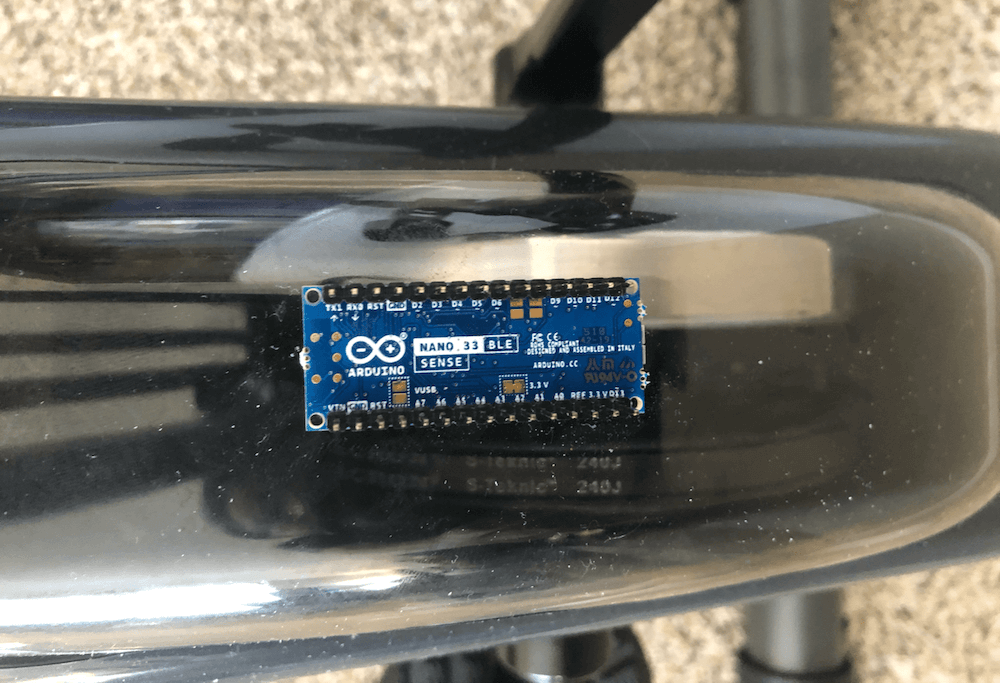
    Taking this a step further, Schucker found that the magnetic field amplitude actually changes with the resistance input, allowing him to correlate the two with an analog sensor built into the Arduino Nano 33 BLE Sense.

    The Nano is attached near the flywheel, and sends data over BLE, enabling him to use this rather cheap indoor bike in a much more involved way than it was likely ever intended. Code for the project is available on GitHub, while a demo of it controlling Zwift can be seen in the video below.

    Website: LINK

  • How can we help? New Help Center makes it easier than ever to enjoy Arduino

    How can we help? New Help Center makes it easier than ever to enjoy Arduino

    Reading Time: 3 minutes

    How can we help? New Help Center makes it easier than ever to enjoy Arduino

    Arduino TeamOctober 8th, 2020

    The Arduino customer support team is excited to announce the final release of the Arduino Help Center. A place where you can find answers to your questions and lots of useful troubleshooting articles to help you enjoy and get the most out of the Arduino experience.  

    With the active Arduino community finding ever more creative ways to use an Arduino, building a purposeful help center with customers at heart has been a challenge that we enjoyed taking. The design, development and customer support teams have been studying all the different contact points in our ecosystem to gather more information and insights on how users interact with Arduino; providing a solid foundation to build a Help Center with useful sections and friendly navigation.

    One primary aim of putting together the Help Center was to specifically make it easier for new Arduino users to access all the information that can help them to get the most out of their Arduino experience. This new solution expands the channels we use to support our customers, and rest assured we are still here to help if you can’t find the answer you’re looking for — plus there is the Arduino forum with millions of community members out there willing to share their tips. Given the constantly active nature of the Arduino community, we will continue to add new articles on a monthly basis with the most topical and useful solutions.

    How to use the new Arduino Help Center

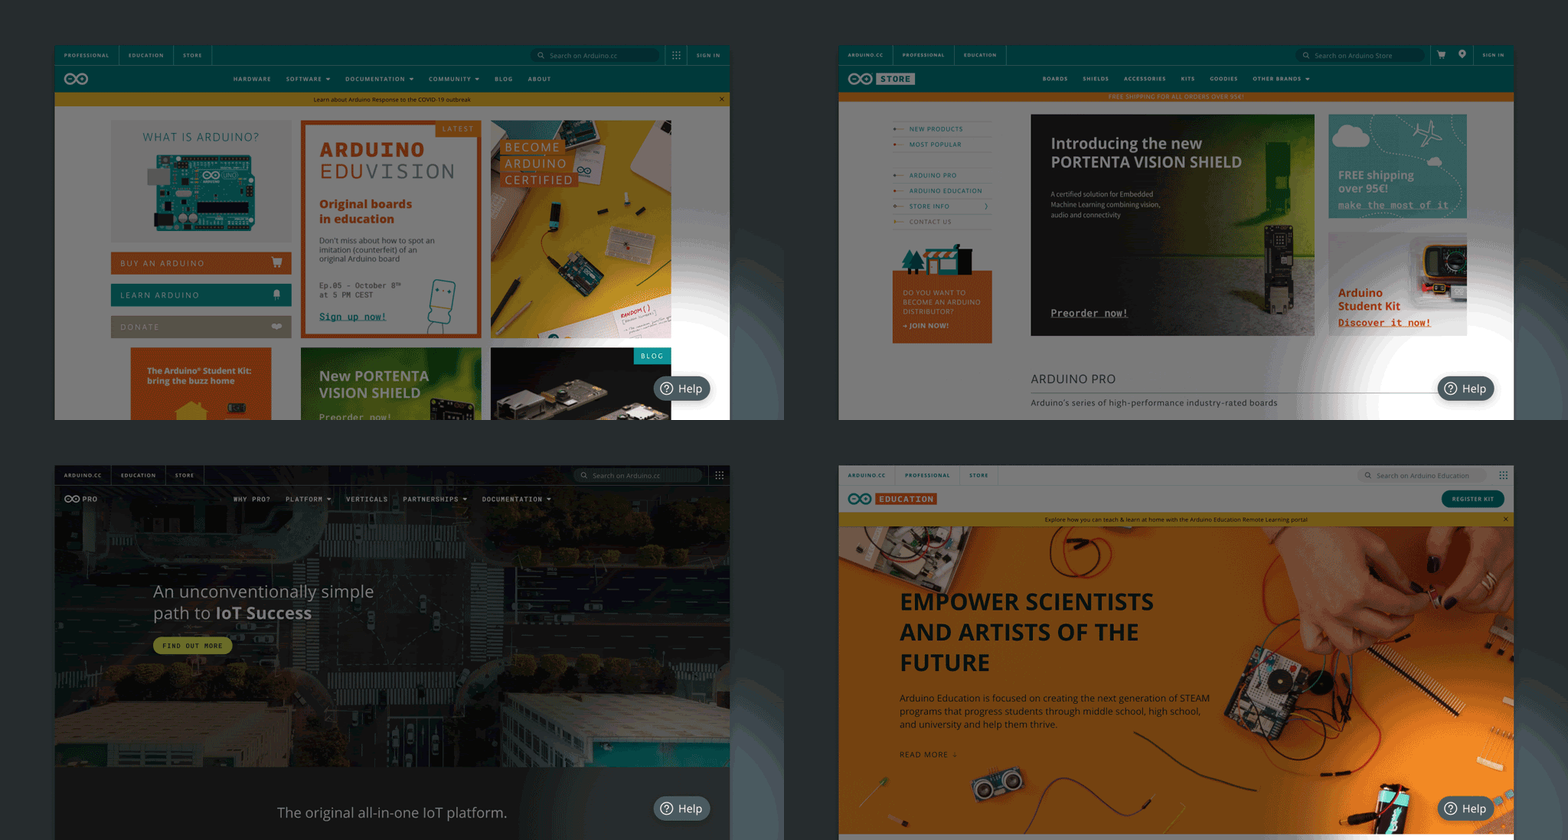
    The Arduino Help Center is always available — simply click ‘Help’ in the bottom right of your screen.

    Once there you will find 4 main sections:

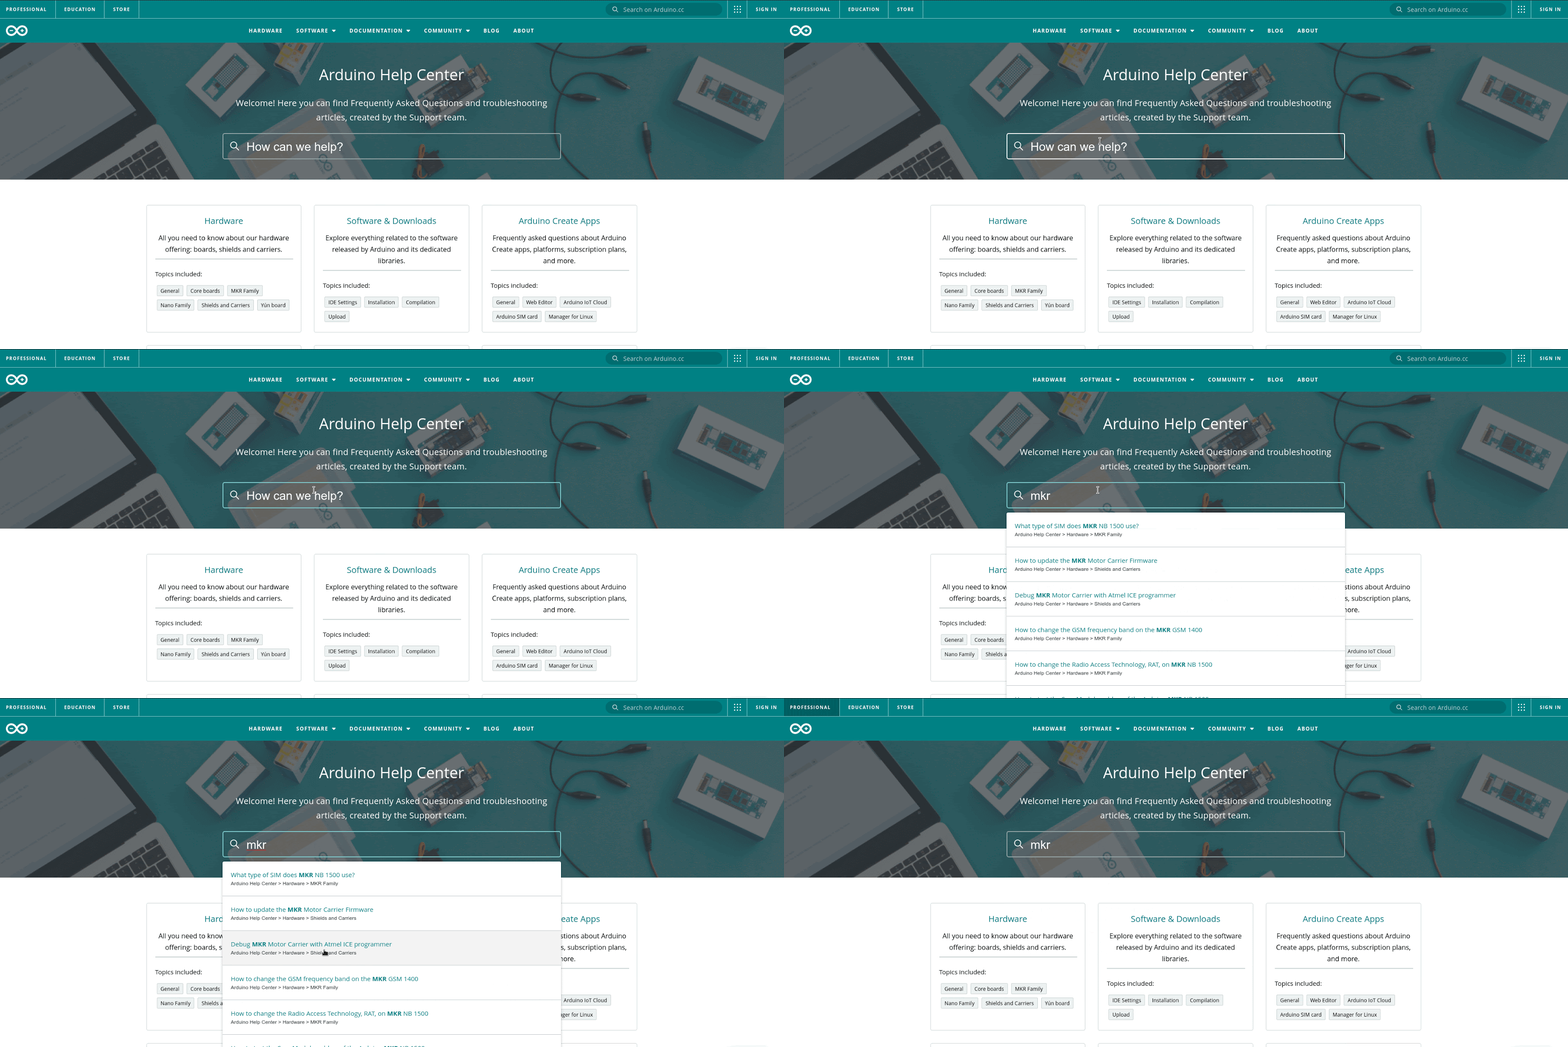
    • Search bar: The search will immediately find any relevant article within the Help Center. For instance, if you are looking for information about the ‘MKR NB 1500’,  simply type the name of the board and you will have access to all the available articles for this board.
    • Articles: For each of navigation the articles have divided into 6 categories:
      • Hardware Products: boards and shields (by family)
      • Software: IDE and Libraries. 
      • Arduino Create Apps: Web editor, Arduino IoT cloud, Arduino Sim card and linux devices.
      • Education: All our educational offers.
      • Store Support: orders, shipping and payments.
      • About Arduino:  Using your Arduino account, Arduino logos and trademark.
    • Tutorials: Useful tutorials including ‘getting started’ and examples to explore.
    • Additional support: Other ways to interact with the Arduino Customer support and the Arduino Community  (The Arduino Forum, our contact us forms and our discord server).

    What is next?

    Our customers and community are fundamental for our evolution and the Help Center is just the first move towards a better customer experience. Therefore we want to hear from all of you and for now we want to understand how relevant is every article and if it helped you solve your question. Just by answering the questions at the end of the article, it helps us to produce better and more accurate explanations. Also, don’t hesitate on suggesting new articles or fixes through our contact us form. 

    Website: LINK

  • How teachers train in Computing with our free online courses

    How teachers train in Computing with our free online courses

    Reading Time: 4 minutes

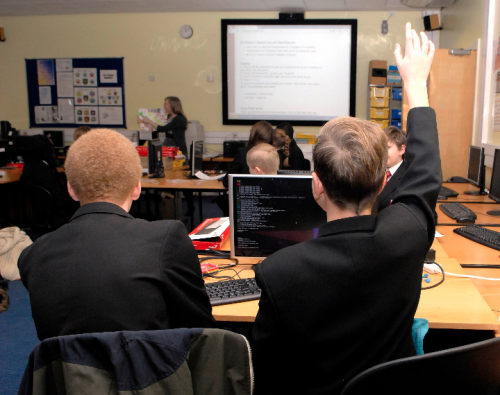
    Since 2017 we’ve been training Computing educators in England and around the world through our suite of free online courses on FutureLearn. Thanks to support from Google and the National Centre for Computing Education (NCCE), all of these courses are free for anyone to take, whether you are a teacher or not!

    An illustration of a bootcamp for computing teachers

    We’re excited that Computer Science educators at all stages in their computing journey have embraced our courses — from teachers just moving into the field to experienced educators looking for a refresher so that they can better support their colleagues.

    Hear from two teachers about their experience of training with our courses and how they are benefitting!

    Moving from Languages to IT to Computing

    Rebecca Connell started out as a Modern Foreign Languages teacher, but now she is Head of Computing at The Cowplain School, a 11–16 secondary school in Hampshire.

    Computing teacher Rebecca Connell
    Computing teacher Rebecca finds our courses “really useful in building confidence and taking [her] skills further”.

    Although she had plenty of experience with Microsoft Office and was happy teaching IT, at first she was daunted by the technical nature of Computing:

    “The biggest challenge for me has been the move away from an IT to a Computing curriculum. To say this has been a steep learning curve is an understatement!”

    However, Rebecca has worked with our courses to improve her coding knowledge, especially in Python:

    “Initially, I undertook some one-day programming courses in Python. Recently, I have found the Raspberry Pi courses to be really useful in building confidence and taking my skills further. So far, I have completed Programming 101 — great for revision and teaching ideas — and am now into Programming 102.”

    GCSE Computing is more than just programming, and our courses are helping Rebecca develop the rest of her Computing knowledge too:

    “I am now taking some online Raspberry Pi courses on computer systems and networks to firm up my knowledge — my greatest fear is saying something that’s not strictly accurate! These courses have some good ideas to help explain complex concepts to students.”

    She also highly rates the new free Teach Computing Curriculum resources we have developed for the NCCE:

    “I really like the new resources and supporting materials from Raspberry Pi — these have really helped me to look again at our curriculum. They are easy to follow and include everything you need to take students forward, including lesson plans.”

    And Rebecca’s not the only one in her department who is benefitting from our courses and resources:

    “Our department is supported by an excellent PE teacher who delivers lessons in Years 7, 8, and 9. She has enjoyed completing some of the Raspberry Pi courses to help her to deliver the new curriculum and is also enjoying her learning journey.”

    Refreshing and sharing your knowledge

    Julie Price, a CAS Master Teacher and NCCE Computer Science Champion, has been “engaging with the NCCE’s Computer Science Accelerator programme, [to] be in a better position to appreciate and help to resolve any issues raised by fellow participants.”

    Computing teacher Julie Price
    Computer science teacher Julie Price says she is “becoming addicted” to our online courses!

    “I have encountered new learning for myself and also expressions of very familiar content which I have found to be seriously impressive and, in some cases, just amazing. I must say that I am becoming addicted to the Raspberry Pi Foundation’s online courses!”

    She’s been appreciating the open nature of the courses, as we make all of the materials free to use under the Open Government Licence:

    “Already I have made very good use of a wide range of the videos, animations, images, and ideas from the Foundation’s courses.”

    Julie particularly recommends the Programming Pedagogy in Secondary Schools: Inspiring Computing Teaching course, describing it as “a ‘must’ for anyone wishing to strengthen their key stage 3 programming curriculum.”

    Join in and train with us

    Rebecca and Julie are just 2 of more than 140,000 active participants we have had on our online courses so far!

    With 29 courses to choose from (and more on the way!), from Introduction to Web Development to Robotics with Raspberry Pi, we have something for everyone — whether you’re a complete beginner or an experienced computer science teacher. All of our courses are free to take, so find one that inspires you, and let us support you on your computing journey, along with Google and the NCCE.

    If you’re a teacher in England, you are eligible for free course certification from FutureLearn via the NCCE.

    Website: LINK

  • SUDO: sudoku-solving robot

    SUDO: sudoku-solving robot

    Reading Time: 3 minutes

    Named after both the UNIX command and Japanese puzzle, SUDO began life as a companion to help Arijit with number-based puzzles. “I was trying to master sudoku puzzles and invested a lot of effort,” he explains. As an experienced inventor and programmer, he soon realised there was no need to solve sudokus manually. “I can build a robot to solve any complex sudoku within seconds,” he reasoned.

    SUDO is powered by a Raspberry Pi 3B+ and has been carefully trained using machine learning to recognise numbers shown in different fonts

    Keeping track with robot camera eye

    Arijit has been experimenting with Raspberry Pi possibilities since 2017, when he began trying out IoT projects. These include a Spy-Dog live video surveillance bot, a drowsiness detection device, and a web-based GPS tracker. His SUDO robot runs on a Raspberry Pi 3 B+, but he says it could easily run on a Raspberry Pi Zero.

    For the sudoku challenge, the robot required “an eye to see the sudoku, a brain to solve the sudoku, and a medium to communicate the solution”, says Arijit. He soon realised that Raspberry Pi’s Camera Module could act as the eye, its processor as the brain, and a display and speaker as the communication medium.

    As long as SUDO is able to detect the puzzle placed in front of its camera, it’s able to solve complex sudokus in a few seconds. The caveat, says Arijit, is that the robot finds it tricky to read the puzzle grid in poor light. When it recognises a grid, SUDO states: “I have detected a sudoku,” quickly followed by “I have solved the sudoku successfully.” SUDO then displays the solution on its touchscreen display.

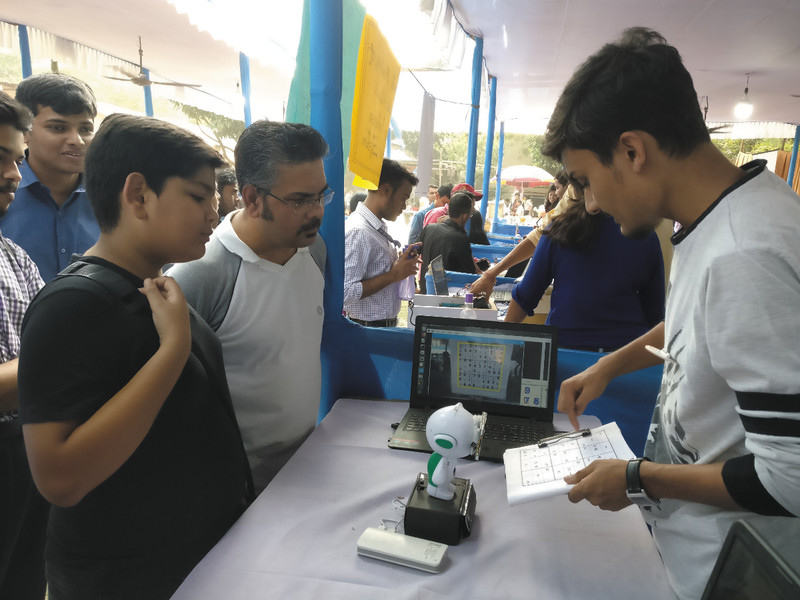
    Arijit holds out a sudoku puzzle for the robot to scan and solve; at the moment, it needs to be held steady

    Puzzling it out
    : solving sudoku with Raspberry Pi

    Arijit is working on overcoming the challenge of low light, which can cause SUDO to misread numbers on a sudoku grid. He has put in many hours getting SUDO to recognise different fonts. “Accuracy was the ultimate factor, as misinterpreting numbers would give wrong results,” he says.

    This required training the robot using machine learning algorithms to recognise all those fonts. Arijit used OpenCV to train SUDO. He is currently looking at ways to get his robot to follow and track a piece of paper held in front of its camera, since people often unintentionally move the paper containing the sudoku puzzle while SUDO is trying to decode it.

    Having gained experience of machine learning when training Raspberry Pi to recognise vehicle number-plates for another project, Arijit knew which existing algorithms to use to get SUDO to solve the puzzles. He adapted them to work with Raspberry Pi and his own machine learning data set. He used open-source Python code to control the robot. The robot’s appealing case was originally that of one of his childhood toys. The fully operational robot has been shown off at Maker Faires and tech events, attracting selfie-takers and kids who plead with Arijit to make them a robot to solve maths problems. SUDO even had a human challenger. Arijit proudly relates what happened: “Before the guy wrote a single digit on the paper, SUDO solved [the sudoku puzzle] and showed the solution”.

    Build a sudoku robot

    Find instructions on how to build your own SUDO robot on GitHub.

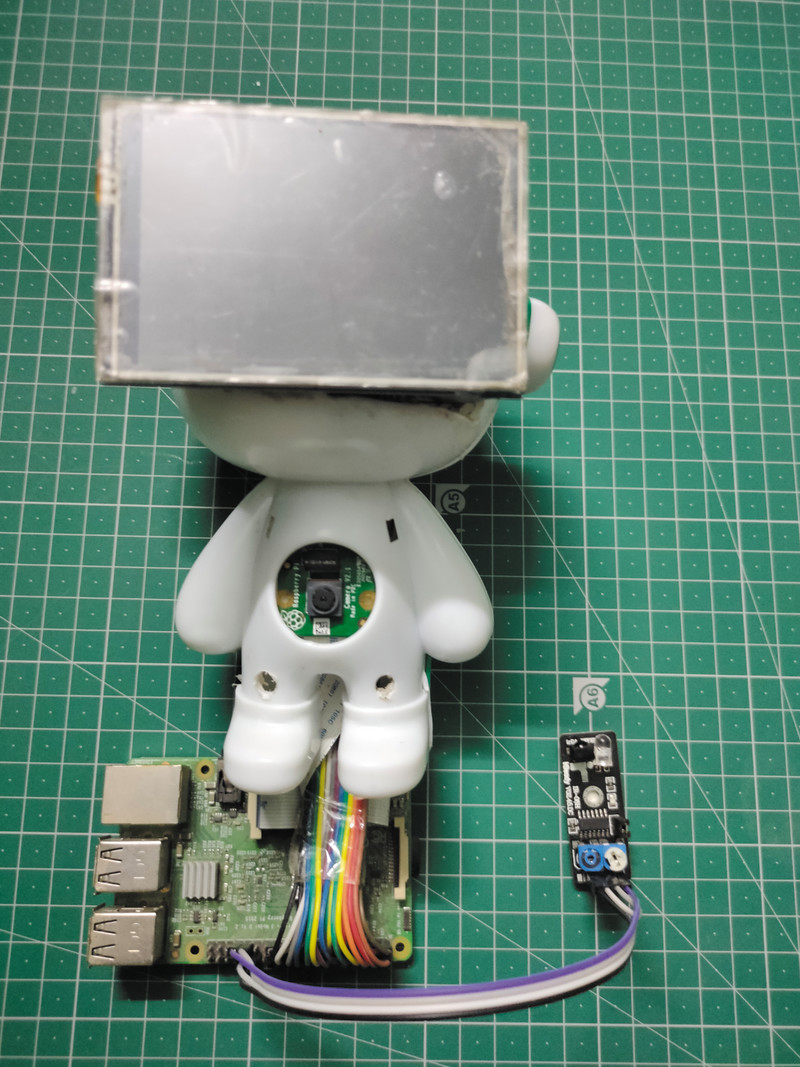
    Place an IR sensor on top of the touchscreen and connect it to Raspberry Pi, then screw or clip the rear of the robot shell in place. Use sudoku grids to help train your robot to recognise numerals.

  • The Pixel Mask animates mouth movements for fun yet safe trick-or-treating

    The Pixel Mask animates mouth movements for fun yet safe trick-or-treating

    Reading Time: 2 minutes

    The Pixel Mask animates mouth movements for fun yet safe trick-or-treating

    Arduino TeamOctober 7th, 2020

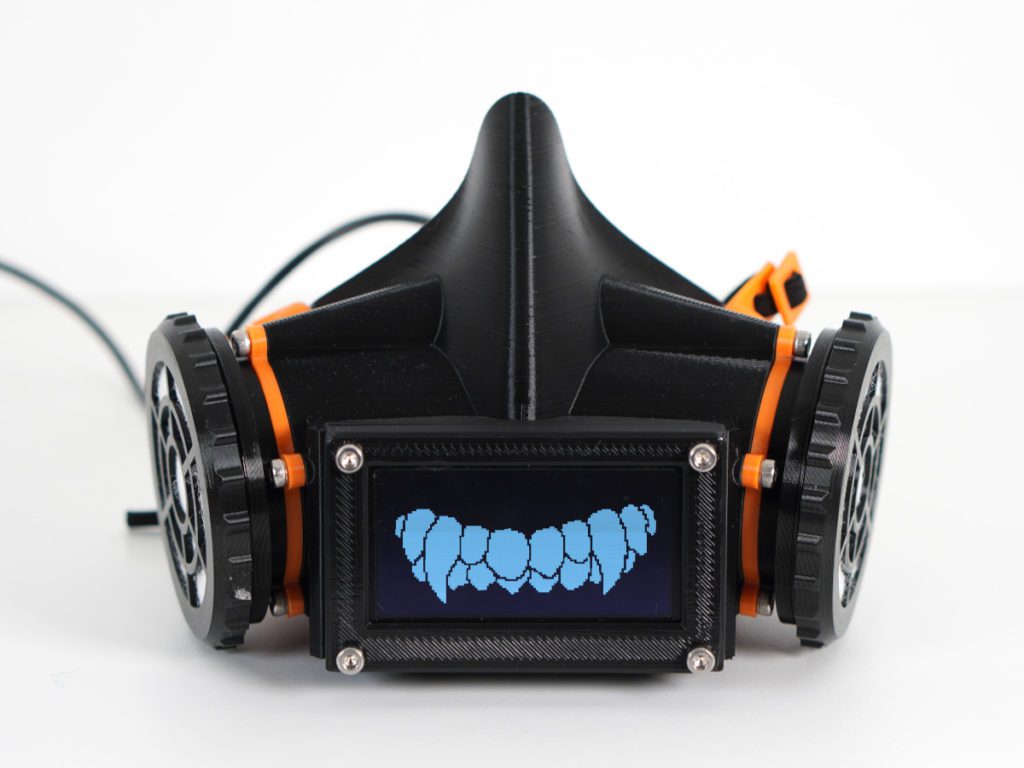
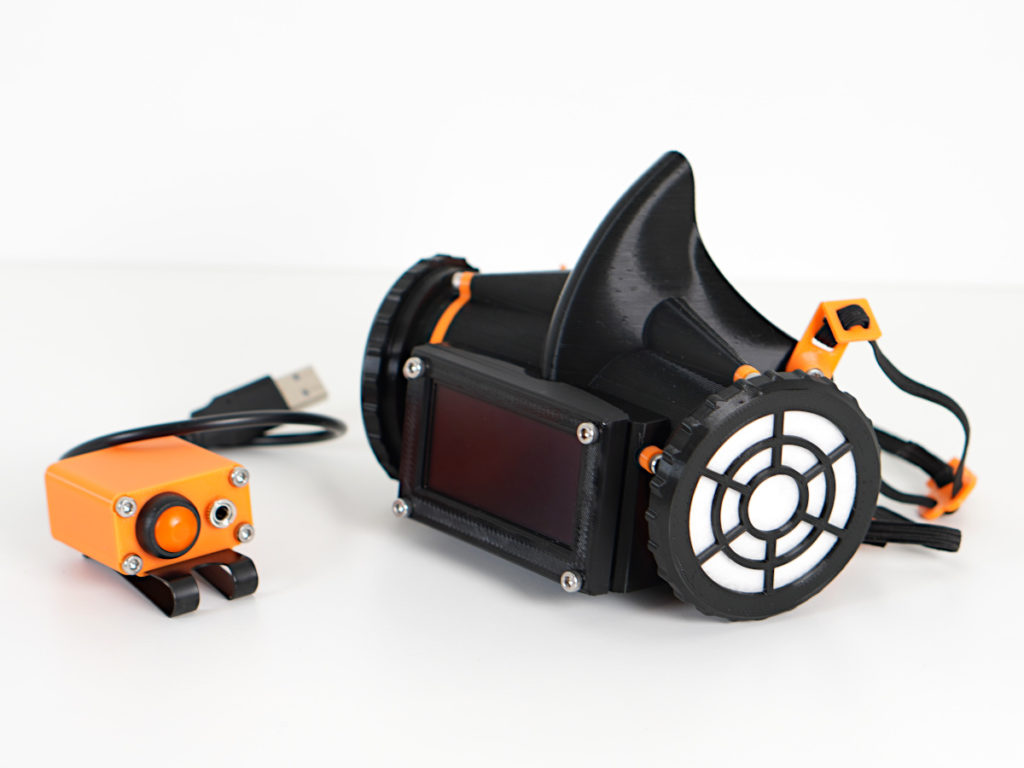
    While trick-or-treating may or may not be in effect this Halloween, if you’re planning to participate, a mask could be a good idea. To help add some “expression” to your COVID-19 facial covering, BuildXYZ has come up with the Pixel Mask — capable of showing fangs and other graphics on an 128×64 OLED screen to match any costume.

    But that’s not all. The device is equipped with an Arduino Nano and microphone that senses sound levels and then animates a mouth on the front display to mimic a wearer’s mouth movements. There’s even a button to activate a special “Trick or Treat” message.

    The build can be equipped with N95 filter material, and is powered by a portable USB pack. Print files are available on Thingiverse and code is on GitHub if you’d like to construct your own.

    [youtube https://www.youtube.com/watch?v=XleVUkH1xlI?feature=oembed&w=500&h=281]

    Website: LINK

  • This Arduino-powered clock tells time in colors

    This Arduino-powered clock tells time in colors

    Reading Time: 2 minutes

    This Arduino-powered clock tells time in colors

    Arduino TeamOctober 7th, 2020

    As humans, we’ve divided time up into 24 hours per day, 60 minutes per hour, and 60 seconds per minute. With many of us now working from home on differing schedules, time may seem a bit less concrete than before, like something that fades from one part of the day to another.

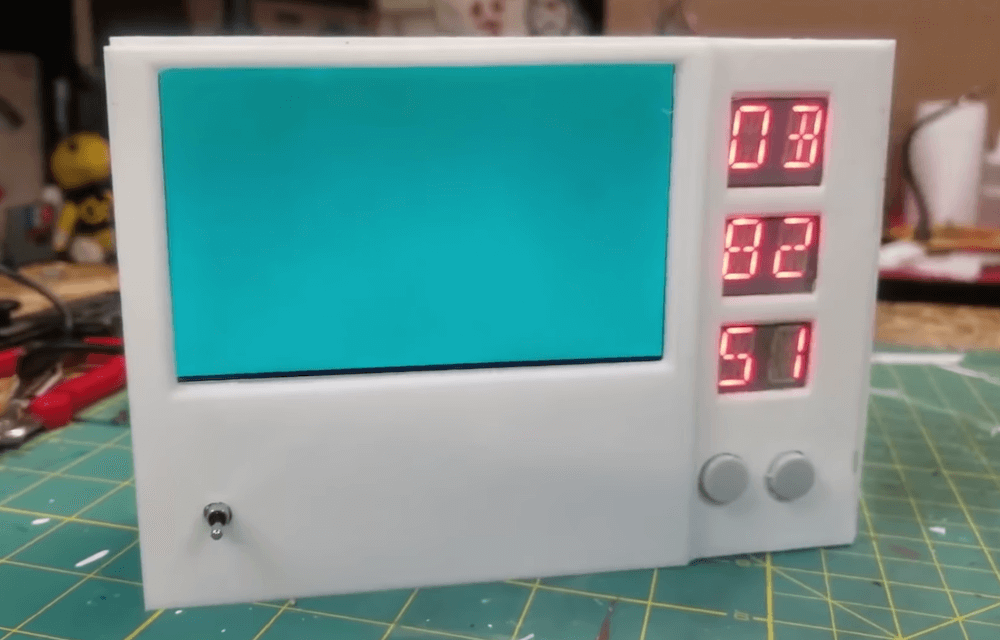
    To express this new reality, e14 Presents’ Matt Eargle has constructed a clock that cycles through “every” color in the rainbow, subbing in a scaled version of the HH:MM:SS time value for RGB values on a 5” LCD TFT display.

    The build is powered by an Arduino Uno with an RTC module for accurate timekeeping. The resulting color panel is quite interesting, if not so useful for, say, catching a train. If you do need to be punctual for something, the actual digits are shown along the side, so it should still be usable when things are (hopefully) a bit more normal.

    [youtube https://www.youtube.com/watch?v=jtvV1r_LD4U?feature=oembed&w=500&h=281]

    In the socially-distanced, work-from-home apocalypse of Southern California, clocks have become obsolete as time has become essentially meaningless. After months of no longer using an alarm clock, Matt has missed the simple act of checking the time — even for curiosity’s sake — and decides to build a clock that measures the passage of time in a completely novel way: by converting hours, minutes, and seconds into hexadecimal values and displaying the relative color value associated with that time. It’s certainly not the most practical chronometer in the world, but this hexadecimal color code clock proves that form doesn’t always have to follow function!

    Website: LINK

  • Haunted House hacks

    Haunted House hacks

    Reading Time: 3 minutes

    Spookify your home in time for Halloween with Rob Zwetsloot and these terror-ific projects!

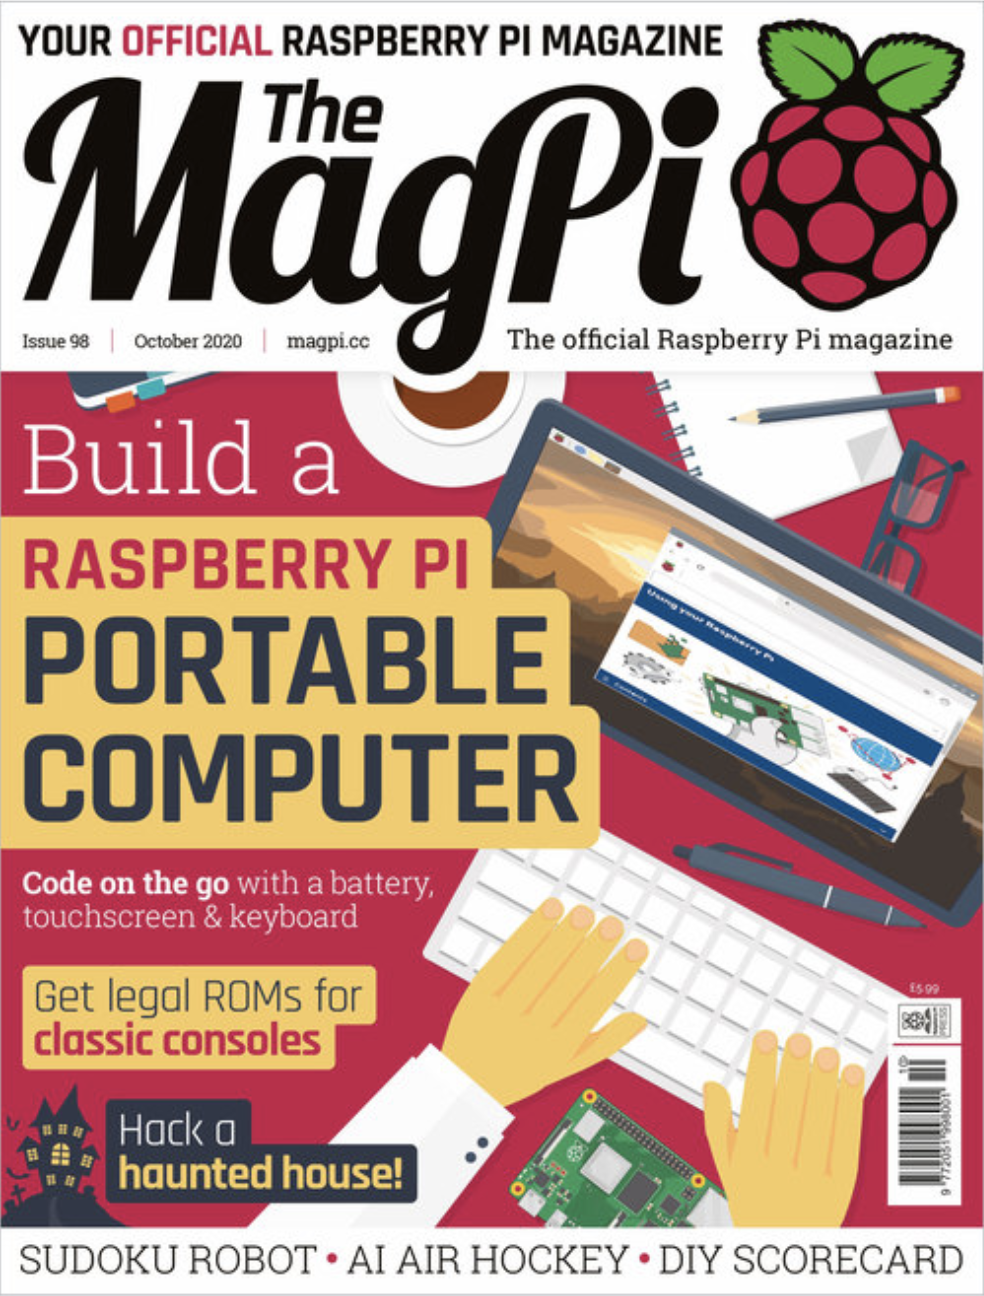
    We picked four of our favourites from a much longer feature in the latest issue of The MagPi magazine, so make sure you check it out if you need more Haunted House hacks in your life.

    Raspberry Pi Haunted House

    This project is a bit of a mixture of indoors and outdoors, with a doorbell on the house activating a series of spooky effects like a creaking door, ‘malfunctioning’ porch lights, and finally a big old monster mash in the garage.

    A Halloween themed doorbell

    MagPi magazine talked to its creator Stewart Watkiss about it a few years ago and he revealed how he used a PiFace HAT to interface with home automation techniques to create the scary show, although it can be made much easier these days thanks to Energenie. Our favourite part, though, is still the Home Alone-esque monster party that caps it off.

    Check it our for yourself here.

    Eye of Sauron

    It’s a very nice-looking build as well

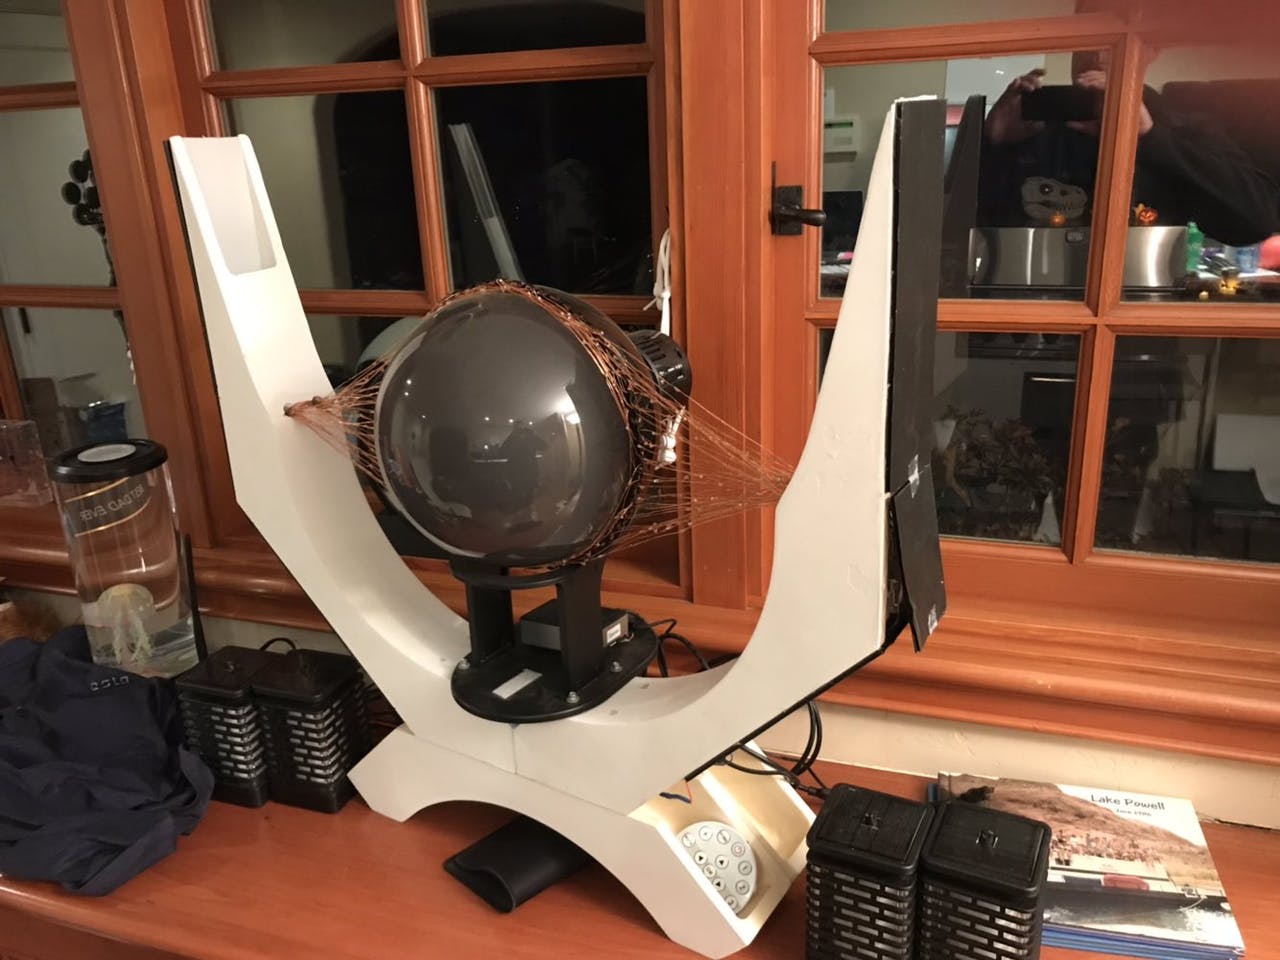
    The dreaded dark lord Sauron from Lord of the Rings watched over Middle-earth in the form of a giant flaming eye atop his black tower, Barad-dûr. Mike Christian’s version sits on top of a shed in Saratoga, CA.

    The eye of sauron on top of a barn lit in red lights
    Atop the shed with some extra light effects, it looks very scary

    It makes use of the Snake Eyes Bonnet from Adafruit, with some code modifications and projecting onto a bigger eye. Throw in some cool lights and copper wires and you get a nice little effect, much like that from the films.

    There are loads more cool photos on Mike’s original project page.

    Raspberry Pi-powered Jack-o-Lantern

    We love the eyes and scary sounds in this version that seem to follow you around

    A classic indoor Halloween decoration (and outdoor, according to American movies) is the humble Jack-o’-lantern. While you could carve your own for this kind of project (and we’ve seen many people do so), this version uses a pre-cut, 3D-printed pumpkin.

    3D printed pumpkin glowing orange
    The original 3D print lit with a single source is still fairly scary

    If you want to put one outside as well, we highly recommend you add some waterproofing or put it under a porch of some kind, especially if you live in the UK.

    Here’s a video about the project by the maker.

    Scary door

    You’re unlikely to trick someone already in your house with a random door that has appeared out of nowhere, but while they’re investigating they’ll get the scare of their life. This door was created as a ‘sequel’ to a Scary Porch, and has a big monitor where a window might be in the door. There’s also an array of air-pistons just behind the door to make it sound like someone is trying to get out.

    [youtube https://www.youtube.com/watch?v=LL48k6GSOrM?feature=oembed&w=500&h=281]

    There are various videos that can play on the door screen, and they’re randomised so any viewers won’t know what to expect. This one also uses relays, so be careful.

    This project is the brainchild of the element14 community and you can read more about how it was made here.

    The MagPi magazine is out now, available in print from the Raspberry Pi Press onlinestore, your local newsagents, and the Raspberry Pi Store, Cambridge.

    You can also download the PDF directly from the MagPi magazine website.

    Website: LINK

  • Embedded machine vision goes pro with the new Portenta Vision Shield

    Embedded machine vision goes pro with the new Portenta Vision Shield

    Reading Time: 3 minutes

    Embedded machine vision goes pro with the new Portenta Vision Shield

    Arduino TeamOctober 6th, 2020

    [youtube https://www.youtube.com/watch?v=RGLlcgOFx6U?feature=oembed&w=500&h=281]

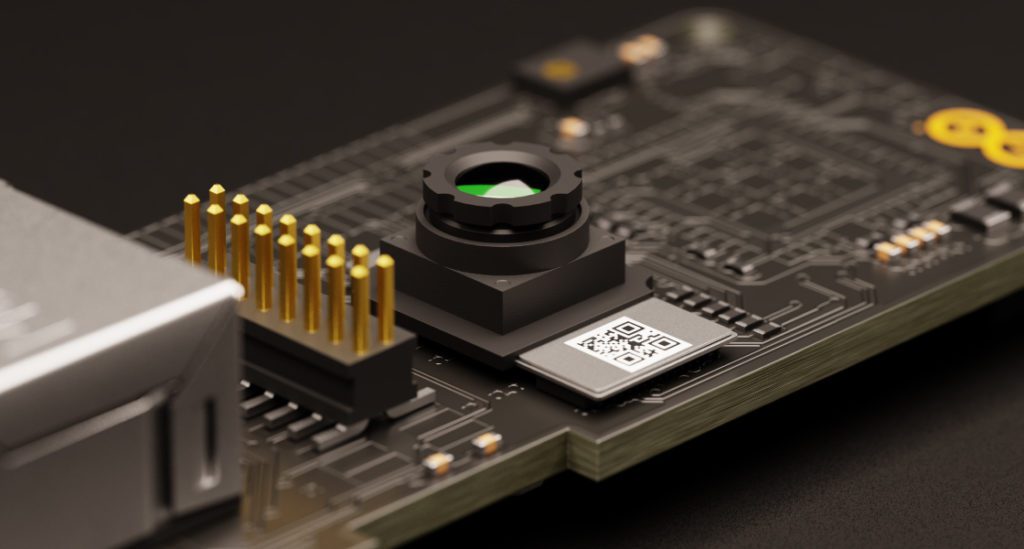
    We’re excited to announce the launch of the Arduino Portenta Vision Shield, a production-ready expansion for the powerful Arduino Portenta H7 that adds a low-power camera, two microphones, and connectivity — everything you need for the rapid creation of edge ML applications.

    Always-on machine vision

    The Portenta Vision Shield comes with an ultra-low-power Himax camera. The camera module autonomously detects motion while the Portenta H7 is in stand-by — only waking up the microcontroller when needed.

    Voice and audio event recognition

    The Portenta Vision Shield features two ultra-compact and omnidirectional MP34DT06JTR microphones, bringing voice recognition and audio event detection. Both the video and audio data can be stored on an SD card, and transmitted through Ethernet or LoRa® modules (plus option of the WiFi or BLE on the Portenta H7 module).

    Additional LoRa® or Ethernet connectivity

    The powerful Arduino Portenta H7 makes machine possible learning on-device — greatly reducing the communication bandwidth requirement in an IoT application. The LoRa® module option is specifically designed for edge ML applications, enabling low-power, long distance communication over LoRa® wireless protocol and LoRaWAN networks. 

    The Ethernet version is perfect for all those wired applications that need high bandwidth data transfer speed. 

    (N.B. The LoRa® and Ethernet connectivity options on the Portenta Vision Shield are in addition to the existing WiFi and BLE connectivity provided by the Portenta H7 module.)

    Embedded computer vision made easy

    In tandem with the launch of the Portenta Vision Shield Arduino has teamed up with OpenMV to make their IDE  fully compatible with the Portenta. The OpenMV IDE provides an easy way into computer vision using MicroPython as a programming paradigm. There are an abundance of AI/machine learning algorithms available straight ‘out of the box’ providing a user experience we are sure you will appreciate.

    Download the free license to OpenMV for Arduino Editor and browse through the examples we have prepared for you to try out embedded machine vision with your new Portenta Vision Shield.

    Embedded machine learning will transform industries. The Portenta Vision Shield is now the fastest way to go from concept to deployment of low-power machine vision and audio applications delivering certified, production-ready hardware with support from easy-to-use ML software frameworks,” says Andrea Richetta, Arduino Pro BU leader. 

    The Ethernet version of the Arduino Portenta Vision Shield is now available for pre-order on the Arduino Store, while the LoRa® version will be in stock by the end of this year.

    Website: LINK

  • Build an e-paper to-do list with Raspberry Pi

    Build an e-paper to-do list with Raspberry Pi

    Reading Time: 3 minutes

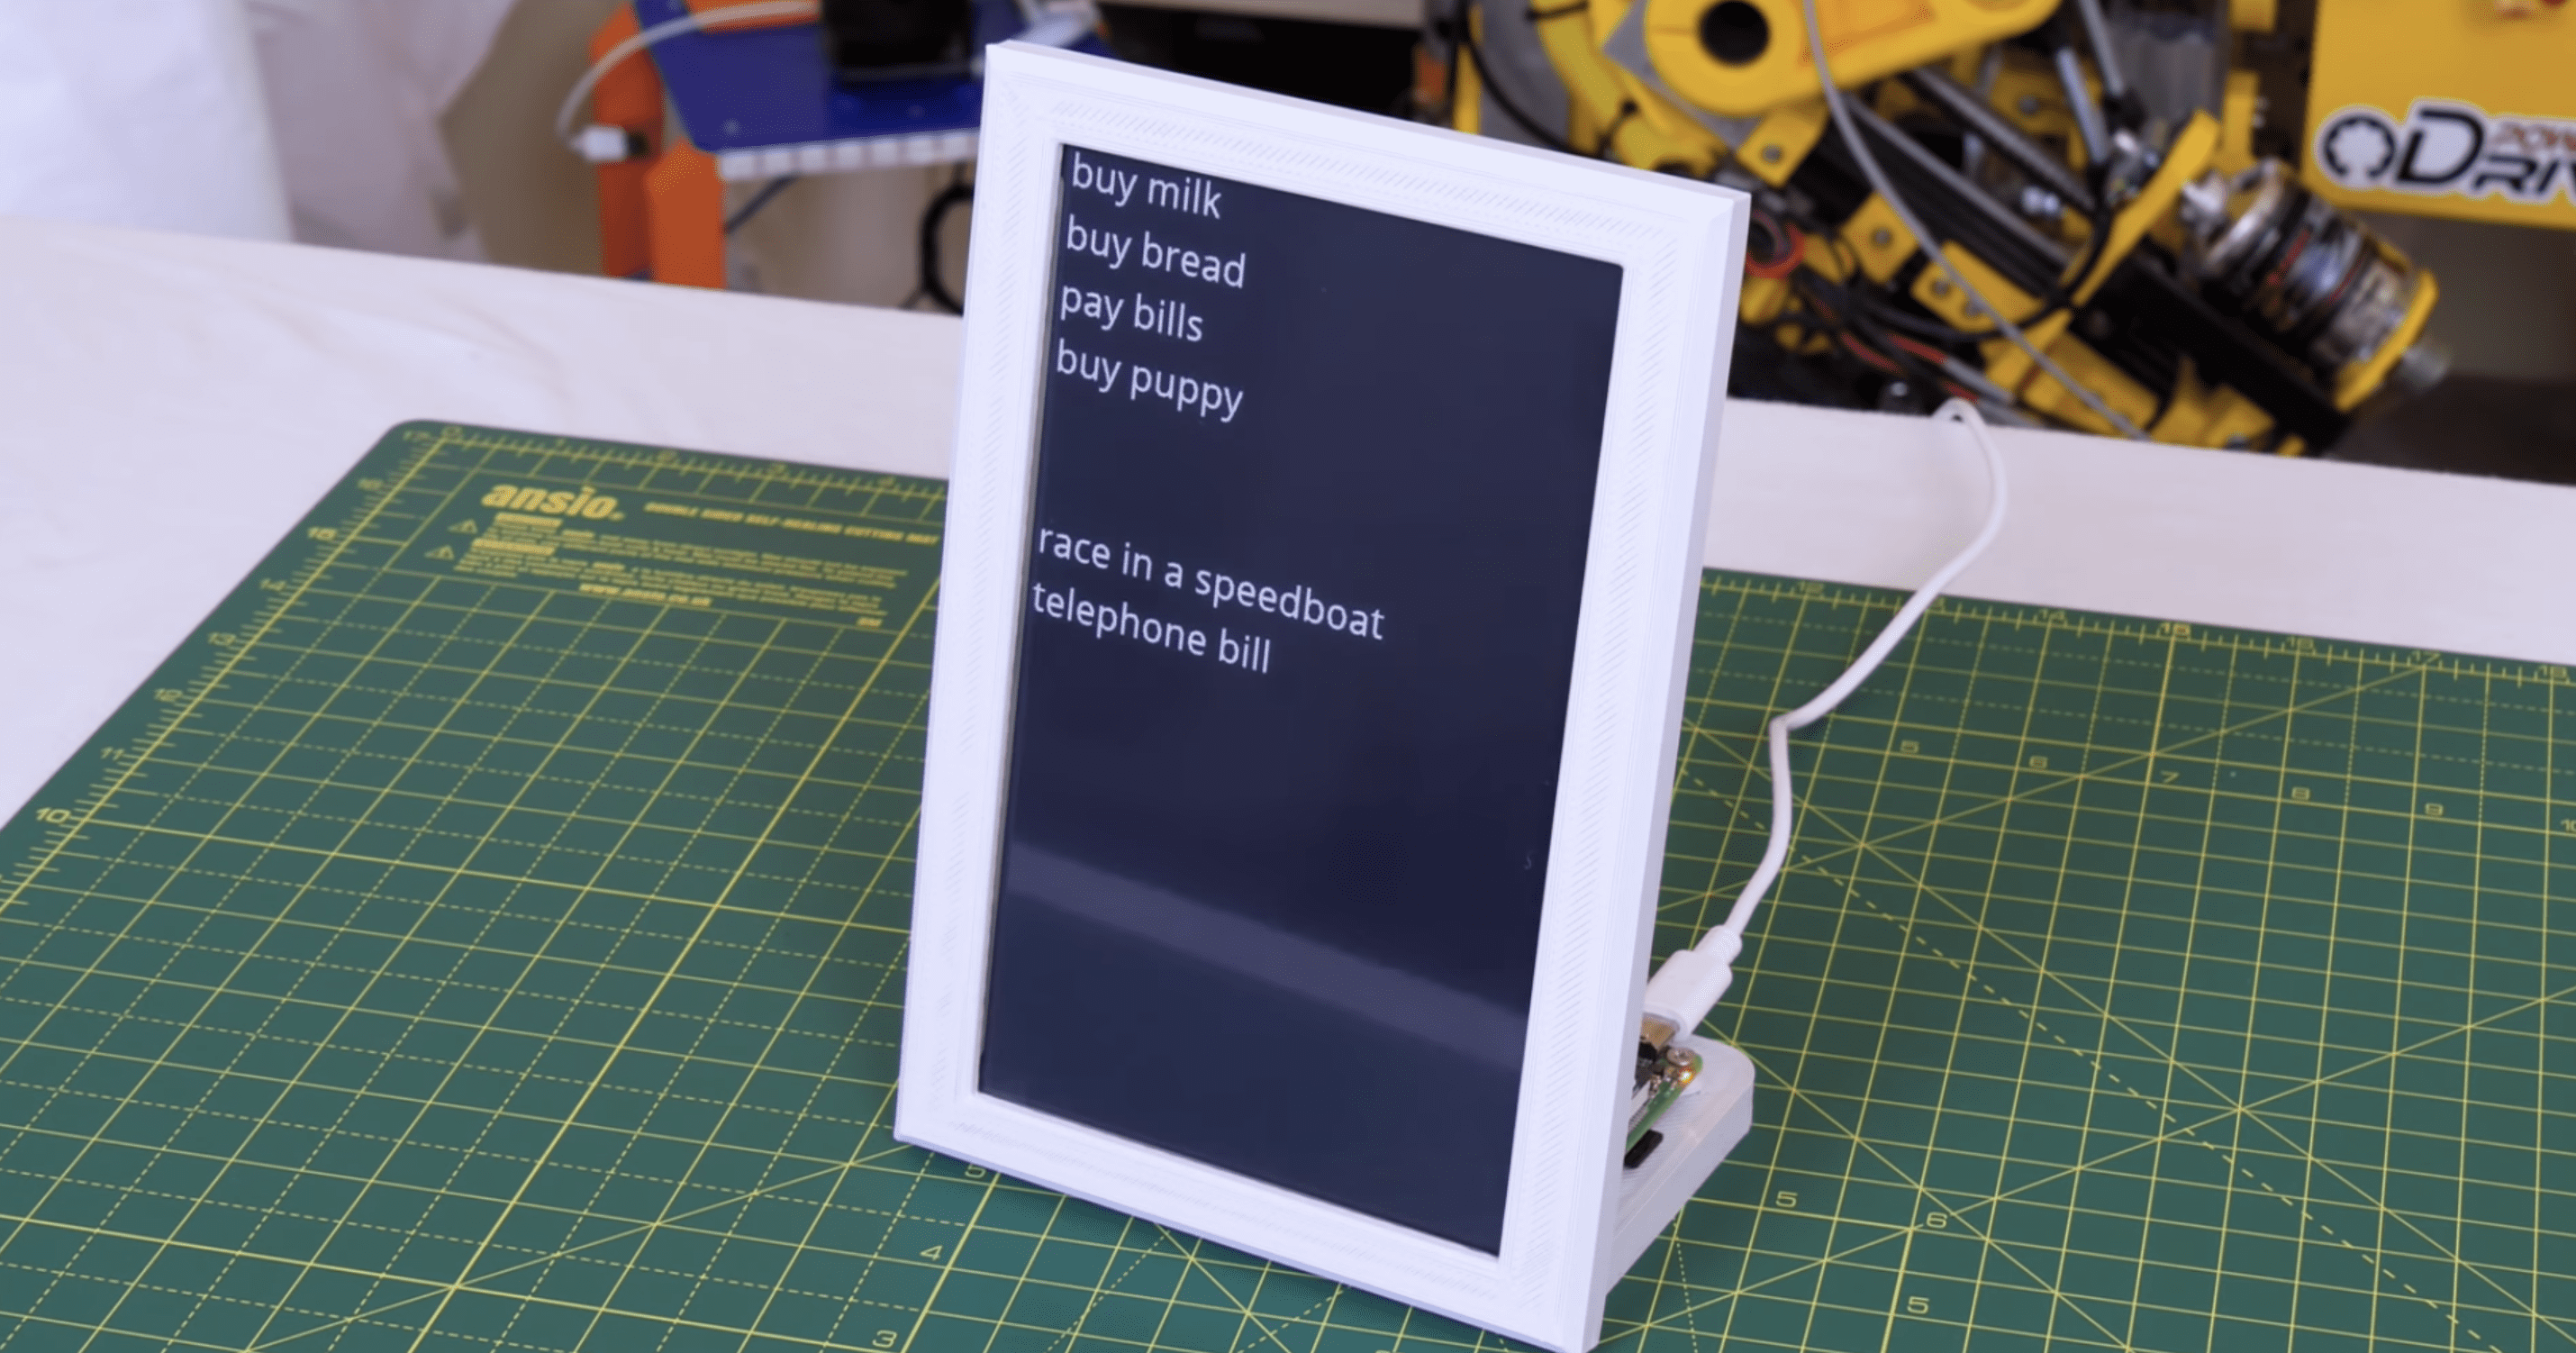
    James Bruxton (or @xrobotosuk on Instagram) built an IoT-controlled e-paper message board using Raspberry Pi. Updating it is easy: just edit a Google sheet, and the message board will update with the new data.

    [youtube https://www.youtube.com/watch?v=cGsRJhoF5yY?feature=oembed&w=500&h=281]

    Harnessing Google power

    This smart message board uses e-paper, which has very low power consumption. Combining this with the Google Docs API (which allows you to write code to read and write to Google Docs) and Raspberry Pi makes it possible to build a message board that polls a Google Sheet and updates whenever there’s new data. This guide helped James write the Google Docs API code.

    We’ll do #4 for you, James!

    Why e-paper?

    James’s original plan was to hook up his Raspberry Pi to a standard monitor and use Google Docs so people could update the display via mobile app. However, a standard monitor consumes a lot of power, due to its backlight, and if you set it to go into sleep mode, people would just walk past it and not see updates to the list unless they remember to wake the device up.

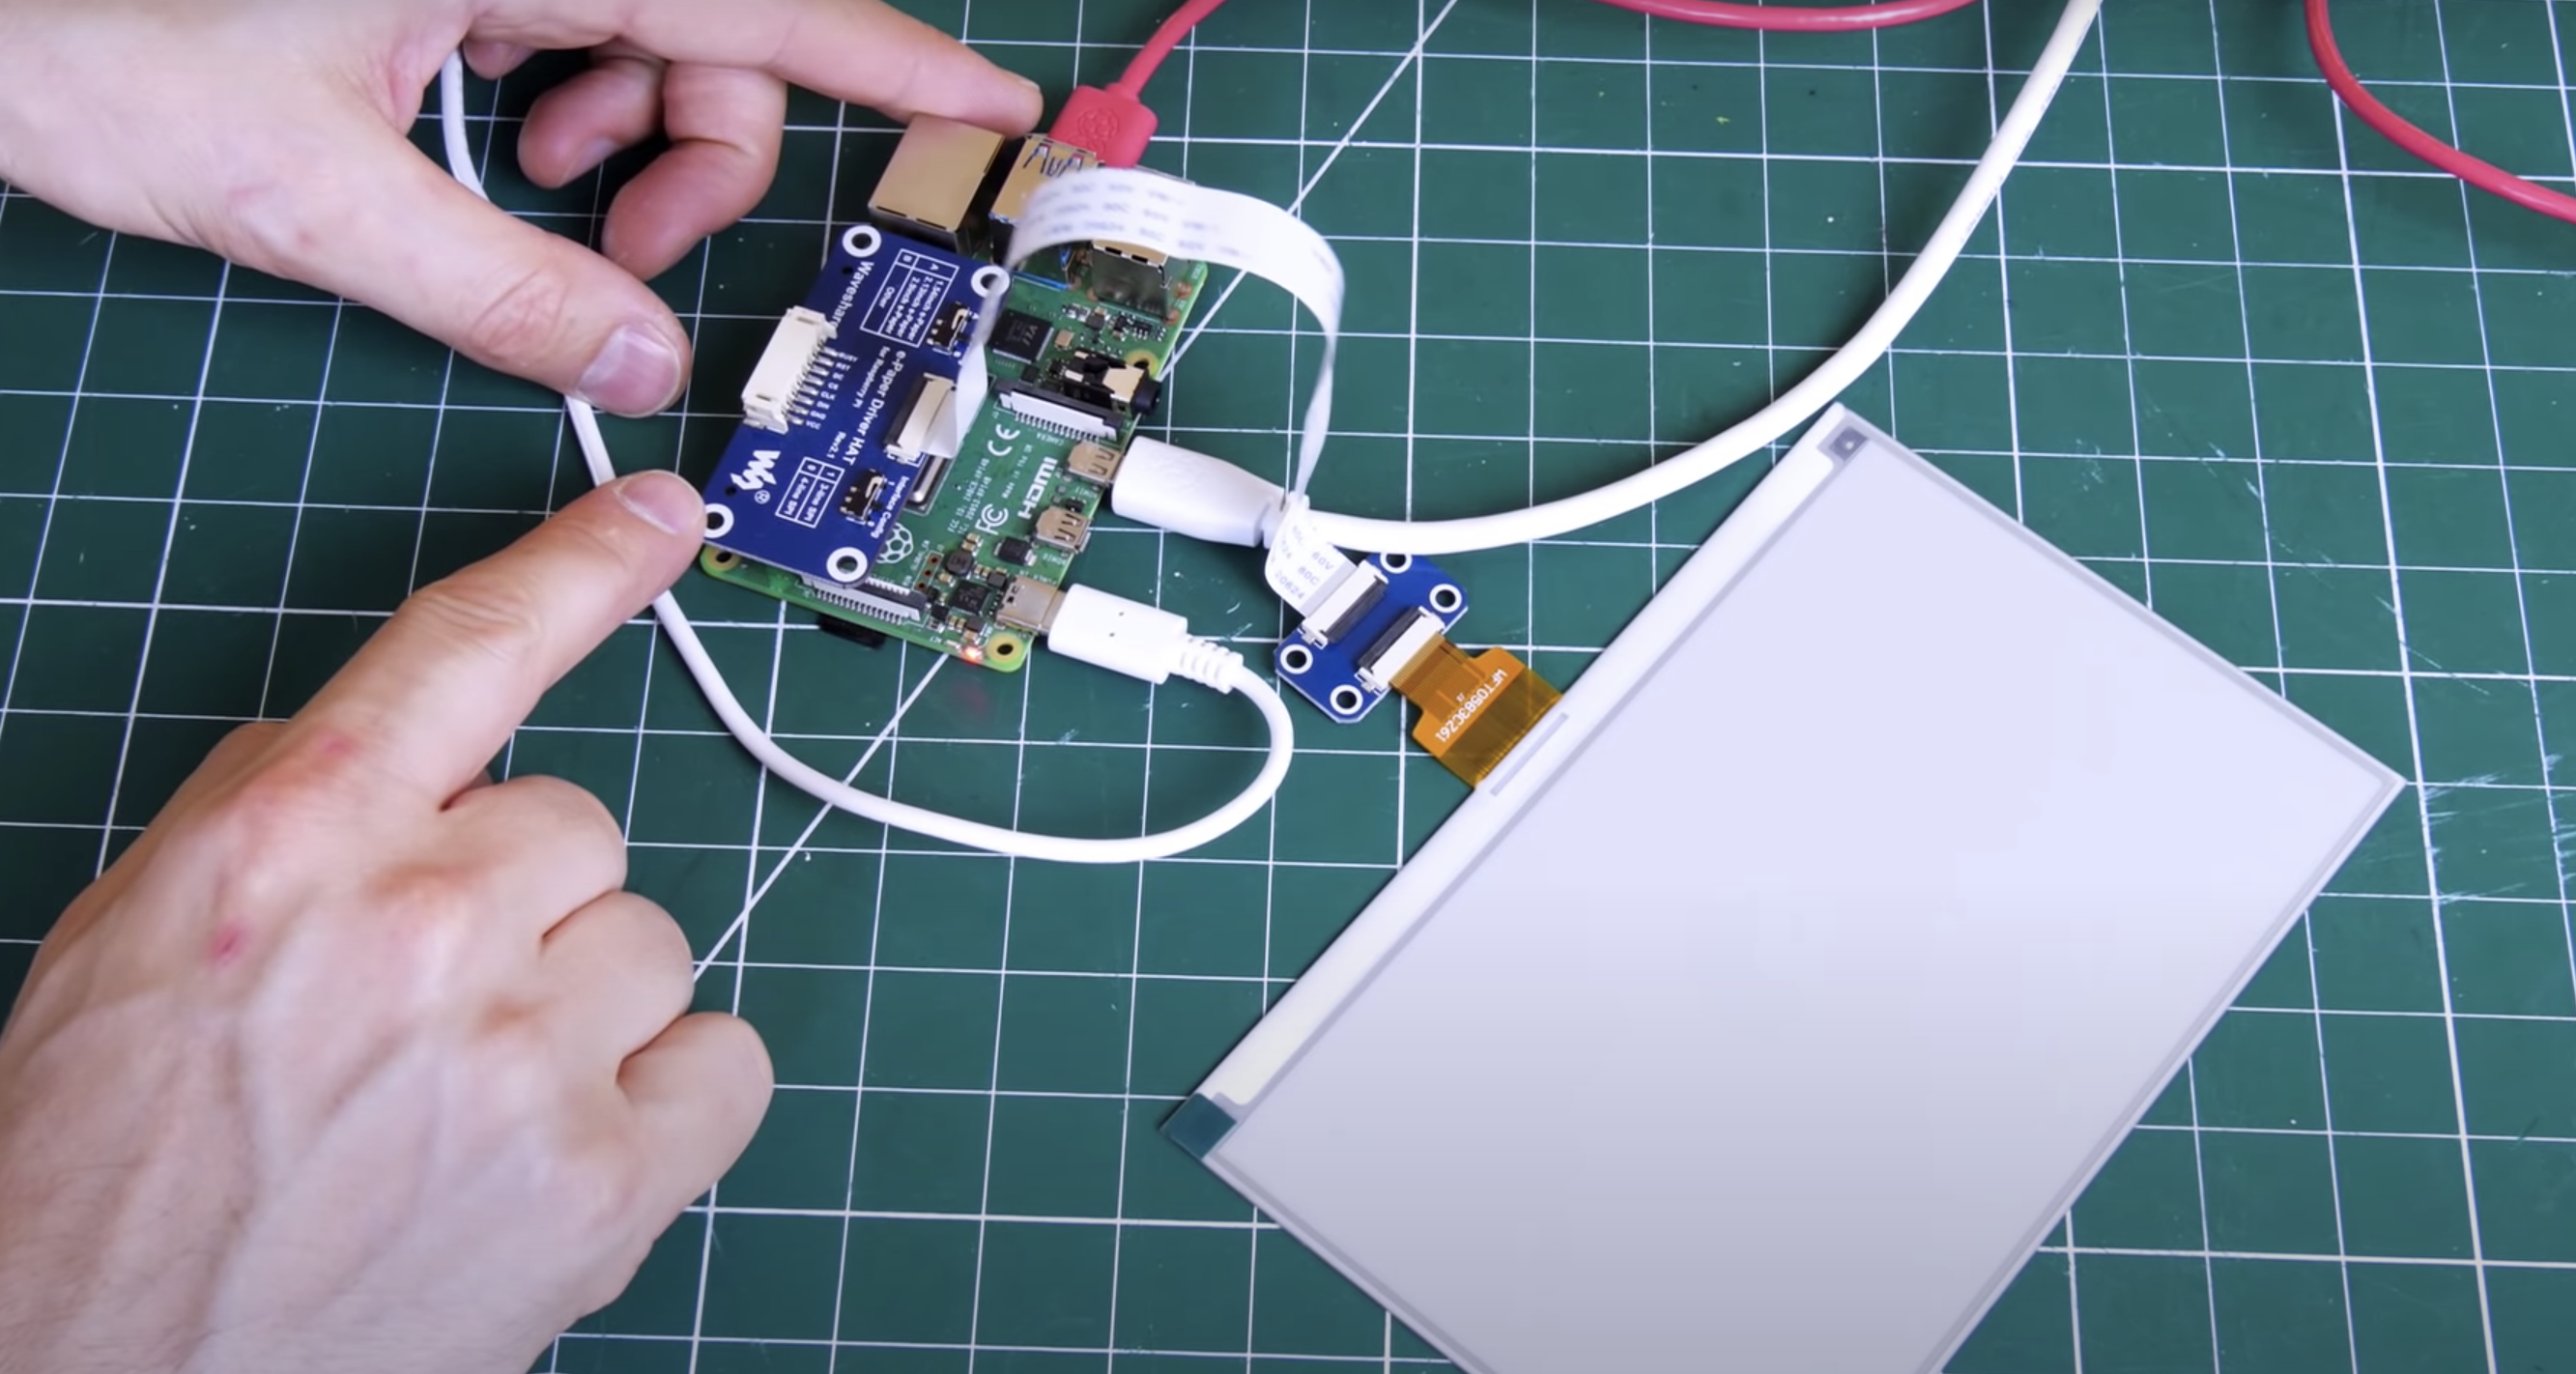
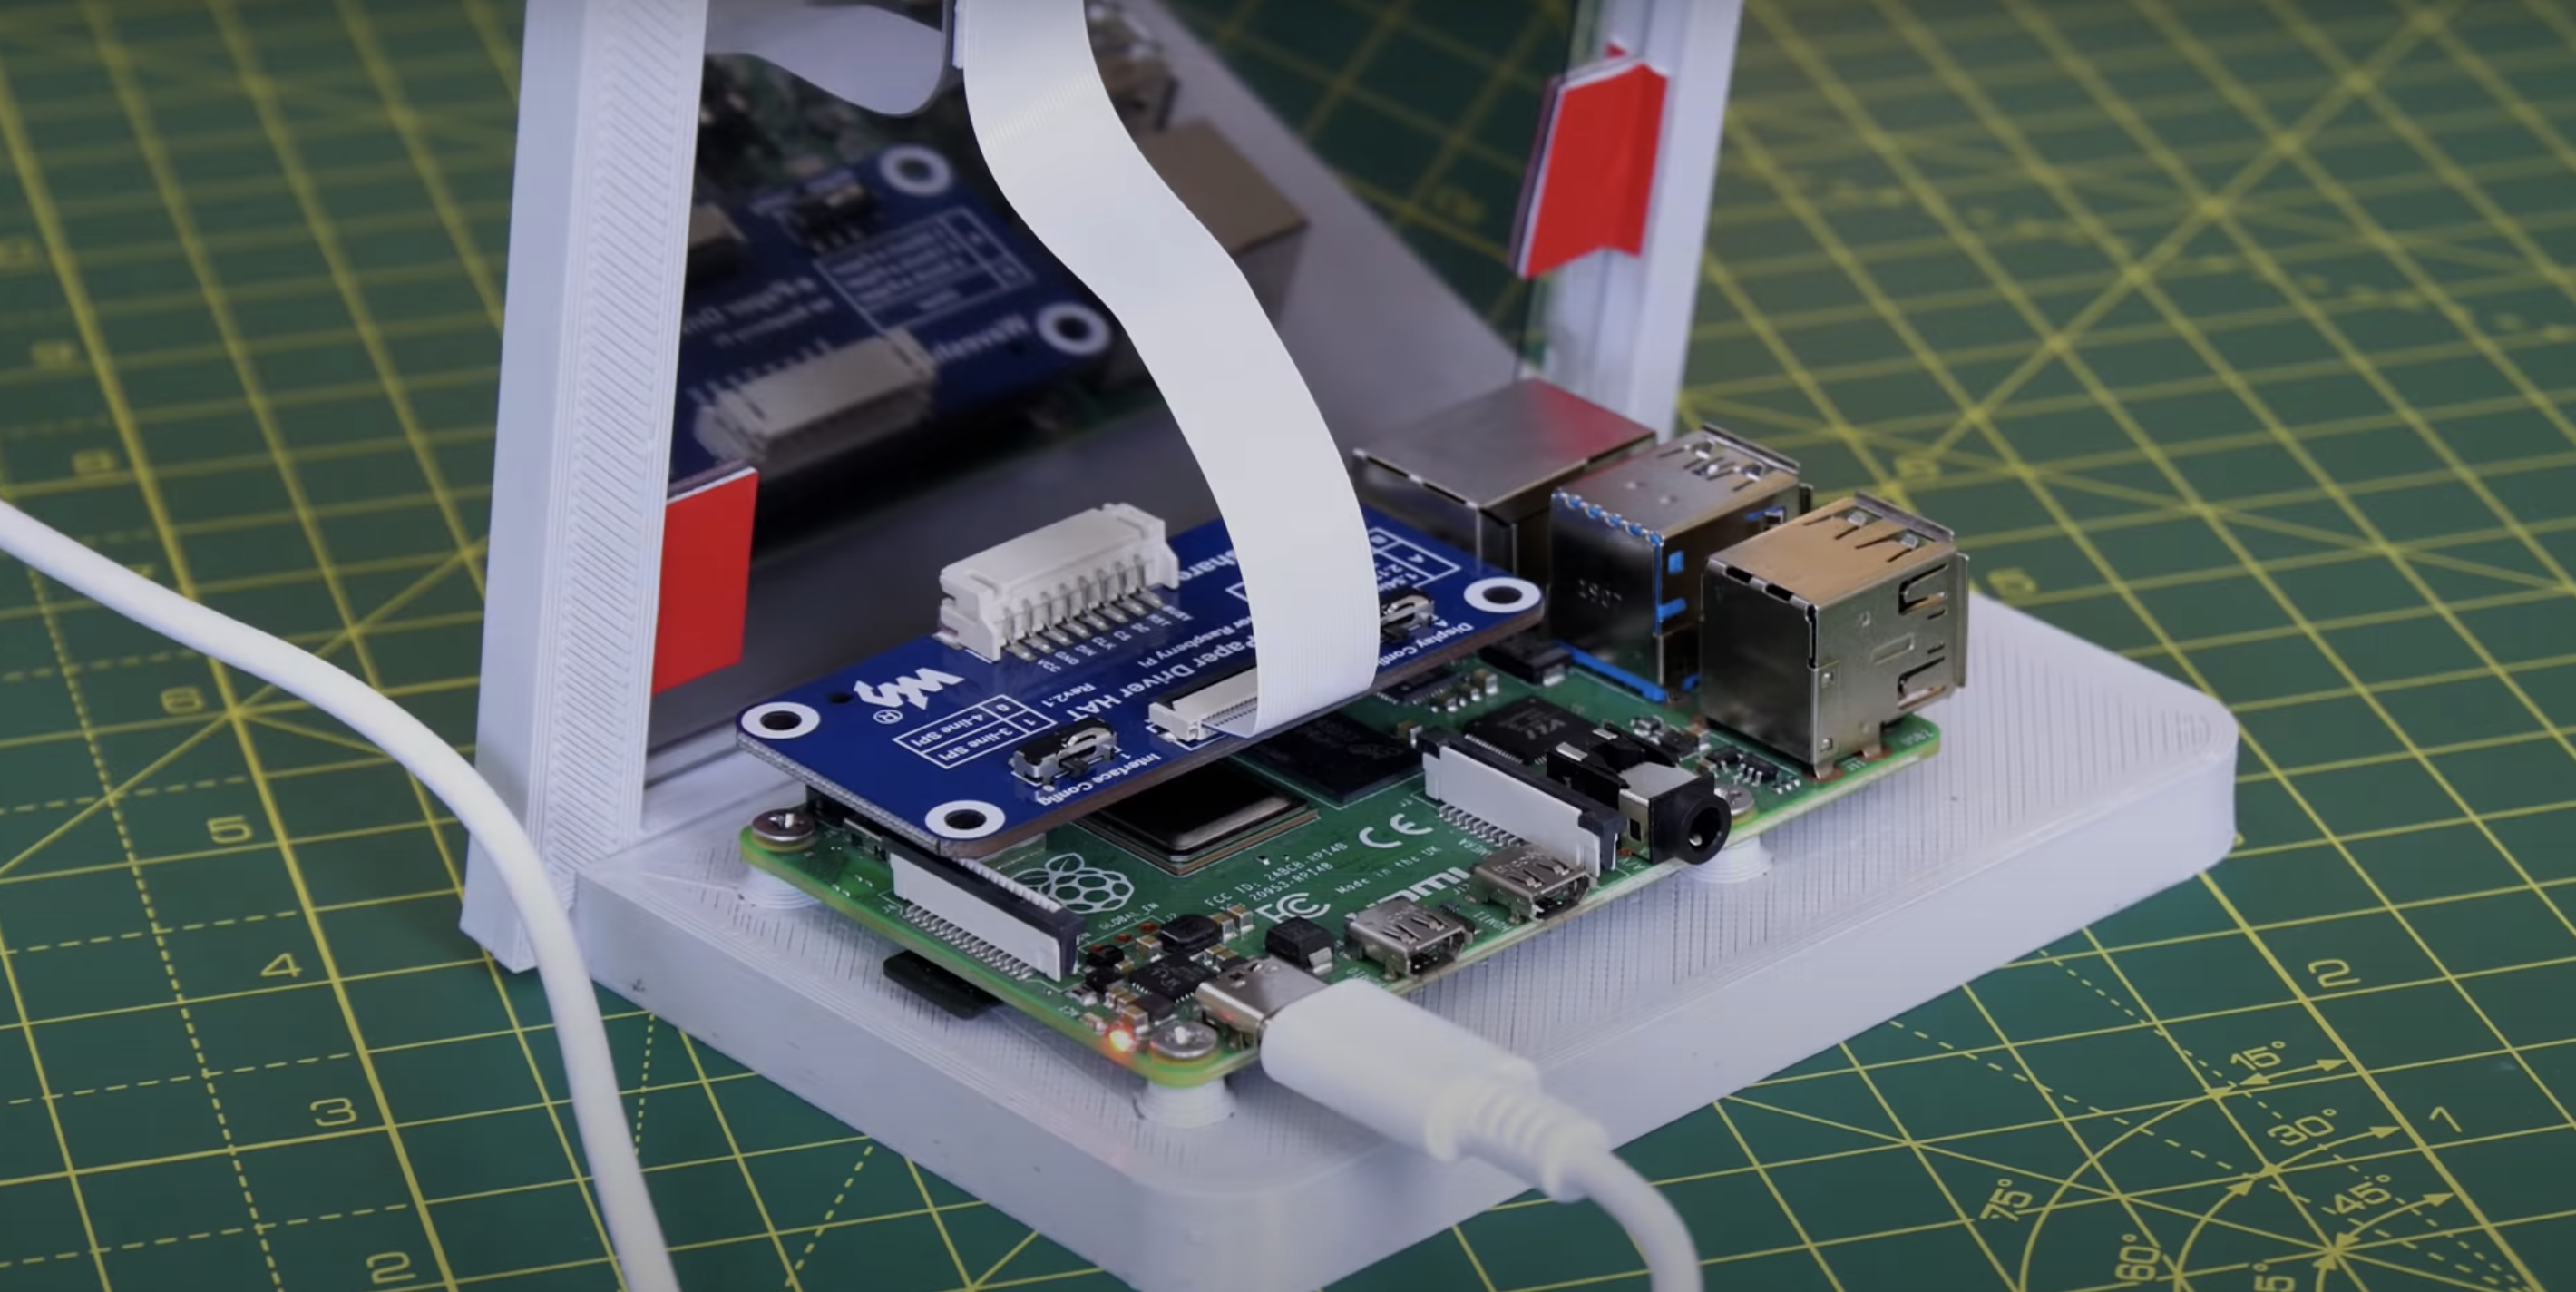
    Raspberry Pi wearing its blue e-paper HAT on the left, which connects to the display on the right via a ribbon cable

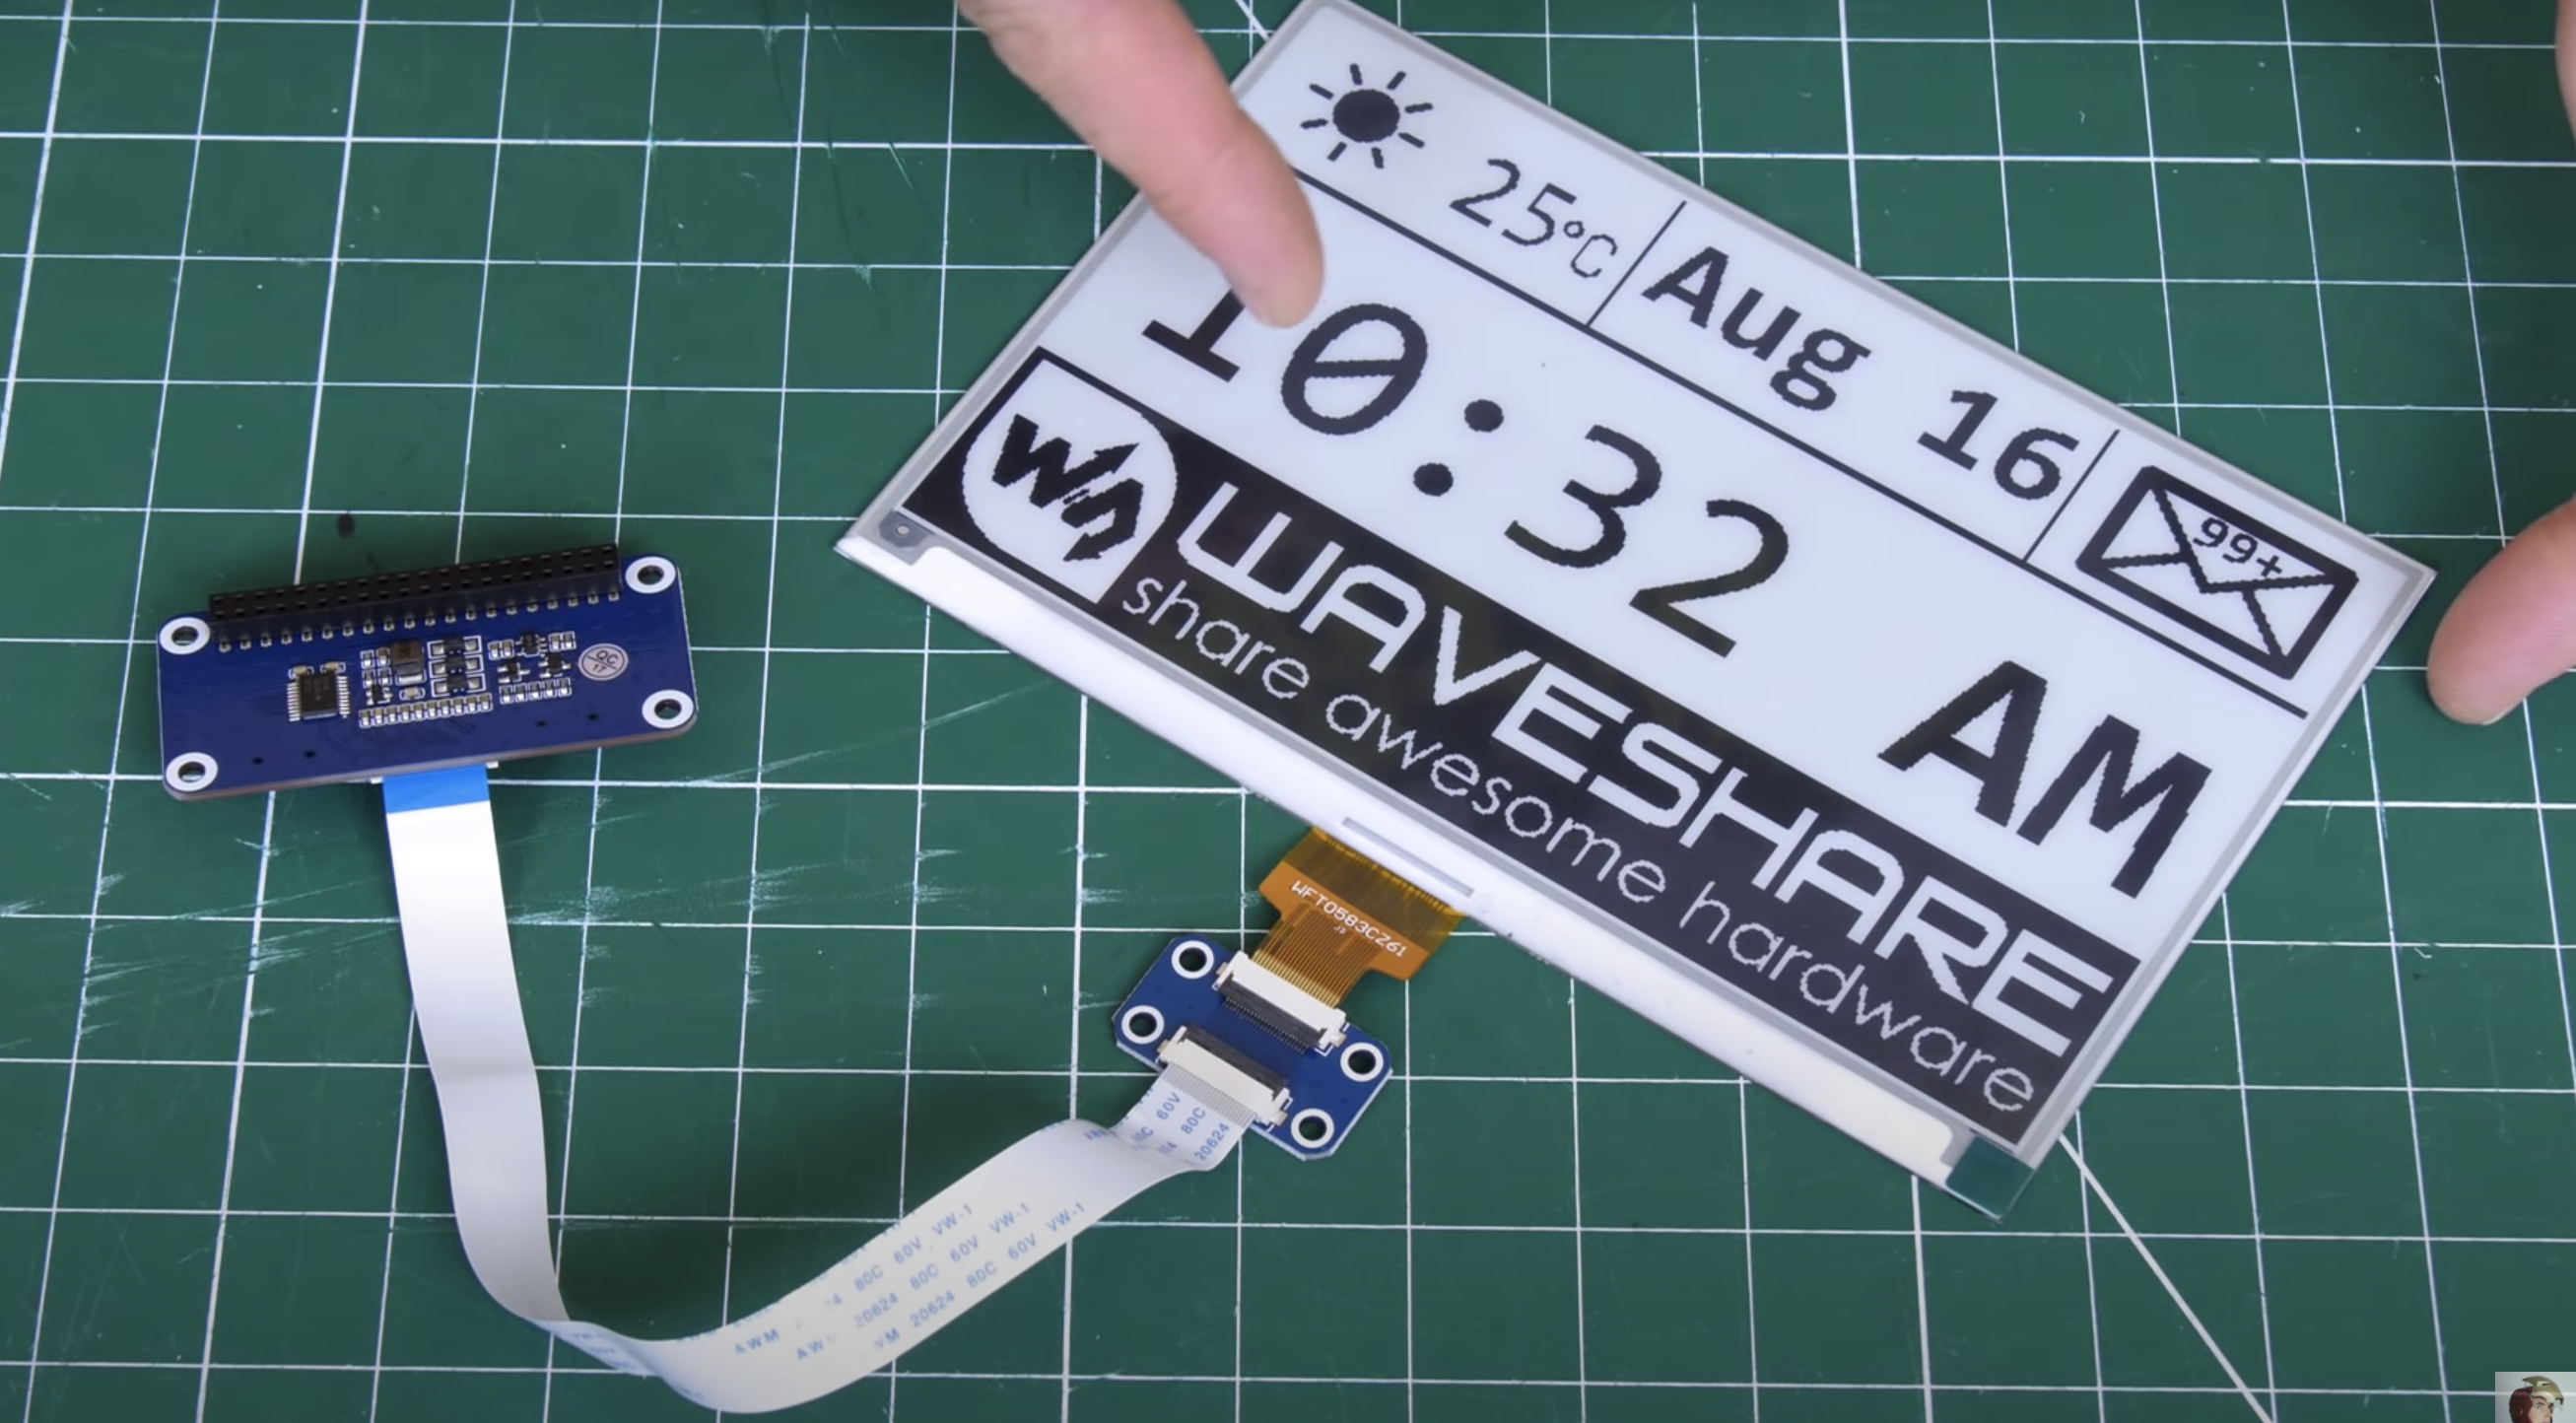
    Enter e-paper (the same stuff used for Kindle devices), which only consumes power when it’s updating. Once you’ve got the info you want on the e-paper, you can even disconnect it entirely from your power source and the screen will still display whatever the least update told it to. James’s top tip for your project: go for the smallest e-paper display possible, as those things are expensive. He went with this one, which comes with a HAT for Raspberry Pi and a ribbon cable to connect the two.

    The display disconnected from any power and still clearly readable

    The HAT has an adaptor for plugging into the Raspberry Pi GPIO pins, and a breakout header for the SPI pins. James found it’s not as simple as enabling the SPI on his Raspberry Pi and the e-paper display springing to life: you need a bit of code to enable the SPI display to act as the main display for the Raspberry Pi. Luckily, the code for this is on the wiki of Waveshare, the producer of HAT and display James used for this project.

    Making it pretty

    A 3D-printed case, which looks like a classic photo frame but with a hefty in-built stand to hold it up and provide enough space for the Raspberry Pi to sit on, is home to James’s finished smart to-do list. The e-paper is so light and thin it can just be sticky-taped into the frame.

    The roomy frame stand

    James’s creation is powered by Raspberry Pi 4, but you don’t need that much power, and he’s convinced you’ll be fine with any Raspberry Pi model that has 40 GPIO pins.

    Extra points for this maker, as he’s put all the CAD files and code you’ll need to make your own e-paper message board on GitHub.

    If you’re into e-paper stuff but are wedded to your handwritten to-do lists, then why not try building this super slow movie player instead? The blog squad went *nuts* for it when we posted it last month.

    Website: LINK

  • Set up a LAMP server with Mythic Beasts

    Set up a LAMP server with Mythic Beasts

    Reading Time: 7 minutes

    In this test, we’ll use it to set up a WordPress website similar to the one we use online. But you could also use LAMP to deliver any kind of website.

    Sign up with Mythic Beasts

    Start by ordering a Raspberry Pi 4 from Mythic Beasts.

    We’re going to use a faster Raspberry Pi 4, to get the extra 4GB RAM for our LAMP server. There’s a monthly charge of £7.25 for a Raspberry Pi 4 web server, which is an excellent deal for a dedicated computer with network storage (our look at non-Raspberry Pi services showed around £27 per month for a Linux machine with four cores).

    You can test out the service with a Raspberry Pi 3 for only £5.25 per month (this only has 1GB RAM).

    We’re going to stick with the default 10GB storage, although the ‘Disk space’ slider at the bottom is used to select up to 250GB (at 2p per GB).

    Click the green Order Now button.

    Enter a service name and tick the ‘I agree to the terms and conditions’ box. The other fields are optional. Click Confirm to provision (activate) your Raspberry Pi. Enter your payment details or click Raise Invoice.

    Wait for Raspberry Pi to be provisioned and the operating system to be installed. Don’t close the web window.

    Generate an SSH key

    When provisioning has completed, click ‘Configure your server’ (if you browse away, then you will find the server at
    mythic-beasts.com/customer/servers/rpi
    ).

    Mythic Beasts uses SSH keys to provide secure access between your local computer and the remote Raspberry Pi server. If SSH Keygen is new to you, then take a look at passwordless SSH access in the Raspberry Pi documentation.

    First, check whether there are already keys on the local computer. Open a Terminal window and enter:

    ls ~/.ssh

    If you see files named id_rsa.pub or id_dsa.pub then you have keys set up already, so you can skip the ‘Generate new SSH keys’ step below and head to Step 3. To generate new SSH keys, enter the following:

    ssh-keygen

    Upon entering this command, you will be asked where to save the key. We suggest saving it in the default location (~/.ssh/id_rsa) by pressing ENTER.

    You will also be asked to enter a passphrase, which is optional. The passphrase is used to encrypt the private SSH key so that if someone else copied the key, they could not impersonate you to gain access. If you choose to use a passphrase, type it here and press ENTER, then type it again when prompted. Leave the field empty for no passphrase.

    Add the key SSH

    Take a look a the content of the key:

    cat ~/.ssh/id_rsa.pub

    The output will start with ‘ssh-rsa’ and end with your hostname ‘pi@raspberrypi’.
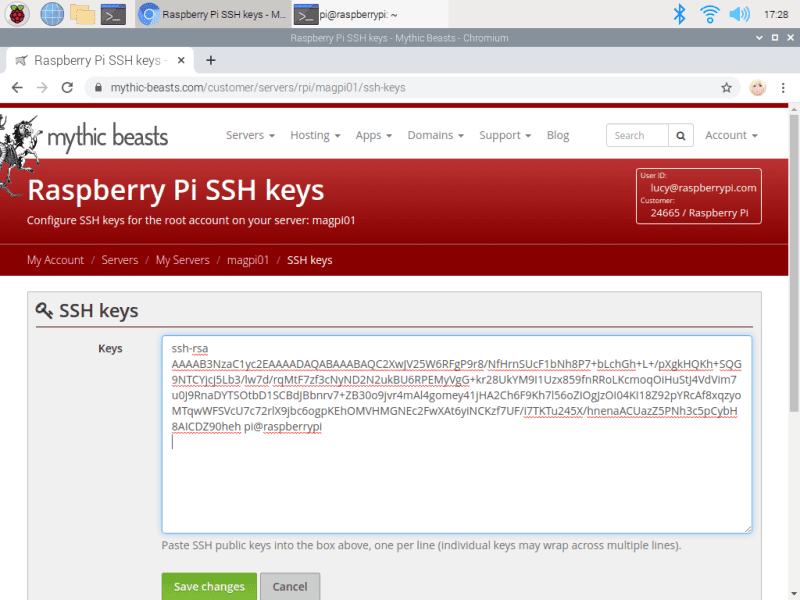
    Use your mouse to select all the output of the SSH key, then right-click and choose Copy. Now head back to the browser and click ‘configure keys’. Right-click on the large ‘Keys’ text field and choose Paste to enter the SSH key. Click ‘Save changes’.

    A secure SSH key generated on your local computer is shared with the remote computer to provide access

    SSH access

    Scroll down the server window and take a look at the details in SSH access. Here you will see your Username, Host, Port, and Authentication information. You will use this information to connect to your Raspberry Pi server. There is also a Command section, with the Terminal command used to connect directly. Ours looks like this:

    ssh -p 5274 root@ssh.magpi01.hostedpi.com

    Copy and paste the command into the Terminal and press ENTER.

    Respond ‘yes’ at the ‘continue connecting’ prompt and your SSH key will be added to your list of ‘known hosts’.

    If you created one, you’ll need to add the SSH key password when prompted. When logged in, the command prompt will change to root@raspberrypi. You are logged in as ‘root’ and in the root user’s home directory ‘/root’.

    Install a web server

    We’re going to use the Apache web server, which you can install with the following commands:

    apt update
    apt upgrade -y
    apt install apache2 -y

    Note that you don’t need to use ‘sudo’ as you are the root user.

    Open a web browser and visit the following URL (replacing ‘magpi01’ with the name of your own hosted server: magpi01.hostedpi.com.)

    This will display the Apache2 Debian Default webpage with an ‘it works!’ message.

    This page is an HTML file located on your remote Raspberry Pi, at /var/www/html/index.html.

    Navigate to this directory in the Terminal and have a look at what’s inside:

    cd /var/www/html
    ls -al cat index.html

    Install PHP

    We now have the ‘L’ and ‘A’ of our LAMP server: Linux and Apache. The M and P come next: MySQL and PHP.

    MySQL is a database system, while PHP is a programming language. You’ll need both to run most content management systems, such as WordPress.

    Now is the ideal time to add the software. You can install PHP with the following command:

    apt install php -y

    And MySQL with this command:

    apt install mariadb-server php-mysql -y

    Now restart your Apache server to ensure both services are running.

    service apache2 restart

    Upload content remotely

    You don’t need to be logged in to your Raspberry Pi server to edit content in the html directory. Close the connection with:

    exit

    You can send files directly to the html directory from your local computer using secure copy (scp).

    First, we’re going to get a photo (of our cat) and name it cat.jpg. Then create an index.html file.

    nano index.html

    And enter this basic HTML code:

    <html> <head> <title>Siouxsie</title> </head> <body> <p>Our cat, Siouxsie!</p> <img src="cat.jpg"> </body>
    </html>

    Copy the two files directly to the html directory on your remote Raspberry Pi server:

    scp -P 5274index.html cat.jpg root@ssh.magpi01.hostedpi.com:/var/www/html/

    …making sure to replace the ‘5274’ and ‘magpi01’ parts with the port and hostname of your Raspberry Pi server. Press F5 to refresh your web browser and view the new webpage design.

    Test out PHP

    Let’s test that PHP is working, and also take a look at the index page for our website. Create the file index.php:

    cd /var/www/html
    nano index.php

    Put some PHP content in it:

    <?php echo "Hello, World!"; ?>

    Save the file and close with CTRL+O and CTRL+X.

    Now get rid of the index.html file (because it takes precedence over the index.php file):

    rm index.html

    Reload your website in the web browser and you will see ‘Hello, World!’. This page isn’t dynamic, but it’s created with PHP code.

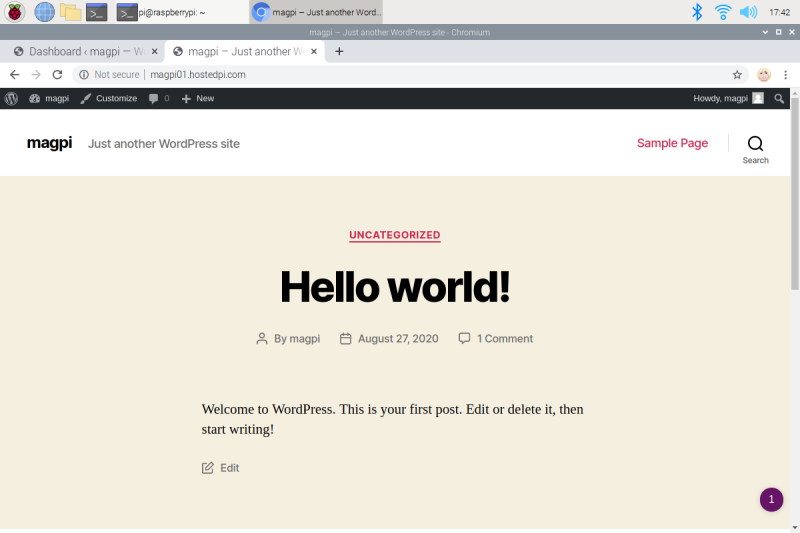
    A LAMP (Linux, Apache, MySQL, and PHP) server can be used to run a WordPress-based website

    Install WordPress

    Now we’re going to head back into our remote server and do something a little more detailed. We’re going to set up WordPress, a popular CMS (content management system). This makes use of our PHP and MySQL database and is a great option if you’re looking for a powerful website with a minimum of coding.

    Log back into your remote Raspberry Pi server.

    ssh -p 5274 root@ssh.magpi01.hostedpi.com

    Go to your html folder and get rid of all the content.

    cd /var/www/html/
    rm *

    Now download the latest version of WordPress:

    wget http://wordpress.org/latest.tar.gz

    If you need to install wget, use apt install wget.

    Next, extract the WordPress tarball to get at the WordPress files:

    tar xzf latest.tar.gz

    Move the contents of the extracted wordpress directory to the current directory.

    mv wordpress/* .

    Tidy up by removing the tarball and the now-empty wordpress directory:

    rm -rf wordpress latest.tar.gz

    Use ls to view the contents of a WordPress directory inside your html directory. It will include a new index.php file along with various HTML and PHP files.

    The WordPress login page running on a Raspberry Pi web server using PHP and HTML

    Set up your WordPress database

    Although you have the WordPress files, you can’t use your website just yet. First, you need to set up the MySQL database. Enter this command:

    mysql_secure_installation

    As this is the first time running MariaDB, there is no password, so just press ENTER.

    Type in Y and press ENTER to ‘Set root password?’. Type in a password and press ENTER. Make sure you note this root password, as you will need it shortly.

    You’ll be asked four questions. Answer ‘y’ to each one: Remove anonymous users, Disallow root login remotely, Remove test database and access to it, and Reload privilege tables now.

    When complete, you will see the message ‘All done!’ and ‘Thanks for using MariaDB!’.

    Create a database

    Now that the database is installed, you need to create a database for WordPress:

    Run mysql in the Terminal window:

    mysql -u root -p

    Enter the root password you created. You should start up the MariaDB monitor and see this command prompt:

    MariaDB [(none)]>

    Enter this command:

    create database wordpress;

    If this has been successful, you should see this:

    Query OK, 1 row affected (0.03 sec)

    Now enter these two commands:

    GRANT ALL PRIVILEGES ON wordpress.* TO 'root'@'localhost' IDENTIFIED BY 'YOURPASSWORD';
    FLUSH PRIVILEGES;

    Exit the MariaDB monitor using CTRL+D.

    Open WordPress

    Open the web browser on Raspberry Pi and head to your website: magpi01.hostedpi.com.
    You should see a WordPress setup page; click on Let’s Go.

    You will see ‘unable to write to wp-config.php file’. Select all the code inside the window and right-click to copy. Now switch to the Terminal window on your remote Raspberry Pi and enter:

    nano wp-config.php

    Paste the code into the wp-config.php file in Nano, then save and exit (CTRL+O, CTRL+X). Switch back to your web browser, and click ‘Run the installation’.

    Fill out the information fields and click the Install WordPress button, then log in using the account you just created.
  • Microphone open/mute control with repurposed racing pedals

    Microphone open/mute control with repurposed racing pedals

    Reading Time: < 1 minute

    Microphone open/mute control with repurposed racing pedals

    Arduino TeamOctober 6th, 2020

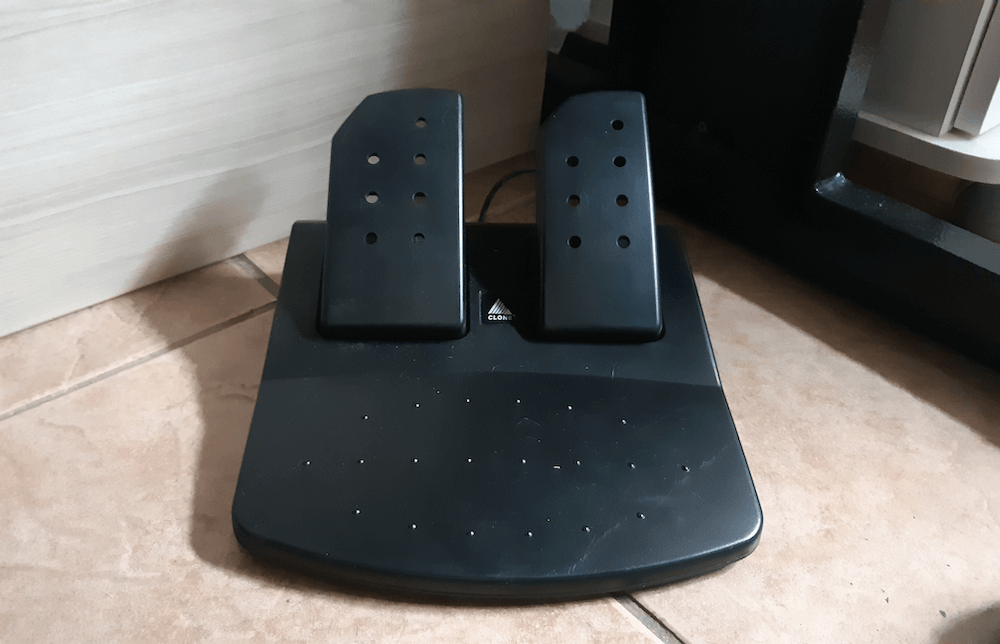
    Ribeiro de Azeredo, like many of us, has been working from home as of late. Also like many of us, he has a child around the house, which isn’t always conducive to online meetings. To help with this, he built a foot-based microphone switcher using the pedals off of an old racing controller.

    Pedal inputs are simply a pair of variable resistors, so he created a voltage divider for each one, reading the resulting analog output with an Arduino Nano.

    Data is then passed along to his Linux computer, which mutes or opens the mic on (foot) command. Additionally, he set up an onscreen mic status indicator using Polybar, ensuring that his audio doesn’t get unintentionally sent out!

    Website: LINK

  • Pioneer600 review

    Pioneer600 review

    Reading Time: 2 minutes

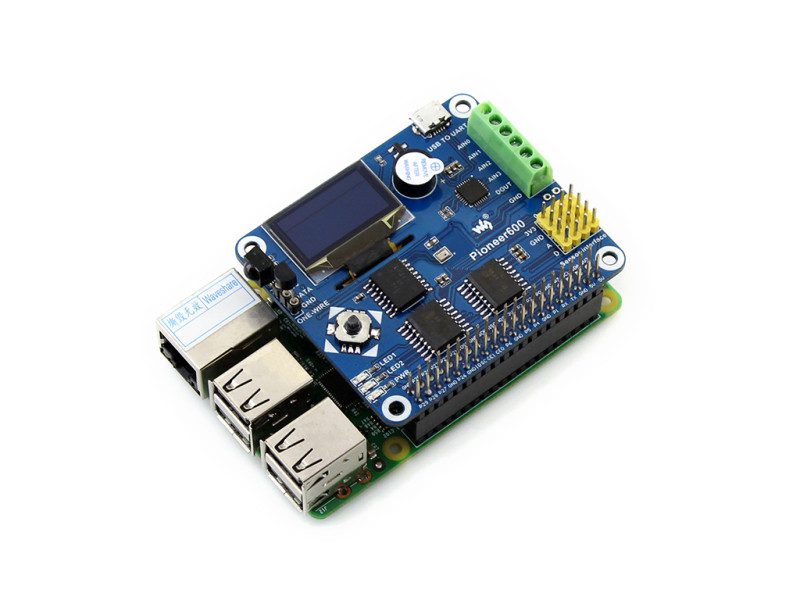
    First of these features we noticed was a five-way joystick and 0.96-inch OLED display. This is backed up by a dual-LED and buzzer. On closer inspection, we discovered the on-board LFN0038K to enable remote control. A DS3231 real-time clock is also included (you’ll need to supply your own battery).

    There is a built-in BMP280 for measuring air pressure and temperature, but it’s the available ports for external sensors that are the key attraction: a PCF8591, 8-bit resolution, screw terminal interface, a 1-Wire device (a DS18B20 thermometer is included), a 4×4 pin sensor interface, and GPIO expansion.

    There is also a micro USB to UART connection and cable supplied. UART is normally used to debug Raspberry Pi, but with debugging mode disabled, you can send data to and from Raspberry Pi and a connected PC.

    One for the C crowd

    The physical setup is easy enough. This isn’t an official HAT (hardware attached on top) standard board, so manual installation of the various software library components is required.
    Sample programs for bcm2835, WiringPi, and Python can be found on the Pioneer600 wiki. We had more success with the bcm2835 and WiringPi sample code (both are in C) than Python, where we encountered a few errors.

    Perhaps this is better than the other way around: Pioneer600 is a professional sensor board that will find a happy home in an industrial environment running C code to sense and report on its findings. Ultimately, we recommend it to C developers over Python coders.

    Verdict

    7/10

    Pioneer600 is packed with a lot of I/O and the OLED screen is a nice touch. We found the Python sample code cranky, but the WiringPi code runs just fine. Better for C developers.

  • Raspberry Pi robot prompts proper handwashing

    Raspberry Pi robot prompts proper handwashing

    Reading Time: 3 minutes

    Amol Deshmukh from the University of Glasgow got in touch with us about a social robot designed to influence young people’s handwashing behaviour, which the design team piloted in a rural school in Kerala, India.

    [youtube https://www.youtube.com/watch?v=DBFy3LI890s?feature=oembed&w=500&h=281]

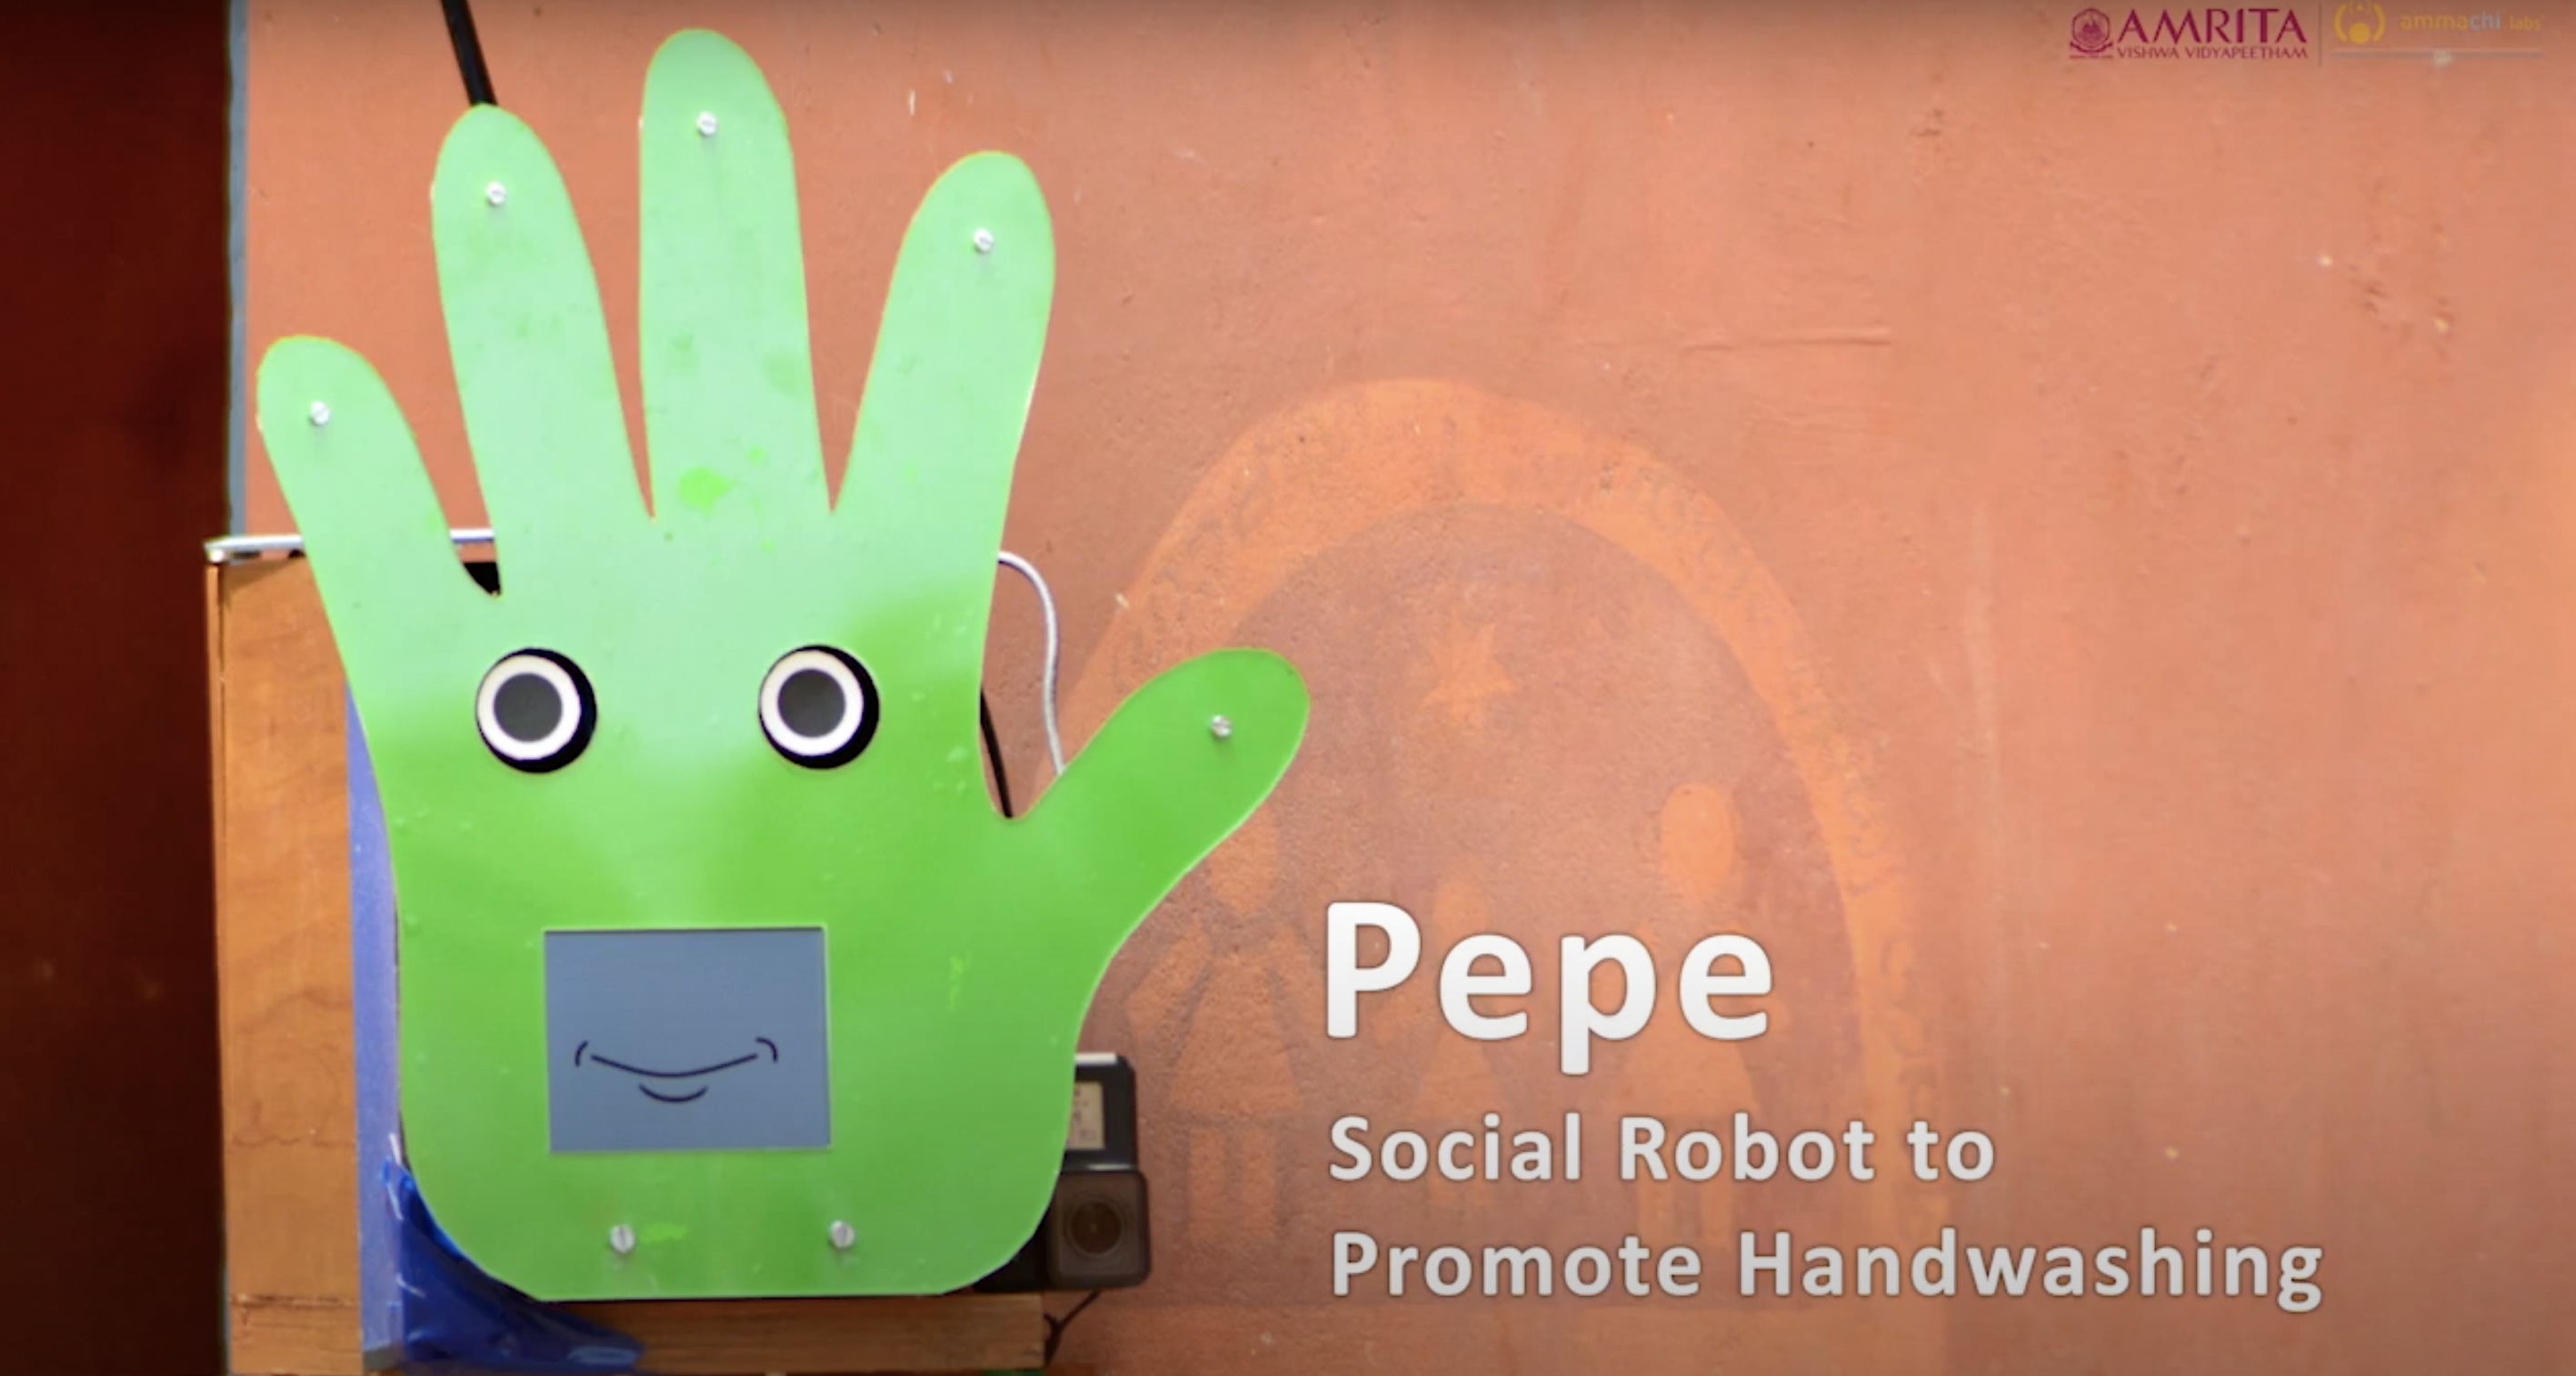
    In the pilot study, the hand-shaped Pepe robot motivated a 40% increase in the quality and levels of handwashing. It was designed by AMMACHI Labs and University of Glasgow researchers, with a Raspberry Pi serving as its brain and powering the screens that make up its mouth and eyes.

    How does Pepe do it?

    The robot is very easy to attach to the wall next to a handwashing station and automatically detects approaching people. Using AI software, it encourages, monitors, and gives verbal feedback to children on their handwashing, all in a fun and engaging way.

    Amol thinks the success of the robot was due to its eye movements, as people change their behaviour when they know they are being observed. A screen displaying a graphical mouth also meant the robot could show it was happy when the children washed their hands correctly; positive feedback such as this promotes learning new skills.

    Amol’s team started work on this idea last year, and they were keen to test the Pepe robot with a group of people who had never been exposed to social robots before. They presented their smiling hand-face hybrid creation at the IEEE International Conference on Robot & Human Interactive Communication (see photo below). And now that hand washing has become more important than ever due to coronavirus, the project is getting mainstream media attention as well.

    What’s next?

    The team is now planning to improve Pepe’s autonomous intelligence and scale up the intervention across more schools through the Embracing the World network.

    Pepe had a promising trial run, as shown by these stats from the University of Glasgow’s story on the pilot study:

    • More than 90% of the students liked the robot and said they would like to see Pepe again after school vacation.
    • 67% of the respondents thought the robot was male, while 33% thought it was female, mostly attributing to the robot’s voice as the reason
    • 60% said it was younger than them, feeling Pepe was like a younger brother or sister, while 33% thought it was older, and 7% perceived the robot to be of the same age
    • 72% of the students thought Pepe was alive, largely due to its ability to talk

    Website: LINK

  • 10 amazing Raspberry Pi IoT projects

    10 amazing Raspberry Pi IoT projects

    Reading Time: 3 minutes

    Smart doorbell: See who’s ringing

    Internet-connected doorbells are quite popular these days. Instead of buying an expensive system, build your own, better one.

    Rosie RiOT

    Rosie IoT Brick: Outdoor IoT

    Allow friends and family to remotely track your marathon running with Rosie IoT Brick. It can also act as a GPS for the runner if required.

    PiRoomba

    PiRoomba: Robot vacuum enhanced

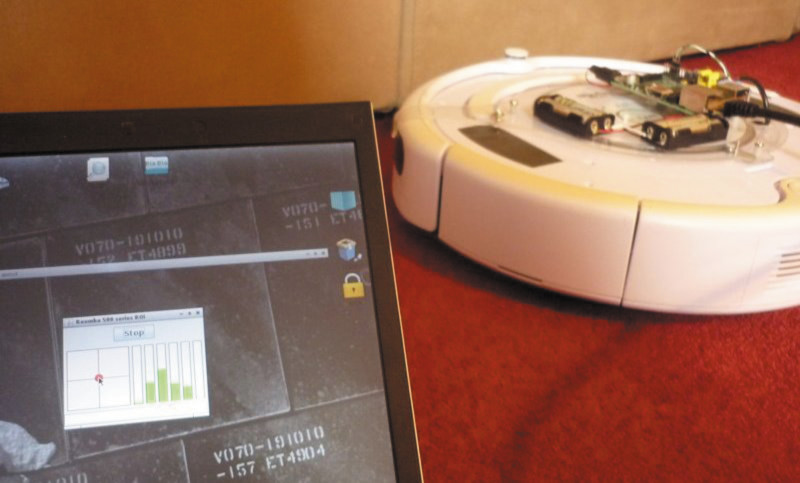
    The Roomba vacuum cleaner is fantastic. Using a Raspberry Pi, though, you can supercharge it like Tim ‘The Toolman’ Taylor. See PiRoomba.

    Sleepbuddy

    Sleepbuddy: Robot babysitter

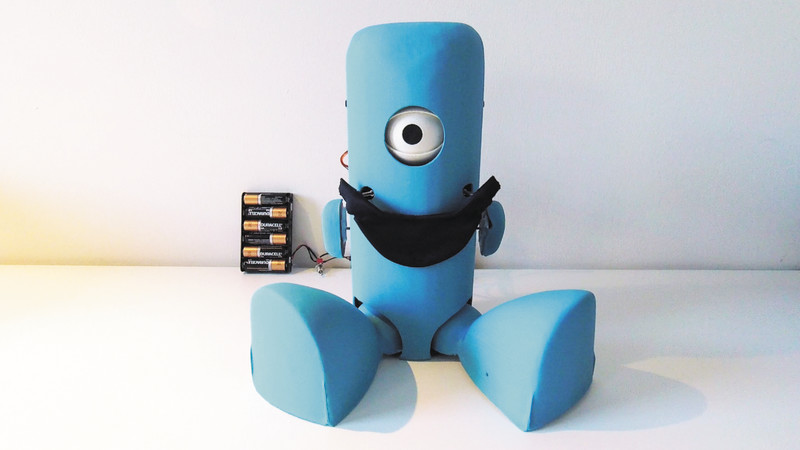
    A social robot that can help looking after a child. It’s not a full-on Jetsons maid, but Sleepbuddy will help when you’re trying to enjoy some telly.

    Furlexa

    Furlexa. Nineties throwback assistant

    However you feel about Furbies, we’re sure you’ll definitely have stronger opinions about Furlexa, a smart Furby that can answer your questions. Put down the pitchforks.

    Smart Home Bulb

    Smart home bulb: Clap on

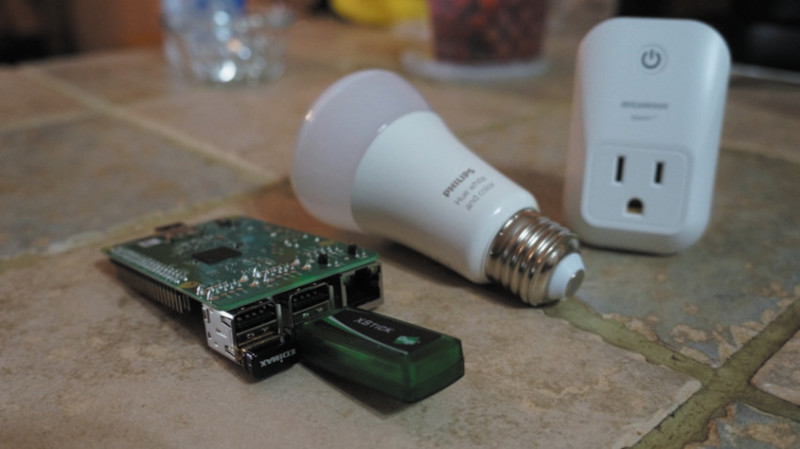
    Controlling your lights via the internet has never been easier, thanks to loads of companies now making smart bulbs you can hack.

    MudPi

    MudPi: Automated gardening

    Automated gardening is in vogue, and what better way than growing your own delicious vegetables (climate allowing) in your own garden with help from robots? Check out MudPi.

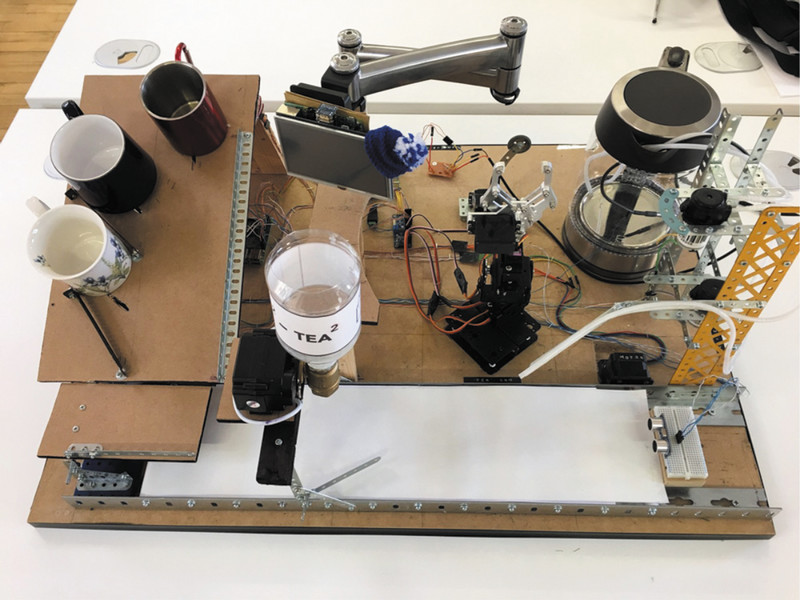
    AI Teasmaid

    Raspberry Pi AI Teasmade: Wake up to a brew

    Looking less like a classic teasmade and more like a Rube Goldberg machine, this AI Teasmade contraption will nevertheless make you a cuppa – possibly while playing Powerhouse.

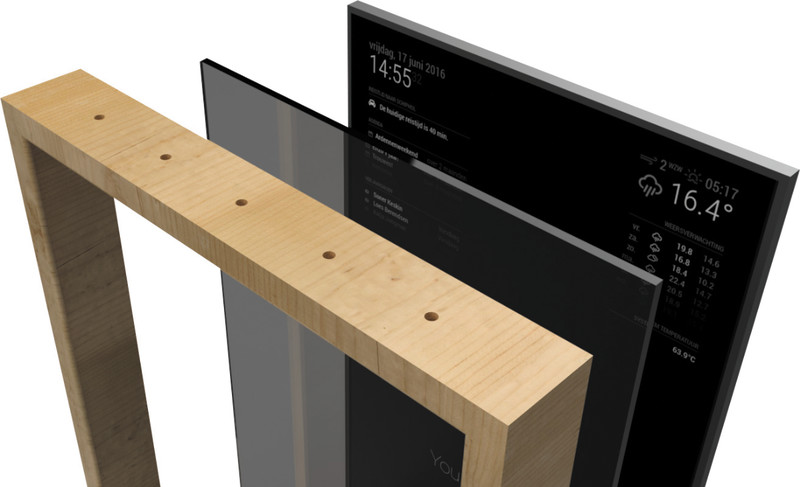
    Magic Mirror

    Magic mirror: Smart casual

    A now popular Raspberry Pi project, smart/magic mirrors are an amazing way to make sure you’re ready for the morning.

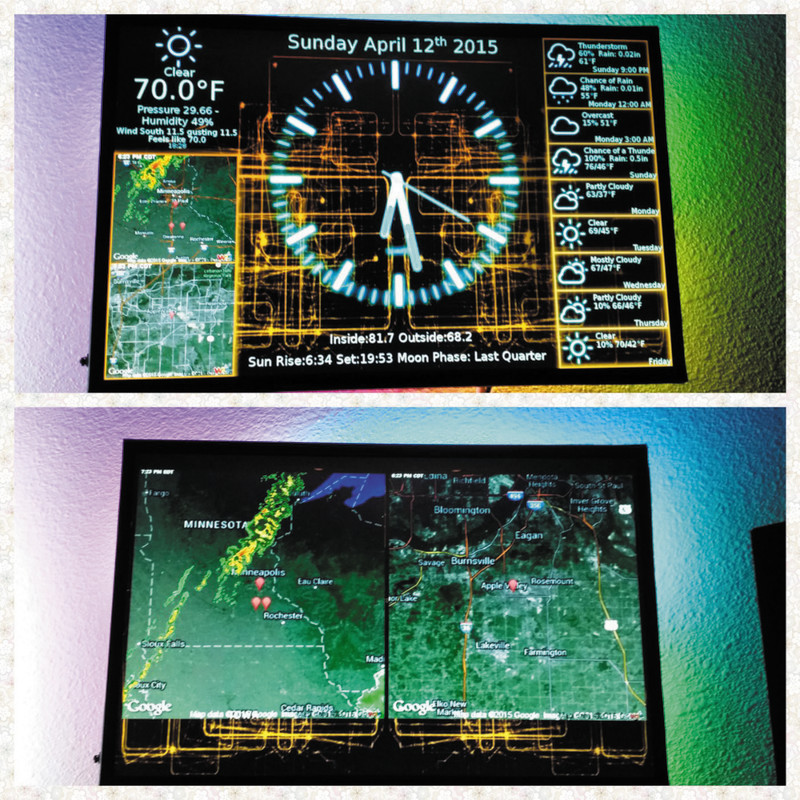
    PiClock

    PiClock
    Time and weather

    A classic use of IoT is the weather. Turn a Raspberry Pi into something that powers a lovely PiClock that also displays the weather.

  • Ultrasonically detect bats with Raspberry Pi

    Ultrasonically detect bats with Raspberry Pi

    Reading Time: 3 minutes

    Welcome to October, the month in which spiderwebs become decor and anything vaguely gruesome is considered ‘seasonal’. Such as bats. Bats are in fact cute, furry creatures, but as they are part of the ‘Halloweeny animal’ canon, I have a perfect excuse to sing their praises.

    baby bats in a row wrapped up like human babies
    SEE? Baby bats wrapped up cute like baby humans

    Tegwyn Twmffat was tasked with doing a bat survey on a derelict building, and they took to DesignSpark to share their Raspberry Pi–powered solution.

    UK law protects nesting birds and roosting bats, so before you go knocking buildings down, you need a professional to check that no critters will be harmed in the process.

    The acoustic signature of an echo-locating brown long-eared bat

    The problem with bats, compared to birds, is they are much harder to spot and have a tendency to hang out in tiny wall cavities. Enter this big ultrasonic microphone.

    Raspberry Pi 4 Model B provided the RAM needed for this build

    After the building was declared safely empty of bats, Tegwyn decided to keep hold of the expensive microphone (the metal tube in the image above) and have a crack at developing their own auto-classification system to detect which type of bats are about.

    How does it work?

    The ultrasonic mic picks up the audio data using an STM M0 processor and streams it to Raspberry Pi via USB. Raspberry Pi runs Alsa driver software and uses the bash language to receive the data.

    Tegwyn turned to the open-source GTK software to process the audio data

    It turns out there are no publicly available audio records of bats, so Tegwyn took to their own back garden and found 6 species to record. And with the help of a few other bat enthusiasts, they cobbled together an audio dataset of 9 of the 17 bat species found in the UK!

    Tegwyn’s original post about their project features a 12-step walkthrough, as well as all the code and commands you’ll need to build your own system. And here’s the GitHub repository, where you can check for updates.

    Website: LINK

  • Solar Scare Mosquito 2.0 detects and destroys potential disease-carrying insects

    Solar Scare Mosquito 2.0 detects and destroys potential disease-carrying insects

    Reading Time: 2 minutes

    Solar Scare Mosquito 2.0 detects and destroys potential disease-carrying insects

    Arduino TeamOctober 2nd, 2020

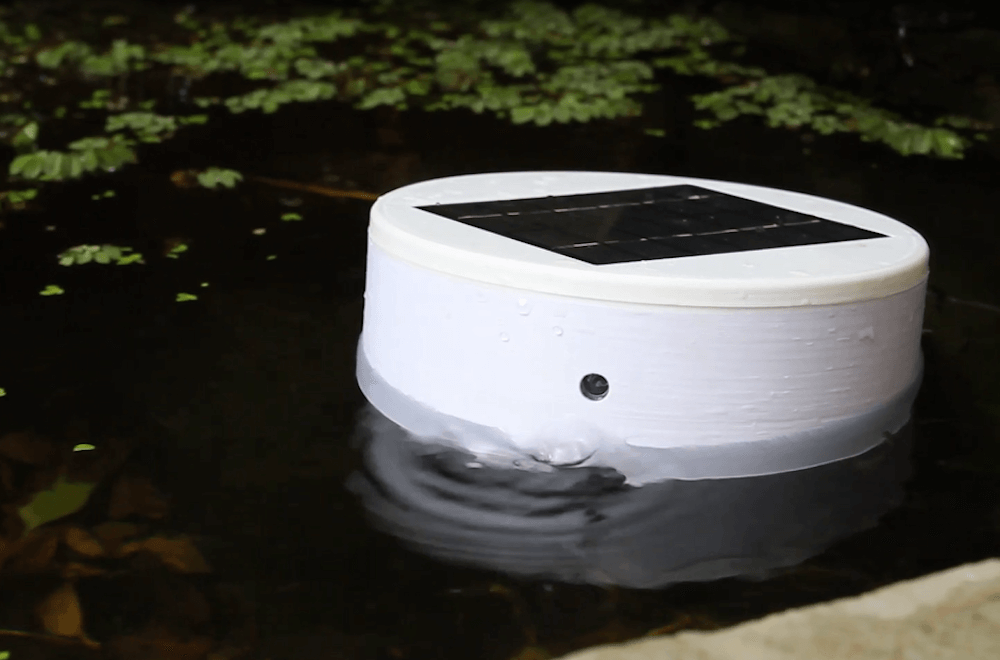
    Not only are mosquitoes extremely annoying, they can also carry deadly diseases like malaria, yellow fever, dengue, and the Zika virus. In order to prevent epidemics, Pranav Agarwal has developed the Solar Scare Mosquito — a solar-powered repellent device that allows the insects to lay their larvae at dusk and dawn, then produces intermittent ripples during the day to prevent the offspring from breathing at the surface of standing water.

    A finalist in this year’s Hackaday Prize, Agarwal is currently developing the second version of the platform that will be able to sense mosquito presence via a built-in microphone, and even help determine the sex and type of the pest by its wingbeat frequency.

    An Arduino MKR GSM 14000 controls the Solar Square Mosquito and provides IoT communication capabilities, with the goal of alerting affected populations to potential outbreaks using a smartphone app.

    [youtube https://www.youtube.com/watch?v=-TmqptTB3bc?feature=oembed&w=500&h=281]

    Website: LINK

  • Petoi Bittle robot dog has bite

    Petoi Bittle robot dog has bite

    Reading Time: 2 minutes

    The teachable robot pet promotes STEM learning and reached its $50K Kickstarter fundraising goal. It went on to attract nearly ten times that amount in the subsequent month-long campaign period.

    The tiny robot dog is its maker Petoi’s second such endeavour: earlier this year it started shipping the successfully crowdfunded Nybble, an open-source robot cat.

    Robot pets have been around for more than a decade, but the extensible nature of the Petoi pets makes them ideal for learning how to control robots yourself. Petoi aims to bring down the cost of consumer robots.

    At around $225 for the Bittle kit, it’s aimed at adult tech enthusiasts. Unlike robot toys marketed at children, Bittle is a quadruped with controllable legs. This makes it closer to a £1000+ Sony Aibo robot dog although the design nods to Boston Robotic’s industrial Spot robot.

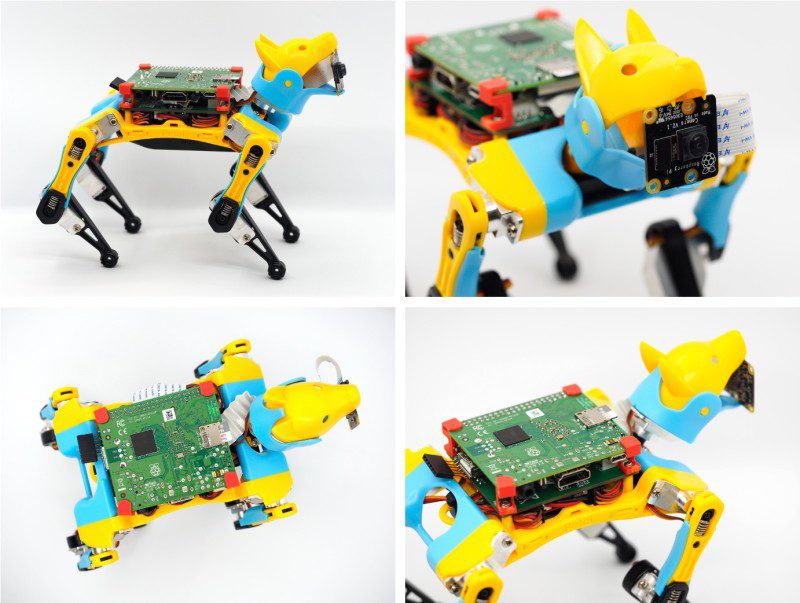
    Bittle has an Arduino controller board for the legs, while Raspberry Pi adds AI elements to the build such as image recognition and tracking. Bittle backers receive components of the robot dog and can share their pet’s exploits with others on a dedicated forum.

    New dog; old tricks

    As any Lego, Meccano, or train set designer will tell you, the enjoyment is in the construction at least as much as the finished article.

    The pet robot will be modular and Petoi claims it takes around an hour to assemble. Its maker explains that the pet dog is assembled from a ‘puzzle-like frame’ with demo codes downloadable from a GitHub page. Bittle can go for a walk, avoid obstacles, and right himself if he falls down steps.

    While teaching Petoi tricks will bring its own rewards, there will also be a competitive element. Owners can entertheir robot pet into a virtual dog show and demo the skills they’ve both learned.

    Arduino and Raspberry Pi provide the robot dog’s controls and artificial intelligence

  • Code a Rally-X-style mini-map | Wireframe #43

    Code a Rally-X-style mini-map | Wireframe #43

    Reading Time: 4 minutes

    Race around using a mini-map for navigation, just like the arcade classic, Rally-X. Mark Vanstone has the code

    In Namco’s original arcade game, the red cars chased the player relentlessly around each level. Note the handy mini-map on the right.

    The original Rally-X arcade game blasted onto the market in 1980, at the same time as Pac‑Man and Defender. This was the first year that developer Namco had exported its games outside Japan thanks to the deal it struck with Midway, an American game distributor. The aim of Rally-X is to race a car around a maze, avoiding enemy cars while collecting yellow flags – all before your fuel runs out.

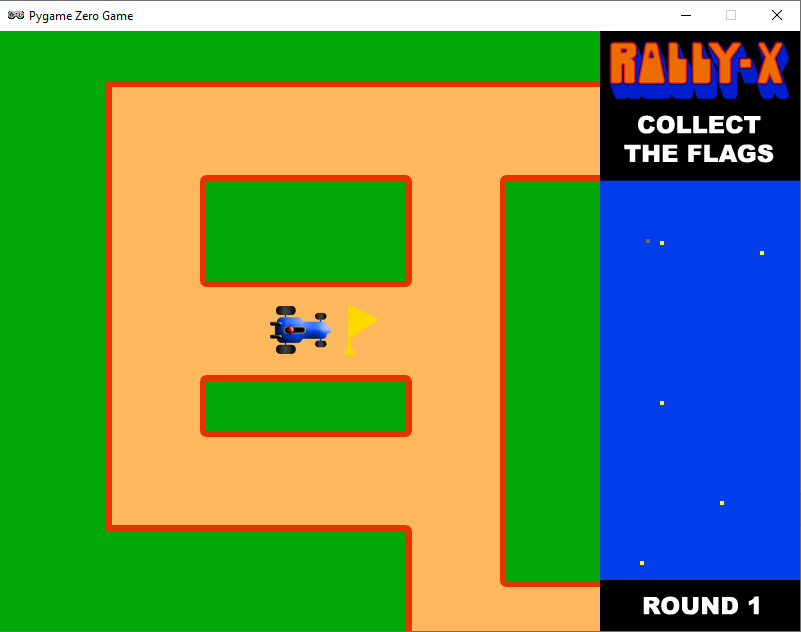
    The aspect of Rally-X that we’ll cover here is the mini-map. As the car moves around the maze, its position can be seen relative to the flags on the right of the screen. The main view of the maze only shows a section of the whole map, and scrolls as the car moves, whereas the mini-map shows the whole size of the map but without any of the maze walls – just dots where the car and flags are (and in the original, the enemy cars). In our example, the mini-map is five times smaller than the main map, so it’s easy to work out the calculation to translate large map co‑ordinates to mini-map co-ordinates.

    To set up our Rally-X homage in Pygame Zero, we can stick with the default screen size of 800×600. If we use 200 pixels for the side panel, that leaves us with a 600×600 play area. Our player’s car will be drawn in the centre of this area at the co-ordinates 300,300. We can use the in-built rotation of the Actor object by setting the angle property of the car. The maze scrolls depending on which direction the car is pointing, and this can be done by having a lookup table in the form of a dictionary list (directionMap) where we define x and y increments for each angle the car can travel. When the cursor keys are pressed, the car stays central and the map moves.

    A screenshot of our Rally-X homage running in Pygame Zero

    Roam the maze and collect those flags in our Python homage to Rally-X.

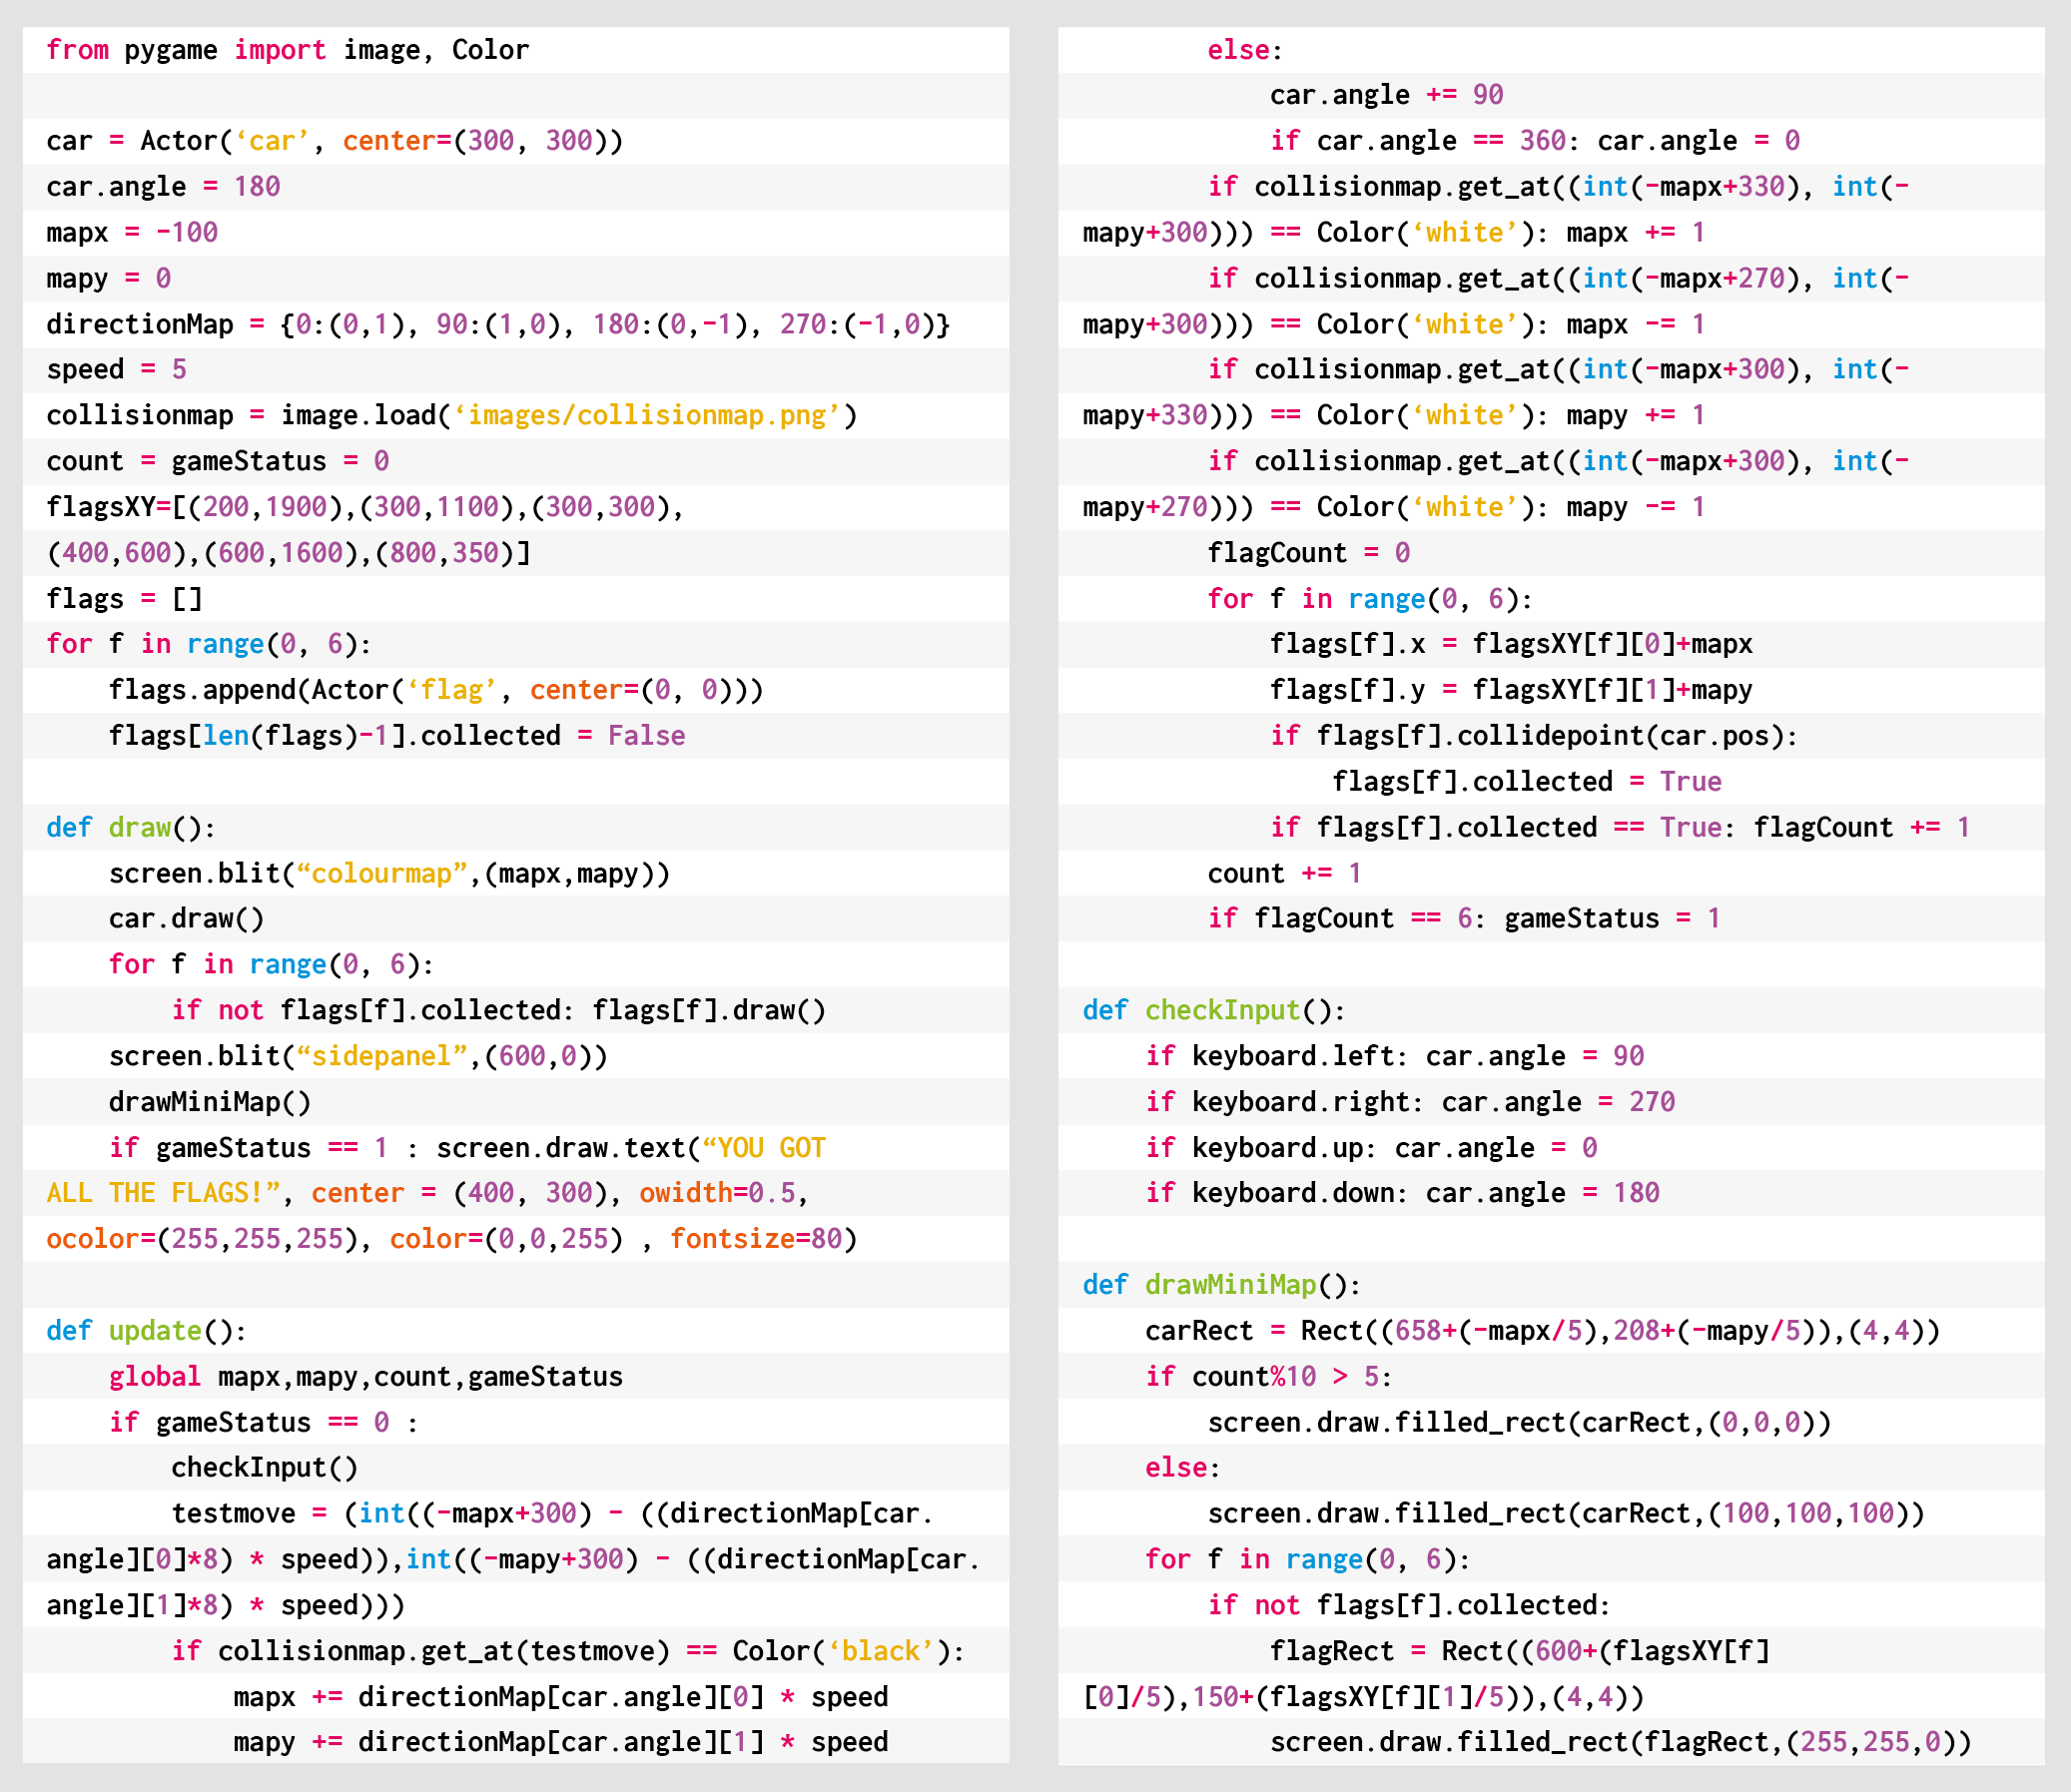
    To detect the car hitting a wall, we can use a collision map. This isn’t a particularly memory-efficient way of doing it, but it’s easy to code. We just use a bitmap the same size as the main map which has all the roads as black and all the walls as white. With this map, we can detect if there’s a wall in the direction in which the car’s moving by testing the pixels directly in front of it. If a wall is detected, we rotate the car rather than moving it. If we draw the side panel after the main map, we’ll then be able to see the full layout of the screen with the map scrolling as the car navigates through the maze.

    We can add flags as a list of Actor objects. We could make these random, but for the sake of simplicity, our sample code has them defined in a list of x and y co-ordinates. We need to move the flags with the map, so in each update(), we loop through the list and add the same increments to the x and y co‑ordinates as the main map. If the car collides with any flags, we just take them off the list of items to draw by adding a collected variable. Having put all of this in place, we can draw the mini-map, which will show the car and the flags. All we need to do is divide the object co-ordinates by five and add an x and y offset so that the objects appear in the right place on the mini-map.

    And those are the basics of Rally-X! All it needs now is a fuel gauge, some enemy cars, and obstacles – but we’ll leave those for you to sort out…

    Here’s Mark’s code for a Rally-X-style driving game with mini-map. To get it running on your system, you’ll need to install Pygame Zero. And to download the full code and assets, head here.

    Get your copy of Wireframe issue 43

    You can read more features like this one in Wireframe issue 43, available directly from Raspberry Pi Press — we deliver worldwide.

    And if you’d like a handy digital version of the magazine, you can also download issue 43 for free in PDF format.

    Wireframe #43, with the gorgeous Sea of Stars on the cover.

    Make sure to follow Wireframe on Twitter and Facebook for updates and exclusive offers and giveaways. Subscribe on the Wireframe website to save up to 49% compared to newsstand pricing!

    Website: LINK

  • Light[s]well is a voice-controlled custom lighting installation

    Light[s]well is a voice-controlled custom lighting installation

    Reading Time: < 1 minute

    Light[s]well is a voice-controlled custom lighting installation

    Arduino TeamSeptember 30th, 2020

    Designed by Brian Harms of NSTRMNT, Light[s]well is a beautifully crafted 4’x8′ light installation for a triple-height living room that’s voice-responsive thanks to the Arduino Alexa skill.

    Light[s]well is constructed out of 80/20 extrusions and fasteners, with individually addressable LED strips embedded in the channels of the structure. 74 sheets of laser-cut cardstock make up the undulating light-diffusing wave pattern.

    According to Harms, 30 LEDs per meter strips were used to give each gap in the cardstock two LEDs per structural metal beam, for a total of six LEDs per gap. The LEDs are controlled by a MKR1000 (via a logic level shifter) along with the Arduino IoT Cloud.

    More details and images of the incredible project can be found on Harms’ NSTRMNT website.

    [youtube https://www.youtube.com/watch?v=JBNFrtWiiJ4?feature=oembed&w=500&h=281]

    Website: LINK

  • Raspberry Pi reaches more schools in rural Togo

    Raspberry Pi reaches more schools in rural Togo

    Reading Time: 3 minutes

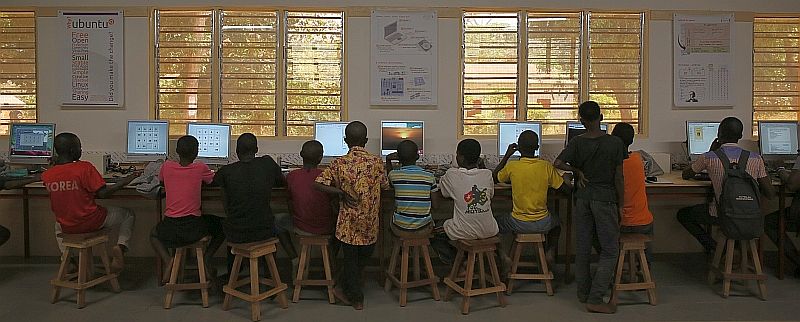
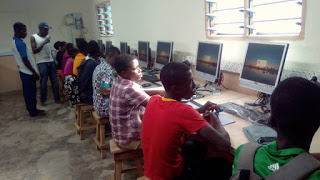
    We’ve been following the work of Dominique Laloux since he first got in touch with us in May 2013 ahead of leaving to spend a year in Togo. 75% of teachers in the region where he would be working had never used a computer before 2012, so he saw an opportunity to introduce Raspberry Pi and get some training set up.

    We were so pleased to receive another update this year about Dominique and his Togolese team’s work. This has grown to become INITIC, a non-profit organisation that works to install low cost, low power consumption, low maintenance computer rooms in rural schools in Togo. The idea for the acronym came from the organisation’s focus on the INItiation of young people to ICT (TIC in French).

    The story so far

    INITIC’s first computer room was installed in Tokpli, Togo, way back in 2012. It was a small room (see the photo on the left below) donated by an agricultural association and renovated by a team of villagers.

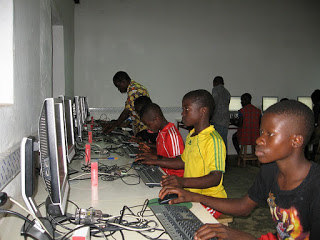
    Fast forward to 2018, and INTIC had secured its own building (photo on the right above). It has a dedicated a Raspberry Pi Room, as well as a multipurpose room and another small technical room. Young people from local schools, as well as those in neighbouring villages, have access to the facilities.

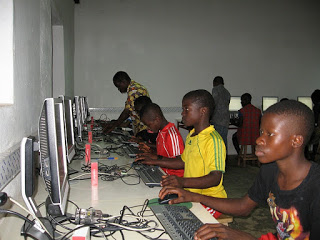
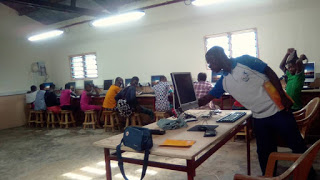
    The first dedicated Raspberry Pi Room in Togo was at the Collège (secondary school) in the town of Kuma Adamé. It was equipped with 21 first-generation Raspberry Pis, which stood up impressively against humid and dusty conditions.

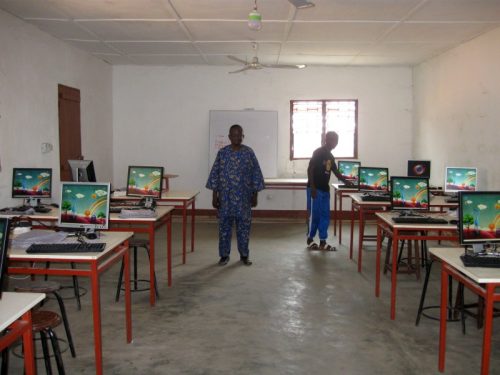
    In 2019, Kpodzi High School also got its own Raspberry Pi Room, equipped with 22 Raspberry Pi workstations. Once the projector, laser printer, and scanners are in place, the space will also be used for electronics, Arduino, and programming workshops.

    What’s the latest?

    Ready for the unveiling…

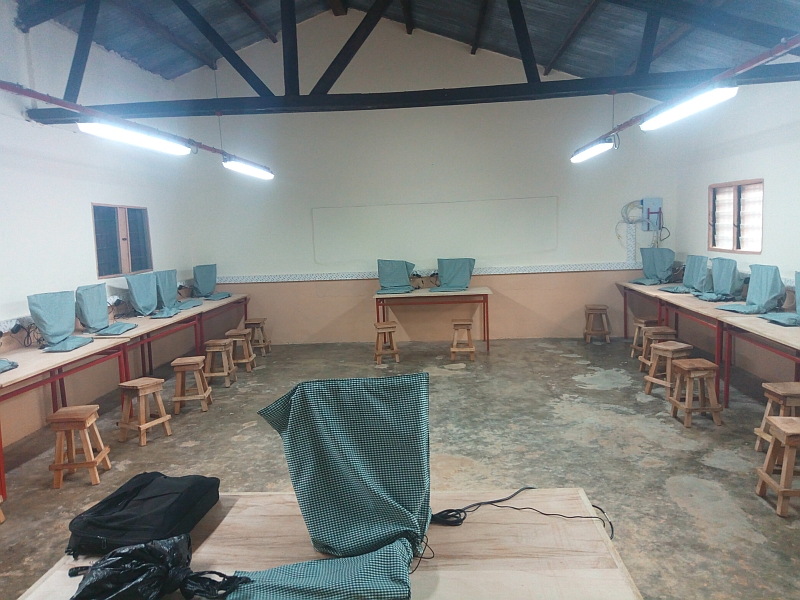
    Now we find ourselves in 2020 and INTIC is still growing. Young people in the bountiful, but inaccessible, village of Danyi Dzogbégan now have access to 20 Raspberry Pi workstations (plus one for the teacher). They have been using them for learning since January this year.

    We can’t wait to see what Dominique and his team have up their sleeve next. You can help INTIC reach more young people in rural Togo by donating computer equipment, by helping teachers get lesson materials together, or through a volunteer stay at one of their facilities. Find out more here.

    Website: LINK

  • Watch your houseplant’s growth really take off in this Saturn V planter

    Watch your houseplant’s growth really take off in this Saturn V planter

    Reading Time: 2 minutes

    Watch your houseplant’s growth really take off in this Saturn V planter

    Arduino TeamSeptember 29th, 2020

    As first reported by Technabob, almost two years after he made a rather stunning Saturn V lamp, SimonRob decided to create something a bit different in the form of his Saturn V planter.

    The device is based on the lower section portion of a 3D-printable rocket model, which is modified and sealed to hold dirt and water. A succulent now pops out where the rest of the rocket should be, and when combined with a 30mm thick wood plank, gives it a very unique and polished look.

    A switch on the front lights up the printed flame assemblies emanating from the engines, using a trio of SMD LEDs on each exhaust. These LEDs are controlled by an Arduino Nano nestled inside the wooden base to produce random lighting effects when an activation button is pressed.

    [youtube https://www.youtube.com/watch?v=Mg0TcEaZRzw?feature=oembed&w=500&h=281]

    Website: LINK

  • “Tinkering is an equity issue” | Hello World #14

    “Tinkering is an equity issue” | Hello World #14

    Reading Time: 8 minutes

    In the brand-new issue of Hello World magazine, Shuchi Grover tells us about the limits of constructionism, the value of formative assessment, and why programming can be a source of both joy and angst.

    How much open-ended exploration should there be in computing lessons?

    This is a question at the heart of computer science education and one which Shuchi Grover is delicately diplomatic about in the preface to her new book, Computer Science in K-12: An A-to-Z Handbook on Teaching Programming. The book’s chapters are written by 40 teachers and researchers in computing pedagogy, and Grover openly acknowledges the varying views around discovery-based learning among her diverse range of international authors.

    “I wonder if I want to wade there,” she laughs. “The act of creating a program is in itself an act of creation. So there is hands-on learning quite naturally in the computer science classroom, and mistakes are made quite naturally. There are some things that are so great about computer science education. It lends itself so easily to being hands-on and to celebrating mistakes; debugging is par for the course, and that’s not the way it is in other subjects. The kids can actually develop some very nice mindsets that they can take to other classrooms.”

    Shuchi Grover showing children something on a laptop screen

    Grover is a software engineer by training, turned researcher in computer science education. She holds a PhD in learning sciences and technology design from Stanford University, where she remains a visiting scholar. She explains how the beginning of her research career coincided with the advent of the block-based programming language Scratch, now widely used as an introductory programming language for children.

    “Almost two decades ago, I went to Harvard to study for a master’s called technology innovation and education, and it was around that time that I volunteered for robotics workshops at the MIT Media Lab and MIT Museum. Those were pretty transformative for me: I started after-school clubs and facilitated robotics and digital storytelling clubs. In the early 2000s, I was an educational technology consultant, working with teachers on integrating technology. Then Scratch came out, and I started working with teachers on integrating Scratch into languages, arts, and science, all the things that we are doing today.”

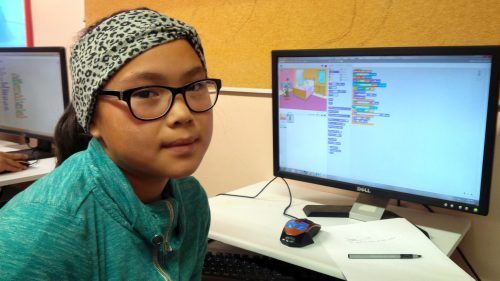
    A girl with her Scratch project
    Student Joyce codes in Scratch at her Code Club in Nunavut

    Do her formative experiences at MIT, the birthplace of constructionist theory of student-centred, discovery-based learning, lead her to lean one way or another in the tinkering versus direct instruction debate? “The learning in informal spaces is, of course, very interest-driven. There is no measurement. Children are invited to a space to spend some time after school and do whatever they feel like. There would be kids who would be chatting away while a couple of them designed a robot, and then they would hand over the robot to some others and say, ‘OK, now you go ahead and program it,’ and there were some kids who would just like to hang about.

    “When it comes to formal education, there needs to be more accountability, you want to do right by every child. You have to be more intentional. I do feel that while tinkering and constructionism was a great way to introduce interest-driven projects for informal learning, and there’s a lot to learn from there and bring to the formal learning context, I don’t think it can only be tinkering.”

    “There needs to be more accountability to do right by every child.”

    “Everybody knows that engagement is very important for learning — and this is something that we are learning more about: it’s not just interest, it’s also culture, communities, and backgrounds — but all of this is to say that there is a personal element to the learning process and so engagement is necessary, but it’s not a sufficient condition. You have to go beyond engagement, to also make sure that they are also engaging with the concepts. You want at some point for students to engage with the concept in a way that reveals what their misconceptions might be, and then they end up learning and understanding these things more deeply.

    “You want a robust foundation — after all, our goal for teaching children anything at school is to build a foundation on which they build their college education and career and anything beyond that. If we take programming as a skill, you want them to have a good understanding of it, and so the personal connections are important, but so is the scaffolding.

    “How much scaffolding needs to be done varies from context to context. Even in the same classroom, children may need different levels of scaffolding. It’s a sweet spot; within a classroom a teacher has to juggle so much. And therein lies the challenge of teaching: 30 kids at a time, and every child is different and every child is unique.

    “It’s an equity issue. Some children don’t have the prior experience that sets them up to tinker constructively. After all, tinkering is meant to be purposeful exploration. And so it becomes an issue of who are you privileging with the pedagogy.”

    She points out that each chapter in her book that comes from a more constructionist viewpoint clearly speaks of the need for scaffolding. And conversely, the chapters that take a more structured approach to computing education include elements of student engagement and children creating their own programs. “Frameworks such as Use-Modify-Create and PRIMM just push that open-ended creation a little farther down, making sure that the initial experiences have more guide rails.”

    Approaches to assessment

    Grover is a senior research scientist at Looking Glass Ventures, which in 2018 received a National Science Foundation grant to create Edfinity, a tool to enable affordable access to high-quality assessments for schools and universities.

    In her book, she argues that asking students to write programs as a means of formative assessment has several pitfalls. It is time-consuming for both students and teachers, scoring is subjective, and it’s difficult to get a picture of how much understanding a student has of their code. Did they get their program to work through trial and error? Did they lift code from another student?

    “Formative assessments that give quick feedback are much better. They focus on aspects of the conceptual learning that you want children to have. Multiple-choice questions on code force both the teachers and the children to experience code reading and code comprehension, which are just so important. Just giving children a snippet of code and saying: ‘What does this do? What will be the value of the variable? How many times will this be executed?’ — it goes down to the idea of code tracing and program comprehension.

    “Research has also shown that anything you do in a classroom, the children take as a signal. Going back to the constructionist thing, when you foreground personal interest, there’s a different kind of environment in the classroom, where they’re able to have a voice, they have agency. That’s one of the good things about constructionism.

    “Formative assessment signals to the student what it is that you’re valuing in the learning process. They don’t always understand what it is that they’re expected to learn in programming. Is the goal creating a program that runs? Or is it something else? And so when you administer these little check-ins, they bring more alignment between a teacher’s goals for the learners and the learners’ understanding of those goals. That alignment is important and it can get lost.”

    Grover will present her latest research into assessment at our research seminar series next Tuesday 6 October — sign up to attend and join the discussion.

    The joy and angst of programming

    The title of Grover’s book, which could be thought to imply that computer science education consists solely of teaching students to program, may cause some raised eyebrows.

    What about building robots or devices that interact with the world, computing topics like binary, or the societal impacts of technology? “I completely agree with the statement and the belief that computer science is not just about programming. I myself have been a proponent of this. But in this book I wanted to focus on programming for a couple of reasons. Programming is a central part of the computer science curriculum, at least here in the US, and it is also the part that teachers struggle with the most.

    “I want to show where children struggle and how to help them.”

    “As topics go, programming carries a lot of joy and angst. There is joy in computing, joy when you get it. But when a teacher is encountering this topic for the first time there is a lot of angst, because they themselves may not be understanding things, and they don’t know what it is that the children are not understanding. And there is this entire body of research on novice programming. There are the concepts, the practices, the pedagogies, and the issues of assessment. So I wanted to give the teachers all of that: everything we know about children and programming, the topics to be learnt, where they struggle, how to help them.”

    Computer Science in K-12: An A-to-Z Handbook on Teaching Programming (reviewed in this issue of Hello World) is edited by Shuchi Grover and available now.

    Hear more from Shuchi Grover, and subscribe to Hello World

    We will host Grover at our next research seminar, Tuesday 6 October at 17:00–18:30 BST, where she will present her work on formative assessment.

    Hello World is our magazine about all things computing education. It is free to download in PDF format, or you can subscribe and we will send you each new issue straight to your home.

    In issue 14 of Hello World, we have gathered some inspiring stories to help your learners connect with nature. From counting penguins in Antarctica to orienteering with a GPS twist, great things can happen when young people get creative with technology outdoors. You’ll find all this and more in the new issue!

    Educators based in the UK can subscribe to receive print copies for free!

    Website: LINK