
“I have a YouTube channel, and a company called Divoom sent me a Bluetooth speaker to review,” Carter explains. “Unfortunately, I’m not a product reviewer, so I decided to make a project with it. Initially, I was hoping to make a standalone music and media player for my kitchen but, as I got further along, I realised that I’d need to remove the speaker if I wanted to fit in a display.”
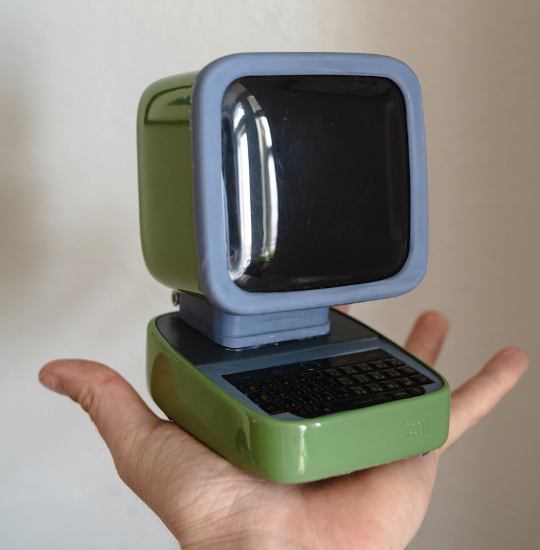
The item Carter received was the Divoom Ditoo Plus Retro Pixel Art Game Bluetooth Speaker. It’s a curious little thing that’s styled to look like a desktop PC and, as well as six buttons and a tiny stick to navigate its many features, it has a screen which allows users to display pixel art, play games, or view information.
Key to success
To turn this device into a PC, however, the buttons, the screen, and the speaker needed to be stripped away. Carter grabbed cutting tools and a screwdriver and began disassembling, eventually leaving just the case. He then began inserting new hardware, starting with a replacement keyboard. He happened to have a USB BlackBerry Q20 keyboard with trackpad to hand, and this fitted neatly once he trimmed the corners.
“It was simply luck that the keyboard I had on hand was such a good fit,” he says, explaining that he hid the rough edges and the surrounding board by 3D-printing a bezel. Unfortunately, the display proved trickier. “The screen I had was not a good fit,” he laments. “Although being square was a good start, the glass was too large to fit within the speaker housing.
“I cut the glass with shears and covered the edge shards with a 3D-printed bezel. But cutting electronics with shears is a bit of an inside joke on my YouTube channel. It’s dumb and it’s not a method I recommend. To make the display look more like a CRT, I also shaped a piece of thermal plastic into a dome with a hair-dryer and placed it over the LCD.”
Making sacrifices
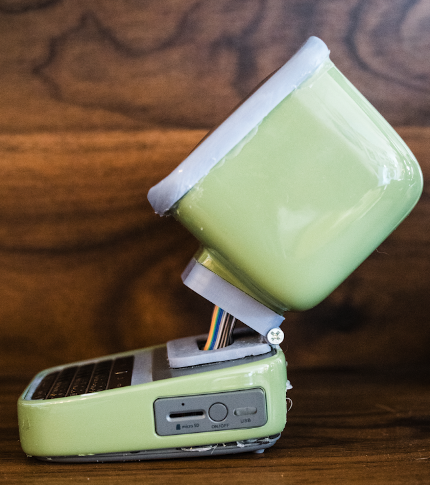
The final step was to fit a Raspberry Pi 3B computer. Again, it needed to squeeze into the case and it required removing the GPIO pins to fix on a right-angle header. This proved tricky and Carter still couldn’t create a sufficiently low profile, so he ended up cutting the bottom of the housing instead. “If I was to buy the parts, I would have used a Raspberry Pi Zero computer which would have fit better,” he says.

Even so, once assembled, the Mini PC has worked a treat. It boots up, displays the familiar Raspberry Pi OS screen, and it’s controllable via the keyboard. But if Carter worked on it again, he says he might do things differently.
“The bottom cover could be designed better to fit over the Raspberry Pi computer, and the upper housing could be redesigned to include a speaker,” he says. “I could find some way of preserving the LCD’s touch sensitivity while still achieving the CRT domed look. To be honest, though, I haven’t really used it much. I kinda just built it to see if I could.”
Schreibe einen Kommentar
Du musst angemeldet sein, um einen Kommentar abzugeben.