Kit you’ll need to build a 3D camera

Prepare Raspberry Pi
To create 3D photographs, we need to be able to take two photos simultaneously, about 5 cm apart. These images can then be processed into a variety of different formats such as parallel view, cross-view, or anaglyph (when you wear red/green glasses). As this is a 3D project, it’s not surprising to learn that we’ll need two of everything. As we can only attach one camera per Raspberry Pi Zero W, we’ll need to prepare a left and right computer. Start by installing Raspbian Lite as normal on both computers and updating everything with:
sudo apt update && sudo apt full-upgradeMake sure both computers are connected to WiFi before proceeding.
Know the difference
Choose one computer for the left camera and the other for the right. From the command line, run sudo raspi-config and go to Networking Options > Hostname. Change the name from ‘raspberrypi’ to ‘leftcam’ and ‘rightcam’ on each respective Raspberry Pi Zero. Also in raspi-config, make sure SSH is enabled on each (Preferences > Interfaces).
After this, leave the configuration utility and shut both computers down. Now is a very good time to attach the short camera cable that was supplied with the case to each Raspberry Pi Zero and thread it through the slot on the rear of the case and insert both computers. Add the cover and label each case as ‘left’ or ‘right’.
Power sharing
As we have two Raspberry Pi Zero boards, we need two power supplies, right? Well, we can pull a little trick so that only one is required. With some wire, solder a 5 V line and a ground (GND) line from one GPIO to the equivalent on the other (see Figure 1 diagram). This ‘power rail’ allows the second Raspberry Pi Zero W to pull power from the one connected to a USB power supply. Just remember to use a suitable power supply with enough amperes to power both. We found the official micro USB supply worked well. Check, check, and double-check before following this step. Soldering to the wrong connectors could permanently damage your devices.

Attach the cameras
It’s really important that the two cameras are lined up together and not at odd angles. We’ve provided a STL file for 3D-printing a mounting plate that holds them perfectly in place. You don’t have to use it, but if you do have access to a 3D printer, it’ll make life easier. Connect the short ribbon cables provided with the cases to each camera, then attach the cameras to the mounting plate side-by-side using the nuts and bolts. Be very careful not to bend or tear the ribbon cables. Finally, flip the cameras over so the plate is resting on the case lids and affix them with some sticky pads.

Camera testing
Before going any further, test that both cameras are working as expected. Carefully attach the lenses to each camera board (if you’re using the mounting plate, watch out for the control levers hitting each other). Use SSH to log in remotely to your left camera (ssh pi@leftcam.local) and at the command line, enter this:
raspistill -o test.jpg After a few seconds, an image file will be created in your current directory. Transfer it back to your computer and have a look. Chances are it’ll be blurry – but so long as an image was taken, we’re all good. Repeat this test on the right-hand camera.
Streaming for two
If you’ve been wondering how one camera is going to get its image to the other, the answer is by setting up a HTTP-based stream on each camera. This will turn each Raspberry Pi Zero W into a streaming webcam and we can then view both images from a further website we’ll install later. The following steps need to be followed on each Raspberry Pi Zero W. Start by installing some libraries we need:
sudo apt install cmake libjpeg8-dev git Now we’ll get and build the MJPEG streaming software:
git clone https://github.com/jacksonliam/mjpg-streamer.git cd mjpeg-streamer/mjpeg-streamer-experimental make sudo make install
First test images
To run the package we’ve just installed, enter the following commands on each Raspberry Pi Zero W: cd ~/mjpeg-streamer/mjpeg-streamer-experimental export LD_LIBRARY_PATH=. ./mjpg_streamer -o „output_http.so -w ./www“ -i „input_raspicam.so“ There is now a web server running on each device. Have a look by visiting
http://leftcam.local:8080/ and
http://rightcam.local:8080/.Each will have a fun little website where you can view static and video feeds from each camera. When you’re done, you can stop each server by entering CTRL+C in the Terminal.
Bring them together
To view both images on the same page and generate 3D images, we need a further web service that takes a feed from both sites we’ve just installed. Create a directory called 3dcamera in your home directory, then create two files: 3dcamera.py and control.html.
Enter both code listings (or download them from GutHub) and save. This is a very simple web server and an HTML page that will display both images on a single page and, with a simple click, create and download a parallel-eye image.
Make sure both MJPEG streamers are running and then start the additional server on leftcam only:
python3 3dcamera.py
You should be able to access the site at
http://leftcam.local:8081/ and be able to see a video stream of each device.
View your image
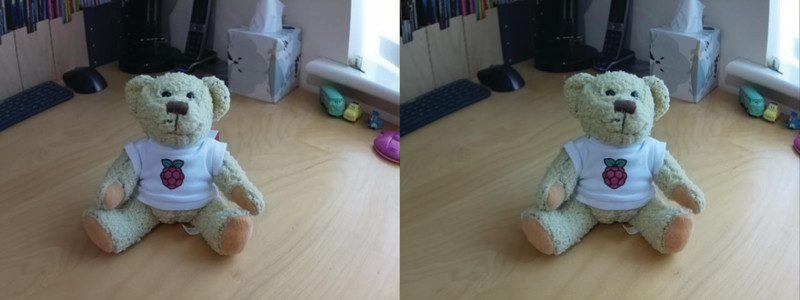
Take an image by holding the cameras steady and clicking ‘Snap!’ on the website. The dual image will be downloaded to your computer. If you have a Google Cardboard kit or one of the widely available mobile phone VR headsets, transfer your parallel image to your mobile phone and then view it in glorious three dimensions. If not, many people can see the image by focusing their eyes ‘beyond’ the two images until they merge into one. If you’re struggling with this, reverse the two captured images as noted in the code to create a cross-view image.
Take it further
This is just a starting point for your adventures in 3D photography. We haven’t touched on creating anaglyphs or streaming 3D video. Check out the GitHub repo for a more advanced version that allows you to set the type of image to generate and adds a few more features. What’s the most creative thing you can do with your 3D camera?
3dcamera.py
import os
import urllib.request
from http.server import SimpleHTTPRequestHandler, HTTPServer
from PIL import Image
from io import BytesIO port = 8081
control_html = os.path.dirname(os.path.realpath(
__file__)) + '/control.html'
# Reverse the URLs to create cross-view images instead of parallel
left_camera = "http://leftcam.local:8080/?action=snapshot"
right_camera = "http://rightcam.local:8080/?action=snapshot" def process_image(): left_image = urllib.request.urlopen(left_camera) right_image = urllib.request.urlopen(right_camera) images = [Image.open(x) for x in [left_image, right_image]] widths, heights = zip(*(i.size for i in images)) total_width = sum(widths) max_height = max(heights) side_by_side_image = Image.new('RGB', (
total_width, max_height)) x_offset = 0 for image in images: side_by_side_image.paste(image, (x_offset, 0)) x_offset += image.size[0] image_buffer = BytesIO() side_by_side_image.save(image_buffer, format='JPEG') image_data = image_buffer.getvalue() return image_data class handle_request(SimpleHTTPRequestHandler): def do_GET(self): print('Sending control HTML') f = open(control_html, 'rb') self.send_response(200) self.send_header('Content-type', 'text/html') self.end_headers() self.copyfile(f, self.wfile) def do_POST(self): new_image = process_image() self.send_response(200) self.send_header('Content-type', 'image/jpeg') self.send_header('Content-disposition', 'attachment; filename="3d.jpg"') self.end_headers() self.wfile.write(new_image) httpd = HTTPServer(("", port), handle_request)
try: httpd.serve_forever()
except KeyboardInterrupt: pass httpd.server_close()
control.html
<!DOCTYPE html>
<html> <head> <style> .viewfinder { display: flex; } </style> </head> <body> <h1>3D Camera</h1> <div class="viewfinder"> <img src="http://leftcam.local:8080/?action=stream" /> <img src="http://rightcam.local:8080/?action=stream" /> </div> <form method="post" action="/"> <button>Snap!</button> </form> </body>
</html>
Schreibe einen Kommentar
Du musst angemeldet sein, um einen Kommentar abzugeben.