Kategorie: Reviews

  • Making makers

    Making makers

    Reading Time: 3 minutes

    The world is full of people who have lost touch with the mechanical roots of technology. They use shiny devices made of glue and glass, with components sealed away and moving parts that are only visible at the microscopic level. They lack heart and soul, and any sense of wonder or joy.

    The word ‘algorithm’ may as well be ‘abracadabra’ for most people. Tech is indistinguishable from magic.

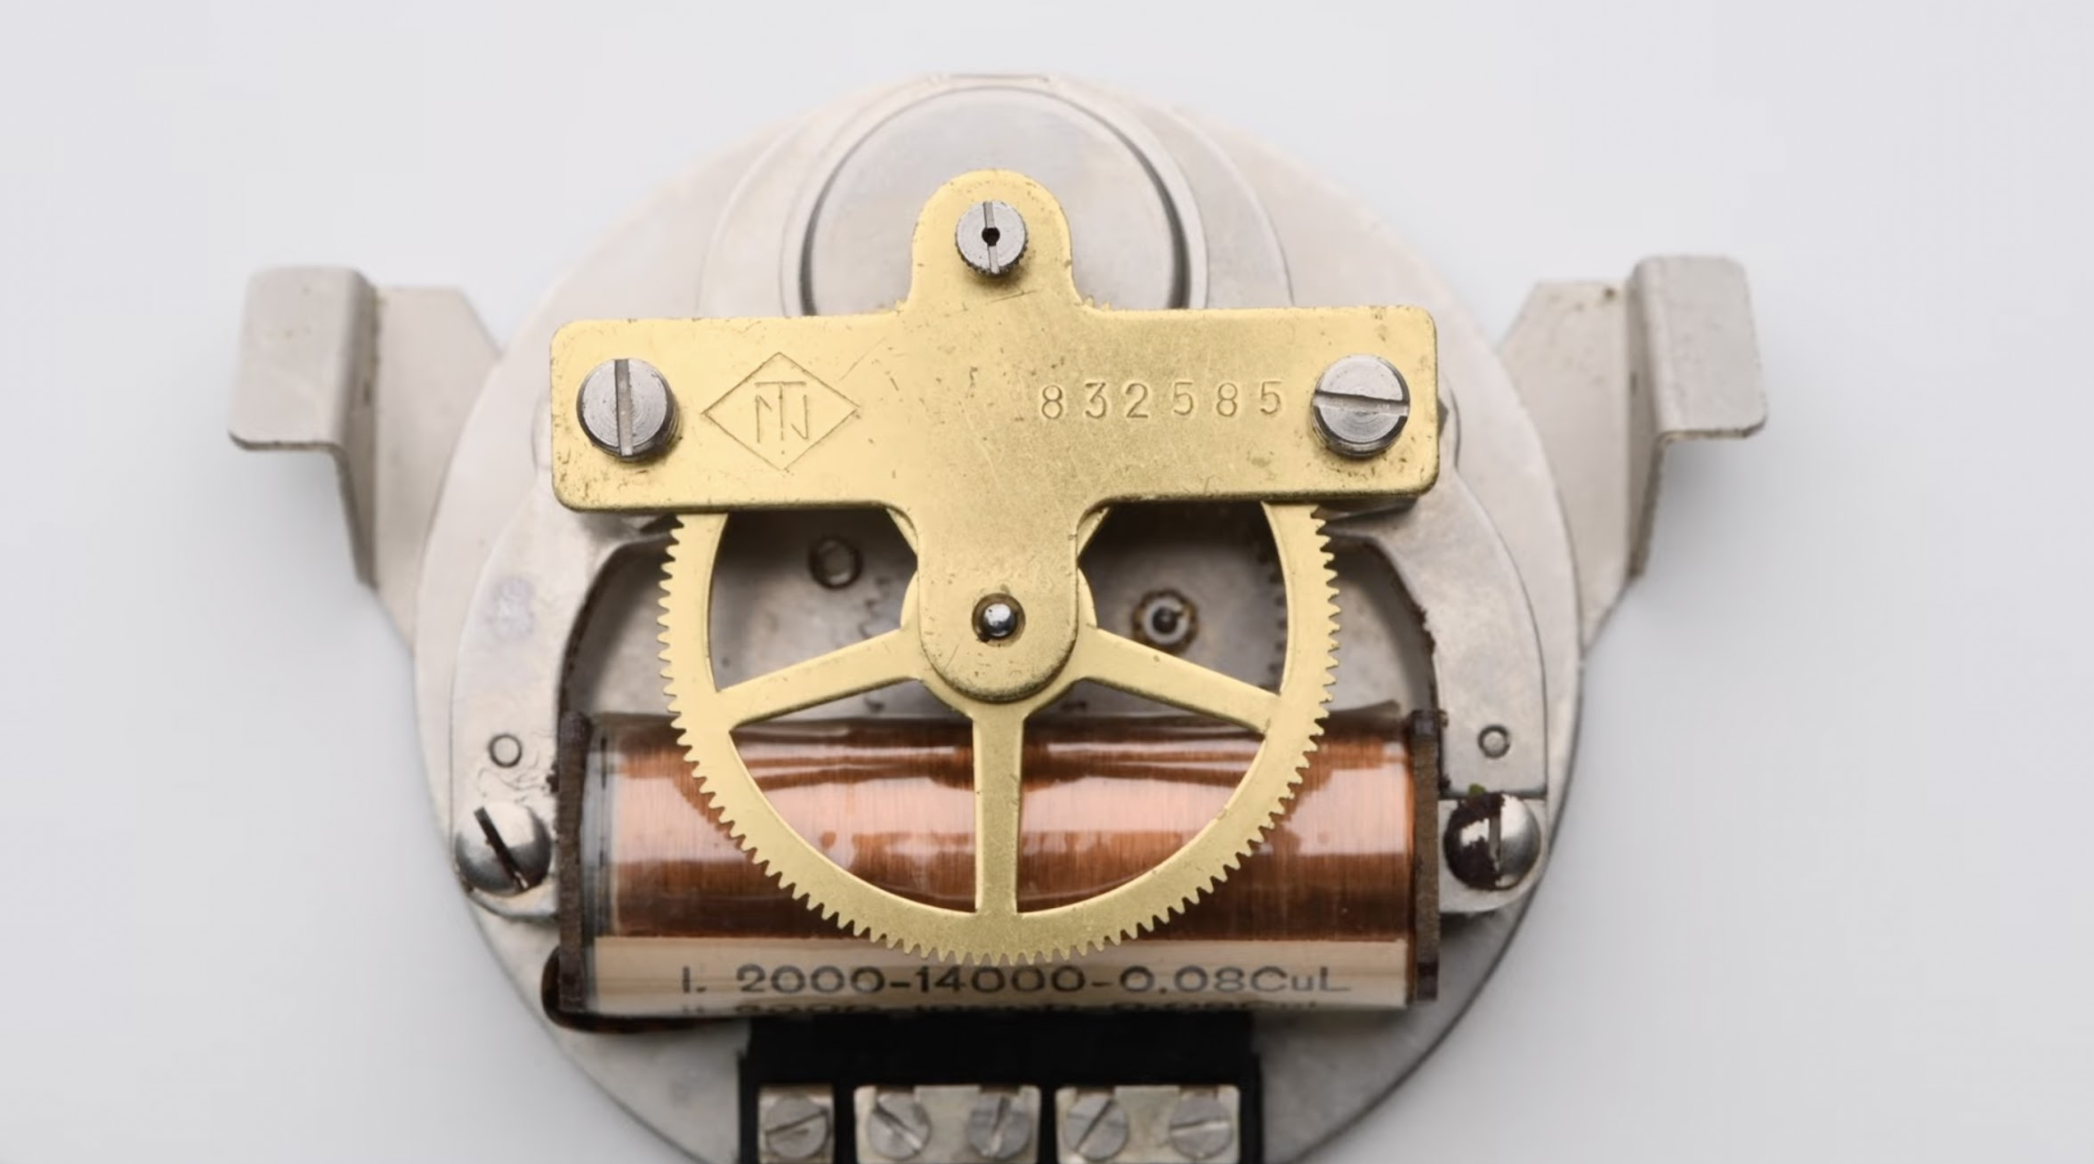
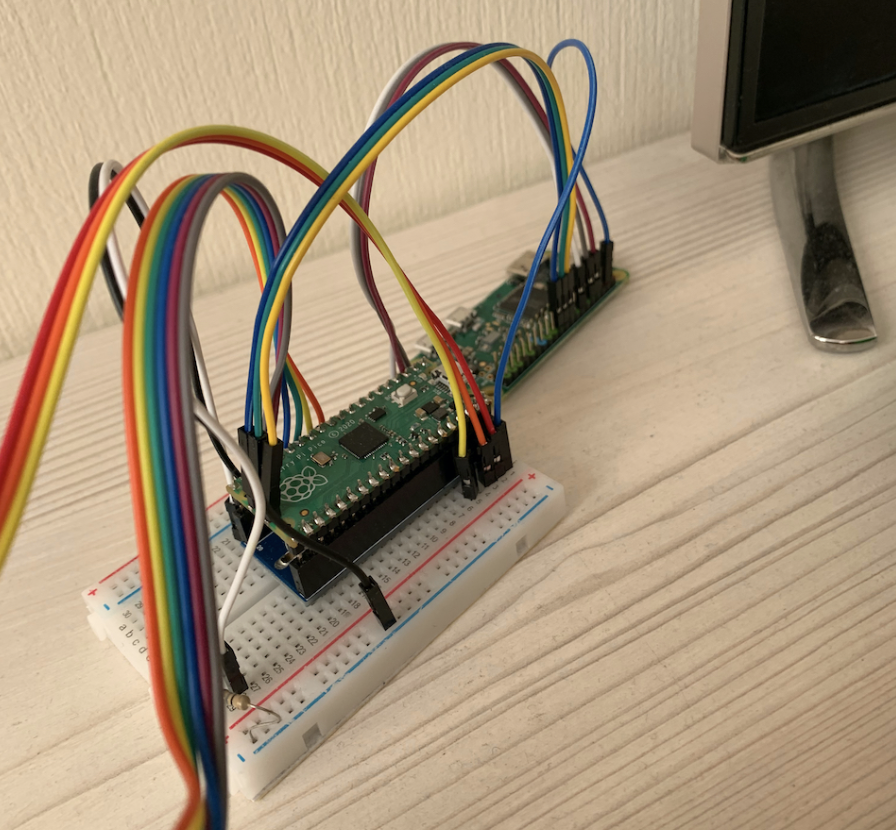
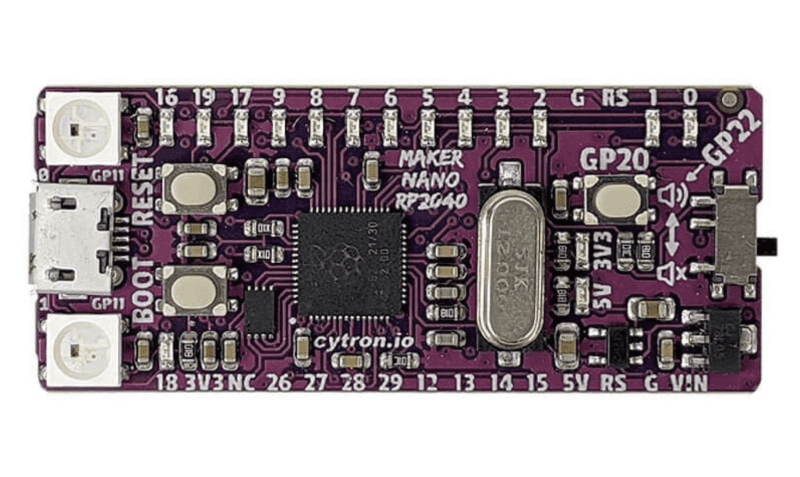
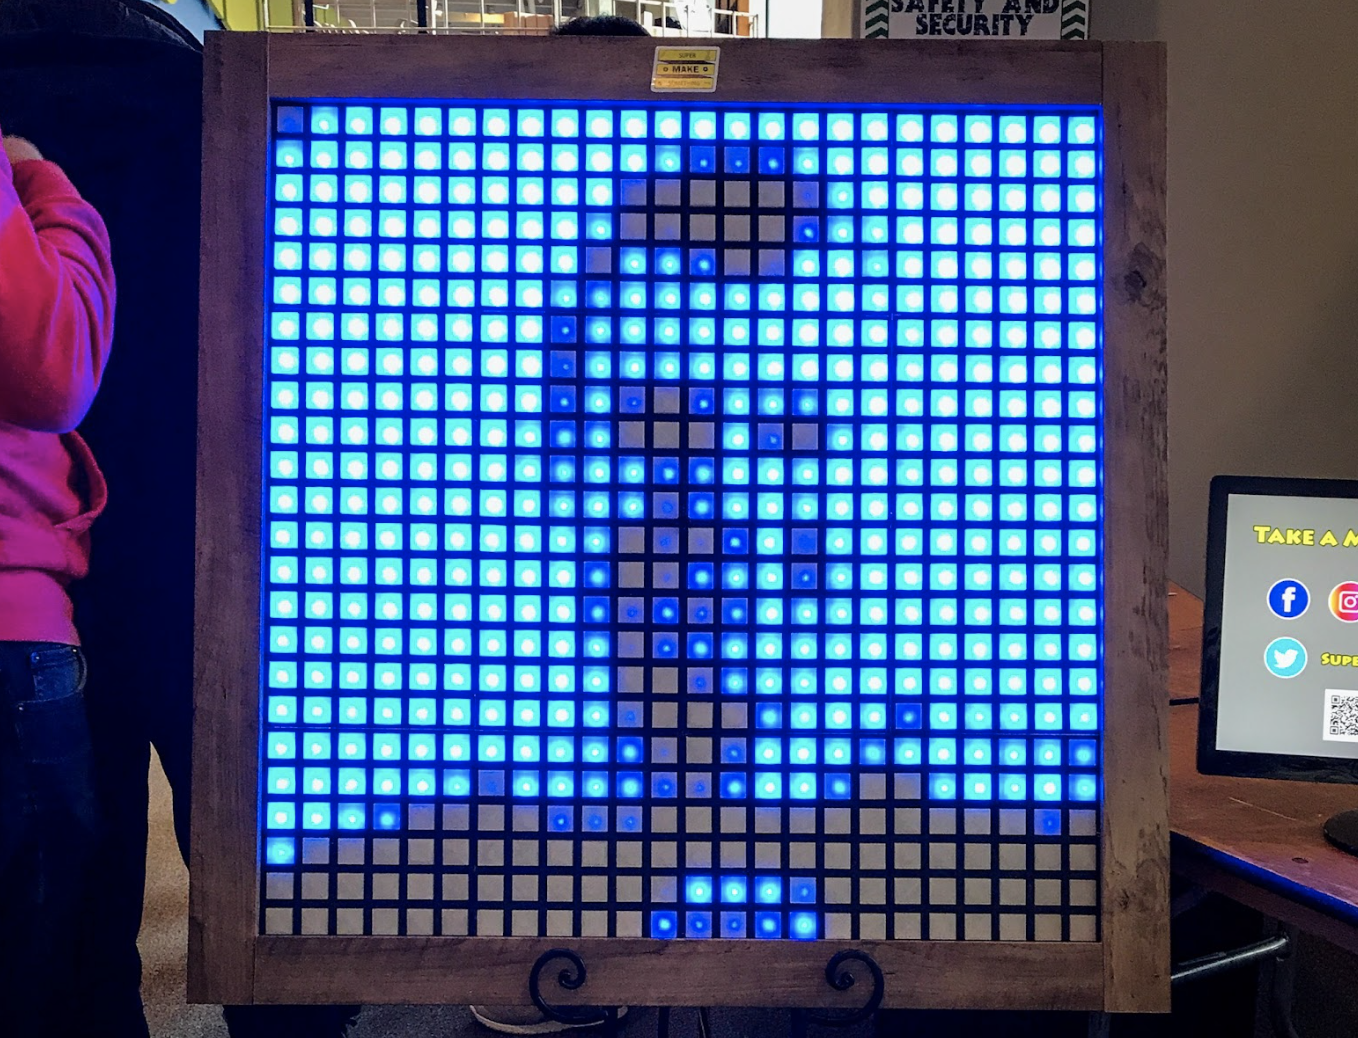
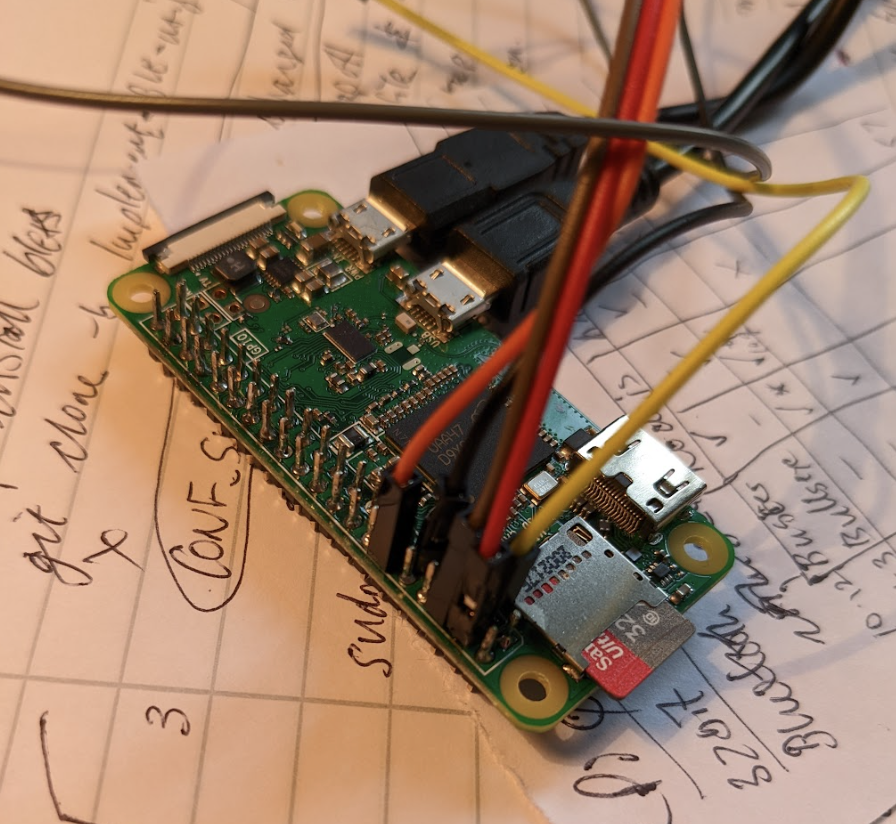
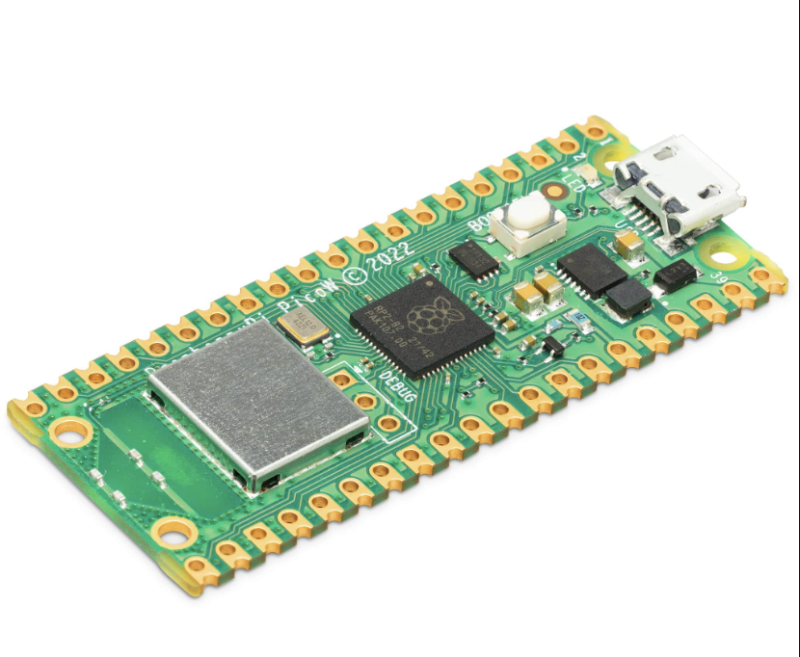
    Raspberry Pi Pico has no glass and glue hiding the circuitry. The RP2040 processor is on full display. It’s almost asking you to make something with it.

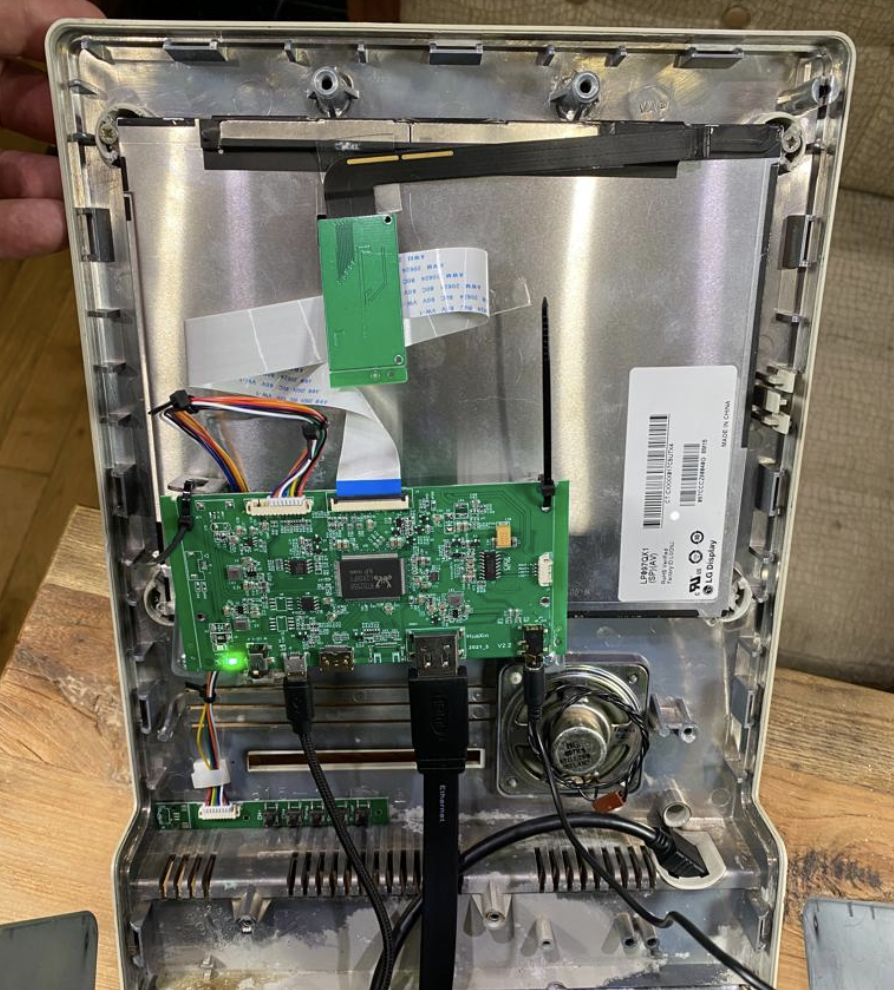
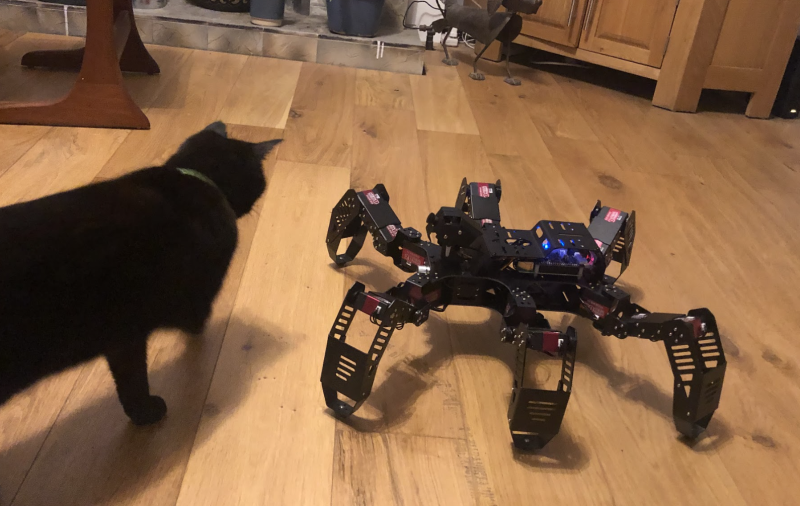
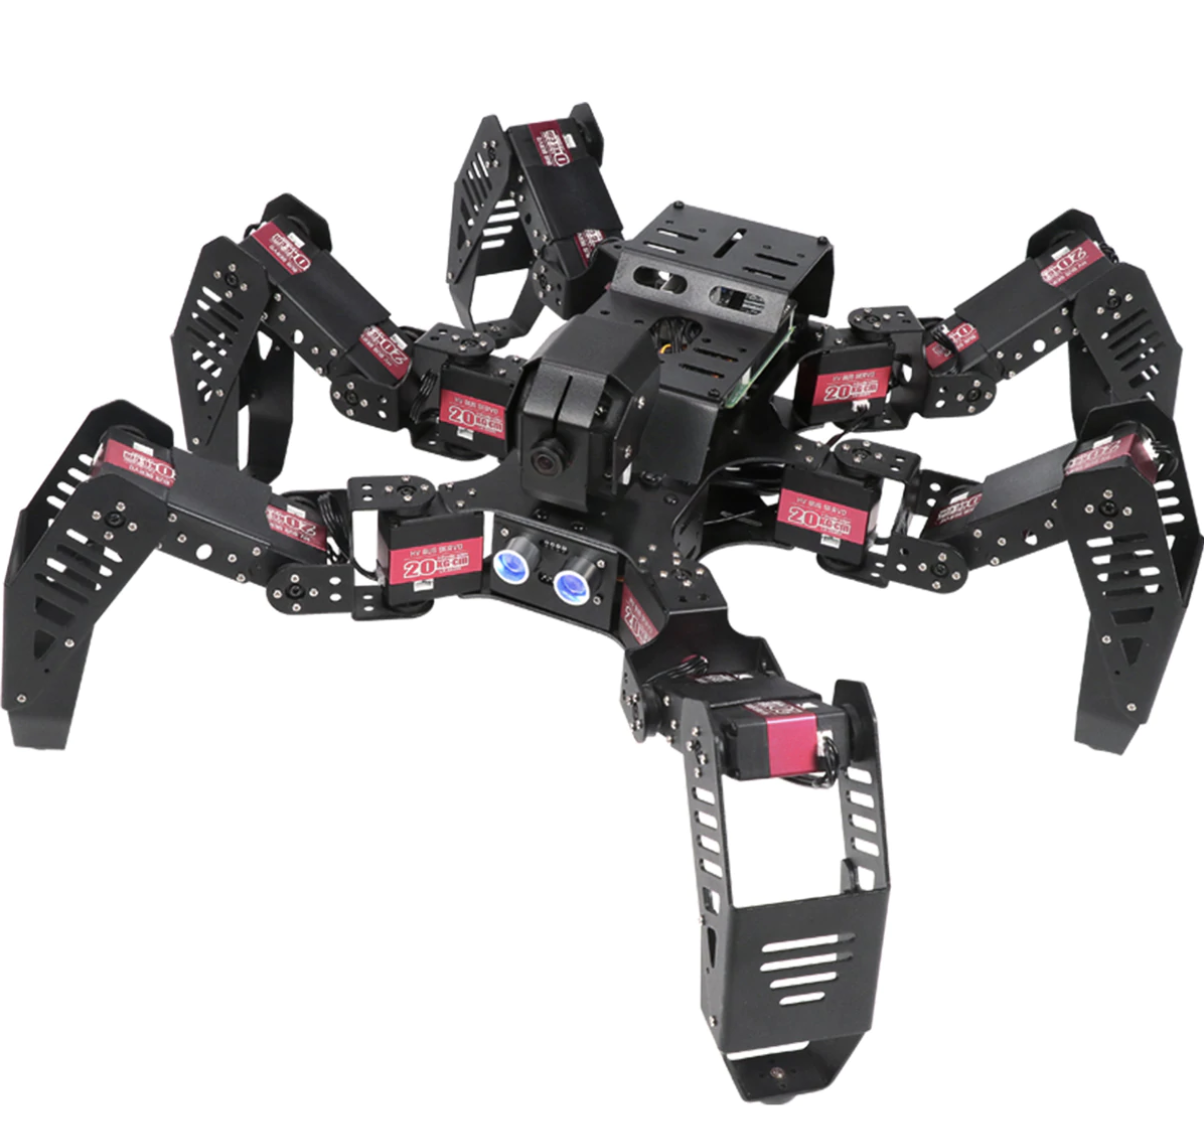
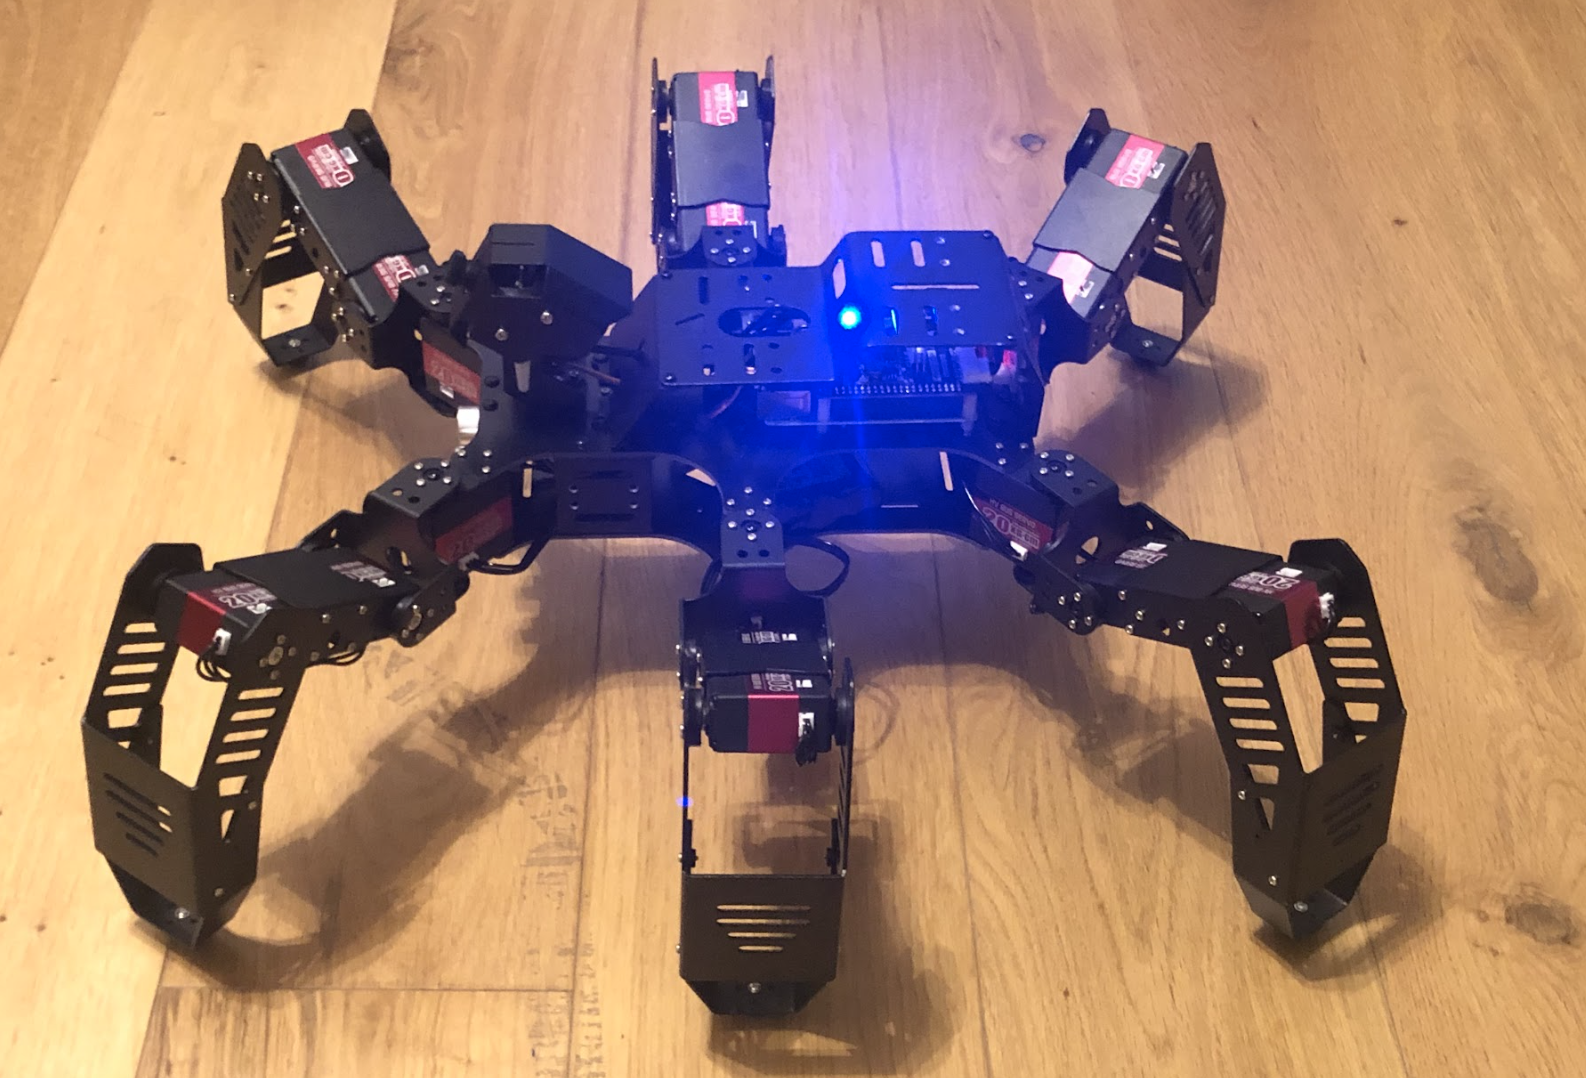
    What you make with a new Pico W is, of course, up to you. There’s a world of possibilities, from home automation projects to personal robotics; its ultra‑small footprint and low power consumption make it ideal for wearable projects and embedding on your person or upcycling old equipment with ultra-modern features.

    What you are really creating though is a little more personal understanding of the world around you. When delivery robots roll down the street, you’ll see the motors and GPS unit inside; when supermarkets get rid of checkouts, you’ll see the image detection cameras and the micro-location technology. When social media algorithms start to push you towards a more extreme edge of your favourite hobby, you’ll – well, we hope – know enough to step back.

    The difference between knowing and not knowing how technology works can be life-changing stuff. The MagPi has been using Raspberry Pi for years to make this difference, in our own small way, to the people who pick up our magazine.
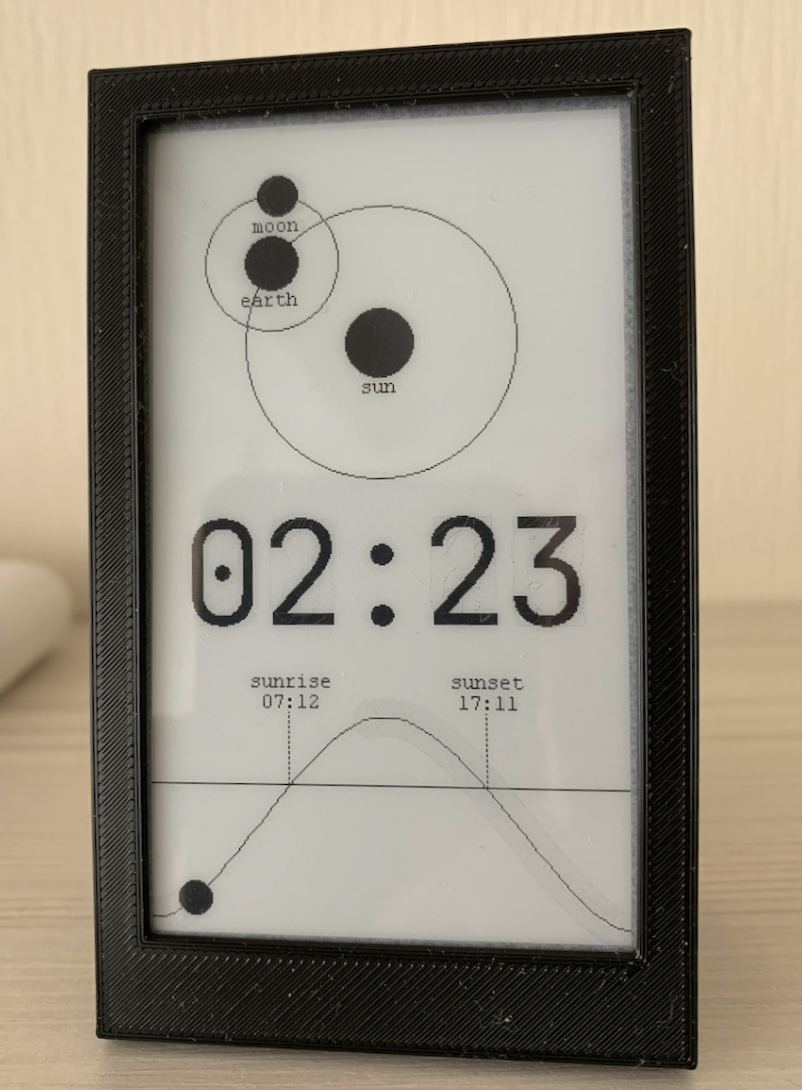
    Pico power-up

    For the rest of this year we’re going to make the most of Pico W. We’re going to start again, from the ground up.

    From basic electronics to smart home kits, retro gaming and robotics. We’re going to really go for it all over again. This time with the new Pico W.

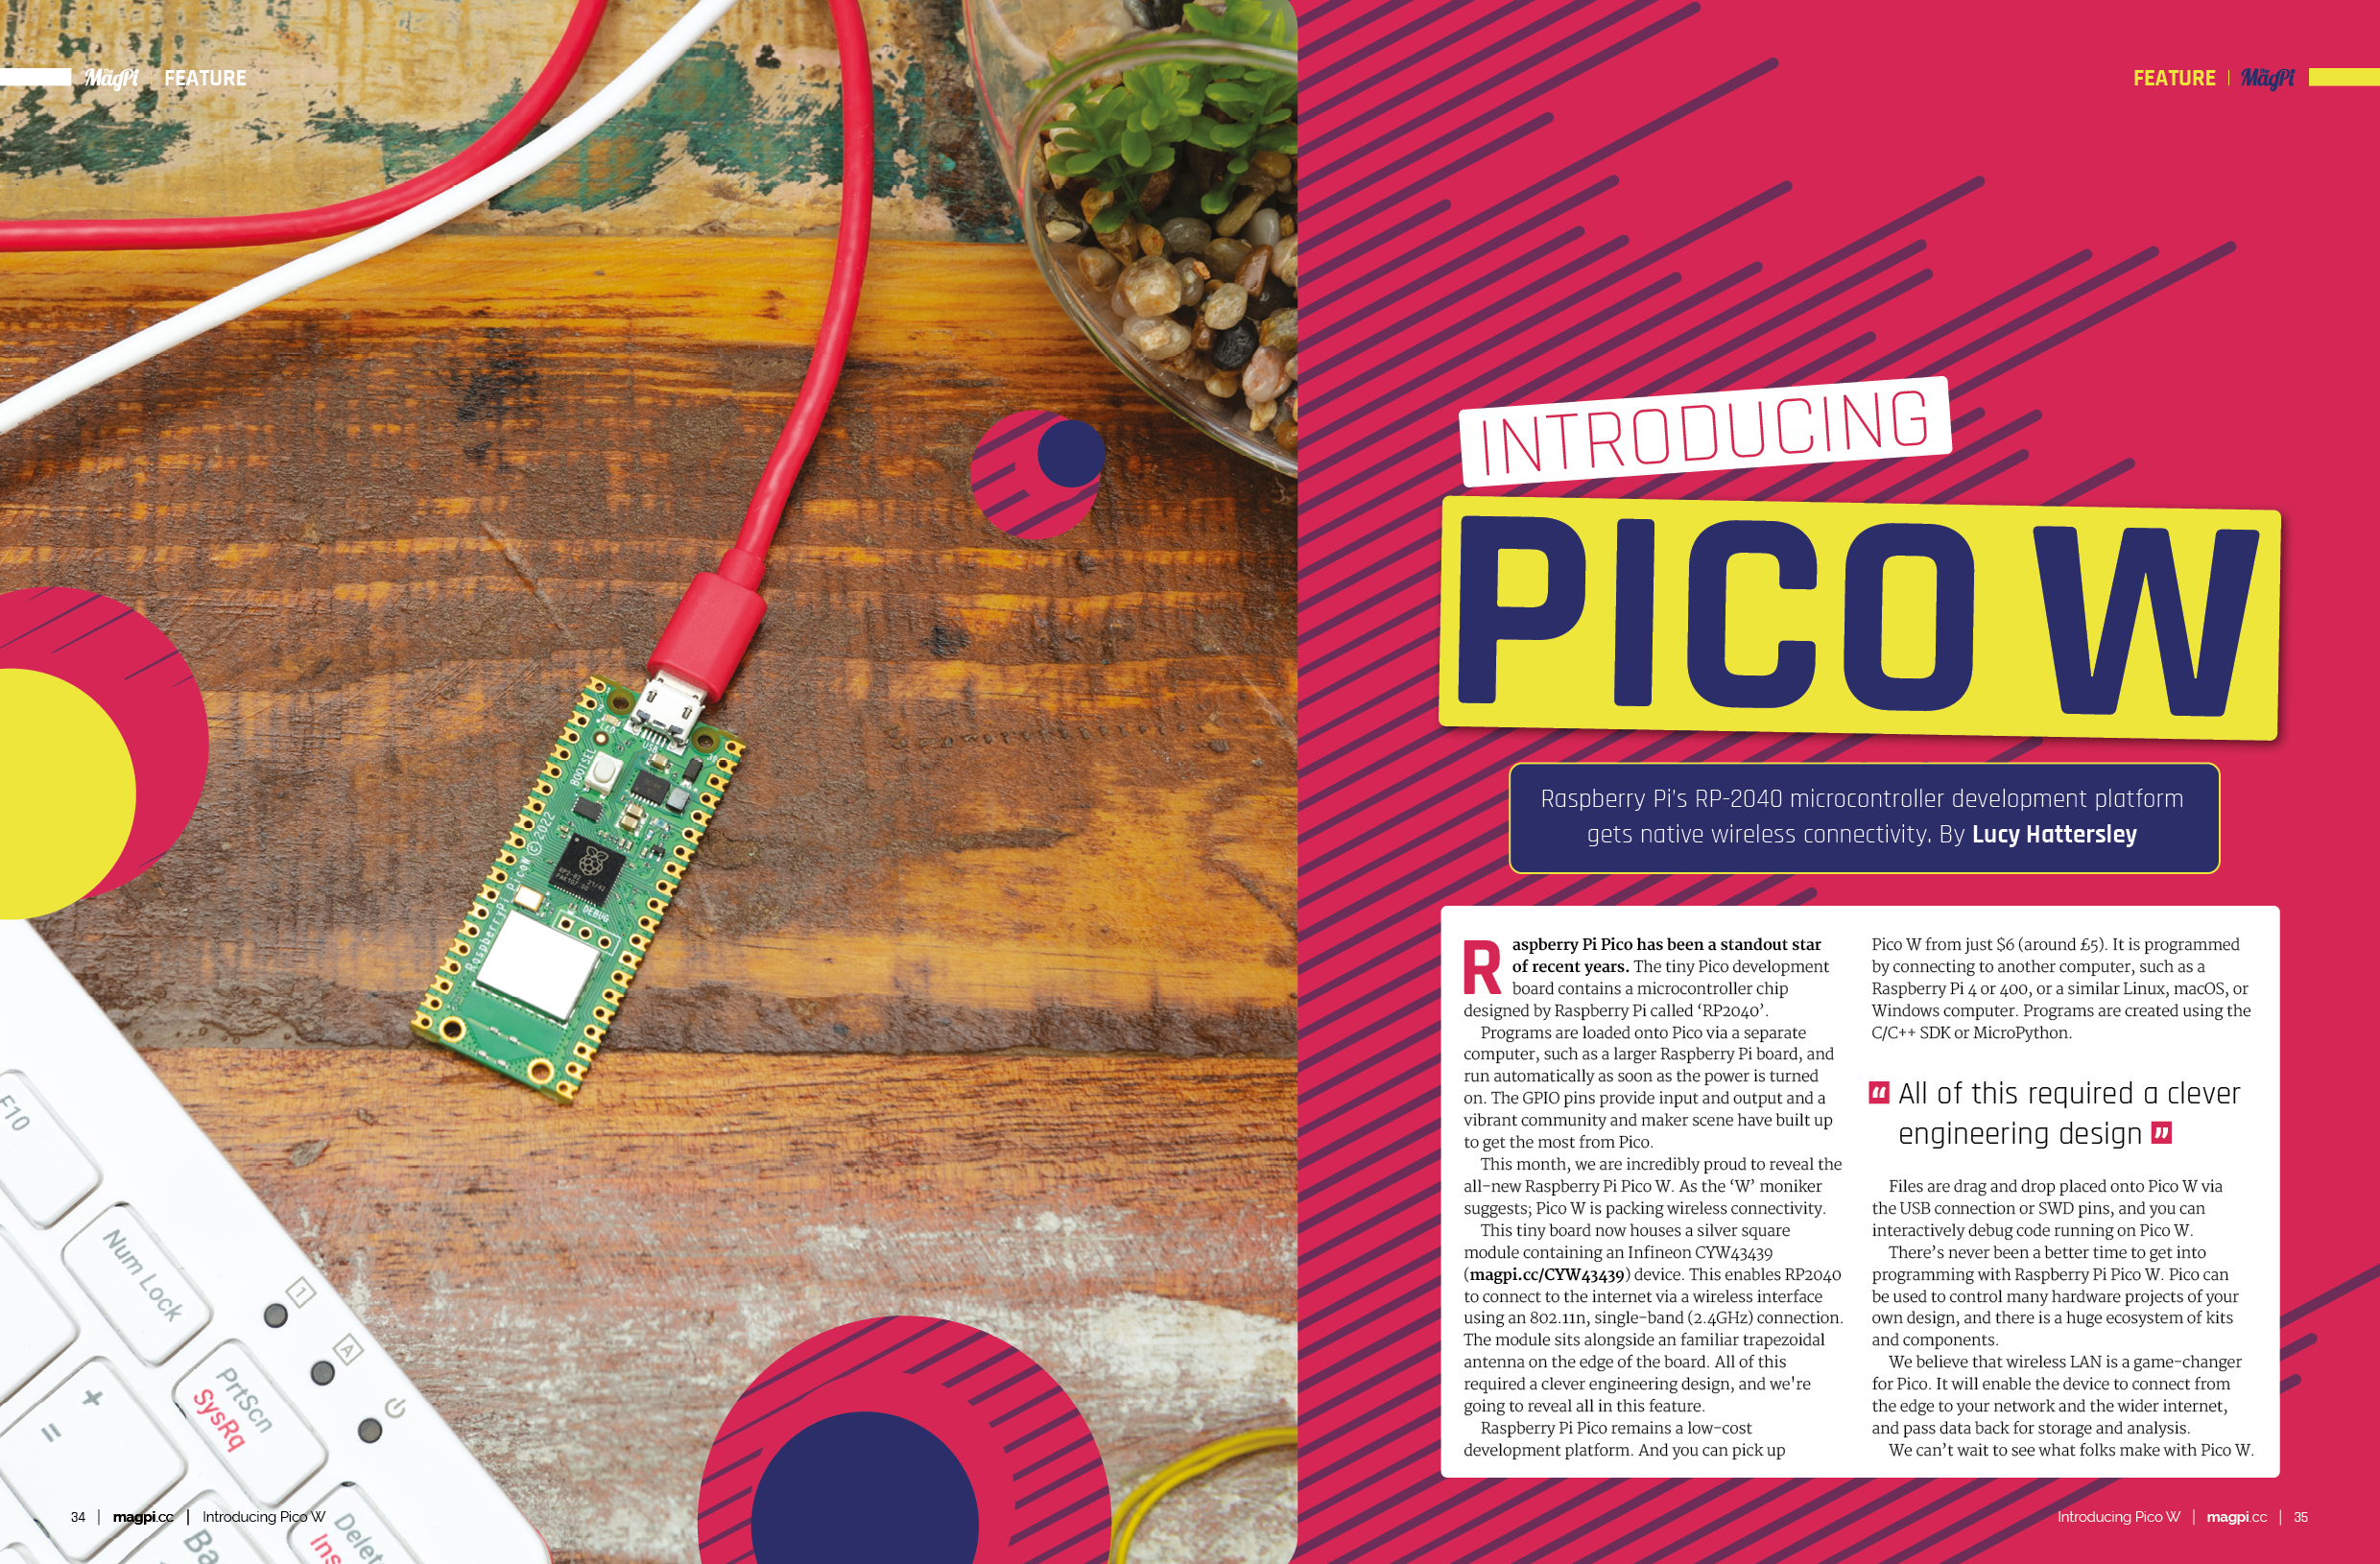
    Raspberry Pi Pico is a relatively new component in the Raspberry Pi products catalogue. But with Pico W’s addition of wireless LAN networking and in-house silicon, it’s clearly a product having its moment in the spotlight. For various reasons, Pico W remains largely free from the broader supply chain problems. You can get Pico W in plentiful supply and should be able to throughout the rest of the year. So, now is the perfect time to pick up a Pico W and start making with it.

    I’ve already got an electronics kit from Pimoroni to play around with, and a smart home automation system. Every one of The MagPi’s editorial team and freelancers have been asked to line up Pico W projects and tutorials. I can’t wait for you to read about what they are working on.

    Pico W is, of course, a great thing to happen for Raspberry Pi. But it’s also a great thing for The MagPi. We get to start again with all those projects we love.

    It’s also time for us to learn to make a difference all over again. As well as being an incredible engineering tool, Raspberry Pi teaches children – of all ages – how computers work, and how to use computers to make a difference in their lives.

  • SystemSix: a modern homage to Macintosh computers

    SystemSix: a modern homage to Macintosh computers

    Reading Time: 3 minutes

    Dubbed a “desk accessory”, it displays the local weather, a calendar, the current phase of the moon, and even the bin collection day, among other things. But what makes it extra-special is that it’s housed on a stylish laser-cut piece of acrylic, bent to allow it to stand. It’s an impressive piece of work.

    Introducing SystemSix

    John became fascinated with e-ink displays a while ago. One project which blew him away was a large display that resembled the front page of a newspaper, although it was very expensive. When he saw a cheaper e-ink project, however, he was persuaded to give it a go. “I set out simply to recreate an e-ink calendar project I had seen on the web, and I also wanted to learn Python,” he says.

    Having recreated the project, he began to modify the code, learning how and why it worked. “One of the early ideas was to add a lunar-phase to the calendar,” he says. “A quick search in GitHub showed many examples of an algorithm to determine the phase of the moon for a given date. I then needed two dozen or so images of the moon in various phases and did an image search.”

    It then struck him that he’d have to convert the images to black and white. “Back in the day, when I was cutting my teeth in programming on a Macintosh Plus, [Apple coder and MacPaint author] Bill Atkinson had a fantastic algorithm that made very pleasant 1-bit image results,” he says. “I found dithering websites with an Atkinson option, and the results with the moon images were fantastic. Perfectly reminiscent of the retro Mac experience.”

    It’s that simple

    The idea for a non-interactive desktop hub grew. “I had the moon displayed in black and white Atkinson pixels,” he says. “That was when the whole idea came to me: to go all in and make the entire calendar look like an early Mac. The current date could be displayed in a window title (perhaps the name of a document being edited). Maybe a Finder window would display a list of folders with the names of them corresponding to upcoming events…”

    The task entailed many hours using Affinity Photo and Pixelmator to crop and clean up pieces of art, the idea being to replicate the look of Apple’s System 6. Although it was always going to be a static, non-interactive project (you can’t click on the screen or move the windows), he arranged them in layers to look like an early Mac desktop. “It wasn’t too hard to drop them into the project and write code to render them,” he says. Yet he didn’t stop there.

    John also created different layouts. “I thought it would be fun to mix it up. Maybe a MacWrite layout one day, Finder with folders the next, and so on,” he explains, urging anyone replicating his project to try their hand at adding more. “Hypercard, a classic Mac app, could inspire a couple of new layouts,” he says. “I only wish animation on e-ink displays was better. An After Dark layout, if you remember that classic screensaver, would be very cool, although probably not on the cards.”

  • Mini pupper robot review

    Mini pupper robot review

    Reading Time: 2 minutes

    ROS (Robotic Operating System) is the OS installed on Raspberry Pi for Mini Pupper, and Mini Pupper includes OpenCV, SLAM (Simultaneous Localization and Mapping), and other navigation technologies. It will create a map of an area, much like a Roomba so that it can navigate it better.

    Pupper in the window

    Our Mini Pupper came fully built, however, you do have the option to save some money and supply your own parts, like a Raspberry Pi, so that you can construct it yourself. While the construction methods are constantly being updated and improved, it’s not a quick build and it is a touch fiddly – it is quite a small kit after all!

    Once constructed, the body feels pretty sturdy though, and the legs are much better than they may seem in photos. It weighs just over half a kilo, yet the legs don’t really have much of a problem holding it up. Out of the box, you can connect a Bluetooth controller to move around Mini Pupper and it has many movement modes such as trotting, lowering, raising, sideways shuffling, and many more. The makers claim 12 degrees of freedom because of this.

    New tricks

    Customising and programming Mini Pupper requires you to plug Raspberry Pi into a PC so that you can access ROS onboard. Here, you can start playing around with the facial settings and also get it connected to your wireless network – the latter of which you’ll need to make use of the navigation abilities and mapping.

    Movement of Mini Pupper looks fairly odd, but it can move around just fine on a flat surface, although we had huge trouble on carpeted floor, so your ability to make it map a room may depend on the floor. As it’s for learning and tweaking with code, it will likely mostly live on a tabletop, so we can forgive it for that.

    While it is quite expensive, it is very impressive with the amount it can do – thanks to the mixture of parts and ROS running it. It’s also fairly expandable as well.

    Verdict

    8/10

    A fun little robot that is a great way to try out several kinds of robotic programming. Might stay on your desk though.

    Price
    £335 / $399

    Specs
    Technologies:
    SLAM (Simultaneous Localization and Mapping), Full Self-Navigation, OpenCV
    Physical specs: 209 × 109 × 165 mm, 560 g
    Electronics: 800 mAh battery, 240 × 320 LCD screen, 13 × custom servos

  • Pico railway clock

    Pico railway clock

    Reading Time: 3 minutes

    Old timer

    “We bought a railway station clock from a flea market and were a bit crestfallen when nothing happened when we plugged it in,” explains Martin. “The nice man who sold it seemed adamant that it worked, so after a bit of reading, I found out that it was waiting for a signal from a ‘Mutteruhr’.”

    As the duo explain in their YouTube video, often when you see such clock in a station setting, there is a delay between the second hand reaching 12 and the minute hand advancing; this is because the clock is waiting for an electrical pulse from the ‘Mutteruhr’, or mother/master clock. This pulse drives the minute hand forward and then the second hand is free to complete another cycle.

    Martin and Vanessa had purchased what was essentially a secondary clock – ineffective without a mother clock. To get it working, they decided to build a mother clock themselves with a few additional components and some code running on a Raspberry Pi Pico microcontroller.

    Inner workings

    Attaching a ferrite antenna – to pick up the DCF77 atomic clock long-wave radio signals in Europe – to Pico was a first step, along with incorporating a real-time clock (RTC). “There is a text file that tells the code the time that is showing on the clock,” explains Martin. “You enter that manually. When Pico is plugged in, the code checks if the recorded time is the same as the RTC time – if not, it sends a pulse to the clock, updates the recorded time by a minute, and says ‘what about now?’ It just keeps doing that.”

    The pair encountered few issues during the build and think it would be a relatively easy make to replicate. “The Python code needed to be tweaked a little, but it was relatively plain sailing,” says Martin, who reveals that they have now updated the code to also work in the US using the WWVB signal. A radio signal is not essential, however: “Setting the RTC manually would get it to work. The only difference is that the code would not update the RTC.”

    The 3.3 V output from Pico’s GPIO pins is converted to 24 V by a step-up module, before being routed to an H-bridge to send the pulse to the clock, although the voltage will depend on the timepiece used. “Some bigger clocks need a bigger electrical ‘kick’,” notes Martin.

    The pair’s interest in old clocks has led to quite the collection. Indeed, Martin admits they now have “too many”, but he has a cunning plan to free up some wall space, as he says some will likely become birthday presents “for people that were foolish enough to look interested as we explained to them how they worked!”

    As for upcoming ventures, they are certainly not short of spare horological parts. “We’ve got a box with 74 clock movements in it,” reveals Martin. “We mentioned in the video that people often take the original movements out and replace them with quartz movements – we found one of those people, and convinced him to give us the leftovers.” They are not entirely sure what they will do with all their clock components: “ideas welcome!“

  • Super Simple Robotics in The MagPi magazine issue #120

    Super Simple Robotics in The MagPi magazine issue #120

    Reading Time: 3 minutes

    Super Simple Robotics

    Super Simple Robotics

    Rolling a wheeled robot around with code is a cool thing to do with Raspberry Pi. Turning a jumble of wires and wheels into a controllable critter is much easier than you’d imagine. This month’s cover feature explains how motors, servos, and sensors all work together. Plus we look at some of the best robot kits you can buy and walk you step-by-step through your first robot build.

    Back to School 2022

    Get ready for the new academic year with Raspberry Pi. Our Back To School feature is packed with advice on how to use Raspberry Pi to get the most out of your education.

    CrowPi L laptop review

    CrowPi L laptop

    This white clamshell laptop kit features a Raspberry Pi 4 at its heart. Building on the previous CrowPi 2 model, it now features a battery and innovative design that uses magnets to hold Raspberry Pi inside. it’s better than other laptops because you can use it to discover electronics.

    Build a 64-bit Minecraft server

    Build a 64-bit Minecraft server

    With the release of Raspberry Pi OS 64-bit you can now run a Minecraft server using Raspberry Pi. Setting up a server is a great way to play Minecraft in Multiplayer mode.

    10 amazing Pico projects

    10 Amazing Pico projects

    Pico W continues to be an endless source of inspiration for us. This month we take a look at some of the best Pico and Pico W projects around. From cyber glasses to a solar system display.

    Pico PlayStation Memory card

    This cunning build uses Pico to recreate an original PlayStation memory card. The original memory cards are now hard to locate, and this home hack is a low-cost alternative to buying increasingly expensive cards.

    VK-Pocket camera

    VK-Pocket camera

    This build is based on a scene from the classic movie Blade Runner. It upcycles a tiny CRT screen from an old camcorder to display an eye. The eye itself is recorded from your face, via a built-in camera and OpenCV is used to crop in on the eye. It’s a clever project.

    Talkative Tube Dashboard

    Talkative Tube Dashboard

    There are nearly 300 holes in this tube map that one maker has used to light up with 10m of fairy lights. The light colour reflects the status of the trains on the line.

  • Win a PecanPi DAC Rev 3.0!

    Win a PecanPi DAC Rev 3.0!

    Reading Time: < 1 minute

    Subscribe

  • Night camera tracks sleep patterns

    Night camera tracks sleep patterns

    Reading Time: 3 minutes

    While Emilio says he’s in good health, he feels his sleep quality has degraded over the years: “I have been trying to understand why and what could I do to improve it. There is nothing better than waking up in the morning feeling fully recovered and energised!”

    Bedroom eyes

    The concept for the tracker came from reading The MagPi, specifically a nature-watching camera project that used the NoIR Camera Module.

    “I purchased a sleep tracker which provided me with very useful feedback,” Emilio explains. “However, sometimes the results from this device would not necessarily match how I was feeling in the morning. Some time afterwards, while reading in a TheMagPi issue a project where the NoIR Camera Module was used to take pictures of animals at night, I realised I could become one of those ‘animals’, and see if my own footage could help me understand those gaps.”

    The software side used a series of images that Emilio had manually labelled as back, left, and right for the poses he was sleeping in. He then fed them into Google’s Teachable Machine to train the model to recognise the poses he wanted.

    “This is a great way to very quickly sense how feasible the whole project would be,” Emilio says. “With 100 labelled samples for each class, and in less than ten minutes, I had a trained model downloaded in my local machine running inferences on the entire set of captured images.”

    He then 3D-printed a cage for the components after some prototyping, including infrared LEDs to help with lighting. It’s powered from the mains, once it became clear that even beefy rechargeable batteries would not quite suffice.

    Dream warrior

    During sleep, a Python script runs over nine hours and takes one image every 15 seconds, which Emilio can then analyse.

    “After manual inspection of all pictures over several nights, I can confirm the 15-second cadence is fit for purpose. I can even see some REM (rapid eye movement),” Emilio says. “So far, I only have some basic statistics from the last ten nights: on average I sleep 27% on my back, 41% on my left side, and 33% on my right side. Another interesting observation is that eyeballing the Oura ring sleep score against the percentages on each night, I can see that high scores tend to occur on nights with more ‘on right’ sleep.”

    Emilio is continuing to work on the system, increasing accuracy, doing sleep research, and searching for patterns in his own sleep.

    Quick facts:

    • Emilio ruled out medical issues like sleep apnoea

    • Identifying which side he was sleeping accurately took more training

    • Emilio plans to add more things for the system to measure

    • Real-time analysis using an Edge TPU will occur eventually

    • The limited LED use is so they don’t overheat

  • Raspberry Pi revives a Macintosh SE/30 shell

    Raspberry Pi revives a Macintosh SE/30 shell

    Reading Time: 3 minutes

    Looking at Dan Beimborn’s Mac SE/30, you’d think it was worth the outlay. Photographs suggest it’s running fine 33 years on, but that’s not actually true in this case. Instead, this model has been stripped of all its innards and it is running entirely on a Raspberry Pi 4 computer.

    “I thought it would be relatively straightforward to use an old Mac case to fit a screen and the various Raspberry Pi components to get things working, so I set off on many long evenings searching for parts,” says Dan, motivated by nostalgic memories of playing Risk on a neighbour’s Mac during study breaks in the 1990s.

    Shelling out

    Dan found an empty Mac SE/30 shell on eBay, buying it for a good price. He already had a Raspberry Pi 4 8GB model in an Argon One M.2 case, but he added a 1TB SSD, made use of an 18 W power supply, incorporated a USB hub, bought a USB-powered speaker set, and went hunting for a suitable screen, coming across a 9.7-inch 2048×1536 4:3 LCD display by LG on AliExpress.

    “The biggest challenge was fitting the screen to the bezel,” he says. “I used a mini Dremel to remove some plastic where the monitor bracket connected and this left me with four corners with C-shaped brackets. I carefully picked an LCD panel with the right dimensions and made tiny adjustments until it was snug. It’s held in place with a few tiny screws directly into the plastic where it can’t be seen, and a pair of repurposed L-brackets helped hold the screen’s controller board in place.”

    From that point, the main task was cable management, although Dan decided he wanted to connect an original Mac keyboard and mouse. He used an Apple Desktop Bus to USB keyboard/mouse adapter made by tinkerBOY. “It was literally plug and play, but I’ll probably remap some keys.”

    Sixes and sevens

    The Mac SE/30 ran up to Mac OS 7, so Dan used Alex Goldcheidt’s BerryBoot boot manager to select between Raspberry Pi OS, Kodi, RetroPie, and Xubuntu. “I have Xubuntu running TwisterOS and, from here, I can start Mini vMac or MAME to run Mac OS 6 or 7,” Dan explains.

    Emulation proved to be a little fiddly, however. “At first, I was having a heck of a time getting 512×384 to full-screen properly. Mini vMac has a nice screen doubling filter built in, but full screen won’t automatically stretch to fit perfectly. My LCD doesn’t like very low resolutions, but 1600×1200 works quite well.”

    It took some research to get MAME working with Mac emulation. “Apple released the installation media for the operating system some time ago and it seems to have dropped off its website, but archive.org had a mirror, ” Dan continues. “I was also able to make a 200MB hard drive image using MAME software, and I could then use images from other emulators to copy files back and forth, eventually getting the programs I wanted on to my hard drive image.”

    Dan’s certainly pleased with how it’s turned out, but he’s not finished with Macs yet. He now wants to restore one to its original glory. “I’ve been inspired by this project,” he says. “And I want to get a real CRT one going next.”

  • Hiwonder SpiderPi robot review

    Hiwonder SpiderPi robot review

    Reading Time: 3 minutes

    The hardware from which SpiderPi is constructed is similar to that of its Hiwonder sibling, TonyPi, reviewed back in The MagPi 111 (magpi.cc/111). Controlled by a 4GB Raspberry Pi 4, SpiderPi’s legs are made from 18 servos – three for each of its six legs – fitted into hinged aluminium frames, giving it a Meccano-like appearance. This also gives you some idea of how robust and well-constructed this clever hexapod is. The robot’s HD camera head can rotate through 140 degrees while observing its immediate surroundings, picking out faces and signalling recognition by waving a leg.

    It’s powered via an 11.1 V lithium-ion battery that connects to its governing Raspberry Pi 4, and provides roughly 40 minutes of usage from battery power. To control SpiderPi, install the WonderPi app on your tablet or smartphone, then select either a direct connection mode and use SpiderPi as a personal hotspot, or connect over a LAN or home network. Initiate a search for SpiderPi if the app doesn’t automatically detect it. However, you’ll realise the robot has been ‘found’ as its limbs will suddenly move, ready for action. Make sure you’ve got plenty of space around you, as you’re about to discover it can cover half a room with alacrity.

    Sudden movements

    Select SpiderPi when its icon appears in the app to bring up the menu of ‘games’, including the AI‑based line tracker and coloured ball recognition activities.

    An on-screen D-pad prompts SpiderPi to scuttle forward, back, and sideways, as well as twist menacingly on its haunches and raise its front legs to fight. It can even perform an inelegant but speedy flip and boasts an ‘Inverse Kinematic Gait’. SpiderPi’s rate of movement and camera sweep angles for the object and face recognition games are easily adjusted via a sliding bar. A friendly wave of a leg usually indicates SpiderPi has spotted you if you’re sitting within a metre of its camera, but you might be overlooked if you’re at the extremes of range of vision.

    This intelligent hexapod can also be tasked with following an undulating line on the floor, distinguishing between different-coloured objects and following commands issued via a Python script tied to a QR code its 480 p camera notes and Raspberry Pi decodes. It can be challenged both to pick up and carry and to avoid objects, effectively shuffling round to outfox barriers and obstacles, as long as they’re hefty enough for its camera to notice them. These games, of course, are ideal if you want to use SpiderPi as an interactive learning tool, since new commands can be written in Python, and QR codes generated for its camera to find and carry out.

    Verdict

    9/10

    SpiderPi is a solidly built robot that will impress friends and intimidate battlebot challengers. Its realistic scuttling movements, accurate face and object recognition, and the ability to learn new tricks make it a great, if pricey, learning tool.

    Price

    From £480/$600

    Specs

    Dimensions: 700 × 610 × 160 mm; 2.3 kg

    Battery: 2500 mAh 11.1 V lithium-ion battery pack, 40 mins battery life

    Robot frame: 18 × LX-824 three-port bus servo, 2 × LFD-01 servo, 20 × servo wire, 480 p camera, metal frame, voltage display

  • Begegnet der Katze von Stray, das morgen erscheint

    Begegnet der Katze von Stray, das morgen erscheint

    Reading Time: 3 minutes

    Fast geschafft! Die Veröffentlichung von Stray steht kurz bevor und wir können es kaum erwarten, die Leute spielen und hoffentlich genießen zu sehen, woran wir so lange gearbeitet haben. Und wir dachten uns, jetzt ist eine gute Gelegenheit, euch ein bisschen mehr darüber zu erzählen, wie der Hauptprotagonist des Spiels zum Leben erweckt wurde.

    Als echter Streuner, d. h. eine Katze ohne Besitzer, hat der Schlüsselprotagonist von Stray keinen Namen oder zumindest keinen, der sich mit menschlicher Sprache erklären ließe. Aber die Hauptinspiration für die Erschaffung dieser liebenswerten Videospielfigur hat einen. Ich freue mich sehr, euch die lebende Legende vorstellen zu können: Murtaugh!

    Murtaugh ist eine der beiden Katzen der Mitbegründer (Viv und Koola) und war tatsächlich ein Streuner, der in der Nähe von Montpellier, Frankreich, unter einem Auto gefunden wurde. Aber keine Sorge, es geht ihm jetzt prima. Er wird auch „The Boss“ genannt, und obwohl der Charakter im Spiel keine direkte Nachbildung von Murtaugh ist, war er definitiv eine große Inspiration für sein Aussehen und eine große Unterstützung während der gesamten Entwicklung.

    Auch wenn wir wussten, dass wir keine hundertprozentig genaue Darstellung anstrebten, so war es doch mit viel Arbeit verbunden, einen möglichst glaubwürdigen Charakter zu erschaffen – vor allem für Katzenbesitzer, die ihre Gefährten täglich um sich haben. Viv und Koola haben das Aussehen der Katze im Spiel auf sehr subtile Weise überarbeitet, um die Niedlichkeit, aber auch die Lebendigkeit und Verspieltheit einer Katze einzufangen.

    Aber wenn man ein gutes Bild für seinen Charakter hat, muss man ihn perfekt animieren, um ihm wirklich Leben einzuhauchen. Miko ist unser Haupt-Katzenanimator, und er hat dank seines erstaunlichen Talents und unzähliger Stunden bei der Suche nach Referenzen wirklich unglaubliche Arbeit geleistet. Aber nicht alle Referenzen, die er verwendet hat, stammen aus dem Internet. Ich freue mich sehr, euch den inzwischen berühmten Filmschauspieler Oscar vorstellen zu können!

    Oscar ist eine Sphynx-Katze, die fast jeden Tag zu uns ins Studio kommt und uns sehr geholfen hat, als Miko eine Videoreferenz von einigen Sprüngen und Läufen brauchte. Einen Vierbeiner zu animieren ist schon eine Herausforderung, aber die Feinheiten der Bewegungen einer Katze sind unglaublich präzise und es ist extrem schwer, sie richtig rüberzubringen.

    Miko und Rémi, unser Katzenprogrammierer, haben unzählige Stunden an den Basis-Bewegungen des Hauptcharakters gearbeitet und dabei jeden kleinen Sprung und Übergang überarbeitet, um den perfekten Kompromiss zwischen großartig aussehenden Animationen und unterhaltsamem und reaktionsschnellem Gameplay zu finden. Dass wir während der gesamten Entwicklung echte Katzen vor der Nase hatten, war natürlich in vielerlei Hinsicht äußerst hilfreich.

    Ich muss euch auf jeden Fall noch ein weiteres sehr wichtiges Mitglied des Teams vorstellen, das jeden Tag mit uns im Studio arbeitet. Als Executive Chief General President Commander Director Officer des Studios war er dafür verantwortlich, die Arbeit des Teams täglich zu überwachen und sicherzustellen, dass sich jeder voll ins Zeug legt. Hier ist Mr. Immer-gut-drauf: Jun!

    Murtaugh, Oscar, Jun und das gesamte Team von BlueTwelve Studio freuen sich sehr, endlich das zu teilen, woran wir mit so viel Leidenschaft und Hingabe gearbeitet haben. Wir wünschen allen viel Spaß bei unserem ersten Spiel.

    Website: LINK

  • Knight Rider KITT recreation

    Knight Rider KITT recreation

    Reading Time: 3 minutes


    “As a kid during the 1980s, I was a big fan of Knight Rider and I remember watching it thinking KITT was the coolest car ever,” says Fred Arias. “I even remember going to Universal Studios in Hollywood, where I got the opportunity to sit inside KITT and talk to him directly. That experience never left me.”

    Decades later, Fred has recreated his own version, making use of an RP2040 microcontroller. “Over the years, I’ve seen people recreate KITT in the form of a VU meter but always needing to provide an audio source manually,” he says. “I’ve been playing with a Raspberry Pi Pico over the last few months, while learning MicroPython to control different hardware, and I thought it would be best to learn how to use it by incorporating it into fun projects.”

    On a crusade

    There were three main considerations: Fred needed his KITT to look, sound, and respond like the original. “Basically this project works by responding to movement using an IR sensor and then listening for sound levels using a PDM microphone,” Fred explains.

    “Based on how loudly you speak to KITT, he will respond with a list of responses loaded on to the flash memory.”


    Fred used a Waveshare RP2040-Plus to take advantage of its 4MB of flash memory and he took the responses directly from the TV series, saving them as MP3 files. He used an LM3915 display driver to control KITT’s LED bars, a DAC audio board, and a PAM8303 audio amplifier directly connected to a speaker. “Luckily, I found a schematic online that showed how to connect the LED bars to the driver, so that helped me figure out some of the connections,” Fred reveals.

    Since he didn’t want to solder and wire each individual LED pin to multiple resistors and transistors, realising it would be time-consuming and prone to error, he decided to create a custom PCB. It enabled the LED sound bars to better resemble those used in the car in the TV series. “I started watching lots of YouTube videos on how to design PCBs and, after hours of trial and error, I came up with workable designs for the project.”

    The extra mile

    The software was written in CircuitPython. “I wrote a true loop first, checking for movement with the IR sensor,” Fred says. Once movement is detected, KITT will listen for sound. None but the IR sensor is activated, KITT will randomly say something from a list to get a person’s attention. If the person responds with a loud voice, KITT will tell a joke.

    “If you ask a yes/no question in a normal voice. KITT will give you a yes/no answer and it’s different every time.

    By speaking softly, KITT says ‘you’re welcome’ in a couple of different ways. All of these responses are in separate lists and they can be edited to make it say other things.
    I have a folder with 380 possible responses.”

    In the future, he wants to add more LEDs that will light up with sound effects.
    But would he put it in his car? “It would be possible to incorporate into a car,” he says.

    “I would probably need to make some changes to the code to compensate for the noise levels in a vehicle. The project already runs on 12 V, so it wouldn’t be a problem connecting it to an internal power source.“

  • Little Sun Gazer sun tracker

    Little Sun Gazer sun tracker

    Reading Time: 3 minutes

    With that in mind, he got to work on a device that could calculate the sun’s position based on a person’s longitude and latitude. Aside from showing the angle of the sun relative to where the viewer is on Earth, he wanted it to show the position of the Earth in relation to the star, and the position of the moon in relation to Earth. He also wanted to display the current time and show when the sun would rise and set.

    Powering on

    As with the Solar System Display, he decided to use a Raspberry Pi Pico microcontroller board, not so much out of a desire to experiment, but out of practicality. “As the project was supposed to be battery-powered, I had to go with a microcontroller and not a system-on-a-chip computer such a Raspberry Pi Zero due to the power consumption limitations,” he says.

    “Raspberry Pi Pico was my first choice because it has enough RAM to keep a frame buffer and a deep sleep mode which allowed me to save some battery. Additionally, I wanted to experiment with a 3.7-inch e-ink display and Waveshare had a ‘plug-and-play’ version of the display for Raspberry Pi Pico which cemented the choice.”

    A precision real-time-clock module completed the setup, along with a Pimoroni LiPo SHIM and Li-Po 2000 mAh 103450 rechargeable battery.

    Holding on

    The main work has involved calculating positions. “My background is in software engineering, and I always dabbled in astronomy, but astronomical formulas and calculations are definitely not my strong suit,” he says. “To become familiar with the subject and put together the model, I had to consult multiple sources and examples such as Astronomical Algorithms by Jean Meeus, Computing Planetary Positions by Paul Schlyter, and the National Oceanic and Atmospheric Administration website.”

    Although he has plans to create a 3D-printable case, which he aims to put on MakerBot Thingiverse, the project is currently on hold. “There are a number of things I was looking to improve, starting from the case and ending at the diagrams/widgets/functionality, but I had to stop working on this project quite abruptly,” he says. As regular readers will know, Dmytro lives in Ukraine and he had to flee Kyiv with only a backpack of possessions when the shelling began.

    “I like the state this project is in now, though,” he continues. “But it wasn’t supposed to be the final iteration. For example, I wanted to show and incorporate noon – the code for it has been written but I never got to incorporate it in the diagram. Another example could be that there is still no easy way to set time, so this is the first thing I need to address once I get to work on it. I hope I will be able to continue working on it soon.”

    Quick facts

    > The device is battery-powered

    > It displays the sun’s position in real-time

    > It’s based around Raspberry Pi Pico

    > The battery powers the microcontroller board and display

    > The code is incomplete at the moment

  • Arduino Maker Nano RP2040 review

    Arduino Maker Nano RP2040 review

    Reading Time: 2 minutes

    A pair of reset pins are linked to a handy reset button on the top, where there’s also a boot button – held to attach the board as a USB drive to a computer – and a programmable button linked to GPIO pin 20.

    Other connections include a micro-USB port (for power and connecting a computer) and two Qwiic / STEMMA QT ‘maker ports’ which also work with Grove modules using the two supplied adapter cables.

    Lights and sound

    On either side of the micro-USB port are two RGB NeoPixel LEDs. Since both are linked to GPIO 11, they can’t be controlled separately, but some cool colour-changing effects can be achieved. In addition, 14 of the digital pins have tiny blue status LEDs that may well prove useful when troubleshooting I/O connections for circuits.

    Primitive audio is also provided in the form of a piezo buzzer that can be muted with a slide switch. It can be programmed to play beepy tunes by sending numerical note values.

    Talking of coding, the Maker Nano RP2040 comes with CircuitPython firmware pre-installed, including a mini demo that shows off the lights and sound. More code examples are found in the GitHub repo: magpi.cc/makernanogh. Alternatively, you can flash MicroPython firmware or program in C/C++ (natively or via the Arduino IDE). Like Pico, it’s very flexible.

    Verdict

    8/10

    A well-designed microcontroller board with a familiar Arduino form factor, the power of RP2040, and cool bonus features.

    Specs

    Processor: RP2040 with 264kB SRAM and 2MB flash storage

    Features: 14 × status LEDs, 2 × RGB LEDs, 3 × push-buttons, piezo buzzer, with switch

    Connections: 22 × digital GPIO pins, 4 × analogue inputs, 2 × Qwiic / STEMMA QT ports, 2 × Grove adapters

    Dimensions: 49.6 × 21.1 × 15 mm

  • Meet Alex Schepelmann aka Super Make Something

    Meet Alex Schepelmann aka Super Make Something

    Reading Time: 3 minutes

    “Super Make Something is a YouTube channel that aims to teach people about 3D printing, electronics, robotics, and other STEM topics through step-by-step DIY project videos,” Alex explains. “The source code and design files for all of my projects are always released for free alongside my videos, and while it is always cool to see others reproduce my projects, my real hope is that viewers can use bits of code or parts of my designs as a starting point for their own builds.”

    What is your history with making?

    I have always been interested in making since I was little. One of my favourite hobbies growing up was to draw and craft. When I was five, I took apart my grandmother’s wristwatch to see what was inside, and was fascinated by all of the gears and intricate moving parts. (Unfortunately I wasn’t quite able to get it back together, and the watch ended up running fast.) This interest in mechanisms, as well as a healthy appetite for science-fiction books, movies, and video games eventually led me to study Mechanical Engineering as an undergraduate and Robotics in graduate school.

    When did you learn about Raspberry Pi?

    I first learned about Raspberry Pi when it launched in 2012. During graduate school, I was enrolled in a Systems Engineering class in the 2012 spring semester and one of the early class assignments was learning how to program a microcontroller. I had only programmed on computers before, and thought that embedded electronics were absolutely fascinating – there were so many things that tiny computers could be useful for, since you could literally put them anywhere! After working my way through the assignment, I wanted to make a project that involved video output, but quickly learned about the computational limitations that microcontrollers can have. About a week later, my office mate excitedly told me that a new $35 computer was releasing, which absolutely blew my mind.  That computer was the original Raspberry Pi!

    What was your first Raspberry Pi project?

    After receiving my first Raspberry Pi, I spent a lot of time learning Linux and Python, and also explored many projects that were being developed for the system, like RetroPie. My first independent project was to use the Raspberry Pi Camera and some NeoPixel LEDs to create a rudimentary motion detector based on background subtraction. Whenever there was a significant difference between a template image and whatever the camera was currently seeing, my code would light up the LEDs.  This would then let me know if people were sneaking up behind me at my desk – I had a few jump scares when working in the grad school lab late at night and didn’t think that anyone else was around, haha.

    What’s your favourite Raspberry Pi project that you’ve made?

    It’s a tie between the Giant NeoPixel LED mirror that I built for the 2019 Cleveland Maker Faire and ‘LunchBot 9000’, a tweet-sending motion detector that uses a Raspberry Pi Zero.

    ‘LunchBot 9000’ is a more practical ‘everyday’ build that came about because I kept forgetting to take my lunch to work. Using a Raspberry Pi Zero and its WiFi functionality, along with an IR distance sensor and a 3D-printed case, this device plugs into an outlet near my front door and sends a tweet that pops up on my smartwatch to remind me to take my lunch when it senses motion between 6:00 and 8:00 am. That project has definitely paid for itself multiple times over by saving me trips to the cafeteria at work.

  • Automatically light up your saxophone with Raspberry Pi

    Automatically light up your saxophone with Raspberry Pi

    Reading Time: 3 minutes

    “Chris Croft, a friend of over 40 years is not only the world’s most watched project management trainer, but plays saxophone in a band (lost-at-sea.co.uk) for fun,” Keith explains. “He had someone design a light for his saxophone to illuminate it based on the note he was playing. It’s a great piece of electronics, but crucially chews through batteries (he has to replace them in the interval), is bulky, meaning that he has to physically wear the electronics, and is expensive to modify as it is based on complex circuitry with quite a few PCBs. I thought I could come up with a new software-based design that overcame all the problems that were bugging Chris. I also wanted it to be low-cost.”

    Smaller solution

    Keith decided to go with Raspberry Pi, not only because he’d used it before in projects, but also because Raspberry Pi Zero was small enough to fit in the bell of the saxophone.

    “The design process turned out to be quite complex and involved a lot of dead ends,” Keith admits. “For example, one design ended up with too much interference from the LEDs on the microphone, so I had to abandon it. The main issues involved finding a suitable microphone that was not susceptible to interference and would work with a Raspberry Pi, finding LEDs that could be easily controlled and interfaced, setting up the code to reliably detect saxophone notes and ignore the rest of the band, and, finally, fine-tuning the lighting to remove flicker and fade appropriately. The physical build was relatively simple, and involved modifying a strainer from a gutter to house the components, including a switch to safely turn Raspberry Pi off at the end of a gig.”

    Jam session

    So, how does Chris like the final product? “Chris loves it!” Keith tells us. “It’s a game-changer for him and not only overcomes the previous problems, but performs better too (more colours, less flicker, less interference from other sounds and so on).”

    While there are currently no upgrade plans for the light, Chris is going to test it further at future gigs. Keith can always remotely dial into it anyway thanks to VNC.

    We hope to one day see more light-up instruments at the gigs we go to.

  • Pico Unicorn Pack review

    Pico Unicorn Pack review

    Reading Time: 2 minutes

    You’ll also need to flash Pico with Pimoroni’s custom MicroPython UF2 firmware. This includes the MicroPython module for the Pico Unicorn, which you can import at the top of your programs. While not as sophisticated as the Python one for Pimoroni’s Unicorn HATs for Raspberry Pi computers, it does enable you to set individual pixels to RGB values (or a single value) and read button presses. Disappointingly, there’s no built-in function for scrolling text, although it can be done with a bit of know-how.

    Pico Pong

    Only two MicroPython code examples for Pico Unicorn are provided in Pimoroni’s GitHub repo, but doing a search for ‘Pico Unicorn’ on GitHub reveals a wide variety of programs created by the community, giving you an idea of the possibilities. Our favourite is a two-player game of Pong using the buttons as controls (magpi.cc/unicornpong). There’s even a funky plasma generator that enables you to scroll messages using a frame buffer (magpi.cc/unicornplasma). We also found a version of Conway’s Game of Life on the Pimoroni forums.

    Those RGB LEDs are bright and very responsive. Controlled using the PIO state machines on Pico’s RP2040 chip, they’re updated in the background with very little CPU usage. In fact, it’s so fast that 14 bits of resolution can be achieved, resulting in smoother brightness transitions using gamma-corrected values. In short, it looks very impressive.

    Verdict

    9/10

    With a matrix of super-responsive RGB LEDs, it’s ideal for animations and even games using the tiny push-buttons.

    Specs

    Features: 16×7 RGB LED matrix, 4 × programmable push-buttons

    Dimensions: 65 × 25 × 10 mm

  • GroundBIRD telescope

    GroundBIRD telescope

    Reading Time: 4 minutes

    “The telescope is designed to achieve the highest sensitivity for wide sky observation, with a continuous high rotation speed of 120°/s to suppress atmospheric fluctuations,”  explains Mike Peel, part of a team of astronomers from Japan, Korea, Spain, and The Netherlands who developed and work on the GroundBIRD project.

    Achieving precise observations with the telescope involves multiple Raspberry Pi monitors keeping an eye on the telescope’s hardware operations, such as controlling its rotation speed and the temperature, humidity, and pressure in the telescope dome, in addition to monitoring the prevailing weather conditions.

    Communication hub

    GroundBIRD uses a number of Raspberry Pi computers – one for each hardware/sub-project evaluation – each of which is developed and tested independently before all the hardware is installed directly into the telescope. This approach meant troubleshooting one Raspberry Pi-enabled feature didn’t hold back progress with other elements of the project. The sensors, monitoring instruments, and FPGA (field-programmable gate array) circuitry were also bought as off-the-shelf components and adapted for the project’s needs using the wealth of useful information readily available online about how to use Raspberry Pi for specific purposes. Much of the development work involved ways to enable modules to communicate with the Raspberry Pi server.

    The GroundBIRD telescope was initially developed and constructed in Japan and transported to the Teide Observatory in the Canary Islands in 2018.Code written for the project was first shared locally using GitLab, but will eventually be available on GitHub. Communication is over a wired Ethernet, since wireless connections would interfere with the radio observatory’s signals. Python scripts from sensors or cameras connected to each Raspberry Pi relay information in real-time to the GroundBIRD server which consists of a desktop PC, two rack-mounted PCs, and seven Raspberry Pi computers. The dome is controlled solely by Raspberry Pi, whereas the humidity detector – which lets the researchers know it’s too damp to have the dome open – runs a different system.

    The team assigned each of the six discrete Raspberry Pi boards a name, either of a fruit or a ground bird, so mango-pi, yuzu-pi, pera-pi weather sensor, kaki-pi, choco-pi, and momo-pi. Most of these were adapted and up and running in the space of a few days, whereas the more complex FPGA coding for the angle encoder took several months of development. This was also the most costly element, aside from the hardware associated with the telescope itself.

    Fruits of their labour

    Although space is limited in the dome, the team was keen to install a very small PC and display. Raspberry Pi and a small touchscreen display seemed an obvious choice. This device, mango-pi, checks all DAQ connections before adjusting the telescope’s elevation or starting it moving. This same computer also controls the dome while the main server for GroundBIRD observation continuously rotates together with the telescope, and therefore cannot be connected from the dome control. Another Raspberry Pi, yuzu-pi, is fitted with a DAC HAT and has an SPI connection to the telescope’s azimuth controller. By changing the voltage to the azimuth controller, it acts as an emergency stop mechanism should it be necessary to prevent the fully remotely-controlled telescope from continuing to rotate.

    Choco-pi trains four cameras on the telescope’s wheels, while momo-pi listens for unexpected noises related to the telescope’s rotation and acts as an early warning system for potential problems. “The pulse-tube-cooler (the cryostat cooling down from the room temperature to 4 Kelvin [-269°C] inside the telescope) also generates periodical sound,” Mike explains. “It would be nice to measure this to see whether there is something odd around the cryocoolers.” Finally, coco-pi is fitted with an ADS-B receiver and keeps an eye out for aeroplanes. The observatory is in a no-fly zone, so few aircraft are likely to pass by. However, its high altitude means the small antenna is able to detect aircraft up to around 500 km away.

  • Introducing Raspberry Pi Pico W in The MagPi magazine issue #119

    Introducing Raspberry Pi Pico W in The MagPi magazine issue #119

    Reading Time: 2 minutes

    Introducing Raspberry Pi Pico W

    Raspberry Pi Pico W

    Pico W brings a whole new element to Raspberry Pi’s RP2040 development platform. Our in-depth feature covers the specifications in detail, and shows you how to set up Raspberry Pi Pico W with the new firmware, and connect to your local network. Plus we chat to the hardware and software engineers that brought Pico W to life.

    Reuse your Raspberry Pi

    Reuse your Raspberry Pi

    Raspberry Pi OS still runs on the original Raspberry Pi boards, and if – like us – you are a Raspberry Pi fan you might have one, or two, boards going unused. In this feature, Rob takes a look at all the things you can make with older Raspberry Pi computers.

    Saxophone Light

    Saxophone Light

    We never cease to be amazed by the creative things people make with Raspberry Pi. One maker, Keith Thompson, has designed an illuminating saxophone with Raspberry Pi and a circular NeoPixel LED array.

    GroundBIRD Telescope

    GroundBIRD Telescope

    An international group of astronomers are using multiple Raspberry Pi computers to explore the earlier history of our universe. Raspberry Pi is used to troubleshoot and monitor the data from the telescope.

    ArtEvolver: Build an abstract art installation

    ArtEvolver: Build an abstract art installation

    This month Sean McManus explains how to build ArtEvolver, an abstract art device built using Raspberry Pi and a Pimoroni 8-inch IPS LCD screen. This project automatically blends images to create textured images.

    Hiwonder SpiderPi

    HiWonder SpiderPi tested

    This Raspberry Pi-powered hexapod is an agile, and interesting, robot powered by 18 servo motors. It’s much more physically imposing than many robots we’ve tested, which is sure to make it a hit in the classroom, and it features AI line-tracking and coloured ball detection, along with a Python API for more advanced coding.

  • Win! One of 20 Raspberry Pi Pico W

    Win! One of 20 Raspberry Pi Pico W

    Reading Time: < 1 minute

    Subscribe

  • StackyPi review: An RP2040 microcontroller compatible with standard HATs

    StackyPi review: An RP2040 microcontroller compatible with standard HATs

    Reading Time: 2 minutes

    Other features include a standard micro-USB port (for 5 V power or connecting to a computer), two tiny push-buttons (including a handy reset), an on-board status LED, and six debug pins.

    Plug and play?

    That standard 40-pin GPIO header means you can connect any standard Raspberry Pi HAT, pHAT, or other compatible add-on board. The downside is that it’s not a case of plug and play. You will need to adapt any existing software for your HAT to make it work.

    SB Components has adapted software for several of its own HATs for StackyPi, available in a GitHub repo (magpi.cc/stackpigh), which also features a handy GPIO pinout comparison chart – it’s very similar to that on a Raspberry Pi, although some GPIO pin numbers are different.

    As with Pico, you need to connect the board via micro-USB to a computer to flash the UF2 firmware and program it – using MicroPython, CircuitPython, or C++.

    Why use this over a Raspberry Pi Zero? Well, it does offer far lower power consumption and four ADC channels. Alternatively, you could use a Raspberry Pi Pico with a Red Robotics Pico 2 Pi adapter for standard HATs.

    Verdict

    7/10

    Not a plug-and-play solution for HATs, as you’ll need to do some software tinkering, but still a neat little Pico-style board with some bonus features.

    Specs

    Connectors: 40-pin GPIO header, 6-pin debug header, micro-USB

    Storage: 8MB on-board flash, plus microSD card slot

    Features: Boot and reset buttons, status LED, 4 × 12-bit ADC channels, PIO, I2C, SPI, UART

    Dimensions: 65 × 30 × 10 mm

  • Incredible camera projects

    Incredible camera projects

    Reading Time: 3 minutes

    Toy camera

    The Raspberry Pi High Quality Camera can be used with the CS mount and lenses, but it’s not the only option. As maker Volzo explains, S-mount lenses (ideal for machine vision and infra-red photography) can also be used, which is what he chose for this Raspberry Pi Zero build designed to add zany features and introduce unpredictable effects to digital photography – something more generally known as Lomography. Depending on your level of make-ability, you can either use an existing old camera body or another vessel to house your camera, or fashion one yourself, for which Volzo provides demos and links to ample alternative design ideas. His 3D-printed and CNC-cut version is held together with magnets as well as screws, while the viewfinder is from a pair of night-vision goggles. Exhorting others to rediscover the quirkiness of analogue photography, this project shows how much fun it can be to experiment when the basic Raspberry Pi camera and other parts are cheap enough to allow you the freedom to do so.

    Instant photo printer

    Adafruit’s Philip Burgess offers some great project ideas including this super means of printing out the results of your Raspberry Pi photography on demand, making use of the sort of $45 thermal printer more commonly found at a grocery till. The thermal photo printer works with any standard size Raspberry Pi and the retro photo results are just as good whether taken on a standard Camera Module 2 or the High Quality Camera Module. You’ll need an SD card for the Python code and Raspberry Pi OS, a large push-button, and a means of connecting this and the printer to Raspberry Pi, plus four AA NiMH batteries. A case for the setup could be as simple as a cardboard box or something fancier you design yourself or 3D-print from Thingiverse.

    Face recognition smart clock

    A great way to control access to a building is using the Raspberry Pi High Quality Camera and a smartphone to ascertain who’s calling. When a familiar face pops up on-screen, you can then grant that person access. This works really well – as long as you’re around to check your phone when a visitor notification pops up. For scenarios in which you aren’t around, you could train Raspberry Pi 3 or 4 to recognise friends’ faces and allow them entry. In Seeed Studio’s walkthrough, you take photos of people you want to let in, as per this amusing face-recognition setup along with Grove’s Relay To LTE HAT, a wireless antenna, and of course Raspberry Pi with the Camera Module attached. A text message is sent to the owner stating who was let in whenever someone is recognised and their door unlocked.

    Hubble Pi

    Observers of the night sky with even a basic telescope can use it in tandem with Raspberry Pi and the High Quality Camera plus a C-mount-to-telescope adapter to capture incredible astronomical sights. Hubble Pi pairs Raspberry Pi 4 with free astronomy software KStars which displays a live map of the night sky on the telescope’s display. Maker Santiago exploited the large lens of the HQ Camera and wrote Python code he calls AstroCam to control its shutter speed, the ISO, and exposure time. Bonuses include being able to automatically take multiple RAW photos and using either remote desktop or a touchscreen to trigger a shot.

  • Kitronik Air Quality Datalogging Board for Pico review

    Kitronik Air Quality Datalogging Board for Pico review

    Reading Time: 2 minutes

    Then there’s a host of input and output options, including three analogue inputs (connected to Pico’s ADC channels) for connecting external sensors, a ZIP socket to add more LEDs, a three-pin servo connector, and two high-power outputs (screw terminals) with a max draw of 1 A. In addition, there are solder pads for 3V3 power, GND, digital pins, SPI, and UART.

    Power-wise, there’s a handy switch in one corner and a 3 × AA battery holder on the rear. There’s even a 5 V input if you want to charge up the batteries with a solar panel.

    What a gas

    The key feature of the board is its BME688 sensor, located in one corner. As well as measuring temperature, humidity, and atmospheric pressure (as on a BME680), it features an AI-enhanced gas sensor that detects volatile compounds and gases to determine IAQ (Index of Air Quality) and estimated CO2 levels. It takes five minutes to calculate the baseline for the gas sensor when first used, but this a one-off process and ensures greater accuracy for future readings.

    All in all, this is a well-thought-out board backed up by some top-notch documentation and software. Multiple online tutorials cover its various functions in detail, including data logging and analogue input/output control. The GitHub repo includes a comprehensive MicroPython library for the board and numerous code examples to try out.

    Verdict

    9/10

    A fully-featured Pico add-on with plentiful input/output options, offering a host of possibilities for projects. Excellent documentation too.

    Specs

    Sensor: BME688 – temperature, humidity, pressure, gases

    Connectors: Dual female header for Pico, 3 × ADC inputs, ZIP LED socket, servo output, 2 × high-power outputs, 5 V power input, plus extra solder pads

    Features: 128×64 monochrome OLED, 2 × push-buttons, piezo buzzer, 3 × ZIP (WS2812B) RGB LEDs, 3 × AA battery holder

    Dimensions: 74×72×27.1 mm