
Edge Impulse and TinyML on Raspberry Pi
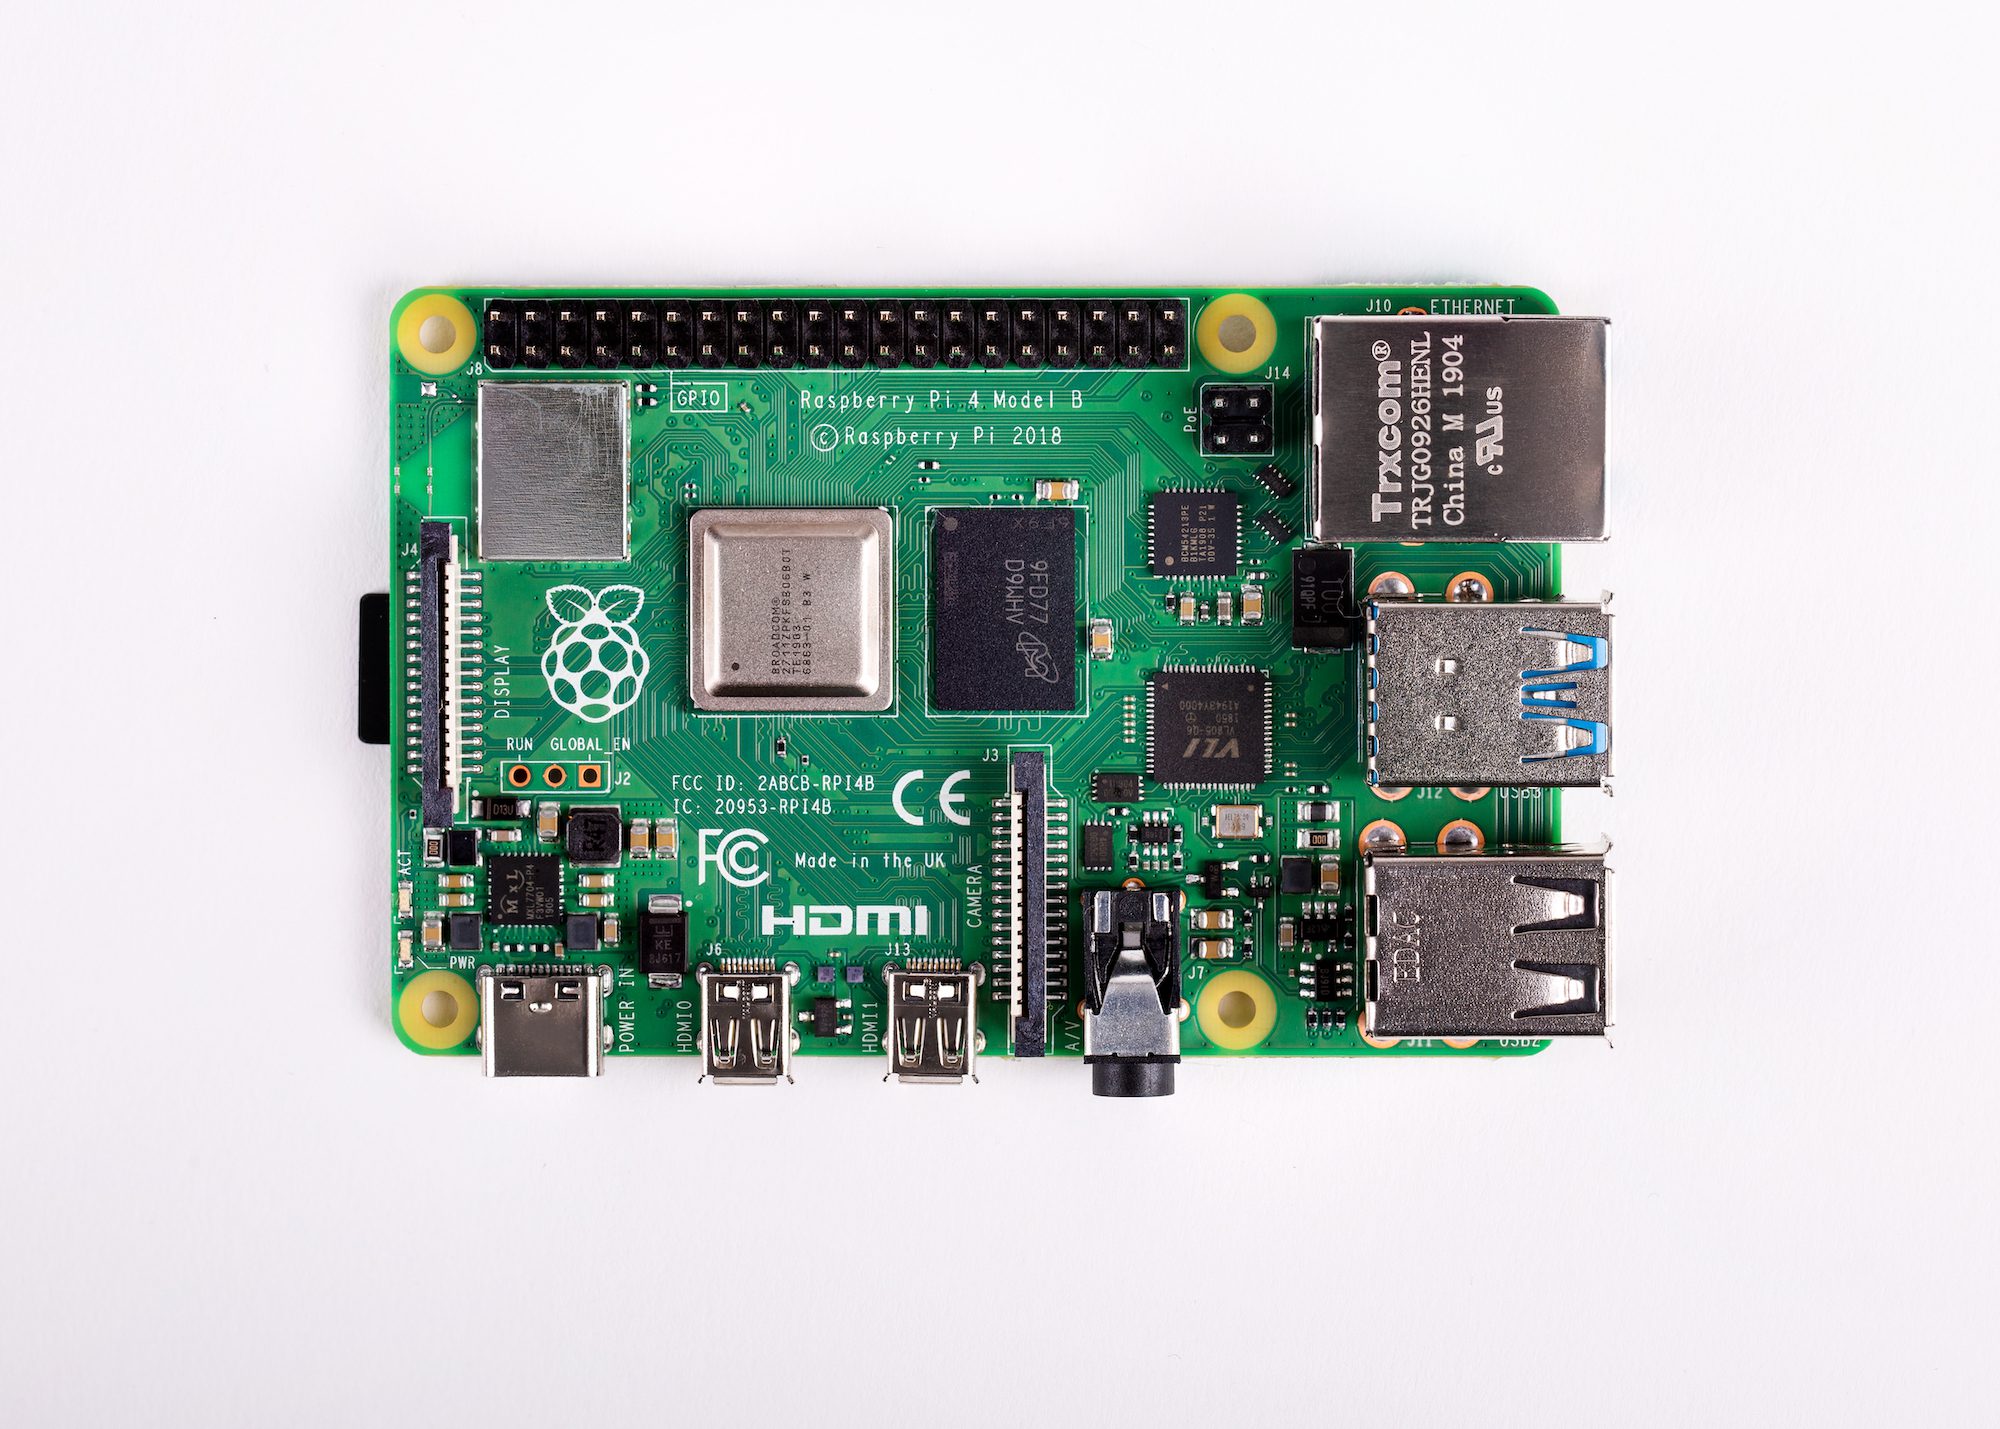
Raspberry Pi is probably the most affordable way to get started with embedded machine learning. The inferencing performance we see with Raspberry Pi 4 is comparable to or better than some of the new accelerator hardware, but your overall hardware cost is just that much lower.
However, training custom models on Raspberry Pi — or any edge platform, come to that — is still problematic. This is why today’s announcement from Edge Impulse is a big step, and makes machine learning at the edge that much more accessible. With full support for Raspberry Pi, you now have the ability to take data, train against your own data in the cloud on the Edge Impulse platform, and then deploy the newly trained model back to your Raspberry Pi.
Today’s announcement includes new SDKs: for Python, Node.js, Go, and C++. This allows you to integrate machine learning models directly into your own applications. There is also support for object detection, exclusively on the Raspberry Pi; you can train a custom object detection model using camera data taken on your own Raspberry Pi, and then deploy and use this custom model, rather than relying on a pretrained stock image classification model.
Because the importance of bananas to machine learning researchers can not be overstated. To test it out, we’re going to train a very simple model that can tell the difference between a banana🍌 and an apple🍎.
Getting started
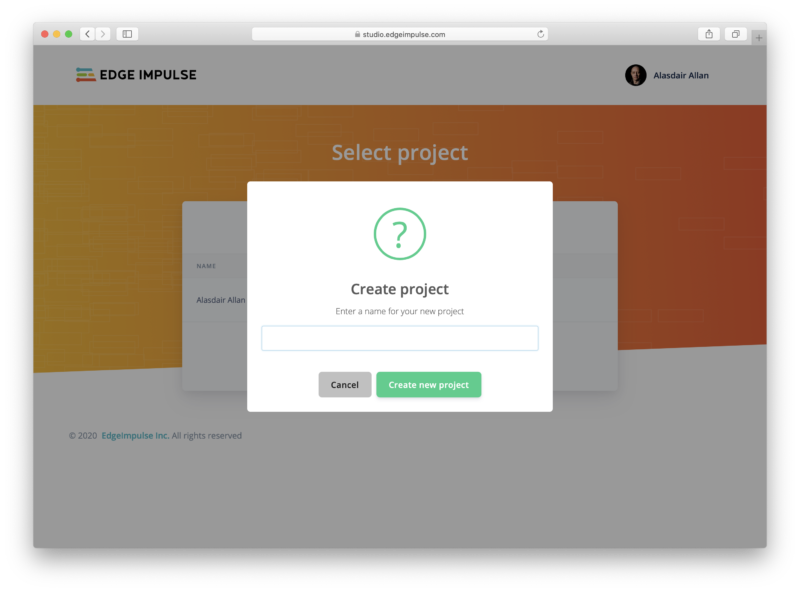
If you don’t already have an Edge Impulse account you should open up a browser on your laptop and then create an account, along with a test project. I’m going to to call mine “Object detection”.
We’re going to be building an image classification project, one that can tell the difference between a banana 🍌 and an apple 🍎, but Edge Impulse will also let you build an object detection project, one that will identify multiple objects in an image.
[youtube https://www.youtube.com/watch?v=dY3OSiJyne0?feature=oembed&w=500&h=281]
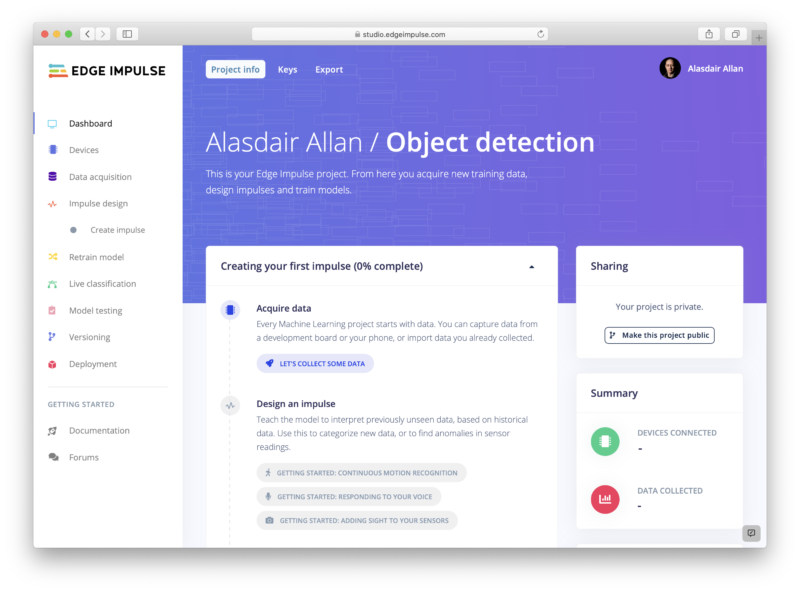
After creating your project, you should see something like this:
Now log in to your Raspberry Pi, open up a Terminal window, and type
$ curl -sL https://deb.nodesource.com/setup_12.x | sudo bash -
$ sudo apt install -y gcc g++ make build-essential nodejs sox gstreamer1.0-tools gstreamer1.0-plugins-good gstreamer1.0-plugins-base gstreamer1.0-plugins-base-apps
$ sudo npm install edge-impulse-linux -g --unsafe-perm
to install the local toolchain. Then type
$ edge-impulse-linux
Edge Impulse Linux client v1.1.5
? What is your user name or e-mail address (edgeimpulse.com)? alasdair
? What is your password? [hidden]
This is a development preview.
Edge Impulse does not offer support on edge-impulse-linux at the moment. ? To which project do you want to connect this device? Alasdair Allan / Object d
etection
? Select a microphone USB-Audio - Razer Kiyo
[SER] Using microphone hw:1,0
? Select a camera Razer Kiyo
[SER] Using camera Razer Kiyo starting...
[SER] Connected to camera
[WS ] Connecting to wss://remote-mgmt.edgeimpulse.com
[WS ] Connected to wss://remote-mgmt.edgeimpulse.com
? What name do you want to give this device? raspberrypi
[WS ] Device "raspberrypi" is now connected to project "Object detection"
[WS ] Go to https://studio.edgeimpulse.com/studio/XXXXX/acquisition/training to build your machine learning model!
and log in to your Edge Impulse account. You’ll then be asked to choose a project, and finally to select a microphone and camera to connect to the project. I’ve got a Razer Kiyo connected to my own Raspberry Pi so I’m going to use that.
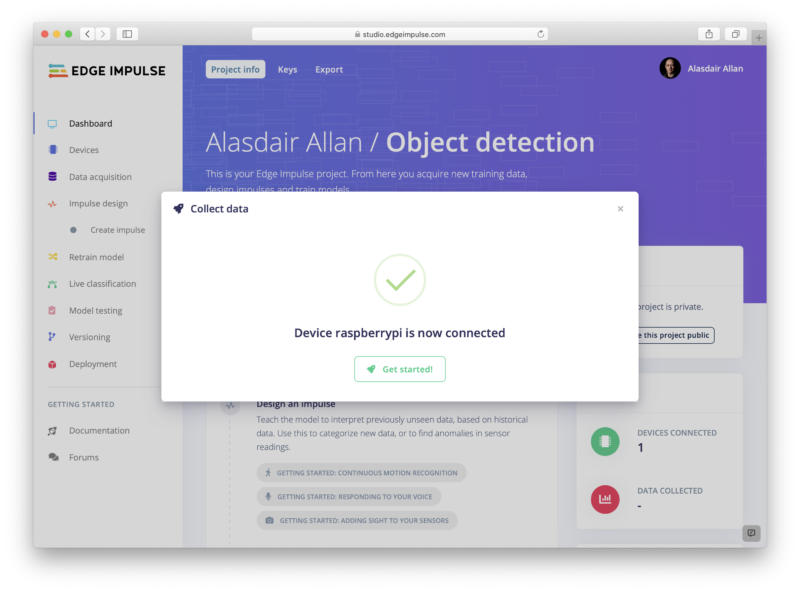
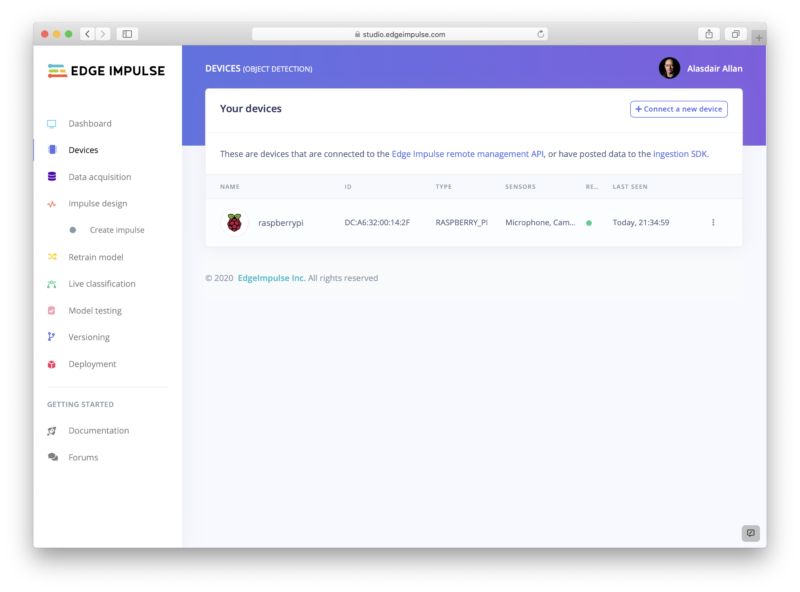
If you still have your project open in a browser you might see a notification telling you that your Raspberry Pi is connected. Otherwise you can click on “Devices” in the left-hand menu for a list of devices connected to that project. You should see an entry for your Raspberry Pi.
Taking training data
If you look in your Terminal window on your Raspberry Pi you’ll see a URL that will take you to the “Data acquisition” page of your project. Alternatively you can just click on “Data acquisition” in the left-hand menu.
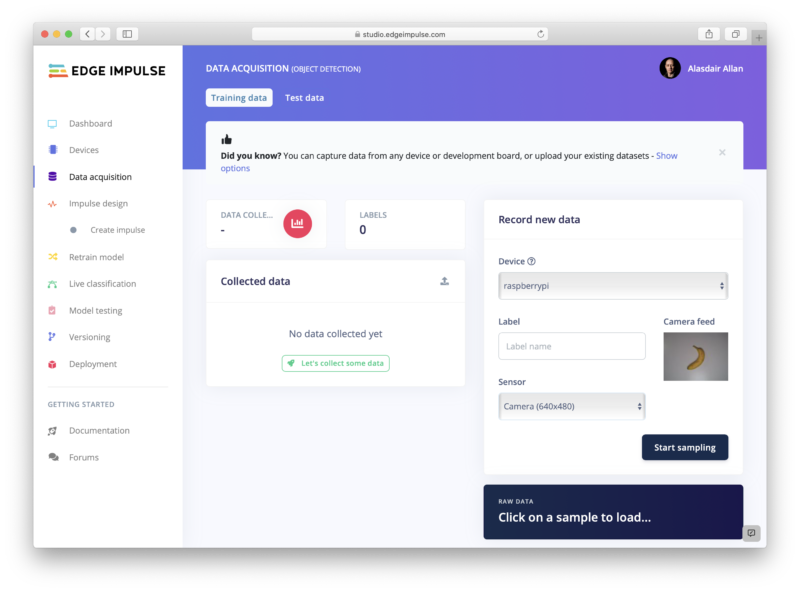
Go ahead and select your Raspberry Pi if it isn’t already selected, and then select the Camera as the sensor. You should see a live thumbnail from your camera appear to the right-hand side. If you want to follow along, position your fruit (I’m starting with with the banana 🍌), add a text label in the “Label” box, and hit the “start sampling” button. This will take and save an image to the cloud. Reposition the banana and take ten images. Then do it all again with the apple 🍎.
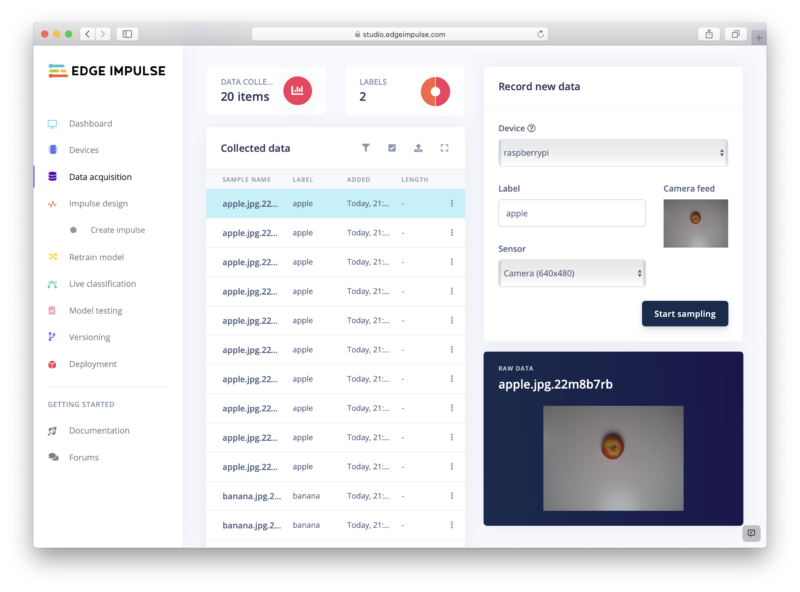
Since we’re building an incredibly simplistic model, and we’re going to leverage transfer learning, we probably now have enough training data with just these twenty images. So let’s go and create a model.
Creating a model
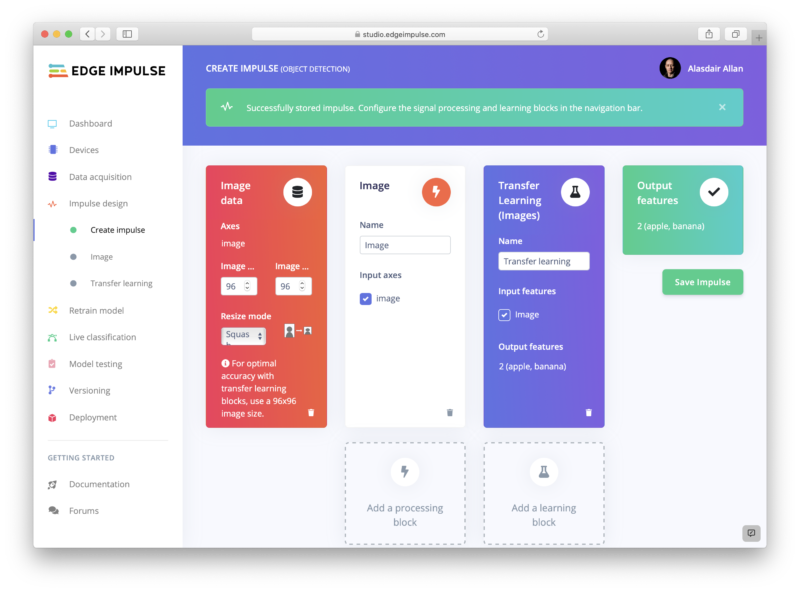
Click on “Impulse design” in the left-hand menu. Start by clicking on the “Add an input block” box and click on the “Add” button next to the “Images” entry. Next click on the “Add a processing block” box. Then click on the “Add” button next to the “Image” block to add a processing block that will normalise the image data and reduce colour depth. Then click on the “Add a learning block” box and select the “Transfer Learning (images)” block to grab a pretrained model intended for image classification, on which we will perform transfer learning to tune it for our banana 🍌 and apple 🍎 recognition task. You should see the “Output features” block update to show 2 output features. Now hit the “Save Impulse” button.
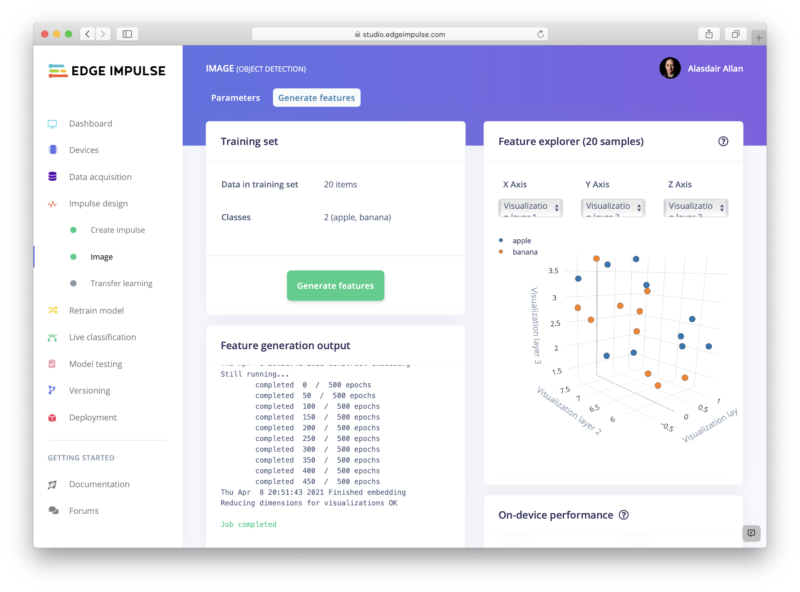
Next click on the “Images” sub-item under the “Impulse design” menu item, switch to the “Generate features” tab, and then hit the green “Generate features” button.
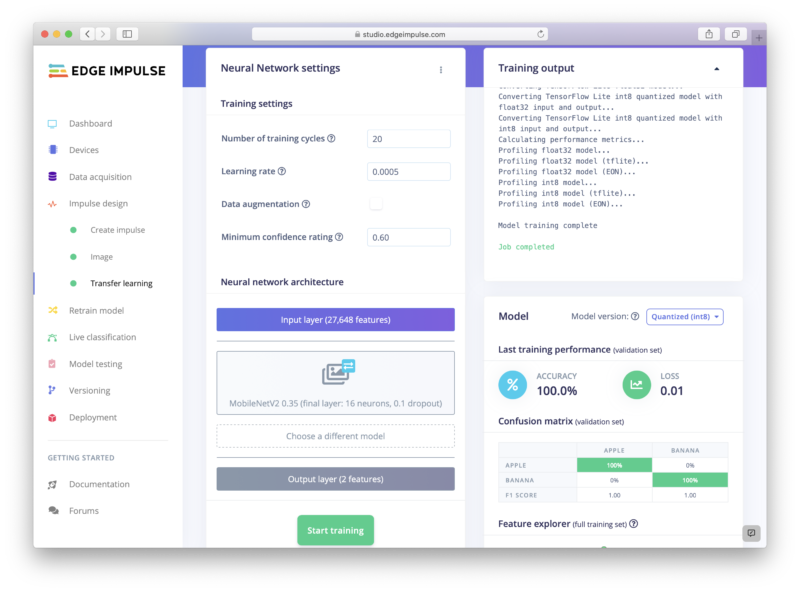
Finally, click on the “Transfer learning” sub-item under the “Impulse design” menu item, and hit the green “Start training” button at the bottom of the page. Training the model will take some time. Go get some coffee ☕.
Testing our model
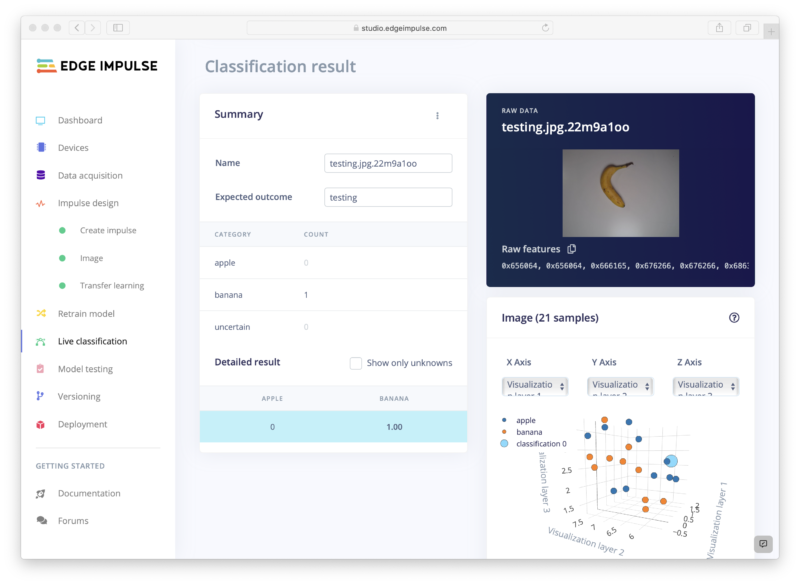
We can now test our trained model against the world. Click on the “Live classification” entry in the left-hand menu, and then hit then the green “Start sampling” button to take a live picture from your camera.
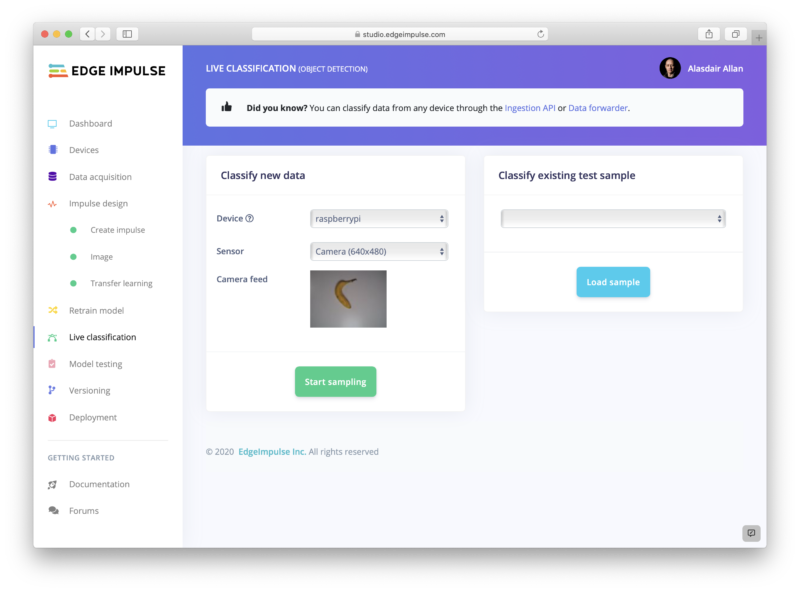
You might want to go fetch a different banana 🍌, just for testing purposes.
If you want to do multiple tests, just scroll up and hit the “Start sampling” button again to take another image.
Deploying to your Raspberry Pi
Now we’ve (sort of) tested our model, we can deploy it back to our Raspberry Pi. Go to the Terminal window where the edge-impulse-linux command connecting your Raspberry Pi to Edge Impulse is running, and hit Control-C to stop it. Afterwards we can do a quick evaluation deployment using the edge-impulse-runner command.
$ edge-impulse-linux-runner
This is a development preview.
Edge Impulse does not offer support on edge-impulse-linux-runner at the moment. Edge Impulse Linux runner v1.1.5 [RUN] Already have model /home/pi/.ei-linux-runner/models/24217/v2/model.eim not downloading...
[RUN] Starting the image classifier for Alasdair Allan / Object detection (v2)
[RUN] Parameters image size 96x96 px (3 channels) classes [ 'apple', 'banana' ]
[RUN] Using camera Razer Kiyo starting...
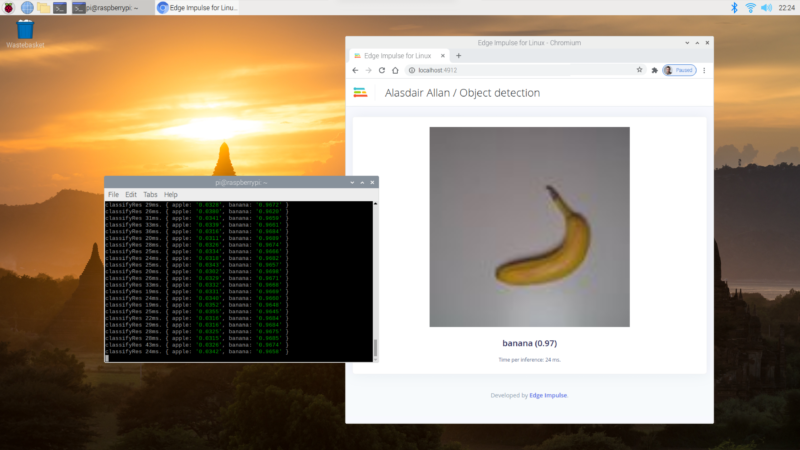
[RUN] Connected to camera Want to see a feed of the camera and live classification in your browser? Go to http://XXX.XXX.XXX.XXX:XXXX classifyRes 31ms. { apple: '0.0097', banana: '0.9903' }
classifyRes 29ms. { apple: '0.0082', banana: '0.9918' } . . .
classifyRes 23ms. { apple: '0.0078', banana: '0.9922' }This will connect to the Edge Impulse cloud, download your trained model, and start up an application that will take the video stream coming from your camera and look for bananas 🍌 and apples 🍎. The results of the model inferencing will be shown frame by frame in the Terminal window. When the runner application starts up you’ll also see a URL: copy and paste this into a browser, and you’ll see the view from the camera in real time along with the inferencing results.
Success! We’ve taken our training data and trained a model in the cloud, and we’re now running that model locally on our Raspberry Pi. Because we’re running the model locally, we no longer need network access. No data needs to leave the Raspberry Pi. This is a huge privacy advantage for edge computing compared to cloud-connected devices.
Wrapping up?
While we’re running our model inside Edge Impulse’s “quick look” application, we can deploy the exact same model into our own applications, as today’s announcement includes new SDKs: for Python, Node.js, Go, and C++. These SDKs let us build standalone applications to collect data not just from our camera and microphone, but from other sensors like accelerometers, magnetometers, or anything else you can connect to a Raspberry Pi.
Performance metrics for Edge Impulse are promising, although still somewhat below what we’ve seen using TensorFlow Lite directly on Raspberry Pi 4, for inferencing using similar models. That said, it’s really hard to compare performance across even very similar models as it depends so much on the exact situation you’re in and what data you’re dealing with, so your mileage may vary quite a lot here.
However, the new Edge Impulse announcement offers two very vital things: a cradle-to-grave framework for collecting data and training models then deploying these custom models at the edge, together with a layer of abstraction. Increasingly we’re seeing deep learning eating software as part of a general trend towards increasing abstraction, sometimes termed lithification, in software. Which sounds intimidating, but means that we can all do more, with less effort. Which isn’t a bad thing at all.
Website: LINK