Build a SatNOGS ground station with a Raspberry Pi 3B+ | HackSpace magazine #18
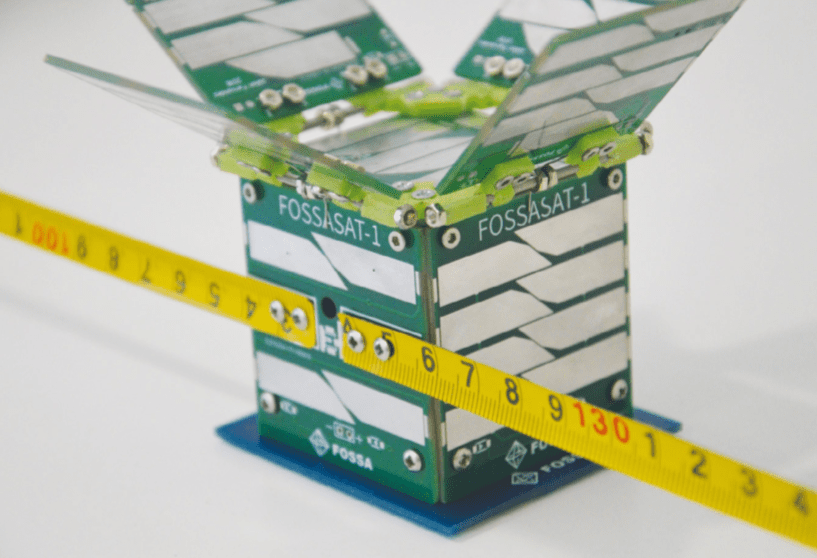
The big feature on outer space in issue 18 of HackSpace magazine, available from today, shows you how to build your own satellite and launch it into orbit.
No, we’re not kidding, this is an actual thing you can do.
And to track the satellite you’ve launched, or another satellite you’re interested in, here’s how to build your own SatNOGS ground station with a Raspberry Pi 3B+.
Building a Raspberry Pi ground station
Once you’ve built and launched your small satellite, you’ll want to listen to all the glorious telemetry and data it‘s sending back as it hurtles around the Earth. Or perhaps you aspire to have a satellite up there, but in the meantime you want to listen to some other objects? What you need is a ground station, but a single ground station has one slight flaw. Most of the time a satellite will not be overhead of a single ground station; in fact, it may only pass over a ground station once every few days, massively reducing the amount of information or data we can receive. So we need a network of ground stations. The SatNOGS network solves this by creating a global network of stations that can work together to increase coverage.
SatNOGS is an open-source project that has numerous designs for satellite ground stations, but whichever design you pick, you can join the network that links them all via the web.
A station owner can use the website to browse for future passes of a satellite, and then click a button to schedule for their station to turn on, tune to frequency, and record the pass, sometimes even rotating the antenna on the station to track the satellite. Not only can a station owner schedule an observation on their own station, but they can schedule observations on any station on the global network.
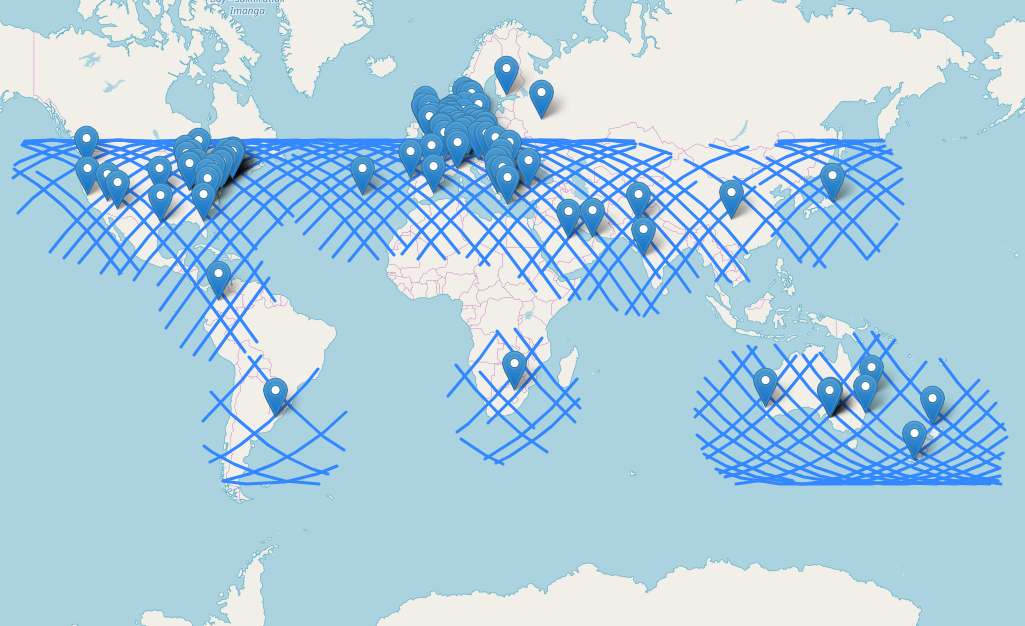
As we can see from this map of data being collected of a recent SSTV broadcast from the ISS (sends single-frame images transmitted via audio from the ISS), the SatNOGS network has near-global coverage, rivalling most professional institutions in the world.
Simple setup
The simplest form of a SatNOGS station is one that doesn’t move or track and is made from a static antenna, a Raspberry Pi, and a cheap software-defined radio (SDR) dongle. The SDR dongle has become ubiquitous in maker circles as it is an affordable entry item into the world of receiving signals via SDR. Looking at our ingredients in the image below, let’s explore them a little more before we get started.
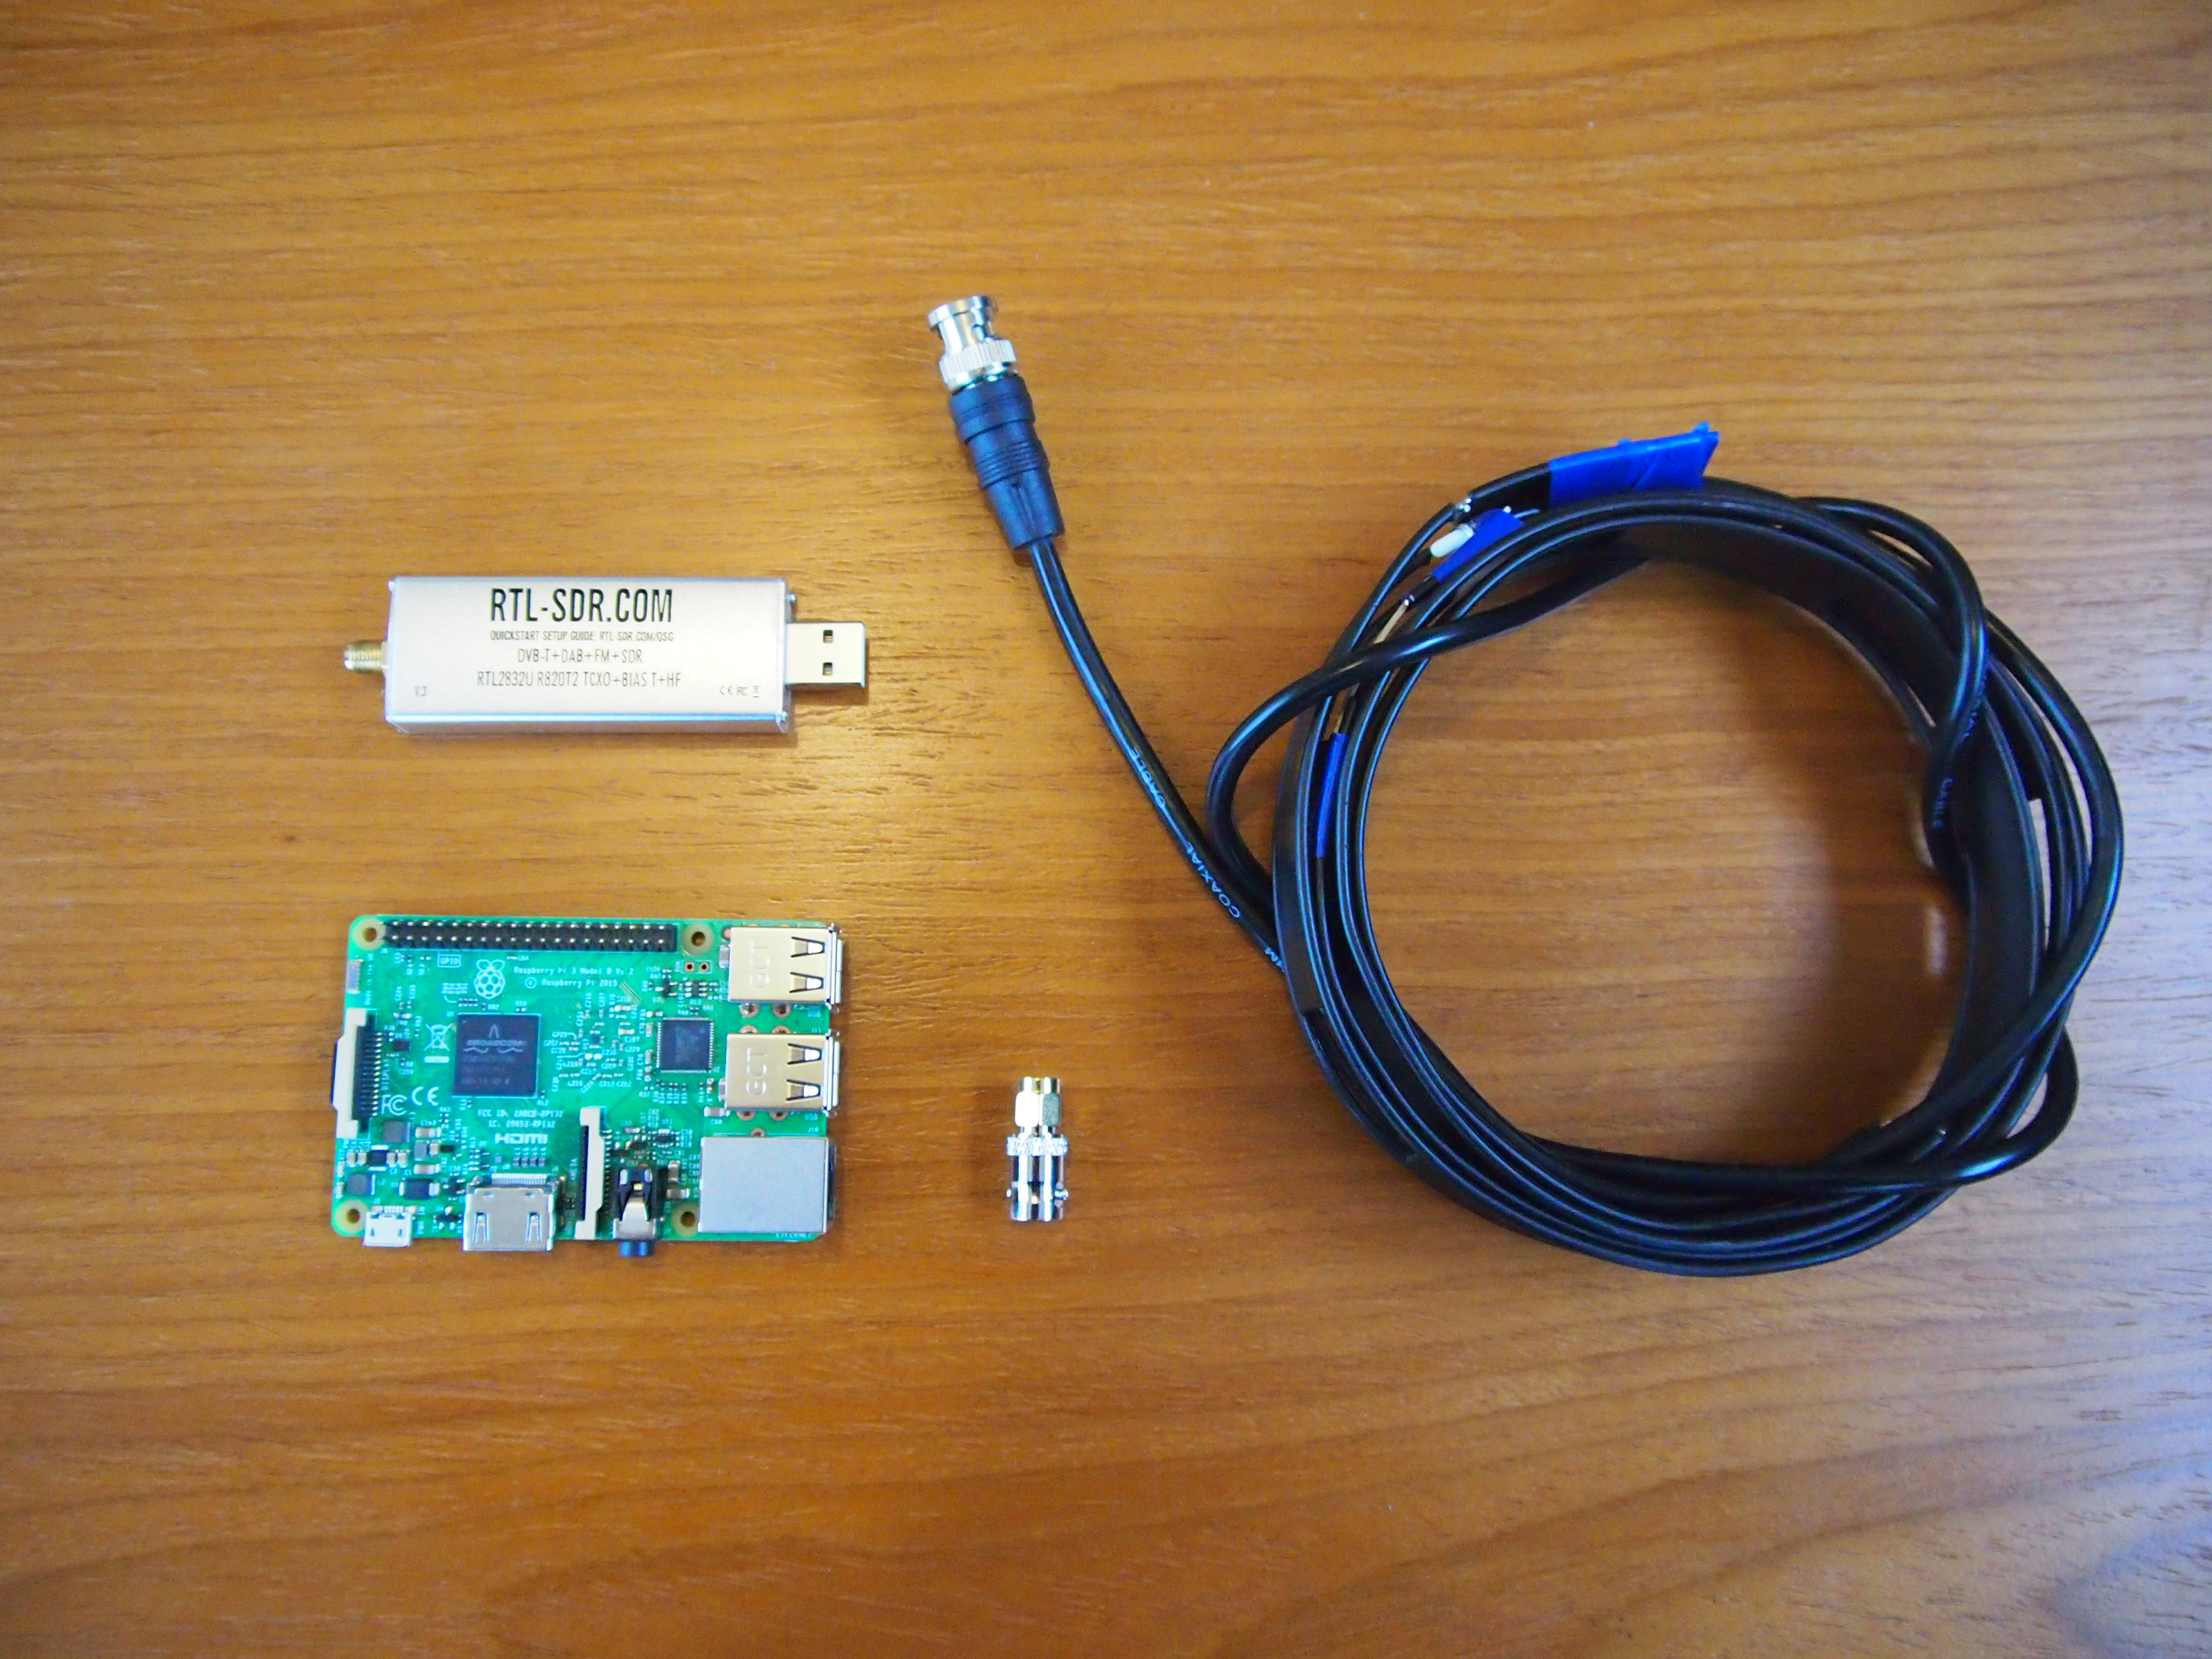
While a permanent station may do better connected by Ethernet cable, using the Raspberry Pi’s built-in wireless LAN functionality means we can run this simply with only a power cable. While many have used the cheapest Realtek SDR dongles with success, some people have found the slightly more refined versions can be more stable – a current recommendation is the RTL-SDR V3, which has a better casing for thermal dissipation, and slightly upgraded components. The RTL-SDR V3 is available here.
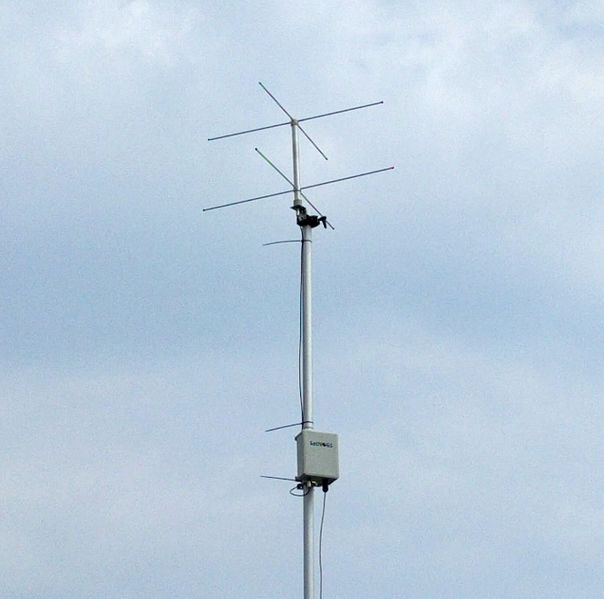
The classic antenna recommended for a static SatNOGS setup shown above is a ‘turnstile’ antenna; commercial models are available, such as the Wimo TA-1, but people have designed and built lots of different static antennas for different frequencies and with small budgets – check out the tutorial Make a Slim Jim antenna on page 112 (in HackSpace issue 18, links below).
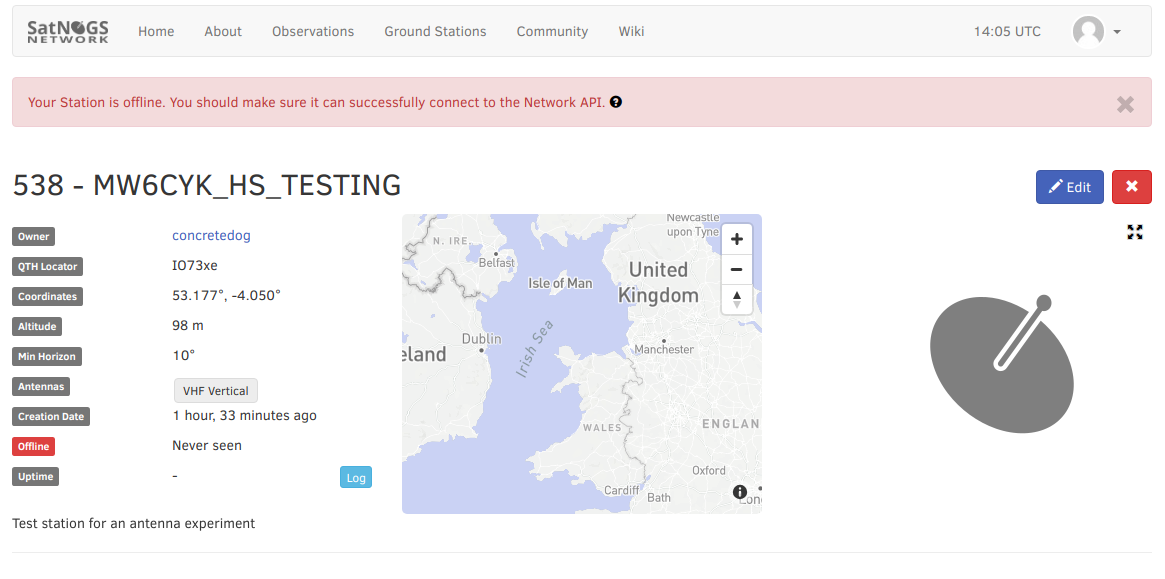
In order to set up a ground station, one of the first tasks we need to do is set up an account on network.satnogs.org. Registering on the site then gives us a dashboard where we can begin to set up a station. Click to add a station — we then need to supply it with some basic details as per the image below: a name for the station, a location in latitude and longitude (Google is your friend here!), and the elevation of the station above sea-level.

You need to decide what frequency your station is going to cover; the most common ranges are UHF and VHF, which would require different antennas, but either range has a huge number of objects you can schedule to observe. Many people opt for VHF, as this includes the frequency range for a lot of the different transmissions from the ISS, so we are going to choose VHF as well. You also need to add a minimum elevation value — this is the minimum angle that a satellite must be in terms of height for your station to see it — if you aren’t sure, either ask for help on the forums, or leave it for now at the default 10 degrees.
Having filled in the boxes to create the station (leave the ‘this is in testing’ box ticked for now), you should now see a ground station entry has been made on your account, as above. You will see (even though it isn’t set up yet) a list populating underneath the entry with ‘Pass Predictions’, which are things you could schedule to observe once you are up and running. Before we leave the website, we need to make a note of the number assigned to the ground station, and also our own personal API key — which we can find in our dashboard by clicking the API key button. These two pieces of information are what will ultimately connect our ground station hardware to the website account.
The next task is to sort out the Raspberry Pi. You can find the current custom SatNOGS image here.
Flash this to your microSD card as you would for a regular Raspberry Pi setup — the free app Etcher, for example, is a simple tool that allows you to flash an image to a card.
Once done, boot the Raspberry Pi, and you can either SSH into the Pi, or connect a keyboard and monitor and interact with the setup that way. The first things we need to do are not SatNOGS-specific, but are the usual things we do when setting up a Raspberry Pi. We need to set up a different password by running the sudo raspi‐config command. Once you’ve set a password and expanded the file system, it’s also useful to set the time zone to UTC, as this is used throughout the SatNOGS network. If you want to run this test station wirelessly, then you need to configure your network connection at this point. If you are connecting via an Ethernet cable, then you don’t need to do anything else. Apply the changes and reboot (then see ‘Final setup’ box above in HackSpace issue 18, links below).
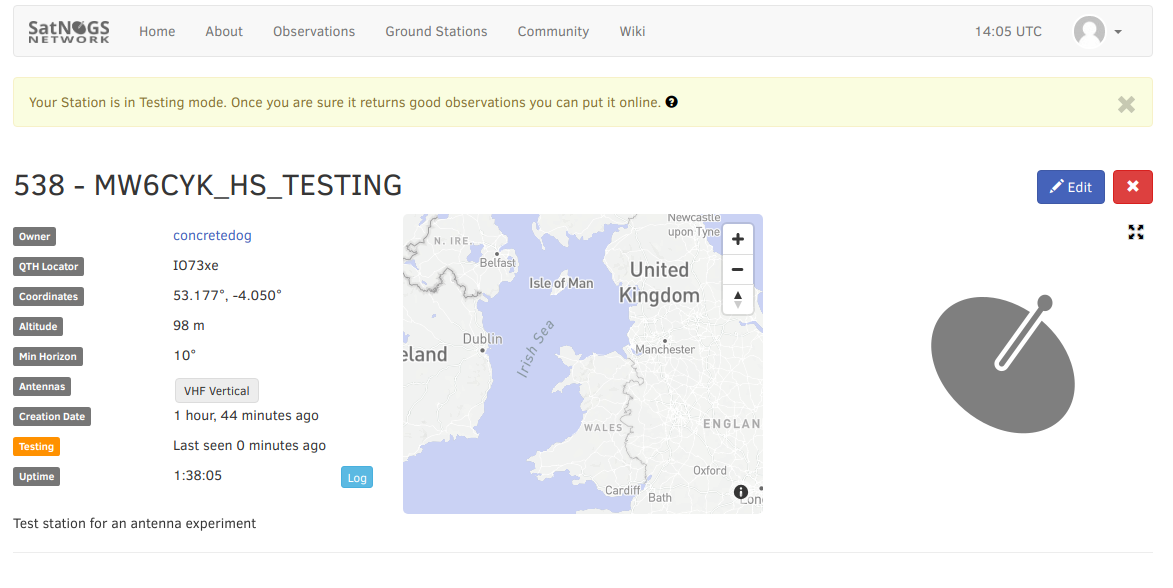
Now, if we go back to our dashboard on the SatNOGS website (perhaps wait a few minutes and click Refresh), we should see that the station is now online, as above. We should see an orange spot on the network map showing our proud station in testing. Being in testing means that only you can schedule observations on the station, but when you are ready, you can change settings to take it out of testing and then it is fully on the network.
On the hunt
Power down one last time and connect the RTL-SDR dongle and the antenna, then reboot — you are now ready to hunt satellites! Scheduling observations is as simple as selecting passes from the list and clicking Schedule. There may be drop-down choices for different transmitters to listen for on the same satellite, and other choices, but essentially you click Calculate to create the observation and then Schedule for the job to be created and sent to the queue for your station. There are hundreds of satellites to try to observe, so don’t worry if you don’t understand what any of them are — in the pass predictions list, if you click the name of a satellite you will get a pop-up with information about it. For a more detailed walkthrough of scheduling an observation on the SatNOGS network, check out this blog post.

After the time of the pass, return to the observation page and, hopefully, you should see some signals. Don’t worry if your first few observations aren’t successful: try at least a dozen observations before making any changes, as there are many possible reasons for a signal not getting picked up; indeed, the satellite may not even have been transmitting. If you have received a signal, you should ‘vet’ the observation as good; this is particularly important if you have scheduled on someone else’s station – etiquette says we should check and vet our own observations. Check out the Slim Jim antenna (see page 112 of HackSpace magazine issue 18, links below) for a link to a successful observation you can listen to.
Happy satellite hunting!
Finally, it’s a great idea to join the Libre Space Foundation community forum (or IRC), as it hosts the SatNOGS community channels, and there is a wealth of expertise and help available there from a very welcoming community. If you build a station, go and share your achievement on the forum — everyone will be pleased to see it.
Get HackSpace magazine issue 18 — out today
HackSpace magazine issue 18 is out today, and available online, or from many high-street retailers such as WHSmith and Sainsbury’s in the UK, and Barnes & Nobel in the US.
You can also download issue 18 for free, today as a PDF, so there really is no reason not to give HackSpace a spin.
Website: LINK