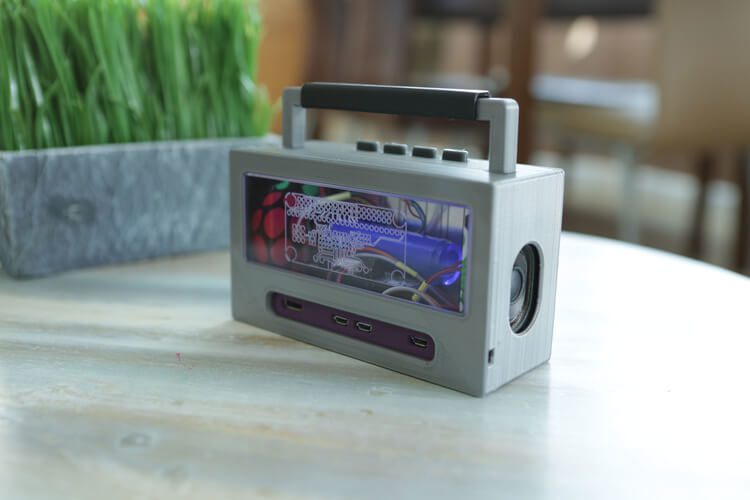
Create your own Raspberry Pi Airplay Boombox using a 3D printer, the Raspberry Pi Zero W, free software, and electronics. However, be warned that soldering and electronics knowledge is required for this project.
Adafruit Industries have come up with a design using the Raspberry Pi Zero W which is both cute and practical – they’re calling it a Boomy Pi, or AirTunes Boombox. You can follow along with their design instructions to create your own smiling AirPlay-ready audio player.
All you need to create the Boombox is a Raspberry Pi, a 3D printer and a few electronics. Plus, access to a CNC mill for post-processing decoration.
However, if you don’t already have the components for this project or access to a 3D printer, it could be an expensive build. Altogether, the parts cost over $100. But, undeniably, the result is pretty nifty.
Using Shairport Sync, you can stream music from your iOS device to the Raspberry Pi. So long as you’re connected to WiFi, you can carry the mini boombox around with you too.
Adafruit suggest you peruse the basic guides for soldering and the Adafruit Speaker Bonnet for Raspberry Pi. However, if you’ve glanced over those and feel confident in your abilities at soldering and electronics, this could be the project for you.
Everything You Need for the Raspberry Pi Boombox
The build starts with the Adafruit Speaker Bonnet, which gives the Raspberry Pi a stereo audio amplifier. Burn the lightweight Raspberry Pi OS Jessie Lite to an SD card and install the software and its libraries.
Next, wire up the electronics to test out the circuit. After 3D printing the parts, which you can download from Pinshape, you should assemble them, making sure to secure the breakouts with machine screws.
The design looks pretty cool with 3D printed buttons which allow you to control the sound and power down the Pi. Adafruit suggest you 3D print these in Ninjaflex or another flexible filament.
Finally, the speakers and electronics all snugly fit inside the case. As well as these parts, the Adafruit PoowerBoost has a 2200mAh battery which also fits and means you can carry it around with you without running out of power.
An Adafruit Speaker Bonnet is hooked up to two 3W stereo speakers giving your boombox a stereo audio amplifier. There are also USB and mini HDMI ports accessible too.
At the back of the design is an acrylic window which allows you to see the electronics inside. This can be CNC milled or laser engraved to add your own personal touch. Add your own artwork to the back of your front cover so you can see it through the window. Finally, the inside of the Boombox lights up thanks to the included LEDs, creating your own mini disco.
Tempted to create your own? Check out the Adafruit Overview on the learning system to get started and order the parts you need from the bottom of the page.
Website: LINK


