Kategorie: Video

  • Weekend Project: Make Your Garden Glow with 3D Printed LED Flowers

    Weekend Project: Make Your Garden Glow with 3D Printed LED Flowers

    Reading Time: 4 minutes

    Want to give your 3D printer the green thumb? Autodesk and Instructables content creator Becky Stern shares a project on how to make 3D printed light-up flowers with LED lights. 

    FDM desktop 3D printing has opened up a new world of possibilities when it comes to making customizable and decorative objects. By integrating LED lights, electronics, and other non-printed components, the potential to create practical or aesthetic projects with your 3D printer expands tenfold.

    Becky Stern is a Brooklyn-based content creator for Autodesk and Instructables, and her last couple of projects have strived to teach CAD design while supplying ornaments to spruce up your home. We recently covered her tutorial on how to create 3D printed LED mason jar lanterns, and now she’s back with another project to adorn your surroundings with.

    This project is simple, educational, and like any blossoming garden, will brighten up your day. Let’s take a look at how to create your own 3D printed LED flower.


    3D Printed Glowing Flowers: What Do You Need?

    To create your own 3D printed LED flower, you’ll need access to a 3D printer, as well as green PLA filament and white PLA filament (if you want to replicate Stern’s version). The STL files are freely available for download via Stern’s Instructables post, where she also explains how to design your own plastic bloom using Tinkercad.

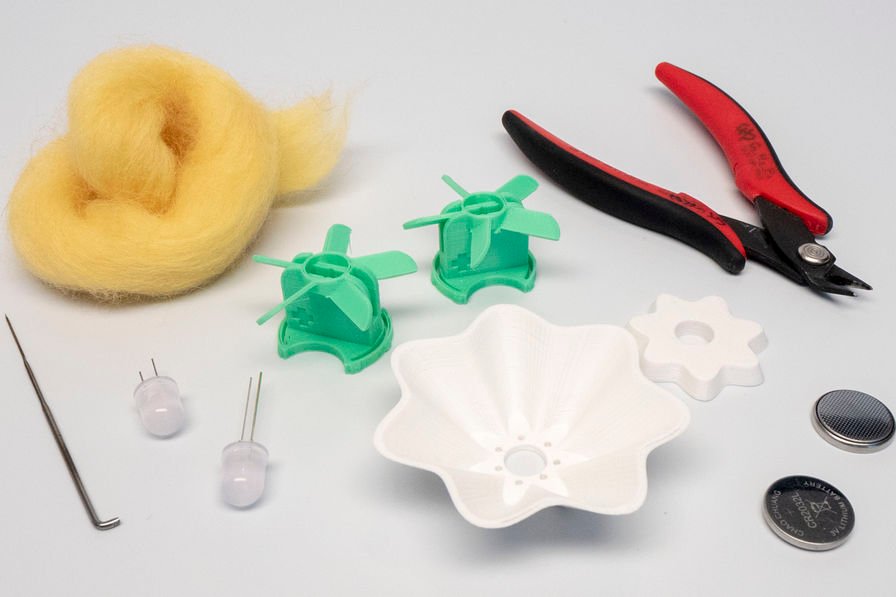
    Outside of the typical desktop 3D printing equipment and filament, here’s what else you need to sprout the seed of this project:


    3D Printed Glowing Flowers: Putting it Together

    Stern kicks her Instructables project off with the CAD design process, explaining how to design your own flower model. She also provides the STL files for her own version, making this first step completely optional. However, if you want to become more familiar with 3D modeling, you can follow her step-by-step process on how to grow a digital flower on this freely available CAD software.

    The model is split into two different STL files, allowing you to pick and choose what color combination you want to evoke with your flower. The flower base should be 3D printed at 100 percent infill, while the pedals are printed at 20 percent infill with a concentric fill pattern.

    Once your flower pedal and stem are 3D printed, it’s time to prep the LED light by clipping both legs and fitting them into the 3D printed base. Be sure to keep track of which leg is the longer one, as this will be important in the following step.


    In the flower stem, there’s a slot for you to insert the battery. There’s a “+” indicator on the 3D printed model to show you which way the battery should be facing. Take the longer leg and line it up with the positive (+) side of the flower base. This should make the LED light illuminate with a white glow.

    Next, you’ll insert the LED into the top of 3D printed base, resting in the small channels that are placed at the opening of the stem. Then, slide the 3D printed flower pedal over the LED and voilà, you now have a 3D printed LED flower.

    The final step is optional, but definitely adds a bit of natural flair to your 3D printed flower. Stern uses a needle felting technique to create the bulb of the flower. By poking tiny holes in the fiber, you can tangle it up and create a dome-like shape to fit over the LED. This will help diffuse the light and produce a more relaxing glow.

    If you want to learn more about Stern’s educational and enjoyable project, check out the full instructions on her Instructables post, as well as the step-by-step video posted below.

    License: The text of „Weekend Project: Make Your Garden Glow with 3D Printed LED Flowers“ by All3DP is licensed under a Creative Commons Attribution 4.0 International License.

    Subscribe to updates from All3DP

    You are subscribed to updates from All3DP

    Website: LINK

  • Google Maps to Improve Walking Navigation with AR Fox and Giant Arrows

    Google Maps to Improve Walking Navigation with AR Fox and Giant Arrows

    Reading Time: 3 minutes

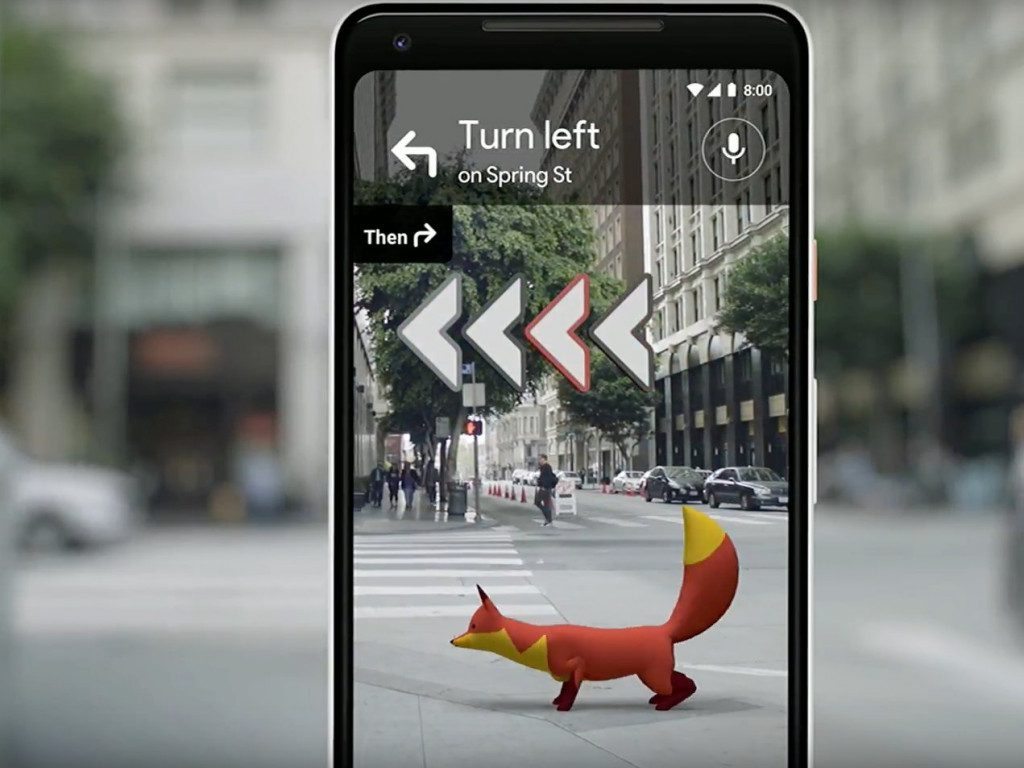
    At Google’s I/O Developers conference this week, the company’s Vice President, Aparna Chennapragada, demonstrated how AR could be used to improve navigation when using Google Maps. The result is a cute AR fox and huge arrows to point you in the right direction. 

    How often do you find yourself relying on Google Maps yet still managing to get lost? Maybe the blue dot arrow was pointing in the wrong direction or maybe you need a virtual character to help show you the way.

    This is Google’s latest idea for Maps. They’re working on improving the walking navigation section by adding augmented reality (AR). As usual, it works by using the camera on your smartphone to show you which direction to go. To do this, arrows pop up to direct you.

    “You instantly know where you are… No fussing with the phone. The street names, the directions, right there in front of you,” explained Google Vice President Aparna Chennapragada during Google’s I/O developers conference this week.

    Better yet is the idea of a guide – in Google’s demo, they showed a bouncy fox. However, it’s unclear whether this character will make it to the final update as it is still a work in progress. But, the audience was certainly in awe and Chennapragada’s demo received cheers and claps.

    It’s clear that having a visual smartphone overlay would make navigating a new city a lot easier and perhaps more enjoyable as the character would show you nearby bars and restaurants to visit.

    Chennapragada displays the AR functionality in the video below – the speech starts from 01:25:00.

    Moving from GPS to VPS

    Chennapragada explains that currently, GPS isn’t good enough for the arrows and AR fox to work accurately. So, Google has been working on VPS – or “visual positioning system”. This can estimate precisely your position and orientation.

    On screen, as well as showing the AR fox, the guiding arrows, and the camera display, there will also be a small semi-circle showing just a section of the map, ensuring you have a vague idea of what street you’re on.

    Of course, this technology wouldn’t work so well for driving. But, if you’re someone who regularly uses Google Maps while walking around and don’t mind looking like a tourist taking hundreds of photos, it could work well.

    Unfortunately for those with a poor sense of direction, Google has given no estimate for when this technology will be available. This is likely due to the need to seriously fine-tune VPS so it doesn’t go wrong as often as the GPS blue dot.

    For now, it’s an interesting, real-world use case for AR which doesn’t appear to be just a gimmick.

    Source: Business Insider

    Google Maps
    Google Maps

    License: The text of „Google Maps to Improve Walking Navigation with AR Fox and Giant Arrows“ by All3DP is licensed under a Creative Commons Attribution 4.0 International License.

    Subscribe to updates from All3DP

    You are subscribed to updates from All3DP

    Website: LINK

  • Export Collada Files from New PSVR Painting App

    Export Collada Files from New PSVR Painting App

    Reading Time: 3 minutes

    A new VR painting application has just released for PlayStation 4. Titled CoolPaintrVR, the app allows you to paint and sculpt in VR and export your creations to 3D modeling software and platforms.

    Besides the throng of stellar games and weirdness-generating virtual social spaces, the rise of home virtual reality (VR) technology has also allowed creativity to flourish in virtual painting and sculpting apps.

    Since its launch in 2016, Sony’s PlayStation VR system has understandably been dominated by games. But a new release may buck this trend. It’s called CoolPaintrVR, and PSVR wielding players can use it to create things like the Viking longship embedded below.

    With a controller in each hand translating to a digital palette and brush in the virtual world, the results can be spectacular, and even make the transition to the real world with 3D printing.

    Interestingly, for a program running on a machine created to play games, CoolPaintrVR boasts the welcome ability to export creations as the Collada file type. Compatible with a number of 3D modeling applications and platforms, including online model repository Sketchfab, this means there’s the possibility to 3D print what you create in PSVR.

    We envisage this workflow to be pretty simple: import suitable models as collada files to your preferred modeling software, fix the mesh and export to a 3D printable format.

    3D Printing from the PlayStation 4

    The CoolPaintrVR UI is said to be simple enough for complete beginners to get up and running. Advanced features including pinning reference images inside the VR space and symmetry tools give CoolPaintrVR more for the serious creative looking to invest the time creating detailed scenes.

    Since the app is for painting, the brush styles and application of them are not particularly conductive to 3D printing. Curving sheets of 2D texture inside a 3D space do not for a watertight model make. However, this does not mean it’s impossible.

    If you’re going to try your hand at 3D printing a design from CoolPaintrVR, a primary consideration should be watertight-ness. Something that looks like a complete 3D model on screen may in fact have edges that simply end in thin air, not connected to other edges to create a seamless model.

    Eliminating these surface-breaking edges closes the model and makes it one step closer to 3D printability. It’s probably best to completely avoid the artistic brushes and opt for stamping out the app’s pre-rendered solid objects for this.

    After this design-led step, we’d say running the model through a mesh repair tool is necessary. All kinds of hidden print-breaking errors are possible, so best to let some software take care of it for you. We have a handy list you can consult (though you’ll need to find a way to convert the file into an STL first).

    See CoolPaintrVR for yourself, over on the PlayStation Store.

    Source: Sketchfab

    License: The text of „Export Collada Files from New PSVR Painting App“ by All3DP is licensed under a Creative Commons Attribution 4.0 International License.

    Subscribe to updates from All3DP

    You are subscribed to updates from All3DP

    Website: LINK

  • 3D Printed Telegraph Replicates Ezra Cornell’s 1844 Original

    3D Printed Telegraph Replicates Ezra Cornell’s 1844 Original

    Reading Time: 3 minutes

    Made with 3D scanning and 3D printing, a replica of Ezra Cornell’s telegraph machine from 1844 goes on display at Cornell University Library.

    In the history of communications, American businessman and philanthropist Ezra Cornell played a significant role. In 1844, his personal telegraph machine received the world’s first telegraph message sent by Samuel Morse.

    Cornell went on to form Western Union in 1851 and co-found Cornell University in 1865; the latter institution is currently the custodian of this precious artifact.

    Moreover, a working replica of the telegraph, created in 2009 by a group of engineering students, has become an important historical item in its own right.

    That was made using Solid Freeform Fabrication (SFF), a family of manufacturing processes that create three-dimensional objects by depositing layers of material, to produce a working replica of Samuel Morse’s original telegraph receiver.

    Both telegraphs are considered too valuable and fragile to display at the new Martin Y. Tang Welcome Center at Cornell University Library. So staff did the next best thing and 3D printed a new model.

    cornell telegraph
    cornell telegraph

    Replica of Cornell’s Telegraph 3D Printed in 10 Days

    “Cornell was about being innovative when it was founded, and the 3D model shows how Cornell continues to be an innovator and a leader. It’s the perfect balance between old and new,” said University Archivist Evan Earle.

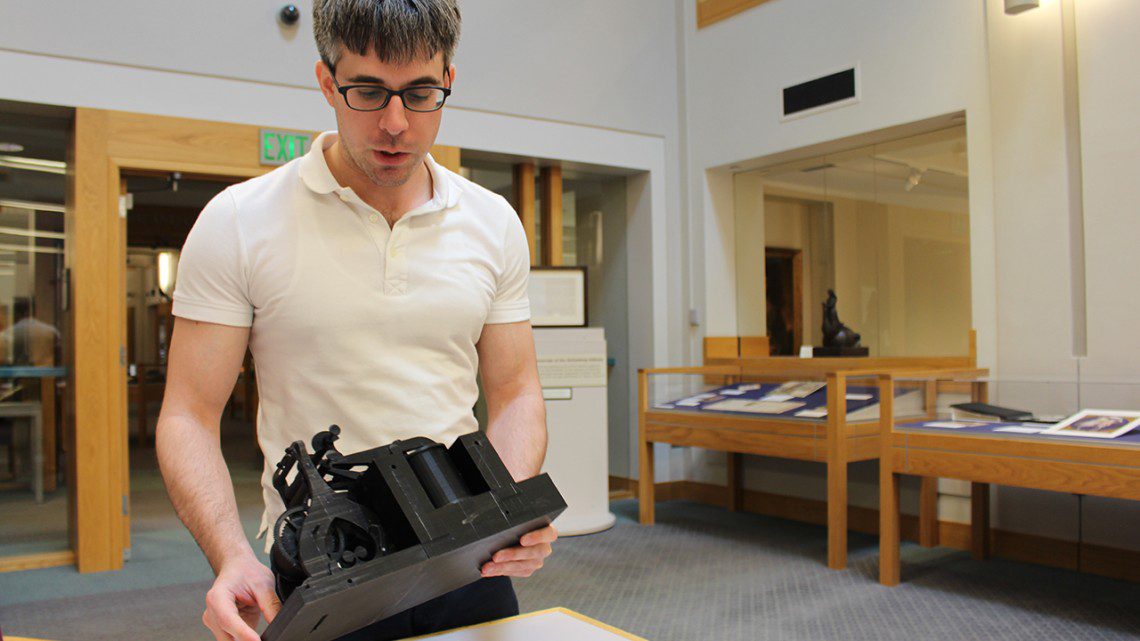
    Peter Corina, reference specialist and reproductions coordinator in the Division of Rare and Manuscript Collections, volunteered to create a new model of the telegraph for the welcome center using the library’s makerspace.

    The new reproduction of the telegraph took 10 straight days to print in mannUfactory, in Mann Library. James McKee, Mann’s makerspace coordinator, helped Corina develop a plan to print the telegraph in three separate parts.

    Once completed, the new version mirrored the 1844 telegraph down to each individual screw.

    “It’s to scale, as close as I could get it with hundreds of iPhone pictures and a ruler,” Corina said.

    And what were the contents of the world’s very first telegraph message, sent by Samuel Morse on May 24, 1844?

    “What hath God wrought,” Morse had written. Quite.

    cornell telegraph
    cornell telegraph
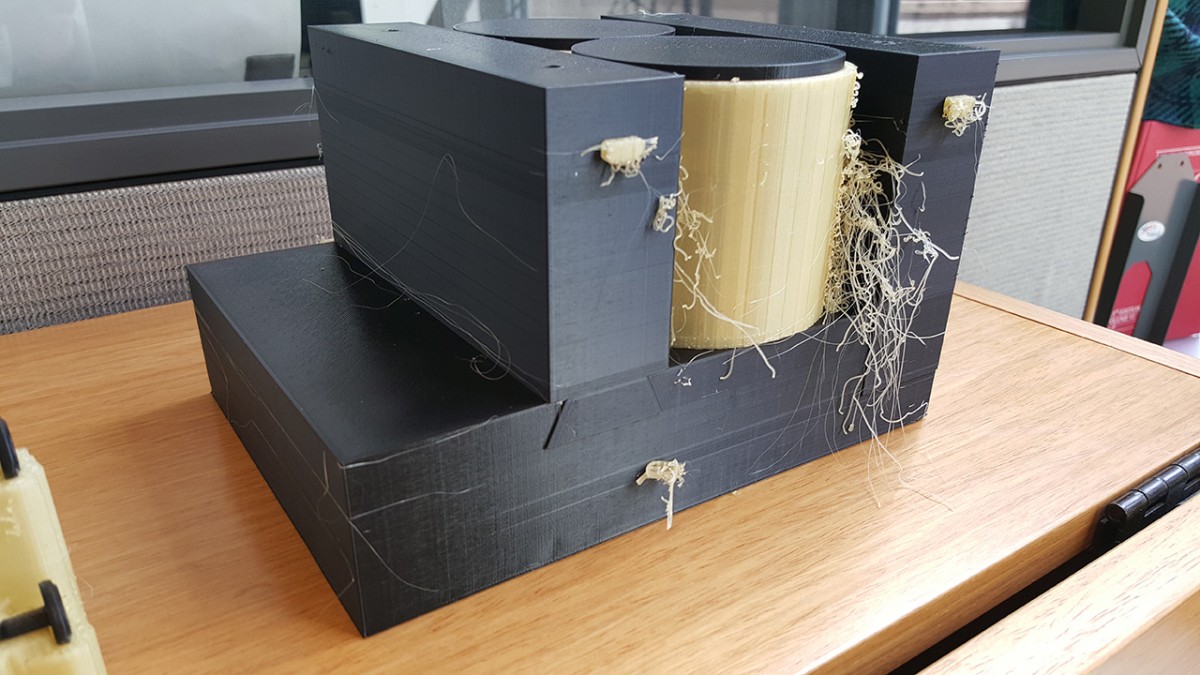
    Hot off the print bed, before the support material is removed.

    Source: Cornell University

    License: The text of „3D Printed Telegraph Replicates Ezra Cornell’s 1844 Original“ by All3DP is licensed under a Creative Commons Attribution 4.0 International License.

    Subscribe to updates from All3DP

    You are subscribed to updates from All3DP

    Website: LINK

  • This 3D Printed Skim Reaper Can Prevent Credit Card Fraud

    This 3D Printed Skim Reaper Can Prevent Credit Card Fraud

    Reading Time: 3 minutes

    Credit card skimming is a disease. Meet the cure. The New York City Police Department is testing a “skim reaper” to detect and prevent credit card fraud. It’s based on a 3D printed prototype by researchers from the University of Florida.

    Cyber-security researchers from the University of Florida are working with the New York City Police Department’s Financial Crimes Task Force on a device that can instantly detect the presence of a credit card skimmer.

    Field trials are well underway. If successful, law enforcement officials and retail merchants can better prevent a card’s data being stolen from a tampered ATM.

    The researchers have built five detectors for NYPD, based on a 3D printed prototype unit. Each one has been deployed to the five boroughs in New York City. Preliminary tests show the device is able to detect skimmers with high reliability.

    “Payment card skimming remains a popular crime, and attackers can easily get into the business using a few inexpensive parts purchased over the Internet,” said Patrick Traynor, who helped develop the skim reaper. Traynor is co-Director of the Florida Institute for Cybersecurity (FICS) Research at UF’s Herbert Wertheim College of Engineering.

    And according to Lt. Gregory Besson of the NYPD Financial Crimes Task Force, card skimmers are a rapidly growing problem.

    “In New York City, we saw a surge in ATM skimming in the past few years, as evidenced by the increase in devices recovered by our agency, the NYPD,” he says.

    “In 2015, we recovered 48 devices, and two years later that number had doubled to almost a hundred devices in 2017. Correspondingly, our arrests more than doubled for the same period, from 48 skimming-related arrests in 2015 to 134 skimming arrests in 2017.

    “The big takeaway is that we’re always seeking new innovative ways to tackle this growing crime type, and we welcome trying new tools that would aid us towards that goal.”

    Don’t Fear the Skim Reaper

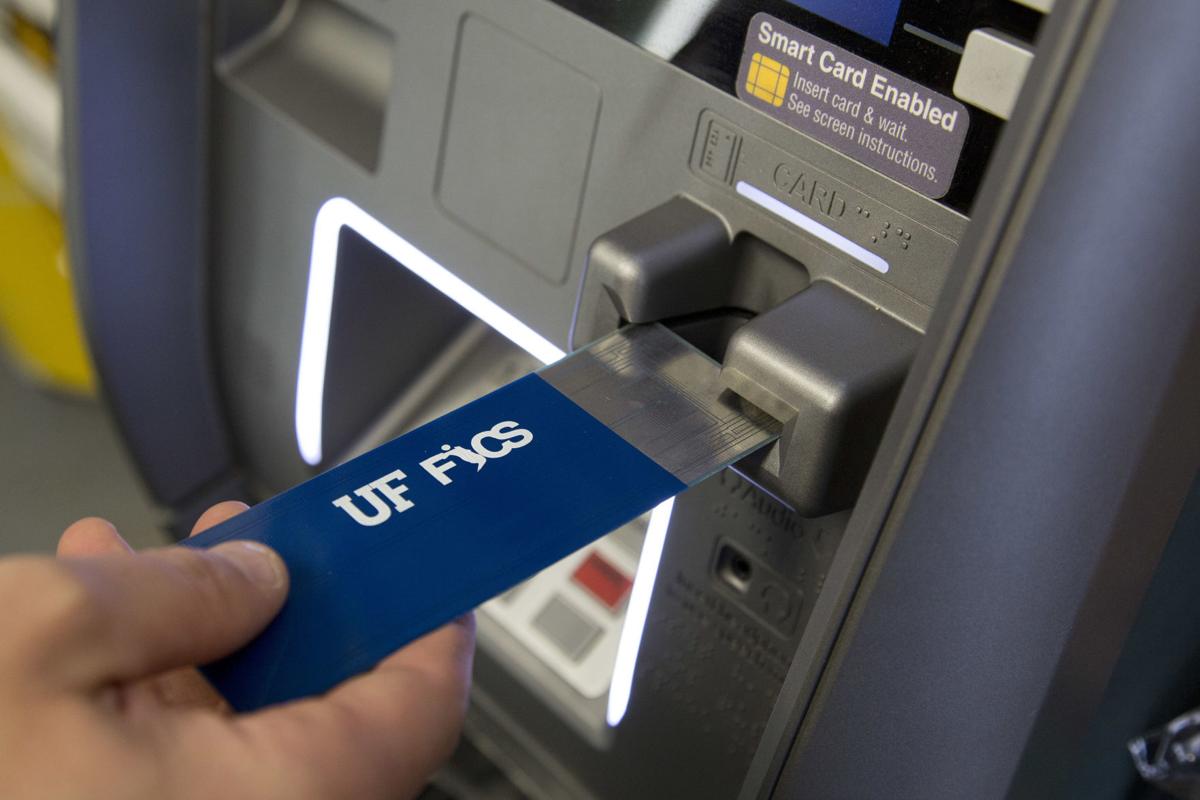
    So how does skim reaper prototype work? Simple. A plastic card the same size of a credit or debit card is inserted into the card reader being tested. The detector inspects the card slot, and alerts the user if the reader is unsafe.

    “We’ve had to manufacture these cards. We’ve been using 3D printers that we have here in the lab to built our boxes. The students have been soldering, they’ve been writing software,” Traynor explains.

    Currently, it costs about $50 to make each Skim Reaper, but Traynor’s team aims to bring that figure down. Commercial availability could happen in six to nine months, and it may be small enough to fit in your wallet.

    In a real world scenario, a consumer inserts the detector into the reader before using their own credit card. The detector would immediately notify the consumer if something was amiss.

    “While more-secure chip cards are becoming more common, their universal use, especially in ATMs and gas pumps, is likely years away,” Traynor says.

    “That means those old-fashioned swipe cards with the magnetic strips on the back will be around for the foreseeable future – along with their vulnerabilities.”

    skim reaper
    skim reaper

    Sources: Associated Press / University of Florida / WCJB

    License: The text of „This 3D Printed Skim Reaper Can Prevent Credit Card Fraud“ by All3DP is licensed under a Creative Commons Attribution 4.0 International License.

    Subscribe to updates from All3DP

    You are subscribed to updates from All3DP

    Website: LINK

  • Made In Space Wins NASA Contract for Next-Gen ‘Vulcan’ 3D Printer

    Made In Space Wins NASA Contract for Next-Gen ‘Vulcan’ 3D Printer

    Reading Time: 2 minutes

    California-based company which built the two 3D printers aboard the International Space Station (ISS) secures a NASA contract to continue developing its next-generation Vulcan manufacturing system.

    As the name implies, Made in Space is a company that specializes in additive manufacturing in space. And they’re pretty established, too. The start-up already has two 3D printers aboard the International Space Station (ISS) for extensive testing.

    So what will be their next feat on the final frontier? The company has won a coveted NASA contract to develop a next generation system called Vulcan.

    Vulcan is a major step up from the two machines currently on board ISS; those can only print in plastic polymers. The new system can fabricate items in the space environment using a broader variety of “feedstock” materials, including metal.

    In fact, Vulcan will be able to use more than 30 materials. These include titanium, stainless steel, aluminum, and a variety of plastic composites, according to Made In Space representatives.

    The upgradeable machine is a hybrid of both 3D printing and standard “subtractive” techniques like CNC milling to machine the printed parts down to their final shapes.

    “The Vulcan hybrid manufacturing system allows for flexible augmentation and creation of metallic components on demand with high precision,” says Made In Space chief engineer Mike Snyder.

    “Vulcan is an efficient, safe capability that utilizes the minimum amount of resources during manufacturing processes.”

    Space Travel Would be Illogical Without Next Gen Vulcan

    Once Vulcan is ready to go, Made In Space plans to demonstrate the technology on the ISS. Once on-board, Vulcan can prove it’s potential usefulness for a variety of exploration missions.

    The benefit of having a 3D printer in space, for example, is reducing the requirement for extensive mission resupplies. Tools can be manufactured as and when they are required, which will save on costs and energy.

    “Vulcan can be important to logistical reduction necessary for long-term exploration,” says Snyder.

    “The hybrid manufacturing system is a major step forward for efficient space operations, providing the ability to build essential components and assemblies in the space environment, where flying spare parts from Earth is otherwise not viable.”

    Made in Space is also working on similar larger-scale projects, like Archinaut, which should be able to build new spacecraft parts outside the confines of a space module using a robotic arm and 3D printer.

    vulcan archinaut
    vulcan archinaut

    Source: Space.com

    License: The text of „Made In Space Wins NASA Contract for Next-Gen ‘Vulcan’ 3D Printer“ by All3DP is licensed under a Creative Commons Attribution 4.0 International License.

    Subscribe to updates from All3DP

    You are subscribed to updates from All3DP

    Website: LINK

  • Creepy Shaved Mario Picture Is Giving People Nightmares

    Creepy Shaved Mario Picture Is Giving People Nightmares

    Reading Time: 3 minutes

    Mario is arguably one of the most iconic video game characters of all time, certainly among the retro games of previous generations.

    The character is so instantly recognisable in his red dungarees, sporting his massive moustache, people only need those two items to dress up effectively as the plumber.

    But what if you take away his trademark facial hair?

    Well, unfortunately, you no longer have to wonder that very question, because the internet.

    The character has been subject to an awful lot of change in recent years, with Nintendo formally announcing the character is no longer a plumber.

    It kind of makes sense though – how has the guy got any time to sort out anyone’s pipes when he’s busy hopping from planet to planet or racing around in go-karts?

    But despite the changes in Mario’s history, we’ve never really had to deal with a change in his character design, which has always stayed true to its roots.

    So check this creepy image out:

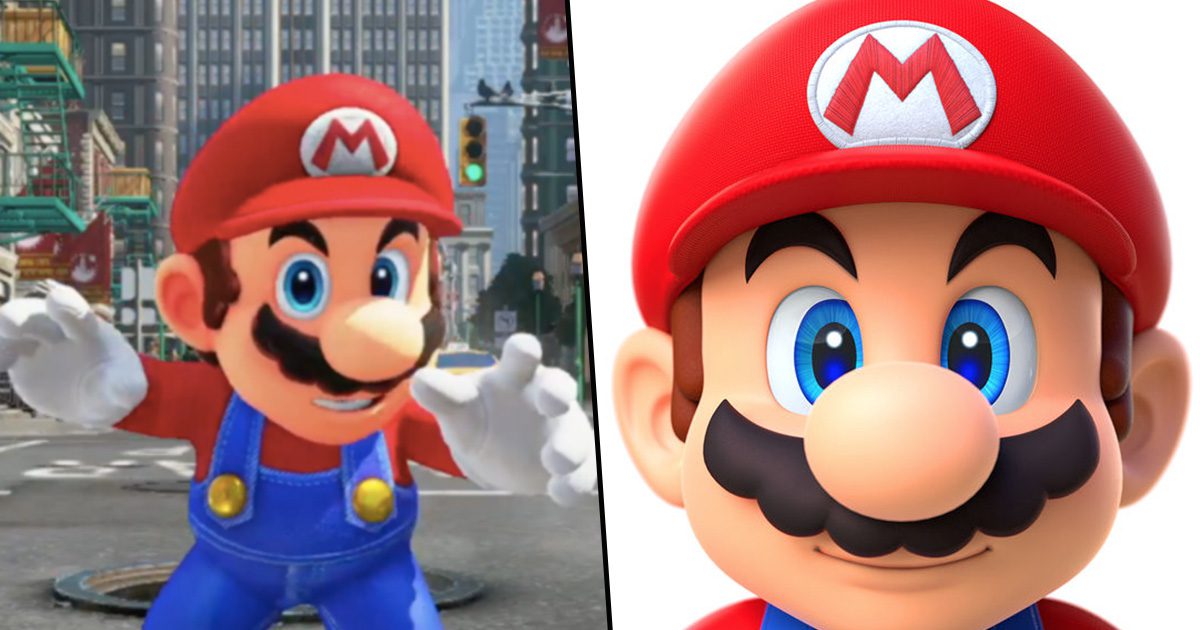
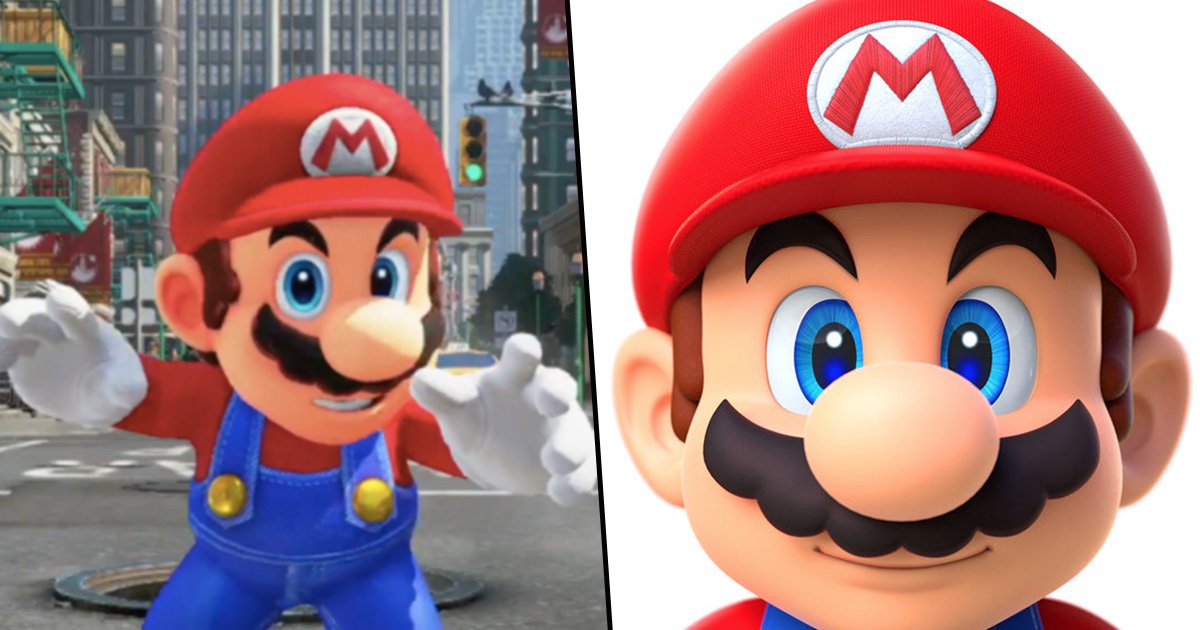
    It’s not hard to see why, when you look at that fan-made image of Mario, completely shaved, it’s absolutely nightmare inducing.

    If you can stand to look at this image for more than three seconds, then you’ll notice it’s not just the moustache which is missing, but his eyebrows and head hair.

    Thankfully, this is not an official pic of Mario so you won’t have to look at it any longer than you have to.

    If you want to get more of Mario in your life, but you don’t have a Nintendo Switch (why not?!), then luckily he’s due to arrive on smartphones pretty soon.

    For those of us whose Wii consoles broke in 2013, playing Mario Kart has been nothing but a dream.

    Nintendo has answered our prayers and gifted us their best game – and on our smartphones.

    Rainbow Road will no longer haunt your mind, but you can tackle the painful turns and fall off the edge into nothingness all while riding the tube or in the office toilets.

    Nintendo made the announcement on Twitter, saying:

    The checkered flag has been raised and the finish line is near. A new mobile application is now in development:

    Mario Kart Tour! #MarioKartTour Releasing in the fiscal year ending in March 2019.

    Nintendo has previously rejected the notion of bringing their biggest franchises like Mario Kart and Donkey Kong to the world of smartphones.

    However with everyone relying on their smartphones more than ever, Nintendo made a goal last year to release five mobile titles.

    Only Animal Crossing: Pocket Camp, Fire Emblem Heroes, Super Mario Run and the defunct Miitomo were released, meaning they missed their target with just four.

    This hasn’t stopped them aiming high with the Mario Kart game as well as a rumoured Legend of Zelda title in the pipeline.

    It’s not clear which aspects of the classic car racing game will make it onto the phone version.

    I sincerely hope Maple Treeway appears on the gaming app. I could happily give up Coconut Mall in its place.

    Just please, please don’t shave him.

    If you have a story you want to tell send it to UNILAD via [email protected]

  • Star Trek: Bridge Crew – In der Erweiterung stecken neben der Enterprise-D auch Romulaner, Borg und vieles mehr

    Star Trek: Bridge Crew – In der Erweiterung stecken neben der Enterprise-D auch Romulaner, Borg und vieles mehr

    Reading Time: 6 minutes

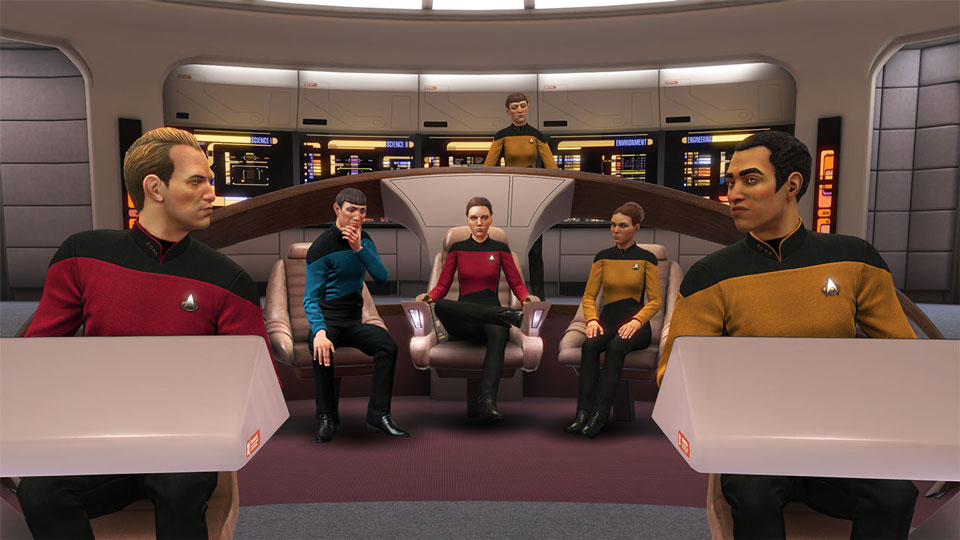
    Star Trek: Bridge Crew The Next Generation erscheint am 22. Mai für die PlayStation VR und PS4 sowie am 21. Juli für die HTC Vive, Oculus Rift und Windows Mixed Reality. Im Rahmen der The Next Generation – Erweiterung werden Spieler das Kommando über die symbolträchtige U.S.S. Enterprise NCC-1701-D (siehe Screenshot) übernehmen. Darüber hinaus werden sie sich jedoch auch mit einer neuen Position auf der Brücke vertraut machen dürfen, die sich Operations (OPS) nennt und sich auf das Crew Management bezieht. Wie immer werden Kommunikation und Koordination entscheidend sein, um eine Mission erfolgreich abschließen zu können. Obwohl sich alles auch alleine erledigen lässt,— sowohl mit als auch ohne VR— handelt es sich auch bei der The Next Generation Erweiterung wieder um einen Cross-Plattform Multiplayer für alle Spieleplattformen (PS4, Xbox One und PC).

    [2018-05-09] Star Trek: Bridge Crew – Enterprise-D, Romulans, Borg, and More Arrive in New Expansion - THUMBNAIL

    Außerdem wird The Next Generation auch wahrlich berüchtigte Gegenspieler einführen. Darunter einerseits die hinterhältigen Romulaner aber auch die fast schon übermächtigen Borg, sowie zwei neue Missionsarten — Patrouille und Widerstand. In Patrouille werden die Spieler die Galaxie frei erkunden können und dabei immer wieder per Zufall auf Gegner treffen oder auf Notrufe reagieren müssen. Im Widerstand-Modus wird das Gameplay sogar noch tiefgreifender, da ihr an der Seite eurer Crew von einem scheinbar unaufhaltsamen Borg-Kubus verfolgt werdet und drei Prototypen von Schiffsmodulen einsammeln müsst, um überhaupt eine Chance gegen diese Bedrohung haben zu können.

    Das Ubisoft News Team hatte kürzlich die Chance sich hinter das Steuer der Enterprise zu klemmen und einen (erfolglosen) Versuch einer Widerstand-Mission zu starten, um den Borg-Kubus zu besiegen. Da jedes Mitglied unseres Teams dabei unterschiedliche Erfahrungen gemacht hat (u.a. auch in der neuen OPS-Position) führen wir diese hier gesondert auf.

    Youssef Maguid: Taktischer Offizier

    Als Newbie in Star Trek: Bridge Crew war ich anfangs etwas überfordert, aber bereits nach einigen, wenigen Minuten innerhalb einer Patrouillen-Mission habe ich mich zurechtgefunden. Als zuständige Person für die Waffen- und Schildsysteme, musste ich schnell feststellen, dass weder unsere Phaser noch die Torpedos wirklich etwas gegen die Borg ausrichten konnten. Um während eines Gefechts überhaupt eine Chance zu haben, mussten wir daher in ein anderes System reisen, dort die Prototypen eines Schiffsmoduls sicherstellen und dann fliehen bevor wir von den Borg entdeckt wurden.

    Aber auch wenn unsere Waffen gegen das gigantische Schiff absolut ineffektiv waren, bedeutete das noch lange nicht, dass es nicht genug andere Objekte gegeben hätte, die mir ins Visier kamen. Im neuen System angekommen, stellten wir beispielsweise fest, dass unsere Verbündeten von einigen feindlichen Schiffen umringt waren und diese erst bekämpft werden mussten, um den Prototyp sicherstellen zu können. Nachdem wir uns der abtrünnigen Schiffe mittels einer Kombination aus Phasern und Torpedos entledigt hatten, wobei Letztere nun sowohl aus Bug als auch Heck abgeschossen werden und mit Annäherungszündern versehen werden können – war es dann meine Aufgabe, die Schilde zu senken und das Schiffsmodul an Bord zu bringen.

    An diesem Punkt stellte ich dann endgültig fest, wie wichtig es ist effizient und schnell zu arbeiten, Denn wenn man zu viel Zeit mit einem System verbringt, dann bleibt nicht mehr genug Zeit für ein anderes. Im schlimmsten Fall bedeutet das, dass man von den Borg entdeckt wird und diese das Feuer eröffnen, während die Schilde unten sind. So nervig es auch war den Countdown unseres Captains zu hören bis die Borg uns erreichten, während ich darauf wartete, dass die Schilde hochfahren, so waren es doch einige der spannendsten und erinnerungswürdigsten Momente während der gesamten Runde.

    [youtube https://www.youtube.com/watch?v=videoseries?list=PLgwdROUJzf2F3hW5nsFUReOvwCQiFow9r&w=1140&h=641]

    Mikel Reparaz: OPS und Steuermann

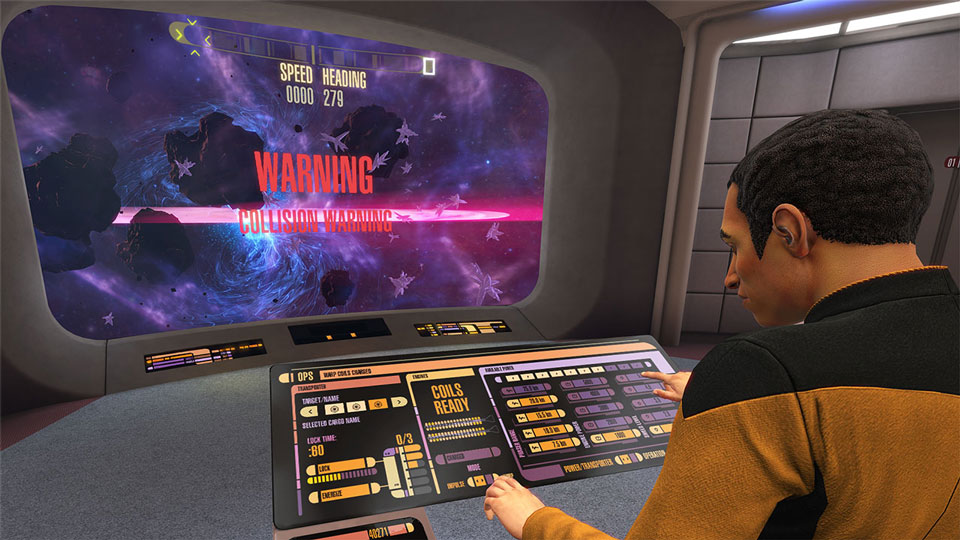
    OPS verbindet den Maschinenraum mit einer neuen Personal Management Funktion und das ist definitiv nichts, was man während einer hektischen Kampfsituation üben sollte. Auf der einen Seite ist es eure Aufgabe, die Warpgondeln aufzuladen die Energieverteilung der Enterprise Antriebssysteme, sowie Phaserreichweite und Schild-Level zu optimieren – etwas das jedem bisherigen Spieler bekannt vorkommen wird. Auf der anderen Seite müsst ihr jedoch auch eine kleine Crew auf 10 Stationen verteilen: Antriebskontrolle, Hauptmaschinenraum, Torpedorampen, Schildgeneratoren, Transporterraum, Astrophysik, Computerkern, Phaserkontrolle, Scanner (Sensoren) und Krankenstation. Letzterer könnt ihr übrigens auch Crewmitglieder zuweisen, die während ihres Einsatzes verletzt wurden und damit verhindern, dass sie sterben. Sollten sie jedoch wirklich sterben, dann bleibt das so für den Rest der Mission.

    Durch die Zuweisung von Personal, können Funktionen jeder Station besondere Vorteile erhalten. Weist man beispielsweise einem taktischen Offizier die Phaser-Kontrolle zu, werden die Phaser wesentlich präziser, wohingegen ein Wissenschaftsoffizier an den Scannern die Erkennung getarnter Schiffe verbessern kann. Zugewiesene Crewmitglieder können außerdem während eines Kampfes beschädigte Systeme reparieren, obwohl das natürlich mit einer hohen Gefahr für deren Leben versehen ist. Es hilft zudem sich daran zu erinnern, dass alle Stationen und Crewmitglieder einem eigenen Farbcode zugeordnet sind. Setzt man also ein Mitglied des Kommandostabes (Rot) auf eine Station die ebenfalls als Rot gekennzeichnet ist, dann wird sich das wesentlich positiver auswirken, als wenn man besagtes Crewmitglied an eine blaue (Medizin / Wissenschaft) oder goldene Station (OPS / Sicherheit / Maschinenraum) setzen würde.

    Dank der neuen Ergänzungen, wird die OPS noch fordernder und dynamischer als die Rolle des Chefingenieurs. Der Wechsel zwischen Chefingenieur und Personal-Planung halt einen ständig auf Trab – weshalb man unbedingt diese Rolle voher ein wenig üben sollte, bevor man „ins kalte Wasser springt“.

    Die Navigation unterscheidet sich kaum zu der Steuerung, die man bereits aus Star Trek: Bridge Crew kennt. Die einzige Ausnahme ist, dass die Steuerung nun das in Star Trek: The Next Generation etablierte LCARS-System verwendet. Mir hat zwar die “physikalische” Antriebskontrolle der Aegis ein wenig gefehlt (die wurde nämlich durch den LCARS-typischen Touchscreen Slider ersetzt) aber andererseits war die Steuerung der Enterprise genauso leicht zu handhaben, wie die jedes anderen Raumschiffs.

    Operations_960x540

    Giancarlo Varanini: OPS und Captain

    Mikel, wage es nicht so über das LCARS zu sprechen! Ich habe absolut jede einzige Minute an Bord der Enterprise-D genossen und die Authentizität der funktionierenden LCARS-Schaltflächen (bei dessen Entwicklung das Team mit dem Designer des Originals zusammenarbeiten konnte) ist einer der Hauptgründe dafür, dass man so tief in das Spiel eintauchen kann. Ich habe mich gleich der OPS gewidmet und wie Mikel schon sagte, kann das recht schnell ziemlich intensiv werden. Aber gleich während unserer ersten Patrouillen-Mission, hatte ich den Dreh raus und konnte die Crew entsprechend zuweisen, sowie generell das Schiff am Laufen halten.

    Die Dinge wurden allerdings etwas heftiger, als wir zum ersten Mal auf die Borg trafen. Die Energieverteilung zwischen den diversen Systemen (Schilde, Waffen und Antriebe) zusammen mit der strategischen Zuweisung der Crew an entsprechende Stationen, wurde zu einer wahrlich monumentalen Aufgabe während einer Gefechtssituation. Mein erster Gedanke war, die Schilde zu verstärken. Also beschloss ich mehr Energie zu ihnen umzuleiten und anschließend die komplette Crew zu der entsprechenden Station zu schicken. Normalerweise würde das den Schilden den Vorteil “Schildmodulation” spendieren, aber leider war ich nicht schnell genug, denn hierbei muss immer bedacht werden, dass die Crew eine ganze Weile braucht, bis sie in Echtzeit durch das Schiff gelaufen ist und ihre Stationen erreicht hat.

    TNG_Crew_Interaction_960x540

    Einmal gelang es uns, den Borg zu entkommen und den ersten Bestandteil des Prototyps zu bergen, mittels dem man sich den Borg stellen kann, aber beim zweiten Versuch hatten wir nicht mehr so viel Glück.

    Während unseres zweiten Versuchs lief trotzdem schon vieles besser. Ich konnte schneller die Energie zwischen den einzelnen Systemen umleiten und so die Phaser mit etwas mehr Saft versorgen, um deren Reichweite zu erhöhen oder zum Antrieb wechseln und noch mehr Geschwindigkeit rausholen. Ich achtete auf die relative Position der Crewmitglieder zu deren Stationen, um sicherzustellen, dass deren Wege möglichst kurz waren, für den Fall, dass ich sie woanders brauche. Je effizienter wie wurden, umso schneller gelang es uns, die Prototypen zusammenzustellen und den Borg mit Warpgeschwindigkeit zu entkommen. Doch es war noch immer nicht genug. Ein Teil der Mission erforderte einen Scan von mehreren Schiffen und als die Borg auftauchten, hatten wir sie noch nicht alle gescannt, während die Zeit langsam ablief. Kurz gesagt: Unsere Crew konnte dem Druck nicht standhalten und wir wurden zerstört. Wir sind stolz darauf, so lange durchgehalten zu haben und nur 17 Minuten vom Ende entfernt gewesen zu sein. Widerstand war zwecklos.

    Mehr über Star Trek: Bridge Crew, findet ihr in unseren bisherigen Artikeln.

    Website: LINK
  • Now students can create their own VR toursNow students can create their own VR toursDaydream Software Engineer

    Now students can create their own VR toursNow students can create their own VR toursDaydream Software Engineer

    Reading Time: 2 minutes

    Editor’s note: For Teacher Appreciation Week, we’re highlighting a few ways Google is supporting teachers—including Tour Creator, which we launched today to help schools create their own VR tours. Follow along on Twitter throughout the week to see more on how we’re celebrating Teacher Appreciation Week.

    Since 2015, Google Expeditions has brought more than 3 million students to places like the Burj Khalifa, Antarctica, and Machu Picchu with virtual reality (VR) and augmented reality (AR). Both teachers and students have told us that they’d love to have a way to also share their own experiences in VR. As Jen Zurawski, an educator with Wisconsin’s West De Pere School District, put it: “With Expeditions, our students had access to a wide range of tours outside our geographical area, but we wanted to create tours here in our own community.“  

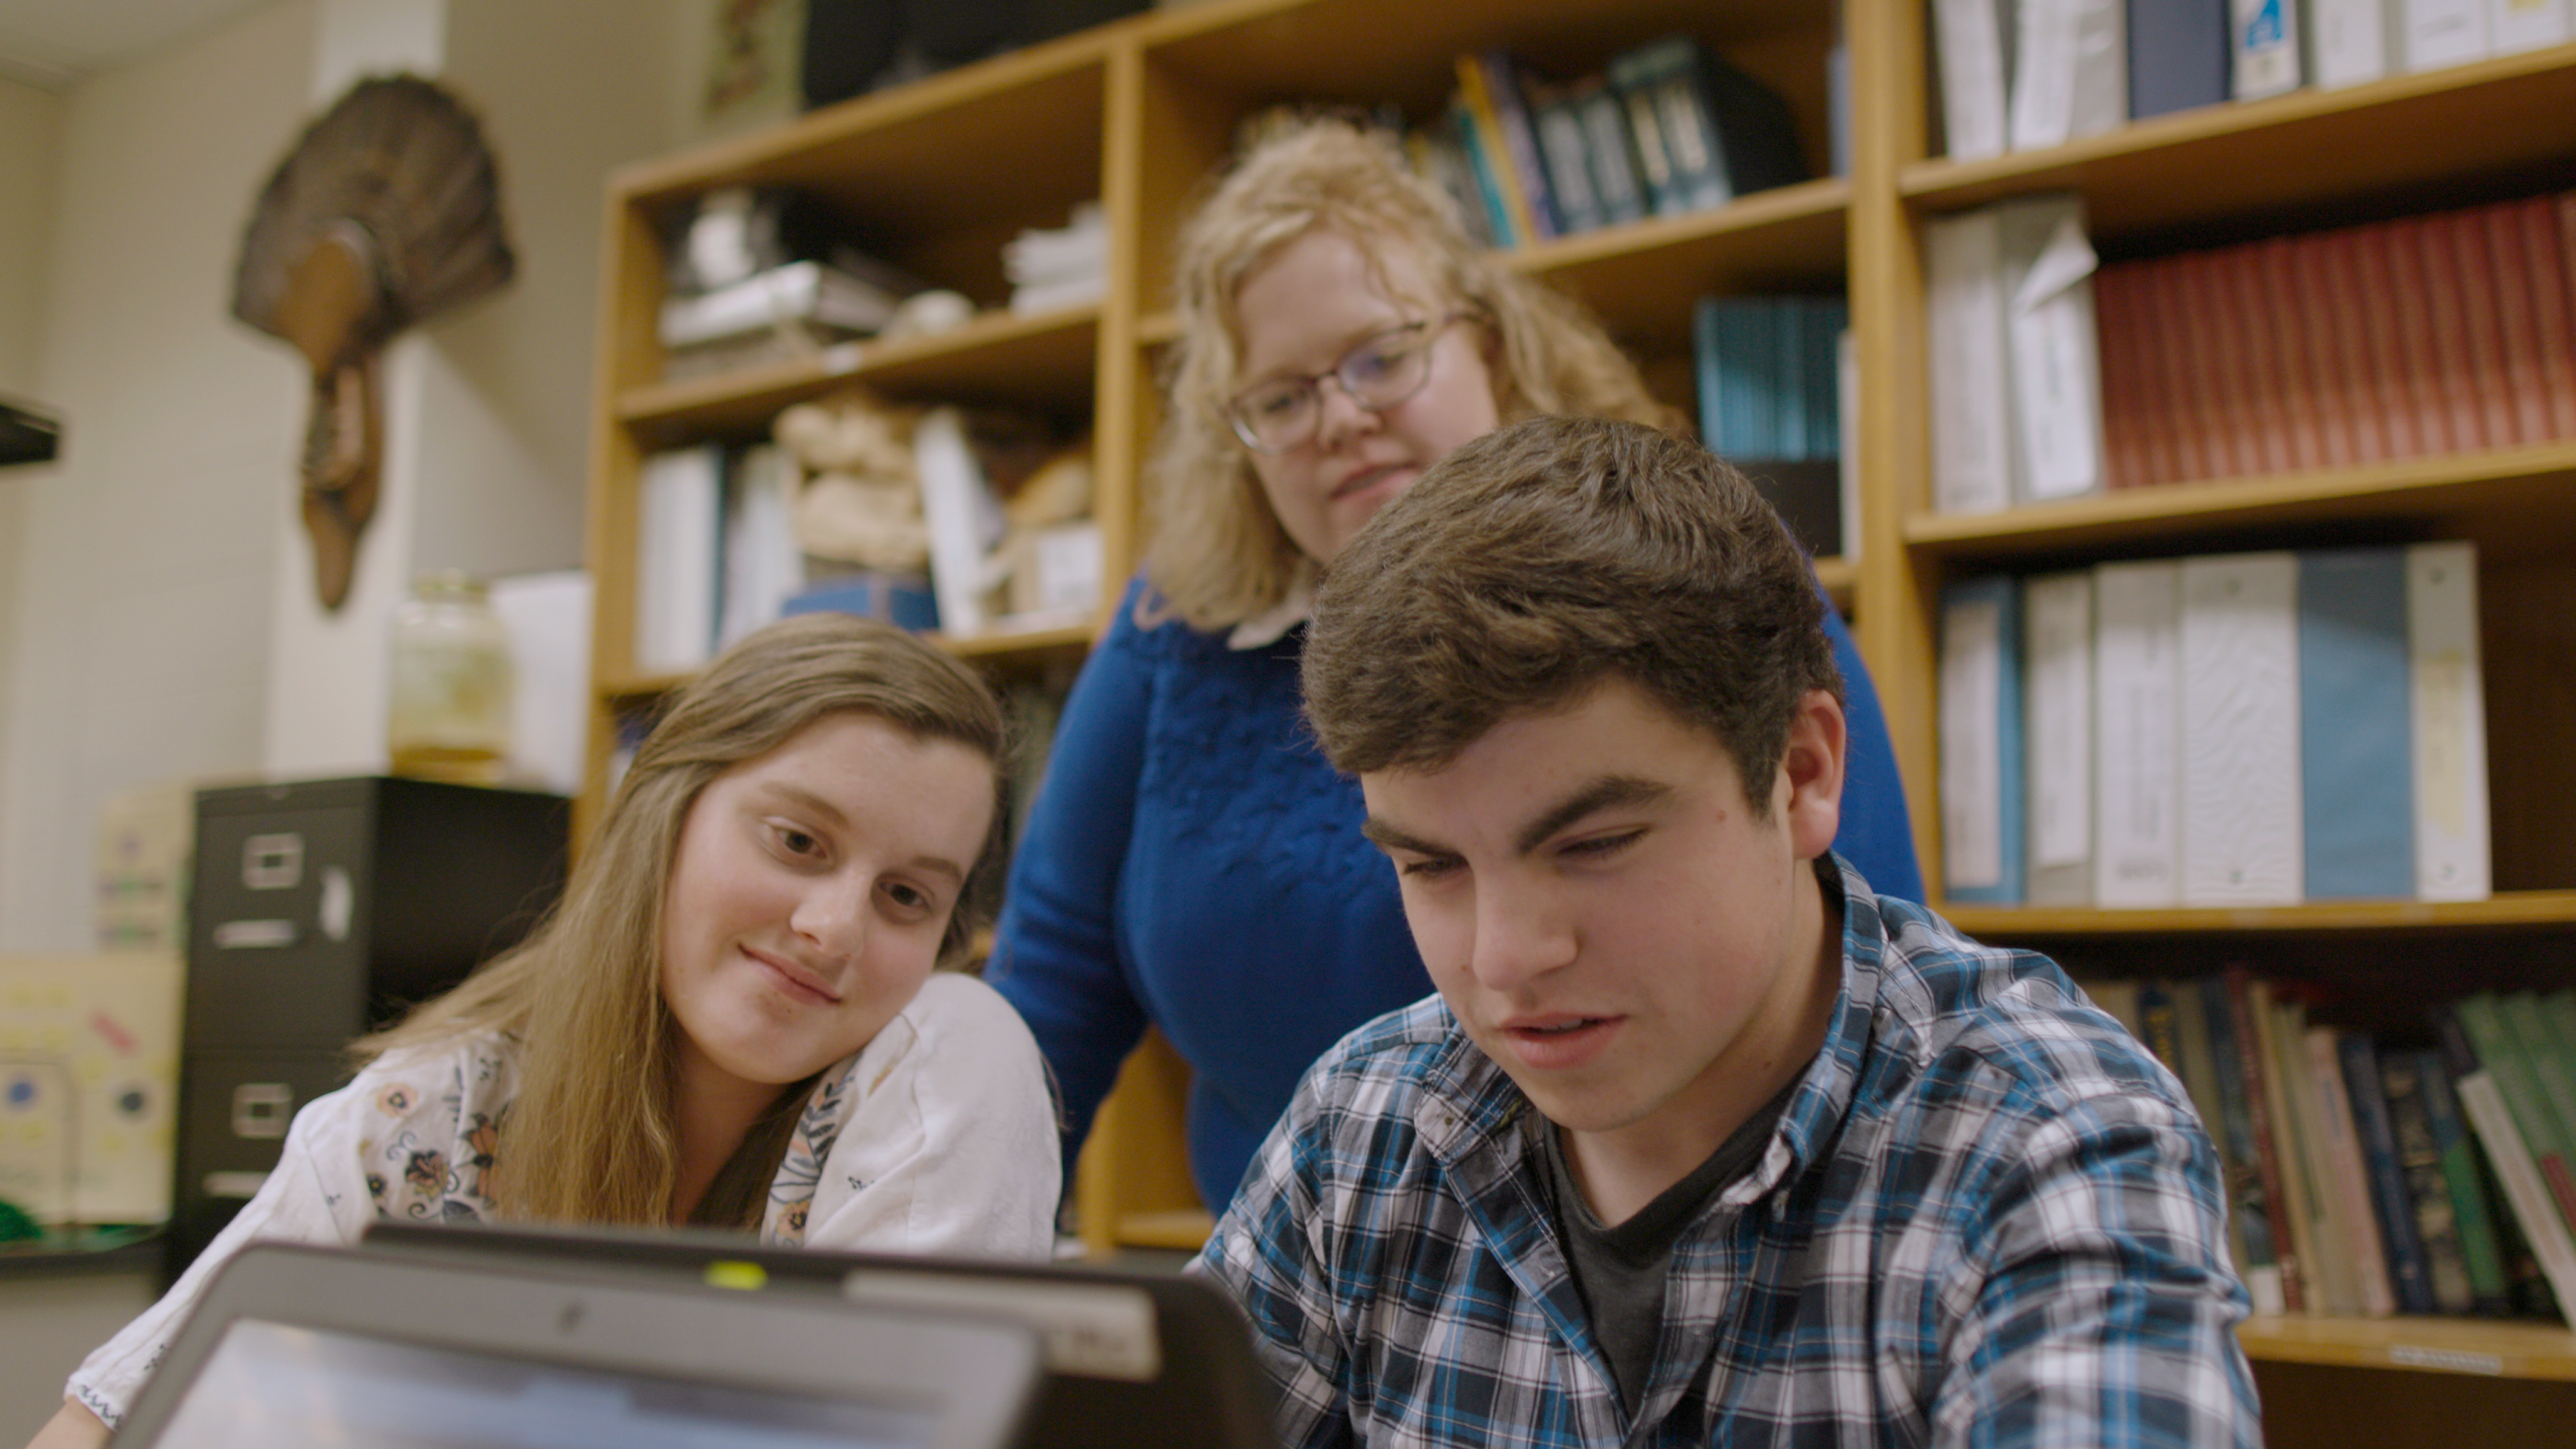
    That’s why we’re introducing Tour Creator, which enables students, teachers, and anyone with a story to tell, to make a VR tour using imagery from Google Street View or their own 360 photos. The tool is designed to let you produce professional-level VR content without a steep learning curve. “The technology gets out of the way and enables students to focus on crafting fantastic visual stories,” explains Charlie Reisinger, a school Technology Director in Pennsylvania.

    Once you’ve created your tour, you can publish it to Poly, Google’s library of 3D content. From Poly, it’s  easy to view. All you need to do is open the link in your browser or view in Google Cardboard. You can also embed it on your school’s website for more people to enjoy. Plus, later this year, we’ll add the ability to import these tours into the Expeditions application.

    Website: LINK

  • Deadpool 2 | Behind The Scenes of Ashes with Céline Dion

    Deadpool 2 | Behind The Scenes of Ashes with Céline Dion

    Reading Time: < 1 minute


    Deadpool 2 | Behind The Scenes of Ashes with Céline Dion | 20th Century FOX


  • Experience augmented reality together with new updates to ARCoreExperience augmented reality together with new updates to ARCoreDirector of Engineering, AR

    Experience augmented reality together with new updates to ARCoreExperience augmented reality together with new updates to ARCoreDirector of Engineering, AR

    Reading Time: < 1 minute

    Three months ago, we launched ARCore, Google’s platform for building augmented reality (AR) experiences. There are already hundreds of apps on the Google Play Store that are built on ARCore and help you see the world in a whole new way. For example, with Human Anatomy you can visualize and learn about the intricacies of the nervous system in 3D. Magic Plan lets you create a floor plan for your next remodel just by walking around the house. And Jenga AR lets you stack blocks on your dining room table with no cleanup needed after your tower collapses.

    Website: LINK

  • Google Lens: real-time answers to questions about the world around youGoogle Lens: real-time answers to questions about the world around youDirector, Google Lens

    Google Lens: real-time answers to questions about the world around youGoogle Lens: real-time answers to questions about the world around youDirector, Google Lens

    Reading Time: 2 minutes

    There’s so much information available online, but many of the questions we have are about the world right in front of us. That’s why we started working on Google Lens, to put the answers right where the questions are, and let you do more with what you see.

    Last year, we introduced Lens in Google Photos and the Assistant. People are already using it to answer all kinds of questions—especially when they’re difficult to describe in a search box, like “what type of dog is that?” or “what’s that building called?”

    Today at Google I/O, we announced that Lens will now be available directly in the camera app on supported devices from LGE, Motorola, Xiaomi, Sony Mobile, HMD/Nokia, Transsion, TCL, OnePlus, BQ, Asus, and of course the Google Pixel. We also announced three updates that enable Lens to answer more questions, about more things, more quickly:

    First, smart text selection connects the words you see with the answers and actions you need. You can copy and paste text from the real world—like recipes, gift card codes, or Wi-Fi passwords—to your phone. Lens helps you make sense of a page of words by showing you relevant information and photos. Say you’re at a restaurant and see the name of a dish you don’t recognize—Lens will show you a picture to give you a better idea.  This requires not just recognizing shapes of letters, but also the meaning and context behind the words. This is where all our years of language understanding in Search help.

    Website: LINK

  • 3D Printer Party Breaks Guinness World Record, 3D Prints 4.8 Meters Sword

    3D Printer Party Breaks Guinness World Record, 3D Prints 4.8 Meters Sword

    Reading Time: 3 minutes

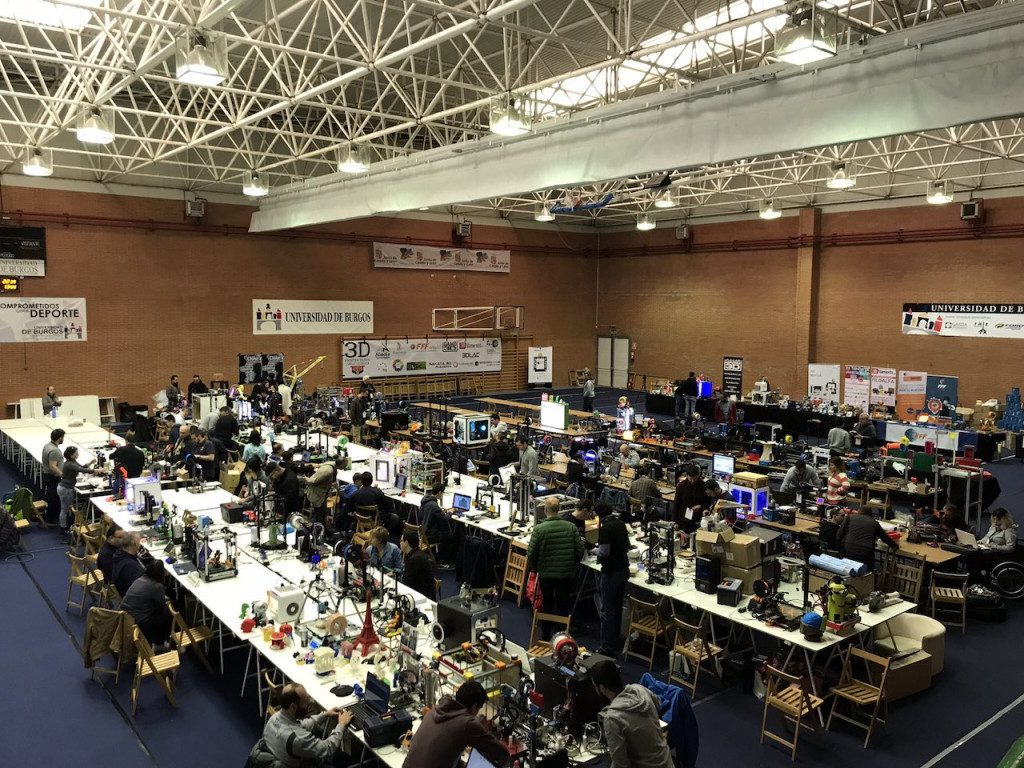
    Last weekend, the 3D Printing Party in Burgos, Spain, broke the record for the most 3D printers printing simultaneously with their owners. However, that may not be the only record broken at the annual event.

    At the University of Burgos in Spain last weekend, a 3D Printing Party took over from May 4th to 6th. During this time, the “biggest event for 3D printing in Spain” broke the world record for amateur 3D printers all working at the same time.

    Impressively, the fourth year of the 3D Printing Party saw 161 machines printing simultaneously, controlled by their 210 owners. The party stole this title from the previous holder, the American Airwolf3D company who had 159.

    As well as this record, MakerGal, a 3D printer design company in Galicia, believe they may have broken the world record for the longest 3D printed sword. It took the team 48 hours to create the 4.8 meters sword. They hope to take the record from previous holder, XRobots UK.

    As well as being a great place for breaking records, the party also displays the capabilities and latest developments in the industry to all those attending. Better yet, it’s also a great way for fans of 3D printing all across Spain to get together.

    Four Years of Bringing Together 3DP Makers and Fans

    This year’s party is the first time it is located in Burgos. For the first few 3D Printing Parties, the location was León, Spain and saw 15,000 visits in three years.

    Rodrigo Morales, one of the organizers, explains that the party “was born from the Clone Wars community – which tries to document everything necessary to build your own 3D printer – with the aim of getting to know each other and sharing knowledge and experiences.”

    The website explains further, “Clone Wars is a group within the RepRap community… We also collect information such as location of local businesses, members of the group that have a printer near you… data in general that can help you with your project.” Join the community, here.

    The reason for the name 3D Printing Party 24 is that it’s held in a 24-hour non-stop format. During this time, attendees are encouraged to present their best works with the chance of winning the II National Prize of 3D Printing.

    It is organized by the Abadía Tecnológica company as well as the National Association for Education and the Promotion of Technology (ANEFT). However, to make this possible, they rely on the collaboration of the City Council and the University of Burgos as well as sponsorship from companies such as; Telefónica Foundation, FFF World, SEUR, 3DLac and the company BQ.

    Source: 3D Printer Party Press Releases


    Image by @innovaland3d

    License: The text of „3D Printer Party Breaks Guinness World Record, 3D Prints 4.8 Meters Sword“ by All3DP is licensed under a Creative Commons Attribution 4.0 International License.

    Subscribe to updates from All3DP

    You are subscribed to updates from All3DP

    Website: LINK

  • 3D Printed Intravaginal Ring Helps to Avoid Unwanted Pregancy and HIV Infection

    3D Printed Intravaginal Ring Helps to Avoid Unwanted Pregancy and HIV Infection

    Reading Time: 6 minutes

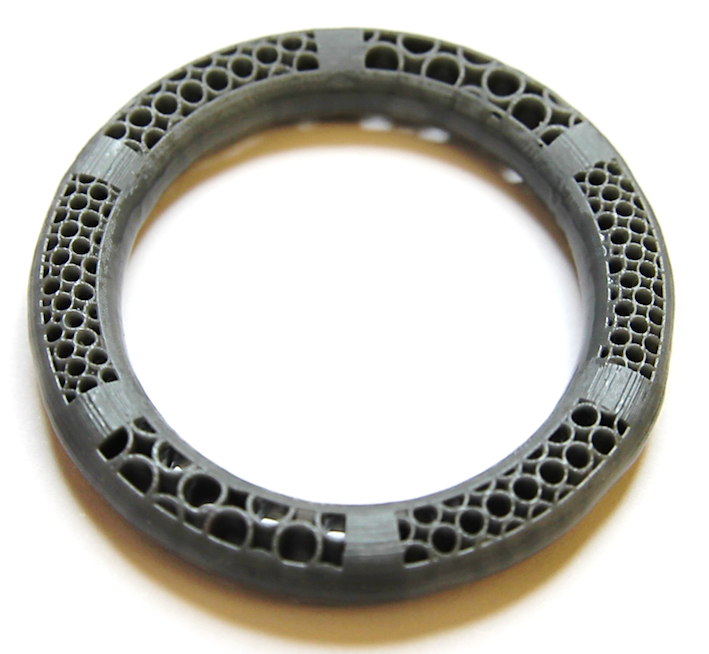
    Rahima Benhabbour is a woman on an amazing mission. Not only is she a professor at the Eshelman School of Pharmacy University department in Chapel Hill, North Carolina she’s also founder of AnnelleO, a 3D printed intravaginal ring.

    Benhabbour’s invention could have a major impact in helping women with a multitude of health issues from trying to get pregnant or avoiding pregnancy to the prevention of HIV and other STIs.

    AnnelleO would also be impossible to create without 3D printing. All3DP spoke to Benhabbour to find out more about how exactly she’s creating the rings and the inspiration behind her work:

    All3DP: What is AnelleO?

    Rahima Benhabbour: AnelleO is a 3D printed intravaginal ring and a platform technology for women’s health indications. To give a bit of background on the name, AnelleO means ring in Italian and the way we market it is, An and a dot then the word “elle” which is her in French then the O becomes the 3D printed ring, so “a ring for her”(An.elle.O).

    Currently, AnelleO is focusing on developing a once a month progesterone releasing ring for infertility and assisted reproductive technology or ART. This product would be called AnelleO PRO.


    What is the inspiration behind AnelleO?

    I had worked for years on developing novel vaginal rings for HIV prevention. I was mainly working with EVA (ethylene vinyl acetate) based rings.

    The inspiration came from when I was watching a Ted Talk by Joe DeSimone, who is the CEO of Carbon, the company that owns the CLIP™ technology. While he was giving his Ted Talk, he had a printer on stage that was making a ball with complex geometries at a very fast speed and all that I could think was “oh my gosh, what if you could actually print a ring that has those intricate features in it?”

    Now we have so many different avenues to fine tune and control the diffusion of drugs from the ring as opposed to just having a solid ring where drug diffusion is very limited in terms of control.

    Currently, the IVR is a one-size-fits-all. We know that women have different anatomies, from being young and adolescent to women who have had multiple children and are towards their thirties or forties. There is definitely a difference in anatomy and having only a one-size-fits-all is not really realistic or fair for women.

    Why did you choose to begin with a progesterone ring?

    The reason why we chose AnelleO PRO, a progesterone-releasing ring, as our first indication is because there is definitely a need in the US for a once-a-month treatment that can provide the same levels of progesterone as a supplementation for promoting pregnancy and maintaining it.

    Currently, the marketed products for ART are limited to vaginal gels or inserts that have to be administered two or three times a day and they’re messy and unpleasant. Or, an injection which is painful and has to be administered daily by a partner. So, really there is no treatment out there that can provide supplementation of progesterone in a sustained fashion. This is where our once a month delivery of progesterone comes in to solve that need.

    Who do you hope will benefit from AnelleO?

    My heart has always been for the philanthropic side of it, so the non-profit side, and that’s where my passion is still and will always be. My hope is that it would help women in first-world countries to provide a better treatment, but the bigger goal for me personally is to see it help the women that are in most need in Sub-Saharan Africa, South East Asia, and South America, really, but mostly Sub-Saharan Africa where the prevalence of HIV is the highest and where women do not have any means in which they can protect themselves in a female-controlled fashion that is discreet, cost-effective and accessible. For me, if we could make that happen it would be a dream come true.


    What stage of development is AnelleO Pro in now? When are you hoping to bring it to market?

    AnelleO has received funding from the Kickstart program at UNC to carry out pre-clinical studies. We’ve done quite a few of them and have shown we can actually release progesterone over 30 days in an ordered or sustained fashion.

    We can finetune the release of progesterone by changing the design or material that we’re using and the way we put progesterone in the ring.

    We’re still at the pre-clinical and development (R&D) stage, we have another one or two years of pre-clinical before we can file an Investigational New Drug application.

    At this stage, AnelleO is a start-up. Because of the nature of the product, we’re going to need the facilities to produce these rings meaning we’ll have to partner with a pharmaceutical company to do all that. It’s a long road, but fun and exciting road to say the least.

    How is AnelleO made and what materials do you use?

    We have a collaboration with Carbon to use CLIP for the AnelleO 3D printed ring. The current biocompatible resin that we’re using is a silosiloxane-polyurethaneed material which is a Carbon resin.

    What are the benefits of using 3D printing for creating AnelleO?

    The major benefits are control of drug release kinetics. With injection molded rings, because the design of the ring is limited and because drug release happens by diffusion of the drug from the ring, this leads to over 80% of the drug that’s loaded in the ring not being released within the time frame of the use of the ring. We are able to release 100% of the drug that we are loading in the ring.

    Injection molded rings are one size fits. It takes weeks to generate a mold with a different cross-sectional diameter and costs ~$50,000 or more. But, we’re using computer-aided-design (CAD) which takes a few sections to change dimensions from one size to another and we can then use the new CAD to print a ring in a matter of minutes.

    When many women see the rings that are currently being developed for HIV prevention, some of the first reactions are “wow, this is too big” and they’re worried about the ring changing their anatomy or “this ring looks too medicinal”. If we can make a ring in different sizes that actually appeal to these women so they’ll want to use it – making it look better by designing it to look less medicinal and more comfortable, I think that would make a huge difference.

    The other aspects are accessibility and cost. Current technologies that aspire to produce rings with drugs for HIV prevention and contraception still rely on injection molding and involve multi-step and complex engineering and not really cost-effective.

    So, if we can make these rings in a single step and cost-effective process and accessible to the people who need them the most this could make a major impact in the prevention of HIV (STIs) and unintended pregnancy.


    License: The text of „3D Printed Intravaginal Ring Helps to Avoid Unwanted Pregancy and HIV Infection“ by All3DP is licensed under a Creative Commons Attribution 4.0 International License.

    Subscribe to updates from All3DP

    You are subscribed to updates from All3DP

    Website: LINK

  • [DEAL] Learn Some 3D Printing Smarts with 3D Printing for Dummies, just $15.58

    [DEAL] Learn Some 3D Printing Smarts with 3D Printing for Dummies, just $15.58

    Reading Time: 2 minutes

    Offering a technological overview of 3D printing and the beats to build your own RepRap, this entry in the “For Dummies” series is almost half-off on Amazon.com.

    The internet is great and all, but it’ll never quite edge out the printed word as an experiential way to learn. Who doesn’t love the feel of a wodge of dead tree between their fingers and the faint whiff of glue and ink?

    Authored by Richard ‘RichRap’ Horne (he of current MasterSpool fame) and Kalani Kirk Hausman, 3D Printing for Dummies gives a broad overview of the main 3D printing technologies in use today, plus how to source objects for 3D printing and even assemble your own RepRap 3D printer. Originally published in 2013, a second edition hit the shelves in May of 2017. This deal pertains to the latter publication.

    For the traditionalists among you with bookshelves to fill, it could be just the thing for some light and informative reading. At the time of us hitting our big red “publish now” button on this post, it can be picked up for $15.58 on Amazon.com — a 48% saving over the list price of $29.99.

    Deal: 3D Printing for Dummies, $15.58 on Amazon.com

    Find more deals over on our Deals page.

    All3DP is an editorially independent publication. Occasionally we need to pay our bills, so we affiliate some product links through which we may receive a small commission. For the full spiel, check out our Terms of Use.

    License: The text of „[DEAL] Learn Some 3D Printing Smarts with 3D Printing for Dummies, just $15.58“ by All3DP is licensed under a Creative Commons Attribution 4.0 International License.

    Subscribe to updates from All3DP

    You are subscribed to updates from All3DP

    Website: LINK

  • Upgrade Your Ride with a 3D Printed Airless Bicycle Tire?

    Upgrade Your Ride with a 3D Printed Airless Bicycle Tire?

    Reading Time: 3 minutes

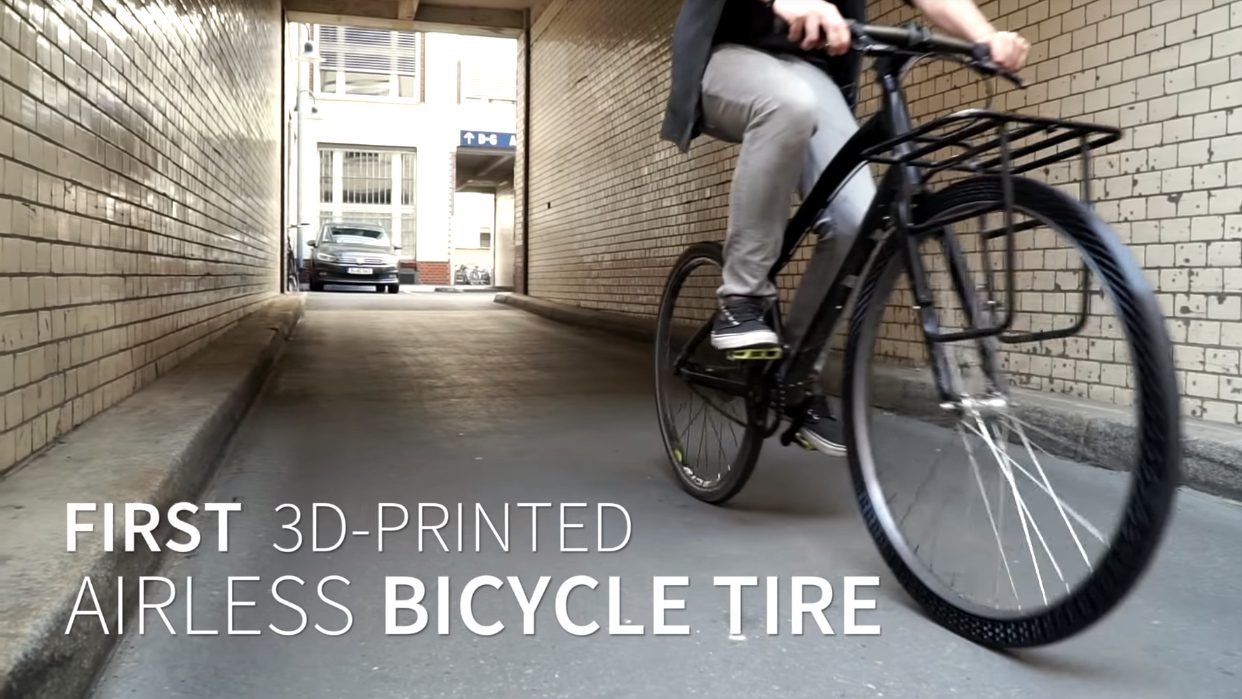
    To showcase their new flexible filament, 3D printer manufacturer BigRep fabricated a 3D printed airless bicycle tire and took it for a spin on the streets of Berlin.

    Don’t Miss: BigRep Launches New Pro Flex Filament for 3D Printing

    Summer’s here! It’s time to dust off your trusty bicycle and take it for a spin in the park. But wait, why is the rear tire looking so flat? Hmm, maybe you should take the roller blades instead…

    Bicycle punctures are a royal pain, no doubt about it. And they’re also a fact of life for two wheeled transportation. But BigRep, a startup in Berlin that specializes in large format 3D printing, reckons they have a viable solution.

    They’ve fabricated a 3D printed airless bicycle tire, and they’ve taken it for a ride on the city streets. The tire looks very similar to the prototypes devised by Michelin and others for the automotive industry. Only it’s been scaled down to fit the rims of a conventional city bike.

    The tire is the work of designer Marco Mattia Cristofori, who you can also see taking it for a test ride in the video below:

    What’s the Point of a 3D Printed Airless Bicycle Tire?

    The beauty of a 3D printed airless bicycle tire is that it can be customized in terms of treads — whether for paths from pavement to mountain trails — and wheel size.

    But can you expect to buy one in the not-too-distant future? According to BigRep, the prototype tire is primarily intended to showcase the potential of their new new Pro Flex filament. The material is based on TPU, and its flexible nature makes it perfect for an application like this.

    Used in conjunction with a BigRep One, an industrial 3D printer with a square meter build volume, Pro Flex can be used for rapid prototyping of items as diverse as skateboard wheels, sporting shoe shells, and ski tips.

    Moreover, this is but one of a handful of BigRep projects concerning things of a circular nature. The company has also created a 3D printed custom wheel rim for a car, and a group of engineers used a BigRep machine to print out a functional bicycle frame.

    So it’s unlikely that BigRep will be going into the bicycle tire business anytime soon. But they’ve certainly blazed a trail for others to follow in their wake.

    3d printed airless bicycle tire
    3d printed airless bicycle tire

    License: The text of „Upgrade Your Ride with a 3D Printed Airless Bicycle Tire?“ by All3DP is licensed under a Creative Commons Attribution 4.0 International License.

    Subscribe to updates from All3DP

    You are subscribed to updates from All3DP

    Website: LINK

  • BigRep Prototypes Big with a 3D Printed Wheel Rim

    BigRep Prototypes Big with a 3D Printed Wheel Rim

    Reading Time: 3 minutes

    Product Designer Marco Mattia Cristofori from BigRep turned to the custom wheel rim for a development challenge, creating a prototype virtually indistinguishable from the real thing. 

    BigRep, the German mechanical engineering company, is reinventing the wheel, so to speak. Marco Mattia Cristofori, a product designer at the company, wanted to show the viability of the company’s large-format FDM 3D printing technology for industrial use. With this goal in mind, Christofori 3D printed a full-scale custom wheel hub prototype for a car.

    In addition to providing a relatable use case for 3D printing in industry, Christofori’s goal was to come up with a striking design. He began by looking at wheel rims and hubcaps for vehicles.

    In the US, it’s popular to customize vehicle features. But, it’s expensive and time-consuming to create prototypes of these parts. Cristofori found that with 3D printing, it’s possible to create custom part prototypes quickly and easily. These prototypes can then go under molding and form checks much sooner than normal.

    With 3D printing you can prototype organic forms, like with our Terra chair,” said Cristofori. “It allows you to envision more complex shapes, because you don’t really have any limits.

    BigRep
    BigRep

    Cristofori’s Final 3D Printed Wheel Rim Design

    Cristofori’s design has branch-like structures coming from the center of the wheel, providing stability and offering an interesting aesthetic. In doing this, he moved away from having just one layer or line on a wheel rim or hubcap.

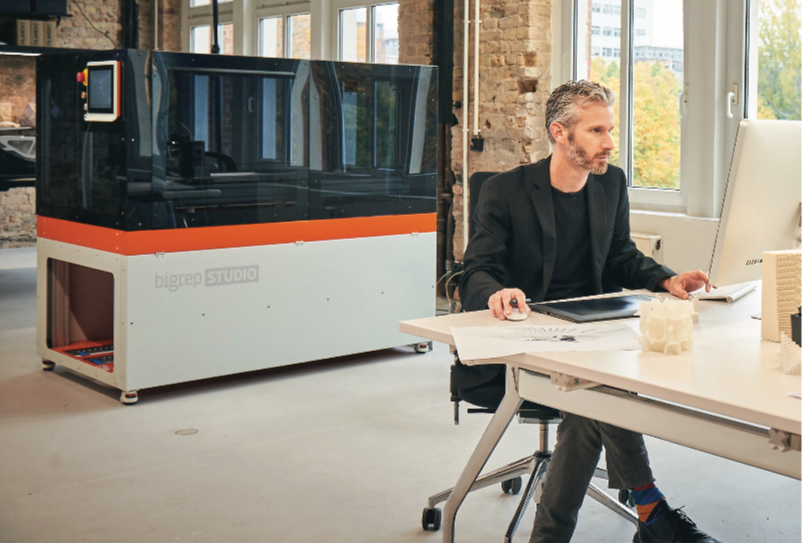
    Of course, this demonstrates one major benefit of 3D printing – complex geometries are possible – unlike with traditional methods. The wheel was printed on BigRep’s new STUDIO 3D printer using high-temperature-resistant filament PRO HT.

    In addition to the stylistic reason of inventive designs, prototyping a wheel rim in such a way brings another benefit. End-use wheel rims must have perfect dimension, so 3D printing can be useful for verifying designs before final production as it’s possible to quickly adjust and change a design to ensure a perfect fit.

    What we’ve developed here is a true-to-life model that can be powder coated,” Cristofori commented, speaking about next steps with the design. “We are planning to Meta-Coat one of them, to see how it looks as a more final product with a highly professional effect.

    Cristofori adds that it’s possible to use the BigRep ONE, with its new Power Extruder to get a similar level of detail. He also recommends printing complex designs with BigRep’s water-soluble support material PVA.

    Although Cristofori’s design is not fully functional as a wheel rim, he believes it would be possible to 3D print end-use hubcaps in plastic and coated to achieve a metallic effect.

    Source: BigRep

    large format 3D printer
    large format 3D printer

    License: The text of „BigRep Prototypes Big with a 3D Printed Wheel Rim“ by All3DP is licensed under a Creative Commons Attribution 4.0 International License.

    Subscribe to updates from All3DP

    You are subscribed to updates from All3DP

    Website: LINK

  • Weekend Project: Five Things to 3D Print for Your Cinco De Mayo Celebrations

    Weekend Project: Five Things to 3D Print for Your Cinco De Mayo Celebrations

    Reading Time: 4 minutes

    Are you getting ready to celebrate the Mexican holiday of Cinco de Mayo this weekend? Prep for the festivities, which usually entail endless margaritas, music, and food, with some of these Cinco de Mayo-themed 3D prints!

    Today is May 5th, and while that might seem like an ordinary day to a majority of the world, it’s a cause for celebration all across Mexico, as well as in the United States and other countries. The annual holiday commemorates the Mexican Army’s victory over the French Empire in on May 5, 1862, but for many people, it has evolved into a cultural appreciation for the amazing food, drinks, and music that have come out of Mexico.

    Regardless of where you and your ancestors come from, there’s no denying that Cinco de Mayo is one of the most fun holidays around, especially if you love Mexican culture and cuisine. Why not use your 3D printer to help prepare you for the long day of margaritas, tacos, nachos, and salsa music? Here are five quick and easy things you can 3D print to make your Cinco de Mayo a special.

    As some of these models will come in contact with food, we highly recommend using food-safe filaments when taking on these projects.

    Margarita Glass Rim Salter


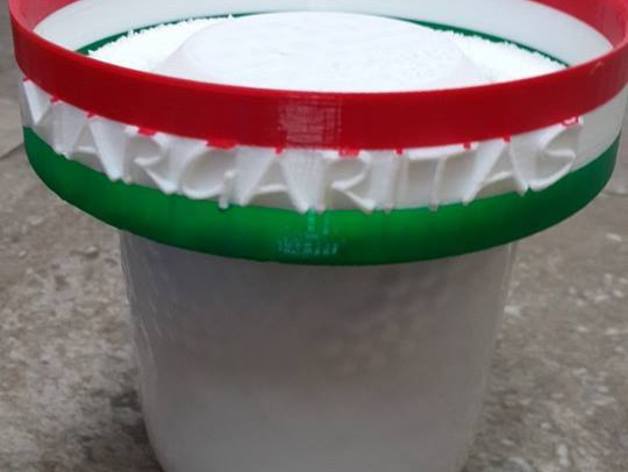
    What is it? Nothing says Cinco de Mayo quite like a chilled margarita with lime in a salt-rimmed glass. This 3D printable glass rim salter can do the job for you. Not only does it have the word “MARGARITAS” embedded on it, but it can also be printed in the colors of the Mexican flag!

    Who designed it? heytiger

    Download here: Thingiverse

    Sombero Hat for Your Cerveza


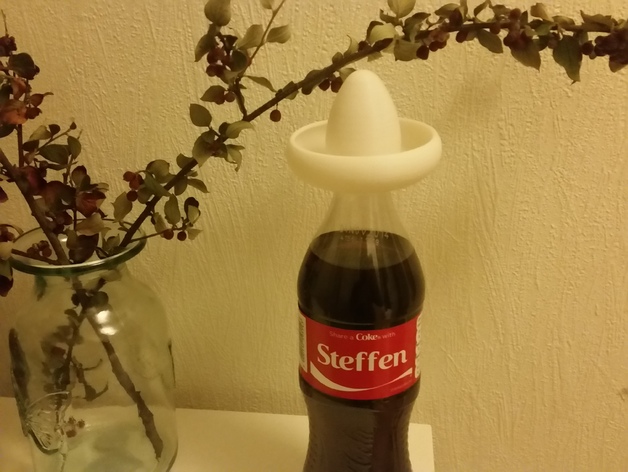
    What is it? Hailing from Mexico, the sombrero is a wide-brimmed hat that helps shield your face from the sun. Why not 3D print a miniaturized version to keep the sun away from your beer? This 3D printable Sombrero is designed to fit over your bottle and give your beverage a bit of style.

    Who designed it? Steffen_lae

    Download here: Thingiverse

    3D Printed Taco Truck


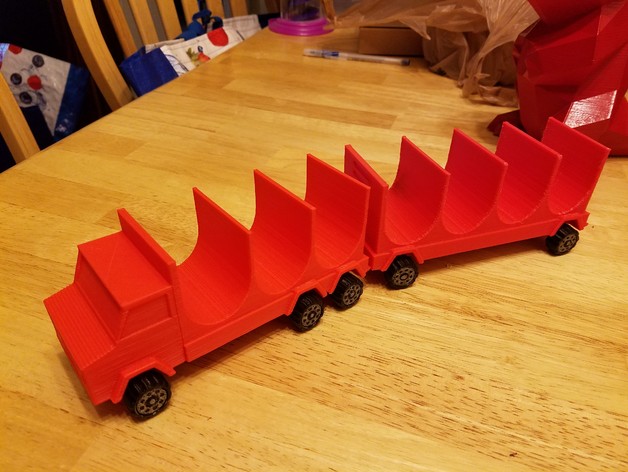
    What is it? Everybody loves a good taco, and oftentimes, you’ll find the best ones come from your local taco truck. You can now 3D print your own truck capable of delivering tacos into your very hands. This 3D printable food truck doubles as a taco holder, making it easy to prepare and place your taco down onto the truck’s bed.

    Who designed it? Mizunoslove

    Download here: Thingiverse

    Coronarita Holder


    What is it? If you’ve never heard of Coronarita, then chances are you’ve never experienced Cinco de Mayo to its fullest. This cocktail mixes Corona beer and the classic margarita, making for a refreshingly twisted beverage for all (adults) to enjoy. With this Coronarita Holder, you can attach it to your margarita glass and hold the Corona in place, making for the ultimate drinking experience.

    Who designed it? AddisonGrist

    Download here: Thingiverse

    PotatoChip-E


    What is it? The best way to kick off Cinco de Mayo (besides with a Coronarita) is with a nice plate of chips and salsa. Bonus points if those chips are served on the sombrero of a 3D printed Marachi band member. He’s not big enough to hold too many tortilla chips, but what he lacks in size he makes up for with a seriously sweet mustache and guitar.

    Who designed it? Wexion

    Download here: Thingiverse

    License: The text of „Weekend Project: Five Things to 3D Print for Your Cinco De Mayo Celebrations“ by All3DP is licensed under a Creative Commons Attribution 4.0 International License.

    Subscribe to updates from All3DP

    You are subscribed to updates from All3DP

    Website: LINK

  • US Navy Awards GE $9 Million Contract for 3D Printing Research

    US Navy Awards GE $9 Million Contract for 3D Printing Research

    Reading Time: 4 minutes

    GE awarded $9 million contract by US Navy to develop framework to rapidly 3D print replacement parts for ships, aircraft, and other critical military assets. The focus of the research is 3D printing with metal.

    A team of scientists at GE Global Research, the technology development arm for General Electric, have been awarded a four-year contract worth $9 million by the US Navy. Their task is to develop a process for rapidly 3D printing exact digital models of replacement components — and to 3D print these parts in metal.

    The team is working together with scientists and engineers from GE Aviation, GE Additive, Honeywell, Penn State, Lawrence Livermore National Laboratory (LLNL), Navy Nuclear Lab (NNL) and the National Center for Defense Manufacturing and Machining (NCDMM).

    The approach is to build “digital twins” from model-based data on parts and sensor-based data from 3D metal printers to dramatically speed up the qualification and certification process. This applies both to replicating and printing replacement parts no longer manufactured for various naval marine and aviation assets, and to create parts for newly designed assets.

    GE Digital Twins are described as living, learning digital models of physical assets, parts, processes and even systems. These models are continually updated as new sensor data or engineering knowledge from technical experts is integrated to reflect the exact state of its physical counterpart at any point in time.

    “Using GE’s Digital Twin technology, we’re aiming to rapidly speed up the time that parts could be re-engineered or newly created using 3D printing processes,” says Ade Makinde, Principal Engineer, Additive Technologies at GE Global Research.

    “With today’s technology, the process for designing a new part can take years. We think we can reduce that timeframe to weeks, with the unique digital solutions under development.”

    Makinde explains that it is extremely difficult to quickly make a 1:1 replacement part through 3D printing processes that was originally produced using conventional manufacturing techniques.

    “The key challenge with industrial 3D printing is being able to additively build a part that mirrors the exact material composition and properties of the original part that was formed through subtractive measures. With the kind of mission-critical equipment the Navy operates, there is no room for deviations in material performance or manufacturing error.”

    US Navy
    US Navy

    US Navy Banking on Digital Twins to Stay in Ship-Shape

    Having a rapid process for producing and installing replacement parts would greatly support the US Navy’s efforts to manage and maintain excellence for an aging Navy fleet.

    The average age of active Navy ships, for example, is 17 years. The oldest in service was deployed in 1970. In cases where ships are several decades old, replacement parts often are no longer manufactured.

    This is similar to what car enthusiasts have experienced when rebuilding or repairing classic or older cars. Just like the automotive sector, the Navy is turning to 3D printing to get the parts they need faster.

    “We’re already seeing the proliferation of 3D printing in the automotive sector, which are enabling the manufacture of outdated car parts no longer being made,” said Makinde.

    “When it comes to mission-critical assets like Naval ships and aircraft, the bar is higher for producing high quality parts that encounter much higher stresses and tolerances. But as one of the world’s leading aircraft engine makers that produce and maintain a fleet of 35,000+ jet engines that are in service for decades, we bring a unique understanding and depth of expertise to what kind of digital models are required.”

    The four- year program will occur in a pair of two-year phases. Phase 1 will focus on the underlying software and hardware developments. In Phase 2, GE will build a complete additive system that demonstrates the rapid and robust creation of a part’s digital model or digital twin and printing of that part using a 3D Direct Metal Laser Melting (DMLM) printer.

    US Navy
    US Navy

    Source: GE Newsroom

    License: The text of „US Navy Awards GE $9 Million Contract for 3D Printing Research“ by All3DP is licensed under a Creative Commons Attribution 4.0 International License.

    Subscribe to updates from All3DP

    You are subscribed to updates from All3DP

    Website: LINK

  • Giant 3D Printed Bones Help Students Learn About Extinct Moa Birds

    Giant 3D Printed Bones Help Students Learn About Extinct Moa Birds

    Reading Time: 3 minutes

    Mindkits is a “family run and kiwi-owned” tech company whose latest project brings extinct New Zealand moa bones to classrooms via 3D scanning. With models of the bones in hand, teachers and students can prep and print them in full size.

    The extinct New Zealand moa was an interesting bird. Flightless and looking a lot like the modern day ostrich, it could grow to 3.6 m (12 ft) in height and weighed about 230 kg (510 lb).

    Rather than learning about these creatures from textbooks, MindKits, an Auckland-based tech company, is giving schools the chance to learn about the magnitude of the bird from accurate 3D printed bones.

    The moa bone project was created to take bones from behind the glass of museums and make them more accessible for teachers to use. With the help of 3D scanning and printing, the original bones can remain safely on display, with exact 3D printed replicas giving children a tactile learning experience.

    Tim Carr, MindKits founder, hopes the project will be used in a range of subjects while also inspiring discovery and exploration in students. He adds: “We’re smashing together technology and ecology in the most hands on way possible – using 3D scanning and 3D printing to recreate the rich natural history of New Zealand“.

    Moa
    Moa

    Meticulously 3D Scanning an Ancient Bird Bone

    Procuring and printing the moa bones was no easy feat. The leg bone alone took MindKits 102 hours to print. However, this wasn’t the most difficult aspect of the project. Carr explains that he had the idea of scanning and printing the moa bones for educational use back in 2014.

    But, museums which hold the moa remains were very reluctant to allow access to the bones. Thankfully, the project was revived due to a chance meeting with Wellington based teacher, Tony Cairns, whose family has a private collection of moa bones.

    Cairns decided to loan MindKits the bones, which were recovered from Wairarapa farmland in the mid 1970’s. The most impressive bone has to be the longest, which is the tibiotarsus leg bone measuring at 85cm.

    The MindKits team then meticulously 3D scanned the ancient bones. So far, 120 3D specimen packs have made it to schools. The project will run from April until June.

    To apply to receive a project pack, visit the MindKits website and submit your email address. If you match the criteria, you’ll be sent a Giant New Zealand Moa Discovery Pack which includes class information and a USB stick with everything you need to get started.

    Source: Scoop
    Header Image by John Megahan via Wikimedia Commons

    License: The text of „Giant 3D Printed Bones Help Students Learn About Extinct Moa Birds“ by All3DP is licensed under a Creative Commons Attribution 4.0 International License.

    Subscribe to updates from All3DP

    You are subscribed to updates from All3DP

    Website: LINK

  • What Would it Take to 3D Print a 1:1 Scale Death Star?

    What Would it Take to 3D Print a 1:1 Scale Death Star?

    Reading Time: 4 minutes

    A 3D printed Death Star in its original size and glory – that’s a 3D printing project of galactic proportions. Franklin Houser has crunched the numbers. 

    So, what does it take to 3D print a 1:1 scale Death Star? The question I have asked myself depends on several variables. For simplicity, I will only be focusing on material costs, and the time needed to complete the task as well as a few different scenarios. One crucial factor is the ratio between the solid material and open space within the battle station as we would only 3D print the solid components.

    Get Prepared for a Big Shipment of Filament

    3d printed death star
    3d printed death star

    A good comparison would be a skyscraper. The Burj Khalifa in Dubai is currently the tallest man-made structure in the world. A large front lobby and 57 elevator shafts make for a good representation of hangar bays and reactor shafts in the Death Star. I did some quick research and found out that the Burj Khalifa has a volume of roughly 2,600,000 m3 based on the total accumulative surface area per individual storey and its height. Considering that the skyscraper was constructed using reinforced concrete at 2400 kg/m3 on average, and has a total empty weight of 440000 metric tons, the building consists of roughly 10% solid building materials and 90% air-filled space. Surprisingly enough, if you were to 3D print a solid 1:1 scale replica of the Burj Khalifa out of classic ABS filament, it would be heavier than the real thing.

    Now let’s assume that 10% of the 3d printed Death Star’s volume was also comprised of solid building material.

    According to Wookieepedia, the first Death Star was a spheroid with length, width, and height measuring 120 km making it as good as completely spherical. Excluding the fact that there is a conical indent on its surface for the super laser, capable of destroying entire planets, the volume of the first Death Star came to roughly 905,000 km3. That’s a lot more than the Burj Khalifa. That means that the total solid volume of the Death Star was 90,500 km3.

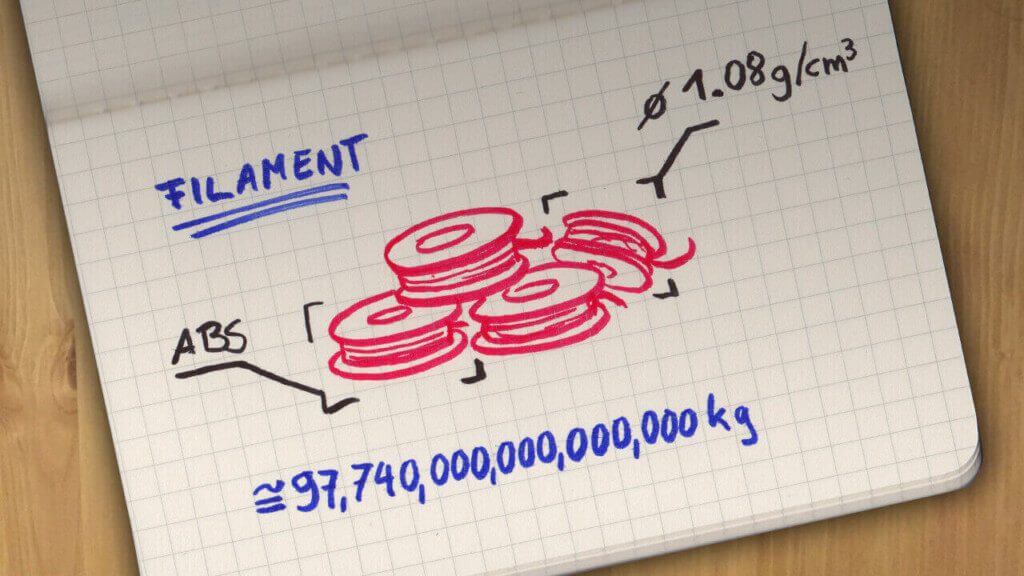
    Using ABS filament, which has a density of 1.08 g/cm3 on average, we would need 97,740,000,000,000,000 kg of it. That’s ninety-seven quadrillion, seven hundred forty trillion kilograms.

    How Long Does it Take to 3D Print a Death Star?

    death-star2
    death-star2

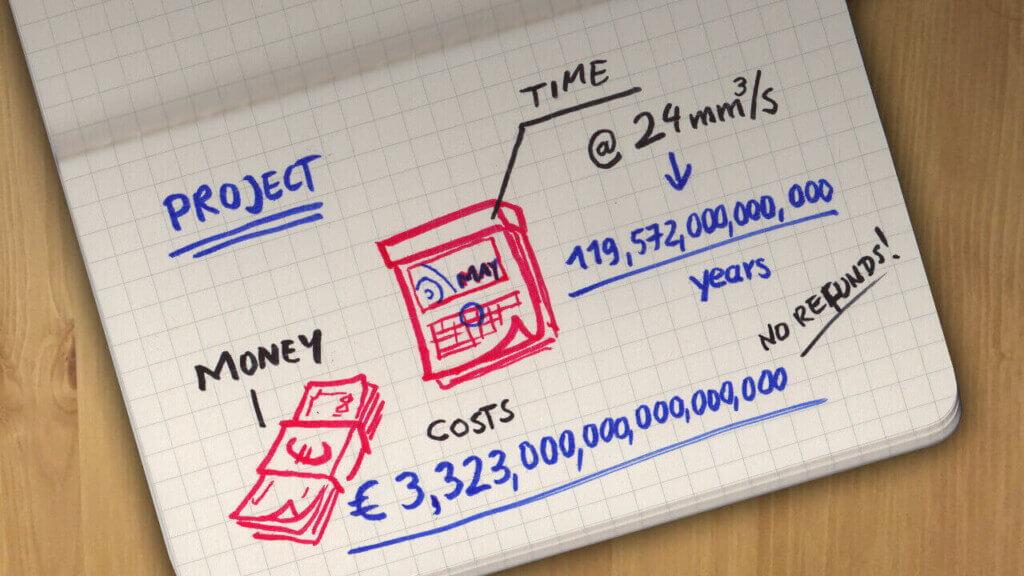
    Most 3D printers can print at a speed of 24 mm/s at least. At that rate, it would take a little more than 119,572,000,000,000 years to complete the 3D printed Death Star. We might as well watch the universe grow cold while we’re waiting for our Death Star to become fully armed and operational. The amount of filament needed would currently cost 3,323,000,000,000,000,000 Euros if bought in 0.75 kg spools with no discount.

    Those numbers are extremely huge, and realistically, the task would never be possible using a desktop 3D printer, unless it could print at a speed of 143487 m3/s at which rate our 3d printed Death Star would be finished in 20 years. That’s how long it took the Galactic Empire to build the first one.

    ABS or PLA for a 3D Printed Death Star?

    death-star3
    death-star3

    There are however a few more factors to consider when planning to 3D print a Death Star. For one, we would have to construct a mechanism to move the printer along the surface of what has already been printed, since the entire Death Star would not fit inside the tiny box of a desktop 3D printer. And, the entire construction would have to take place in space, since it would be extremely difficult to blast the finished Death Star into earth’s orbit.

    Secondly, we would need some power supply; probably solar power. Lastly, ABS filament starts to get soft around 105°C and melts at under 300°C. If the Death Star got anywhere near a star during its lifetime, it would simply turn into a giant ball of molten ABS or burn up. There are many more factors that would restrict the construction of such a Death Star with today’s technology.

    Conclusion: Is it Worth it?

    If you had the time and the money, then definitely; because who wouldn’t want to cruise around the galaxy in their very own Death Star? I can think of one advantage that would come of the extremely long print time. If kept in complete secrecy, the duration of the build might just outlast the existence of the Rebel Alliance or The Resistance, thereby greatly increasing the chances of it ever aging or even being completed.

    Subscribe to updates from All3DP

    You are subscribed to updates from All3DP

    Website: LINK

  • Introducing the first Daydream standalone VR headset and new ways to capture memoriesIntroducing the first Daydream standalone VR headset and new ways to capture memoriesVP

    Introducing the first Daydream standalone VR headset and new ways to capture memoriesIntroducing the first Daydream standalone VR headset and new ways to capture memoriesVP

    Reading Time: < 1 minute

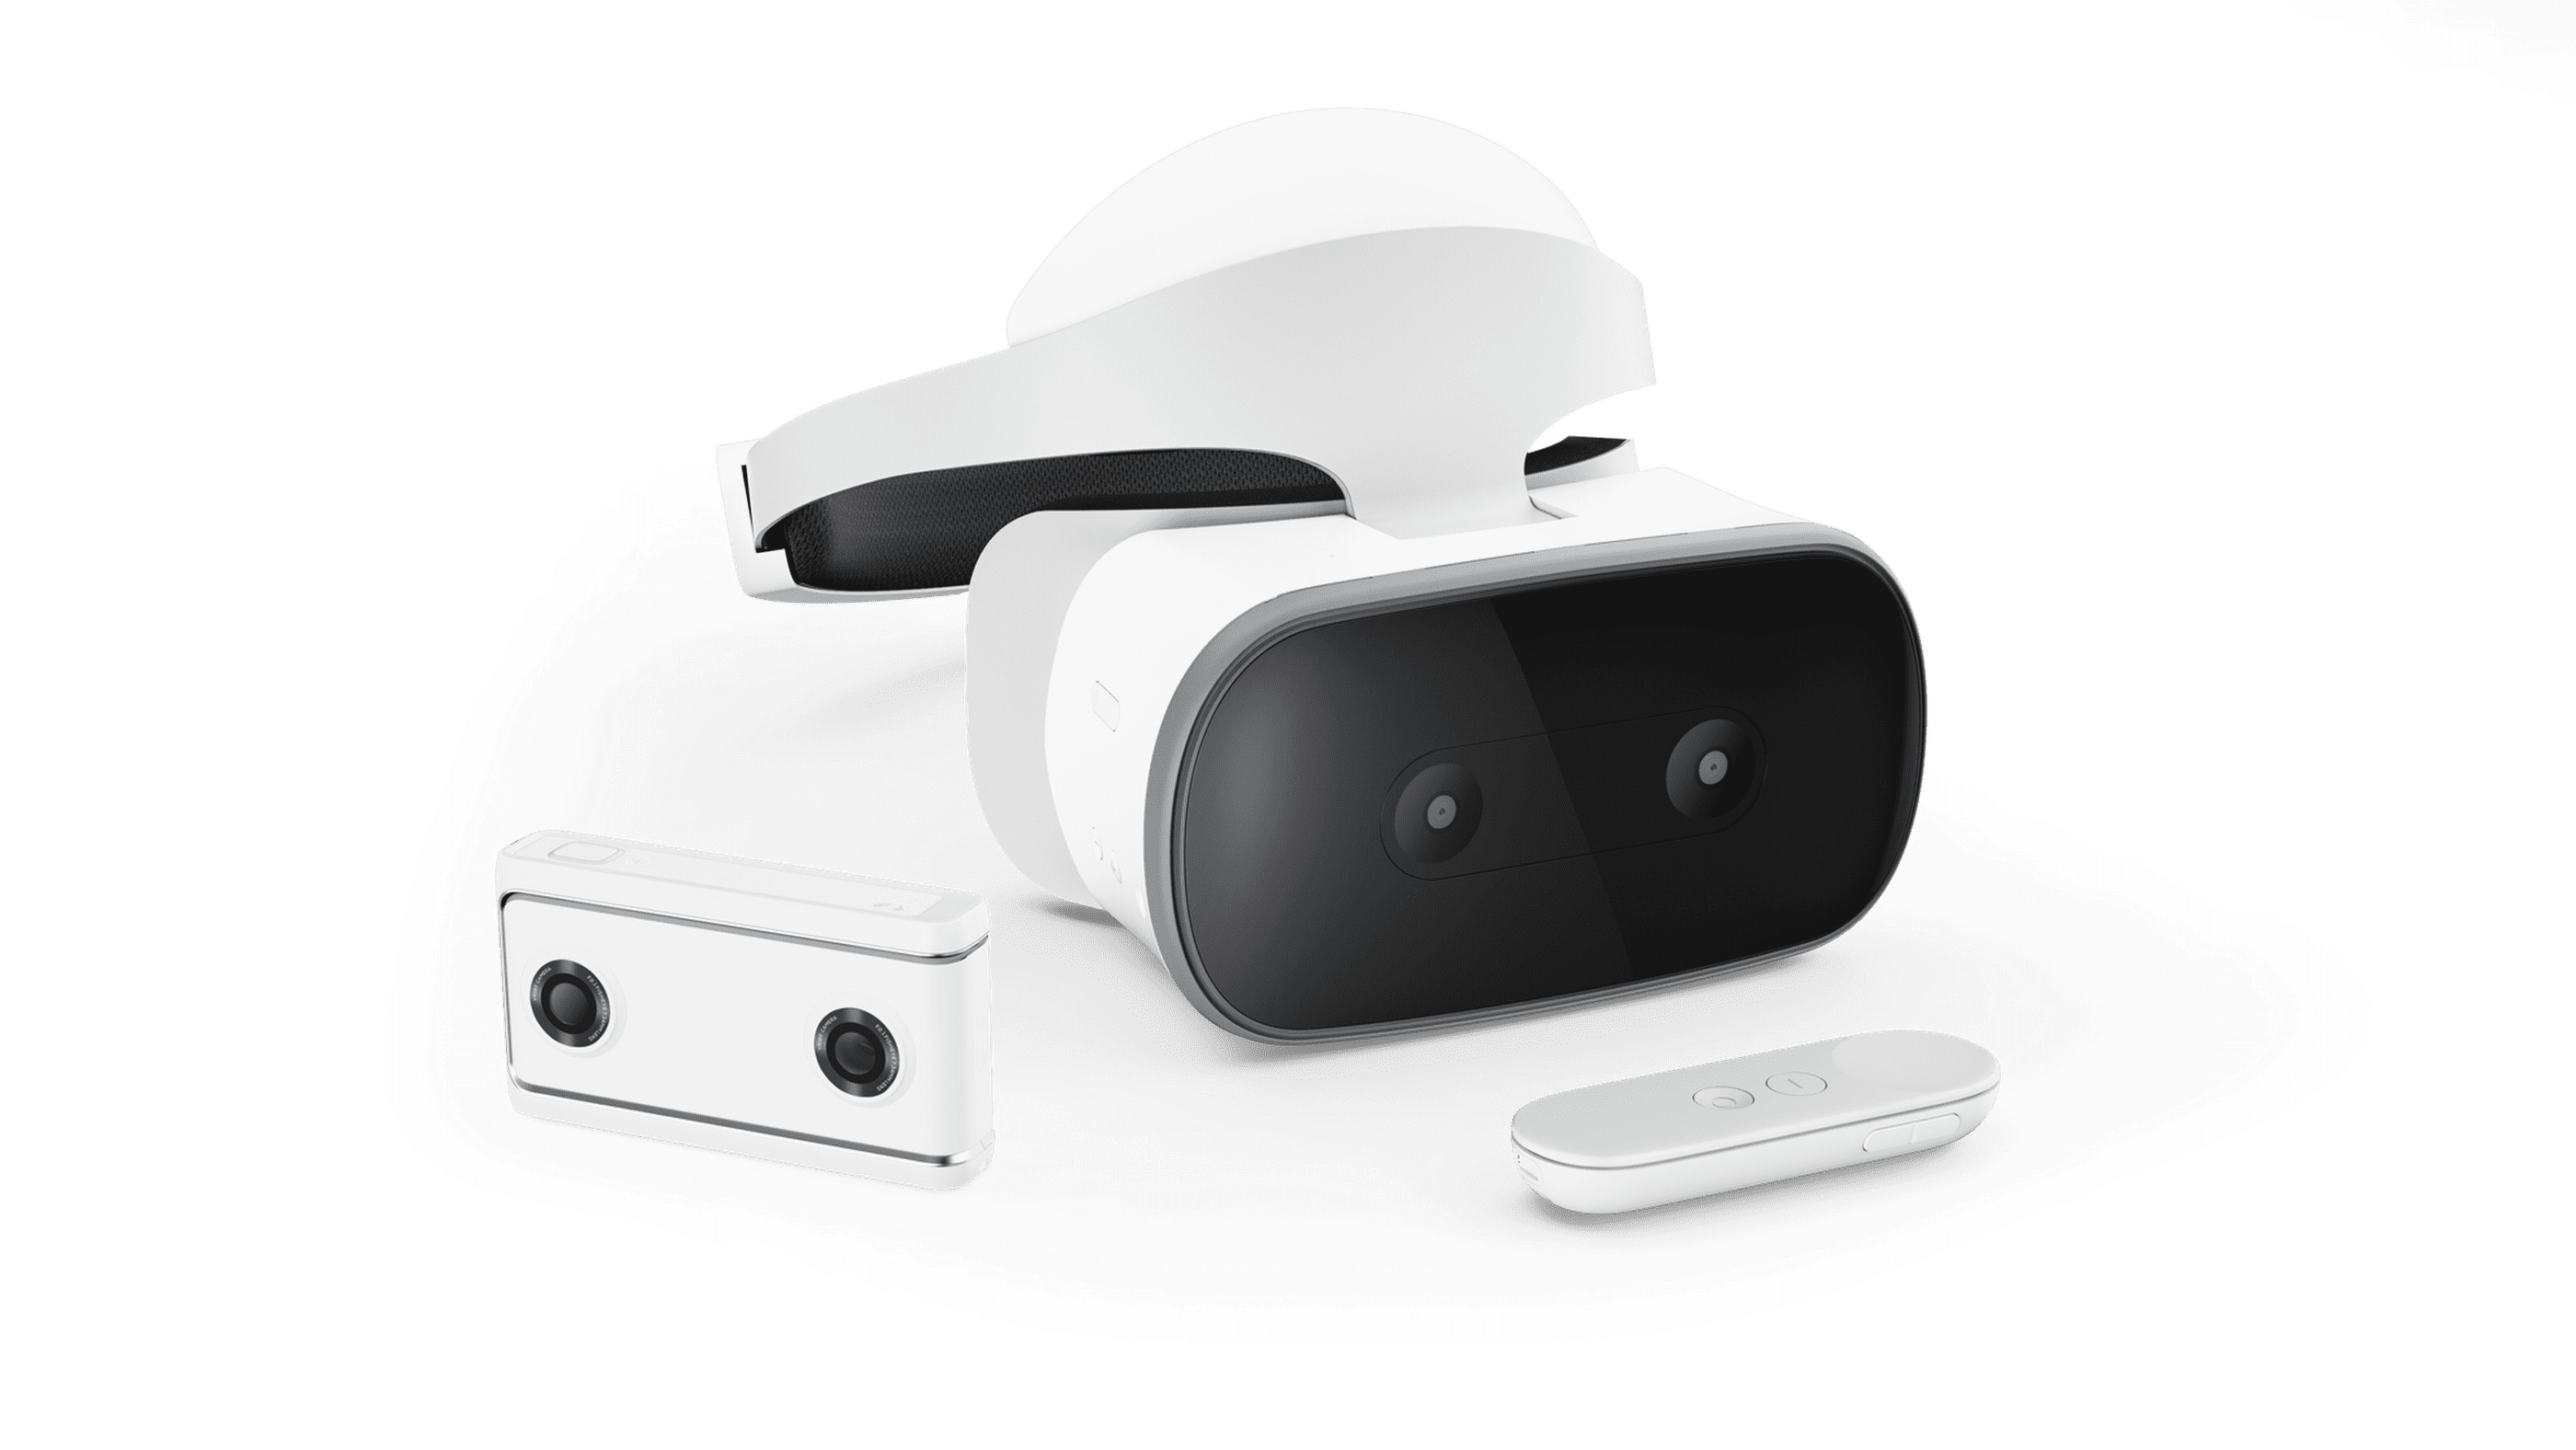
    Back in January, we announced the Lenovo Mirage Solo, the first standalone virtual reality headset that runs Daydream. Alongside it, we unveiled the Lenovo Mirage Camera, the first camera built for VR180. Designed with VR capture and playback in mind, these devices work great separately and together. And both are available for purchase today.

    More immersive

    The Mirage Solo puts everything you need for mobile VR in a single device. You don’t need a smartphone, PC, or any external sensors—just pick it up, put it on, and you’re in VR in seconds.

    The headset was designed with comfort in mind, and it has a wide field of view and an advanced display that’s optimized for VR. It also features WorldSense, a powerful new technology that enables PC-quality positional tracking on a mobile device, without the need for any additional sensors. With it, you can duck, dodge and lean, step backward, forward or side-to-side. All of this makes for a more natural and immersive experience, so you really feel like you’re there.

    Website: LINK