The Pi Towers Secret Santa Babbage
Tired of pulling names out of a hat for office Secret Santa? Upgrade your festive tradition with a Raspberry Pi, thermal printer, and everybody’s favourite microcomputer mascot, Babbage Bear.

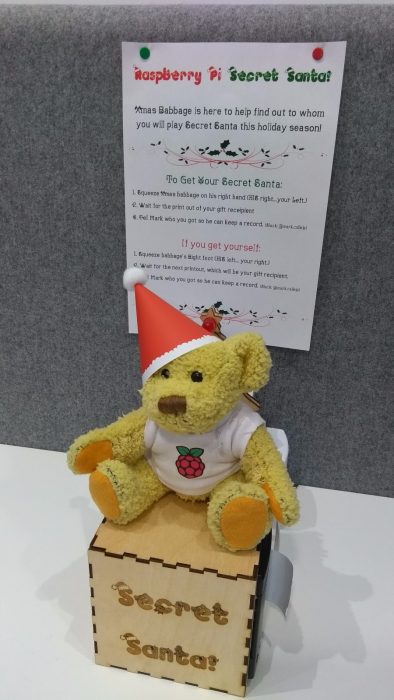
The name’s Santa. Secret Santa.
It’s that time of year again, when the cosiness gets turned up to 11 and everyone starts thinking about jolly fat men, reindeer, toys, and benevolent home invasion. At Raspberry Pi, we’re running a Secret Santa pool: everyone buys a gift for someone else in the office. Obviously, the person you buy for has to be picked in secret and at random, or the whole thing wouldn’t work. With that in mind, I created Secret Santa Babbage to do the somewhat mundane task of choosing gift recipients. This could’ve just been done with some names in a hat, but we’re Raspberry Pi! If we don’t make a Python-based Babbage robot wearing a jaunty hat and programmed to spread Christmas cheer, who will?
Ho ho ho!
Mecha-Babbage Xmas shenanigans
The script the robot runs is pretty basic: a list of names entered as comma-separated strings is shuffled at the press of a GPIO button, then a name is popped off the end and stored as a variable. The name is matched to a photo of the person stored on the Raspberry Pi, and a thermal printer pinched from Alex’s super awesome PastyCam (blog post forthcoming, maybe) prints out the picture and name of the person you will need to shower with gifts at the Christmas party. (Well, OK — with one gift. No more than five quid’s worth. Nothing untoward.) There’s also a redo function, just in case you pick yourself: press another button and the last picked name — still stored as a variable — is appended to the list again, which is shuffled once more, and a new name is popped off the end.
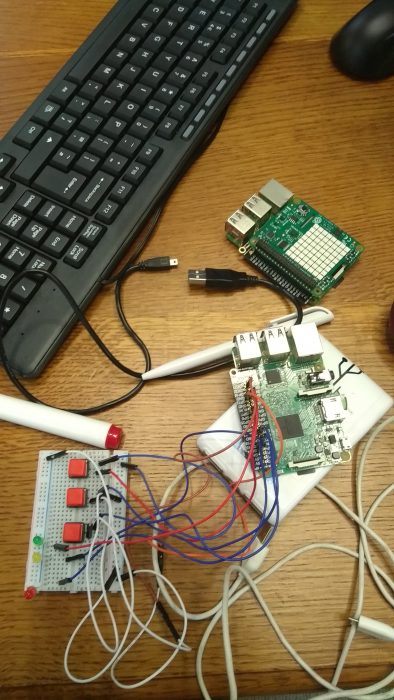
Prototyping!
As the build was a bit of a rush job undertaken at the request of our ‘Director of Vibe’ Emily, there are a few things I’d like to improve about this functionality that I didn’t get around to — more on that later. To add some extra holiday spirit to the project at the last minute, I used Pygame to play a WAV file of Santa’s jolly laugh while Babbage chooses a name for you. The file is included in the GitHub repo along with everything else, because ‘tis the season, etc., etc.
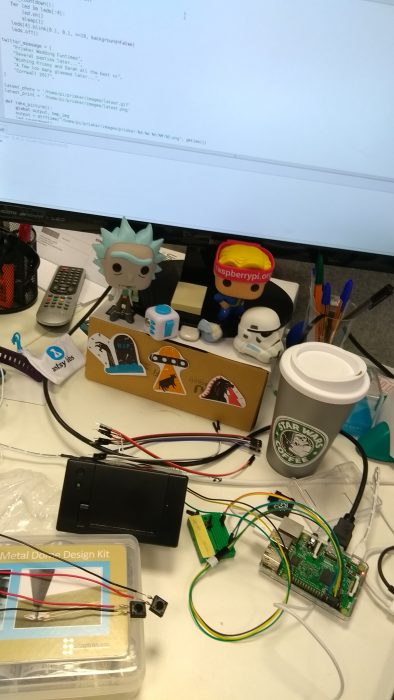
Editor’s note: Considering these desk adornments, Mark’s Secret Santa gift-giver has a lot to go on.
Writing the code for Xmas Mecha-Babbage was fairly straightforward, though it uses some tricky bits for managing the thermal printer. You’ll need to install the drivers to make it go, as well as the CUPS package for managing the print hosting. You can find instructions for these things here, thanks to the wonderful Adafruit crew. Also, for reasons I couldn’t fathom, this will all only work on a Pi 2 and not a Pi 3, as there are some compatibility issues with the thermal printer otherwise. (I also tested the script on a Pi Zero W…no dice.)
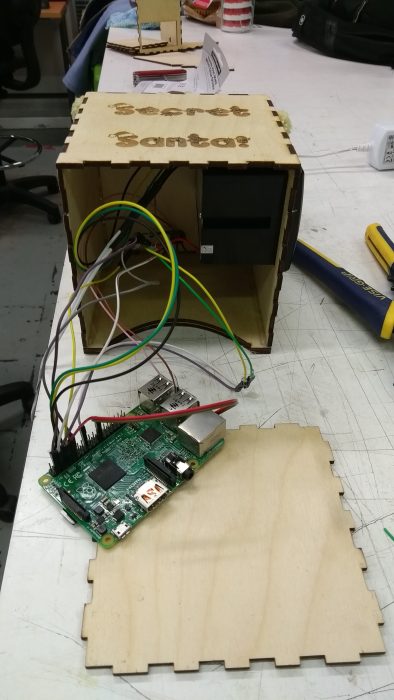
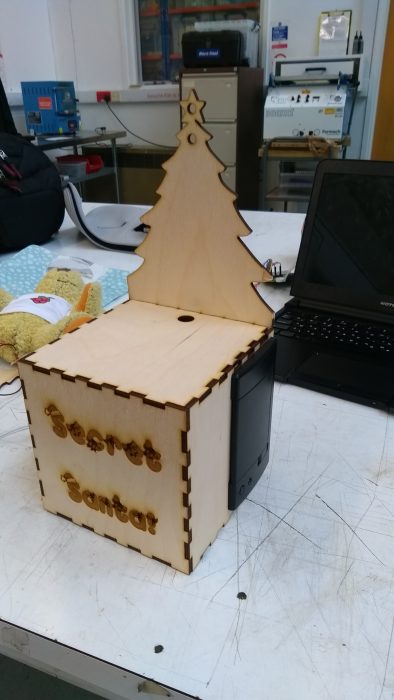
Building a Christmassy throne
The hardest (well, fiddliest) parts of making the whole build were constructing the throne and wiring the bear. Using MakerCase, Inkscape, a bit of ingenuity, and a laser cutter, I was able to rig up a Christmassy plywood throne which has a hole through the seat so I could run the wires down from Babbage and to the Pi inside. I finished the throne by rubbing a couple of fingers of beeswax into it; as well as making the wood shine just a little bit and protecting it against getting wet, this had the added bonus of making it smell awesome.
Next year’s iteration will be mulled wine–scented.
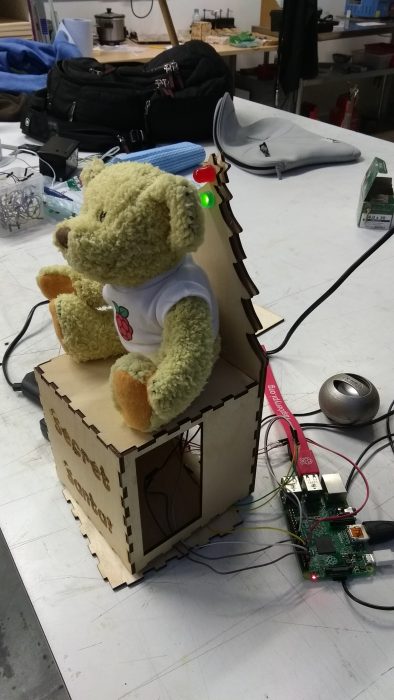
I next soldered two LEDs to some lengths of wire, and then ran the wires through holes at the top of the throne and down the back along a small channel I had carved with a narrow chisel to connect them to the Pi’s GPIO pins. The green LED will remain on as long as Babbage is running his program, and the red one will light up while he is processing your request. Once the red LED goes off again, the next person can have a go. I also laser-cut a final piece of wood to overlay the back of Babbage’s Xmas throne and cover the wiring a bit.
Creating a Xmas cyborg bear
Taking two 6 mm tactile buttons, I clipped the spiky metal legs off one side of each (the buttons were going into a stuffed christmas toy, after all) and soldered a length of wire to each of the remaining legs. Next, I made a small incision into Babbage with my trusty Swiss army knife (in a place that actually made me cringe a little) and fed the buttons up into his paws. At some point in this process I was standing in the office wrestling with the bear and muttering to myself, which elicited some very strange looks from my colleagues.
Poor Babbage…
One thing to note here is to make sure the wires remain attached at the solder points while you push them up into Babbage’s paws. The first time I tried it, I snapped one of my connections and had to start again. It helped to remove some stuffing like a tunnel and then replace it afterward. Moreover, you can use your fingertip to support the joints as you poke the wire in. Finally, a couple of squirts of hot glue to keep Babbage’s furry cheeks firmly on the seat, and done!
Next year: Game of Thrones–inspired candy cane throne
The Secret Santa Babbage masterpiece
The whole build process was the perfect holiday mix of cheerful and macabre, and while getting the thermal printer to work was a little time-consuming, the finished product definitely raised some smiles around the office and added a bit of interesting digital flavour to a staid office tradition. And it also helped people who are new to the office or from other branches of the Foundation to know for whom they will be buying a gift.
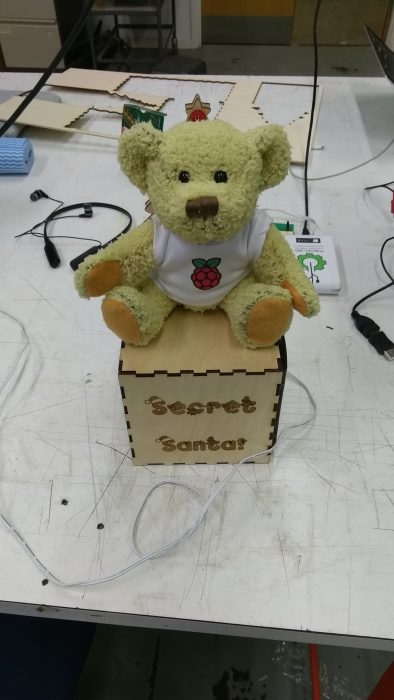
Ready to dispense Christmas cheer!
There are a few ways in which I’ll polish this project before next year, such as having the script write the names to external text files to create a record that will persist in case of a reboot, and maybe having Secret Santa Babbage play you a random Christmas carol when you squeeze his paw instead of just laughing merrily every time. (I also thought about adding electric shocks for those people who are on the naughty list, but HR said no. Bah, humbug!)
Make your own
The code and laser cut plans for the whole build are available here. If you plan to make your own, let us know which stuffed toy you will be turning into a Secret Santa cyborg! And if you’ve been working on any other Christmas-themed Raspberry Pi projects, we’d like to see those too, so tag us on social media to share the festive maker cheer.
Website: LINK