If you haven’t yet experimented with the Arduino Cloud, then you may not be aware of how powerful it is for Internet of Things (IoT) applications. Using the service and its online tools, you can quickly build and deploy smart IoT devices — often with little or no custom code required. Rei Vilo’s Remote E-Paper Weather and Message Board perfectly demonstrates how you can accomplish that.
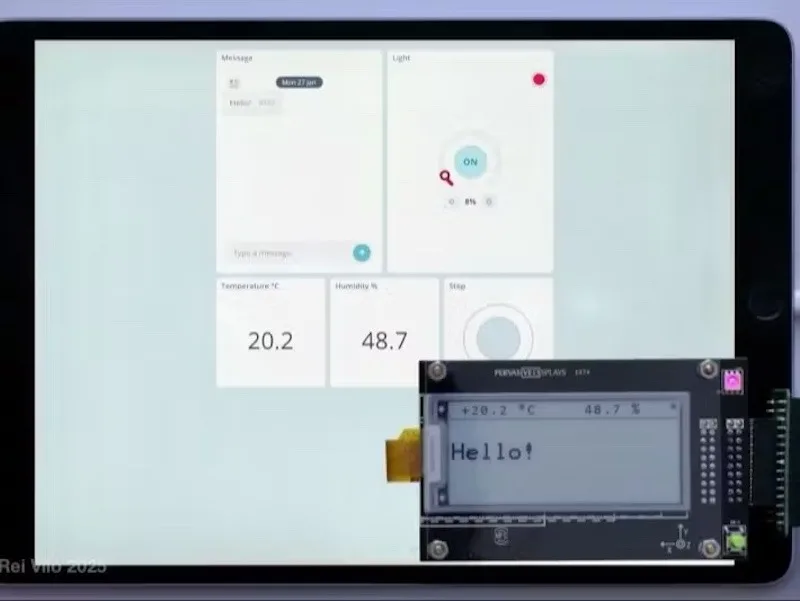
This device shows current weather information and custom messages on a Pervasive Displays E-Paper Development Kit for Matter’s 2.9″ screen. Though that was designed for use with the Arduino Nano Matter, is also works with others, including the Nano ESP32 that Vilo chose for this project. Like all e-paper displays, it only consumes power when refreshing the screen. And the adapter makes it easy to connect to the Arduino board.
The hardware setup is very straightforward: just connect the Arduino to the display adapter and plug in a USB cable for power. Most of Vilo’s tutorial focuses on configuring an Arduino Cloud service and setting up the Nano ESP32 to work with that.
This showcases the real power of Arduino Cloud, which is its ability to automatically generate sketches to make use of hardware and specified variables. For example, Vilo didn’t need to explicitly program functions to gather the weather data. The Arduino Cloud service automatically passes that data over Wi-Fi to the Nano ESP32, which then updates the display with the new information. Arduino Cloud also provides a nice online dashboard where users can interact with their devices, such as to enter a custom message.
As a Node.js developer, you’re probably eager to put your JavaScript skills to work beyond the browser or server, diving into the world of hardware control with Raspberry Pi GPIOs. If that’s the case, you’re in the right place!
But IoT isn’t just about managing hardware locally. True IoT projects require remote dashboards that let you visualize real-time and historical data, and control devices from anywhere. With Arduino Cloud, you can do all of this with ease.
Let’s dive in and see how you can take your IoT skills to the next level with Node.js and the Arduino Cloud!
Raspberry Pi basic GPIO setup
In this article, we present a straightforward yet comprehensive example to demonstrate the power of Arduino Cloud. You’ll learn how to use an Arduino Cloud dashboard to remotely control and monitor your Raspberry Pi’s digital GPIOs. Specifically, we’ll cover how to:
Turn an LED connected to your Raspberry Pi on and off.
Detect when a push button connected to your Raspberry Pi is pressed.
Visualize the real-time and historical values of an integer variable.
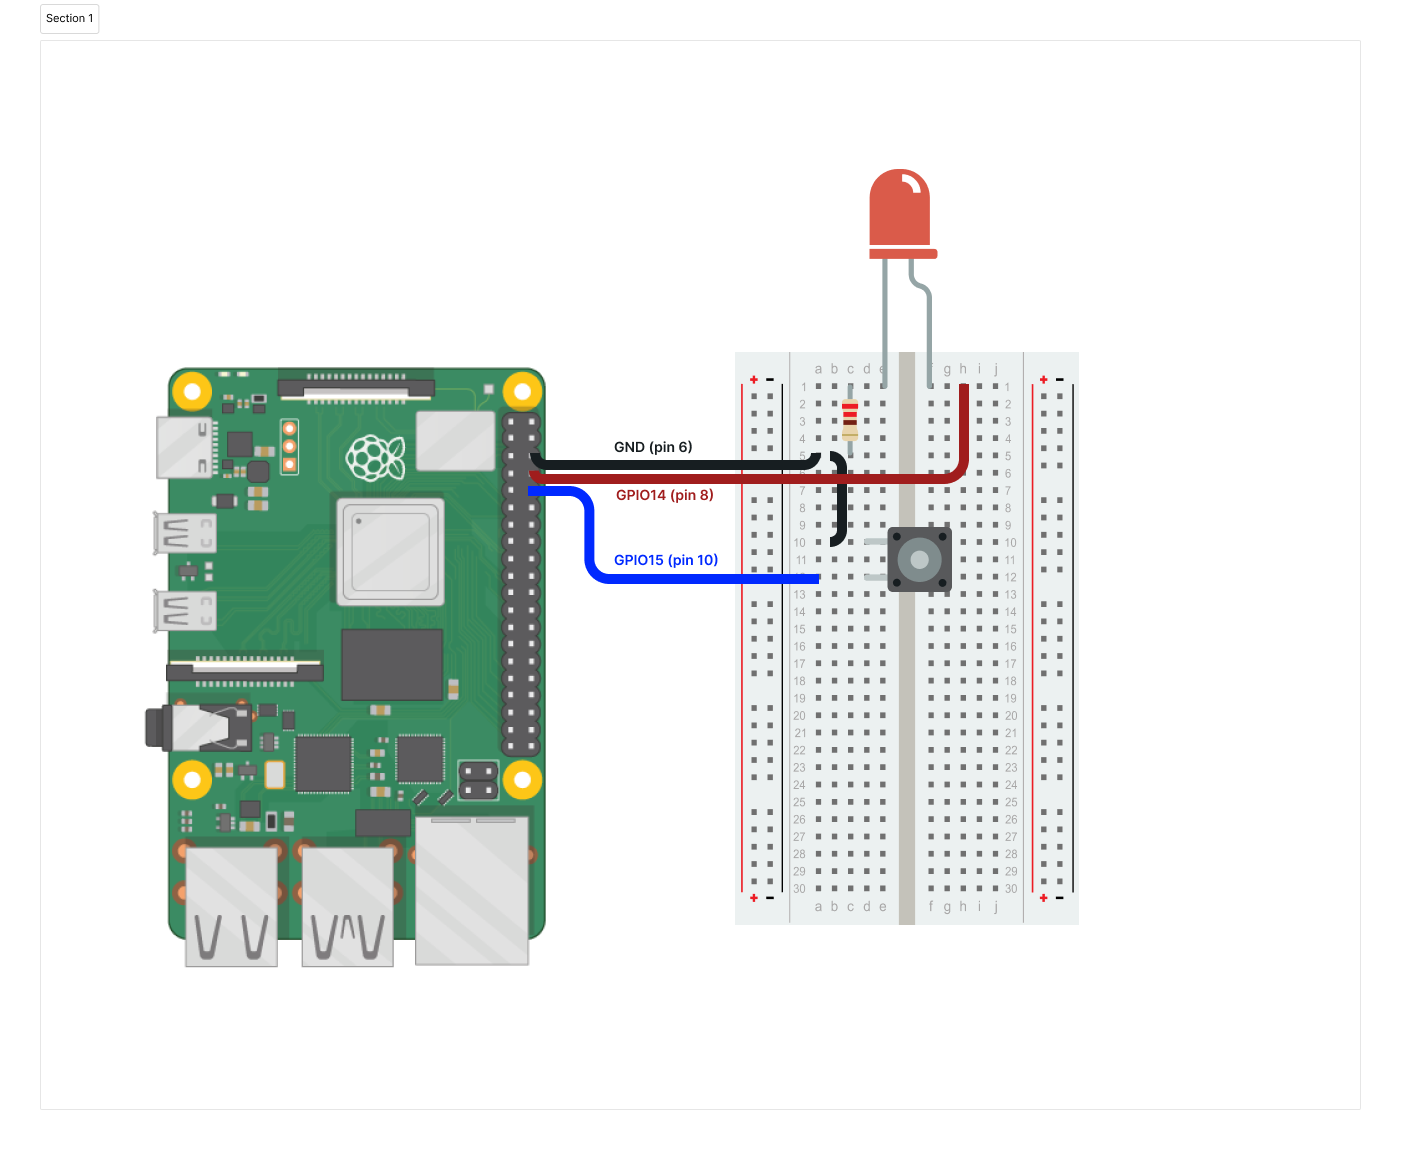
To get started, let’s connect an LED and a push button to your Raspberry Pi as illustrated in the diagram below.
It’s a very simple setup. Now that we have everything ready, let’s get started!
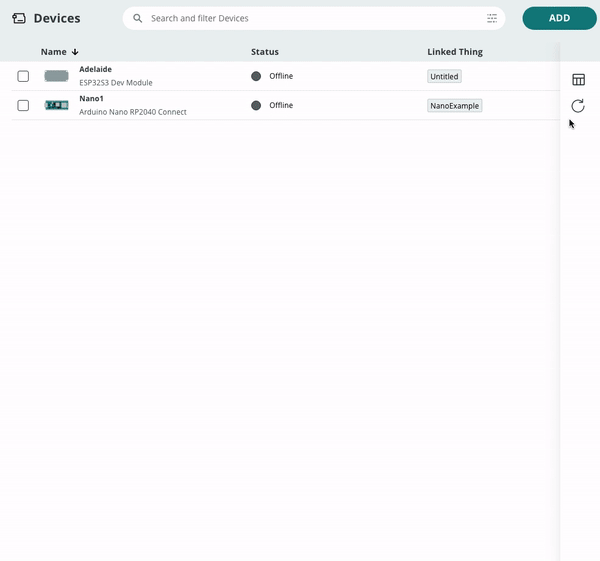
Create the Device and Thing in Arduino Cloud
To send your Raspberry Pi data to Arduino Cloud, you have to follow these simple steps:
In the example shown in this blog post, we use the following three variables:
test_value: We will use this integer variable to show an integer value generated periodically in our Raspberry Pi application in our Arduino Cloud dashboard.
button: We will use this boolean variable to send the information to the Cloud when the push button is pressed.
led: We will use this boolean variable to switch on and off the LED from the Arduino Cloud dashboard.
Create an Arduino Cloud dashboard for data visualization:
Create a switch widget (name: LED) and a LED widget (name: LED) and linke them to the led variable.
Create a chart widget (name: Value evolution) and a Value widget (name: Value) and link them to the test_value variable.
Create a Push button (name: Push Button) and a Status widget (name: Button) and link them to the button variable.
With the dashboard, you will be able to:
Switch ON and OFF the LED using the switch widget
Visualize the status of the LED with the LED widget
Visualize the real time value of the variable test_value with the Value widget
Visualize the evolution over time of the variable test_value with the chart widget
Visualize on the Push Button and Button widgets when the push button has been pressed on the board
Note: You can find more detailed information about the full process in our documentation guide.
Program your IoT device using Node.js
Now it’s time to develop your Node.j application.
const gpiod = require('node-libgpiod');
const { ArduinoIoTCloud } = require('arduino-iot-js');
const { DEVICE_ID, SECRET_KEY } = require('./credentials'); // Modify these lines according to your board setup
const GPIOCHIP = 'gpiochip4';
const LED = 14; // GPIO14, Pin 8
const BUTTON = 15; // GPIO15, Pin 10 // Make sure these variables are global. Otherwise, they will not
// work properly inside the timers
chip = new gpiod.Chip(GPIOCHIP);
ledLine = chip.getLine(LED);
buttonLine = chip.getLine(BUTTON); ledLine.requestOutputMode("gpio-basic");
// To configure the pull-up bias, use 32 instead of gpiod.LineFlags.GPIOD_LINE_REQUEST_FLAG_BIAS_PULL_UP if it is undefined
buttonLine.requestInputModeFlags("gpio-basic", gpiod.LineFlags.GPIOD_LINE_REQUEST_FLAG_BIAS_PULL_UP); let client; // This function is executed every 1.0 seconds, polls the value
// of the button and sends the data to Arduino Cloud
function readButton(client) { let button = buttonLine.getValue() ? true : false; if (client) client.sendProperty("button", button); console.log("pollButton:", button);
} // This function is executed every 10.0 seconds, gets a random
// number between 0 and 100 and sends the data to Arduino Cloud
function readValue(client) { let value = Math.floor(Math.random() * 101); if (client) client.sendProperty("test_value", value); console.log("pollValue", value);
} // This function is executed each time the "led" variable changes
function onLedChanged(led) { ledLine.setValue(led ? 1 : 0); console.log("LED change! Status is: ", led);
} // Create Arduino Cloud connection
(async () => { try { client = await ArduinoIoTCloud.connect({ deviceId: DEVICE_ID, secretKey: SECRET_KEY, onDisconnect: (message) => console.error(message), }); client.onPropertyValue("led", (led) => onLedChanged(led)); } catch(e) { console.error("ArduinoIoTCloud connect ERROR", e); }
})(); // Poll Value every 10 seconds
const pollValue = setInterval(() => { readValue(client);
}, 10000); // Poll Button every 1 seconds
const pollButton = setInterval(() => { readButton(client);
}, 1000);
Create a file called credentials.js with your Device ID and secret.
This code is compatible with all Raspberry Pi models and should also work on any Linux-based machine. Just make sure to specify the correct gpiochip and configure the appropriate GPIO lines in the code snippet below:
For more information about the project, check out the details on Project Hub. You can find the complete code and additional resources in the Github repository. Plus, don’t miss the comprehensive JavaScript + Arduino Cloud guide in the following article.
Start with Arduino Cloud for free
Getting your Raspberry Pi connected to Arduino Cloud with Node.js is incredibly simple. Simply create your free account, and you’re ready to get started. Arduino Cloud is free to use and comes with optional premium features for even greater flexibility and power.
If you’re ready to simplify data visualization and remote control for your Raspberry Pi applications using Node.js, Python, or Node-RED, Arduino Cloud is the perfect platform to explore and elevate your projects.
2024 was a year for Age of Empires and Age of Mythology players and —a year shaped by your passion, creativity, and epic moments. Thanks to your dedication, it’s been an incredible year not just for the community, but for the franchise as a whole. Together, we’ve had an incredible year. We kicked things off with the New Year, New Age showcase, crowned champions at Red Bull Wololo: El Reinado, connected with many of you at Gamescom, and celebrated the launches of Age of Mythology: Retold and Age of Empires Mobile. Along the way, we expanded the franchise in new ways and welcomed over 10 million new players—reaching an incredible milestone of 60 million Age of Empires players worldwide.
Our players continue to influence the many ways in which the franchise moves forward. Today we’re thrilled to start 2025 by unveiling what’s ahead. Settle in, because we’ve got a lot to share!
Immortal Pillars Expansion Launches March 4, Pre-Order Now
For Age of Mythology: Retold players, the wait is almost over! After revealing the Immortal Pillars expansion for Age of Mythology: Retold at Tokyo Game Show, we’re excited to announce it will launch on March 4th – and pre-orders are live now! Packed with brand-new content, this expansion introduces the Chinese pantheon, alongside stunning new maps, myth units, and gameplay features. Check out some highlights of all the exciting content here!
*As a reminder, if you already own the Age of Mythology: Retold Premium Edition, Immortal Pillars is yours at no additional cost – jump in and play on day one!
Age of Empires II: DE and Age of Mythology: Retold coming to PlayStation 5
I’m delighted to share that we are giving fans more choice to play where they want by bringing Age of Empires II: Definitive Edition and Age of Mythology: Retold to PlayStation 5.
Playing across all platforms is a game-changer for our franchise, and it’s all about bringing our community together. This isn’t just about convenience—it’s about growing and strengthening the Age community. With cross-play, we’re creating one global battlefield where every strategy, every empire, and every player matters.
Age of Mythology: Retold on PlayStation 5
First, on March 4, Age of Mythology: Retold will expand into new myths, new cultures, and welcome new players alongside the Immortal Pillars expansion release. We will welcome PlayStation 5 players to adventure with Arkantos, choose their pantheon, and fight for divine blessings with all the same content available in the Xbox and PC versions. PlayStation 5 players will also be able to purchase Immortal Pillars, and expand their Age of Mythology: Retold experience with the all-new Chinese pantheon.
PlayStation 5 Bonuses:
Get the Premium Edition for 5-day early access to Age of Mythology: Retold starting February 27th, access to the new Immortal Pillars expansion on March 4th, and much more!
Pre-order now and enjoy two exclusive Blessings for the Arena of the Gods mode.
All game updates from March 4th onwards will go to all platforms simultaneously – Steam, Windows Store, Xbox and PlayStation 5 – and players will be able to play together.
Age of Empires II: Definitive Edition on PlayStation
This spring, the globally beloved Age of Empires II: Definitive Edition will make its debut on PlayStation 5. Alongside this release, we’ll be dropping one of the most exciting DLC expansions for Age II: DE yet, packed with fresh new content, new civilizations for Ranked play, and ready for all players to enjoy together across all platforms – PC, Xbox , and PlayStation 5.
While we’re keeping some details under wraps until spring, here’s a sneak peek at what’s coming.
No matter where you are or what platform you prefer, you can now unite with friends, challenge rivals, and share your passion for Age of Empires and Age of Mythology.
Two DLCs Bring Exciting New Ways to Play Age IV in 2025
Big news for Age of Empires IV players! Last year we shared we were working on new DLC for Age of Empires IV, and now we’re back with even better news. We’re not rolling out one DLC in 2025 – we’re actually rolling out two!
With these DLCs, we’re expanding upon concepts we’ve introduced previously, like variant civilizations, with your feedback in mind. Variant civilizations allow us to capture diverse strategic tactics and military forces afforded to various historical bodies, and we’ve got some very exciting ones in development, one of which we’ve heard the community’s been wanting since the release of The Sultans Ascend. Not only are we changing up strategic gameplay with these variants, but we’re also spending time on the fine details: we’re introducing a large set of new units and buildings and, in some cases, updating the overall visuals of many shared units and buildings to assist with better readability and make sure your experience feels fresh! In addition to adapting the variant civilization concept, we’re also exploring unique game modes in both 2025 DLCs that focus on shorter and repeatable experiences – these modes will encourage you to try out new playstyles while also allowing you to adapt your skills and test your mettle over time.
Excited to learn more? You won’t have to wait long! The first of these two DLCs, Knights of Cross and Rose, is set to launch this spring. This DLC brings fresh new gameplay experiences to the Age IV community, allowing players to lead two well-known armies inspired by history and offering a solo mode that will challenge even the most skilled strategists.
Stay on the lookout for a deep dive soon. The Age IV team is excited to share what they’ve been cooking up!
Age of Empires Mobile: The Journey Continues
In just four months since launch, Age of Empires Mobile has captivated millions of players worldwide and brought new fans to our community. From Halloween mayhem to the Mightiest Empire contest, governors have been busy expanding kingdoms and leading legendary heroes like Boudica and Lu Bu to victory.
February brings a host of new features and events to enhance your gameplay experience:
Battle of Dawn: A campaign set in a legendary temple is about to unfold. Secure ultimate victory by transporting temple relics and employing class skills. With four stages leading to cross-server combat, there’s plenty to look forward to.
Stellar Glory: This new event activates a battle zone mode letting you face off against governors from different kingdoms.
Valentine’s Day Cosmetics: Obtain exclusive themed items like the Heart Hunter’s Circus Citadel Theme and Passionate Reverie Troop Set.
Josephine’s Treasure Hunt: Follow Princess Josephine and compete in three events; Celestial Chronicles, Path of Starlight and Alchemist’s Secret Art. Earn dice items to roll and earn points. Move around a game board to earn rewards!
Stay tuned for these exciting updates and new features in February.
To celebrate Age of Empires Mobile, we’ve also got an exclusive gift code for the first 20,000 users to redeem it! Code: AoEMVLTN
Making History in 2025
This is just a glimpse of what’s shaping up to be an extraordinary 2025. We’ve got plenty more surprises in store, so make sure you’re following our community channels and reading our blogs at ageofempires.com to stay up to date.
Please continue to send us your feedback, your thoughts and what you’d like to see next across our social channels, forums, Discord and Steam.
Armor up and rally your forces—it’s time to charge into 2025 like Zeus commanding the skies, Joan of Arc leading her crusade, or Genghis Khan conquering the steppes – and I’ll see YOU on the battlefield!! 🛡️⚔️
We love hearing from members of the community and sharing the stories of amazing young people, volunteers, and educators who are using their passion for technology to create positive change in the world around them.
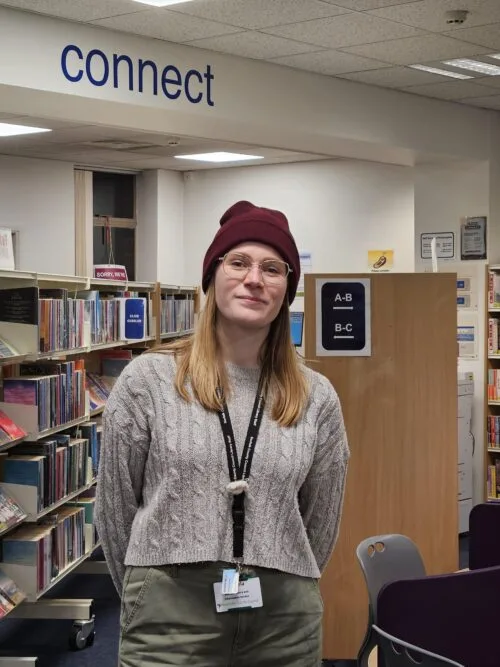
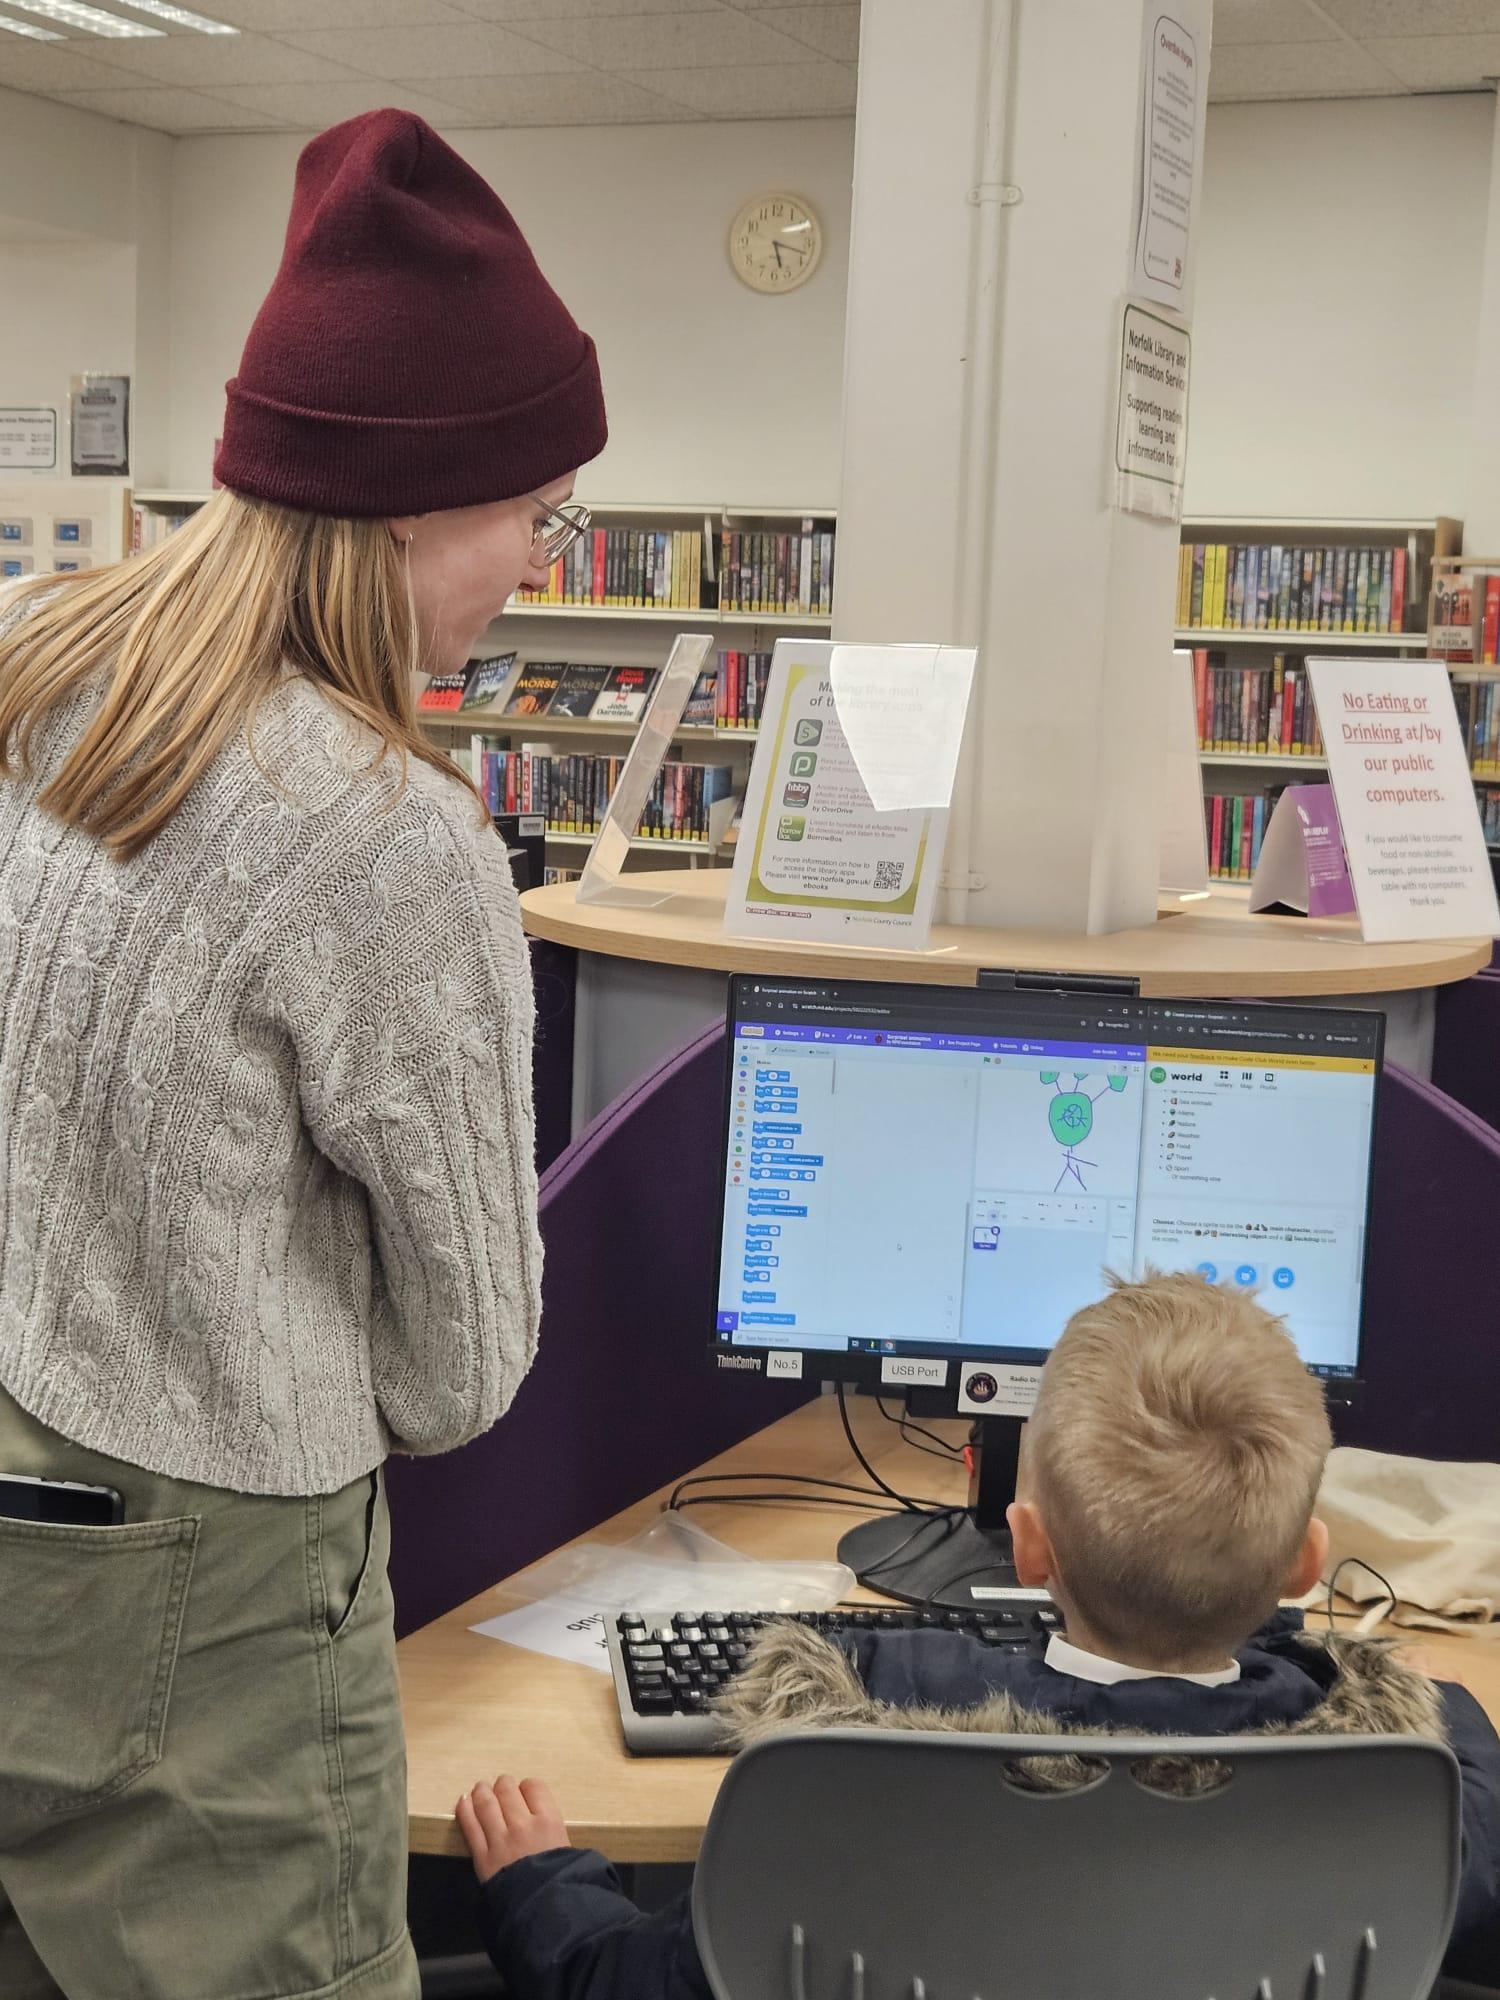
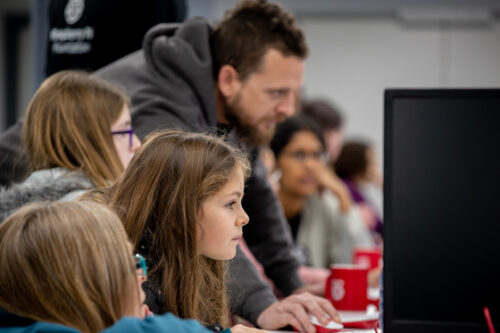
When Daniela made the transition from working in retail to joining the team at Thetford Library, she never imagined that she would one day be leading a Code Club. Her manager, who had previously run the club, asked if Daniela would be interested in taking over, and although she was nervous, she was also eager to embrace the challenge and learn new skills.
“At first, I was nervous about teaching coding, but seeing the children’s excitement made me realise it was so important, and I was learning just as much as they were.”
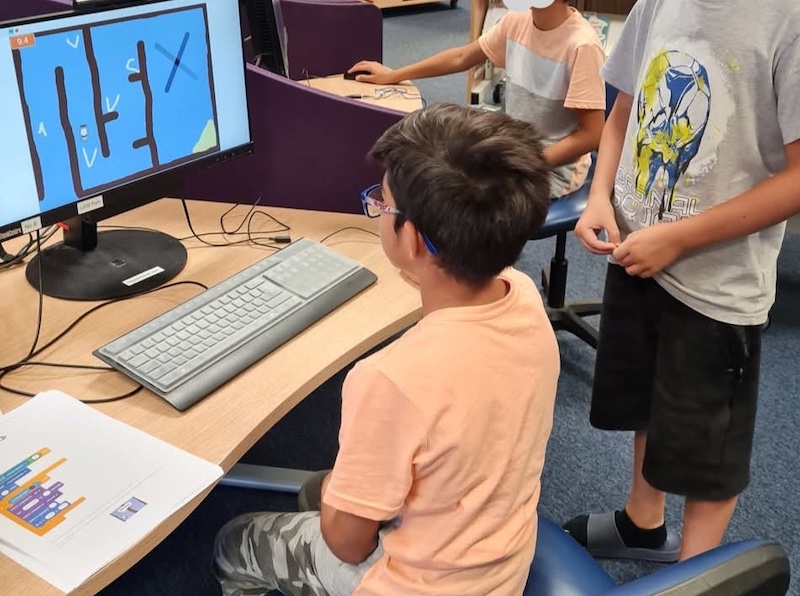
The Code Club was designed to run in eight-week blocks, with a new group of children joining for each term. However, the kids loved it so much that they didn’t want to leave. Daniela, with her growing passion for coding and mentoring, welcomed the children to attend as often as they wanted, with some children, including one particularly enthusiastic young creator, attending every session. This continuity allowed the children to delve deeper into the world of coding, learning in a different way to what they were used to at school.
Inspiring young coders through creativity
One of the key things that Daniela has found resonates most with the children is the combination of creativity and coding. She encourages the kids to draw and plan their projects first, which makes the process more engaging and accessible to all of the young people who want to attend. The freedom to be creative is something that she feels is crucial, especially when compared to the more structured and rigid environment of school curriculums. This approach has been particularly rewarding for one young girl in the club who insists on planning and drawing her own characters and backgrounds for all of her projects.
“Coding isn’t just about writing lines of code — it’s about storytelling, problem solving, and imagining what’s possible.”
Astro Pi: giving young people the confidence to dream big
Daniela’s journey into coding took a significant leap when she decided to explore the Astro Pi challenge, a project that involves writing code to run on Astro Pi computers aboard the International Space Station. Despite her initial nerves about diving into Python, a more advanced programming language than she had tried at the club previously, she was blown away by the possibilities it opened up. When telling the children, she almost felt that she was more excited at the prospect of them trying out real space science than them. But once she showed them some examples, the buzz was infectious and the sessions ran far smoother than she could have hoped. Daniela’s tip for trying Astro Pi for the first time? Find a fellow mentor to help you along the way and dream big.
“I never imagined we’d be working on space science at our library. Introducing children to coding early isn’t just about technology; it’s about giving them the confidence to dream big and think differently.”
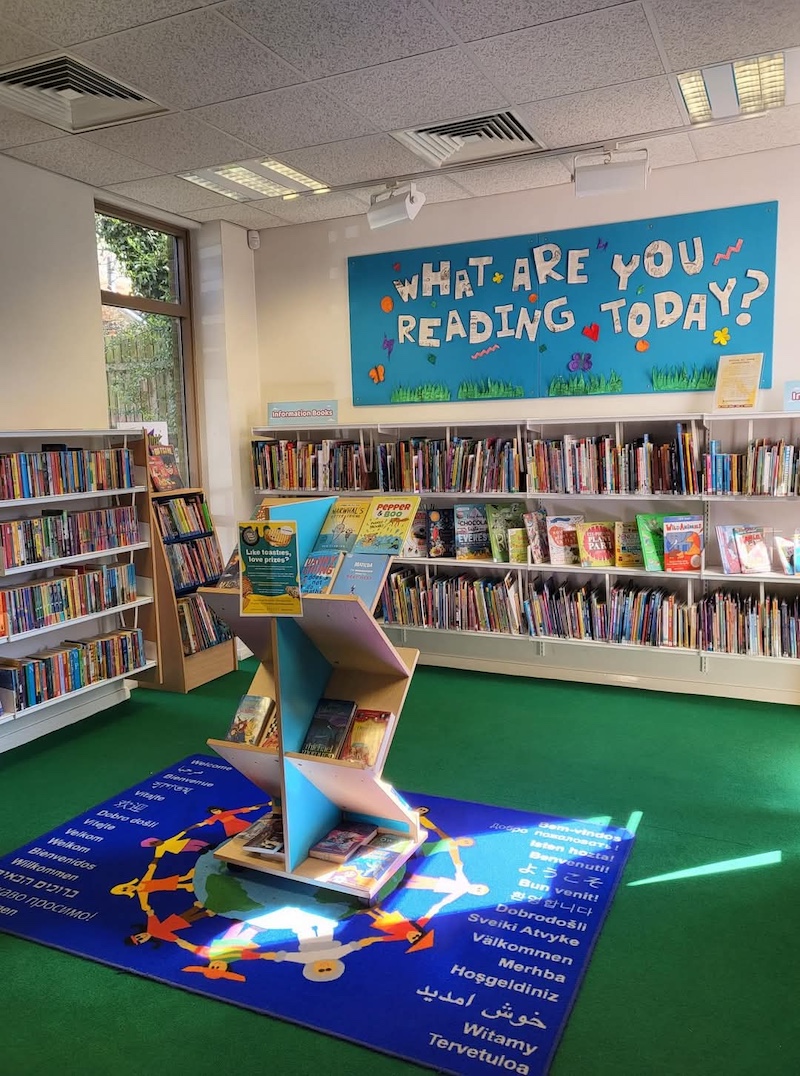
The success of the Code Club at Thetford Library is part of a broader initiative by Norfolk Libraries to provide digital skills to the community. They are committed to offering resources and opportunities for people of all ages to engage with technology. From their Digital Week, which focuses on improving digital literacy, to offering mentorship for adults learning to navigate the digital world, Norfolk Libraries is working hard to bridge the digital divide.
Benefits of volunteering at a Code Club
For Daniela, the importance of introducing children to coding at an early age is not something she thought would become a passion for her when moving careers. She sees firsthand how these skills empower the children, giving them confidence and opening up future career opportunities.
“Code Club has shown me that stepping outside your comfort zone is where the real growth happens. Both for me and the kids!”
It’s this combination of creativity, learning, and the sheer joy of discovery that keeps Daniela passionate about running the Code Club, and why she continues to welcome every eager child who walks through the door.
Inspire young people in your community
If you are interested in encouraging your child to explore coding, take a look at the free coding project resources we have available to support you. If you would like to set up a Code Club for young people in your community, or attend one, head to codeclub.org for information and support.
We’re thrilled to announce the latest member of our System Integrators Partnership Program (SIPP): ControlSI, based in Peru, is well known for their expertise in Industry 4.0 solutions – including industrial automation, operational intelligence, data analytics, computer vision, and edge AI – and brings a wealth of knowledge and innovation to the Arduino ecosystem.
This partnership is a game-changer, combining Arduino Pro’s reliable and flexible hardwarewith ControlSI’s advanced cyber-physical systems integration. Together, we’ll deliver customized solutions that span from data capture to real-time analytics, empowering businesses across industries to optimize their processes through accessible and scalable technology.
“We are excited to welcome ControlSI into the Arduino Pro family,” said Guneet Bedi, Arduino’s Senior Vice President and General Manager of the Americas. “Their dedication to making IoT and cyber-physical technologies accessible to all aligns perfectly with our mission. We look forward to seeing how this partnership will drive innovation and deliver exceptional value to our clients.”
ControlSI’s directors, Orlando Torres and Carlos Diaz, echoed this enthusiasm: “This association with Arduino Pro allows us to expand the limits of industrial automation and real-time data analysis, providing our clients with a complete solution that adapts to their technological and growth needs.”
The System Integrators Partnership Program by Arduino Pro is an exclusive initiative designed for professionals seeking to implement Arduino technologies in their projects. This program opens up a world of opportunities based on the robust Arduino ecosystem, allowing partners to unlock their full potential in collaboration with us.
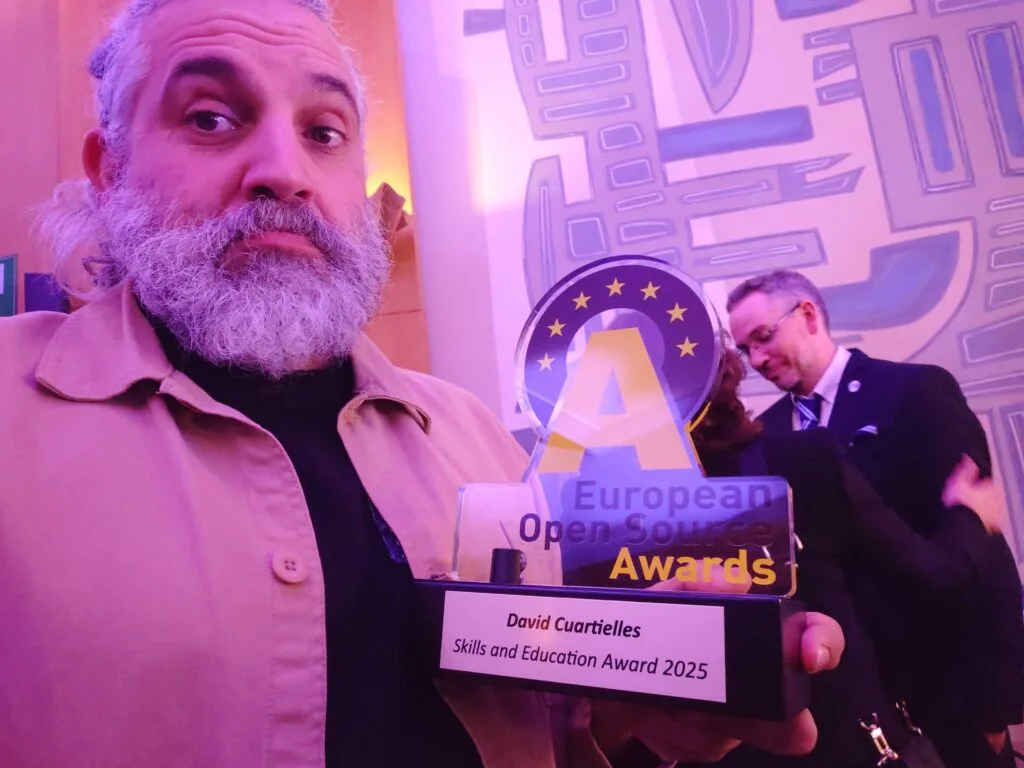
We are proud to announce that David Cuartielles, co-founder of Arduino, has been honored with the Open Source Award on Skills and Education 2025 and has become a founding member of the Open Source Academy of Europe. This prestigious award recognizes individuals who have made outstanding contributions to open-source education, ensuring that knowledge remains accessible to all.
David’s impact on the world of education and technology is undeniable, but this recognition is about more than just one person’s efforts: it is a celebration of the huge community of educators, students, and innovators who have embraced open-source tools, shaping the way we all engage with technology and empowering millions worldwide.
To share this moment with all of you, here are some key reflections from David’s acceptance speech.
A lifelong commitment to education and openness
“I became an engineer by following my own dreams. Since then, I have devoted my professional career to education. I taught, and still teach, programming and electronics to artists and designers. As a side effect, I co-authored what is probably the most copied piece of educational hardware to date – Arduino. Hardware that we decided to publish under an open license.”
When Arduino was introduced in 2005, open-source hardware was a radical idea. At the time, open licenses were primarily associated with software, music, and written content, not physical artifacts. Arduino helped expand the reach of openness, to include design files for hardware, lab tools, and even furniture. This was a game-changer for education, enabling students, researchers, and makers everywhere to build, modify, and share technology freely.
“We were the hippies of hardware, but we believed that open licenses were the way to ensure full access to tools for students and researchers. We were part of an emergent movement happening on a global scale, and we were lucky to arrive early.”
Defending openness in the modern world
But as open-source adoption has grown, its meaning has shifted. What once symbolized accessibility, collaboration, and ethical responsibility has, in some cases, become diluted within large corporate structures. David spoke directly to this concern: “Openness went from being a club of misfits to being what everyone wanted to be. Being a hacker was once seen as dangerous and strangely illegal… now, it’s what parents want for their kids, fueled by stories of economic success.”
Despite widespread – often superficial – adoption, the political values and ethical foundations of open source are fading. “This is the moment to address the elephant in the room. We now live in a world where some claim to be creating open-source LLMs running on the public cloud, but neither are the LLMs open, nor is the cloud public.”
David’s message is clear: the open-source movement mustreaffirm its roots in solidarity, companionship, and social progress. True openness should continue to empower individuals, foster collaboration, and break down barriers to education and innovation.
A heartfelt thank you
David concluded his speech by acknowledging the people who have supported him throughout his journey:
“I would like to thank all of those who supported me on the way: my colleagues and students at Malmö University, the community members and mates at Arduino, my friends, and my family. Thank you.”
This award is a recognition not just of David’s achievements, but of the shared effort of the Arduino community and the global open-source movement. It’s a moment to reflect on how far we’ve come and to continue pushing forward, together.
Congratulations to Dr. David Cuartielles, and thank you to everyone who carries the spirit of open-source forward!
Mark your calendars for March 21-22, 2025, as we come together for a special Arduino Day to celebrate our 20th anniversary! This free, online event is open to everyone, everywhere.
Two decades of creativity and community
Over the past 20 years, we have evolved from a simple open-source hardware platform into a global community with literal millions of makers, educators, and innovators. Together, we’ve built countless projects (5,600+ just on Project Hub at the time of writing!), shared knowledge, and inspired one another to push the boundaries of technology.
As we celebrate this milestone, we want to honor our shared journey as a community. The technological world is accelerating and welcoming more people than ever before: we believe this makes it even more important for everyone to have access to innovation, and to contribute to a future filled with creativity and collaboration.
Be part of the celebration
This year’s Arduino Day promises to be one of the most content-packed to date, featuring engaging talks from experts and enthusiasts on a variety of topics, exciting product announcements to get a first look at what’s coming next, and of course our favorite – community showcases that feature inspiring projects from amateur and professional users around the world. Because it may be called “Arduino Day”, but it’s all about you and the community.
If you’re passionate about sharing your knowledge or organizing an event to celebrate the Arduino community and all that it stands for, here’s how you can get involved:
Call for Speakers: Have a project, idea, or experience to share? Submit your proposal to present during the event. Visit the Arduino Days website for details or go directly to the submission form for speakers.
Call for Organizers: Interested in hosting a local meetup or workshop? Join our global network of organizers and bring Arduino Day to communities everywhere. We’ll literally “put you on the map” on the Arduino Days website! Go to the site for details or straight to the submission form for organizers.
Stay tuned and get involved
Find the most updated information and schedule for the two-day event on the dedicated Arduino Day website, live now: as speakers and organizers are confirmed, we’ll add them there!
Bookmark the page to view the live streaming on March 21st and 22nd: we can’t wait to celebrate this milestone birthday with all of you. Let’s make our 20th-anniversary celebration a memorable one, together!
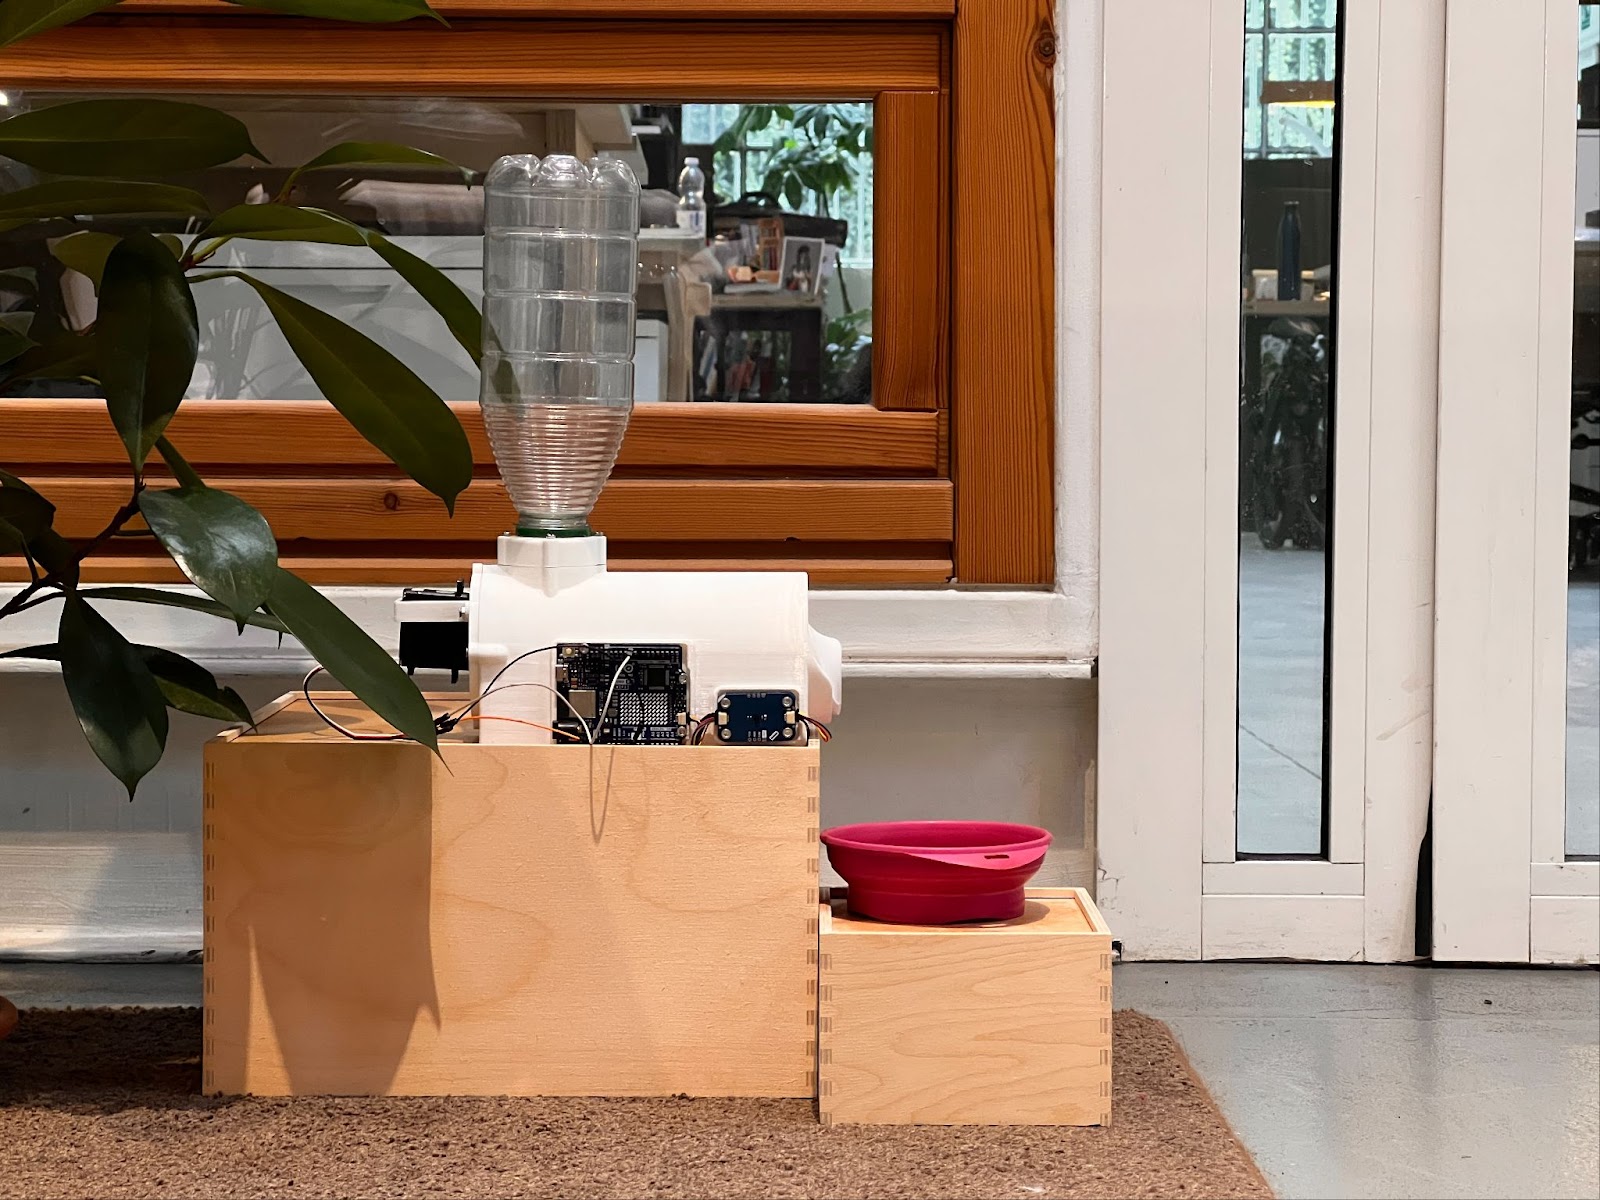
If you are a pet owner, you know how important it is to keep furry companions fed and happy – even when life gets busy! With the Arduino Plug and Make Kit, you can now build a customizable, smart pet feeder that dispenses food on schedule and can be controlled remotely. It’s the perfect blend of functionality and creativity, designed to simplify your life and delight your cat, dog, rabbit, hamster, or cute creature of choice.
Here’s everything you need to automate feeding your pet
This intermediate project is packed with advanced features, made easy by the intuitive Plug and Make Kit. With its modular components, creating your own smart pet feeder is straightforward, fun, and easy to customize.
Here’s what you’ll need:
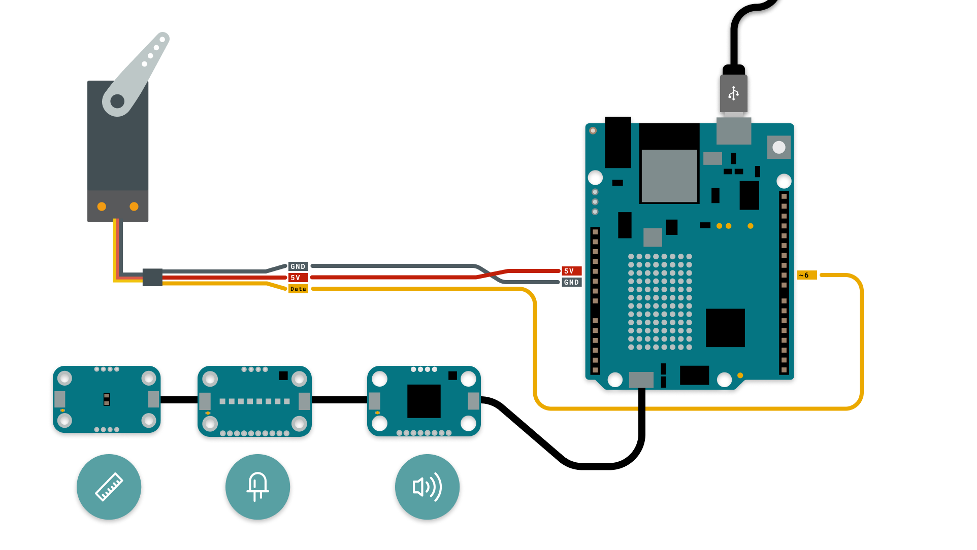
Arduino Plug and Make Kit, which already includes UNO R4 WiFi, Modulino Distance, Modulino Buttons, Modulino Pixels, and Qwiic cables
A continuous servo motor (such as this one, for example)
Some jumper wires and screws for assembly
A 3D printer (to create the case either with the files we provide, or with your own designs!)
Once the setup is complete, you can remotely control the feeder via a ready-to-use Arduino Clouddashboard, where you’ll set dispensing schedules, adjust portion sizes, and even customize LED lights to match your pet’s mood.
The Modulino Distance sensor ensures food comes out only when needed, while the Modulino Buzzer adds some audio feedback for a playful touch.
Make it the cat’s meow!
As you know, the Plug and Make Kit’s versatility allows for endless possibilities. Feel free to expand this pet feeder project with additional features! For example, you can add a motion-activated camera to capture your pet’s activities, or a real-time weight monitor to track how much food is consumed. You can even activate voice commands for an interactive feeding experience (maybe skip this one if you have a parrot!).
Now you have all the info you need to build your own smart pet feeder: time to grab your Arduino Plug and Make Kit and get started. The template we’ve created simplifies the process, letting you focus on the fun parts of building and experimenting.
Be sure to share your creations with us – upload them to Project Hub or email creators@arduino.cc to get in touch. We can’t wait to see how you make the small daily routine of feeding your pet smarter, and a lot more fun, with Arduino!
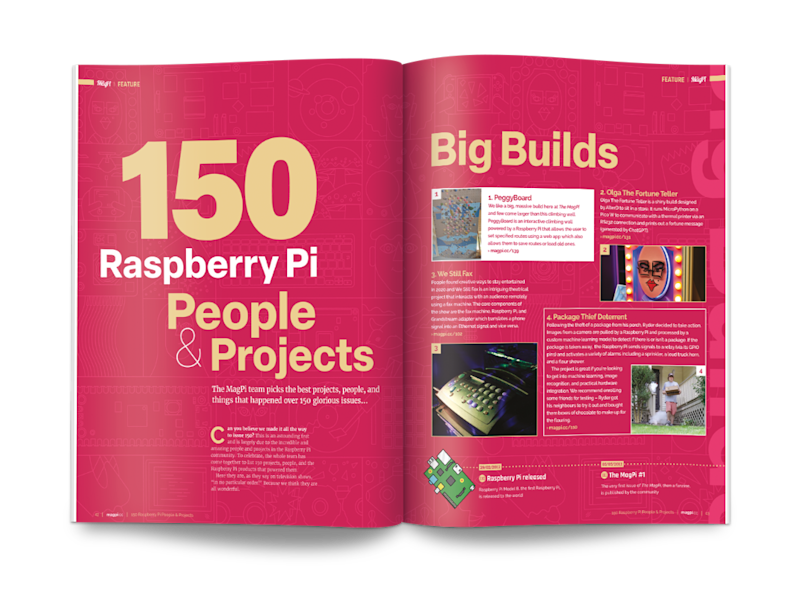
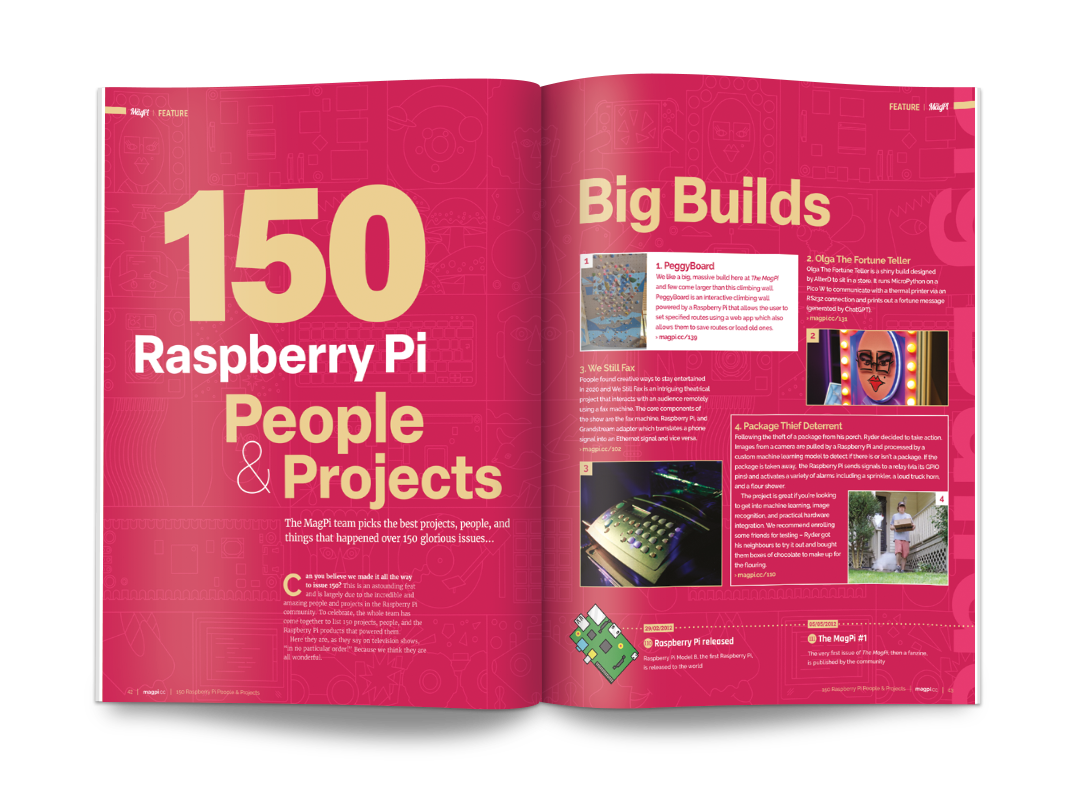
In 150 issues, we’ve seen a huge range of epic builds with Raspberry Pi computers at their heart. We’ve got everything machine learning prosthetic arms to underwater archaeology submarines; old-school equipment and futuristic robots. Over 20 pages with 150 incredible project ideas await you.
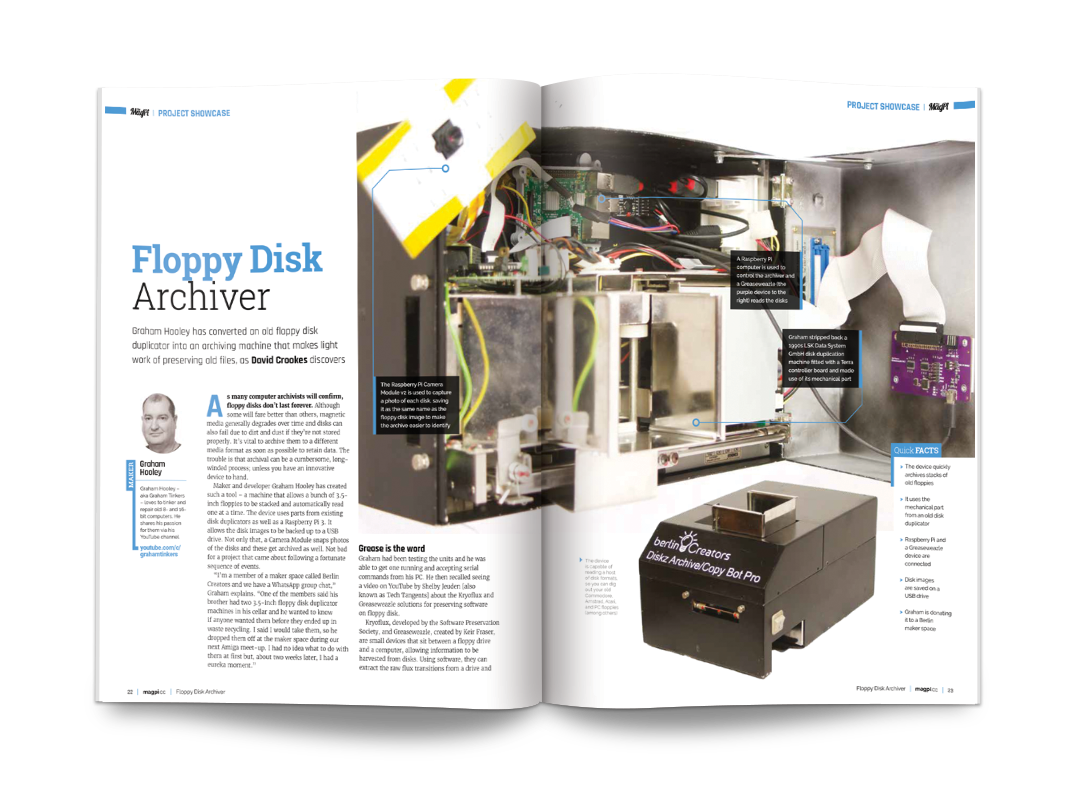
Archiving old floppy disks
Graham Hooley has converted an old floppy disk duplicator into an archiving machine that makes light work of preserving old files. The device uses the mechanical parts from an old disk duplicator, along with Raspberry Pi and a Camera Module. Disk images are scanned, snapped, and saved to a USB flash drive.
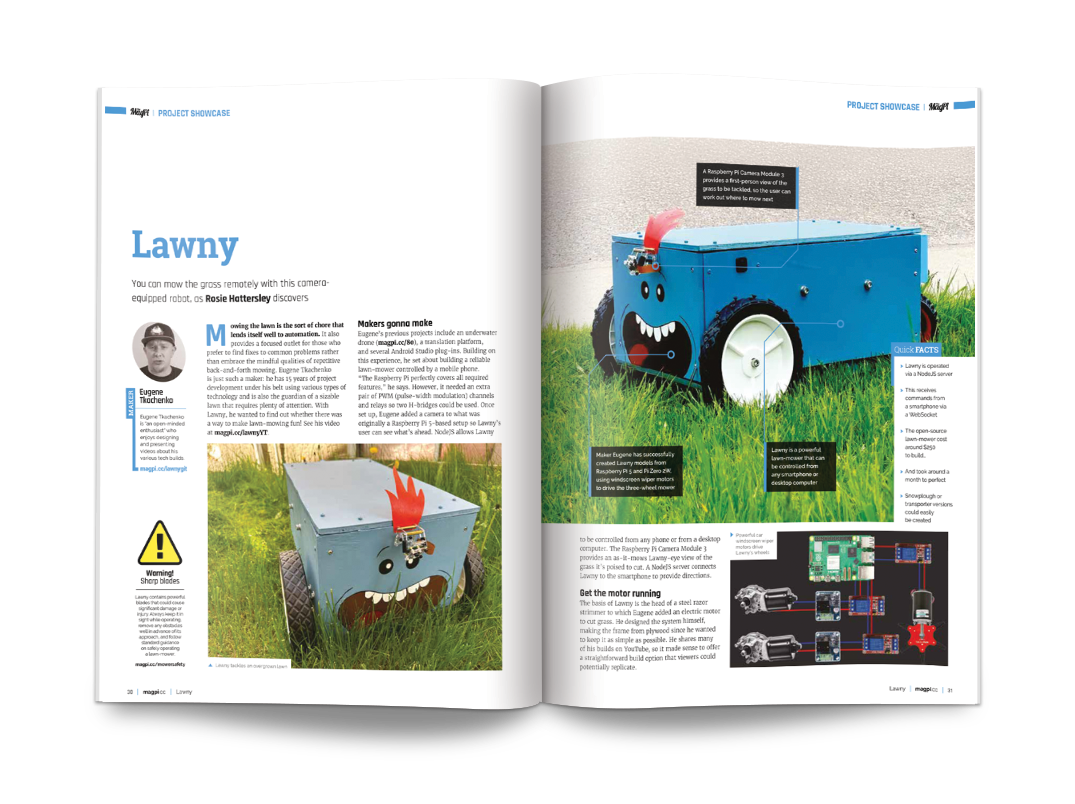
Mow the lawn automatically
Lawny is the brainchild of Eugene Tkachenko. This robot mower is built with windscreen wiper motors controlled by Raspberry Pi. A Raspberry Pi Camera provides a first-person view as Lawny rolls around the garden.
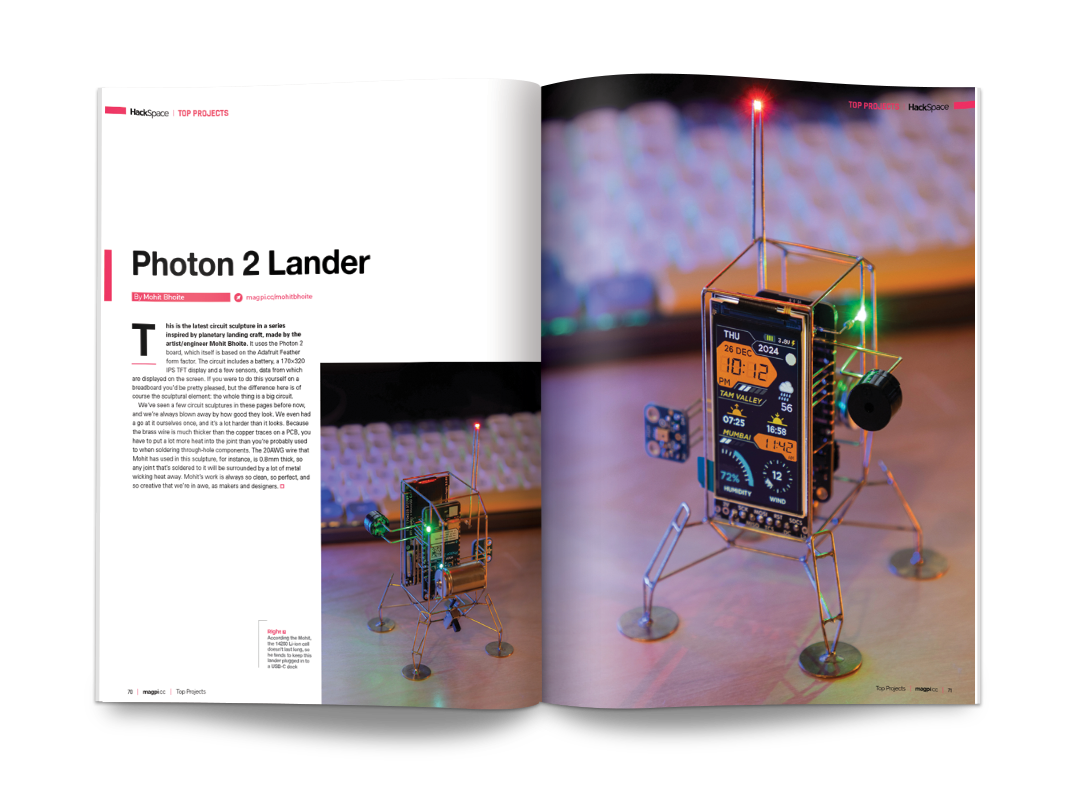
Photon 2 Lander
This is the latest circuit sculpture in a series inspired by planetary landing craft, made by the artist and engineer Mohit Bhoite.
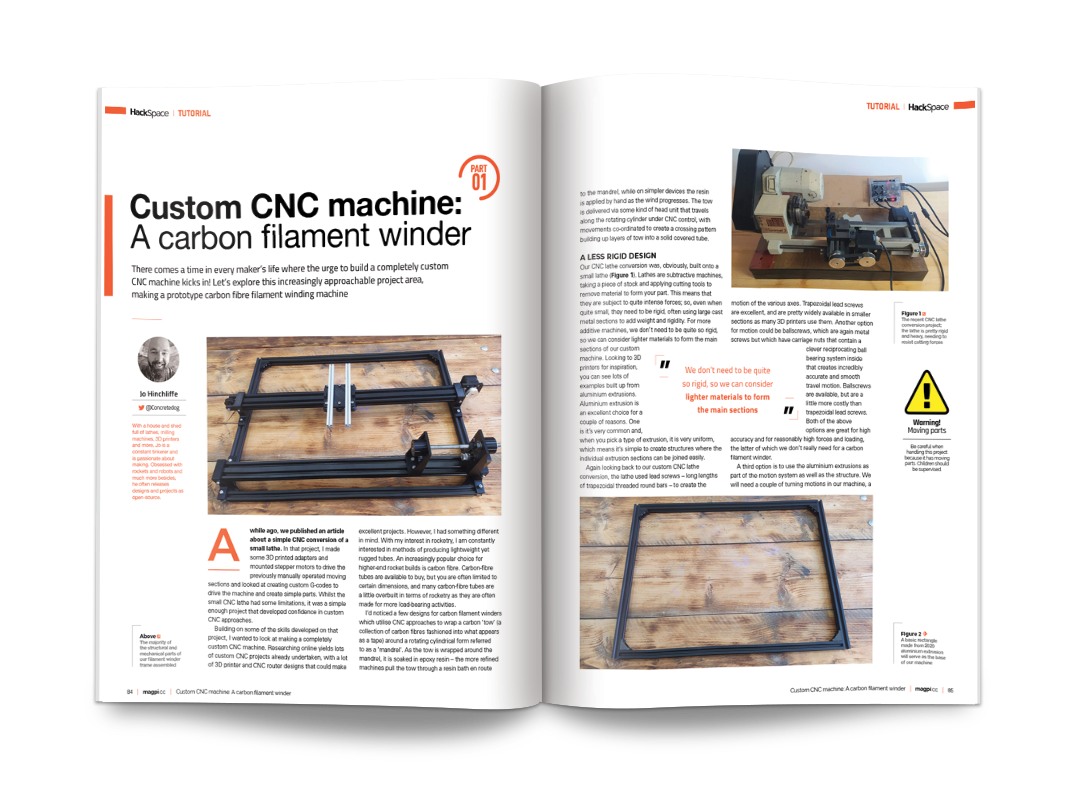
Custom CNC machine: A carbon filament winder
“There comes a time in every maker’s life where the urge to build a completely custom
CNC machine kicks in!” Or so says Jo Hinchliffe. This month Jo looks at increasingly approachable project area, making a prototype carbon fibre filament winding machine
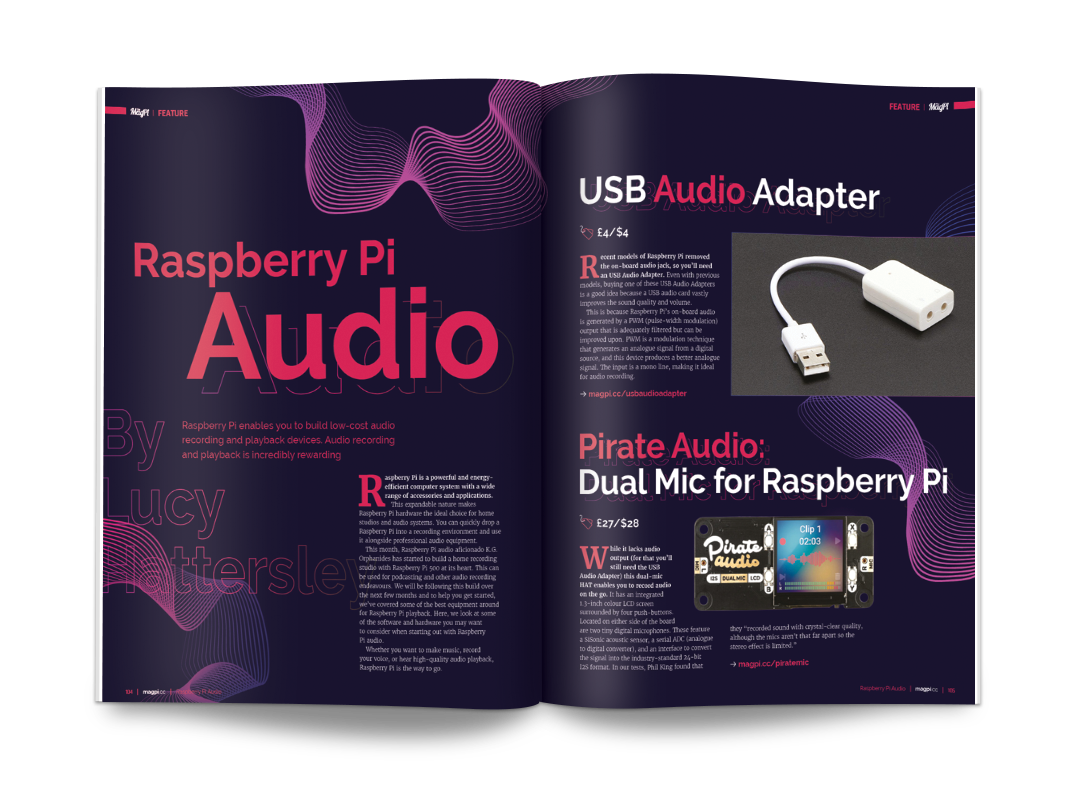
Raspberry Pi Audio
Raspberry Pi hardware is the ideal choice for home studios and audio systems. You can quickly drop a Raspberry Pi into a recording environment and use it alongside professional audio. This month maker, KG Orphanides, puts the powerful-yet-silent Raspberry Pi 500 at the heart of their audio studio build.
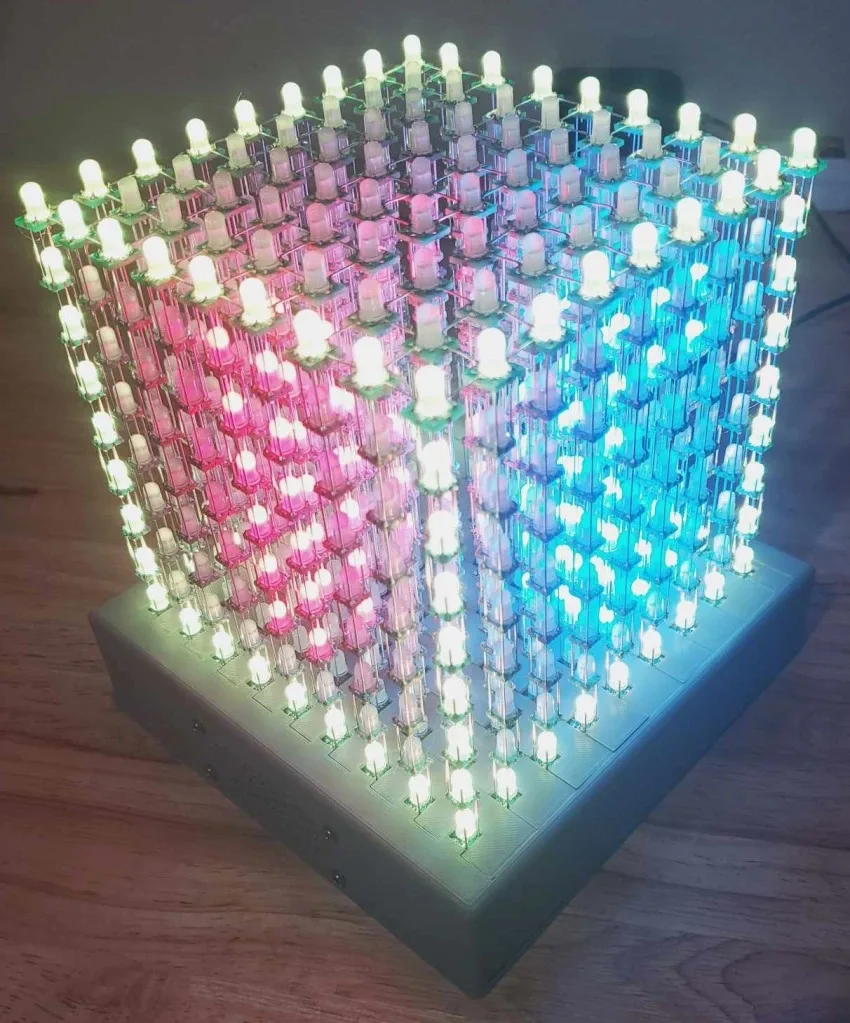
Many modern video games may put your character inside of a virtual 3D environment, but you aren’t seeing that in three dimensions — your TV’s screen is only a 2D display, after all. 3D displays/glasses and VR goggles make it feel more like you’re in the 3D world, but it isn’t quite the same as you have no control over focus. What would gaming look like in true 3D? Greg Brault built this 9x9x9 LED cube as a video game display to find out.
Brault actually built a similar 8×8×8 LED cube with some games 10 years ago, but this new version is a lot better. Not only does it have an additional 217 LEDs, but Brault took the time to create a kind of graphics engine to make game development easier. That’s so good that he was able to program a version of Doom that runs on the cube!
The new cube contains 729 WS2811 individually addressable RGB LEDs on custom PCBs and those are much easier to control than the standard RGB LEDs Brault used in the original cube. An Arduino Nano ESP32 board controls those LEDs on one ESP32-S3 core and the gameplay on the other core. It can play sound effects via a DFPlayer Mini board.
But the real power is in Brault’s custom 3D rendering engine. Building on the FastLED library, it has all kinds of functions and objects useful for programming graphics on the unique cube display. It is efficient enough to run games at a playable “framerate.”
With that engine at his disposal, Brault was able to make a handful of games: Pong, Space Invaders, Pole Position, Snake, Asteroids, and even Doom. Seeing those reimagined to work in 3D is a real treat, so be sure to watch Brault’s demonstration videos.
Save 35% off the cover price with a subscription to The MagPi. UK subscribers get three issues for just £10 and a FREE Raspberry Pi Pico W, then pay £30 every six issues. You’ll save money and get a regular supply of in-depth reviews, features, guides and other Raspberry Pi enthusiast goodness delivered directly to your door every month.
As an organisation with global reach, translation and localisation have been part of the Raspberry Pi Foundation’s activities from the start. Code Clubs and educational partners all over the world are helping young people learn about computing in their own language. We’ve already published over 1,900 translated learning resources, covering up to 32 languages, thanks to the work of our talented localisation team and our amazing community of volunteer translators.
How our approach to translation considers design, process and people
English is seen by many as the language of computing, and in many countries, it’s also either the language of education or a language that young people aspire to learn. However, English is, in some instances, a barrier to learning: young people in many communities don’t have enough knowledge of English to use it to learn about digital technologies, or even if they do, the language of communication with other students, teachers, or volunteers may not be English.
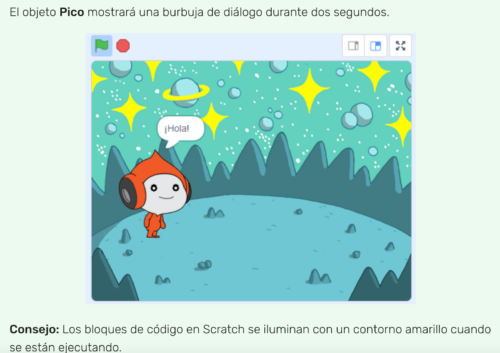
Our ‘Space Talk’ project in Latin American Spanish
In a world where browsers can instantly translate web pages and large language models can power seemingly perfect conversations in virtually any language, it’s easy to assume that translation just happens and that somehow, technology takes care of it. Unfortunately, that’s not the case. Technology is certainly crucial to translation, but there’s much more to it than that. Our approach to translation involves considering design, process, and people to ensure that localised materials truly help young people with their learning journey.
Localisation or translation?
Localisation and translation are similar terms that are often used interchangeably. Localisation normally refers to adapting a product to suit a local market, whereas translation is a subset of localisation that involves changing the language of the text. For instance, localisation includes currencies, measurements, formatting dates and numbers, and contextual references. Meanwhile, translation involves only changing the language of the text, such as from English to French.
At the Raspberry Pi Foundation, we see translation as an enabler. It enables volunteers to reach learners, learners to succeed in their educational goals, and the Foundation to achieve its mission all over the world.
Four key ways the Foundation maximises the impact and reach of our translated materials
1. Create with localisation in mind
Regardless of whether learning materials are intended for English-speaking or global audiences, it’s important to create and design them with localisation in mind. That way, they can be used in a variety of places, and any piece of content (text, graphics, or illustrations) can be modified to meet the needs of the target audience. Keeping localisation in mind might include allowing space for text expansion, being mindful of any text embedded in graphic elements, and even making sure the context is understandable for a variety of audiences. Making a piece of content localisable at the creation stage is virtually cost-free. Modifying fully built assets to translate them or to use them in other markets can be expensive and extremely time-consuming!
2. Always have user needs and priorities upfront
Before investing in localising or translating any materials, we seek to understand the needs and priorities of our users. In many countries where English is not the usual language of communication, materials in English are a barrier, even if some of the users have a working knowledge of English. Making materials available in local languages directly results in additional reach and enhanced learning outcomes. In other communities where English has a certain status, a more selective approach may be more appropriate. A full translation may not be expected, but translating or adapting elements within them, such as introductions, videos, infographics, or glossaries, can help engage new learners.
3. Maximise the use of technology
While it’s possible to translate with pen and paper, translation is only scalable with the use of technology. Computer-assisted translation tools, translation memories, terminology databases, machine translation, large language models, and so on are all technologies that play their part in making the translation process more efficient and scalable.
At the Foundation, we make use of a variety of translation technologies and also, crucially, work very closely with our content and development teams to integrate their tools and processes into the overall localisation workflow.
4. Take great care of the people
Even with the best technology and the smoothest integrations, there is a human element that is absolutely essential. Our amazing community of volunteers and partners work very closely with learners in their communities. They understand the needs of those learners and have a wealth of information and insights. We work with them to prioritise, translate, review and test the learning materials. They are key to ensuring that our learning materials help our users reach their learning goals.
In summary
Thinking about localisation from the moment we start creating learning materials, understanding the needs of users when creating our end goals, maximising the use of technology, and taking good care of our people and partners are the key principles that drive our translation effort.
If you’d like to find out more about translation at the Raspberry Pi Foundation or would like to contribute to the translation of our learning materials, feel free to contact us at translation@raspberrypi.org.
A version of this article also appears in Hello World issue 23.
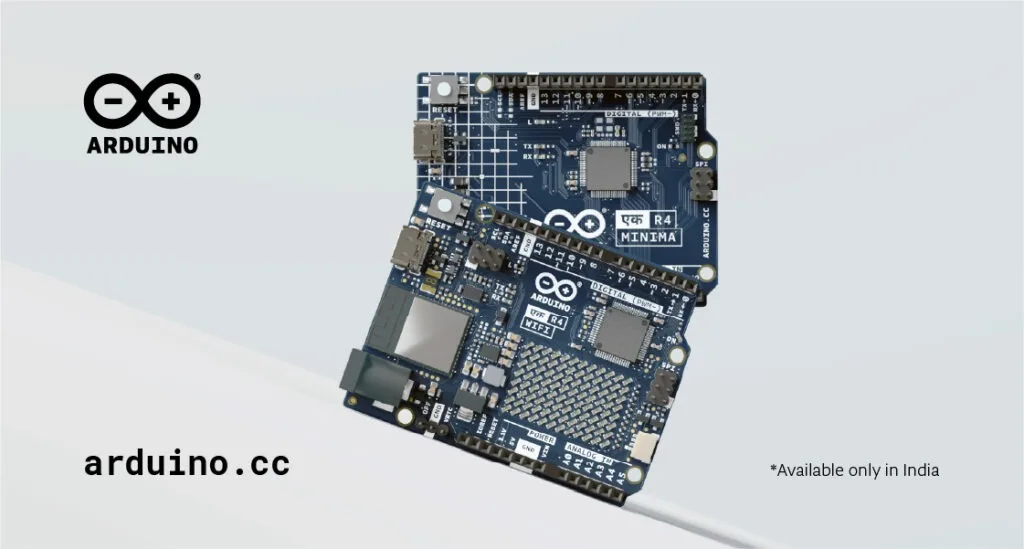
We are proud to announce the Made-in-India UNO Ek R4! Available exclusively in India in both WiFi and Minima variants, it is born to meet the needs of the country’s growing maker and innovation ecosystem, by combining all the powerful features of the UNO R4 with the benefits of local manufacturing, enhanced availability, anddedicated support for Indian users.
Uno, one, Ek ! In case you are wondering, Ek means “one” in Hindi, symbolizing unity and simplicity. It represents the Arduino UNO’s position as the foundation of countless maker projects – simple yet powerful, and always the first step toward innovation. To pronounce Ek, say “ake” (rhymes with “bake”) with a soft “k” sound at the end.
Supporting innovation in India
The two new boards were developed under the “Make in India” campaign, launched to make India the global design and manufacturing hub, and are being launched as part of the country’s Republic Day celebrations. They were first unveiled at the World Economic Forum 2025 in Davos, where they were presented to Shri Ashwini Vaishnav, India’s incumbent Minister of Electronics and Information Technology, and Mr Jayant Chaudhary, Minister of State (IC) for the Ministry of Skill Development & Entrepreneurship. The event was an outstanding opportunity to reflect on India’s huge role in technological innovation and open-source initiatives, with a focus on fostering STEM education and advancing the maker community.
Fabio Violante, CEO (right), and Guneet Bedi, SVP and General Manager (left) with Shri Ashwini Vaishnaw, Minister of Electronics and IT (center).
Fabio Violante, CEO (right), and Guneet Bedi, SVP and General Manager (left) with Mr Jayant Chaudhary, Minister of State (IC) for the Ministry of Skill Development & Entrepreneurship (center).
We are committed to empowering the thriving maker and engineering community in India – the second country in the world for Arduino IDE downloads, just to mention one important statistic! As our CEO Fabio Violante shares,“Arduino’s decision to manufacture in India reflects the nation’s immense potential as a rising global leader in technology. This step embodies our deep belief in the power of collaboration and community. By joining forces with Indian manufacturers, we aim to ignite a culture of innovation that resonates far beyond borders, inspiring creators and visionaries worldwide.”
Why choose UNO Ek R4 boards?
The UNO Ek R4 WiFi and UNO Ek R4 Minima offer the same powerful performance as their global counterparts, featuring a 32-bit microprocessor with enhanced speed, memory, and connectivity options. But the Made-in-India editions come with added benefits tailored specifically for Indian users, including:
Faster delivery: Locally manufactured boards with extensive stock ensure reduced lead times for projects of all sizes.
Affordable pricing: Genuine Arduino products made accessible at competitive prices.
Local support: Indian users gain access to official technical assistance alongside Arduino’s vast library of global resources.
Sustainable manufacturing: Produced ethically with eco-friendly packaging and certified to SA8000 and FSC standards.
Guneet Bedi, Arduino’s Senior Vice President and General Manager of the Americas, comments: “By adding the Arduino UNO Ek R4 WiFi and Arduino UNO Ek R4 Minima to our product line, Arduino is helping to drive adoption of connected devices and STEM education around the world. We’re excited to see the creative projects this community can create with these new boards.”
The past and the future are Ek
The strong legacy of the UNO concept finds a new interpretation, ready to leverage trusted Arduino quality and accessibility to serve projects of any complexity – from IoT to educational applications to AI.
Catering more closely to local needs, UNO Ek R4 WiFi and UNO Ek R4 Minima are equipped to drive the next wave of innovation in India. Both will be available through authorized distributors across the country: sign up here to get all the updates about the release!
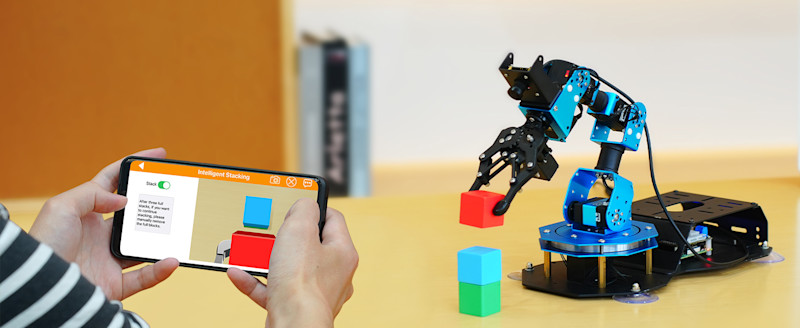
The Standard kit features the robotic arm, breakout board (for Raspberry Pi 4 or 5), power supply, paper ‘map’, wooden blocks, coloured balls, and tags. The Advanced version adds some flat-pack shelving for ‘warehousing’ operations.
A smartphone companion app is the easiest way to try out AI modes such as object tracking and face recognition. But there’s a lot more you can do: by following an extensive array of online tutorials, you’ll learn how to program it with Python, use OpenCV for image recognition, and much more.
Verdict
9/10
A sturdy robotic arm with 6DOF and computer vision. Price: £236 / $300
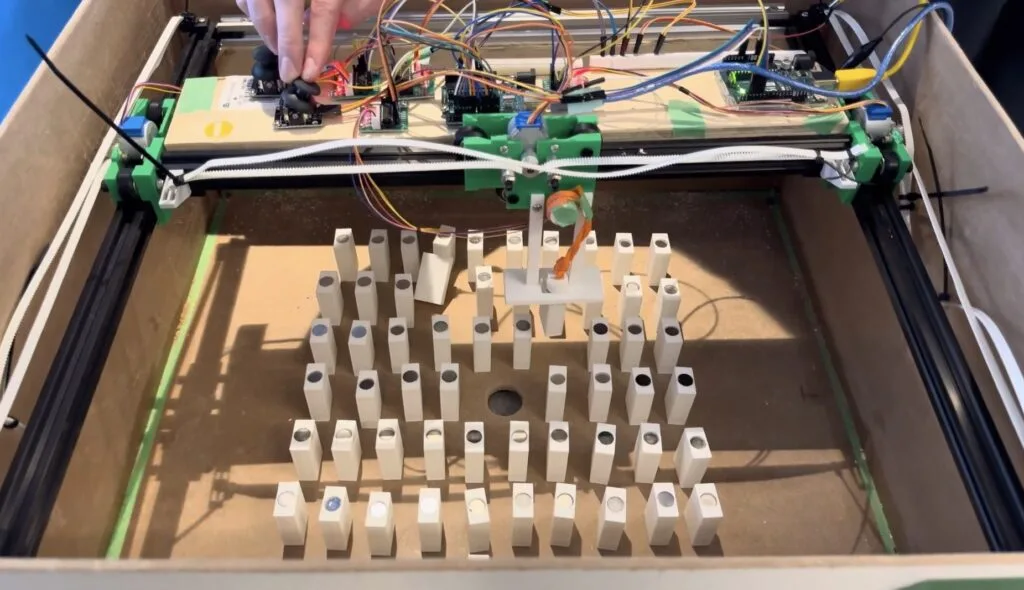
Server rooms are built for the comfort of servers — not people. But those servers need maintenance, which means they need to be accessible. The resulting access corridors take up room that could be filled with more servers, which is why Jdw447 designed a claw machine-esque ‘modular server room’ and built a working scale model to demonstrate the concept.
This isn’t necessarily a serious proof of concept, as there would be a lot more to consider on top of simply moving the servers to an accessible location. But it is a novel idea that Jdw447 actually brought to life in the form of a relatively small model based on Oliver Shory’s gantry design. It is a bit like a claw machine mixed with a plotter. At actual server room scale, it would look like an overhead gantry crane. Here, it looks a bit like the motion system on a laser cutter.
The gantry is made of aluminum extrusion and 3D-printed joints. It has four stepper motors to move the gantry and to actuate the lifting mechanism, which grabs the model server racks using magnets. An Arduino UNO Rev3 board controls those motors through ULN2003 drivers, and the operator directs the movement using joysticks monitored by the Arduino.
This motion system sits in a large MDF box representing a server room, with several 3D-printed blocks representing the server racks arranged in a grid. When a “server” needs maintenance, the operator can use the gantry to pick it up and move it to the desired location.
Today we’re rolling out a handful of updates to make Android’s hearing aid and screenreader experiences even more accessible.
Starting with the Samsung Galaxy S25, we’re bringing the benefits of the next generation of Bluetooth to GN Hearing and Oticon Intent hearing aids, using new LE Audio technology. With LE Audio compatibility, people can now access easy hearing aid management — including hands-free calling, a way to change presets via native settings and lower latency Bluetooth connections. This new integration will also be available on the Pixel 9 with Android 16 beta and come to Galaxy S24 with Android 15 in the coming weeks.
And we’re beginning to roll out new updates to TalkBack, Android’s screenreader, to make devices even more accessible for people who are blind or have low-vision. Starting with Samsung Galaxy S25 devices, anyone who uses braille will be able to use their displays via HID, a way to connect to Bluetooth devices. Over the coming months this functionality will begin to work on any phone or tablet using Android 15. TalkBack will also provide more detailed image descriptions, powered by Gemini models, on Galaxy S25 devices in the coming weeks.
Together with Samsung, today we unveiled a handful of new Android features. The new Samsung Galaxy S25 comes with Gemini built in and available with the press of a button. Don’t miss the just-launched, kid-friendly smartwatch experience that puts parents in control. And there are plenty of other Gemini updates, new ways to search, accessibility tools and more to check out.
And for people who are blind or have low vision, TalkBack 15 on Galaxy S25 devices will now be compatible with braille displays that use HID, a popular way to connect to Bluetooth devices. Following feedback from the community, this compatibility will ensure people can use their braille displays without additional steps, making Galaxy S25 devices even more accessible. In the coming weeks, TalkBack on Galaxy S25 devices will also provide more detailed image descriptions, powered by Gemini models.
5. Stay connected with the Galaxy Watch for Kids experience
With Google Family Link, parents can use their phone to set up and manage Galaxy Watch7 LTE smartwatches with a Galaxy Watch for Kids experience. This allows parents to approve contacts, monitor their child’s watch’s location, manage apps and set up school time to limit distractions during school hours.
This update starts rolling out today in the U.S. with support from major carriers including AT&T, T-Mobile and Verizon.
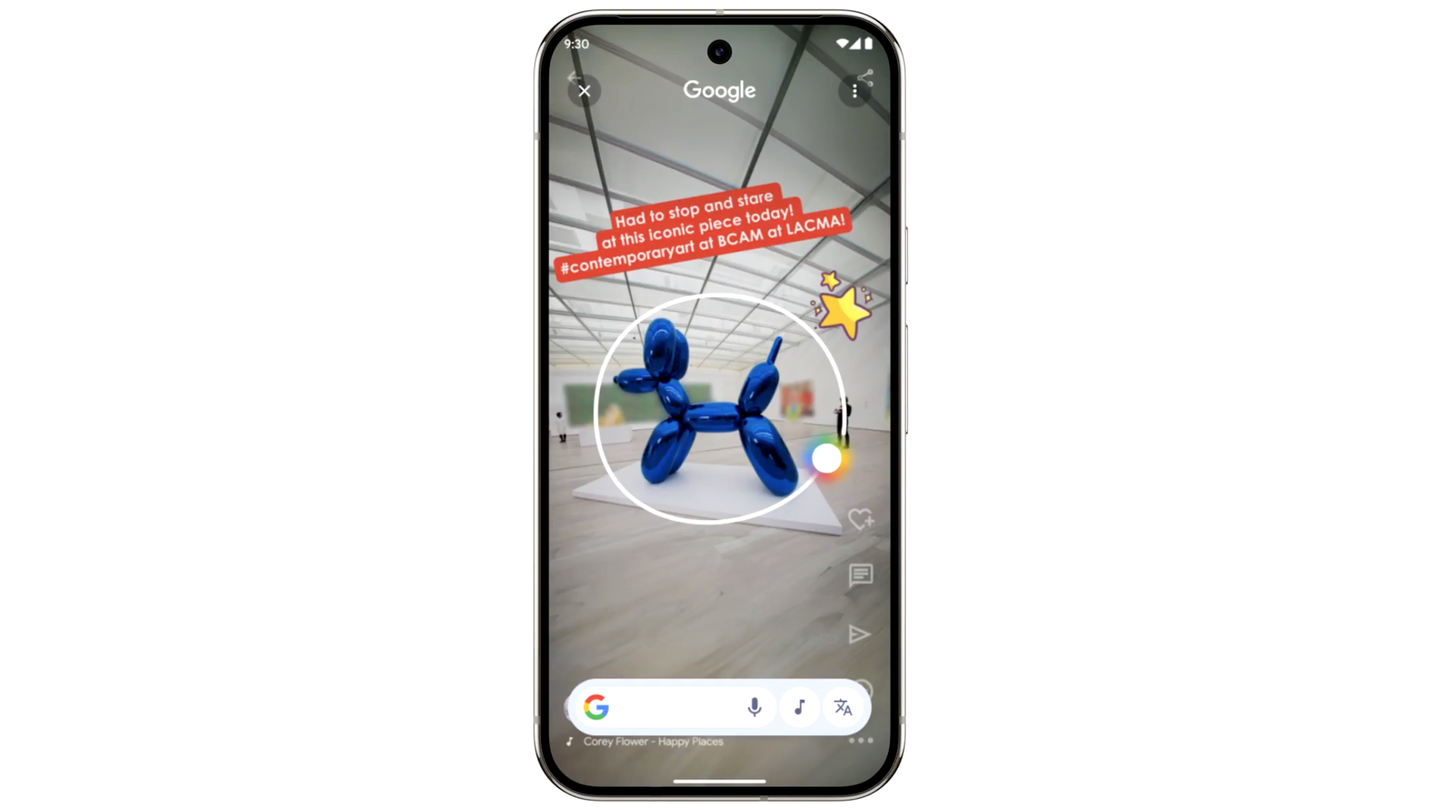
Last year, we introduced Circle to Search to help you easily circle, scribble or tap anything you see on your Android screen, and find information from the web without switching apps. Now we’re introducing two improvements that make Circle to Search even more helpful.
First, we’re expanding AI Overviews to more kinds of visual search results for places, trending images, unique objects and more. Inspired by a piece of art? Circle it and see a gen AI snapshot of helpful information with links to dig deeper and learn more from the web.
Second, we’re making it easier for you to get things done on your phone. Circle to Search will now quickly recognize numbers, email addresses and URLs you see on your screen so you can take action with a single tap.
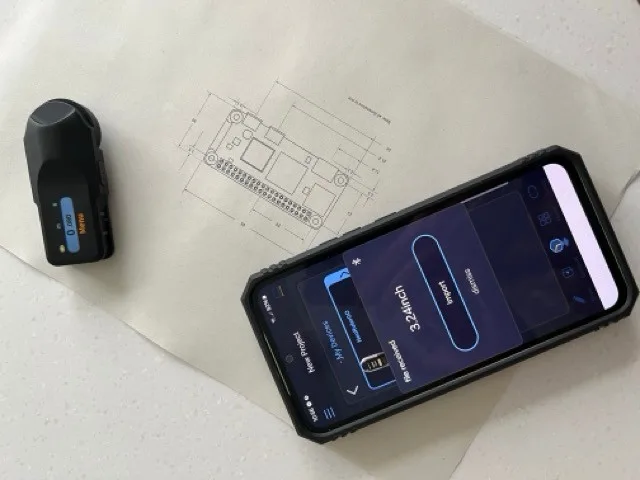
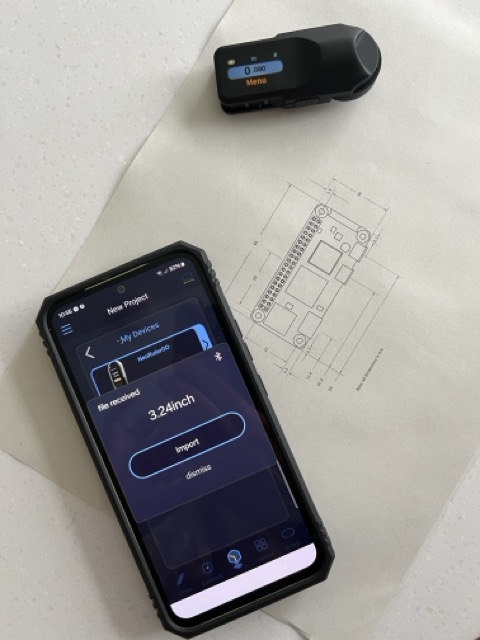
The lightweight gadget has a month-long standby battery life and recharges via its USB-C connector in two or three hours. The clever design hides the USB-C port at one end, revealed when you firmly yank off the silver plastic retaining clip.
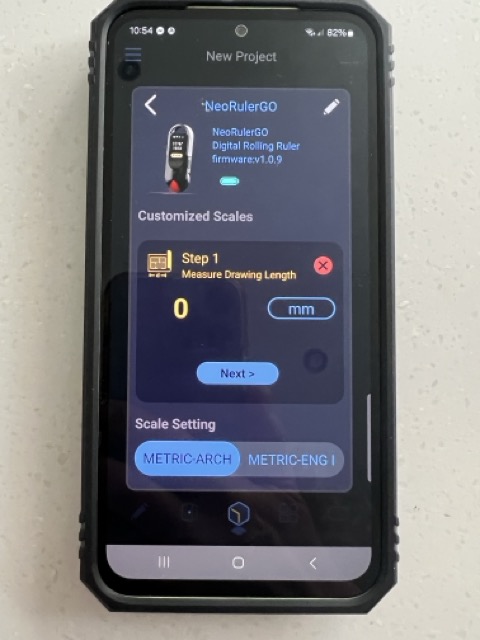
The NeoRulerGO (£55 [£47 now] / $59 [was $69 at launch]) has three modes: Ruler, Scale Ruler, and Customized Scale Ruler, plus a Settings menu. Cycle through metres, inches, feet, centimetres and millimetres, or select ‘fit in’ using the NeoRulerGO’s hard plastic buttons. Two red laser beams emitted at right angles are used to locate the start point. Roll along, keeping the device perpendicular for the most accurate reading, and lift the NeoRulerGO off the surface to lock in the reading.
There is a Corner to Corner option to measure internal corners for which the NeoRulerGO needs to begin and finish at 45 degrees, swinging along the length. The 93 different scales translate to and from 1:100,000 with an accuracy of 1 mm based on the markings on the original drawing, impressing an architect friend who uses a £500 Leica DISTO professional laser measure.
Petite but precise
Hozo packs plenty of features into the NeoRulerGO, but the trade-off for its teeniness is that it’s fiddly to use. Deviations and bumps in the course of rolling can also cause measuring to stop and start again, so make sure you sense-check the reading. These can be exported to the Meazor Android or iOS app for inclusion in a project or simply saved as a list. Hozo helpfully includes configuration options on the NeoRulerGO and within the app to change the screen orientation and left- or right-handed use, so it’s a matter of working out which settings work best for you.
We used NeoRulerGO to take accurate measurements for bathroom spaces and fittings, including the trim needed for the circumference of a partially curved mirror. Its precise measurements were also helpful when stretching and blocking hand-knitted pieces that needed to be a fixed size and accurately sewn together, and when trying to design an enclosure for a Raspberry Pi to be fashioned from assorted materials of varying thicknesses and flex. It was really handy being able to simply cycle through measurements to see how a reading translated metric and imperial measurements down to the nearest ±1 mm, reassuring us when sourcing components.
Verdict
9/10
Despite a few handling issues, we found NeoRulerGO ideal for measuring awkward spaces and shapes, including curved surfaces, with none of the jeopardy of using a retractable metal ruler that might spring back painfully at any moment.
Specs
Weight: 45 g | Dimensions: 31×18×146 mm | Screen: 1.14 in | Wheel: 30 mm | Battery: 300 mAh | Resolution: ±0.02 in (0.5 mm) | Accuracy: ±0.04 inch (1 mm) + (Dx0.5%) in ideal circumstances | Features: Inches, feet, metres, centimetres, millimetres; 93 built-in scales, customisable scales (100K:1 to 1:100K)
As our lives become increasingly intertwined with AI-powered tools and systems, it’s more important than ever to equip young people with the skills and knowledge they need to engage with AI safely and responsibly. AI literacy isn’t just about understanding the technology — it’s about fostering critical conversations on how to integrate AI tools into our lives while minimising potential harm — otherwise known as ‘AI safety’.
The UK AI Safety Institute defines AI safety as: “The understanding, prevention, and mitigation of harms from AI. These harms could be deliberate or accidental; caused to individuals, groups, organisations, nations or globally; and of many types, including but not limited to physical, psychological, social, or economic harms.”
As a result of this growing need, we’re thrilled to announce the latest addition to our AI literacy programme, Experience AI — ‘AI safety: responsibility, privacy, and security’. Co-developed with Google DeepMind, this comprehensive suite of free resources is designed to empower 11- to 14-year-olds to understand and address the challenges of AI technologies. Whether you’re a teacher, youth leader, or parent, these resources provide everything you need to start the conversation.
Linking old and new topics
AI technologies are providing huge benefits to society, but as they become more prevalent we cannot ignore the challenges AI tools bring with them. Many of the challenges aren’t new, such as concerns over data privacy or misinformation, but AI systems have the potential to amplify these issues.
Our resources use familiar online safety themes — like data privacy and media literacy — and apply AI concepts to start the conversation about how AI systems might change the way we approach our digital lives.
Each session explores a specific area:
Your data and AI: How data-driven AI systems use data differently to traditional software and why that changes data privacy concerns
Media literacy in the age of AI: The ease of creating believable, AI-generated content and the importance of verifying information
Using AI tools responsibly: Encouraging critical thinking about how AI is marketed and understanding personal and developer responsibilities
Each topic is designed to engage young people to consider both their own interactions with AI systems and the ethical responsibilities of developers.
Designed to be flexible
Our AI safety resources have flexibility and ease of delivery at their core, and each session is built around three key components:
Animations: Each session begins with a concise, engaging video introducing the key AI concept using sound pedagogy — making it easy to deliver and effective. The video then links the AI concept to the online safety topic and opens threads for thought and conversation, which the learners explore through the rest of the activities.
Unplugged activities: These hands-on, screen-free activities — ranging from role-playing games to thought-provoking challenges — allow learners to engage directly with the topics.
Discussion questions: Tailored for various settings, these questions help spark meaningful conversations in classrooms, clubs, or at home.
Experience AI has always been about allowing everyone — including those without a technical background or specialism in computer science — to deliver high-quality AI learning experiences, which is why we often use videos to support conceptual learning.
In addition, we want these sessions to be impactful in many different contexts, so we included unplugged activities so that you don’t need a computer room to run them! There is also advice on shortening the activities or splitting them so you can deliver them over two sessions if you want.
The discussion topics provide a time-efficient way of exploring some key implications with learners, which we think will be more effective in smaller groups or more informal settings. They also highlight topics that we feel are important but may not be appropriate for every learner, for example, the rise of inappropriate deepfake images, which you might discuss with a 14-year-old but not an 11-year-old.
A modular approach for all contexts
Our previous resources have all followed a format suitable for delivery in a classroom, but for these resources, we wanted to widen the potential contexts in which they could be used. Instead of prescribing the exact order to deliver them, educators are encouraged to mix and match activities that they feel would be effective for their context.
We hope this will empower anyone, no matter their surroundings, to have meaningful conversations about AI safety with young people.
The modular design ensures maximum flexibility. For example:
A teacher might combine the video with an unplugged activity and follow-up discussion for a 60-minute lesson
A club leader could show the video and run a quick activity in a 30-minute session
A parent might watch the video and use the discussion questions during dinner to explore how generative AI shapes the content their children encounter
The importance of AI safety education
With AI becoming a larger part of daily life, young people need the tools to think critically about its use. From understanding how their data is used to spotting misinformation, these resources are designed to build confidence and critical thinking in an AI-powered world.
AI safety is about empowering young people to be informed consumers of AI tools. By using these resources, you’ll help the next generation not only navigate AI, but shape its future. Dive into our materials, start a conversation, and inspire young minds to think critically about the role of AI in their lives.
Ready to get started? Explore our AI safety resources today: rpf.io/aisafetyblog. Together, we can empower every child to thrive in a digital world.
Um dir ein optimales Erlebnis zu bieten, verwenden wir Technologien wie Cookies, um Geräteinformationen zu speichern und/oder darauf zuzugreifen. Wenn du diesen Technologien zustimmst, können wir Daten wie das Surfverhalten oder eindeutige IDs auf dieser Website verarbeiten. Wenn du deine Einwillligung nicht erteilst oder zurückziehst, können bestimmte Merkmale und Funktionen beeinträchtigt werden.
Funktional
Immer aktiv
Die technische Speicherung oder der Zugang ist unbedingt erforderlich für den rechtmäßigen Zweck, die Nutzung eines bestimmten Dienstes zu ermöglichen, der vom Teilnehmer oder Nutzer ausdrücklich gewünscht wird, oder für den alleinigen Zweck, die Übertragung einer Nachricht über ein elektronisches Kommunikationsnetz durchzuführen.
Vorlieben
Die technische Speicherung oder der Zugriff ist für den rechtmäßigen Zweck der Speicherung von Präferenzen erforderlich, die nicht vom Abonnenten oder Benutzer angefordert wurden.
Statistiken
Die technische Speicherung oder der Zugriff, der ausschließlich zu statistischen Zwecken erfolgt.Die technische Speicherung oder der Zugriff, der ausschließlich zu anonymen statistischen Zwecken verwendet wird. Ohne eine Vorladung, die freiwillige Zustimmung deines Internetdienstanbieters oder zusätzliche Aufzeichnungen von Dritten können die zu diesem Zweck gespeicherten oder abgerufenen Informationen allein in der Regel nicht dazu verwendet werden, dich zu identifizieren.
Marketing
Die technische Speicherung oder der Zugriff ist erforderlich, um Nutzerprofile zu erstellen, um Werbung zu versenden oder um den Nutzer auf einer Website oder über mehrere Websites hinweg zu ähnlichen Marketingzwecken zu verfolgen.