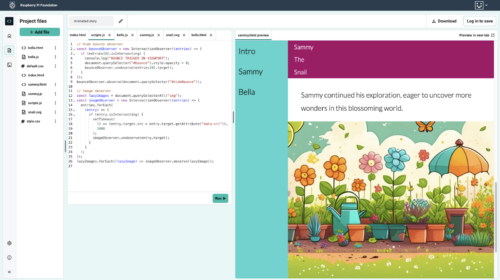
It’s hard to believe, but we’re now in our third month of Indie Selects – and the hits just keep on coming. The team have picked some amazing games this month. We’ve played them, we’ve loved them, and we feel confident that you’ll like them too.
April’s Indie Selects include an interactive, playable historical artifact, two completely different approaches to building, and even a lo-fi, jazzy space shooter. As always, you can find the whole list in one easy-to-access spot on the Xbox Store, right now. With that in mind, here’s the list (in no particular order):
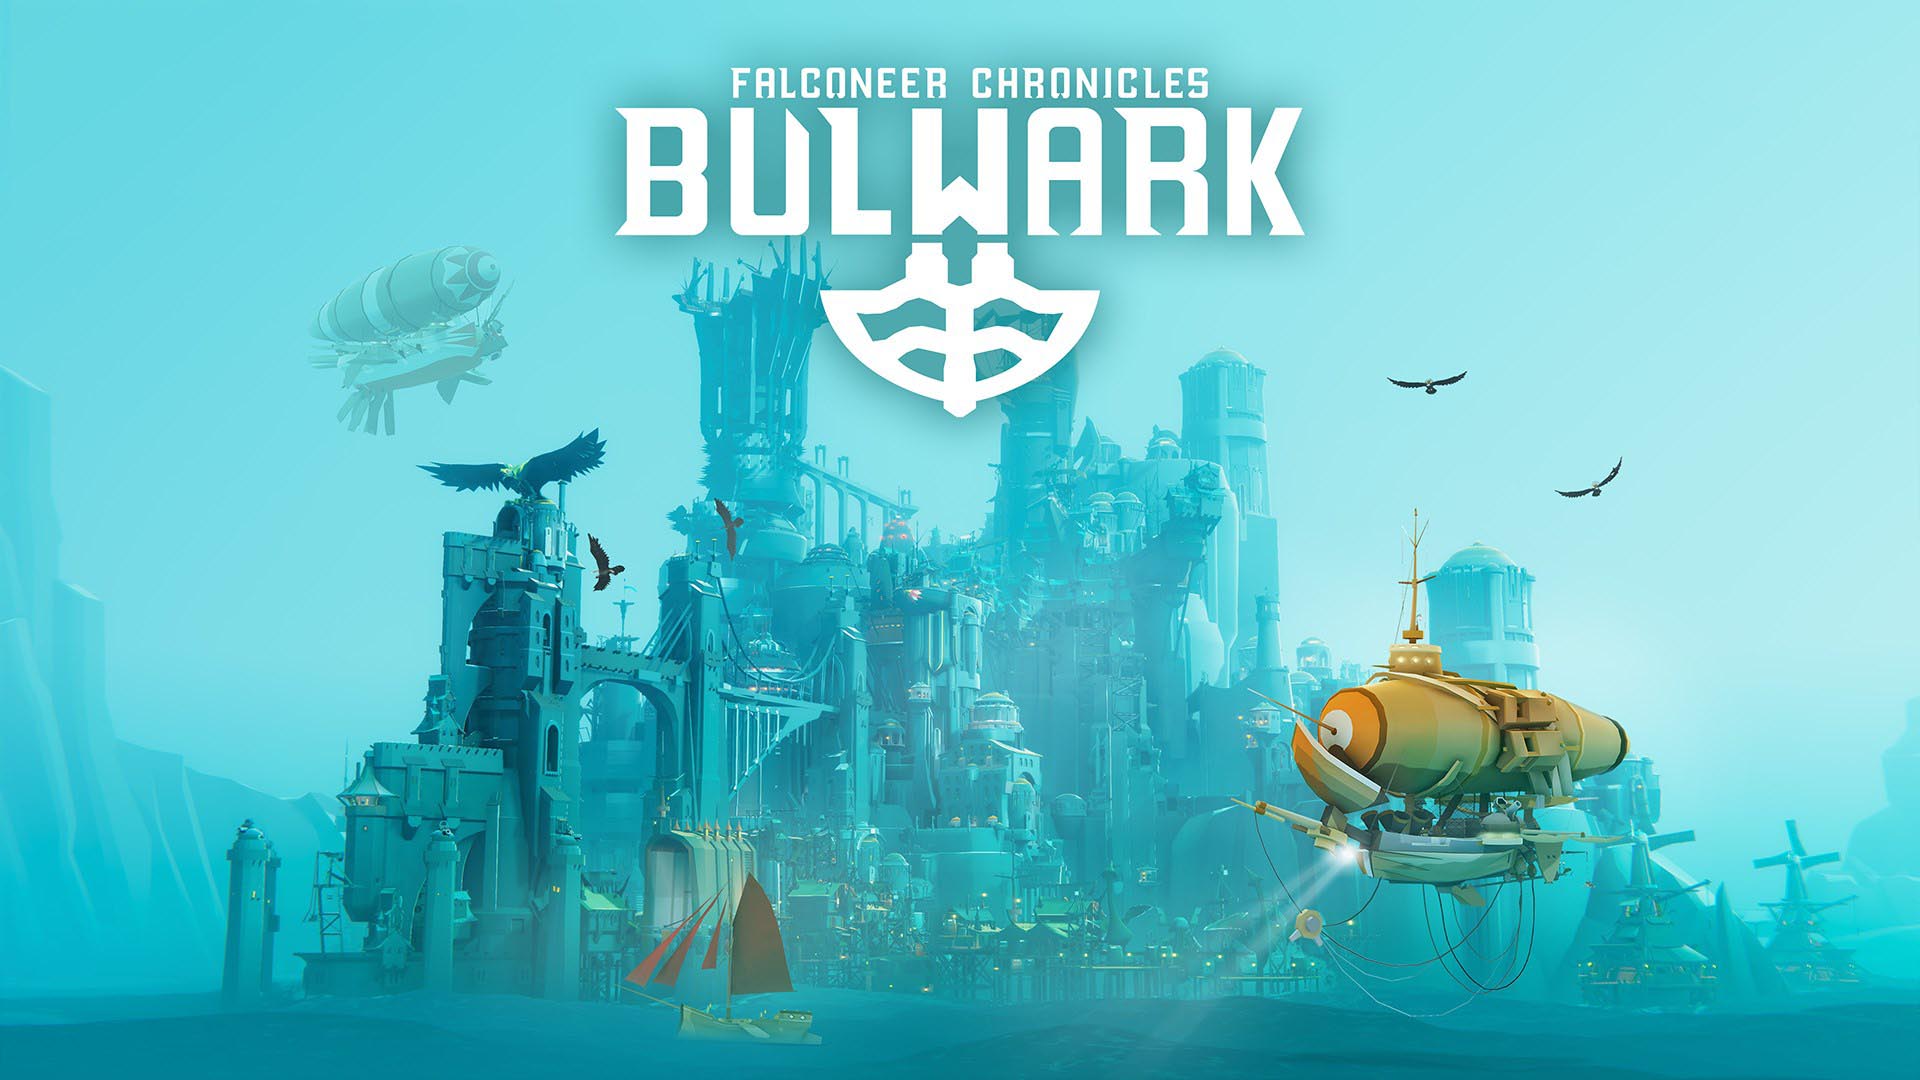
Bulwark: Falconeer Chronicles is a work of passion from the same solo developer behind the original Falconeer. In this iteration, the universe of that game is expanded into vast new territory, and you’re tasked with building the ultimate settlement in an oceanic world. It’s a relaxed, immersive city builder for the most part, serving up an open world where you can scavenge for resources to support your ever-expanding creation.
Later in the game you can open up trade routes and defend your city from invaders, or even become the invader yourself, taking on rival civilizations. It’s really the unique world here that sets this game apart from other city builders: you start with a simple island village, and then expand out into, and over, the seas, with steampunk-inspired flying ships and gothic architecture. You can really play Bulwark any way you like and it’s easy to get sucked into, building and exploring for hours.


Bulwark: Falconeer Chronicles
Wired Productions
$19.99
Bulwark: Falconeer Chronicles is an open world builder with freedom and expression at its core, allowing players to build sprawling towns, spires, and fortresses that become hubs for trade, or rallying grounds for conquests. Carve your legacy into a world shattered by the decisions of those who came before you, tower by tower, wall by wall, sculpting from the daunting cliffs and perilous waters of an unforgiving landscape that refuses to be tamed. Tasked with rebuilding a civilization devastated by the aftermath of a war 40 years prior, you are in command of creating the last great settlement upon the Great Ursee – a vast, fantastical oceanic world filled with lost myths, breath-taking vistas and danger. From humble docks and wooden jetties, you will scavenge resources and grow your settlement as your population and creations grow ever grander, sculpting monumental stone towers and battlements that scrape the skies, where airships and giant warbirds rule. Create trade routes and strike alliances with other factions scattered across the waves, acquiring powerful Captains and Commanders to protect your creations and utilise their aid in exploration – or muster your own battlegroup to strike at them, waging war upon your ancient enemies. This world and its choices are yours to make – what legacy will you leave behind? What creations will bear your name? Build Your Bulwark.
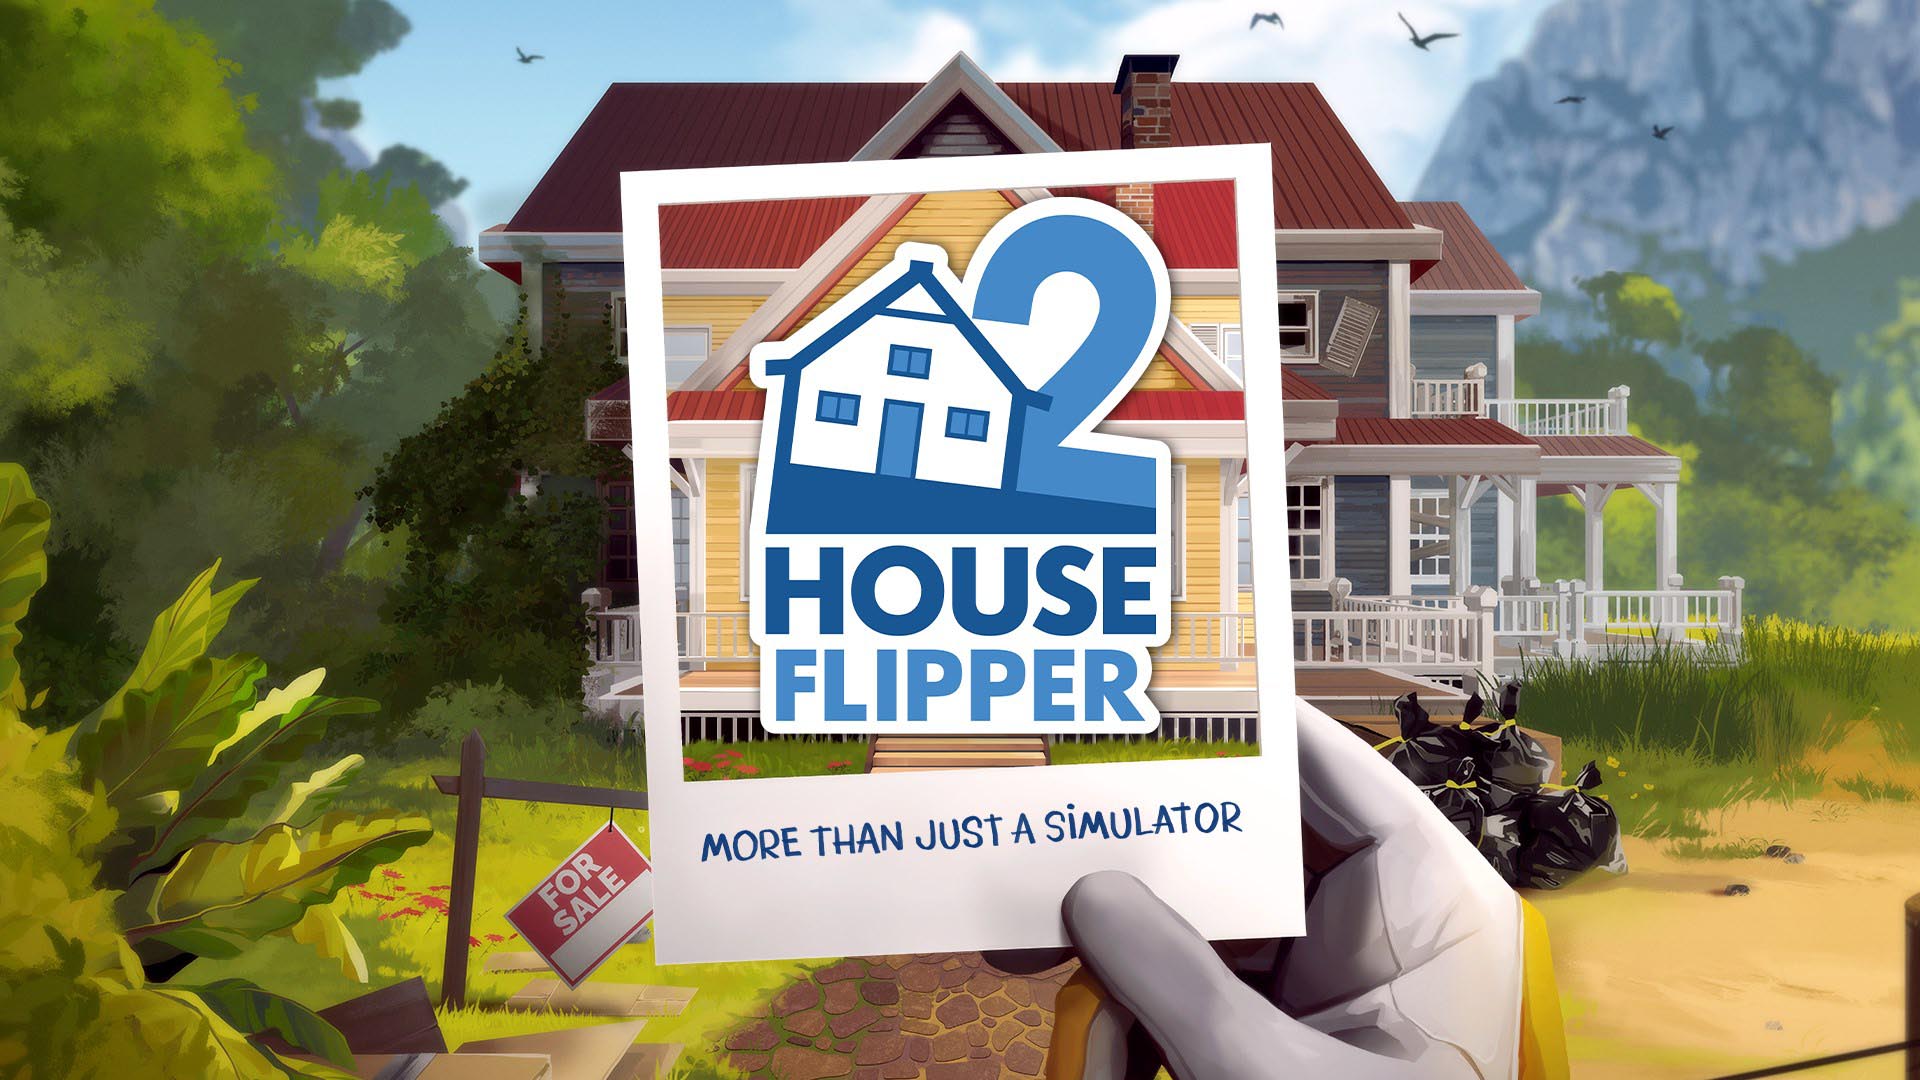
Veteran “flippers” will love the revised mechanics and new content, and will completely lose themselves in the sandbox building mode, in which you can design and build your own original creations. But you don’t have to be an experienced flipper to have fun – it’s super easy to jump in and start painting, renovating, and remodeling, bringing new life to the old, shabby buildings in your town.
There’s even a story mode, where an old pal unveils the secrets of each house under renovation to you. Hard to believe that a game that involves painting, sweeping and hammering – things you’re not likely to see many of us here on the ID team doing in real life – on our “favorites” list, but there are a lot of dedicated flippers on the team now.
House Flipper 2
Frozen District
$39.99
The Flipper’s new groove It doesn’t matter if you’re a makeover veteran or if you’re only starting out – you’ll feel at home in no time!
House Flipper 2 introduces new mechanics and revamps the ones from the original game.
The good old hammer, the trusty paint roller, and the sturdy mop, all await your return! The new visuals make our fixer-uppers look crisp as never before! Another brick in the wall Why renovate a house when you can just build one? Unleash your creativity in the Sandbox Mode! Use it to recreate real-life buildings or design projects that exist in your imagination.
Remember: building from scratch is no easy task! But let’s face it, it’s definitely worth putting in extra effort to design the house of your dreams. Once upon a time… Between the mountain tops and the endless sea, there lies the town of Pinnacove.
A place where time slows down, and the friendly residents are ready to entrust you with their homes.
Can you discover some of the stories within these walls?
Your old pal Tom, who seems to know everybody in the neighborhood, will gladly share some local knowledge with you. Sea of opportunities In House Flipper 2, you are the foreman!
You get to decide what ‚relaxing gameplay‘ means!
Do you enjoy building? Choose the Sandbox Mode which allows you to construct houses from scratch. Or maybe you prefer cleaning and decorating? In the Story Mode, you will delve into long and engaging renovation projects, as well as deal with some quick jobs.
Sit back and relax, here comes the new age of House Flipper!
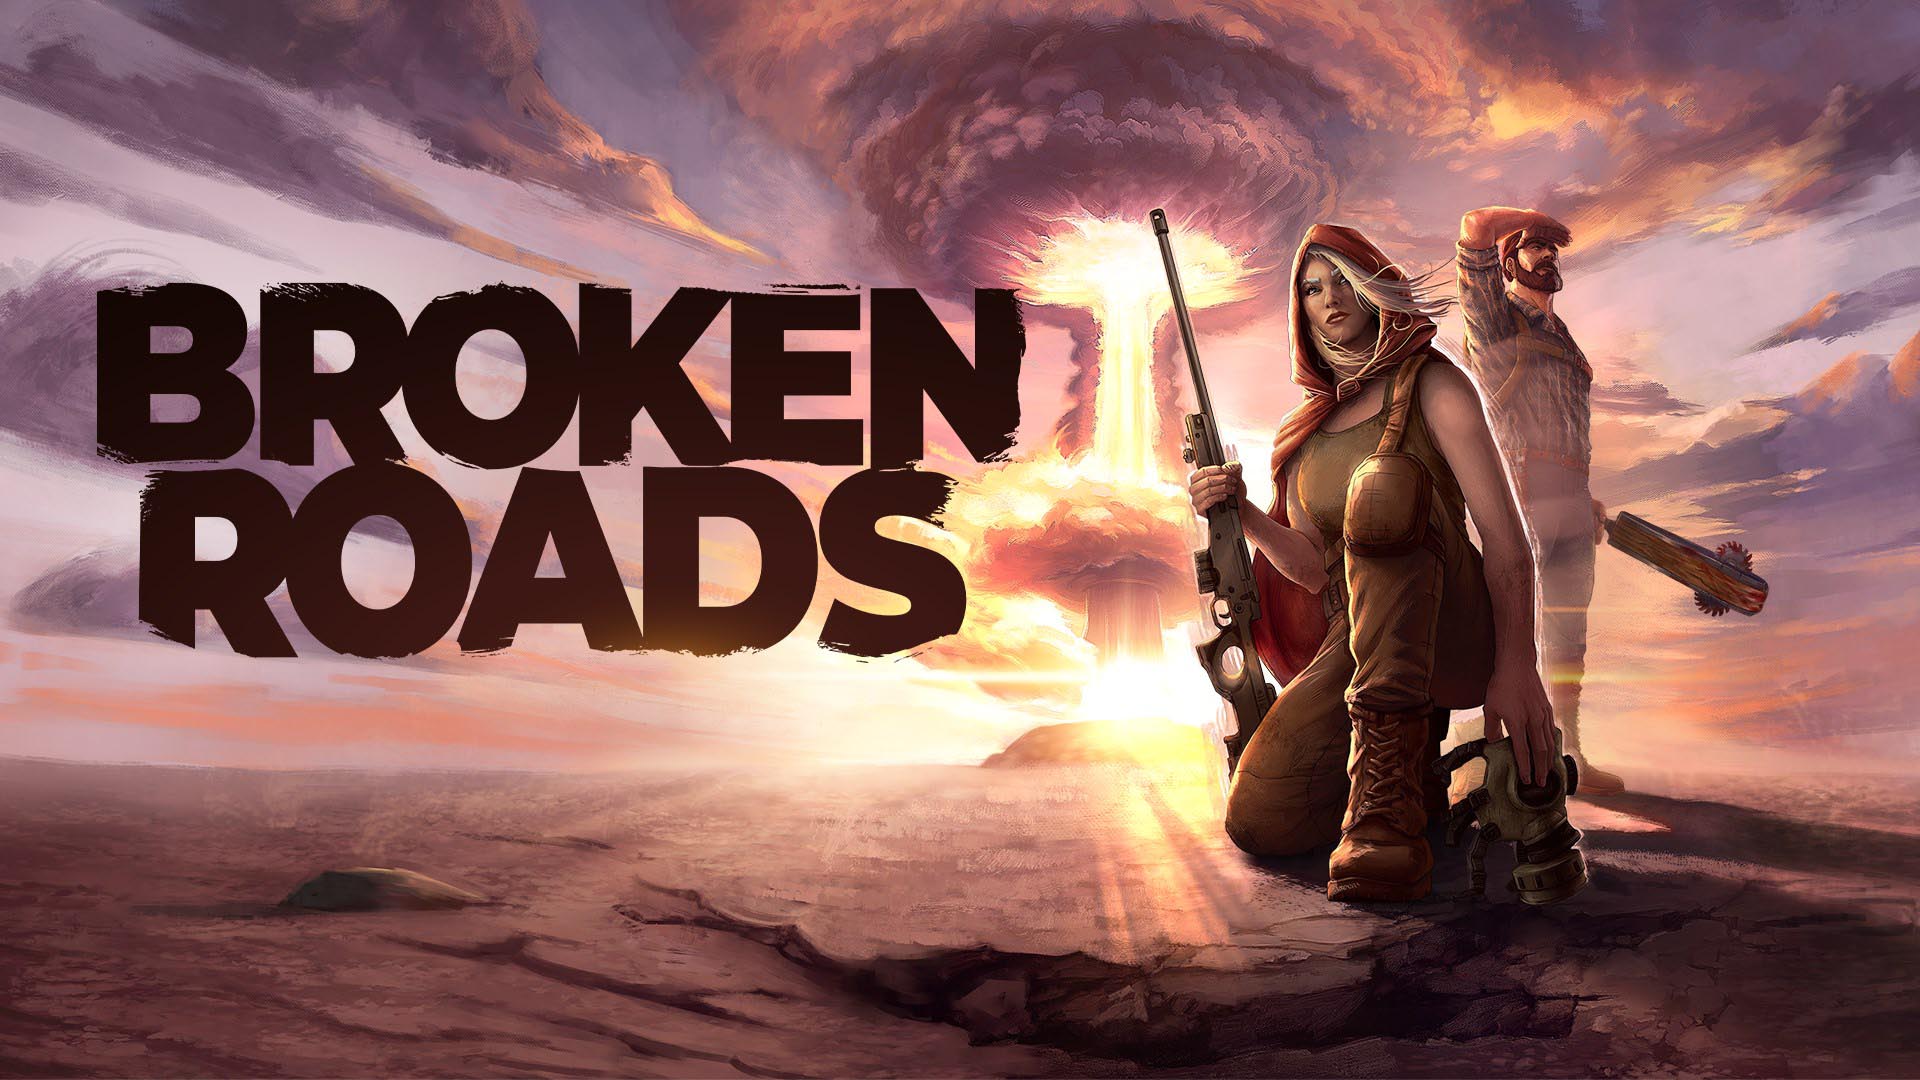
Picture the Australian Outback after the apocalypse with man-eating spiders, raiders, and even blood-thirsty kangaroos. Is it Mad Max? No, this is Broken Roads, a deep RPG that introduces a novel Morality System to mix up the genre. What kind of character will you be? Much is decided in advance as you set out your character’s visions and ideals, which then influence what kind of story you’ll experience.
Much of the game involves discovering, befriending and influencing the vast cast of characters you’ll encounter on your journeys, as you peel back the many layers of the detailed story. It’s an ambitious game that is infused with Australian culture, dialect and humor.
Broken Roads
Versus Evil, LLC
$39.99
Born of a love for traditional computer role-playing, Broken Roads provides a rich, engaging narrative in which players make their way across a desolated future Australia. Blending together traditional and all-new role-playing elements on top of a classless system offering nearly unlimited character development options, Broken Roads presents players with an original morality system: the Moral Compass. This novel design sees dialogue options and questing decisions influence, and be influenced by, a character’s philosophical leaning. Features • All-new post-apocalyptic setting
• Unique morality system influencing dialogue, quests and character development
• Authentic Australian locations and environments
• Blend of traditional and original RPG mechanics
• Up to 5 party members
• Turn-based tactical combat
• Hand-drawn artwork
• A content-rich and densely-crafted world
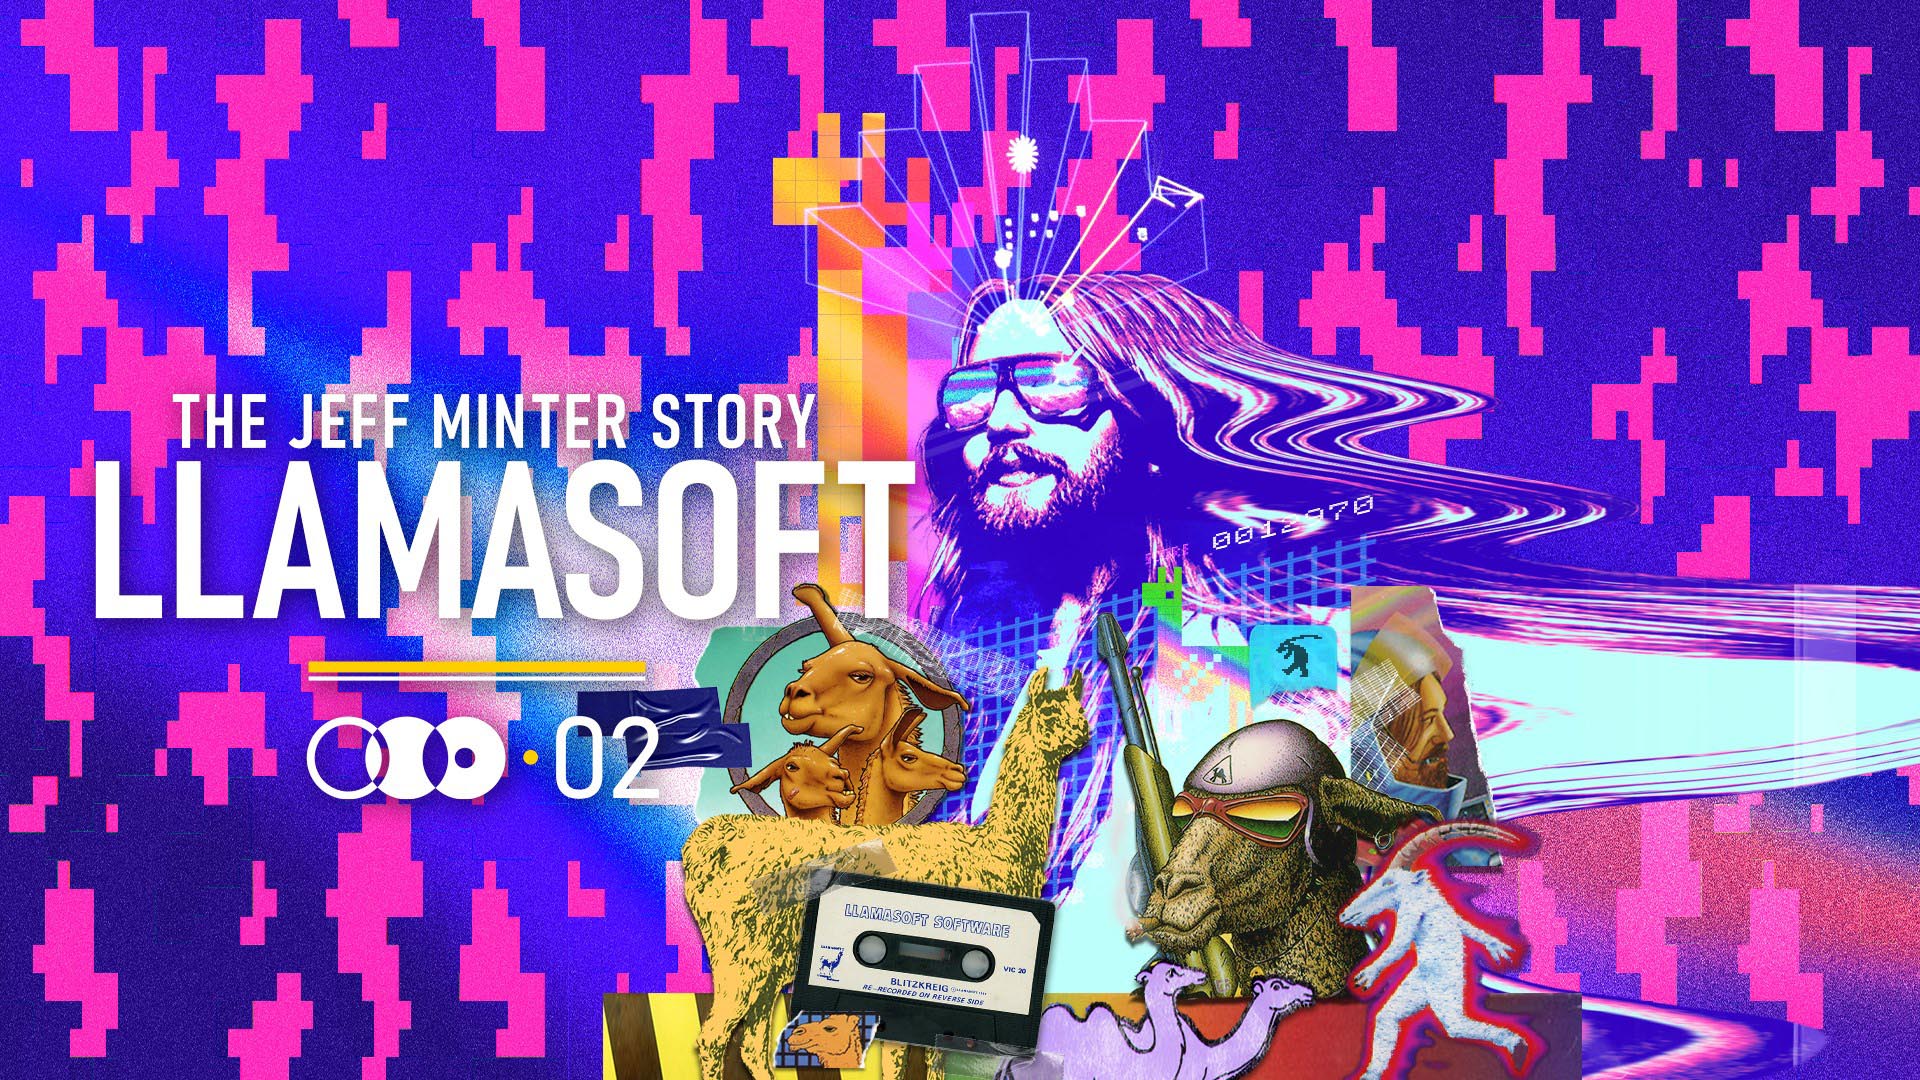
If you’re under the age of 40 or so, and you’re not from the UK, you could be forgiven for not having heard of games like Attack of the Mutant Camels or Metagalactic Llamas Battle at the Edge of Time. But now’s your chance to rediscover some of the wildest and weirdest games to come out of the ’80s and early ’90s. Not only the games: developer Digital Eclipse serves these classics up in their landmark “interactive documentary style”, and takes you into the mind of creator Jeff Minter, and through the entire history of the iconic British Video game company, quixotically named Llamasoft.
If you played any of the originals – like Jeff’s signature shooter Gridrunner – on systems such as the Sinclair ZX81, the Commodore VIC-20, or the Atari 1040 ST (this writer’s favorite computer of all time) you’ll absolutely fall in love with these remasters. But if you’re entirely new to Jeff and his trippy games, you’ll find the Llamasoft story to be a fascinating journey into video game history – a history that you can jump into and play.
Llamasoft: The Jeff Minter Story
Digital Eclipse
$29.99
Gridrunner. Revenge of the Mutant Camels. Tempest 2000. Llamatron. In the British gaming universe of the 80s and 90s, nobody made games like Jeff Minter. Now, in a new interactive documentary from Digital Eclipse, you can play the history of one of the weirdest, wildest game developers to ever exist – a man who loved shooters and sheep, lasers and llamas. LLAMASOFT Journey back in time to an era of cassette tapes, photocopied zines, and README.TXT. An era in which a kid with a Commodore VIC-20 and dreams of radioactive sheep could become one of Britain’s best-known game makers. A virtual museum of design documents, playable games, and all-new video features tell the fascinating story of a true independent game designer. PLAY THE ACCLAIMED ORIGINALS Llamasoft: The Jeff Minter Story includes 42 classic games from 8 different platforms, from Jeff Minter’s earliest work on the Sinclair ZX81 and Commodore VIC-20, to later work on the Spectrum, Commodore 64 and Atari 800, and deep into the 16-bit era with the Atari ST and Atari Jaguar. GRIDRUNNER: REMASTERED Jeff’s signature shooter masterpiece Gridrunner gets an all-new look from Digital Eclipse, updated into thrilling modern graphics and sound – while still running the core of the Commodore 64 version for 100% gameplay accuracy. GAMES, GAMES, GAMES Sheep In Space. Andes Attack. Attack of the Mutant Camels. Matrix. Metagalactic Llamas Battle at the Edge of Time. Hellgate. Laser Zone. And many more. All the Minter classics you’ve heard of (and several you probably haven’t), now with new quality-of-life features to make playing them more fun than ever before. Two of Jeff Minter’s earliest „light synthesizers,“ Psychedelia and Colourspace, are also included, with all-new options and features optimized for controller-based play. Finally, Jeff’s demo of Attack of the Mutant Camels for the unreleased Konix Multi-System console is also included. THE GOLD MASTER SERIES New from Digital Eclipse (Teenage Mutant Ninja Turtles: The Cowabunga Collection, Atari 50: The Anniversary Celebration, The Making of Karateka), the Gold Master Series presents iconic games in an innovative „interactive documentary“ format, putting the shared history of games and their creators into one comprehensive package.

Speaking of classic games, the original Grandia dates back to 1997, and Grandia II came out in 2000. Both iconic RPGs have been lovingly remastered in the Grandia HD Collection. Groundbreaking in their time, the series featured a novel dynamic attack system, deep skill progression, and an extensive and immersive storyline.
New UI enhancements, updated HD cinematics, and tweaks to gameplay make the games feel modern and fresh, while maintaining the original classic characters and stories. If you didn’t get a chance to experience these incredibly influential RPGs, which really defined the idea of “going on an adventure” in a game, now is your chance to set out on that quest.
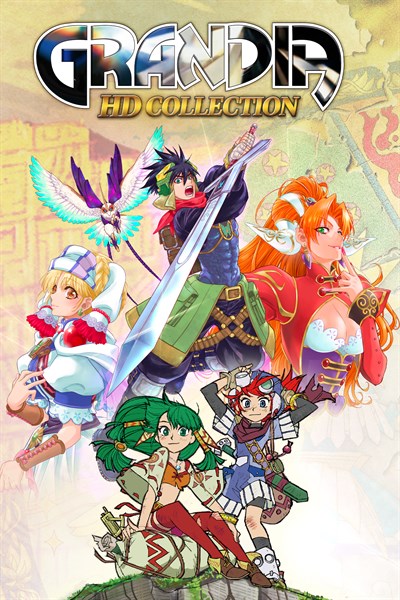
Grandia HD Collection
GungHo Online Entertainment America, Inc.
$39.99
The highly-anticipated Grandia HD Collection for Xbox One and Xbox Series X|S are here! Get your hands on two games that changed the landscape of RPGs forever, in beautiful HD graphics. GRANDIA: Dive into the captivating journey of Justin and his allies as they race against the sinister Garlyle Forces. Unravel the mysteries of a forgotten civilization and immerse yourself in an RPG hailed as a timeless classic, inspiring generations of games to come. GRANDIA II: Step into the shoes of Ryudo, a jaded Geohound with a heart, as he embarks on a magical quest alongside a group of unlikely allies. Their journey is riddled with twists and turns as they seek a divine weapon to save the world. Delve deep into this tale where the line between good and evil blurs, and everything is open to question…
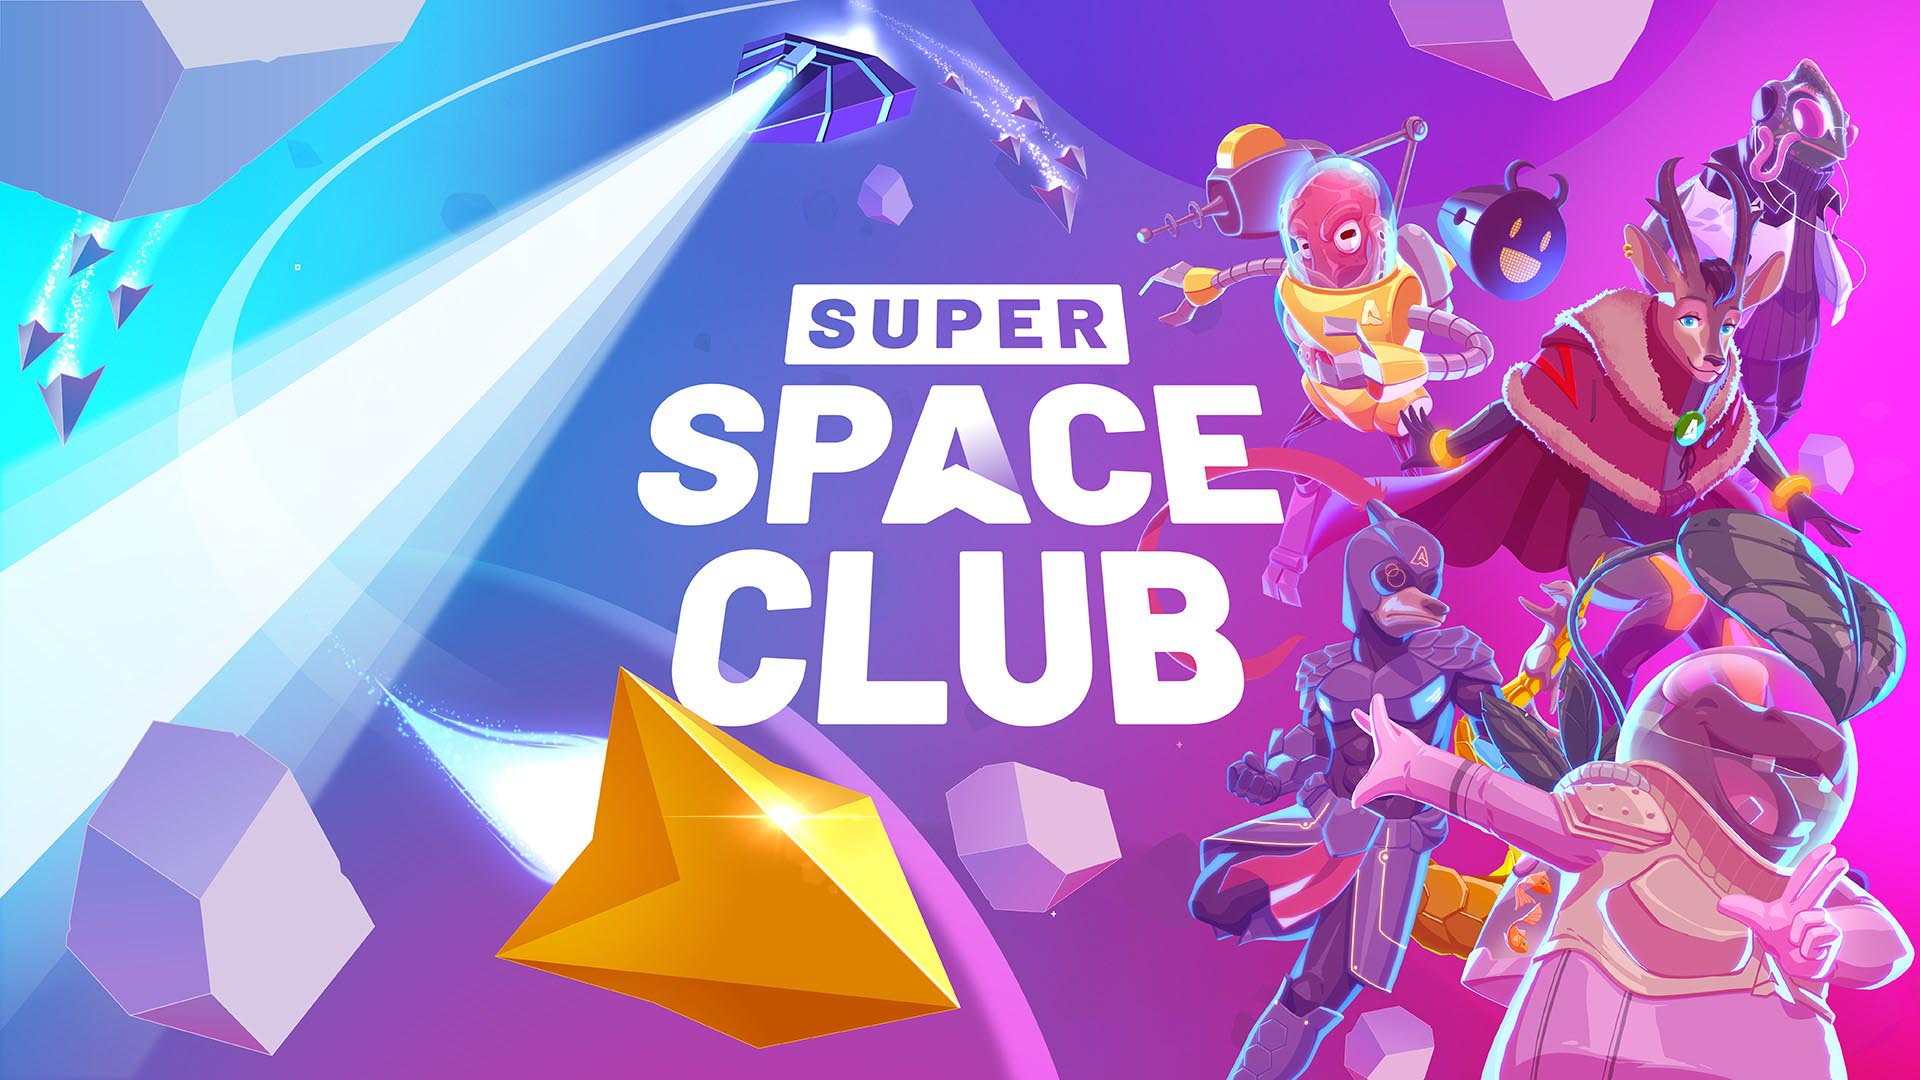
Imagine mashing up a classic top down “shoot-‘em-up” with a lo-fi, chill-out music channel and you’d end up with something very much like Super Space Club. Usually “shmups” go for more of a frenetic, kinetic vibe with lots of angry aliens and what not, but Super Space Club opts for a much more relaxing tone, while also serving up some great space combat.
You can select different weapons, ships and pilots to customize the build you want to take into battle, which is a nice plus-up to the genre. And nothing is more satisfying than mowing down wave after wave of aliens while grooving alone to some jazzy, lo-fi tunes.
Super Space Club
GrahamOfLegend
$14.99
Super Space Club is a colorful endless arcade gunner set to the backdrop of chill, lo-fi music. As a club of skilled misfit pilots, defend the galaxy by taking on galactic forces and completing a series of thrilling missions. In space, everyone can hear you groove. Sling fireworks with the explosive Olly, or dish out ship-seeking shots with the stealthy Roscoe? With a variety of pilots, ships, and weapons at your disposal, choose the perfect build and soar across the stars through physics-based thrusting. As you’re taking down enemies and completing objectives, be wary of your ship’s energy. Depleting energy could leave you vulnerable to devastating damage. Don’t get too comfortable after coming out on top, as the next wave is always right around the corner. Despite the challenge that gameplay may bring, space can be quite dope. Missouri-based audio duo Fat Bard provides the backdrop of lo-fi beats and chill-hop tunes featuring vocal artists from around the globe. Paired with a vibrant and colorful cool-toned aesthetic, Super Space Club delivers a relaxing yet challenging arcade experience unlike any other.
Website: LINK